### [WP Mail SMTP でログに記録されたメールを再送信する方法](https://wpmailsmtp.com/docs/how-to-resend-emails-in-wp-mail-smtp/)
**公開日:** 2023年11月23日
**著者:** David Ozokoye
**抜粋:** メールログからメールを再送信する方法を学びましょう。
**コンテンツ:**
メールログはプロ機能です
メールログやその他の強力な機能でビジネスを成長させましょう。
[ WP Mail SMTP Pro を入手 ](https://wpmailsmtp.com/pricing/)
WordPressサイトからメールを再送信したいですか?メールログを有効にしている場合、WP Mail SMTP を使用すると、クリックするだけで簡単にメールを再送信できます。
このガイドでは、WP Mail SMTP でメールを再送信する方法を説明します。
---
このチュートリアルに進む前に、WP Mail SMTP が WordPressサイトに [インストールおよび有効化](https://wpmailsmtp.com/docs/how-to-install-the-wp-mail-smtp-plugin/) されており、[ライセンスが検証](https://wpmailsmtp.com/docs/how-to-verify-your-wp-mail-smtp-license/) されていることを確認してください。その後、[メールログをオンにする](https://wpmailsmtp.com/docs/how-to-set-up-email-logging/) 必要があります。
### メールを再送信する
メールを再送信するには、**WP Mail SMTP » Email Log** に移動し、再送信したいメールの件名をクリックして個別のログページを開きます。次に、**Actions** メニューの **Resend** をクリックします。
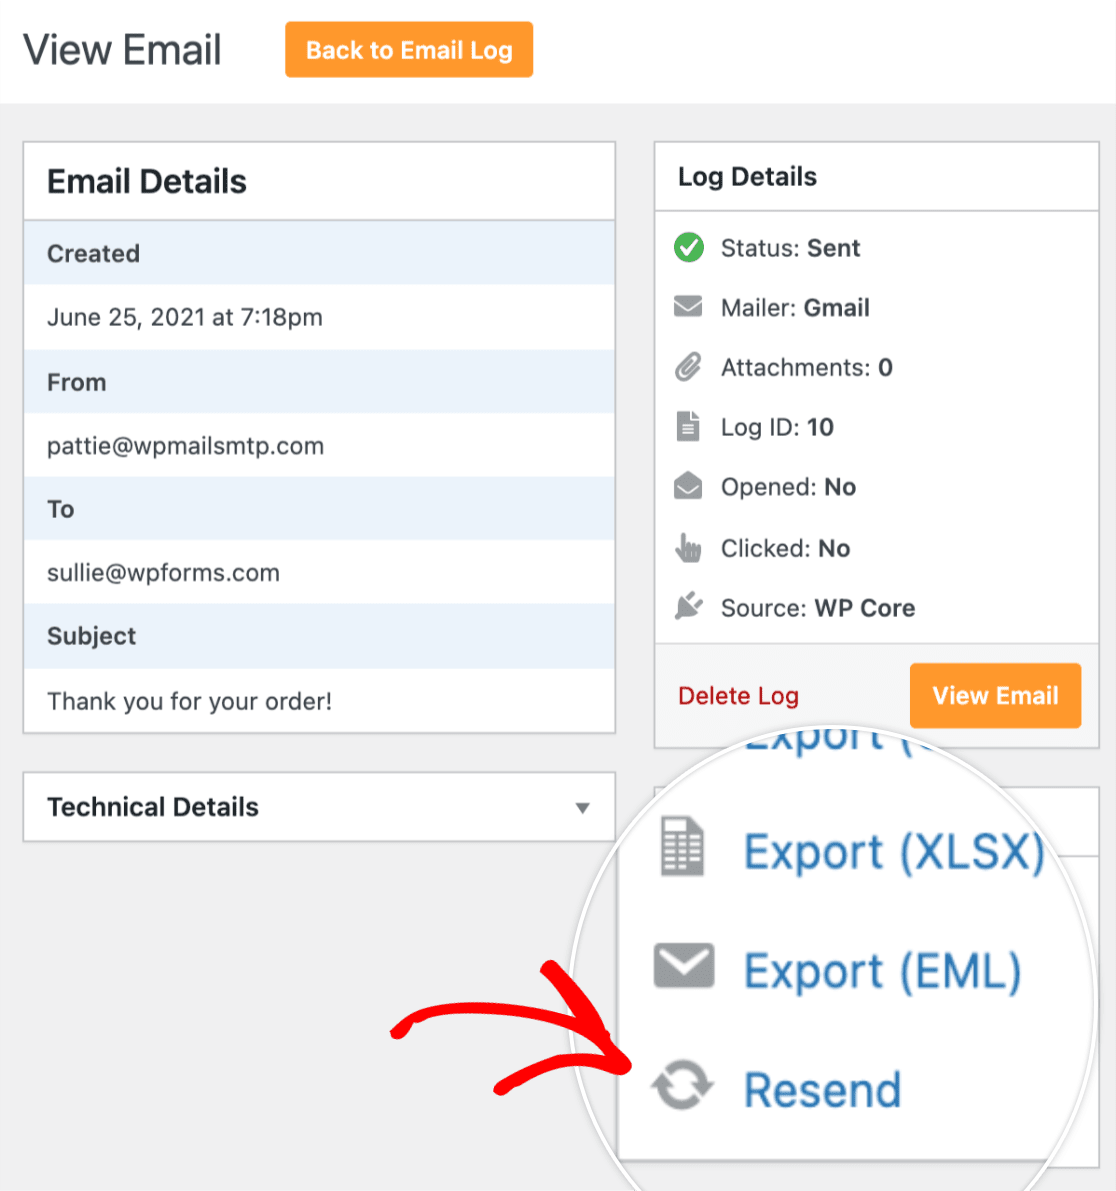
**注意:** メールを再送信するには、メールログ設定で [Log Email Content オプションを有効にする](https://wpmailsmtp.com/docs/how-to-set-up-email-logging/#log-email-content) 必要があります。このオプションにより、メールログがメールの内容をキャプチャできるようになり、機密情報が含まれる可能性があることに注意してください。
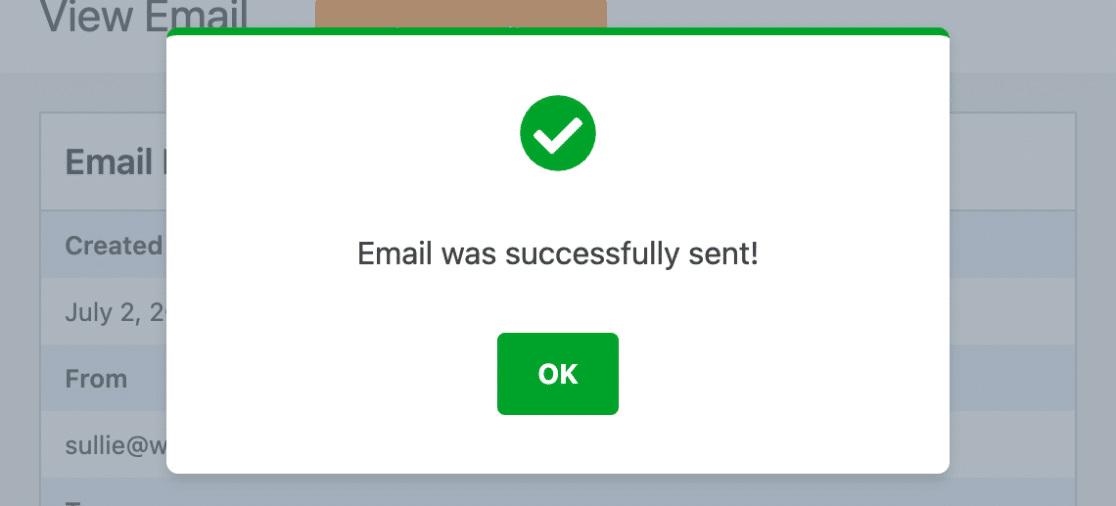
**Resend** をクリックすると、メール受信者を変更するオプションが表示される確認ポップアップが表示されます。複数の受信者を追加したい場合は、各受信者をコンマで区切ってください。

**Connection** の下で、サイトで設定した追加の接続を選択できます。

**注意:** WP Mail SMTP で [追加の接続を設定する方法](https://wpmailsmtp.com/docs/configuring-additional-connections/) については、チュートリアルを参照してください。
準備ができたら、**Yes** ボタンをクリックしてメールを再送信します。

メールが正常に再送信されると、「Email was successfully sent!」という確認ポップアップが表示されます。
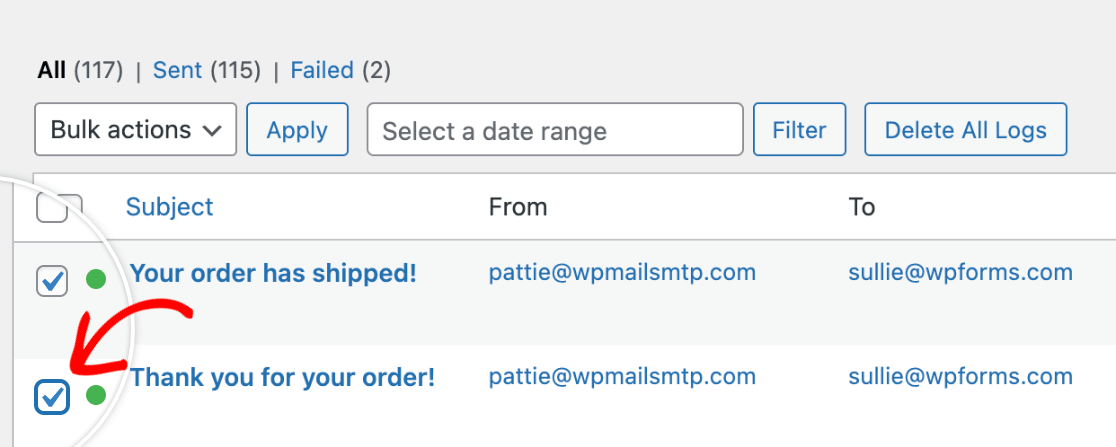
### 一括でメールを再送信する
複数のメールを再送信する必要がある場合は、Email Log ページの **Bulk Actions** ドロップダウンを使用して、すべて一度に送信できます。再送信したいメールを選択するには、各件名の左側にあるチェックボックスを使用します。
次に、**Bulk Actions** ドロップダウンから **Resend** を選択し、**Apply** をクリックします。
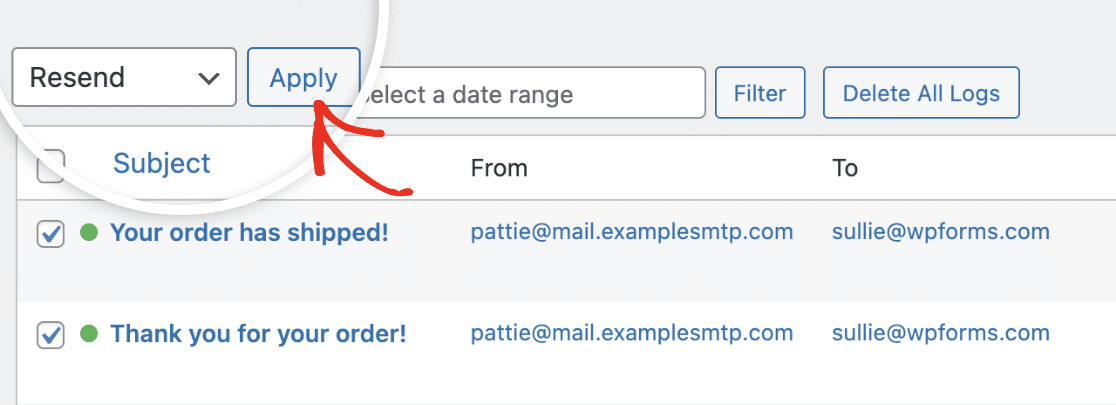
次に、「Are you sure you want to resend selected emails?」というポップアップが表示されます。その下に、メールを再送信するために使用したいメーラー接続を選択できる **Connection** ドロップダウンが表示されます。

準備ができたら、**Yes** をクリックして続行します。

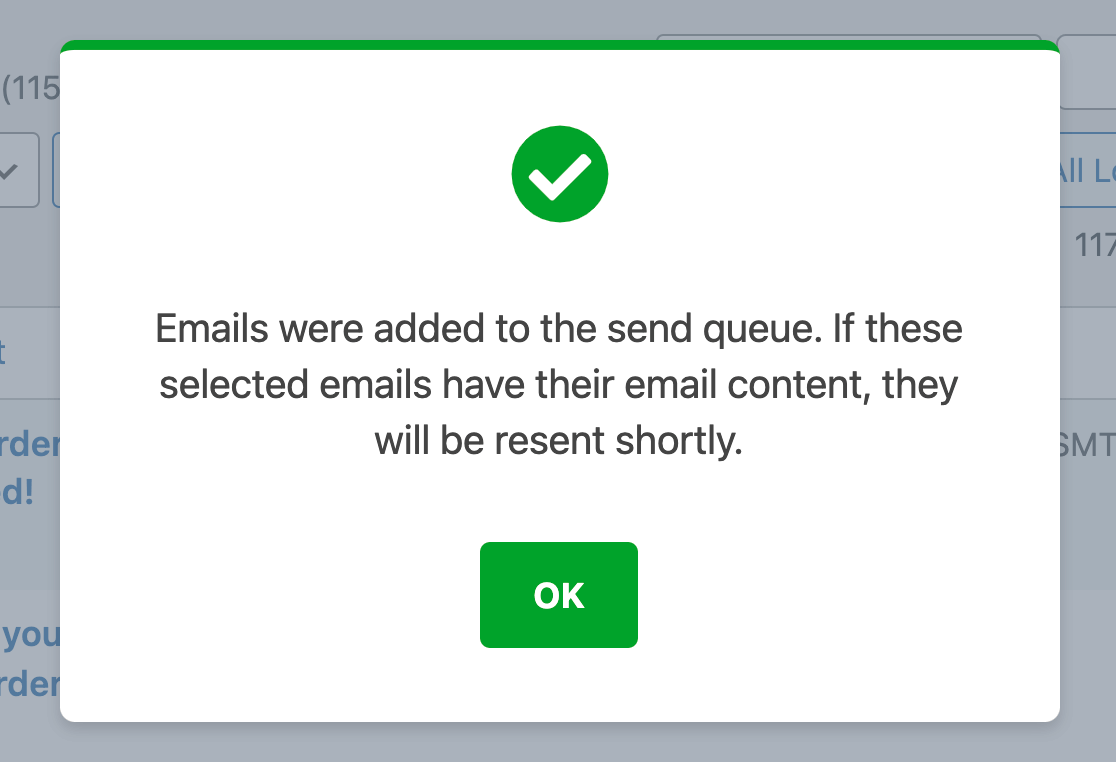
次に、「Emails were added to the send queue. If these selected emails have their email content, they will be resent shortly.」という確認ポップアップが表示されます。
これで完了です!WP Mail SMTP を使用して WordPressサイトからメールを再送信する方法がわかりました。
次に、メールログに表示されるすべての情報について詳しく知りたいですか?詳細については、[WP Mail SMTP でメールログを表示する方法](https://wpmailsmtp.com/docs/how-to-view-email-logs) のチュートリアルを確認してください。
**Categories:** Email Logging
---