### [Error: From Address Does Not Match Verified Sender Identity](https://wpmailsmtp.com/docs/sendgrid-sender-identity-mismatch/)
**Published:** June 1, 2026
**Author:** David Ozokoye
**Content:**
**Note**: This guide applies to the [SendGrid mailer](https://wpmailsmtp.com/docs/how-to-set-up-the-sendgrid-mailer-in-wp-mail-smtp/ "SendGrid") in WP Mail SMTP.
## What This Error Means
SendGrid requires you to verify every From email address before it can send mail. This error indicates that the From address you configured in WP Mail SMTP doesn’t match any verified Sender Identity in your SendGrid account.
## Common Causes
- **From Email never verified**: You never added the address in WP Mail SMTP as a Single Sender, and Domain Authentication doesn’t cover it
- **Sender Identity deleted**: You removed a previously verified Single Sender from the SendGrid account
- **Domain Authentication covers a different domain**: The authenticated domain in SendGrid doesn’t match the domain in the From Email (e.g. you authenticated `example.com` but you’re sending from `otherdomain.com`)
- **From Email changed in WP Mail SMTP**: You updated the From Email in WP Mail SMTP without verifying the new address or domain in SendGrid
## How to Fix
Here is the complete step-by-step guide to resolving the error. Choose Option A if you already have a verified Sender Identity. Choose Option B to verify a single address quickly. Choose Option C (recommended for production) to authenticate an entire domain.
### Option A: Match the From Email to an Already-Verified Address
If you already have a verified Sender Identity in SendGrid, the fastest fix is updating the From Email in WP Mail SMTP to match it.
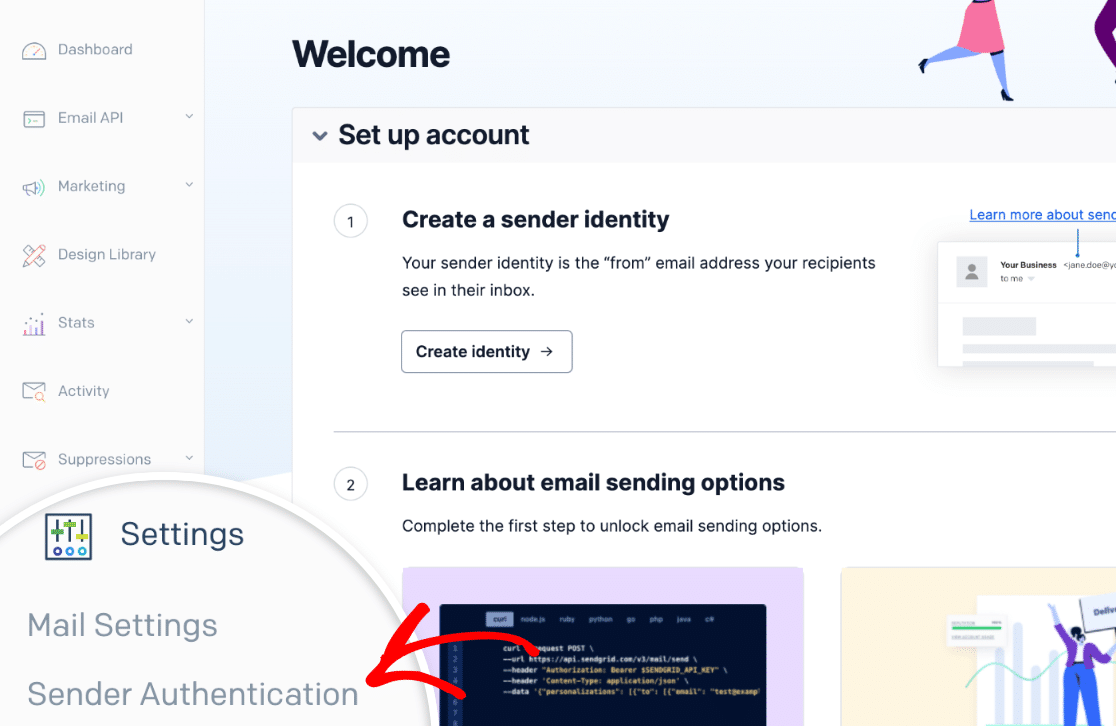
Start by logging in to your [SendGrid](https://app.sendgrid.com "SendGrid") account. Then, go to **Settings » Sender Authentication** and note which addresses or domains are already verified.
Next, go to **WP Mail SMTP » Settings** and click the **General** tab.
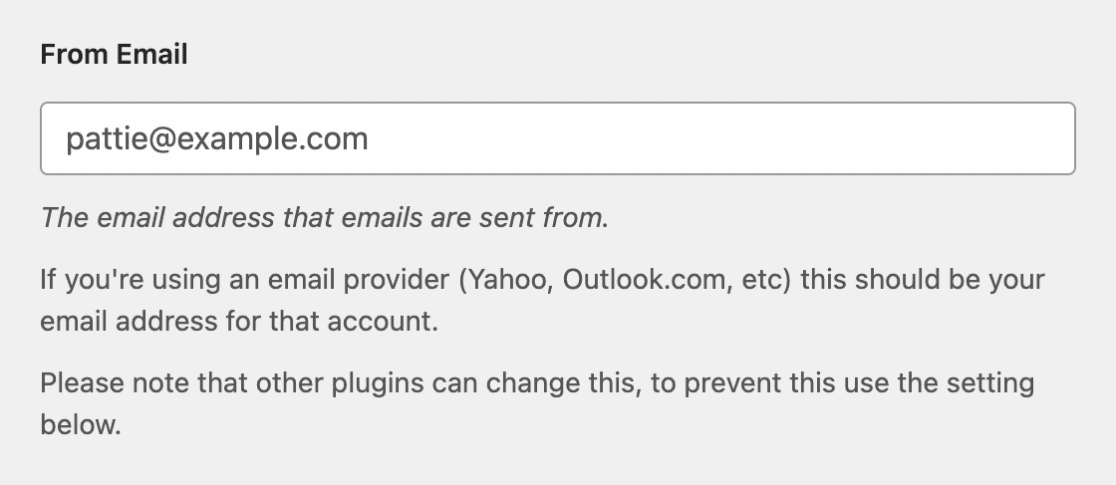
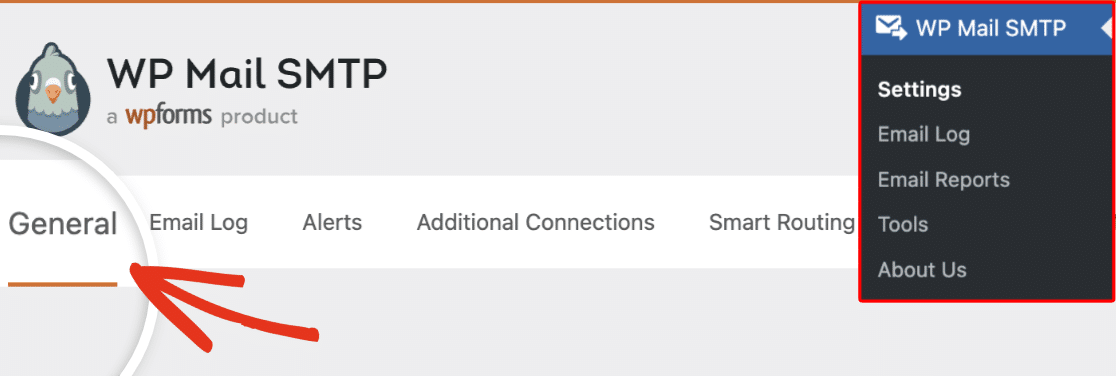Change the **From Email** to an address that matches a verified Sender Identity. Also enable **Force From Email** to apply the changes site wide.
Be sure to save your changes afterward.
Finally, send a test email (see [Sending a Test Email](#sending-a-test-email) below).
If you don’t have any verified identities, or you need to use a different From address, continue to Option B or C.
### Option B: Verify a Single Sender Address
Use this option to verify one specific email address quickly. For production, Domain Authentication (Option C) is the recommended approach.
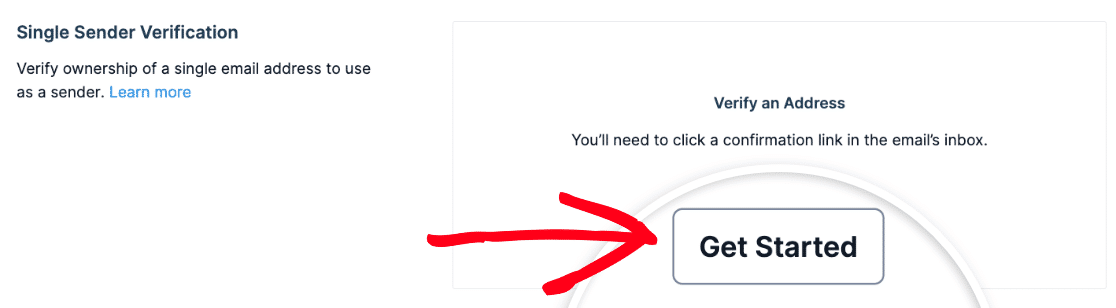
Start by logging in to your [SendGrid](https://app.sendgrid.com "SendGrid") account. Then, go to **Settings » Sender Authentication**. In the **Single Sender Verification** section, click **Get Started**.
Next, enter the sender name and the exact From Email address you want to use in WP Mail SMTP, fill in the required physical address fields, and click **Create**.
After that, check the inbox for that email address. Open the verification email from SendGrid and click the confirmation link.
Finally, go to **WP Mail SMTP » Settings** and confirm the **From Email** matches the address you just verified. Click **Save Settings**, then send a test email (see [Sending a Test Email](#sending-a-test-email) below).
### Option C: Set Up Domain Authentication (Recommended for Production)
Domain Authentication verifies the entire domain at once, so you can use any address at that domain as the From Email. It also improves deliverability and removes the “via sendgrid.net” label from sent emails.
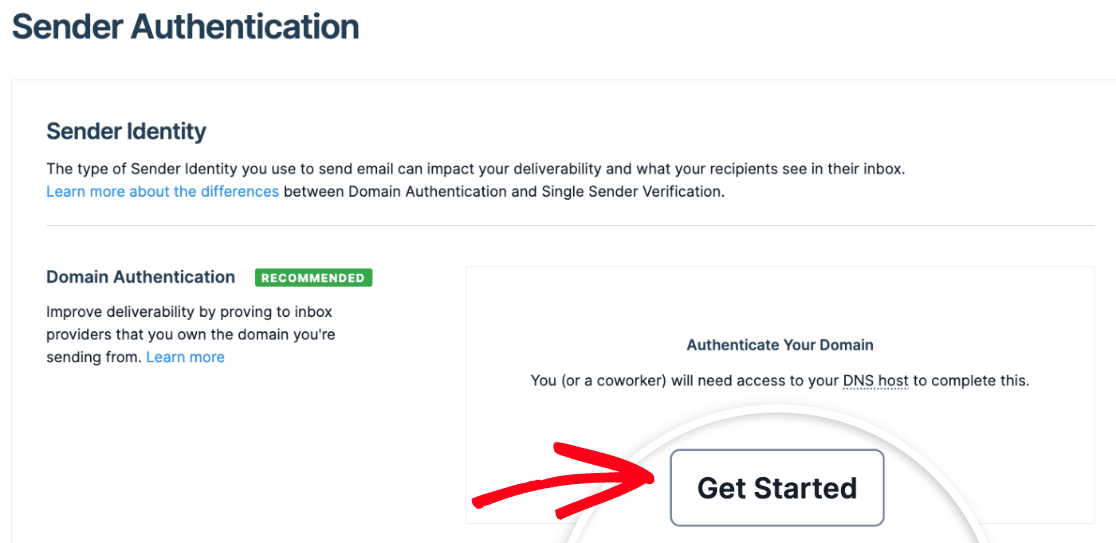
Start by logging in to your [SendGrid](https://app.sendgrid.com "SendGrid") account. Then, go to **Settings » Sender Authentication**. In the **Domain Authentication** section, click **Get Started**.
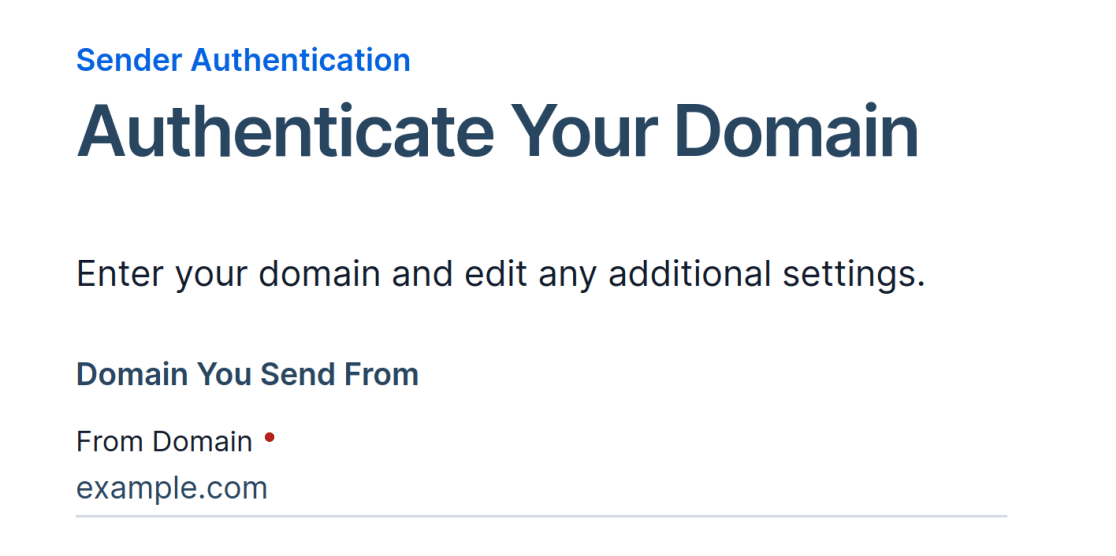
Next, answer the DNS host provider question (select your DNS provider or “Other”), select **Yes** for link branding, and click **Next**. Then, enter your domain (e.g. `example.com`).
After that, click **Advanced Settings**.
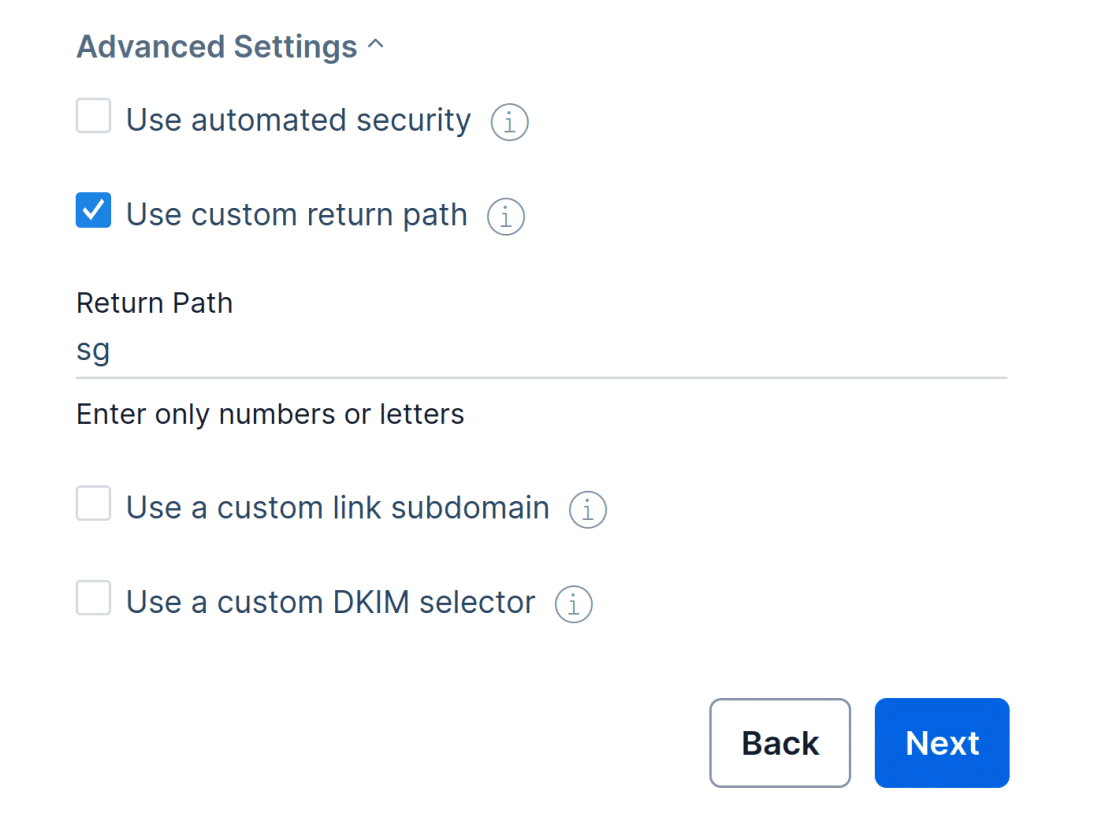In Advanced Settings, **uncheck** “Use automated security” and **check** “Use custom return path”. Enter `sg` in the **Return Path** field, and click **Next**. SendGrid displays the DNS records you need to add.
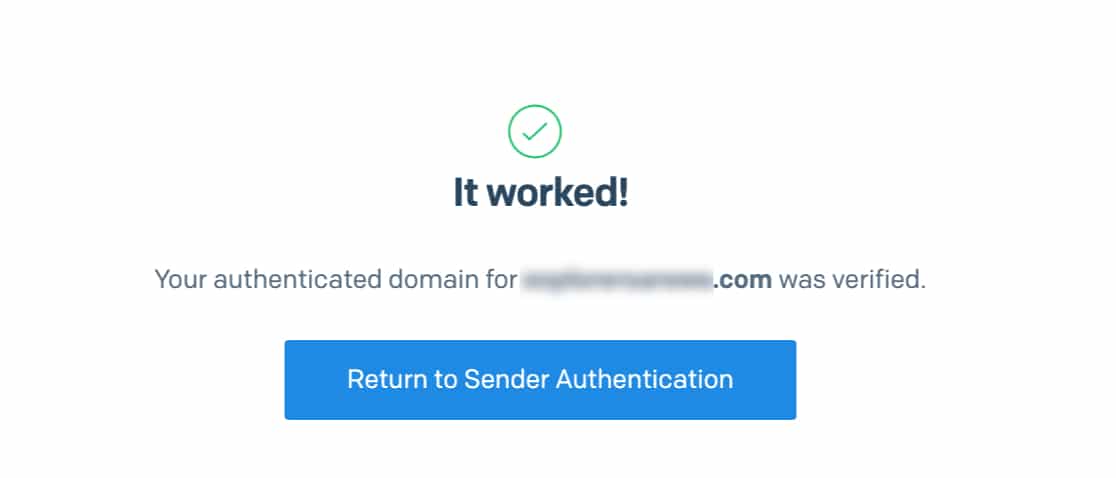
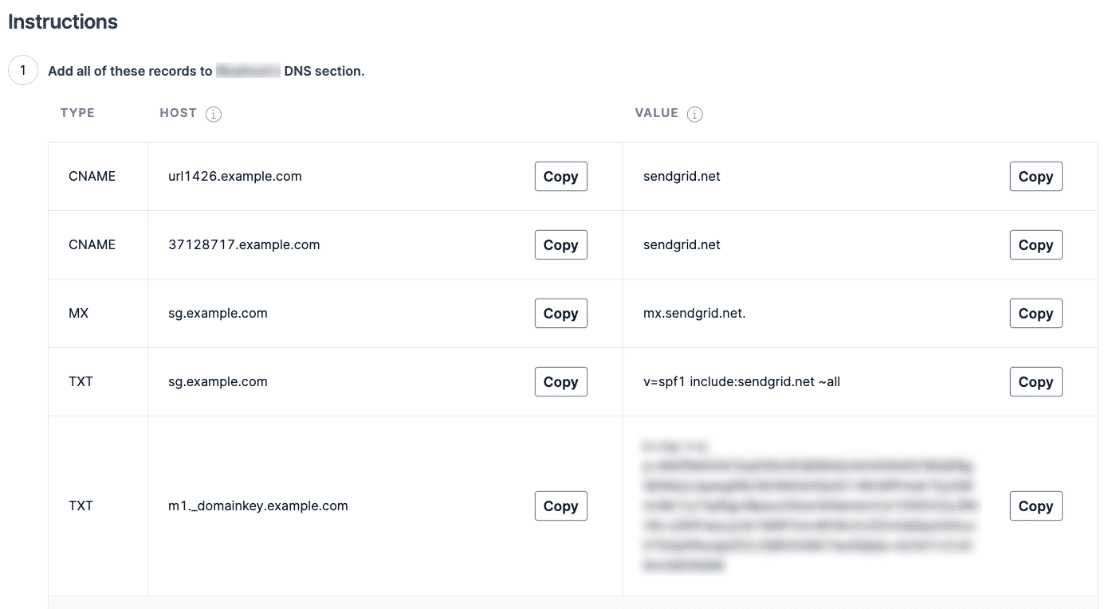Then, log in to your **DNS provider** (Cloudflare, GoDaddy, Namecheap, Route 53, etc.) and add all the DNS records exactly as shown. Return to SendGrid, check the **“I have added these records”** checkbox, and click **Verify**.
**Note**: DNS propagation can take up to **48 hours**, though it’s usually much faster.
After SendGrid confirms verification, go to **WP Mail SMTP » Settings** and click the **General** tab. Set the **From Email** to an address at the authenticated domain, and enable **Force From Email** so all outgoing mail uses this address.
Then, in the **SendGrid** section, set the **Sending Domain** to `sg.example.com` (matching the subdomain you chose above plus your domain).
Finally, click **Save Settings**, then send a test email (see [Sending a Test Email](#sending-a-test-email) below).
## Sending a Test Email
To test the fix, go to **WP Mail SMTP » Tools** and click the **Email Test** tab. Enter a recipient email address in the **Send To** field, leave the **HTML** toggle ON, and click **Send Email**.
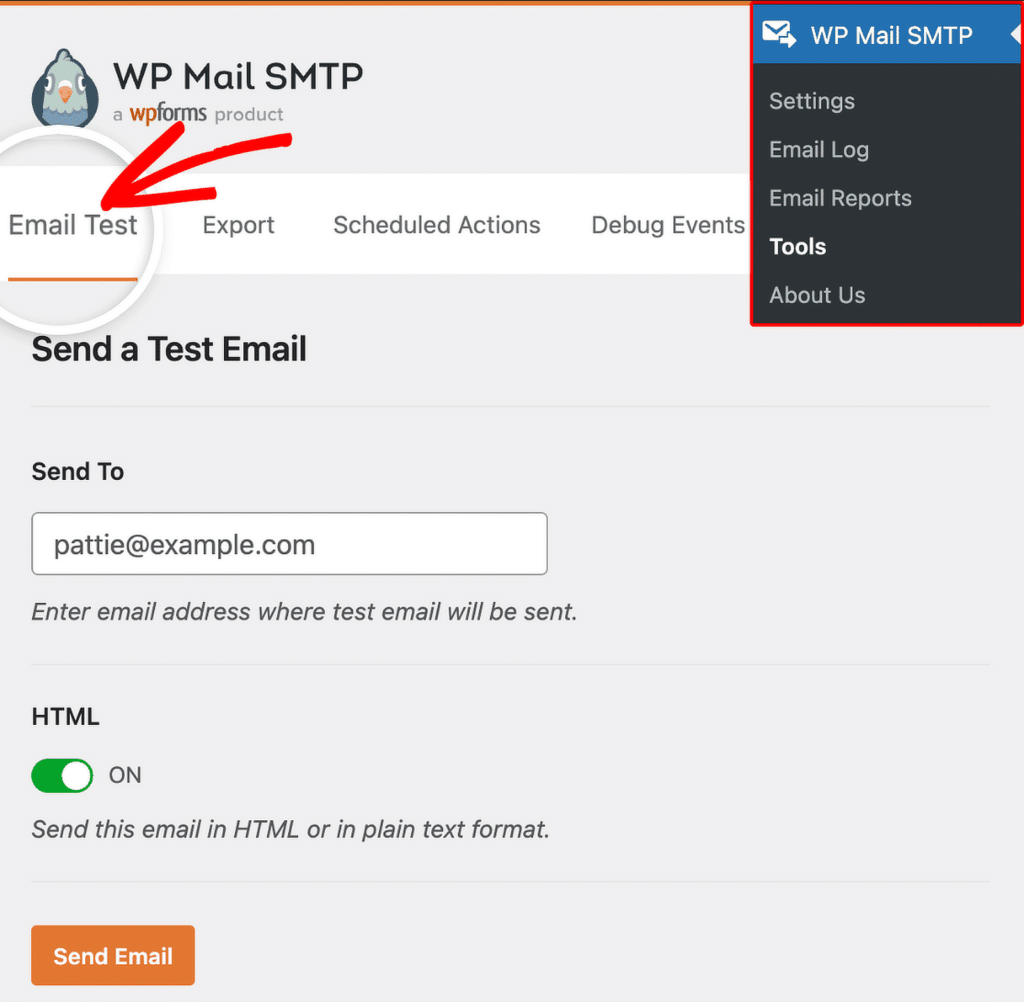Once done, check for a success message, then check the recipient inbox to confirm delivery.
## Notes
- **Domain Authentication is the recommended approach.** It verifies all addresses at your domain at once and improves deliverability. Single Sender Verification is quick but doesn’t improve deliverability.
- Don’t use `mail` as the subdomain during Domain Authentication. It can conflict with your hosting. Use `sg` instead.
- Don’t use underscores in the subdomain.
- Set the **Sending Domain** field in WP Mail SMTP to the authenticated subdomain plus your domain (e.g. `sg.example.com`).
- DNS changes can take up to **48 hours** to propagate. If verification fails, wait and try again before troubleshooting DNS entries.
- If records appear correct but verification fails, double-check for extra spaces or trailing dots that some DNS providers add automatically.
That’s It! You now know how to fix the ‘From Address Does Not Match Verified Sender Identity’ error in SendGrid and get your emails sending again through WP Mail SMTP.
**Categories:** SendGrid Errors, Error Library
---