AI Summary
Note: This guide applies to the Brevo mailer in WP Mail SMTP.
What This Error Means
Brevo requires manual approval before a new account can send transactional emails. This error means the account’s transactional sending feature has not been activated yet. Brevo reviews each account individually and will not enable sending until domain verification is complete and the account passes their review.
Common Causes
- New Brevo account that hasn’t been approved for transactional sending yet
- Sending domain not verified, which Brevo requires before they will consider activating the account
- Account activation request was never submitted to Brevo support
How to Fix
Here is the complete step-by-step guide to resolving the error.
Step 1: Verify Your Sending Domain in Brevo
Brevo will not activate transactional sending until at least one domain is verified. If you haven’t added a domain and verified your DNS records yet, complete this step first.
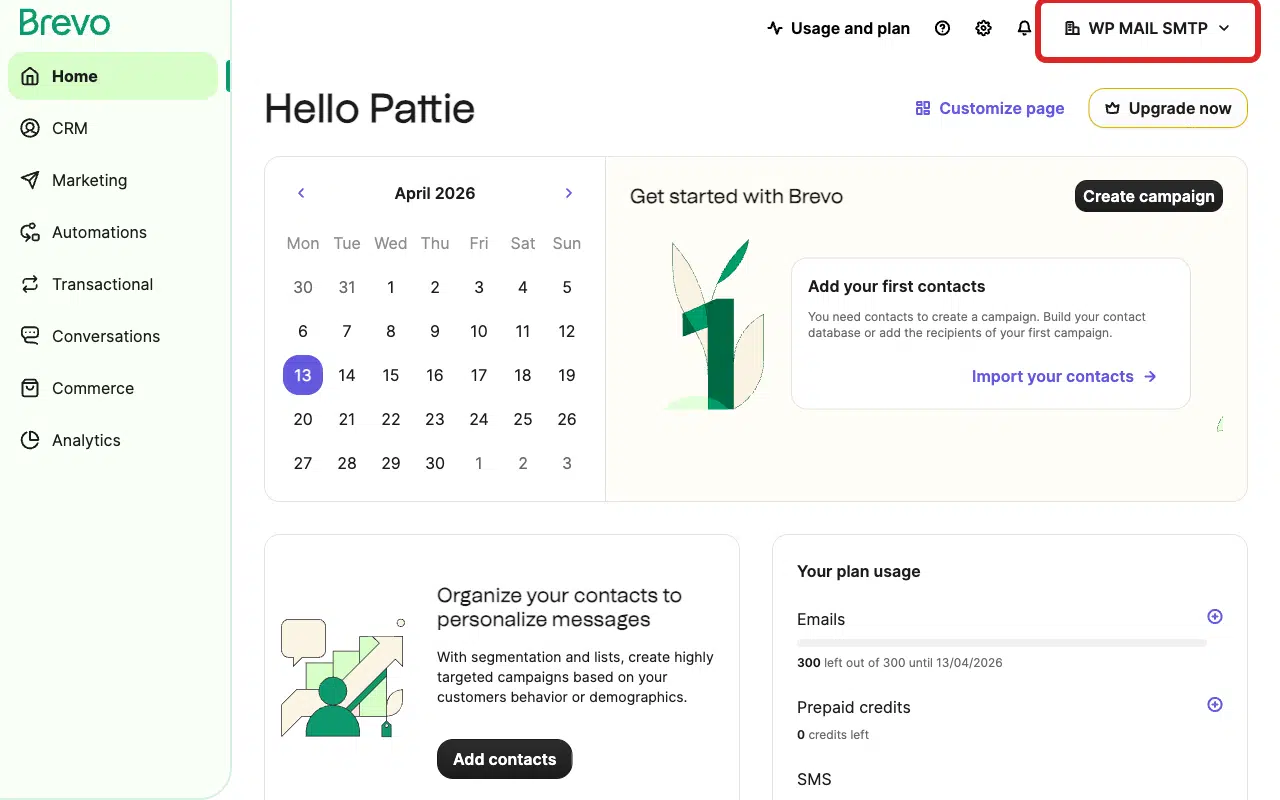
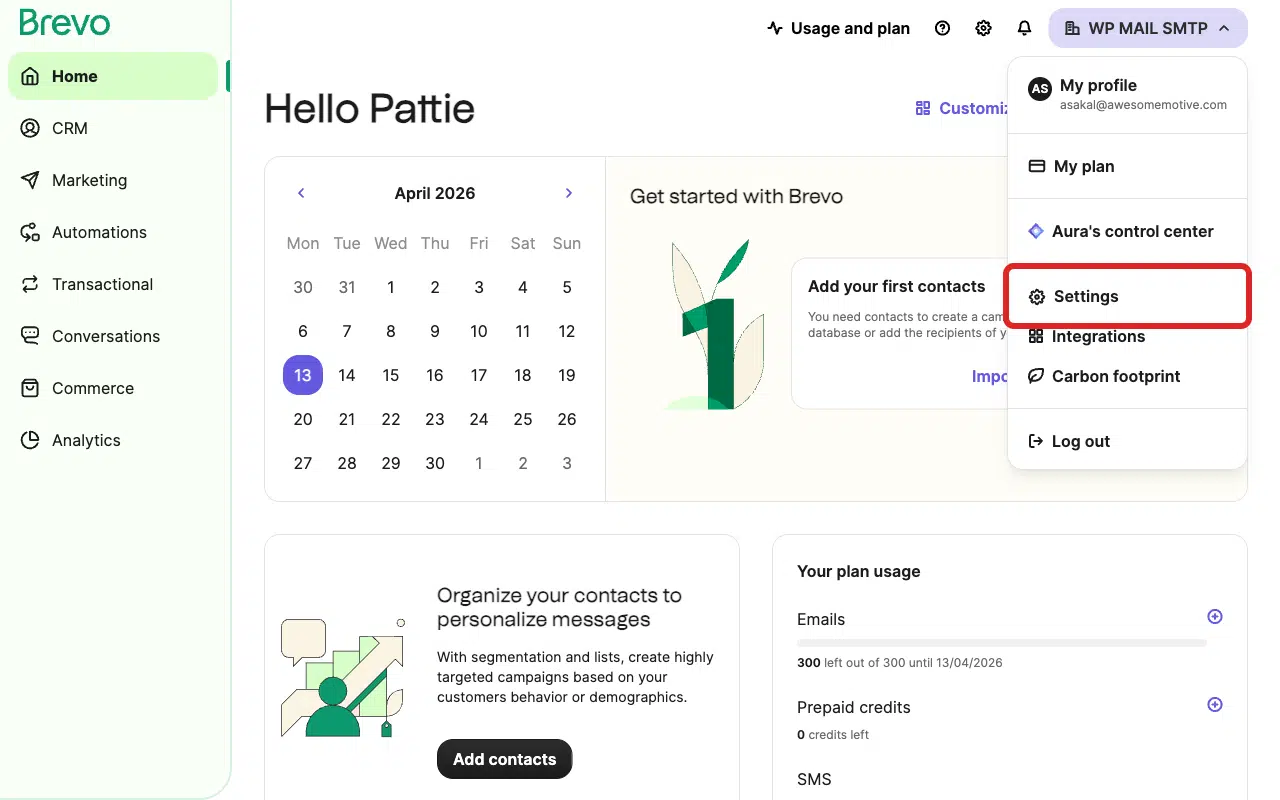
Log in to your Brevo account. Once you’re logged in, click your organization name in the top-right corner of the page.
Then select Settings from the dropdown menu.
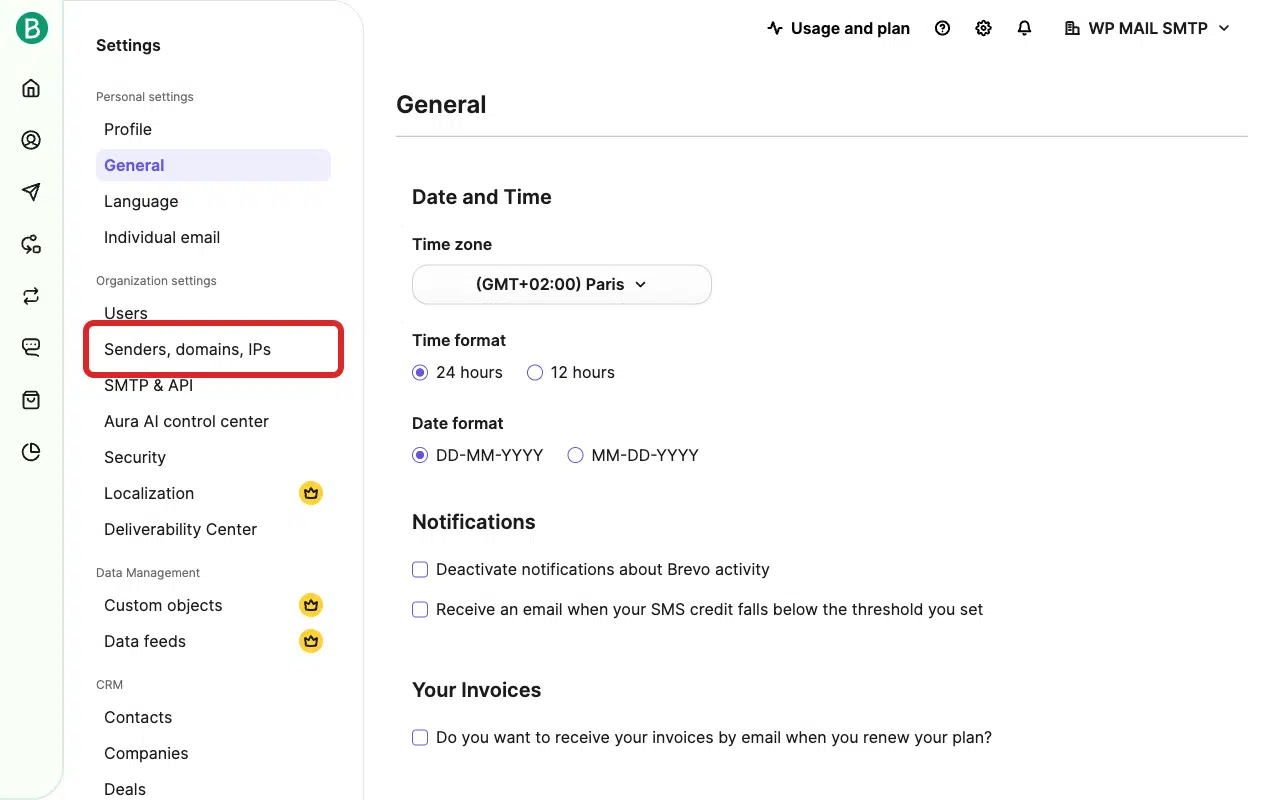
From the settings page, click Senders, domains, IPs in the left sidebar.
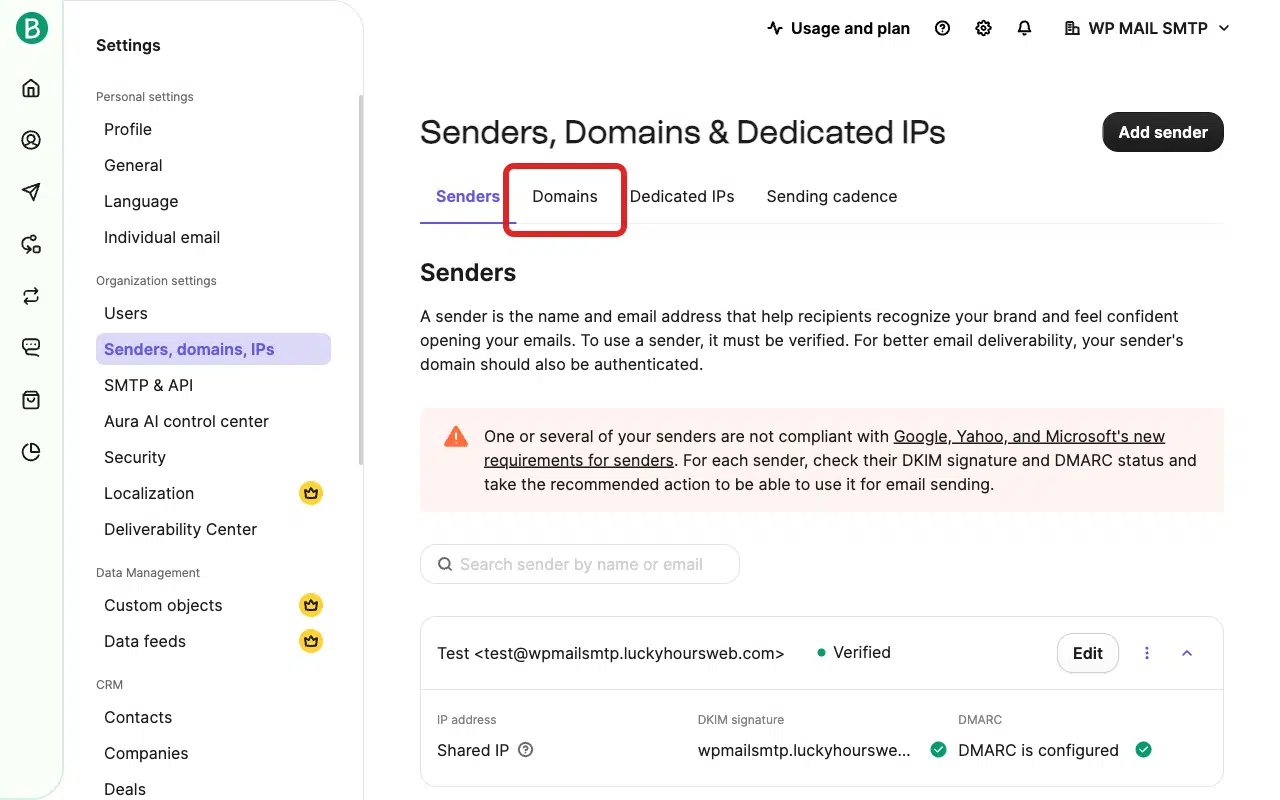
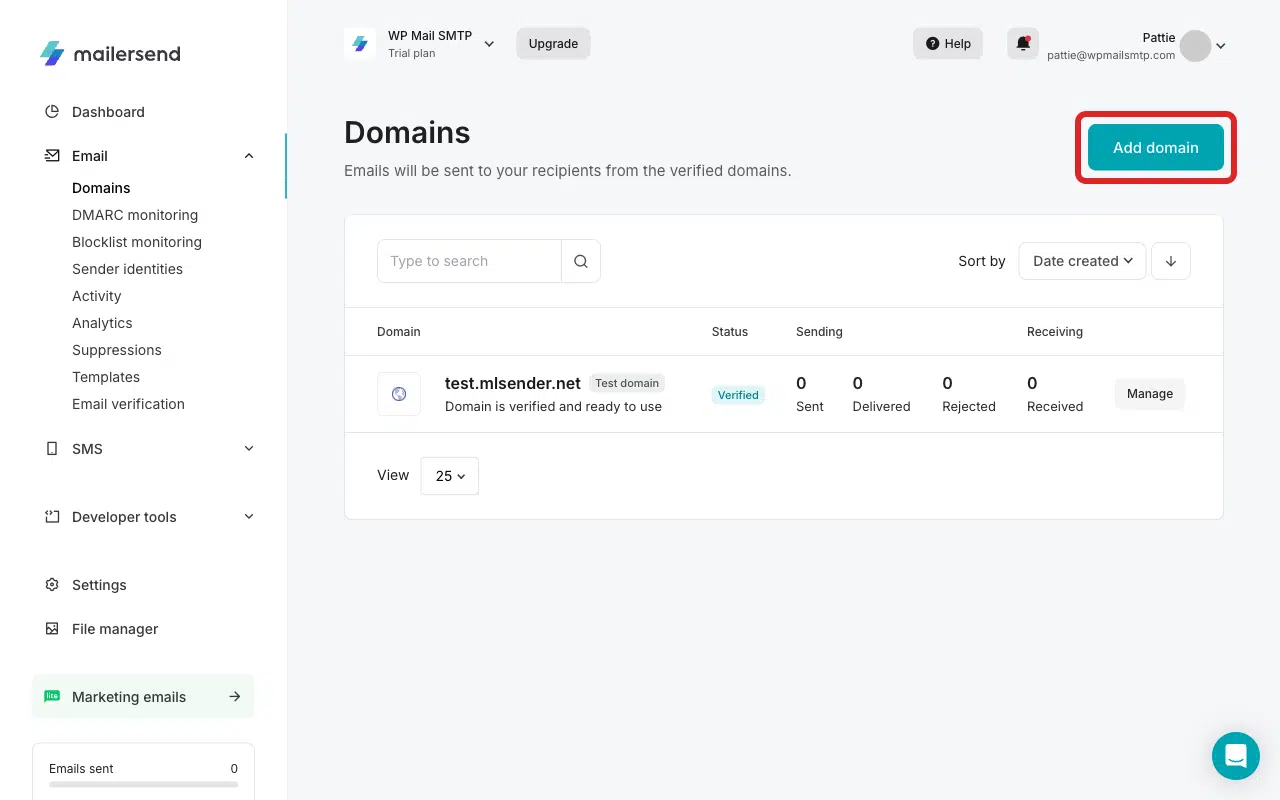
Next, click the Domains tab.
Click the Add domain button.
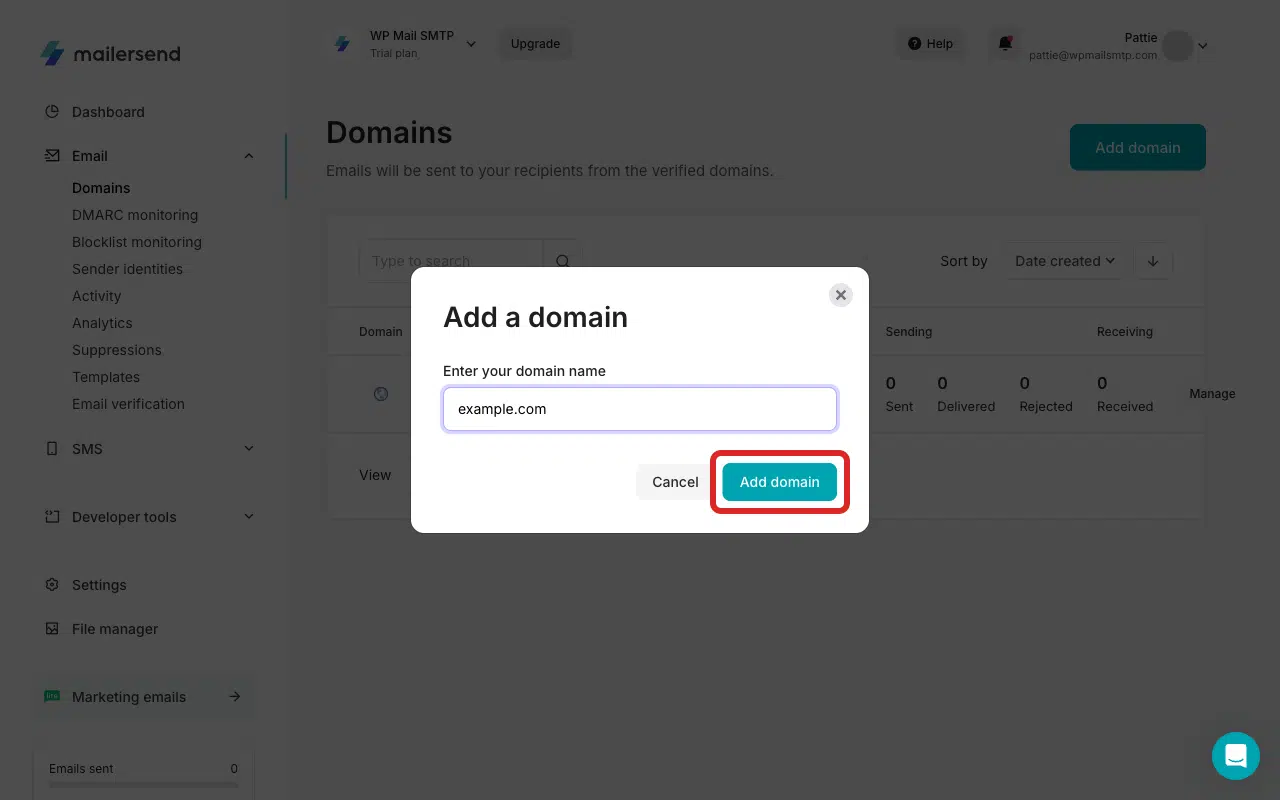
Enter your sending domain in the Domain name field. Then click Add domain to proceed.
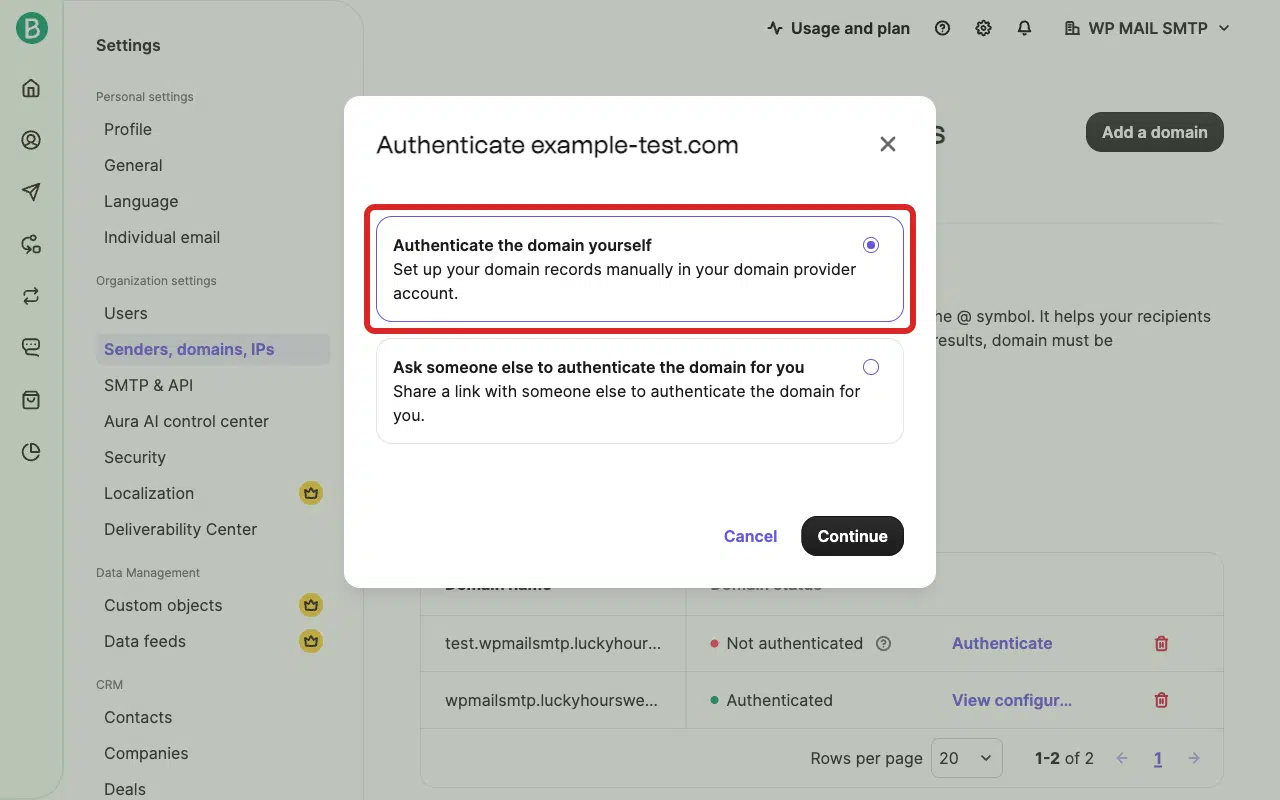
After that, select Authenticate the domain yourself and click Continue to proceed.
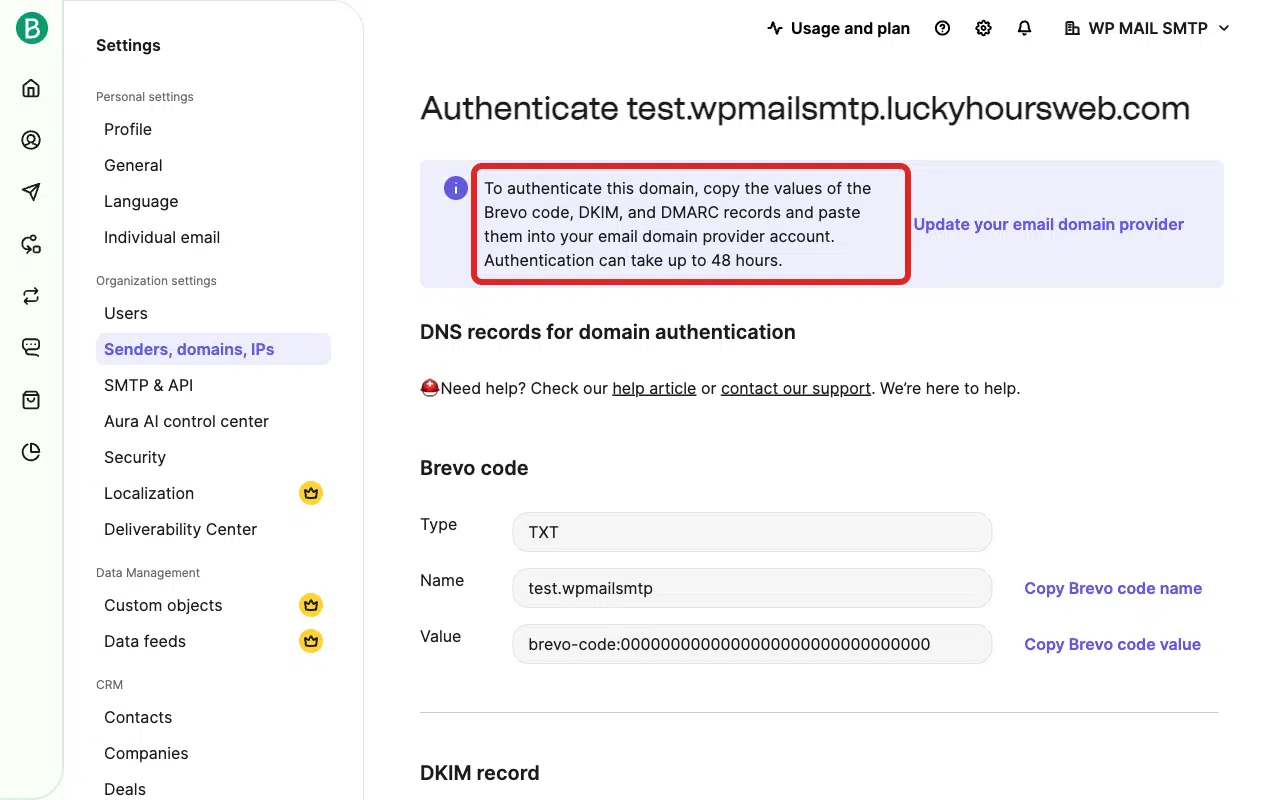
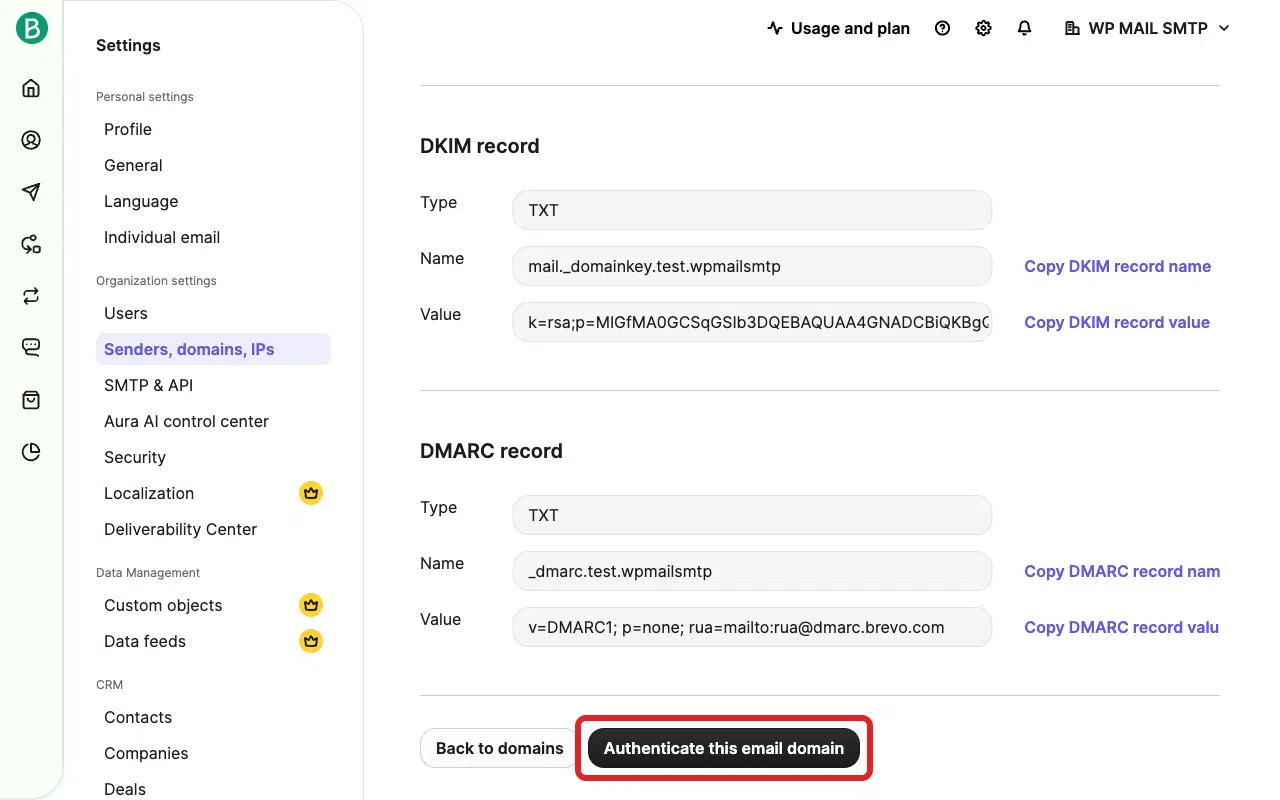
Brevo will display three DNS records to add at your DNS provider (Cloudflare, GoDaddy, Namecheap, etc.):
- Brevo code (TXT record)
- DKIM record (TXT record)
- DMARC record (TXT record, optional but recommended).
Note: If you need help setting up your DNS records, be sure to check our adding DNS records guide.
After adding all records at your DNS provider, return to Brevo and click Authenticate this email domain.
Note: DNS propagation can take up to 24-48 hours. If verification fails immediately, wait and try again later.
Step 2: Request Account Activation From Brevo Support
Once your domain is verified, contact Brevo to activate transactional sending on your account.
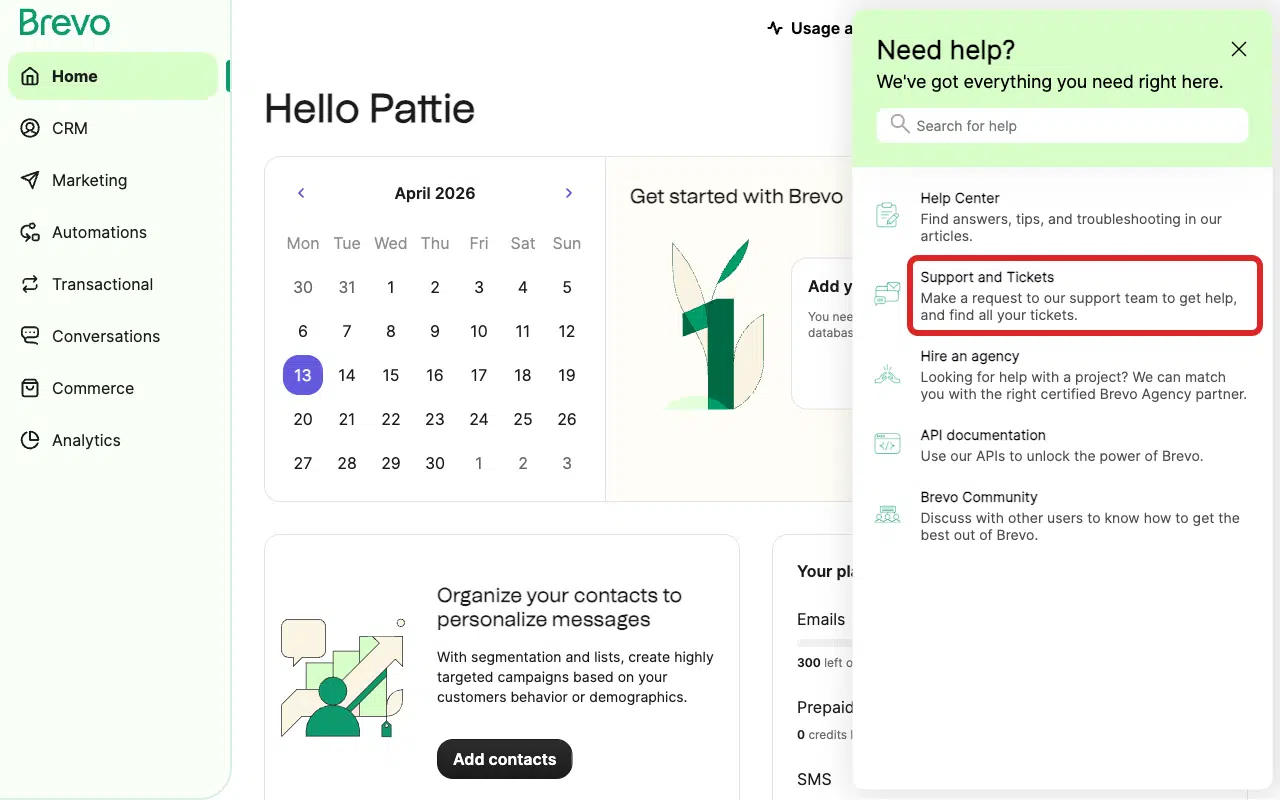
Log into your Brevo account and click the help icon (?) in the top-right header bar of any Brevo page to open the help panel.
Click Support and Tickets to submit a support request.
Include the following in your message: your website URL, that you need transactional email activated (not marketing), the type of emails you will send (e.g. contact form notifications, order confirmations), and your expected monthly sending volume.
Brevo will review your account and reply by email once activation is complete. This typically takes 1-2 business days.
Step 3: Send a Test Email
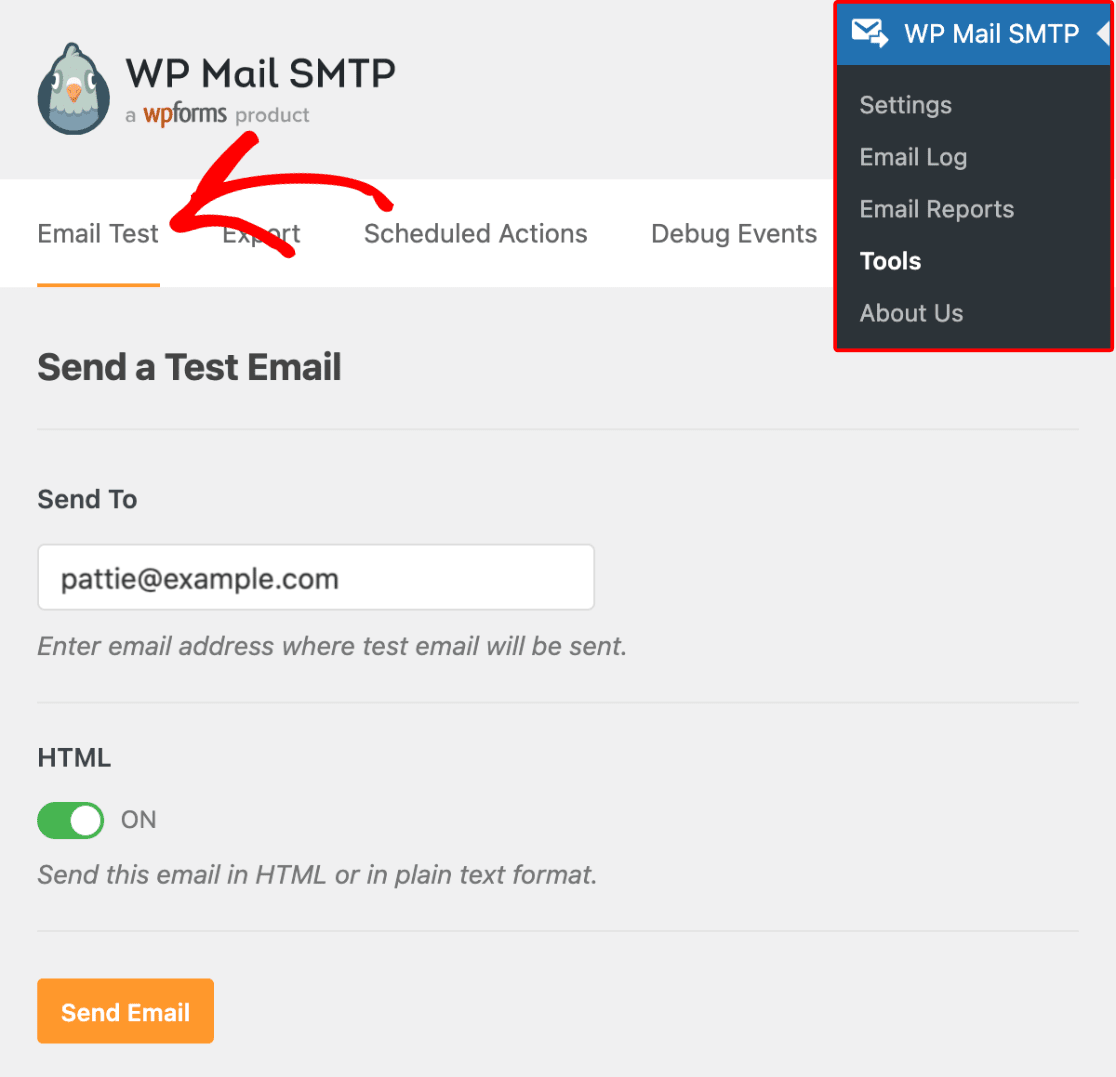
Once Brevo confirms your account is activated, go to WP Mail SMTP » Tools. Click the Email Test tab.
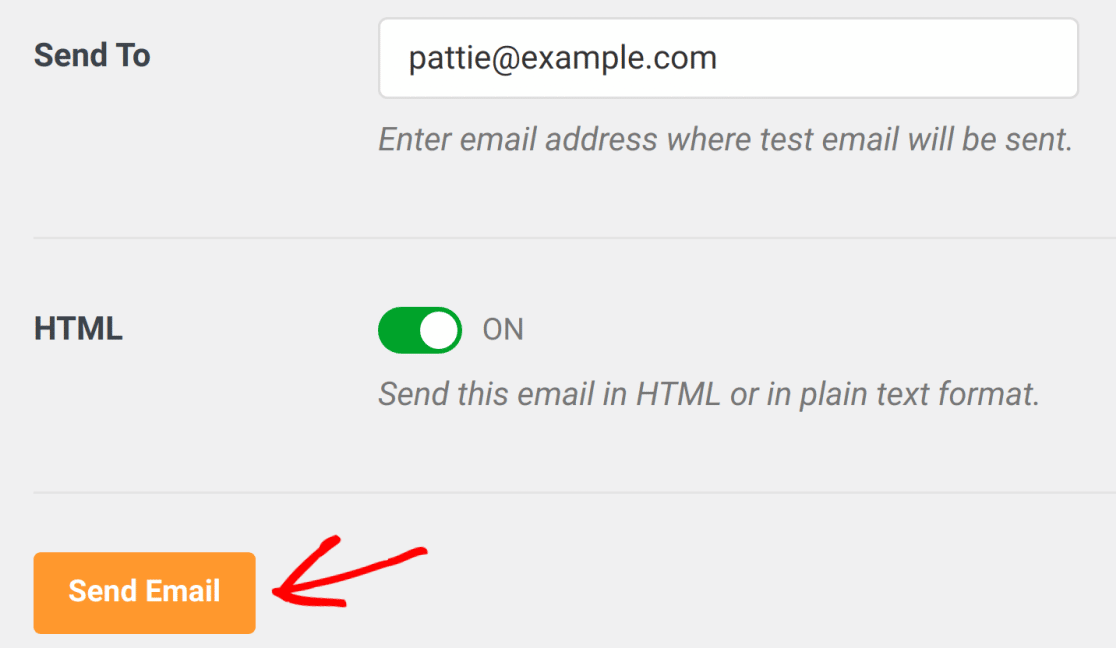
Enter a recipient email in the Send To field. Leave the HTML toggle ON.
Once done, click Send Email.
Look for the success message, then check your inbox to confirm the email arrived.
If the error is gone, you’re done. If it persists, double-check that your domain shows as verified in Brevo and that Brevo support confirmed activation.
Notes
- There is no self-service activation button. Brevo reviews and activates accounts manually.
- Brevo free accounts get up to 300 emails per day once activated.
- If you use GoDaddy for DNS, set the TTL to 1 hour for all DNS records (GoDaddy’s default is higher and slows propagation).
That’s It! You now know how to fix the ‘Permission Denied: SMTP Account Not Activated’ error in Brevo and get your emails sending again through WP Mail SMTP.