AI Summary
Are you ready to install the WP Mail SMTP plugin? After purchasing a license, the next step is to install our plugin on your WordPress site so you can start improving email deliverability.
This step-by-step guide will walk you through how to install WP Mail SMTP on your WordPress website.
1. Downloading the WP Mail SMTP Plugin
To get started, log in to your WP Mail SMTP account. Then click on the Downloads tab.
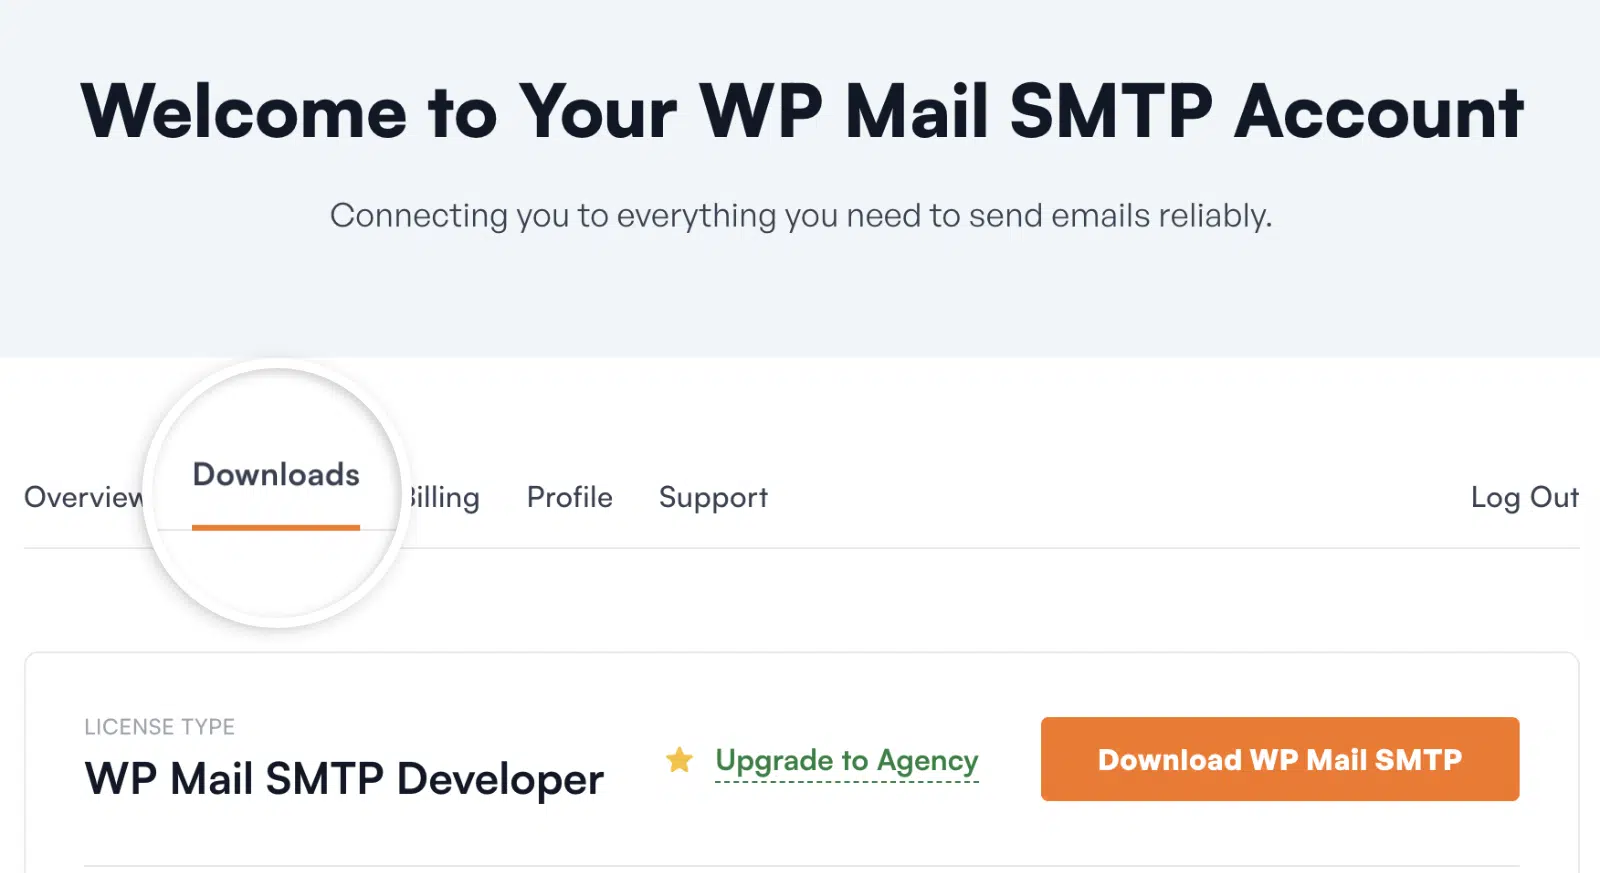
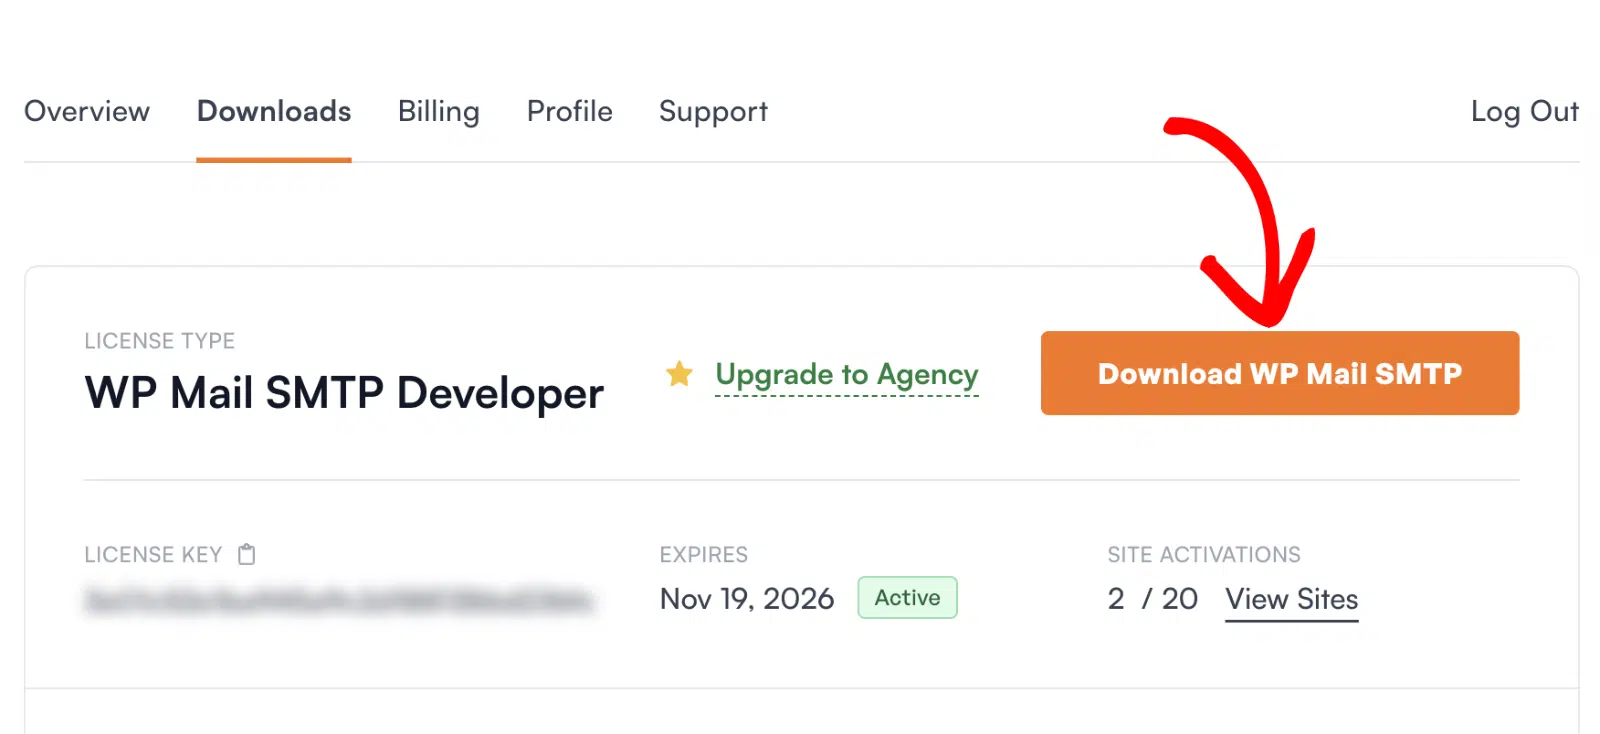
This will show you a page with all of your available licenses. To download the plugin, click on the Download WP Mail SMTP button next to one of your licenses. This will save a zipped file of the WP Mail SMTP plugin to your computer.
2. Installing WP Mail SMTP on Your Site
Once you have the zip file, navigate to the WordPress admin area for the site where you want to install WP Mail SMTP. In the admin dashboard, go to Plugins » Add New. Then click the Upload Plugin button.

You’ll see the option to upload the plugin. Click on the Choose File button and select your WP Mail SMTP zip file.

After your file is uploaded, click on the Install Now button.

WordPress will then install WP Mail SMTP for you. Once the plugin is installed, click the Activate Plugin button to activate the plugin and start using it on your site.

3. Uninstalling and Deleting WP Mail SMTP Lite
When you successfully upgrade to the paid version of the WP Mail SMTP plugin, you can go ahead and delete the Lite version of the plugin, as it is no longer needed.
However, before you fully delete the Lite version of the plugin it’s important to ensure your data, such as your settings and saved keys, remain available on your site. This will help prevent you from having to reconfigure your settings when you upgrade to Pro.
To do this, you’ll need to access the miscellaneous settings in WP Mail SMTP by going to WP Mail SMTP » Settings. Then click on the Misc tab at the top of the page.
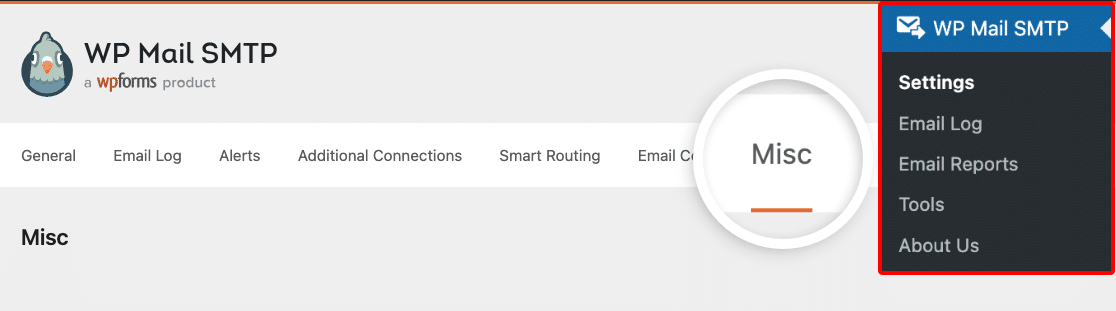
Next, make sure the toggle button for Uninstall WP Mail SMTP is set to the OFF position.

After that, you can delete the Lite version of WP Mail SMTP without worrying about losing any of our data or previously configured settings.
That’s it! You’ve now successfully installed WP Mail SMTP on your WordPress site.
Next, would you like to verify your license so you can receive automatic updates? Check out our tutorial on how to verify your WP Mail SMTP license key for step-by-step instructions.