AI Summary
Are you looking for a super reliable email delivery solution in WordPress that can work with your custom email address? Mailgun is a service specifically designed to help your emails get delivered successfully.
This tutorial will walk you through how to fix email delivery issues in WordPress using Mailgun with WP Mail SMTP.
What is Mailgun?
Mailgun is a popular, reliable email service provider that can scale to support large quantities of emails. It also uses a secure API, and has a free 3-month trial.
While the setup for Mailgun can require more time than some other mailers, these steps are what allow it to be such a reliable email delivery service.
- Cost: A free account without a credit card is limited to 100 emails per day. A free account with a credit card added allows up to 3,000 emails monthly, based on the 100 emails/day limit for a free account. Beyond this, pricing starts at $15 per 10,000 emails.
- From Email Requirements: Mailgun generally works fine with any From Email. However, we recommend using a domain-specific email address (for instance, [email protected]) for the most reliable email delivery.
- Bottom Line: Mailgun is among the reliable email delivery options available, and offers super competitive pricing. However, it requires DNS (Domain Name System) access to set up.
Note: Would you like our team to do this setup for you? With White Glove Setup, we’ll do all configuration and testing for the Mailgun mailer on your site.
For more information about the supported mailers, please check out our complete guide to mailers in WP Mail SMTP.
Signing Up for a Mailgun Account
To get started in this setup process, you’ll need to have a Mailgun account.
Creating a Mailgun Account
If you don’t already have an account with Mailgun, go ahead and sign up for an account on Mailgun’s website.

Note: Mailgun accounts without a credit card are limited to only sending emails to 5 recipients. Though it’s still free to sign up, you’ll need to add a credit card to your account if you want to remove these restrictions. For more information, please see Mailgun’s signup page.
After completing the short signup form, you’ll have a couple of additional verification steps to complete. Multiple levels of verification are what allow Mailgun to better ensure high standards of email deliverability for all of their users.
First, you should receive an email to verify your Mailgun account. To start the verification process, you’ll need to click the Verify your email address button.

After clicking the button, you’ll be asked to enter a mobile number to receive a text verification code.

Once you’ve completed these steps, you should automatically be logged into your Mailgun account.
Adding a Domain
Now that you’re logged in, you should be seeing your Mailgun dashboard. When you’re ready, go to Sending » Domains in the left menu.

On the Domains page, you’ll need to click the Add New Domain button.

Note: If you don’t see a button to add a new domain, this likely means that you haven’t yet entered a credit card. Mailgun requires all accounts (even free accounts) to enter a credit card before you can continue.
Next, you’ll need to enter a subdomain of your website’s domain name. A subdomain replaces the “www” part of your website’s address; for example: “subdomain.example.com.” Subdomains can be used to add separate sections or directories to your website (similar to how some sites have blogs on a subdomain, such as blog.example.com).
In this case, the subdomain will be used by Mailgun only to send emails, and will not be visible on your site at all.
You can just enter a subdomain such as mail.example.com or mg.example.com. It doesn’t really matter what you name it, but using “mail” or “mg” makes it more clear what the purpose of this subdomain is.

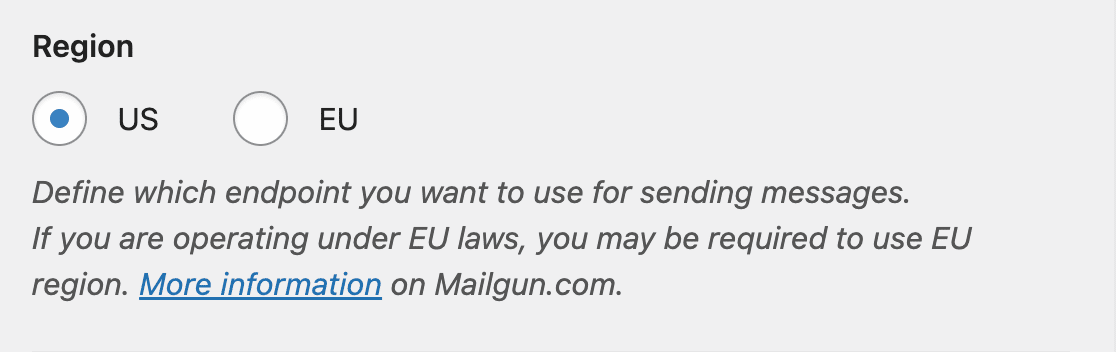
Under Domain region, you’ll need to choose between two regions: US or EU. If your site is hosted in the European Union, then go ahead and choose EU. If your site is hosted anywhere outside of the European Union, then leave the default US option.

Next, click the Advanced settings (DKIM) dropdown to access advanced options. This setting adds an extra security layer for spam protection.

We recommend selecting the 2048 option, which creates a longer DKIM key. Last, you’ll need to click the Add Domain button to continue.

As we continue into the next section, be sure to keep this tab or window open as we’ll return to this page later.
Verifying Your Domain
To protect site owners and their visitors, some SMTP services (including Mailgun) require that you verify your domain by adding records to your site’s DNS. For more information on why verifying your domain is important, refer to Mailgun’s guide.
First, you’ll need to open your site’s DNS settings. If you’re not sure how to find these, Mailgun provides helpful links on their setup page when you add a new domain.

Note: If you’re not sure where to find your site’s DNS settings or feel unsure about making changes, please contact your site’s hosting provider before making adjustments.
Or for more details on modifying a site’s DNS for popular domain providers, check out our adding DNS records guide.
Once your DNS settings are open, you should see an option to add a new record.
To make it possible for Mailgun to verify your domain, you’ll need to add two TXT records to your site’s DNS. Be sure to copy them carefully, as you’ll need the exact values from your Mailgun account for the verification to work.

Note: If GoDaddy manages your DNS, then you will slightly adjust the Hostname shown in Mailgun. You’ll need to remove your normal domain when entering the Hostname into your GoDaddy DNS. For example, instead of entering mg.yourdomain.com for the first TXT record’s Hostname, you would only enter mg.
In your site’s DNS settings, you may also see a TTL (Time To Live) field for the record. If you’re provided with a way to change this, we recommend setting the TTL to one day (or 86400 seconds, depending on the units your DNS uses).
Once you’ve added both TXT records, you’ll need to add MX records in exactly the same way. Just please remember that you must do this for the subdomain you created — not for the main domain.

Now that you’ve added both TXT and MX records, your DNS settings are all set.
Note: Mailgun will also show you a CNAME record. However, you can ignore this as it’s not relevant when using Mailgun only to send emails.
Checking Your Mailgun Verification Status
Now Mailgun will need to verify that your domain has proper DNS records. This verification can take a while (sometimes 24-48 hours) because DNS records may take some time to update.
You can check the status of your domain verification by clicking the Verify DNS settings button.

Once Mailgun can verify the DNS changes you made, it will show an active status next to your domain name.

However, there’s no need to wait on this just yet! You can move ahead to the next step while you wait for this verification to complete. Just be sure to keep this tab or window open, as we’ll need it a little later.
Setting Up WP Mail SMTP
Now that you’ve set up your DNS, you can prepare your WordPress site to start using Mailgun with WP Mail SMTP for sending emails.
If you haven’t already, be sure to install and activate the WP Mail SMTP plugin.
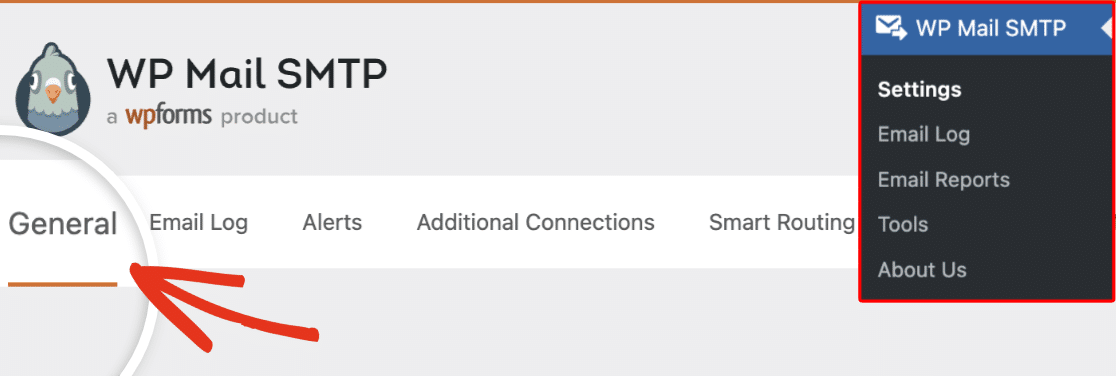
After installing and activating this plugin, navigate to WP Mail SMTP » Settings and click on the General tab to configure plugin settings.
From Email
At the top of this page, you can set the From Email and From Name. By default, these will fill with your site’s admin email and site name.
For the From Email, you can use any valid email address. However, for best results, we recommend using a domain-specific email address (for example, [email protected]).
Note: You can use any email address as the From Email address as long as it contains the domain you verified in your Mailgun account. However, it must be connected to a functional inbox if you plan to receive emails at this address.
You can also choose to check the box labeled Force From Email. If you’d like the From Email to be the same site-wide, this option will save you the trouble of editing the email settings throughout your site (in all form emails, etc).

Note: For more details, see our guide to understand how the Force From Email setting works.
From Name
You may add any From Name you’d like, and you can also choose to Force From Name to apply this setting site-wide.

Return Path
We also recommend checking the optional Return Path checkbox to Set the return-path to match the From Email. With this enabled, you’ll be emailed if any messages bounce due to issues with the recipient’s email.

Mailer
Next, you’ll need to select the Mailgun option in the Mailer field.

Now that you’ve selected Mailgun as your mailer, a new Mailgun section will appear. Here, you’ll need to enter your Mailgun API key and domain information.
Mailgun API Key
Even if your domain is still waiting to be verified, Mailgun will provide this information. You may even have automatically received an email containing your Mailgun API key. Otherwise, you’ll need to return to the tab or window with your Mailgun domain details.
In the upper right corner of your Mailgun account, you’ll need to click on the small circle with your initials. Then, select the API Security option.

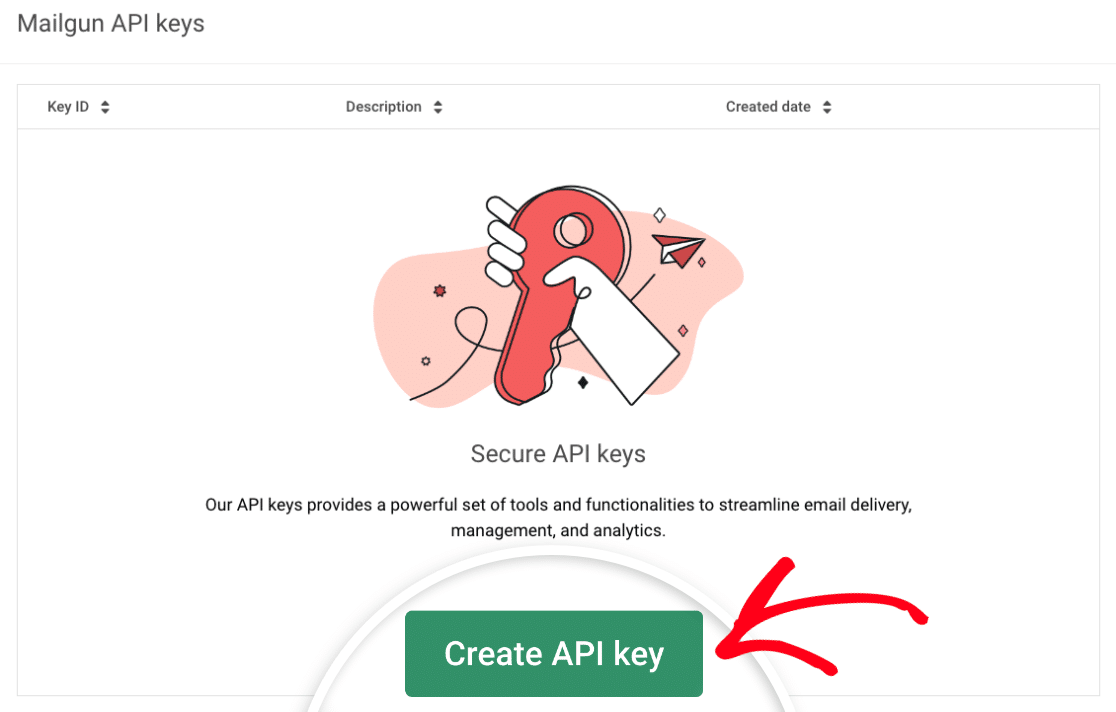
This will take you to a page that includes your Mailgun API keys.
Note: In your Mailgun account, you’ll likely see 3 API keys: Verification Public key, HTTP Webhook Signing key, and Mailgun API keys. We recommend using your Mailgun API key to configure WP Mail SMTP. Using the Verification Public API key will result in email deliverability issues on your website.
To generate your Mailgun API key, scroll to the Mailgun API keys section and click the Create API key button.
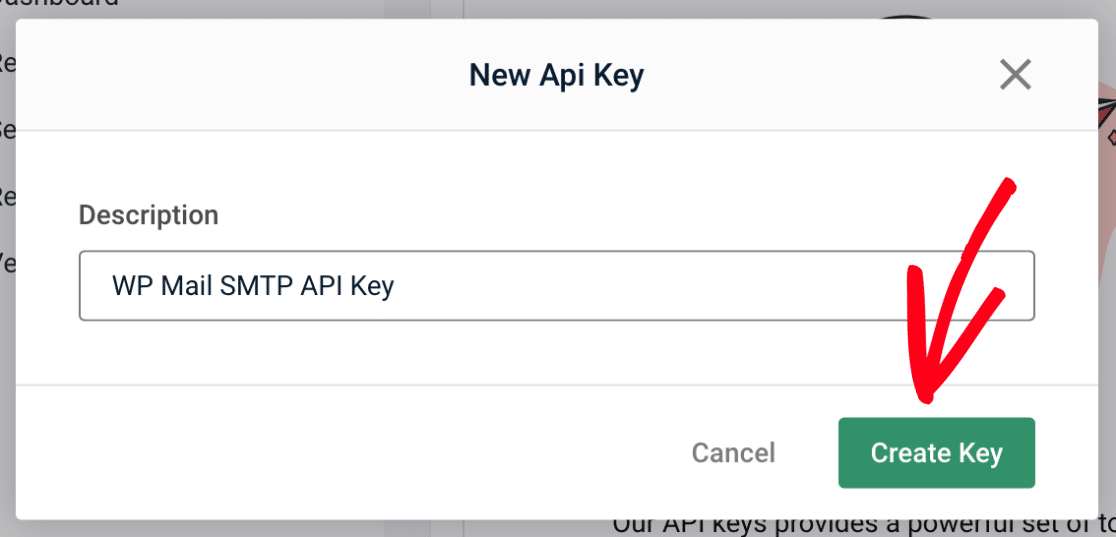
Next, a modal window will appear where you can add a description for your API key. We recommend adding a description that will help you remember what you’re using the API key for. When you’re ready, click the Create Key button.
A new modal will then appear with your new API key. Be sure to copy the key and store it somewhere safe and accessible, as the key is only displayed once. You can copy the key by clicking on the copy icon.
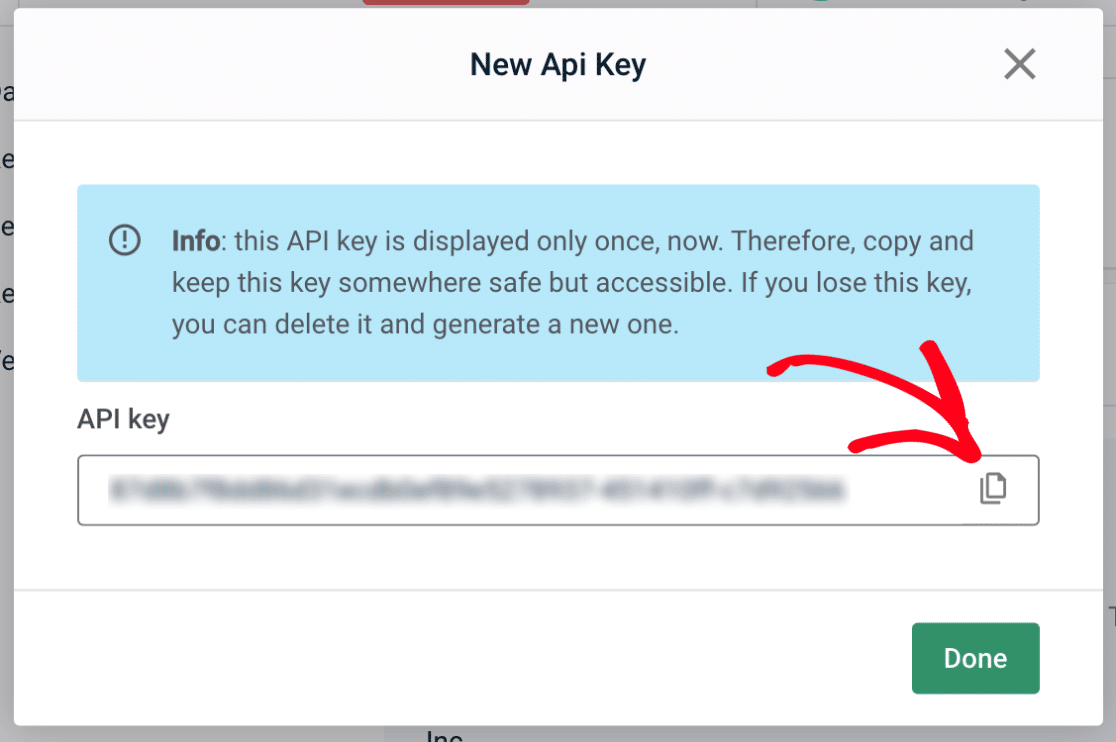
Note: If you lose or Mailgun API key, you’ll need to generate a new one by repeating the previous steps in this section.
Once you’ve copied the text for the full key, return to the WP Mail SMTP settings and paste it into the Mailgun API Key field.

Note: If you have an older Mailgun account, you may see a prefix key- before your key. Be sure to copy this prefix and add it to your WP Mail SMTP settings as well, as leaving this out will cause issues with verification.
Domain Name
For the Domain Name, enter the subdomain you created in Mailgun (for example, mg.example.com).

Region
Last, you’ll need to check the Region setting. This should match what you set up in Mailgun (anyone outside of the European Union should select the US option).
Note: Before proceeding, ensure the verification process is complete. This may take a while, so it’s possible you’ll need to come back to this later.
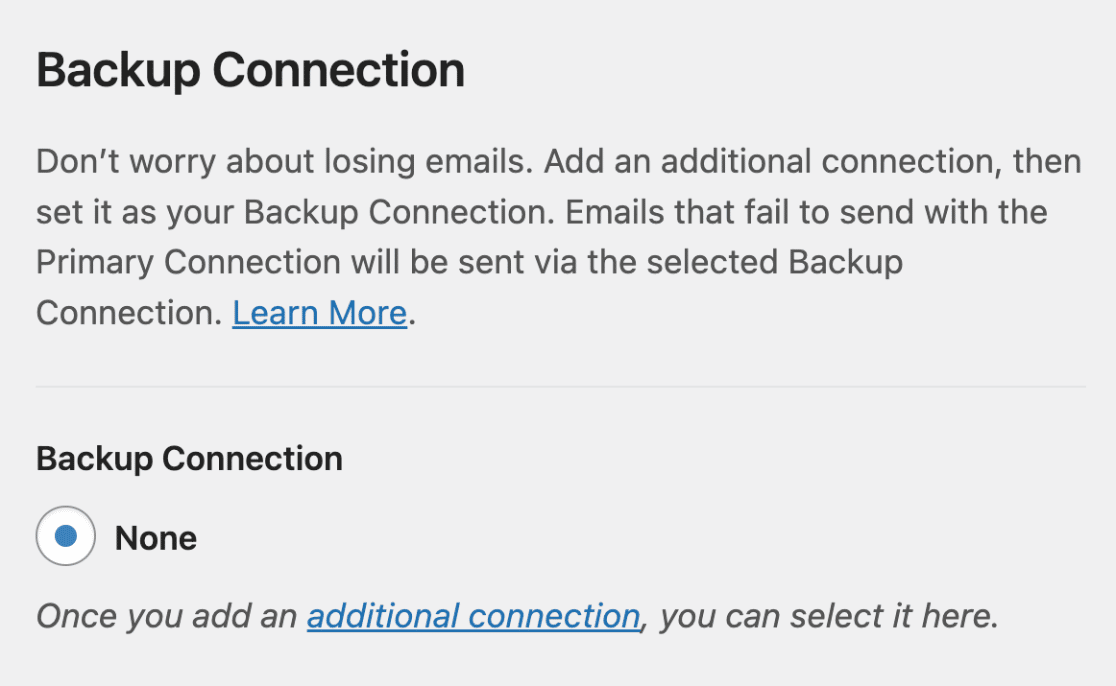
Backup Connection
Setting up a Backup Connection is optional and isn’t required to complete your Mailgun mailer setup. However, to further improve email deliverability, we recommend configuring an additional connection to serve as a backup in case your Primary Connection fails.
Note: Want to send emails using different connections based on a set of rules or conditions? Be sure to check out our Smart Routing tutorial to learn more.
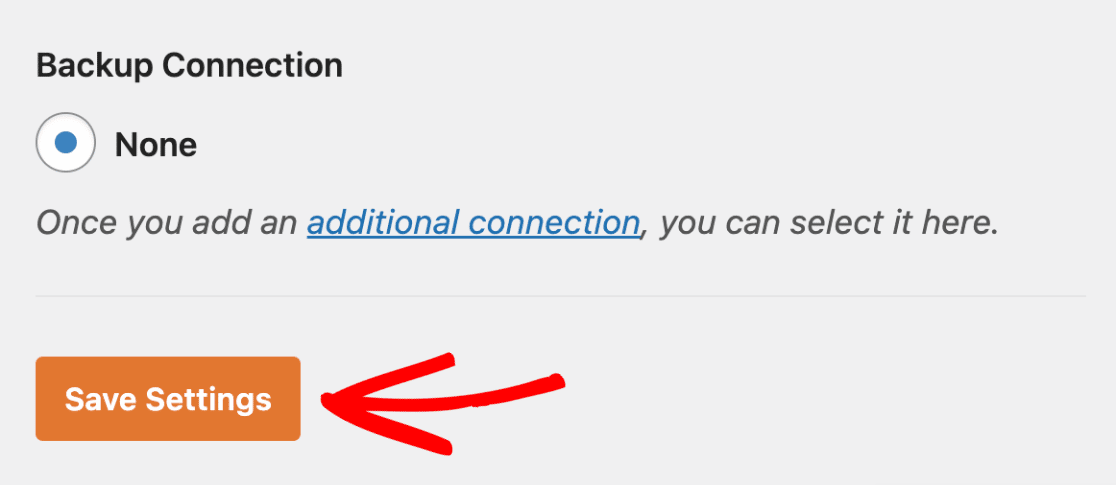
Once this information is complete, go ahead and click Save Settings to save your changes.
Sending a Test Email
Once your domain is verified, and your settings have been added to WP Mail SMTP, it’s important to send a test email to ensure everything is working properly.
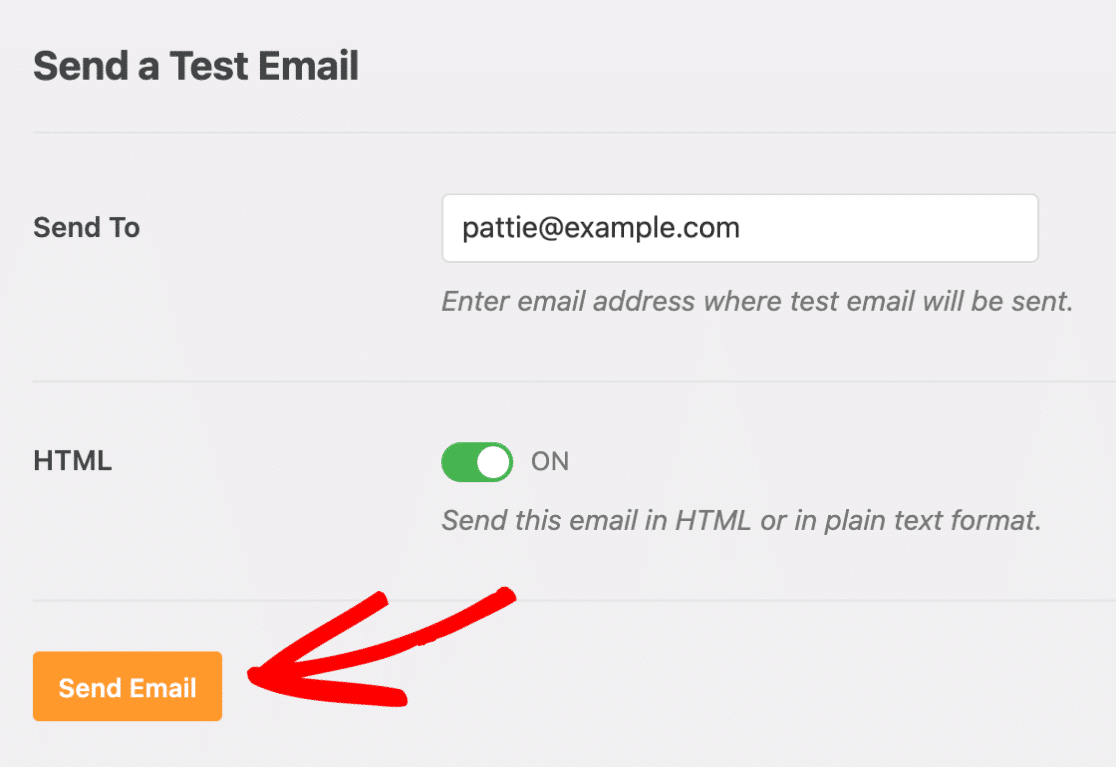
To do this, you’ll need to go to WP Mail SMTP » Tools and then click on the Email Test tab.

On this tab, you can enter any email address that you have access to in the Send To field.
Note: If you’ve set up an additional connection, you’d be able to choose between your Primary Connection and other connections when sending a test email.
Next, click the Send Email button to send your test email.
After sending the email, you should see a success message.

Next, check the inbox for the email address you entered. You should soon receive the email for this test.

Frequently Asked Questions
Below, we’ve shared answers to some of the most common questions we receive about using Mailgun with WP Mail SMTP.
Do I need to use a subdomain for my setup?
We do recommend using a subdomain for your Mailgun setup. Using a subdomain will help avoid potential negative impacts on your site’s deliverability in the future caused by conflicting DNS records.
Why are emails showing “On Behalf Of” in the sender information?
Certain email clients display this notation (also known as “On Behalf Of” notation) in specific circumstances. This means there is a mismatch between the domain being used in a site’s Sender field (e.g., mg.example.com) and the domain used within the site’s From field (e.g., example.com).
If you’d like to prevent your emails from sending in “behalf of” notation, then you’ll need to set your site’s From Email to use your Mailgun subdomain within your SMTP settings. It’s also a good idea to carefully check your Reply To settings in all of your site’s forms, so that all of your users’ responses will be routed to an email you have access to.
How do I change my TLS version within WP Mail SMTP?
TLS settings are controlled by a site’s hosting provider, so the easiest way to get this changed or updated would be to reach out to your host to have them make any adjustments.
Note: As of March 28, 2021, Mailgun will no longer support TLS 1.0 or 1.1 connections. If you’d like to check which version of TLS your site is running, be sure to reach out to your hosting provider for more info.
Can I use a sending API key instead of a Mailgun API key?
You can use a sending API key to set up WP Mail SMTP. However, there are limitations to using a domain-specific API key. A sending API key only works for the domain you used to configured it. Also, webhooks integration doesn’t work with a domain-specific API key.
For better email deliverability, we recommend using your Mailgun API key. This key works for all the domains you’ve set up in your Mailgun account.
That’s it! You have successfully set up your WordPress site to send authenticated emails with Mailgun.
Next, would you like to set up email logging to make sure you have a backup of all emails sent from your site? Be sure to check out our tutorial on using WP Mail SMTP to keep a log of all emails your site sends out.