AI Summary
Would you like to connect more than one mailer to your WordPress site?
Setting up an additional connection in WP Mail SMTP allows you to add a Backup Connection and use Smart Routing. These two powerful features give you more flexibility and control over email delivery.
This tutorial will show you how to configure an additional connection in WP Mail SMTP.
Before getting started, you’ll need to ensure WP Mail SMTP is installed and activated on your WordPress site and that you’ve verified your license.
What Is an Additional Connection?
An additional connection is a supplemental mailer configuration that serves as the building block for even more powerful features. Once you set up an additional connection, you can gain more control over email delivery by taking full advantage of the following WP Mail SMTP features:
- Backup Connection: Select an additional connection to serve as a backup when emails fail to send through your Primary Connection.
- Smart Routing: Route your emails through a specific additional connection based on a set of rules or conditions.
Setting Up an Additional Connection
WP Mail SMTP makes it easy to configure as many additional connections as you’d like.
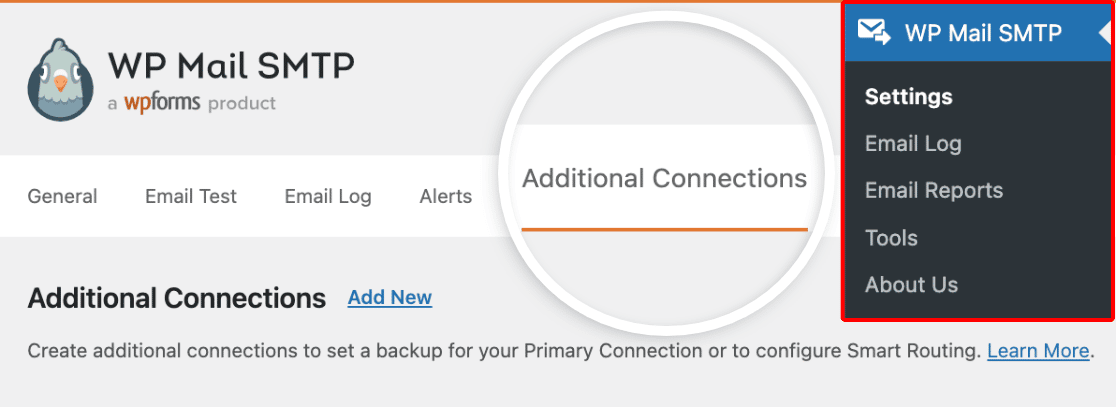
To get started, head to WP Mail SMTP » Settings and click on the Additional Connections tab.
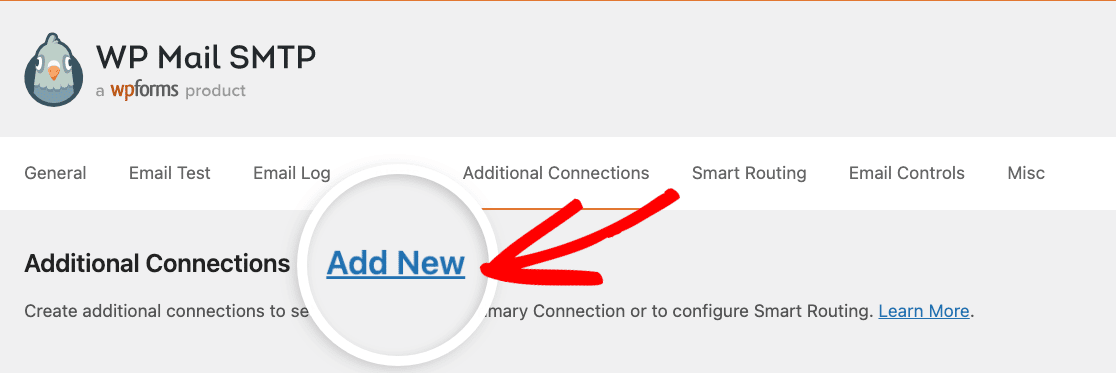
From the Additional Connections screen, click Add New.
Next, you’ll see settings for configuring an additional connection.
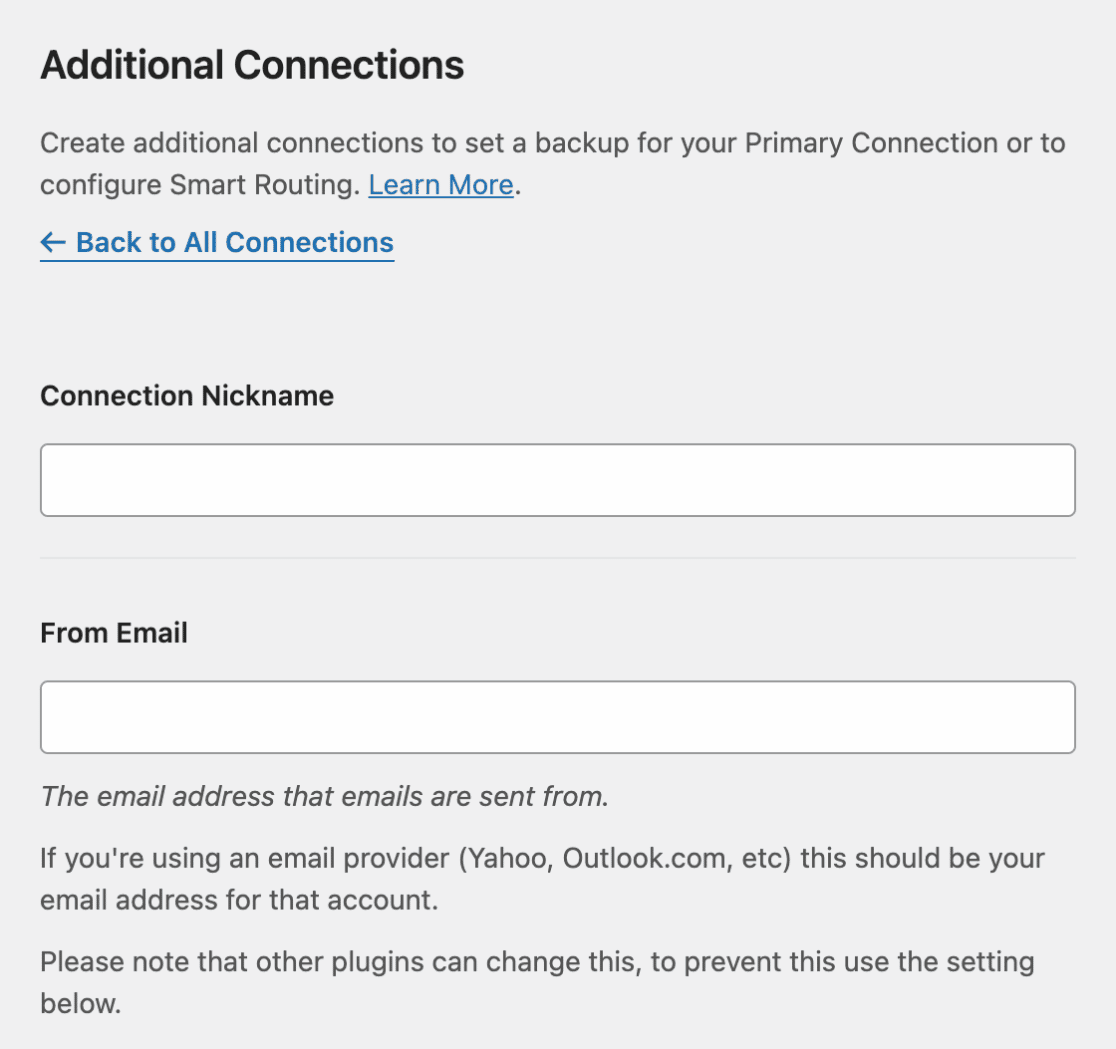
In the following sections, we’ll cover the details for each of the settings on this page.
Connection Nickname
The Connection Nickname allows you to add a name to your additional connection so it’s easier for you to identify. Feel free to add whatever nickname you’d like to your additional connection, as this is only visible to users with access to your WordPress admin dashboard.

From Email
The From Email is the email address that your emails will be sent from. Most mailers available in WP Mail SMTP have strict From Email address requirements that may require you to use a domain-specific email address. To learn more about the settings for a specific mailer configuration, be sure to check out our WP Mail SMTP mailer tutorials.
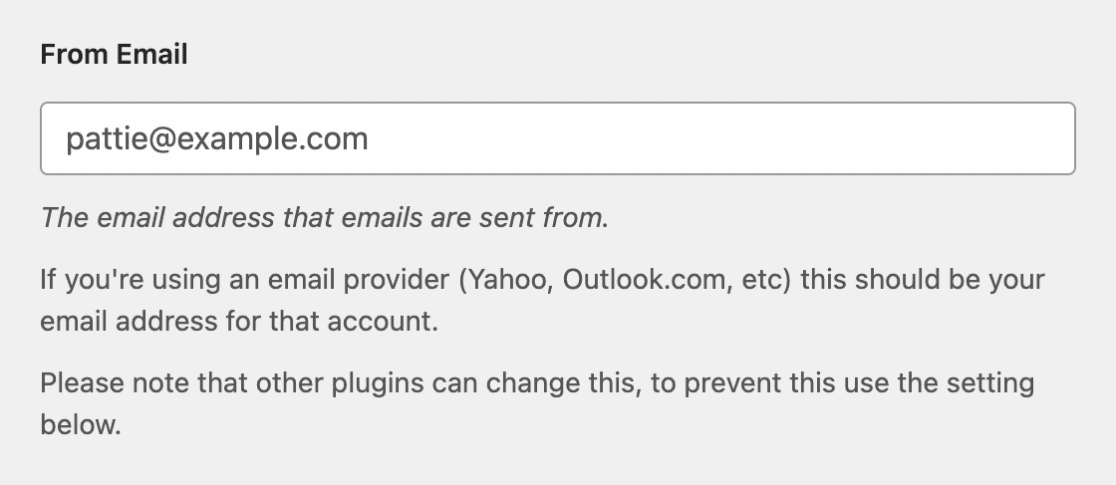
We also strongly recommend toggling the Force From Email option to the ON position. Selecting this option will prevent you from having to edit the From Email settings in other areas of your site.

From Name
The From Name is set to your site’s name by default. However, you can change this to any text you’d like, but keep in mind that the name you add here will be visible to your email recipients.
You can also enable the Force From Name option to apply this setting for all emails, ignoring values set by other plugins.

Return Path
The Return Path is an optional setting that you can enable to receive notifications regarding undelivered or bounced emails. If checked, these notifications will be sent to your From Email address. If set to OFF, information regarding bounced emails may be lost.

Mailer
In the Mailer section, you’ll see a list of different email providers that are available to use with WP Mail SMTP. Go ahead and select the mailer you’d like to use for your additional connection.

Once you’ve selected a mailer, additional settings specific to the chosen mailer will appear. To learn how to configure the additional settings, check out the setup guide for the mailer you’ve selected.
After you’ve filled out the required settings, click the Save Settings button to save any changes made.

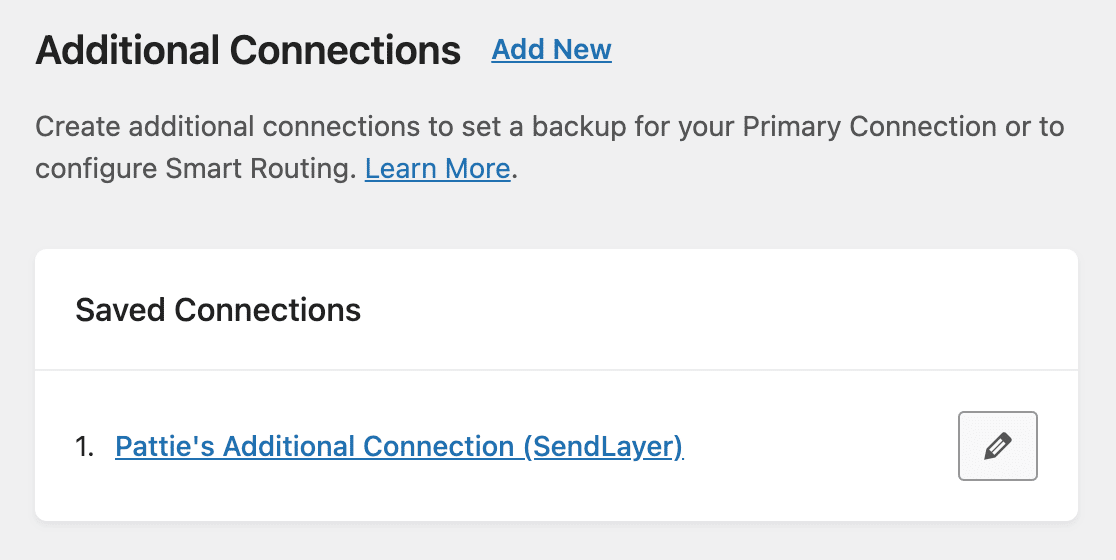
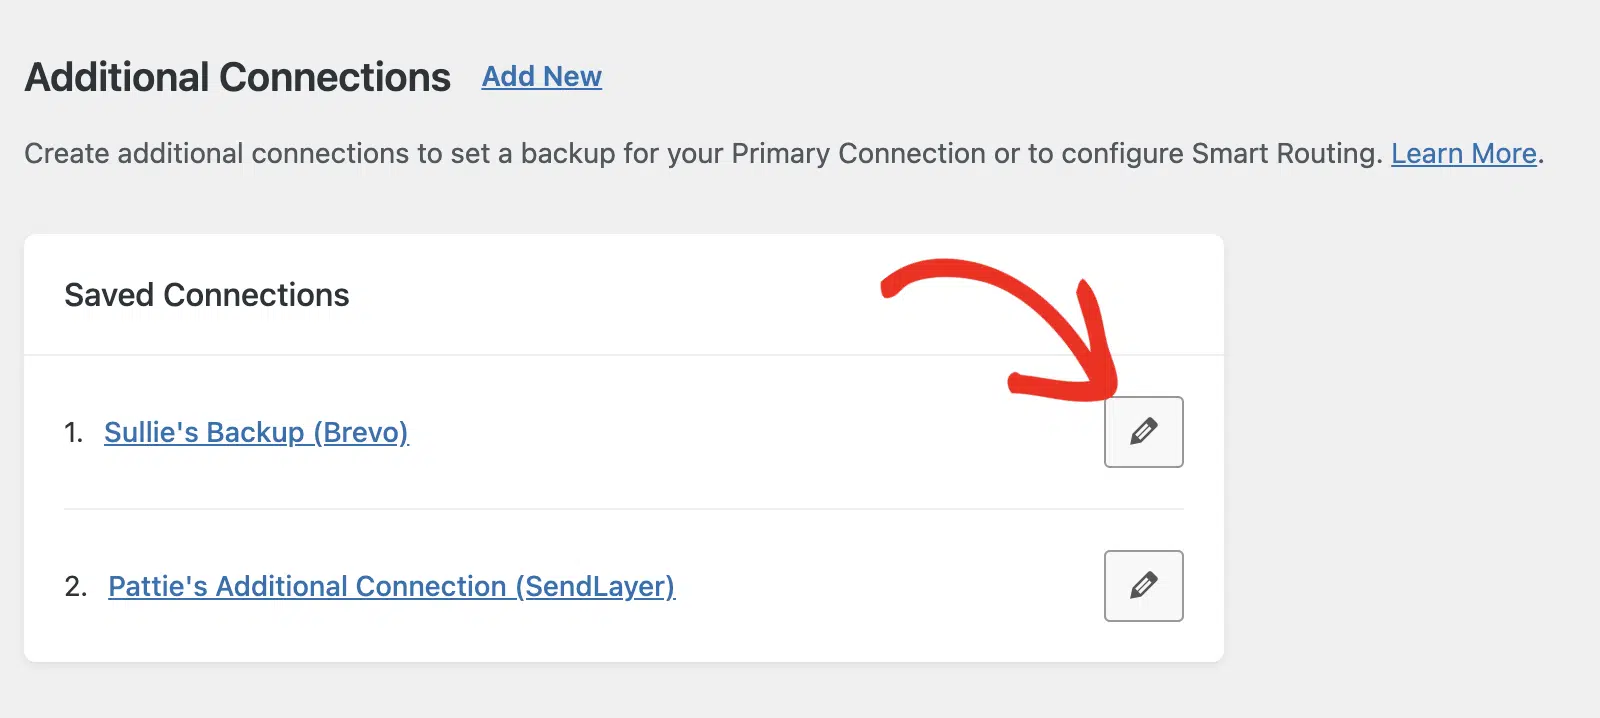
Now when you return to the main Additional Connections screen, you’ll see your additional connection(s) listed under Saved Connections. Here you can view and manage any additional connection you’ve added.
Editing an Additional Connection
WP Mail SMTP allows you to modify the configuration settings for additional connections you’ve added to your site. To do so, click the pen icon next to the connection name.
This will direct you to the mailer settings page. You can update any of the settings for the mailer here.
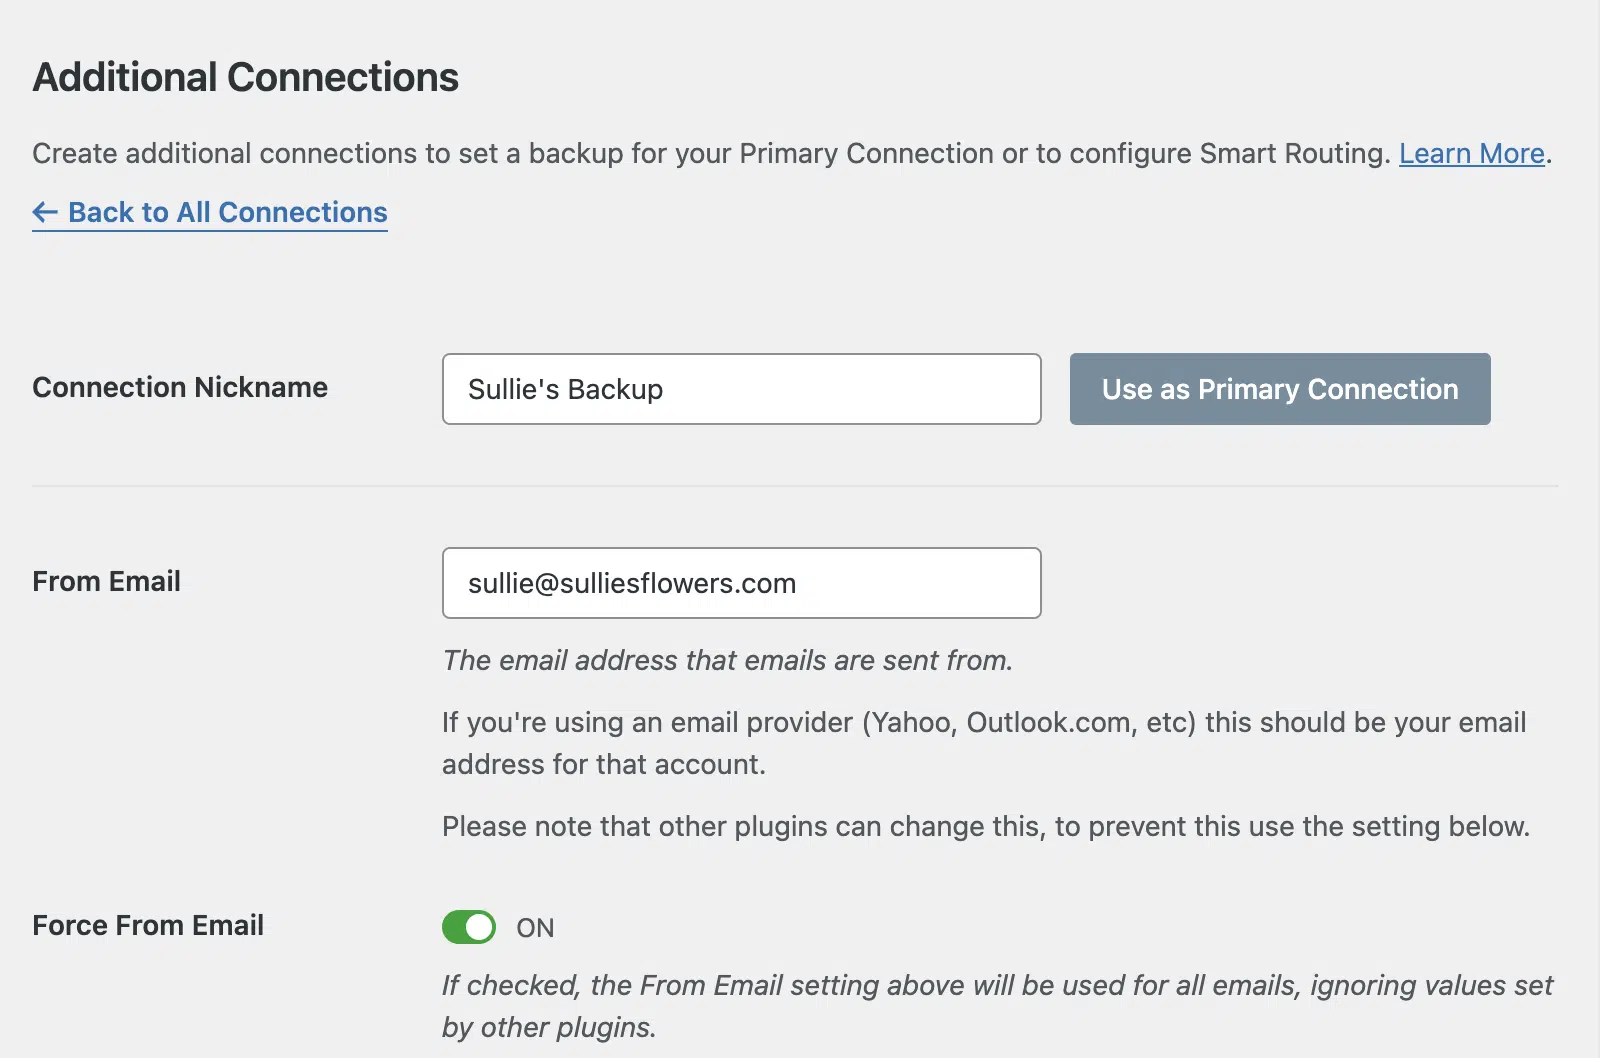
If you’d like, you can set the additional connection as your primary connection. For this, simply click the Use as Primary Connection button.
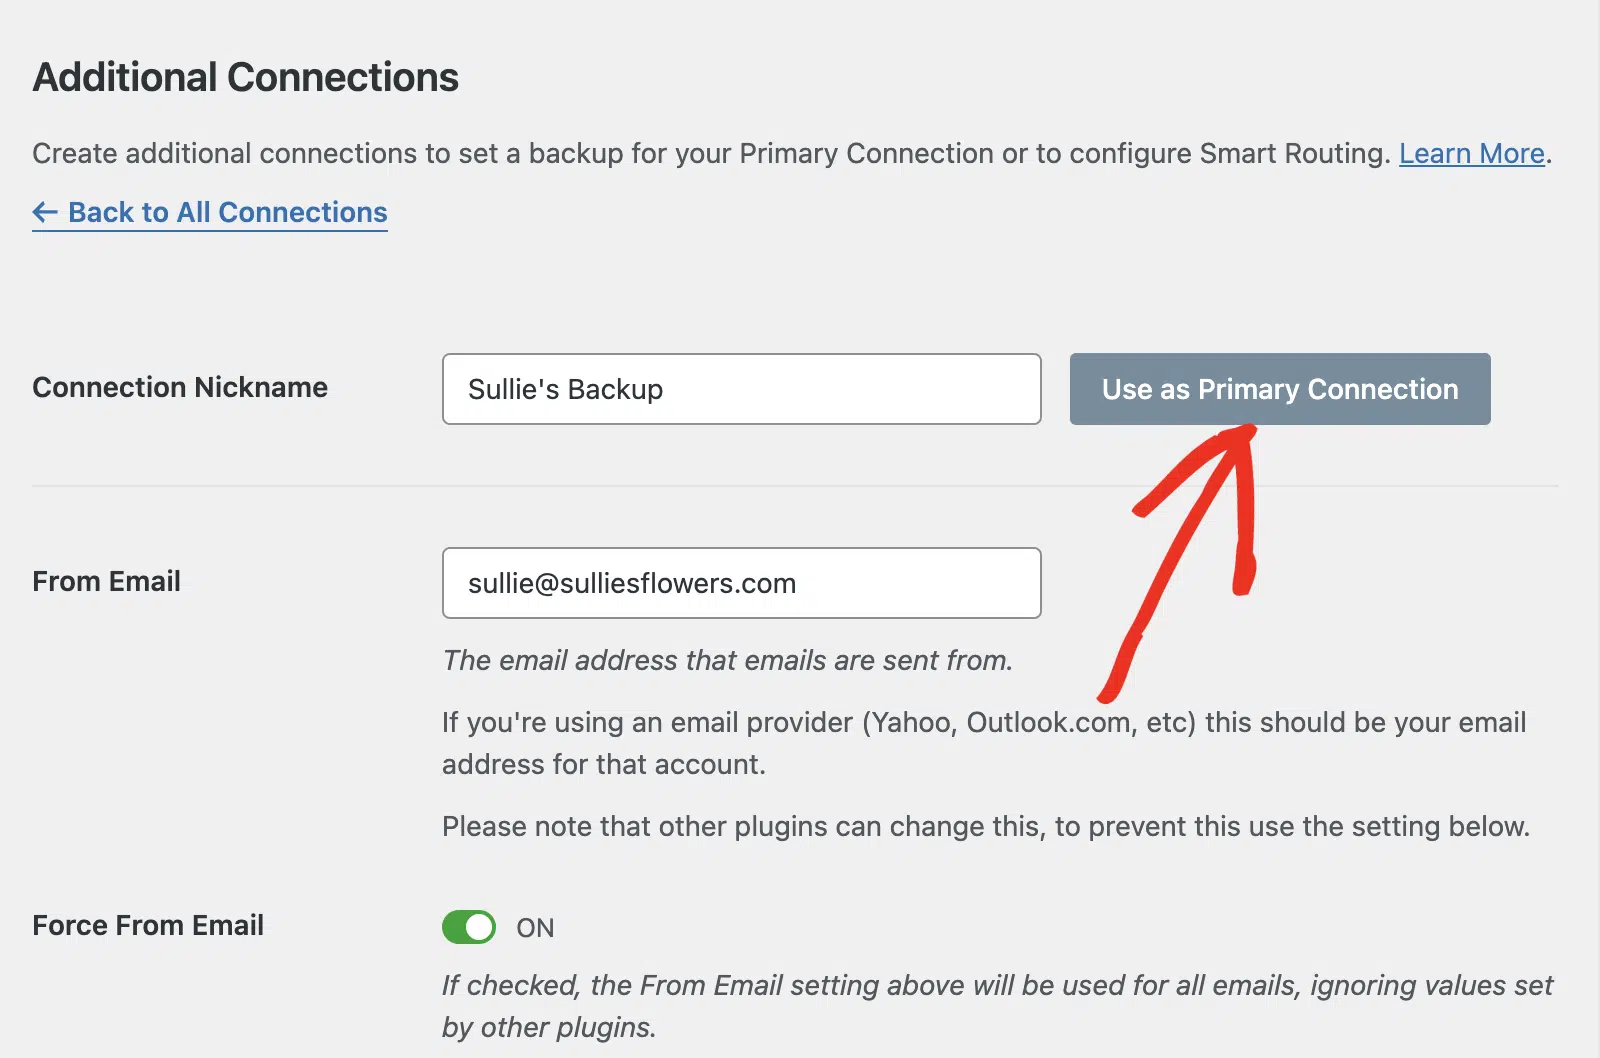
In the overlay that appears, click YES to save your changes.
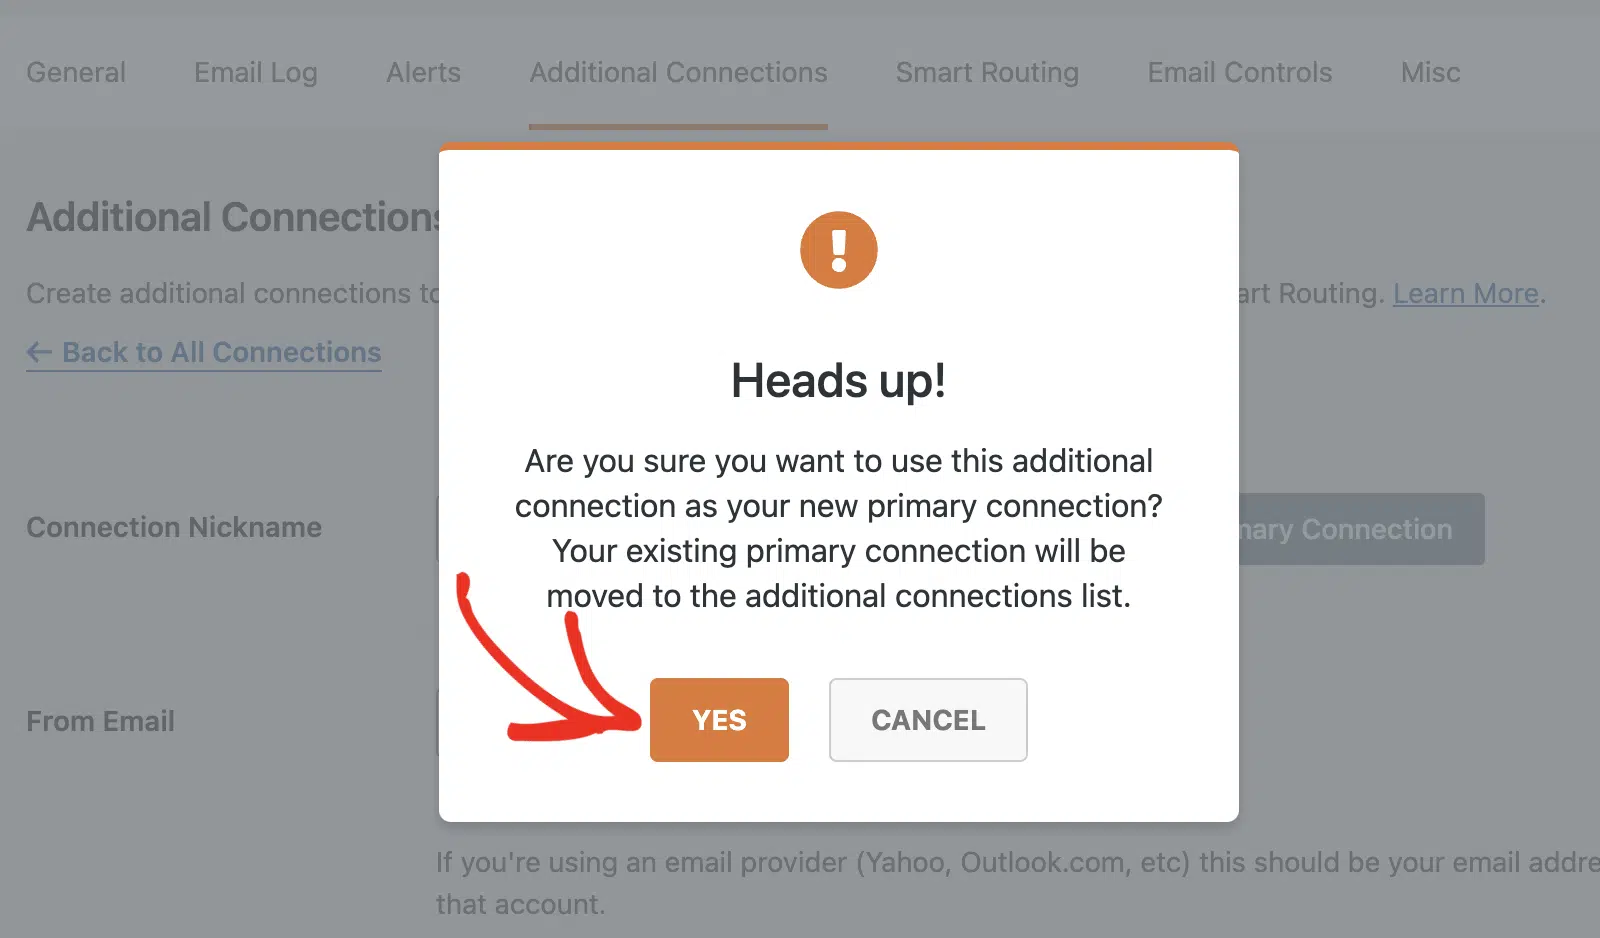
Note: This will move your existing primary connection to the additional connections menu.
Testing Additional Connections
Once you’ve configured an additional connection, we recommend sending a quick test email to ensure everything works properly.
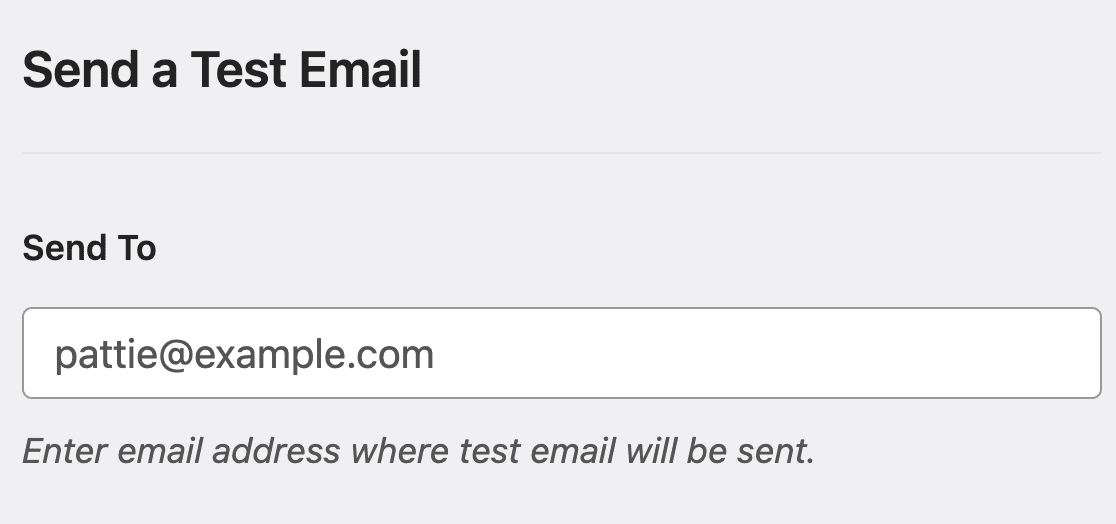
To send a test email, first go to WP Mail SMTP » Tools and click on the Email Test tab.

In the Send To field, you can enter any email address whose inbox you have access to. This is the email address the test email will be sent to.
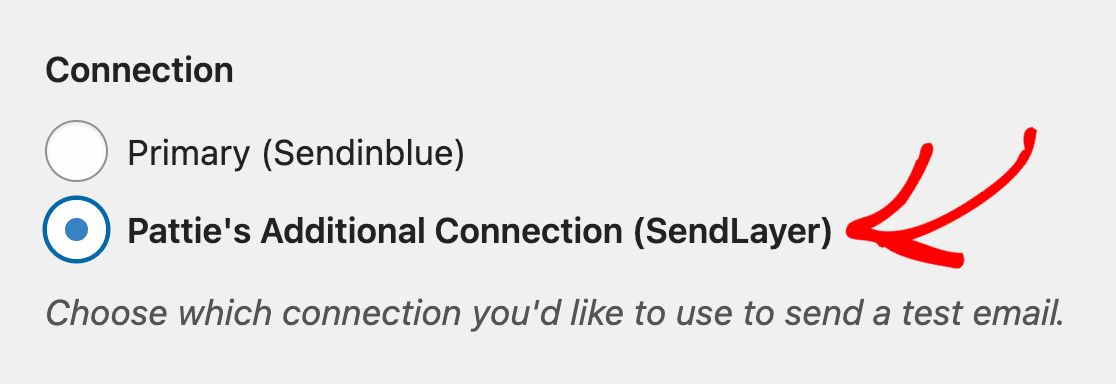
In the Connection section, you’ll see all the connections you’ve configured on your site. Go ahead and select the connection you’d like to test.
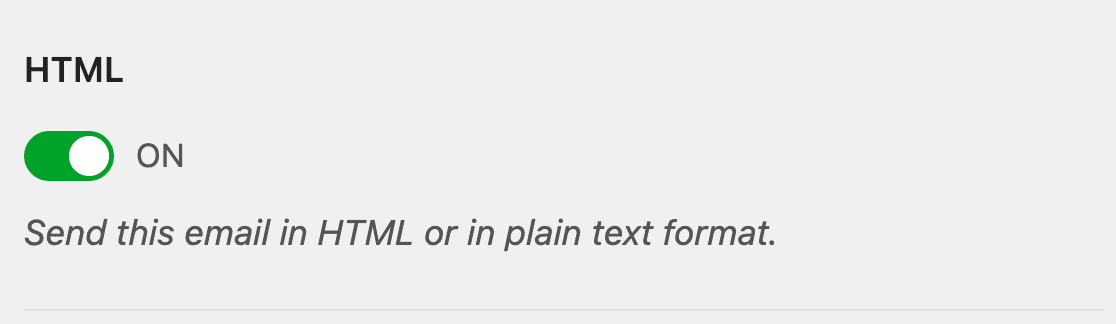
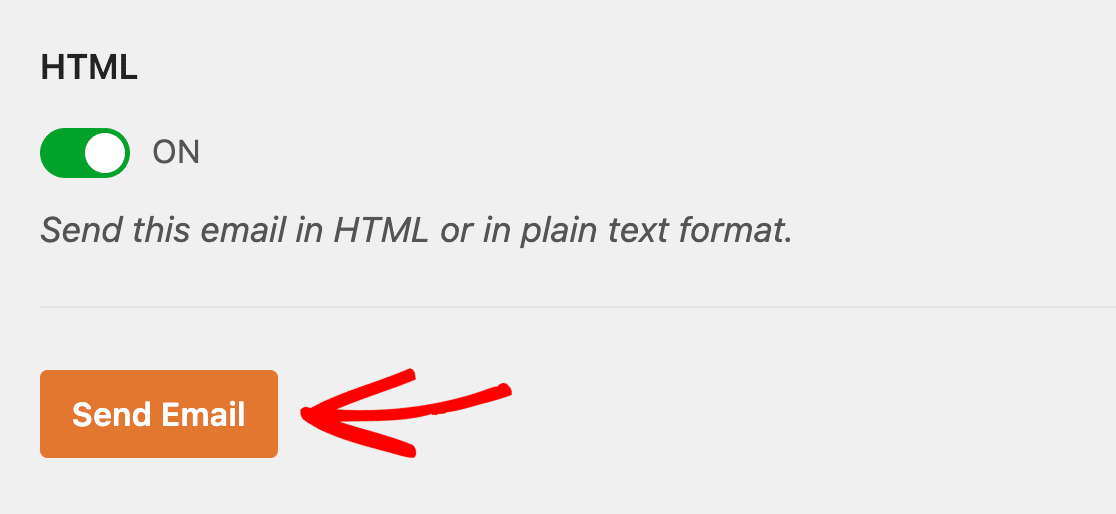
Next, choose whether to send a plain text or HTML email. We recommend leaving the HTML setting ON unless you know you’ll only be sending plain text emails.
After you’ve filled out the required settings, go ahead and click the Send Email button to send your test email.
Once the test email has been sent, you should see a success message.
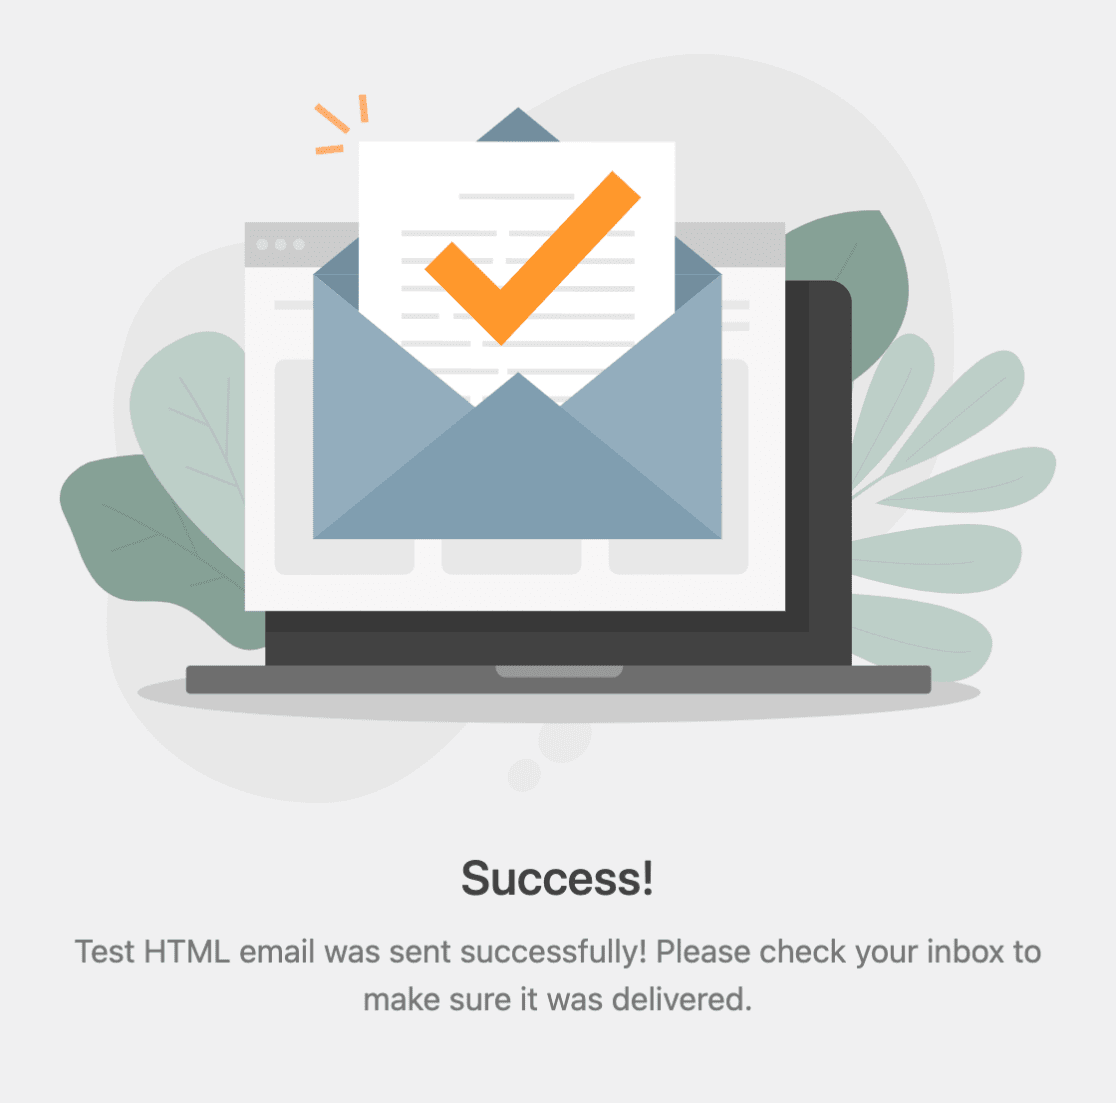
Next, check the inbox for the email address you entered. You should soon receive the email for this test.

That’s it! Now you know how to add an additional connection in WP Mail SMTP.
Next, do you want to learn how to use your additional connection to further improve email deliverability? Be sure to check out our tutorials on configuring a Backup Connection and setting up Smart Routing for all the details.