


AI Summary
Note: This guide applies to the Brevo mailer in WP Mail SMTP.
What This Error Means
Brevo’s IP authorization security feature blocked the API request. Both error variants come from the same feature:
unauthorized: not verified: Brevo detected an unknown IP, sent a verification email to the account owner, and the IP hasn’t been confirmed yet.unauthorized: IP not authorized: IP security is active and this IP is not on the authorized list.
For accounts created after May 16, 2024, this feature is enabled by default. It also activates automatically on older accounts if no new IPs are detected for 30 days.
Common Causes
- Brevo IP authorization is enabled and your server’s IP hasn’t been whitelisted
- Brevo sent a verification email after detecting your server’s IP for the first time, but the email was missed or the link inside wasn’t clicked
- Server IP changed (e.g. new hosting, CDN, server migration) and the new IP isn’t on the authorized list
How to Fix
Here is the complete step-by-step guide to resolving the error.
Option A: Whitelist Your Server’s IP (Recommended)
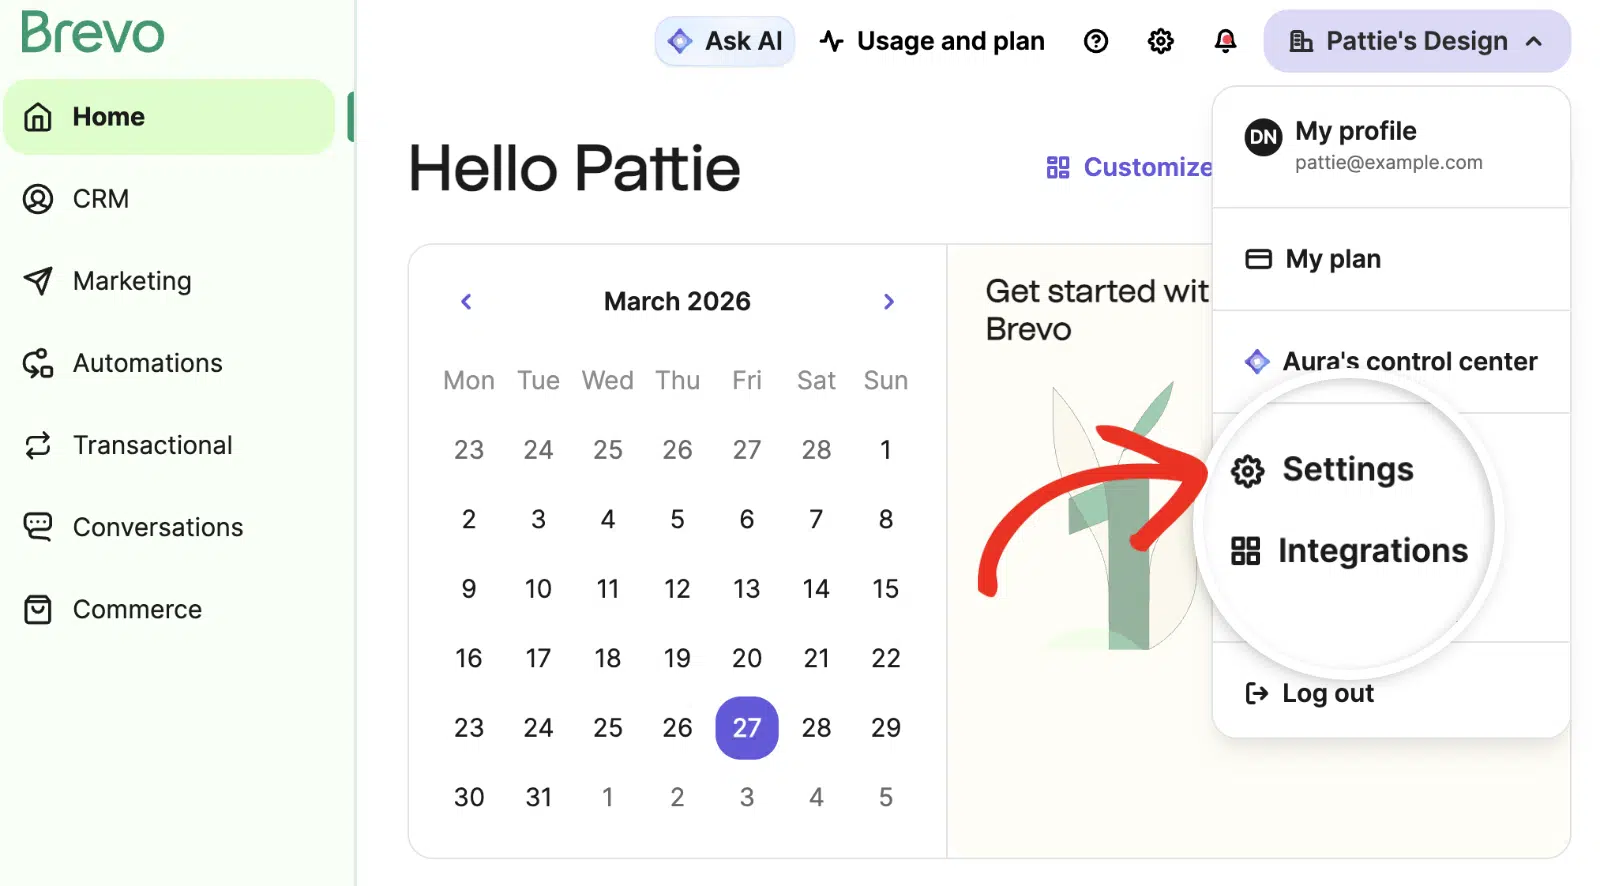
Start by logging in to your Brevo account. Then, click your organization name in the top-right corner and select Settings from the dropdown menu.
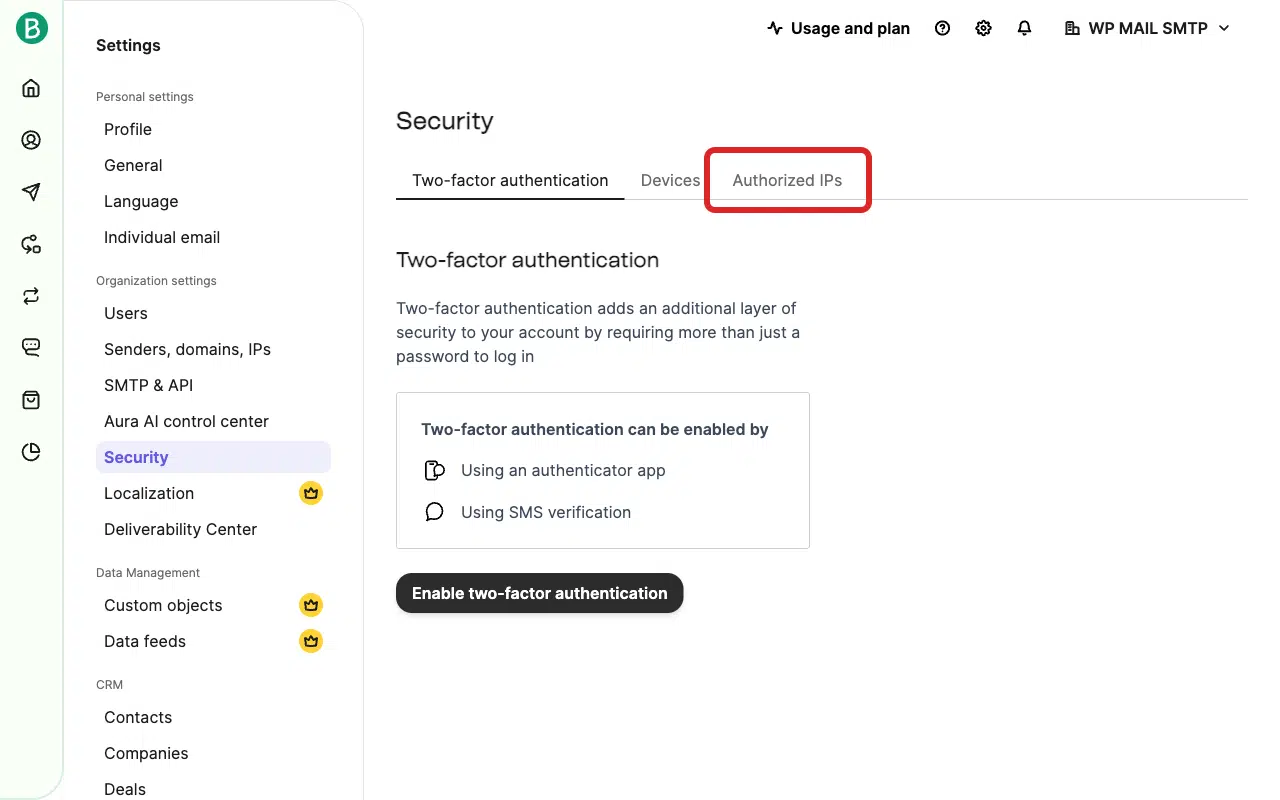
Next, click Security in the left sidebar and open the Authorized IPs tab.
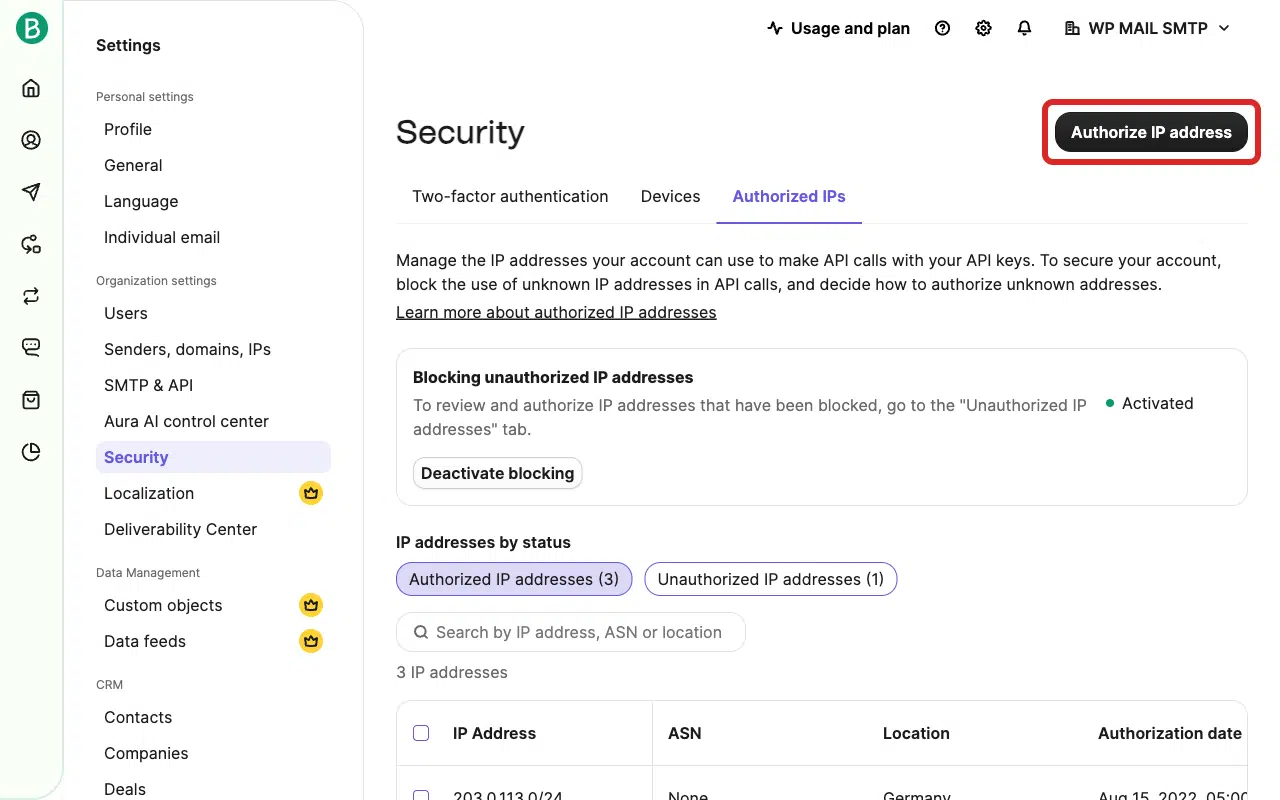
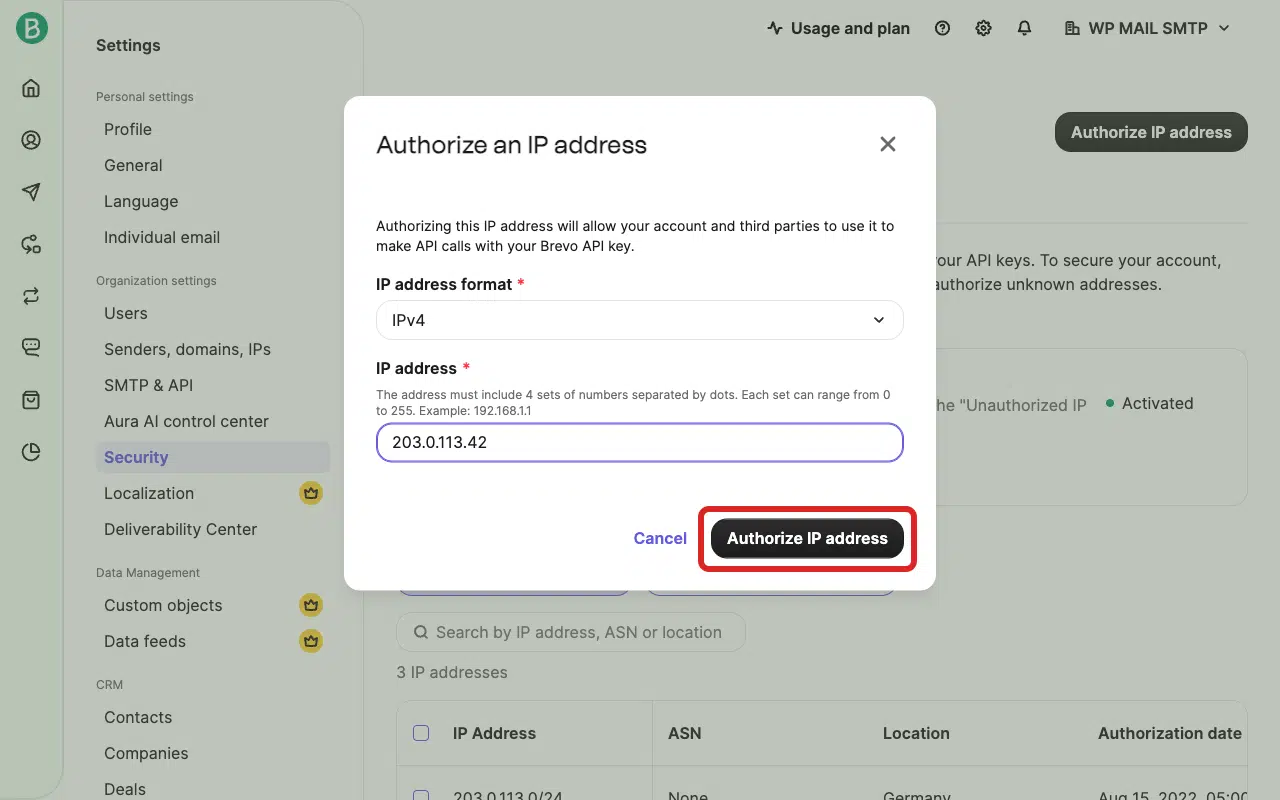
Then, click Authorize IP address to open the dialog.
Select the appropriate IP address format (e.g. IPv4) and enter your server’s outbound IP address in the field.
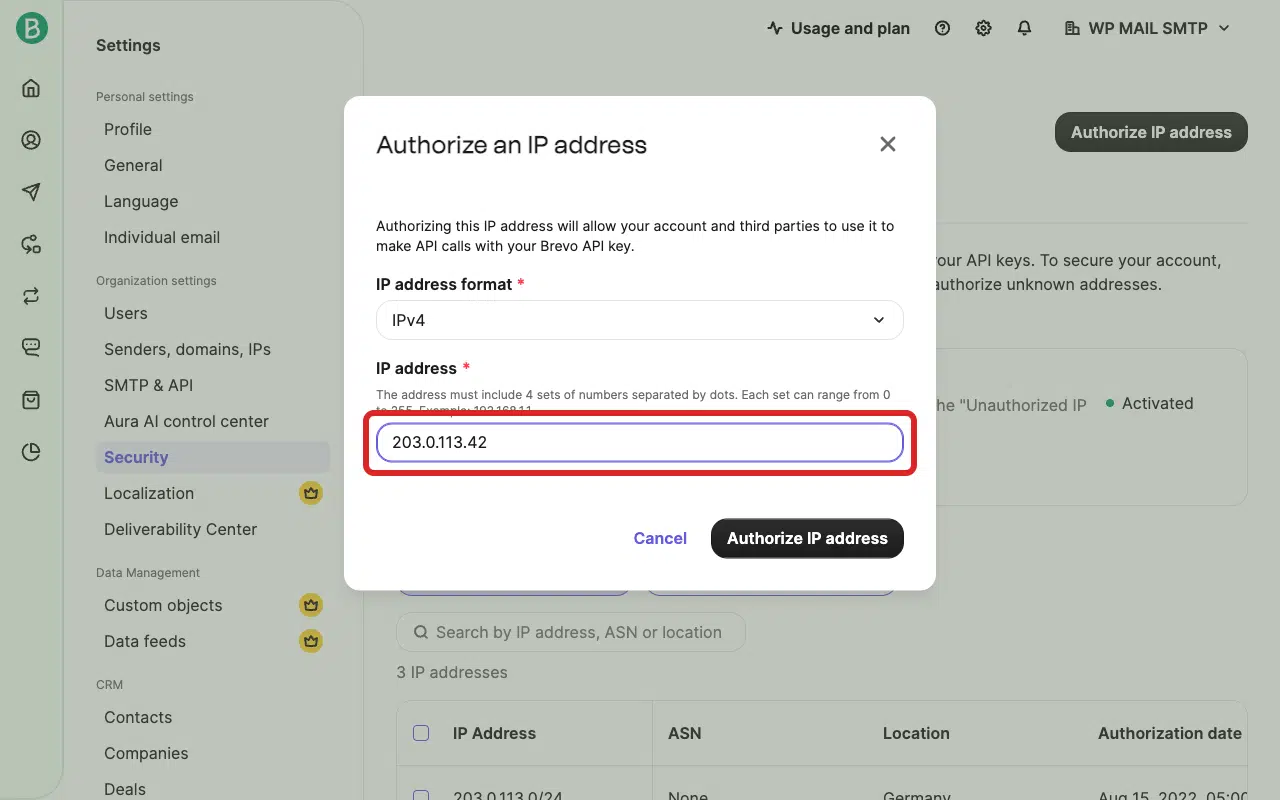
Note: To find your server’s IP, check your hosting control panel (cPanel, Plesk, etc.) or contact your hosting provider and ask for the outbound or external IP address.
After that, click Authorize IP address to submit. If Brevo previously sent you a verification email (subject line: “Validate your IP address”), check your inbox and click the link inside to authorize the IP from that earlier request.
To test the fix, log in to your WordPress admin area and go to WP Mail SMTP » Tools, click the Email Test tab, and click Send Email.
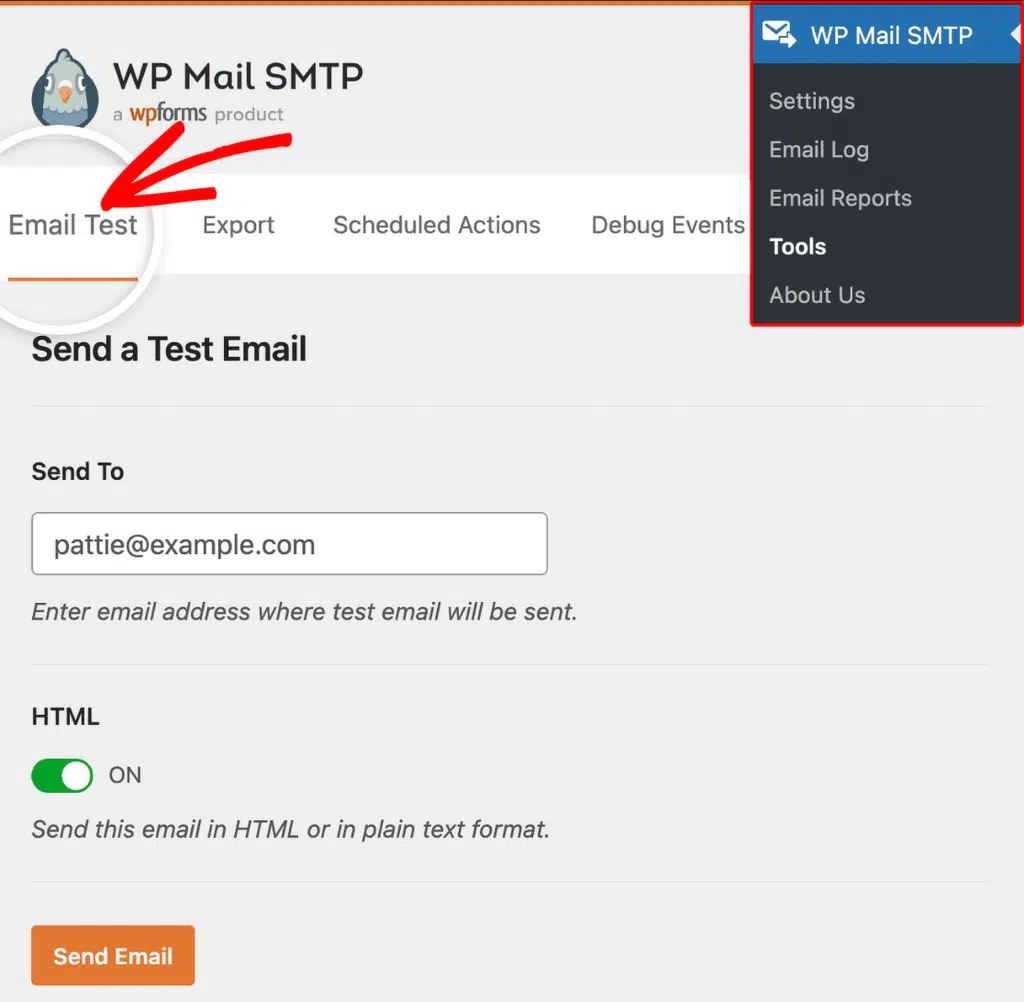
Finally, look for the success message and check your inbox to confirm the email arrived.
Option B: Disable IP Authorization
Use this option only if whitelisting individual IPs is impractical (e.g. your hosting provider rotates IPs frequently).
Start by logging in to your Brevo account. Then, click your organization name in the top-right corner and select Settings in the dropdown menu.
Next, click Security in the left sidebar and open the Authorized IPs tab.
Finally, click Deactivate blocking to disable IP address blocking for API calls.
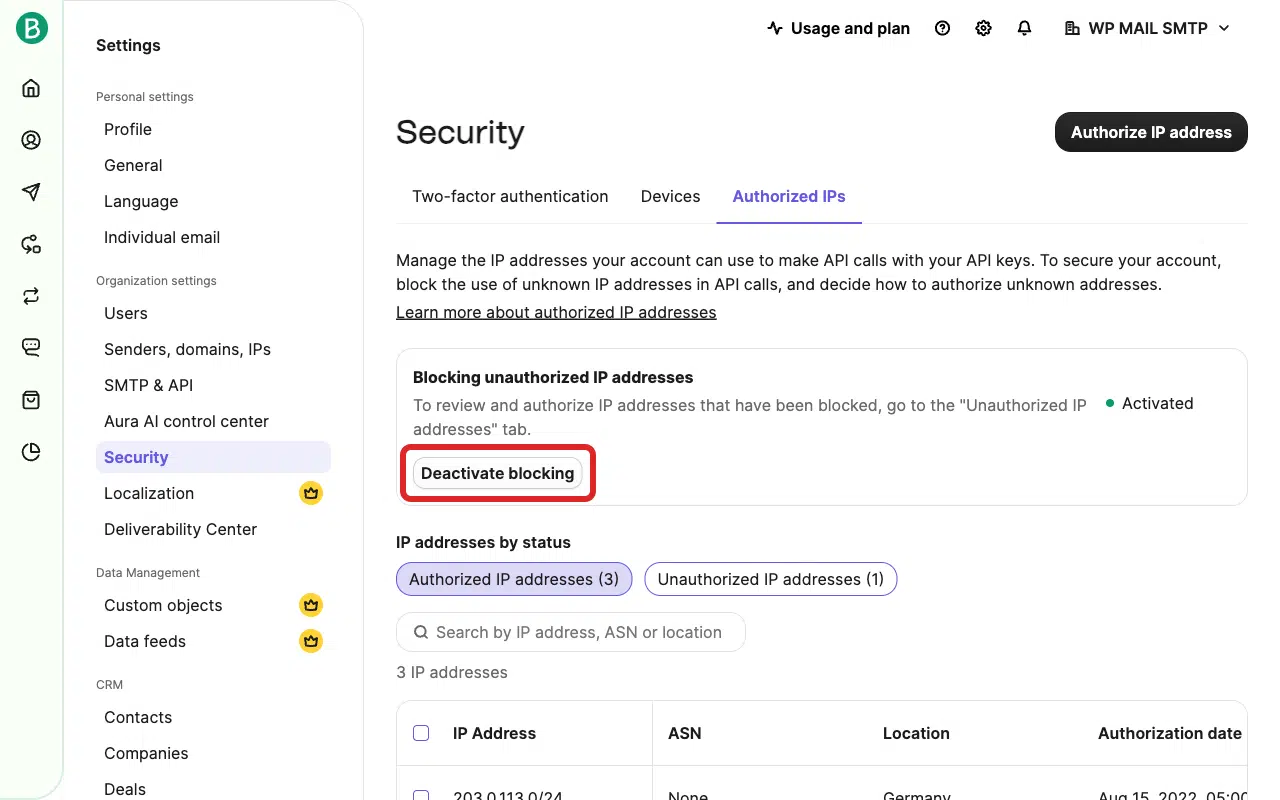
After that, return to your WordPress admin area and send a test email from WP Mail SMTP » Tools » Email Test to confirm the fix.
Notes
- Option A is preferred. Disabling IP authorization entirely reduces your Brevo account security.
- If you saw the
unauthorized: not verifiedvariant specifically, Brevo has already sent a verification email to the account owner. Check spam or junk folders if you don’t see it. Clicking the link authorizes that one IP for that session, but add the IP to the permanent allowlist (Option A) to prevent recurrence. - If the error persists after whitelisting, confirm the IP you added matches your server’s actual outbound IP. Some hosts use different IPs for inbound traffic and outbound API calls.
- If your server is behind a proxy or CDN (e.g. Cloudflare), the outbound IP for API calls is typically your origin server’s IP, not the CDN’s IP.
That’s It! You now know how to fix the ‘Unauthorized: Not Verified or IP Not Authorized’ error in Brevo and get your emails sending again through WP Mail SMTP.