AI Summary
Note: This guide applies to the MailerSend mailer in WP Mail SMTP.
What this Error Means
The domain used in the From Email address hasn’t passed DNS verification in MailerSend. MailerSend requires domain authentication before sending from an address at that domain.
Common Causes
- Domain was added to MailerSend but DNS records haven’t been added yet
- DNS records added but not yet propagated (can take up to 48 hours)
- DNS records entered incorrectly (extra spaces, missing underscores in DKIM selectors, or DNS provider auto-appending the domain name to CNAME values)
- From Email in WP Mail SMTP uses a different domain than the one verified in MailerSend (for example, From Email is
[email protected]but onlyotherdomain.comis verified in your MailerSend dashboard)
Resolving the ‘Domain Not Verified’ Error
Here is the complete step-by-step guide to resolving the error.
Step 1: Check Domain Status in MailerSend
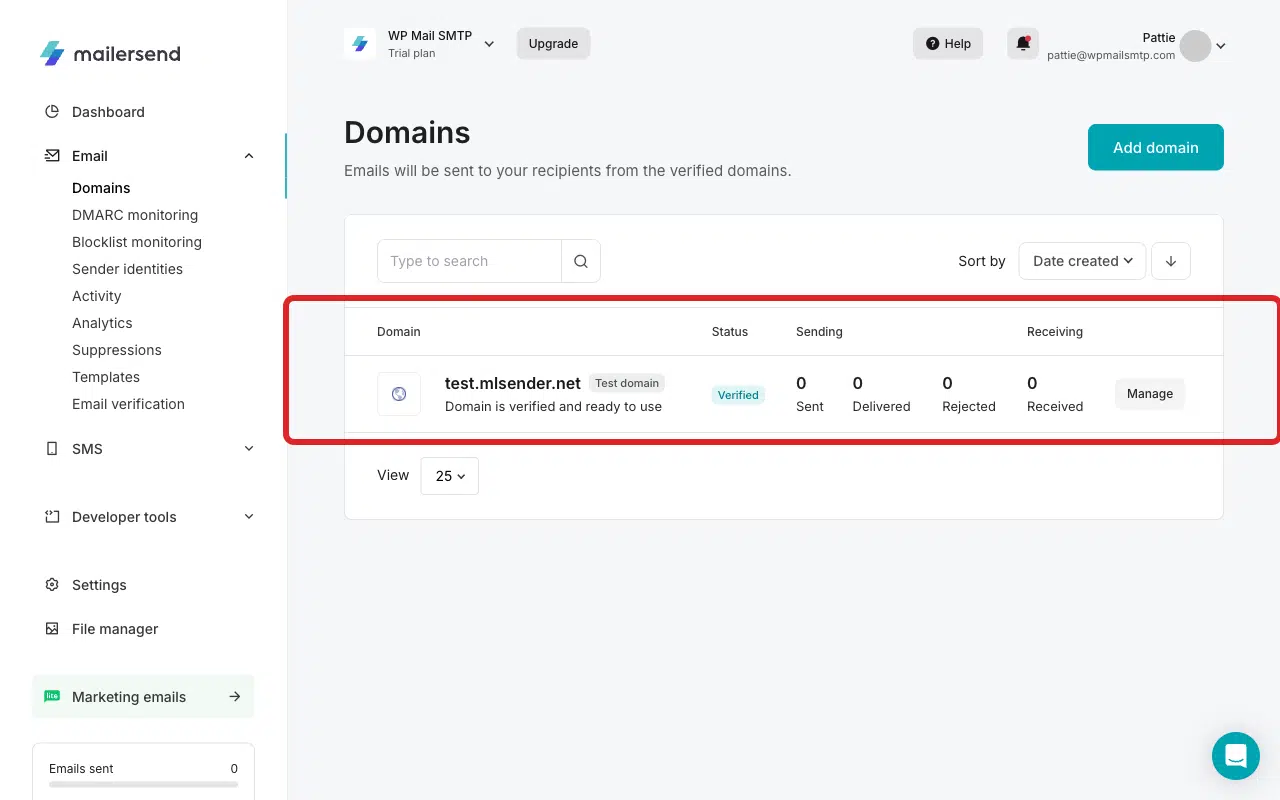
Log in to MailerSend and click Domains in the sidebar under Email.
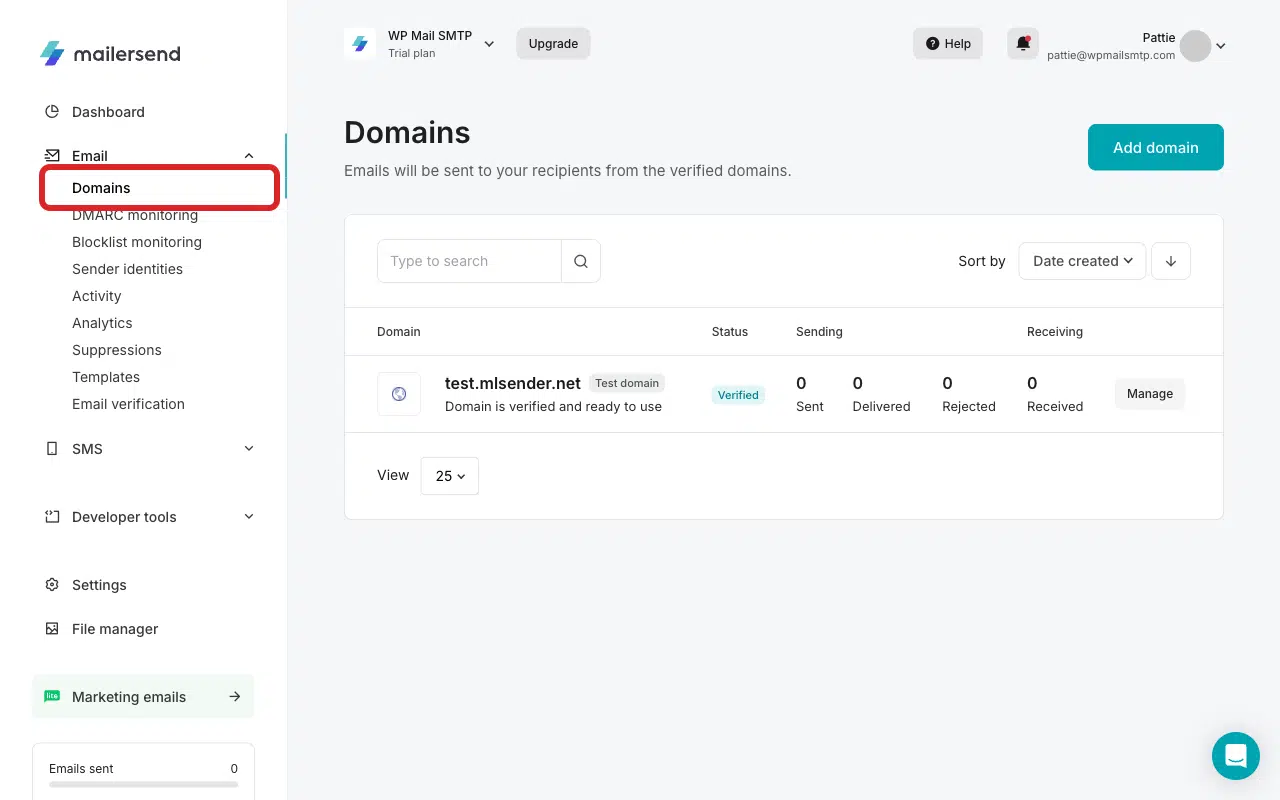
Locate your domain and check its status. If it shows Verified, skip to Step 3. If not, continue below.
Step 2: Verify the Domain
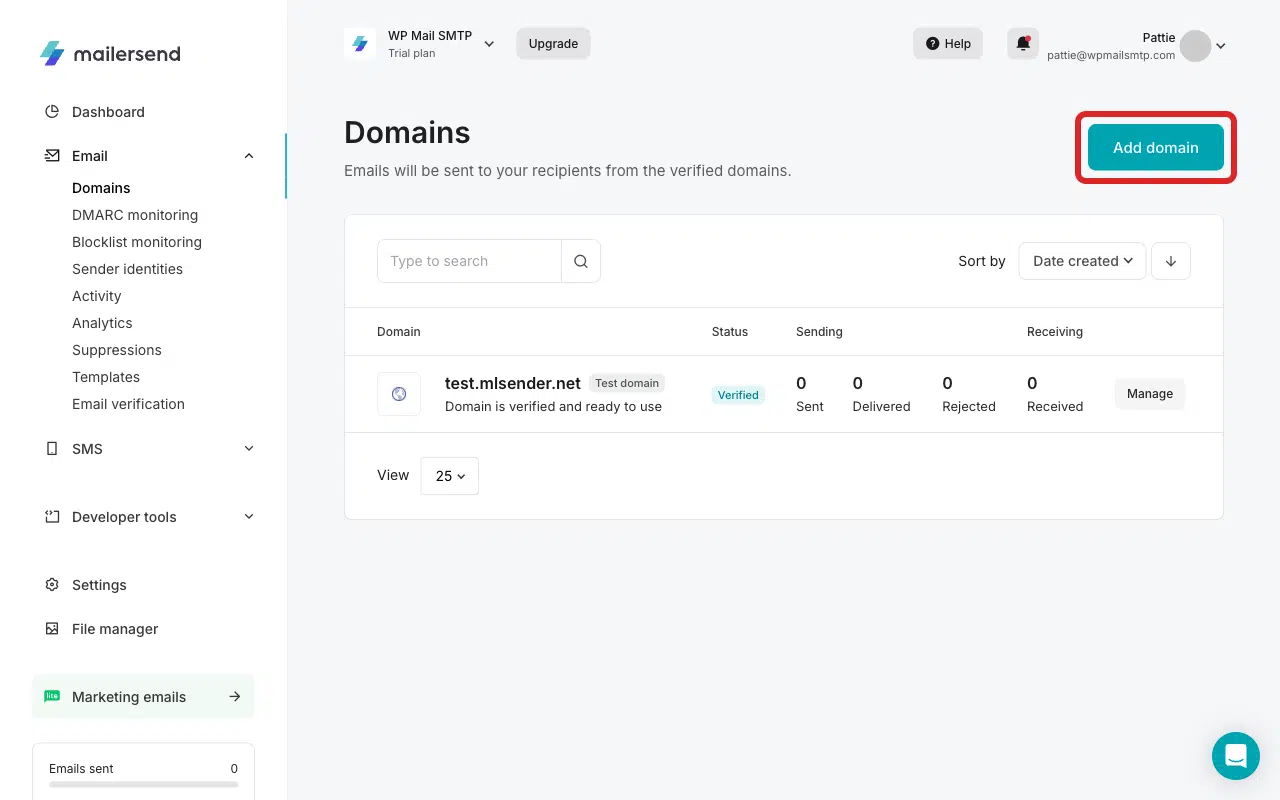
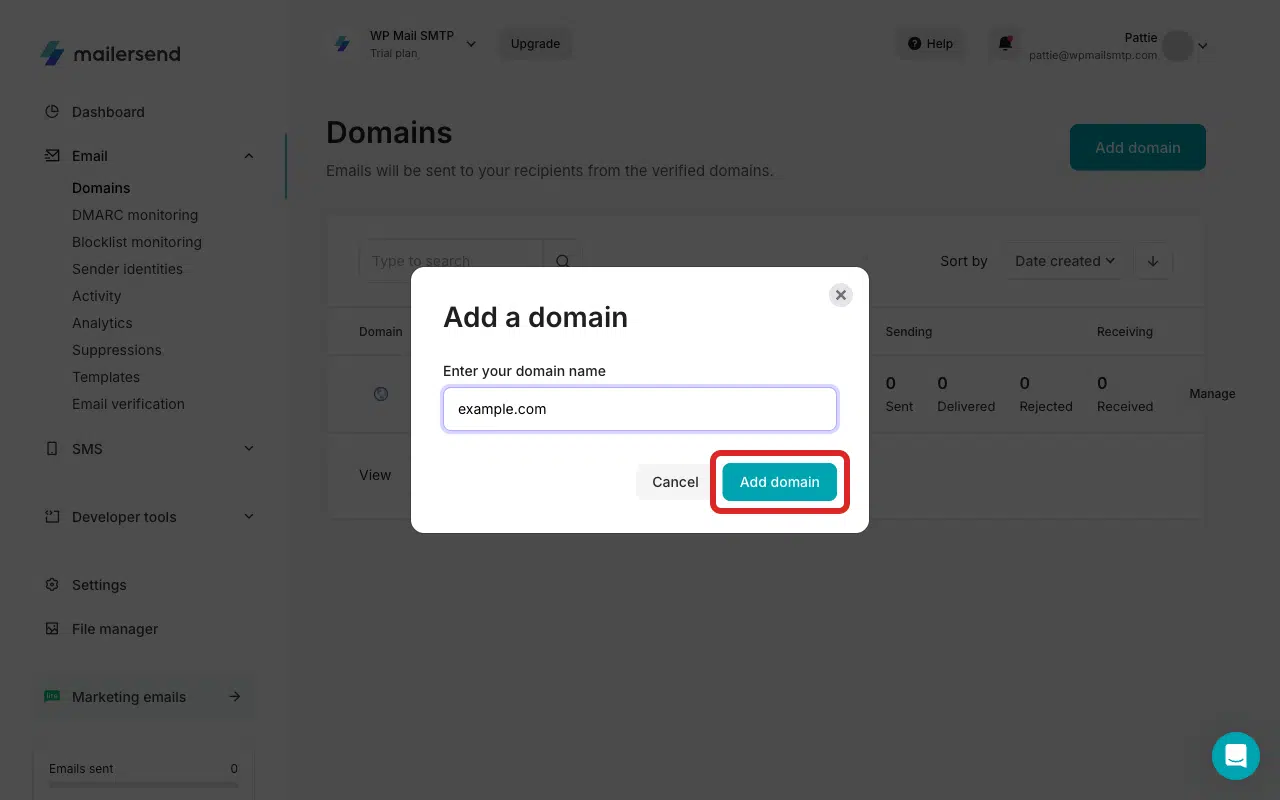
If the domain isn’t listed, add it first by clicking the Add domain.
Next, enter your domain name in the overlay.
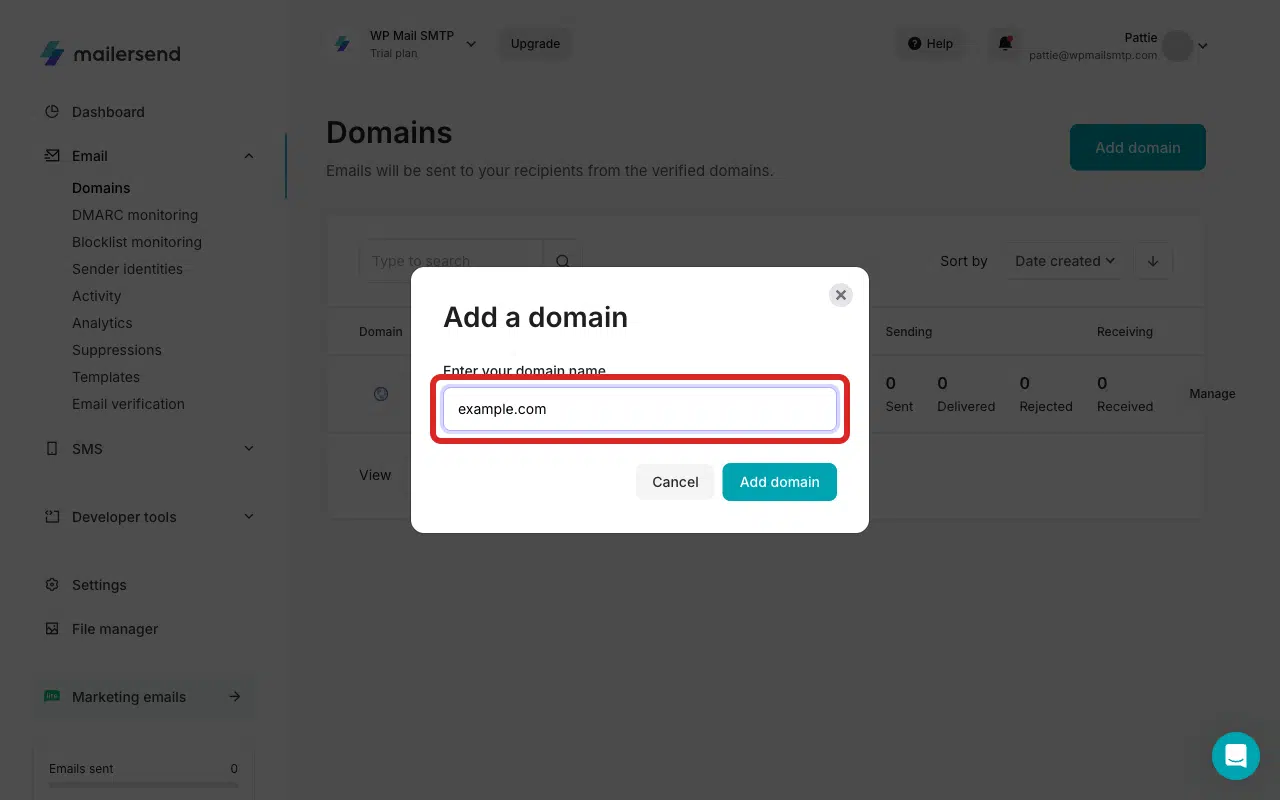
Then click the Add domain button.
MailerSend auto-detects your hosting provider and offers two verification paths:
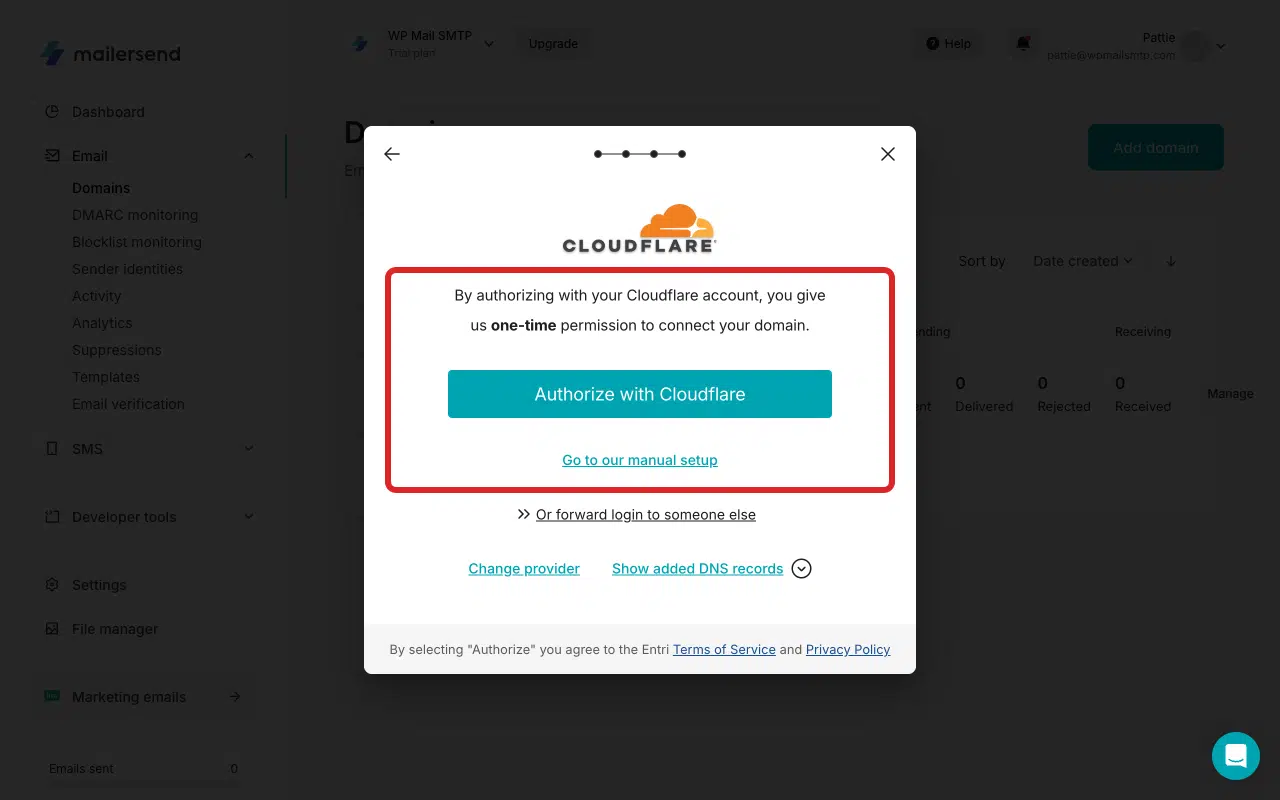
Option A: One-click validation (recommended if available):
Click Authorize with Cloudflare (or the host-specific button that appears for your provider).
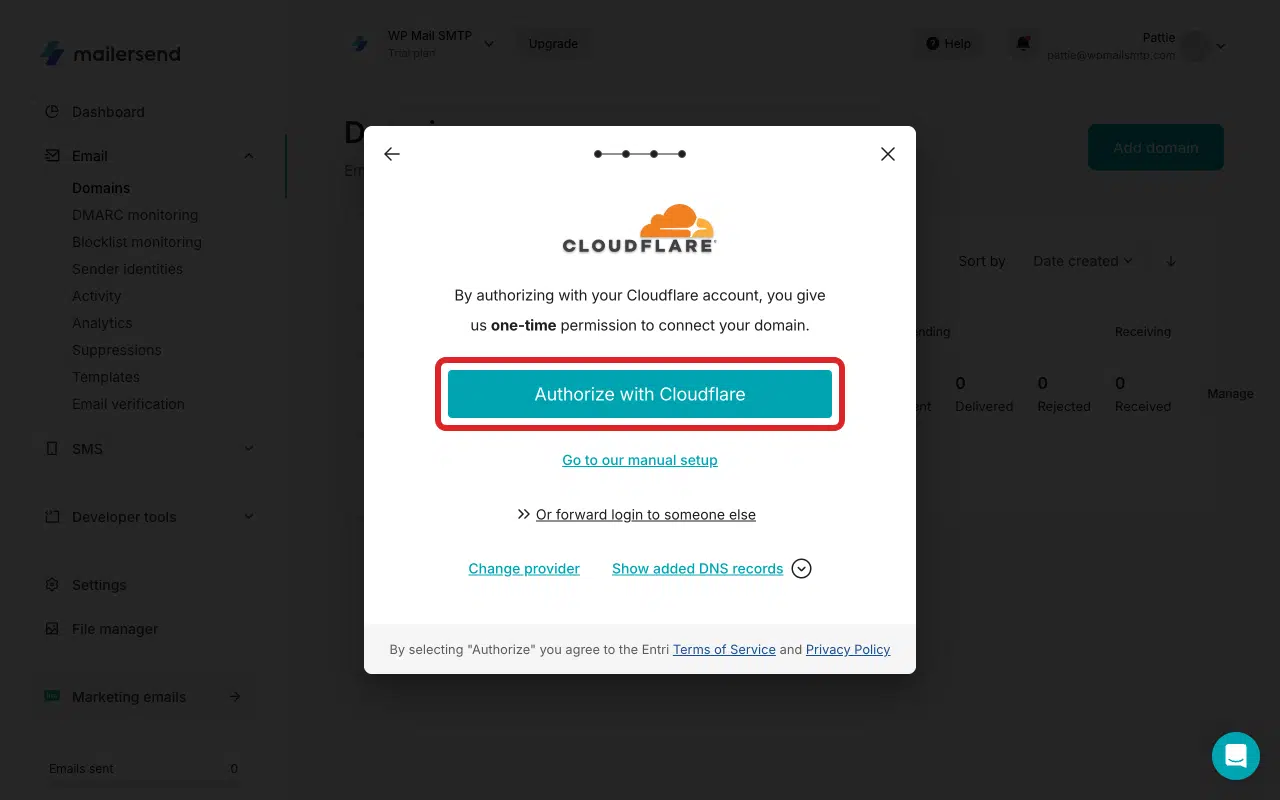
MailerSend redirects you to your host’s dashboard. Click Authorize to let MailerSend add the required DNS records automatically.
Once complete, you’ll be redirected back to your MailerSend dashboard. You should also see a success notification after authorization.
Option B: Manual DNS setup:
To use the manual domain authorization option, click Go to our manual setup.
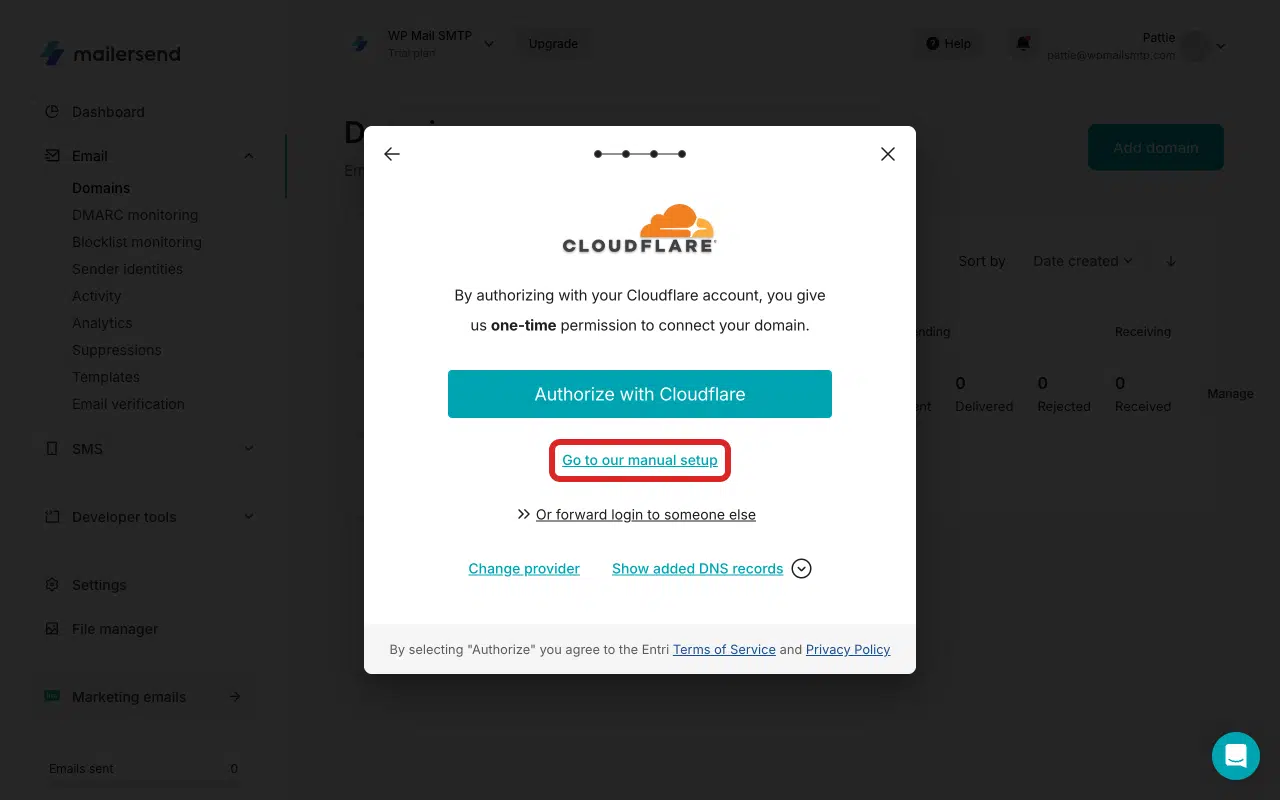
MailerSend displays 3 DNS records (SPF TXT, DKIM CNAME, Return-Path CNAME). You’ll need to add these records to your DNS provider exactly as shown.
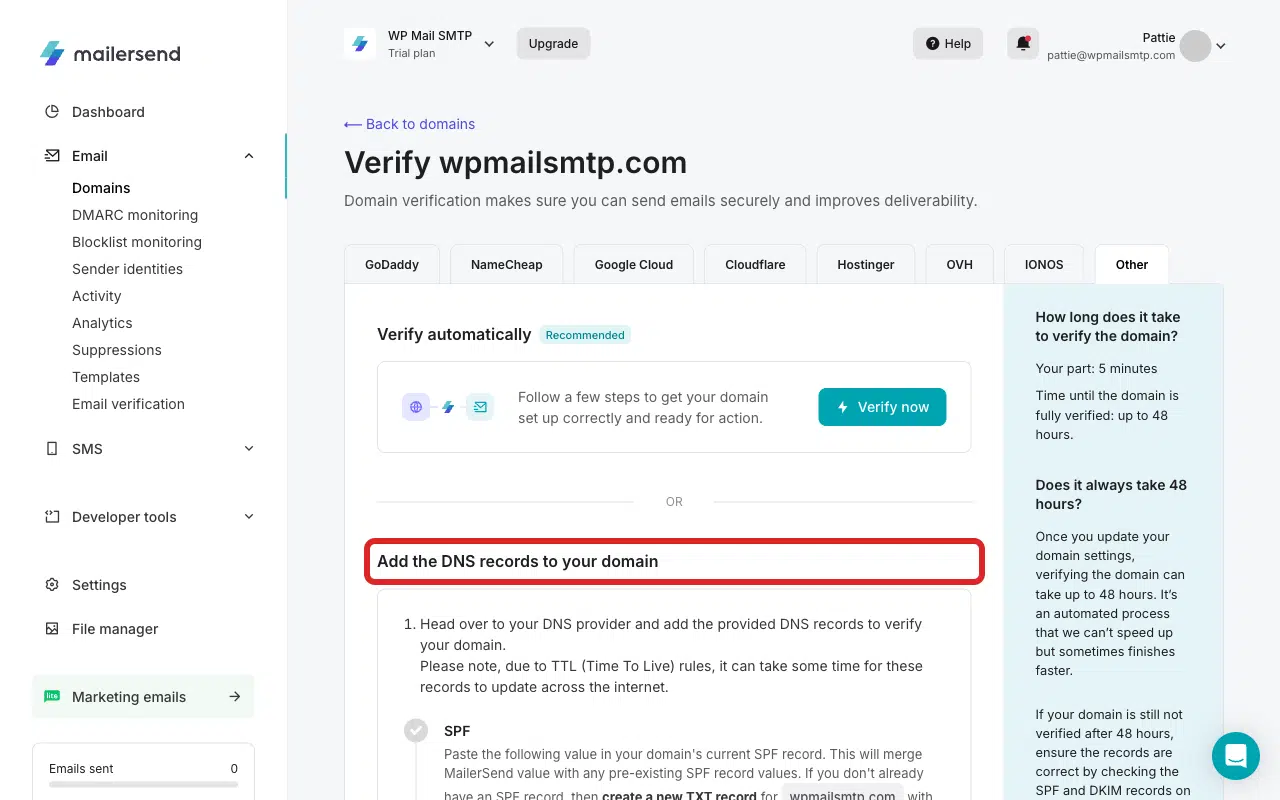
Note: If you are at all unsure of where to locate your DNS records, see our guide on adding DNS records to learn how.
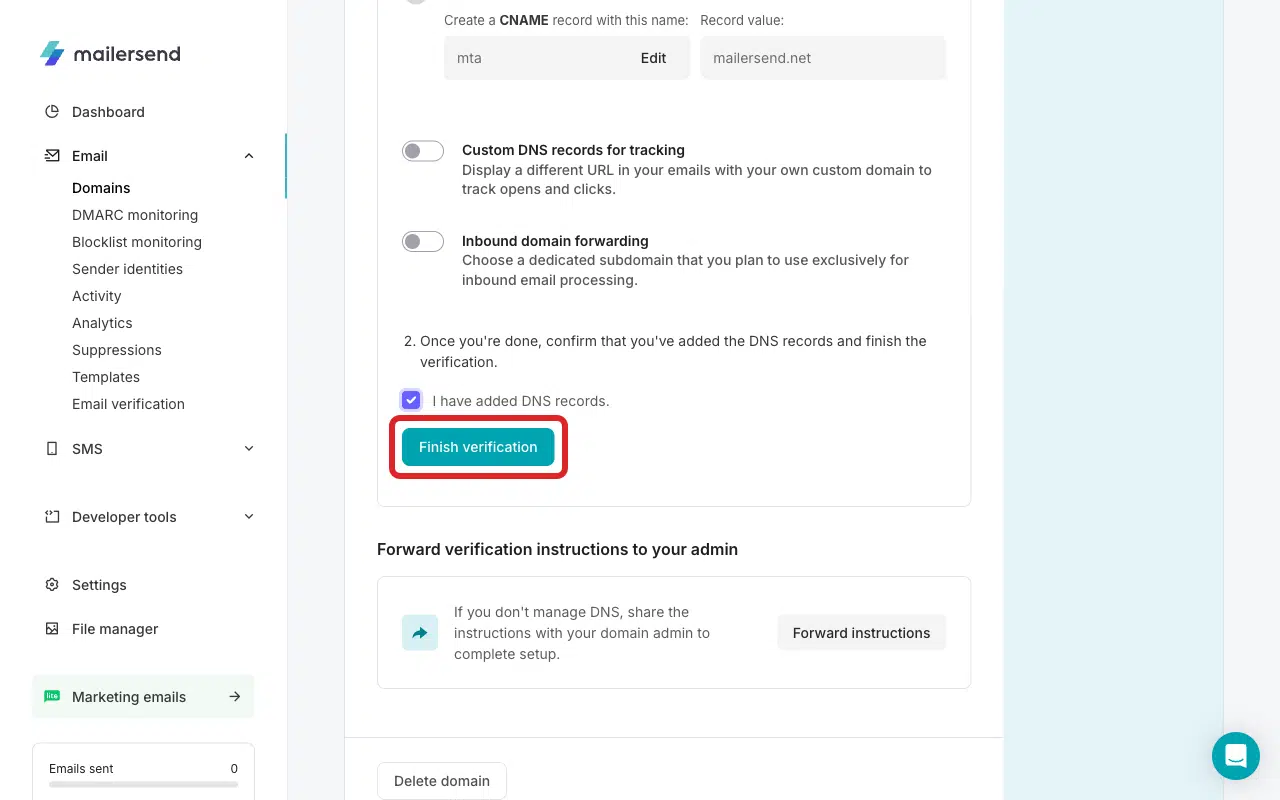
Check the I have added DNS records checkbox.
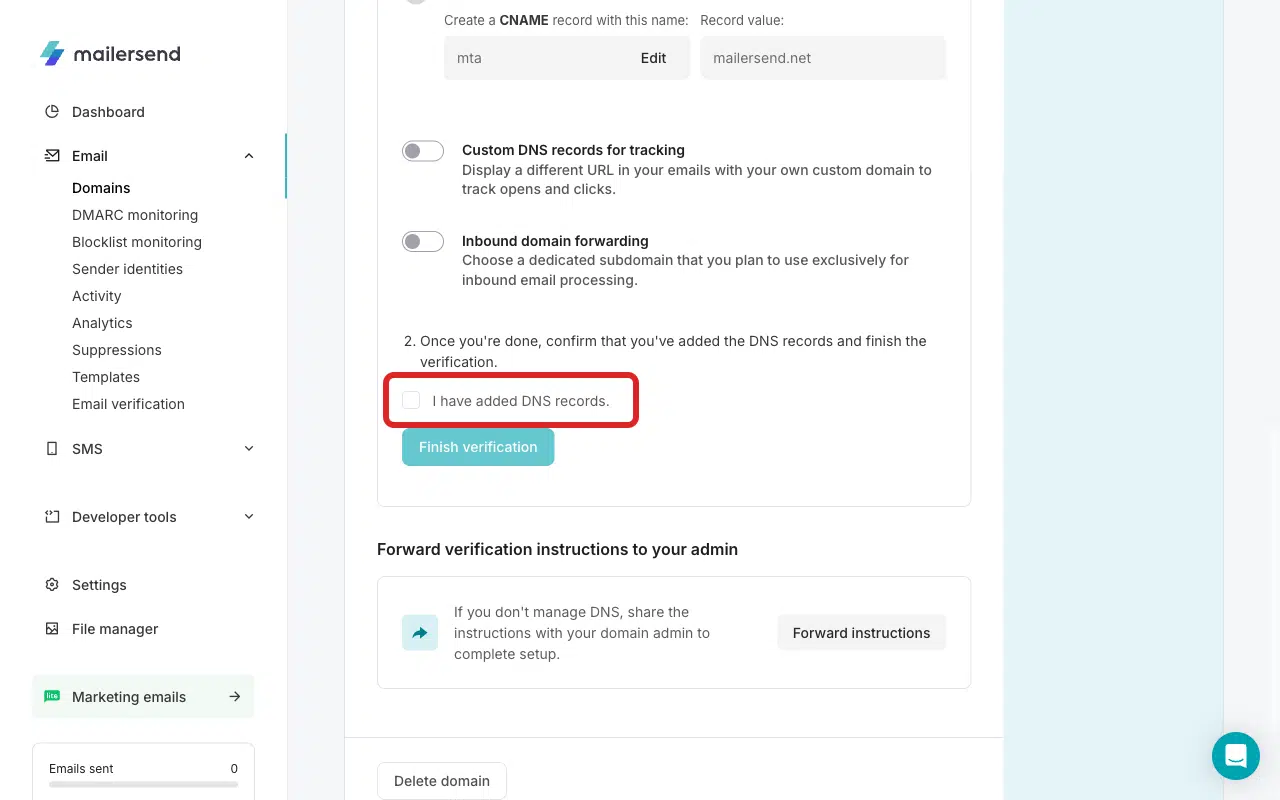
Click Finish verification.
Note: DNS propagation can take up to 48 hours, though it’s usually faster.
Once complete, the domain shows as Verified.
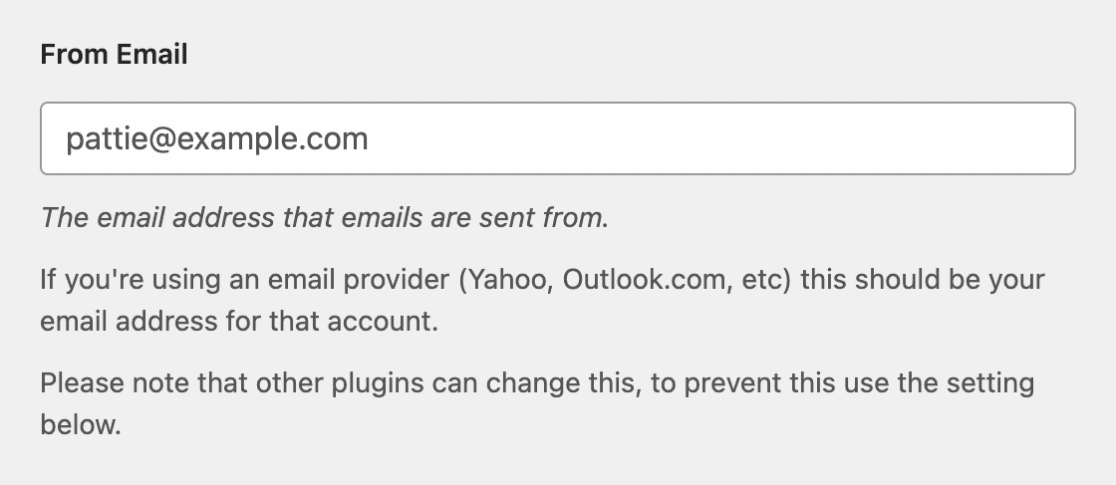
Step 3: Match the From Email to the Verified Domain
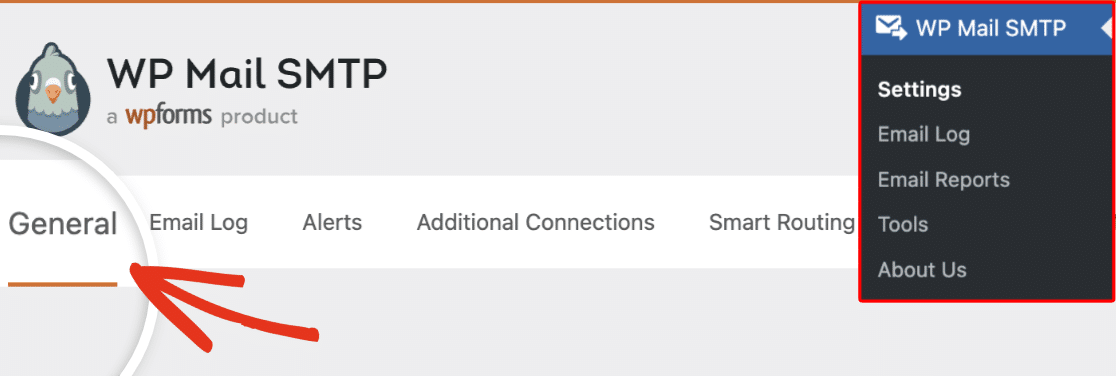
Go to WP Mail SMTP » Settings » General.
In the From Email field, enter an address at the domain you verified in MailerSend. For example, if you verified example.com, the From Email must be something like [email protected].
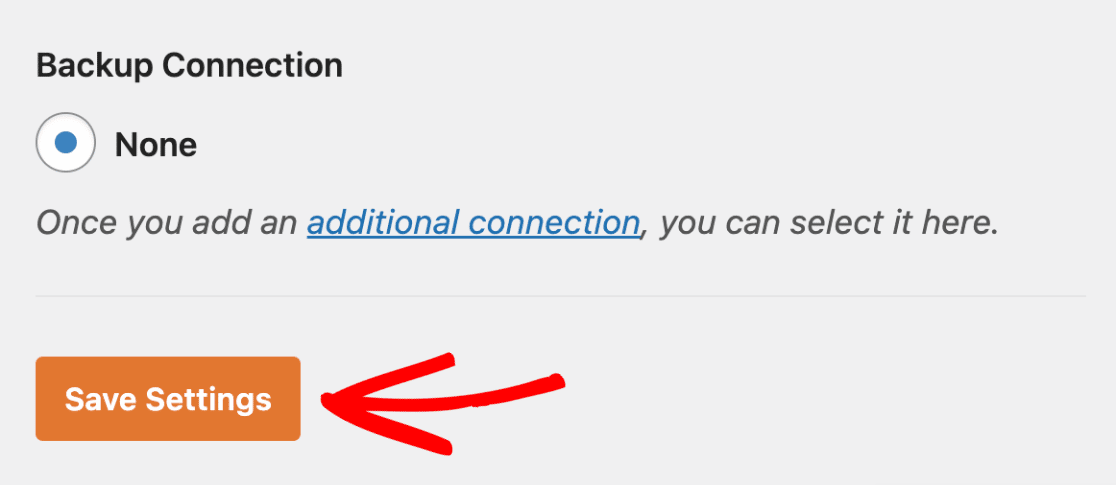
You can also enable the Force From Email settings to apply the changes site-wide. Once done, scroll down and click Save Settings.
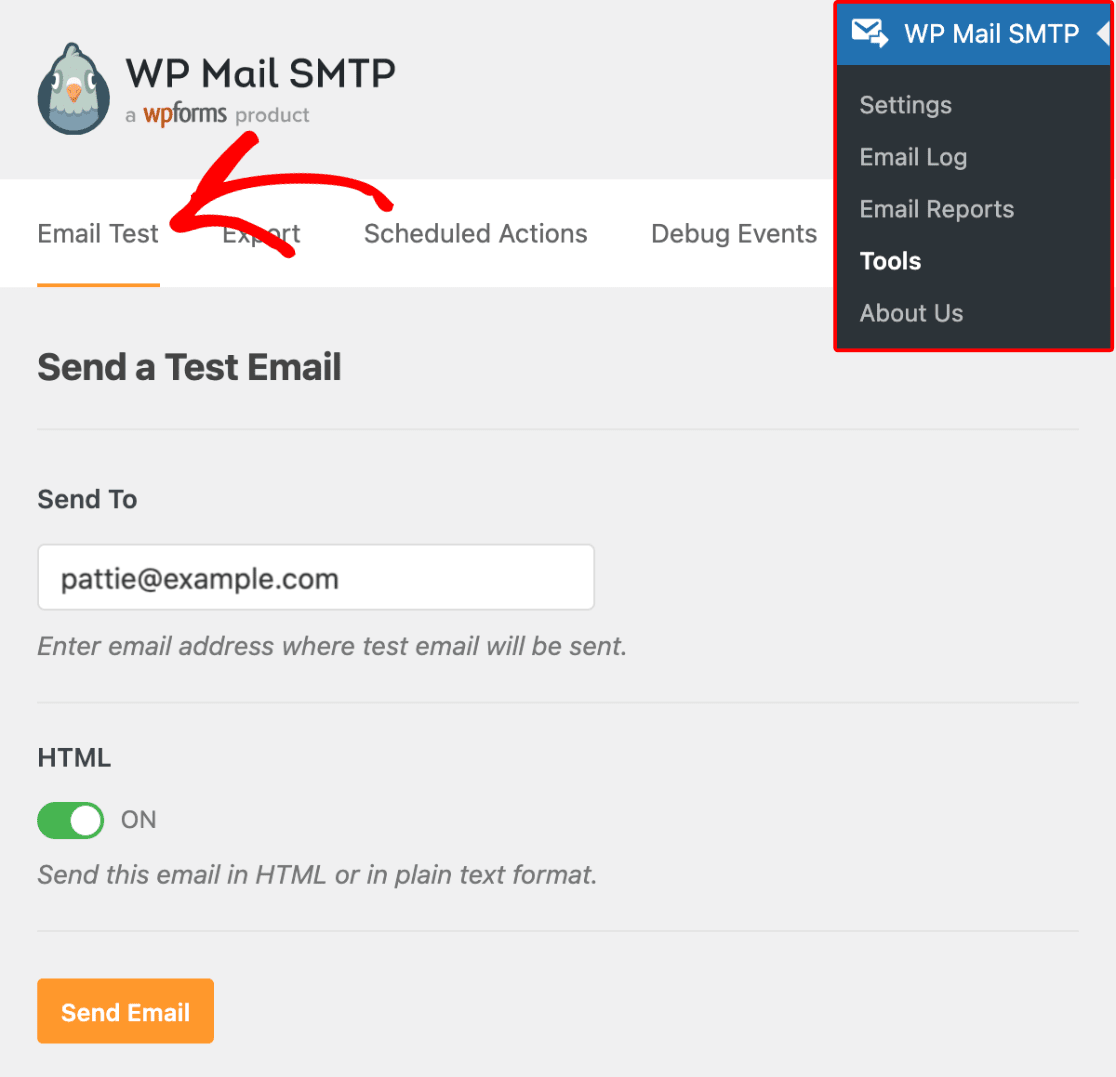
Step 4: Send a Test Email
Go to WP Mail SMTP » Tools. Click the Email Test tab.
Enter a recipient email in the Send To field. Leave the HTML toggle ON.
Once done, click Send Email.
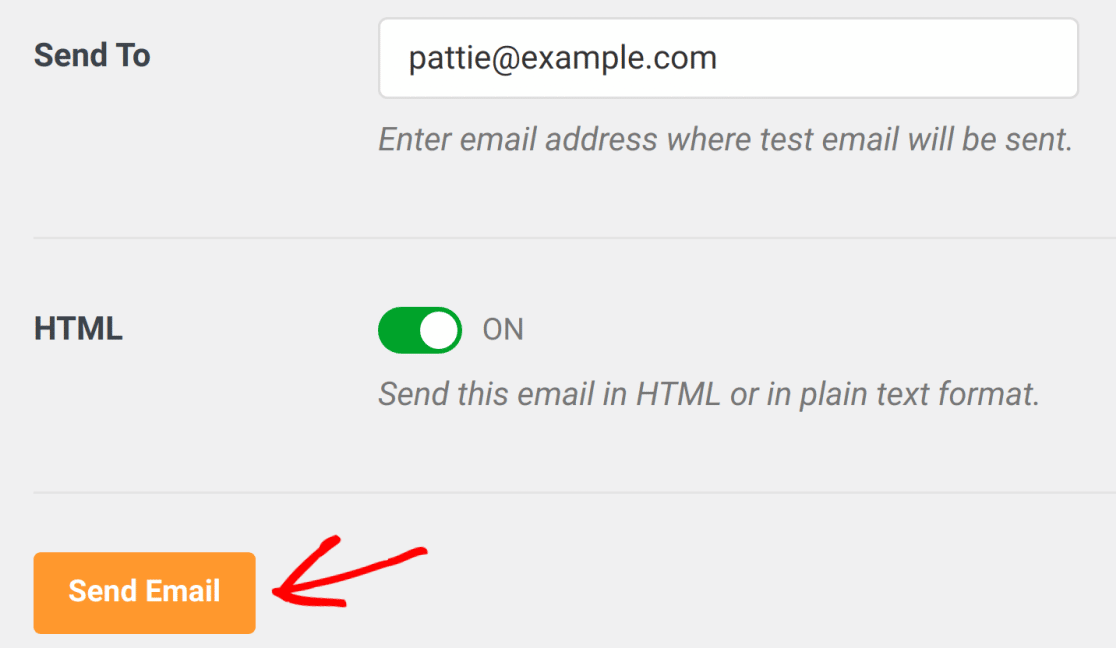
Look for the success message, then check your inbox to confirm the email arrived.
Notes
- MailerSend requires both SPF and DKIM for domain verification — just adding an SPF record isn’t sufficient.
- If records look correct but verification still fails, check for extra spaces, missing underscores in DKIM selectors, or your DNS provider auto-appending the domain name to CNAME values.
- One-click validation is the fastest path if your host supports it (Cloudflare, etc.).
- The From Email domain in WP Mail SMTP must match the verified domain in MailerSend. A mismatch is the most common cause of this error when the domain itself is already verified.
That’s It! You now know how to fix the ‘domain not verified’ error in MailerSend and get your emails sending again through WP Mail SMTP.