Thank you for subscribing to emails from WP Mail SMTP!
We can’t wait to share tips to help you improve email deliverability and get your WordPress emails working without a hitch.
To do that, it’s super important that you allow our emails to bypass your spam filters. Here’s everything you need to know.
Why Allowlist WP Mail SMTP?
Email providers sometimes block emails that are sent from a mailing list. If you’re already using WP Mail SMTP, you might have noticed how aggressive these spam filters can be!
We definitely think spam filtering is a good thing for the whole internet. But it’s not perfect, and it sometimes blocks messages that you actually want to receive.
By adding us to your allowlist, you’re telling your email provider that it’s OK to deliver our emails to your inbox. So next time we send email about our sales, giveaways, and announcements, you’ll be the first to know!
What Is an Allowlist?
An allowlist is a list of email addresses that you’ve manually set up as ‘trusted’ senders in your email account.
Any emails from an address on your allowlist won’t be filed as spam.
It’s an easy way to override spam filters and signal to your email service that these emails are trustworthy senders.
The awesome thing is that these filters actually influence email servers across the whole internet. When you add an email to your allowlist, other providers will recognize that address as a legitimate sender too.
So by adding us to your allowlist, you’re helping out other people who want to get emails from WP Mail SMTP!
How to Add WP Mail SMTP to Your Allowlist
Every e-mail system is different, so we don’t yet have a guide for every single provider here. We’ll show you how to use the allowlist in the most popular ones.
If you don’t see your provider here, please reach out to them for help. PS. If you forward us their answer, we’ll update this page so more people can benefit!
Gmail or G-Suite
First, let’s look at Gmail. These instructions will also work if you have a G-Suite account.
Start by logging into your inbox using your browser. Find your WP Mail SMTP welcome email (or any other email from [email protected]).
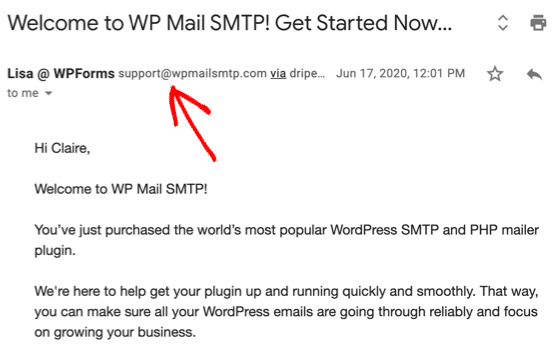
If you’re using tabs, you’ll want to drag the email from the Promotions tab to the Primary tab first.

Finally, add us to your contacts in Gmail!
Here’s the easiest way to do that.
First, open up the email from [email protected].
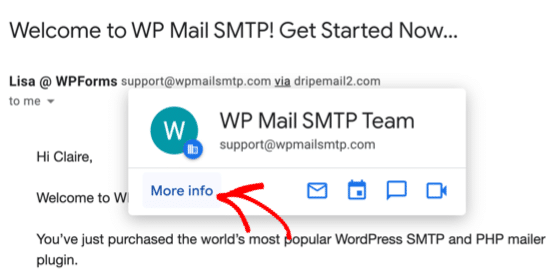
Then hover your mouse over the sender’s name. From the popup, click More Info.
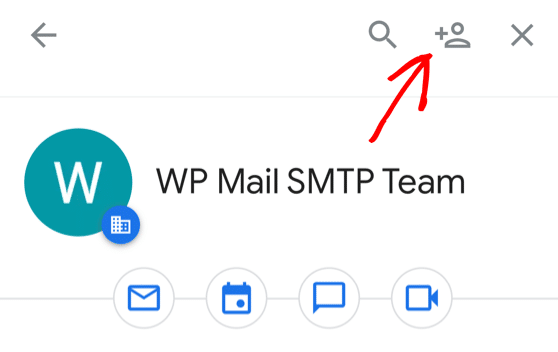
You’ll notice that a sidebar slides out on the right. Simply click the Add Contact icon at the top.
And that’s it! Now you’ve added us as a friend in Gmail or G-Suite.
All our emails will go to your primary folder in the future so you’ll never miss an update.
Yahoo! Mail
If you’re using Yahoo! Mail, adding us to your allowlist is super easy.
Simply hover over the sender’s email and select Add to contacts.
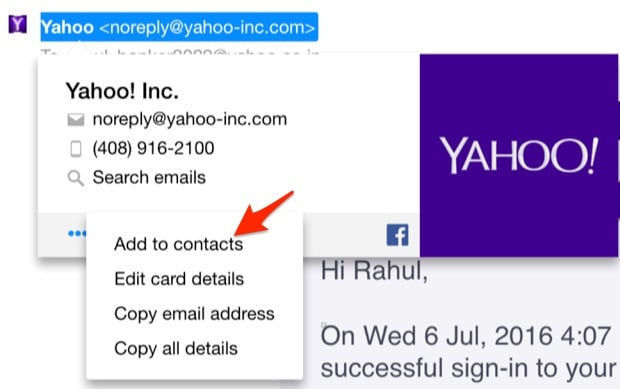
That’s it! You’re done!
Apple Mail
If you’re on a Mac, we’ll show you the easy way to add us to your allowlist.
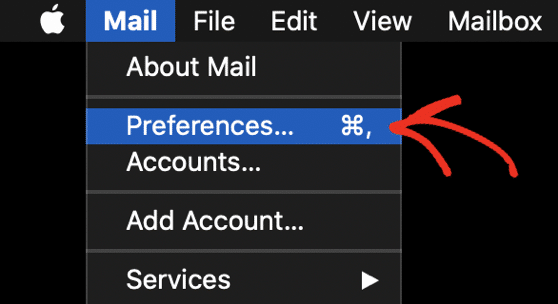
Open up Mail and look to the top left of your screen. Click Mail and then click Preferences from the dropdown.
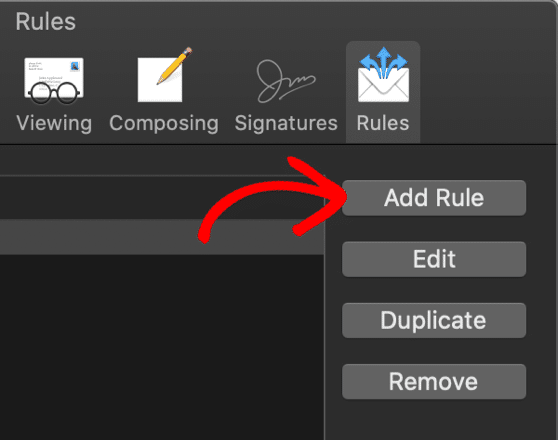
From the icons along the top, click Rules.

Next, click the Add Rule button.
We’re going to create a new rule as follows:
- Description: Type any description so you can easily find your rule
- If any of the following conditions are met
- From contains [email protected]
- Move message to mailbox: Inbox
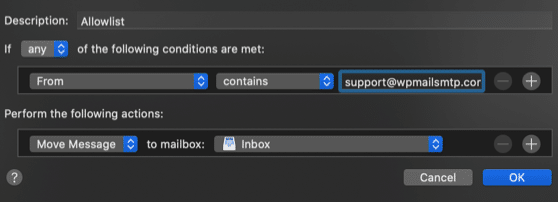
Press OK to save your rule.
That’s it – you’ve added us to your allowlist!
Microsoft Outlook (Desktop)
If you’re using Outlook on your computer, these instructions will help you to whitelist our emails.
From the Home tab, click the Junk dropdown.

Then, from the dropdown, click Junk Email Options.
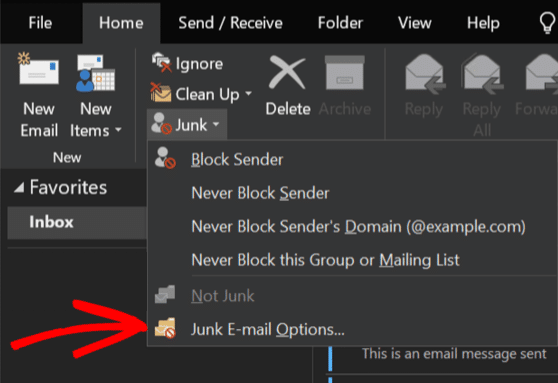
You’ll see a window open up. Click on the second tab here, labeled Safe Senders.
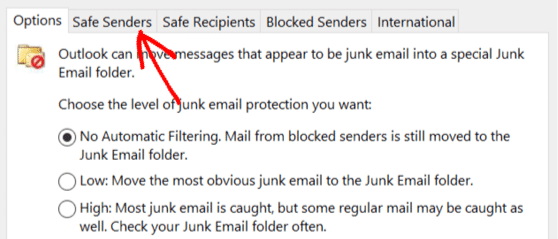
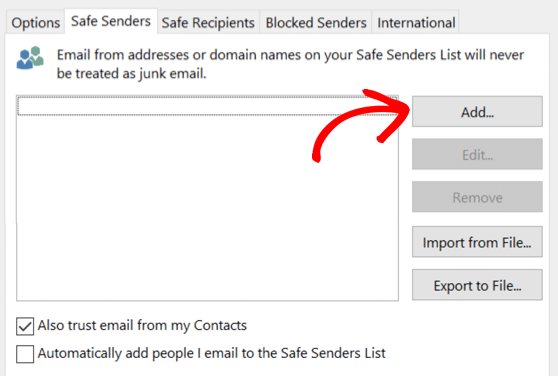
Now click Add to create a new entry in the list.
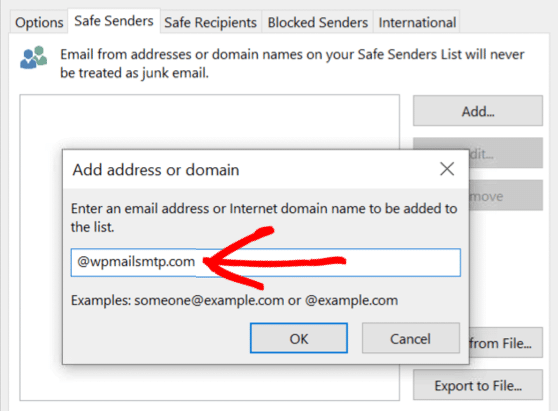
In the popup here, type @wpmailsmtp.com, including the leading @ sign. Then click OK.
And finally, click OK again to save.
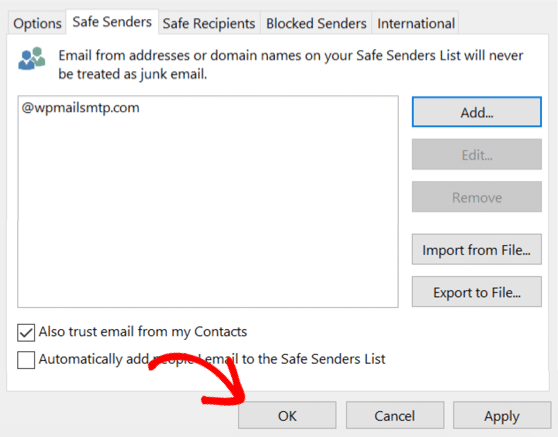
That’s it!
Outlook.com (Web)
If you have a Hotmail, Outlook, or Live address, these instructions will work for you.
First, log in to your Microsoft account and click the 9 dots on the left to pop out the menu. Click Outlook here to open your email account.
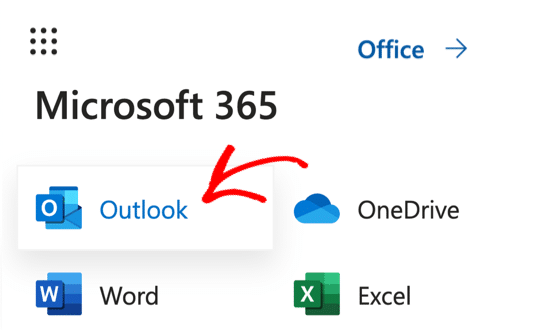
After logging in to your account, click the gear icon and search for Safe senders and domains.
Type wpmailsmtp.com into the domains field and click Save.
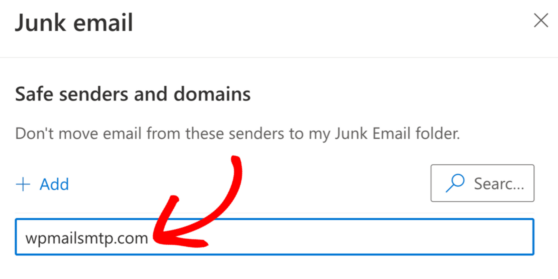
That’s it! Now any email from us will be delivered to your inbox.
