AI Summary
Are you looking to integrate DNS records for your WP Mail SMTP mailer with your domain hosted on Bluehost? To confirm domain ownership and enhance email deliverability, many mailers ask users to input DNS records into their domain host during the setup phase.
In this guide, we’ll walk you through the process of adding DNS records for WP Mail SMTP when you’re hosting your domain on Bluehost.
Before getting started, make sure WP Mail SMTP is installed and activated on your WordPress site.
Understanding How DNS Records Work in SMTP
The Domain Name System (DNS) is like the internet’s address book. DNS provides a means to map a domain name (e.g., example.com) to its corresponding IP address (e.g., 123.123.80.20). Just like how you store a person’s phone number with their name on your smartphone to easily remember them.
DNS records act as a storage system for the settings needed to map a domain name to its corresponding IP address. This means each domain has its unique set of DNS records.
Most mailers in WP Mail SMTP use DNS records as a means to verify your domain on their platform. In some cases, it can be used to improve email deliverability, as in the case of adding SPF, DKIM, and DMARC records.
In the next sections, we’ll cover the steps for adding DNS records for sites hosted on Bluehost.
Accessing DNS Settings in Bluehost
To get started, log in to your Bluehost account.
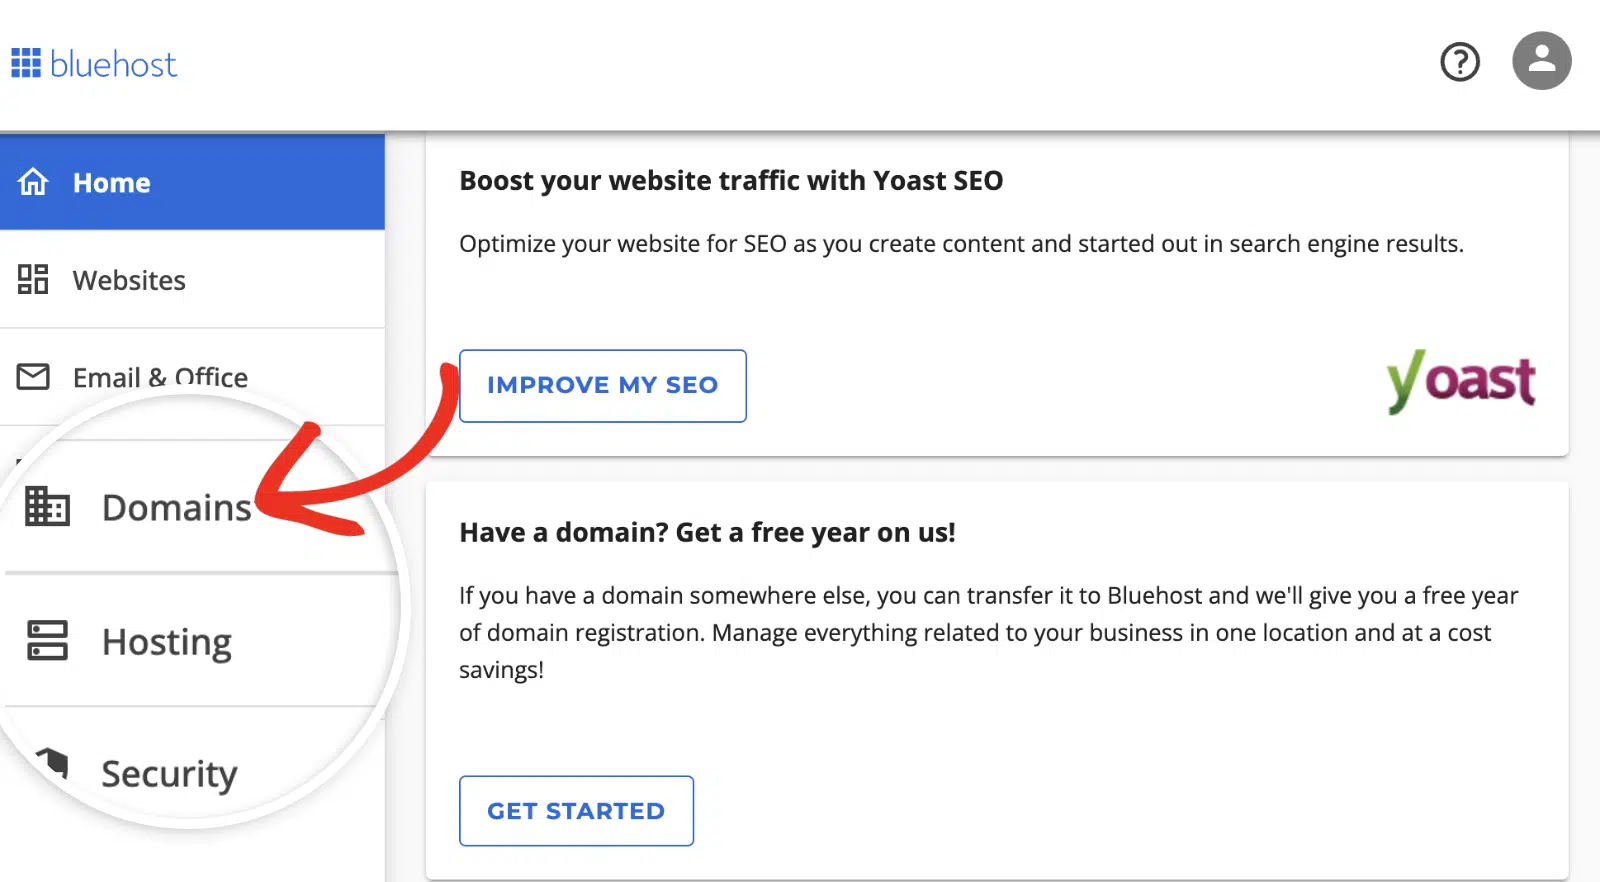
Once you’ve accessed your Bluehost account dashboard, select the Domains option from the menu on the left side.
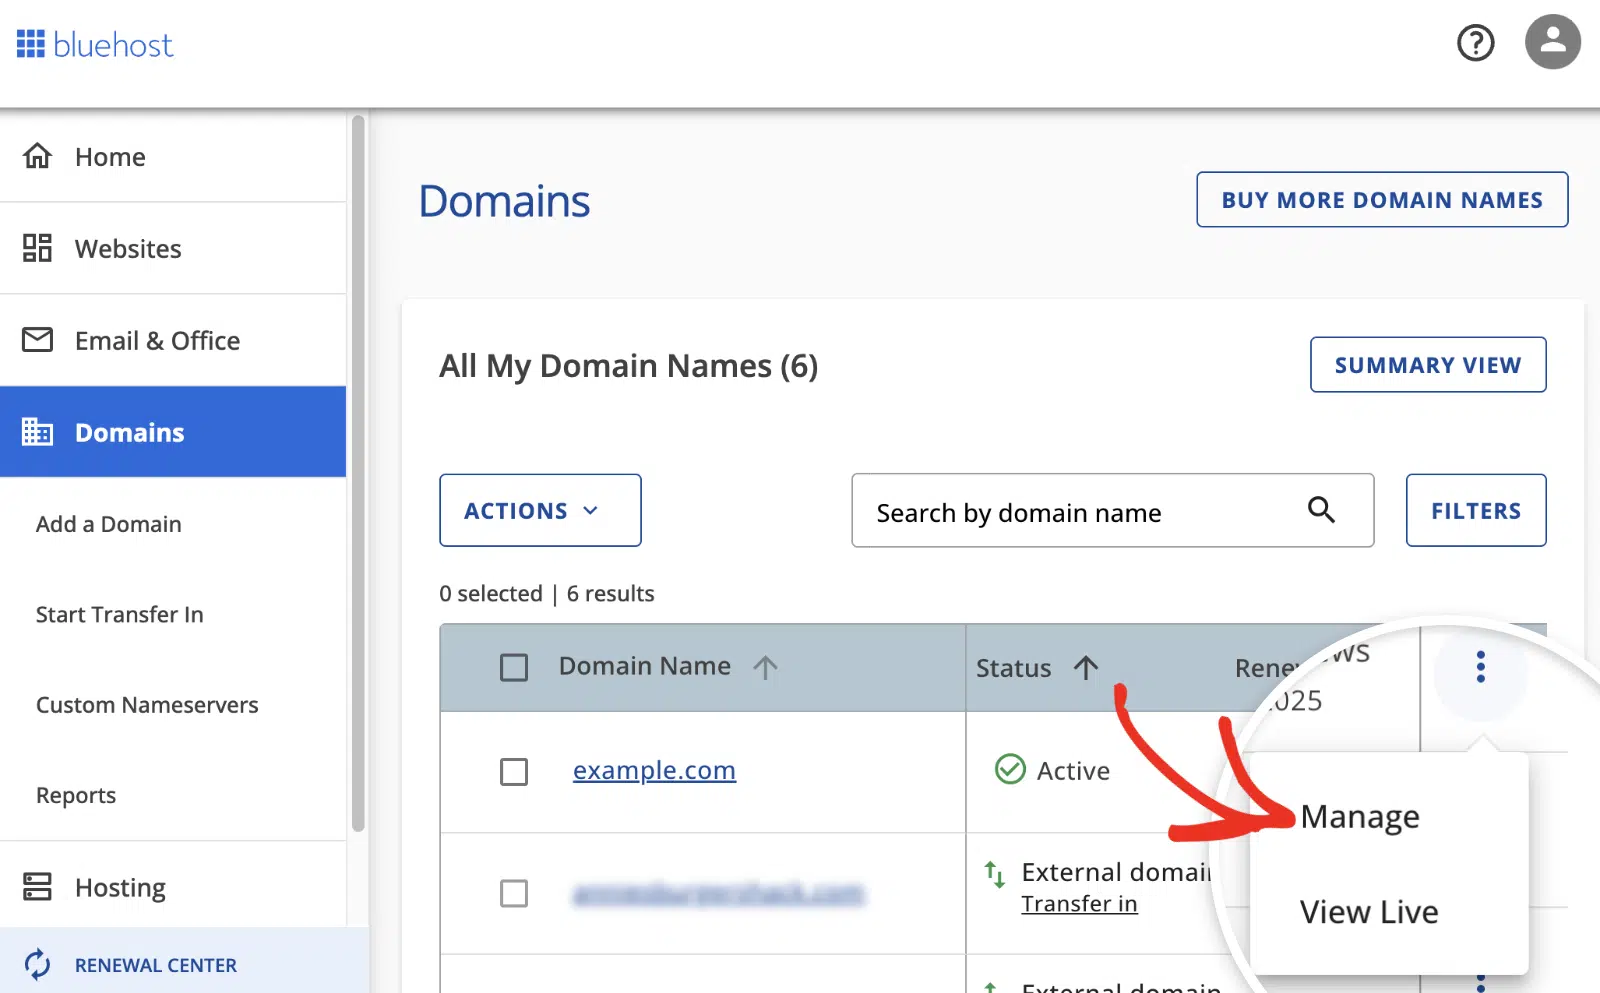
This will take you to a new page where you’ll see a list of your domains hosted by Bluehost. Locate the domain you’d like to manage, then click the 3 dot icon and select Manage.
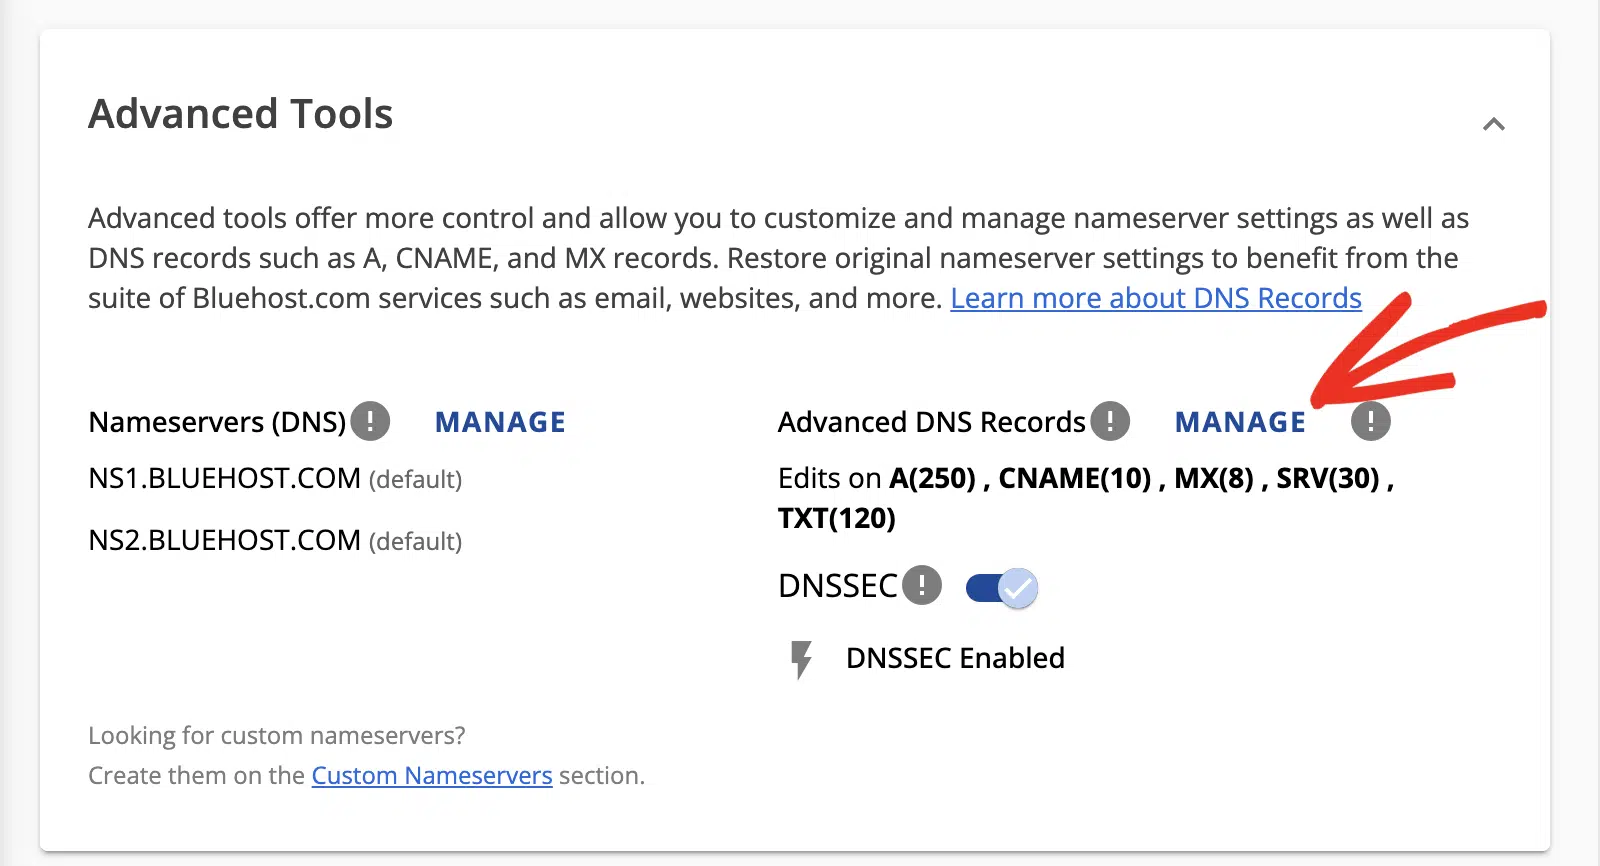
Then, scroll to the Advanced Tools section and select MANAGE next to Advanced DNS Records.
From here, you’ll be able to add new DNS records, which we’ll cover in the next section.
Adding DNS Records in Bluehost
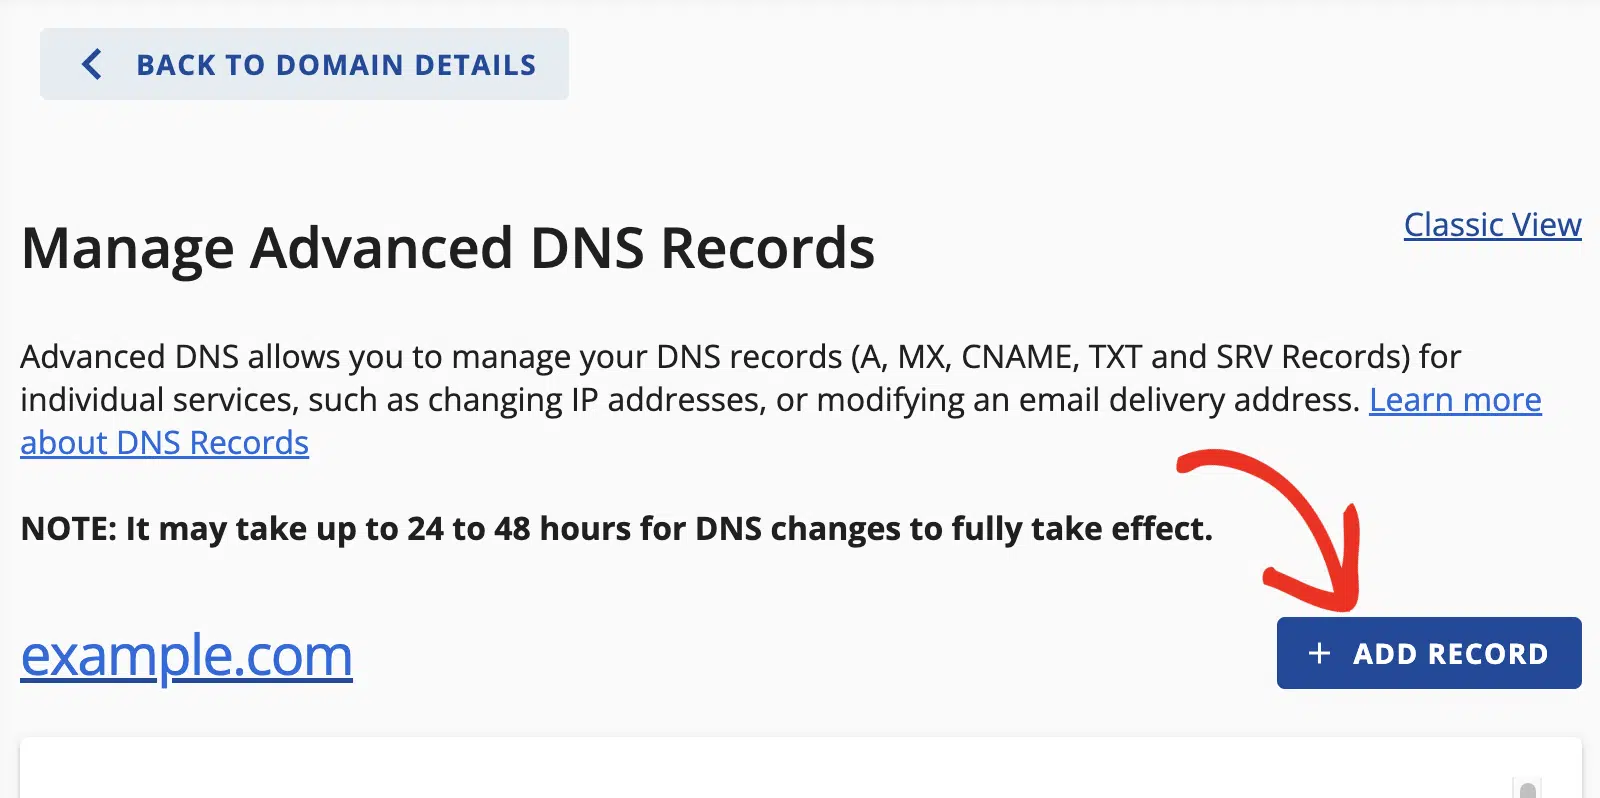
On the Advanced DNS Records page, you can add A, CNAME, MX, SRV, TXT, and AAAA records.
For our example, we’ll demonstrate how to add a CNAME record provided by SendLayer.
To do this, click the + ADD RECORD button.
In the overlay that appears, you’ll need to enter details about the record you want to create.
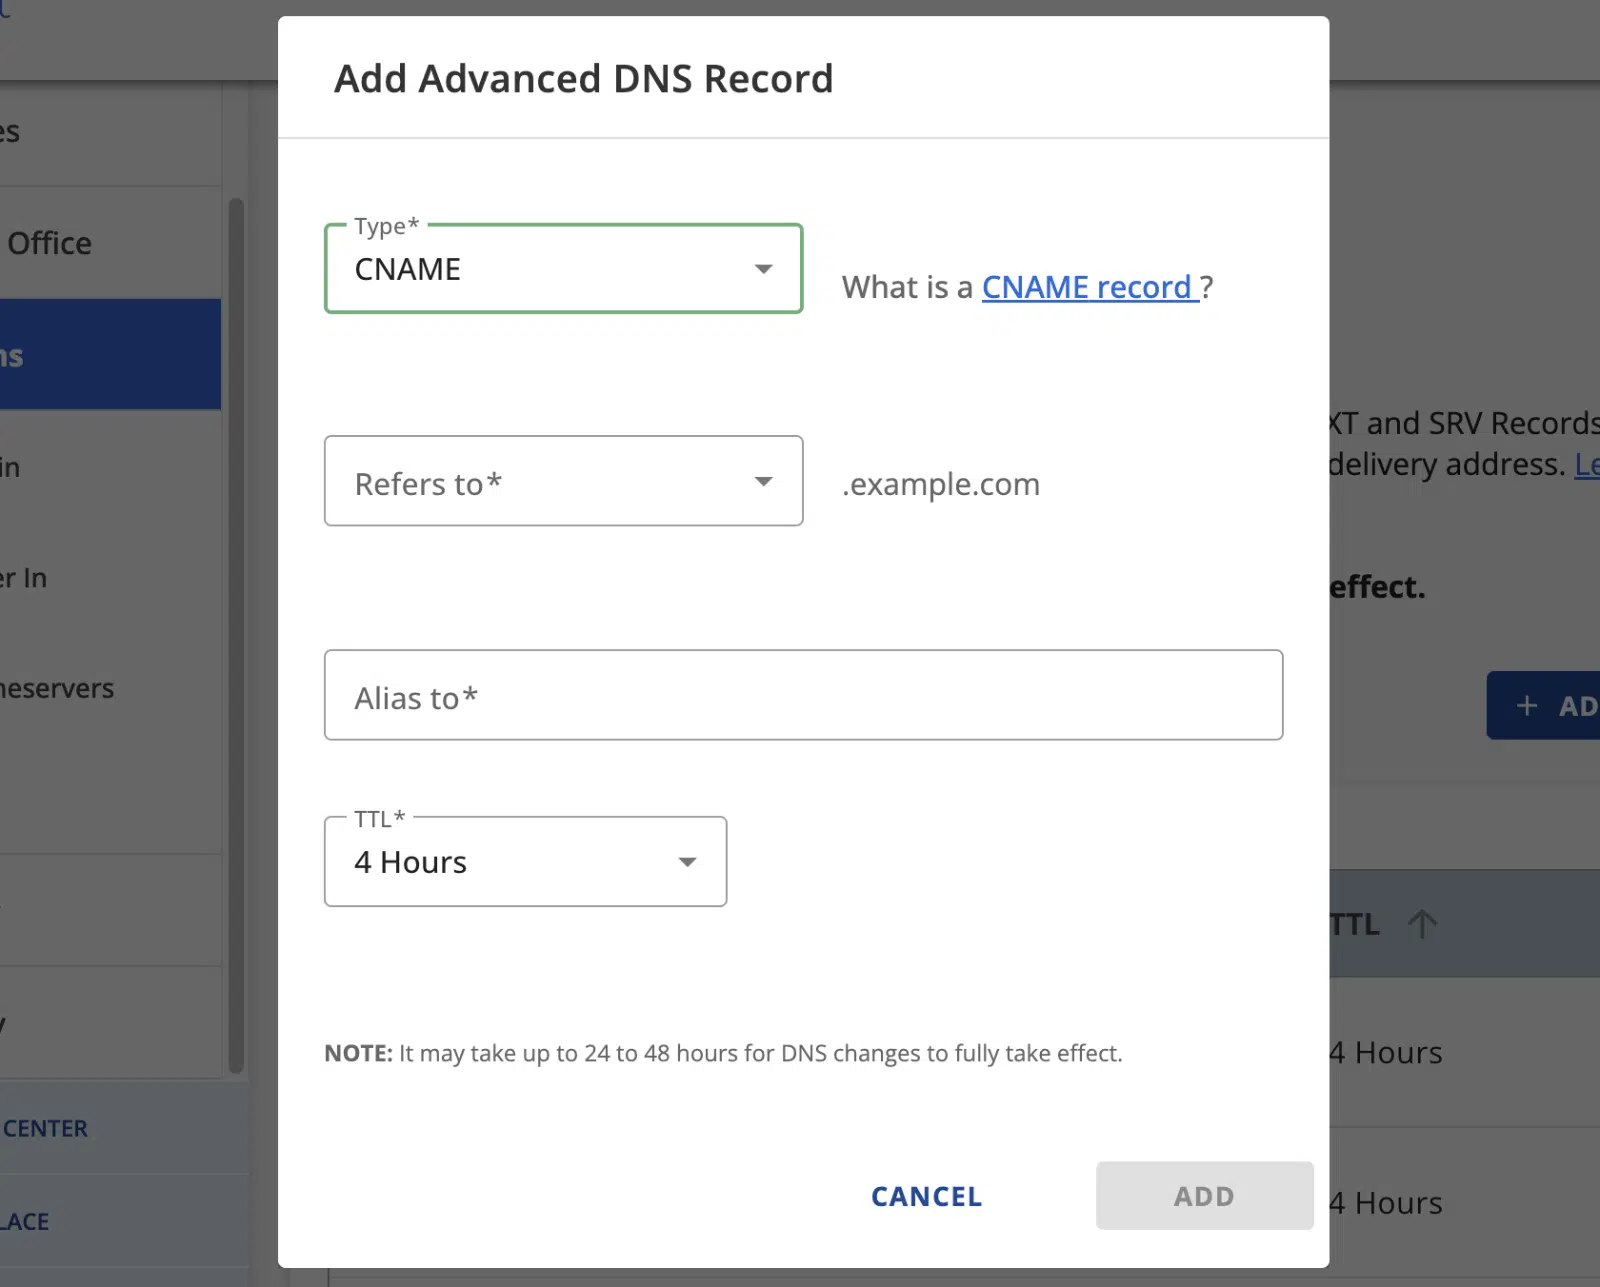
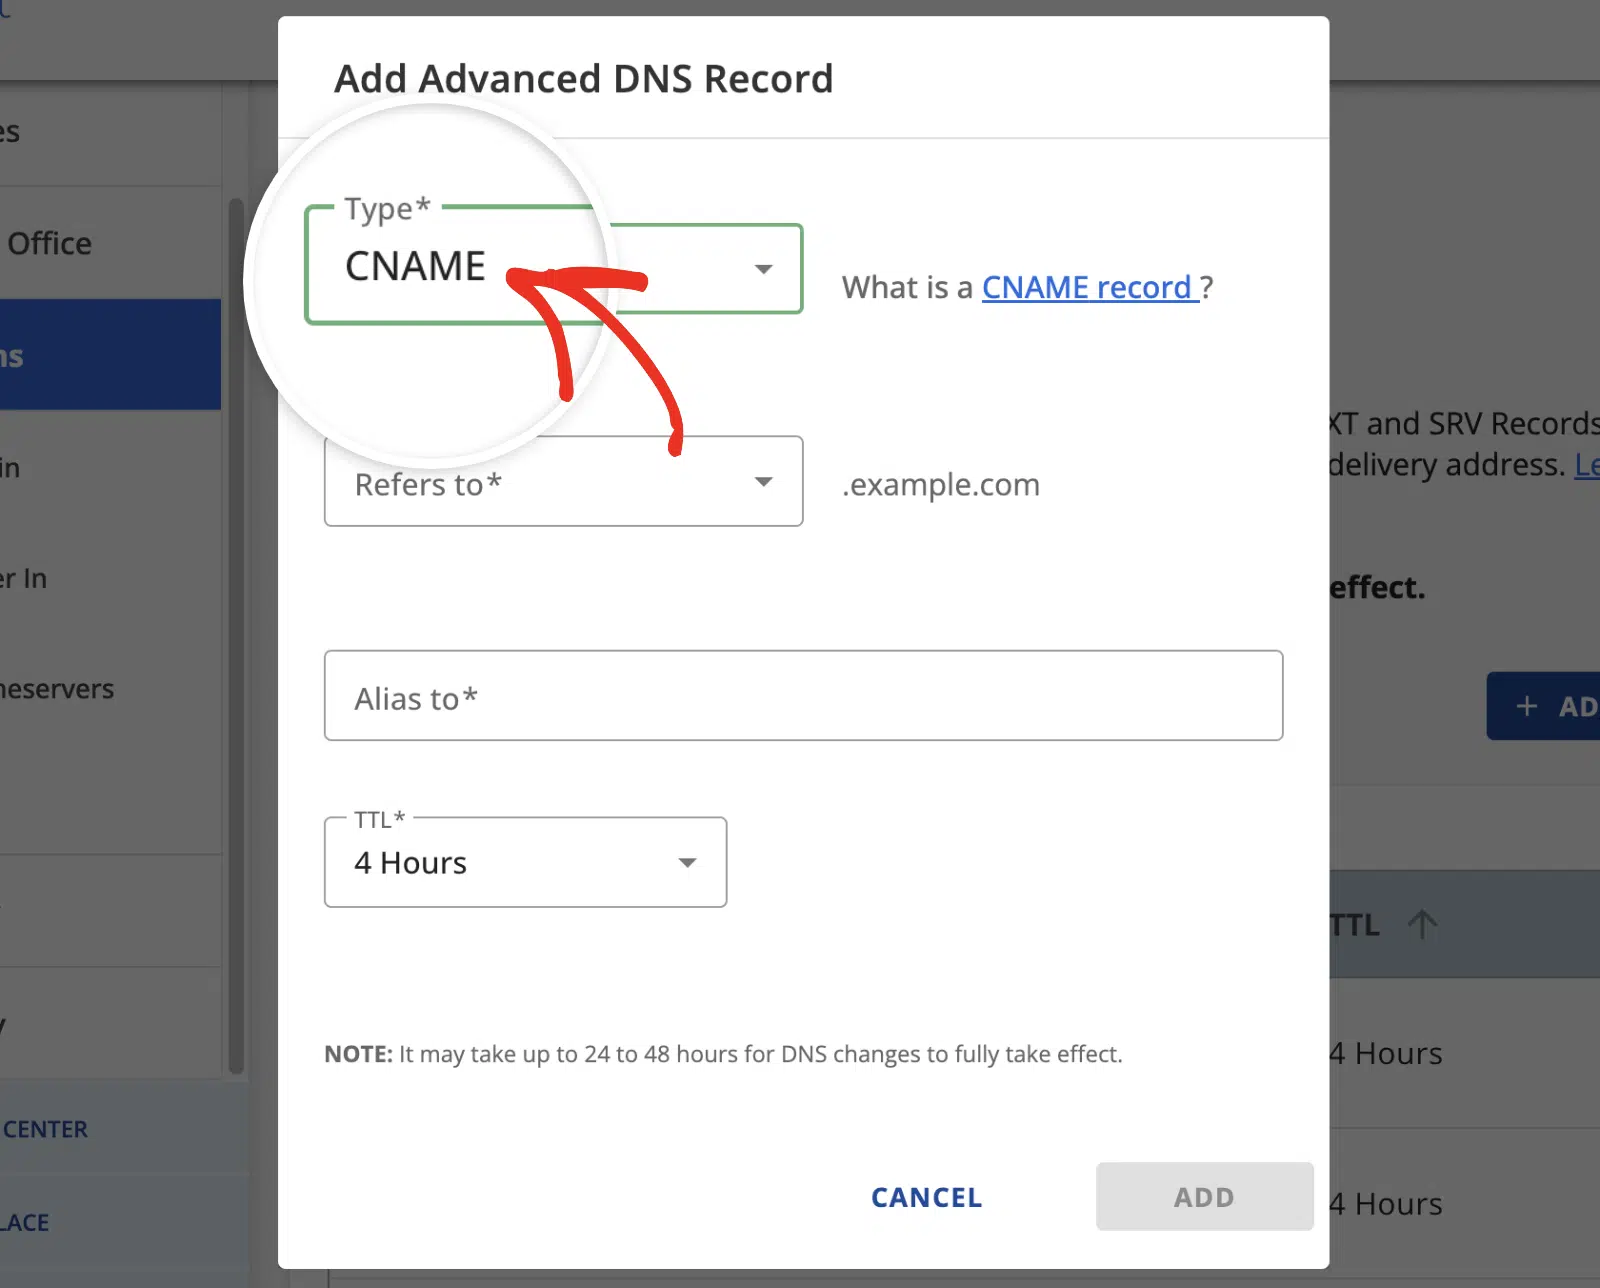
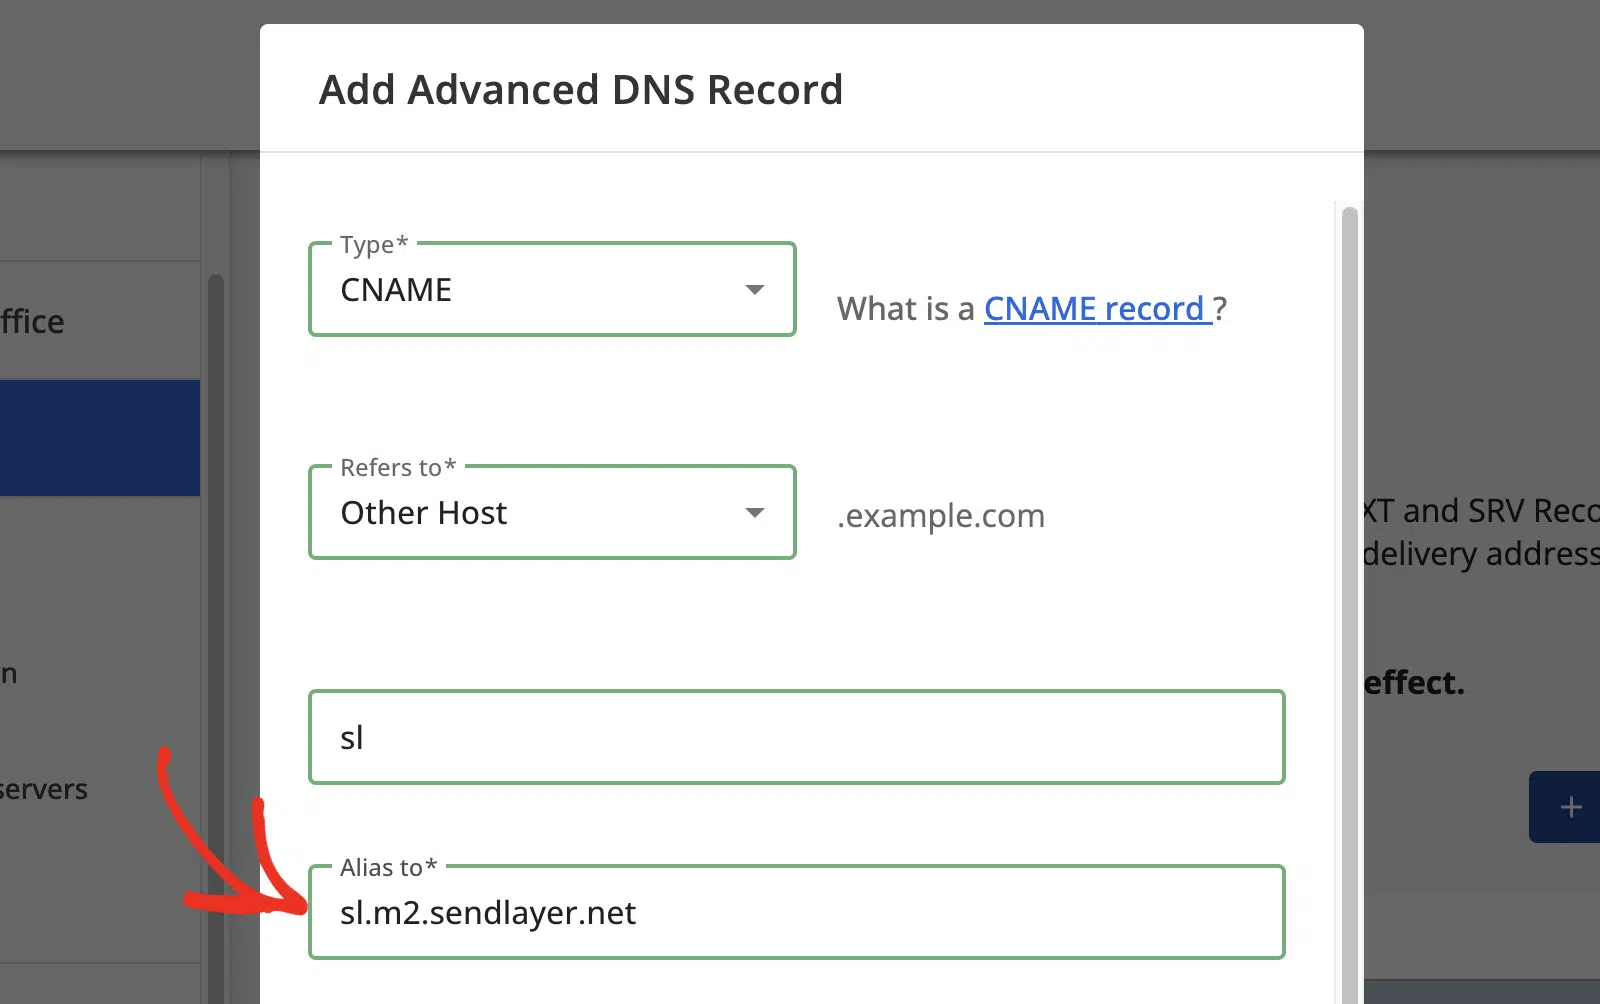
First, select the type of record you want to create from the Type dropdown.
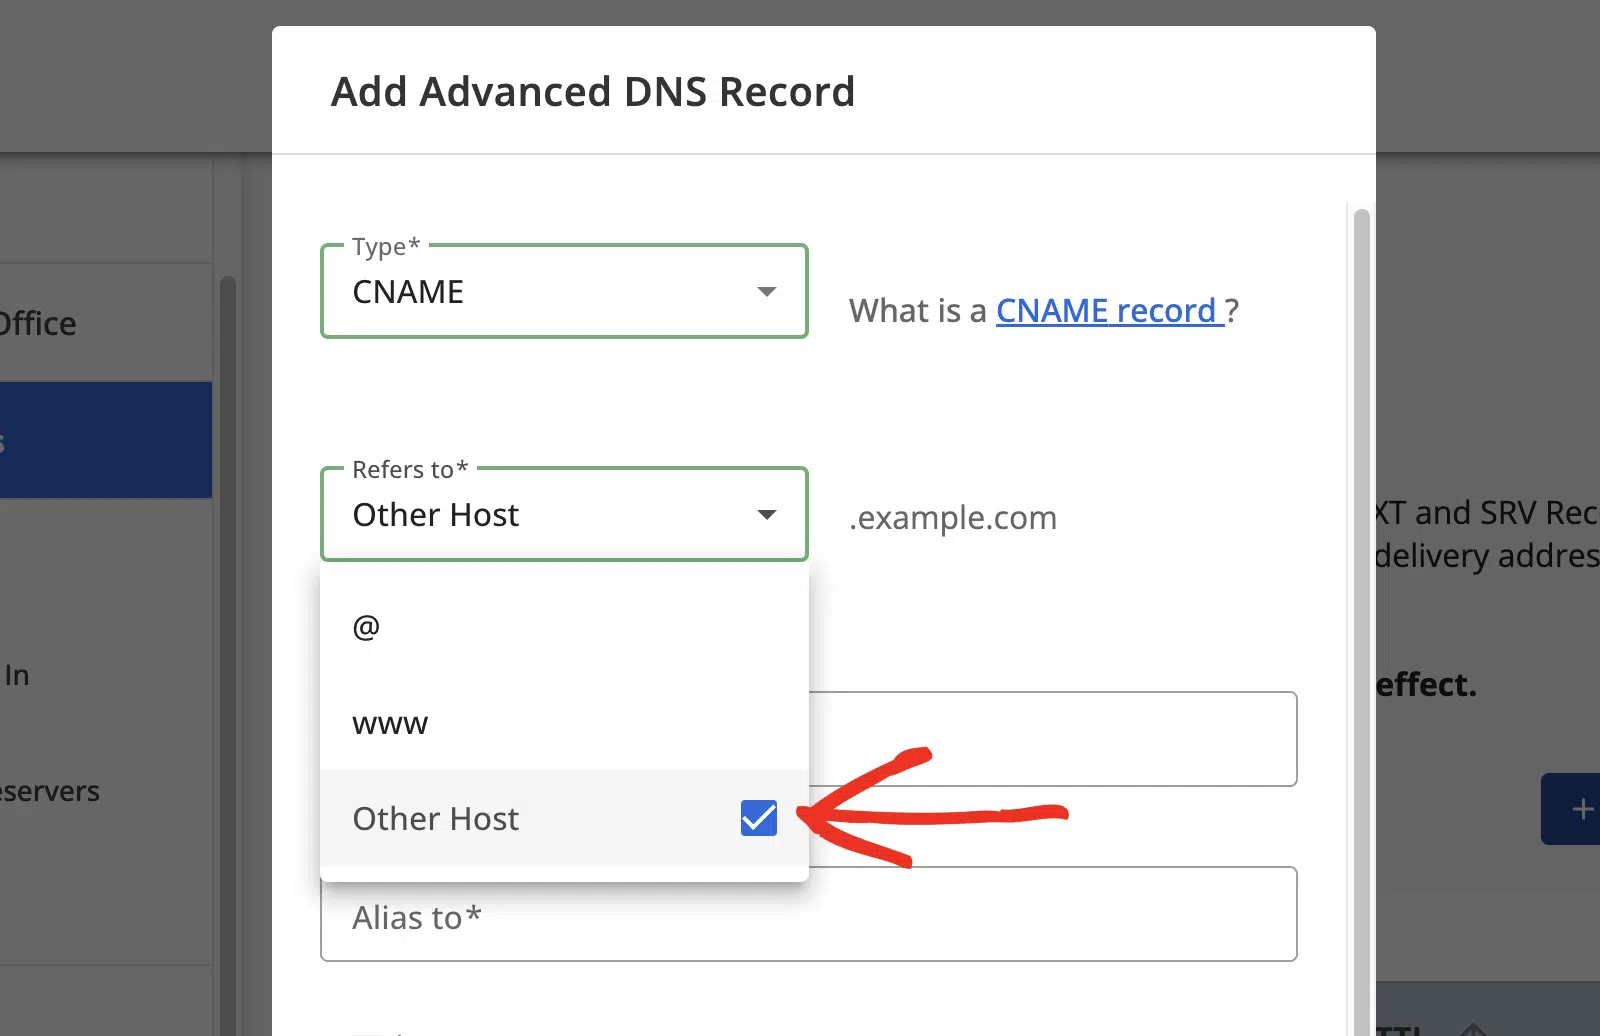
Then select Other Host from the Refers to dropdown.
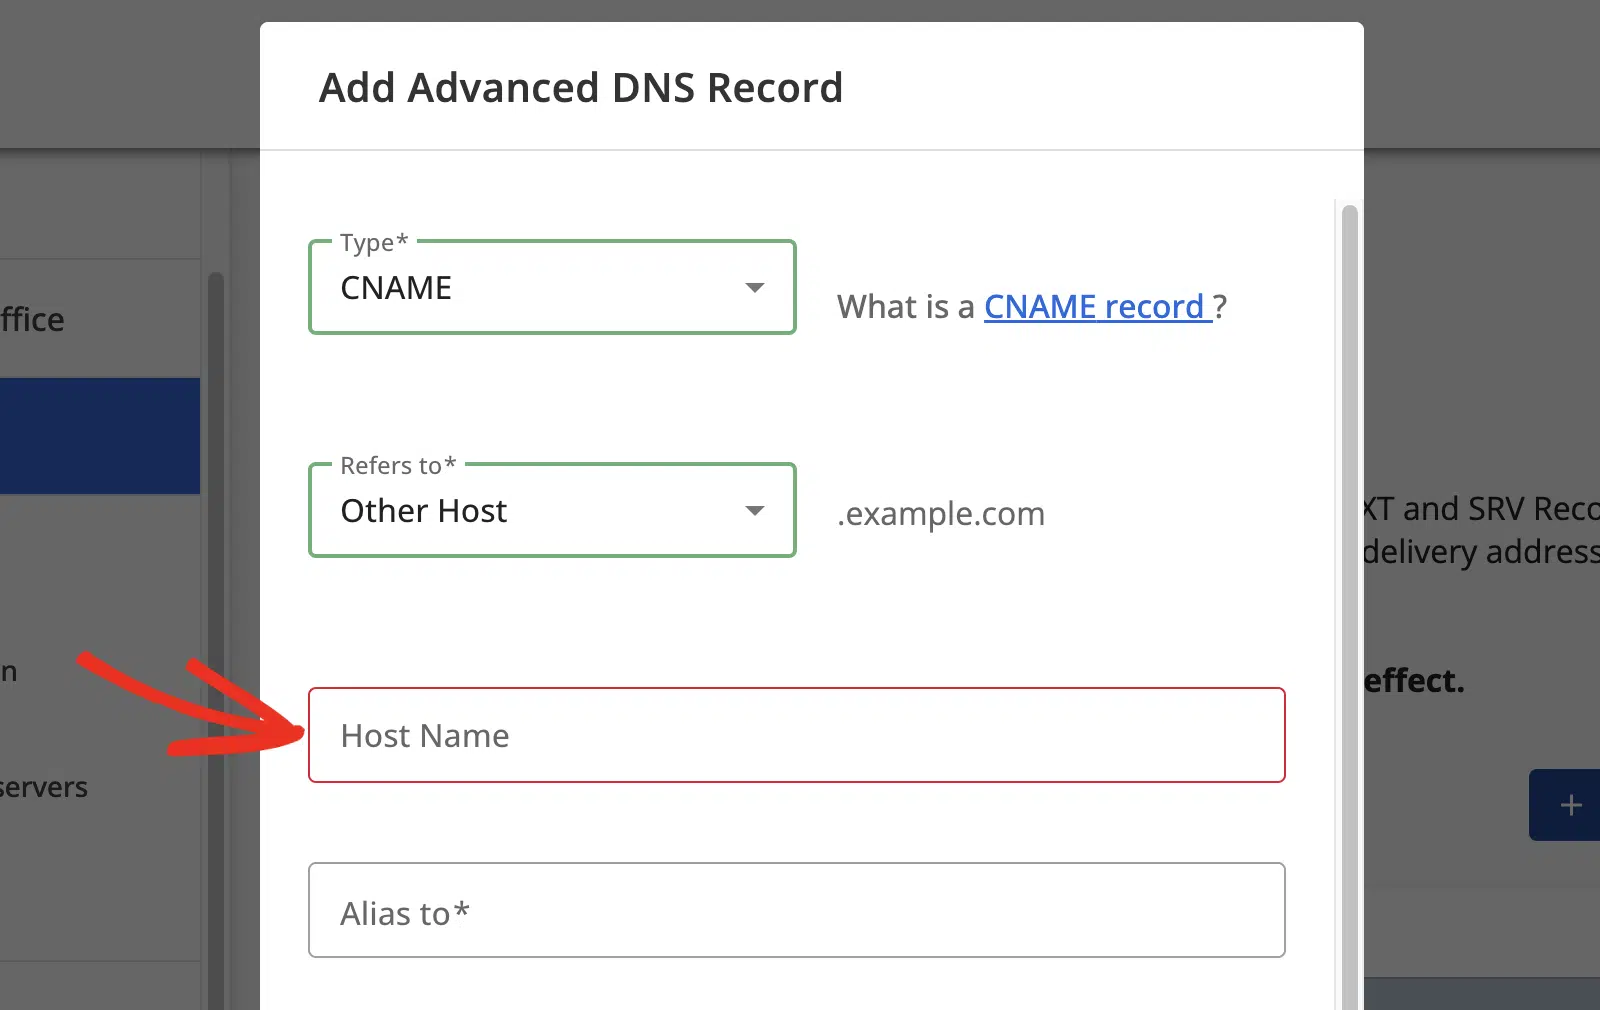
After that, enter the SendLayer Hostname into the Host Name field in Bluehost.
Next, add the SendLayer Value to the Alias to field.
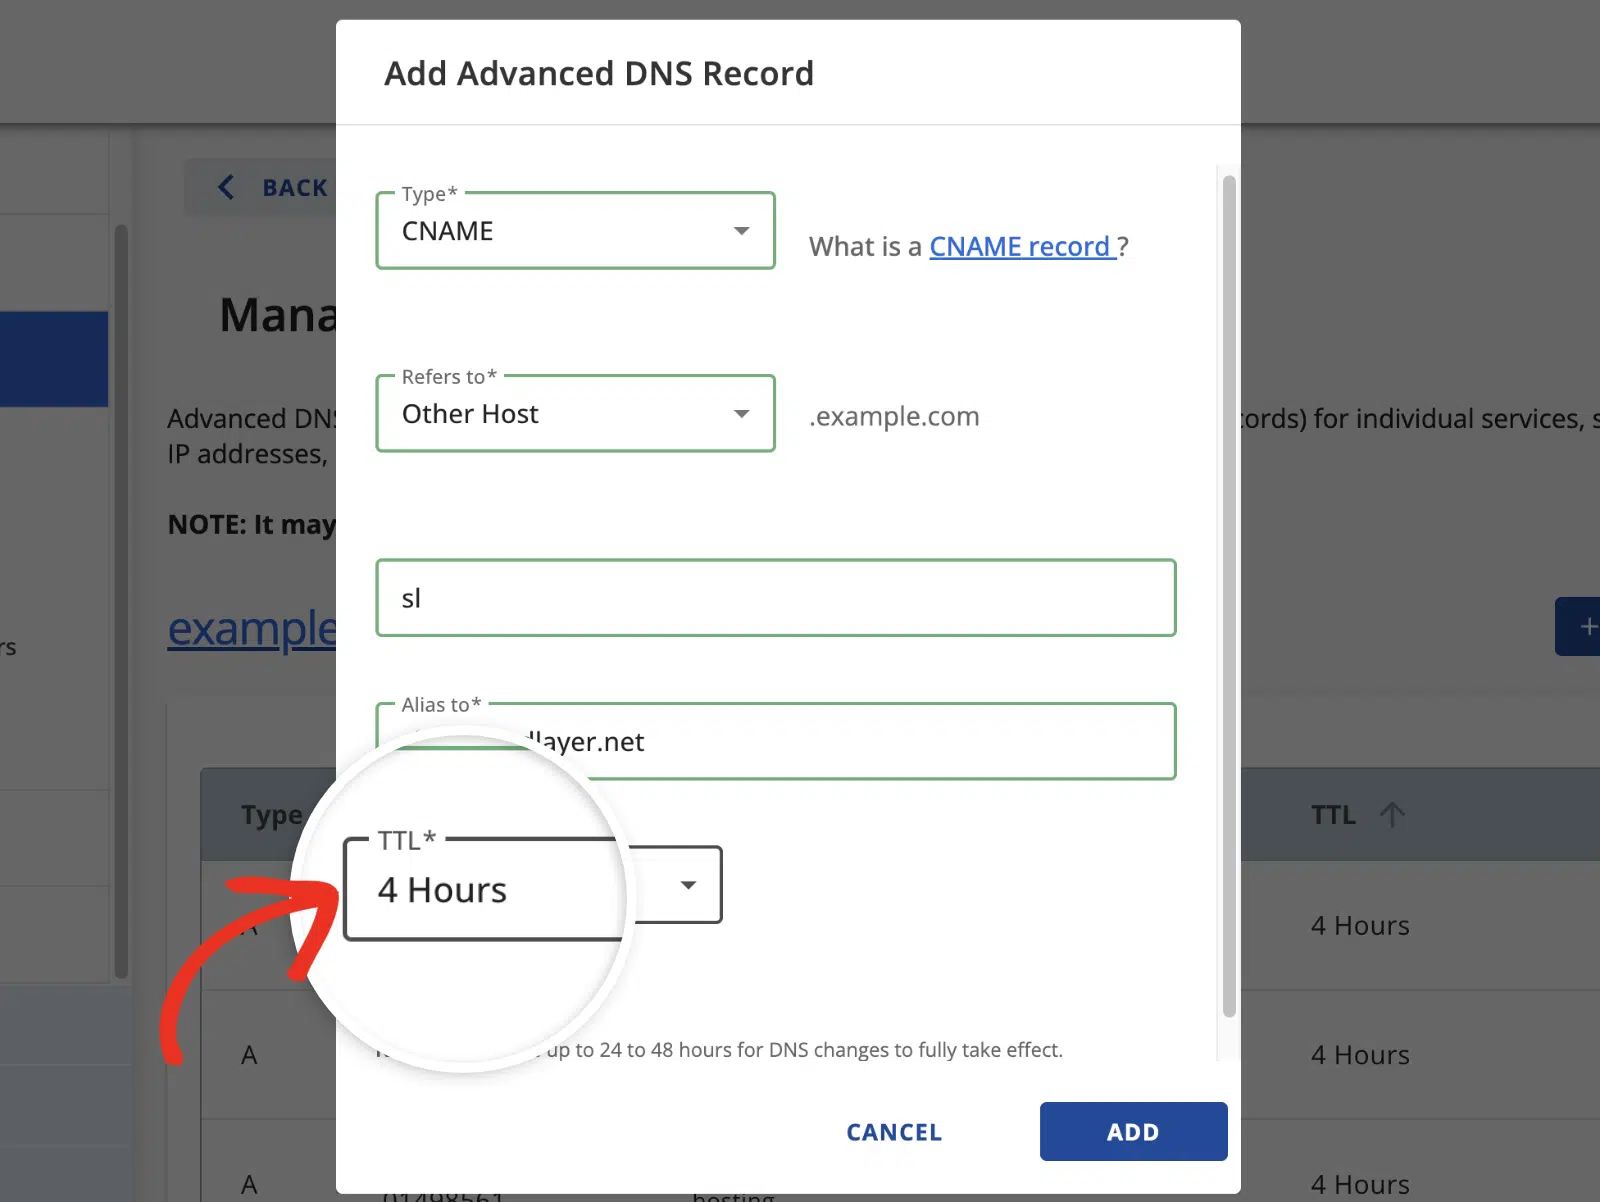
For the TTL (Time To Live), select 4 Hours.
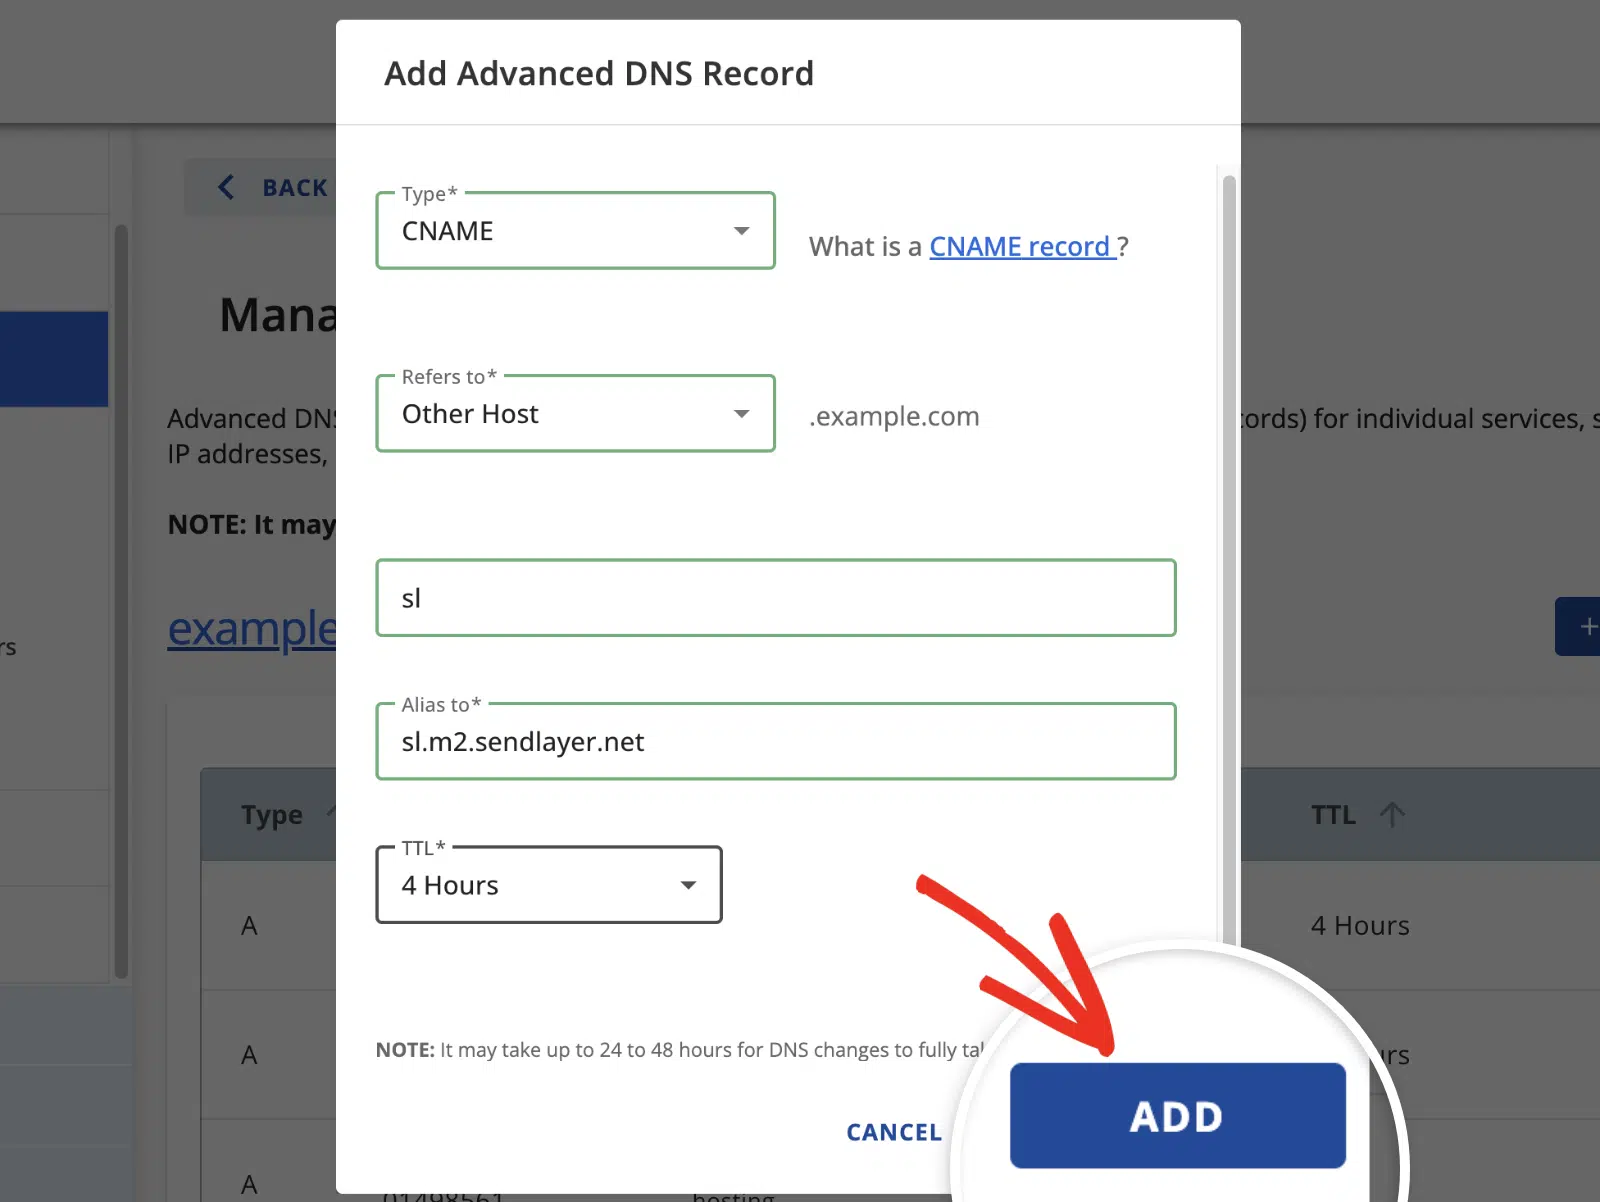
Finally, click on the ADD button to save your new record.
Once you’ve added the first record, repeat the steps above to add the remaining DNS records.
Note: It can take up to 24-48 hours for DNS changes to propagate.
Verifying Your DNS Records
After adding DNS records to support WP Mail SMTP, we recommend verifying that they’ve been implemented correctly. This step helps ensure optimal email deliverability by confirming that your outgoing emails are authenticated.
There are a couple of ways to verify your DNS records:
- Sending a test email: Utilize WP Mail SMTP’s built-in tool for sending a test email. If there’s an issue with your DNS records, an error notification will pop up.
- Using the Site Health tool: The WordPress Site Health tool can help identify any DNS verification problems. If there’s a verification issue with your DNS records, you’ll see a message that provides actions you can take to help resolve it.
For a thorough walkthrough on how to use these tools, be sure to check out our complete guide to verifying your DNS records.
Note: Remember, changes to DNS settings might take up to 48 hours to fully propagate. If you’ve made recent updates, giving it a little more time before troubleshooting might be worthwhile.
That’s it! Now you know how to add DNS records on domains hosted with Bluehost.
Next, want to keep records of every email that’s sent out from your WordPress site? Checkout our tutorial on setting up email logging to learn how.