AI Summary
Note: This guide applies to the Amazon SES mailer in WP Mail SMTP.
What This Error Means
Amazon SES requires email addresses or domains to be verified before they can send mail. All new AWS accounts start in Sandbox mode, which means both the From address and the To address must be verified. In production mode, only the From address or domain needs verification.
Common Causes
- The From Email in WP Mail SMTP doesn’t match any verified identity in Amazon SES (typo or wrong address)
- SES account is in Sandbox mode, so the test recipient email also needs to be verified (most common for new setups)
- SES account is still in Sandbox mode and needs production access to send to any recipient
- From email address or domain not verified in Amazon SES
- You verified the sending identity in a different AWS region than the Closest Region in WP Mail SMTP
How to Fix
Here is the complete step-by-step guide to resolving the error.
Method 1: Check the From Email Address
The most common cause is a From Email in WP Mail SMTP that doesn’t match any verified identity in Amazon SES, often a simple typo.
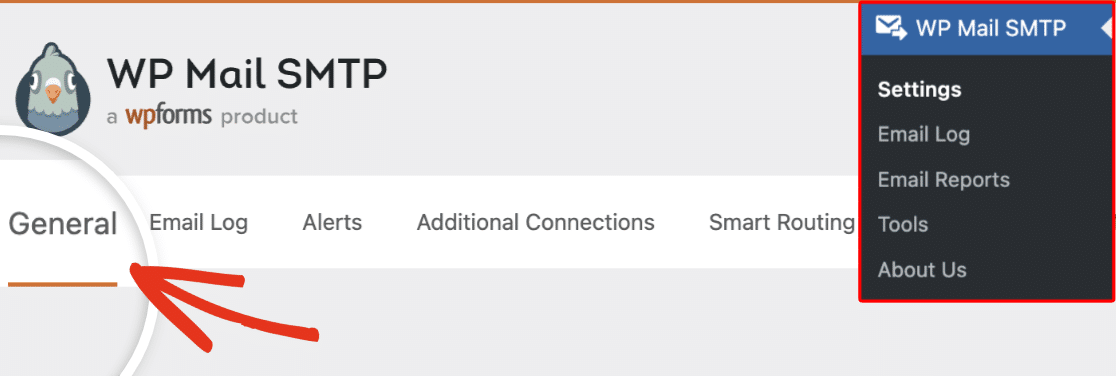
To start, navigate to WP Mail SMTP » Settings.
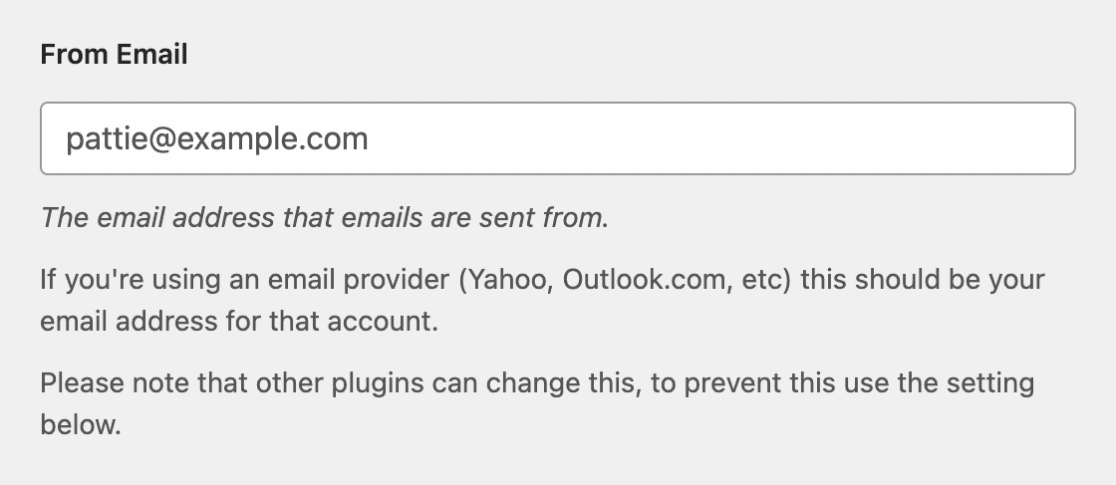
Check the From Email field at the top of the page.
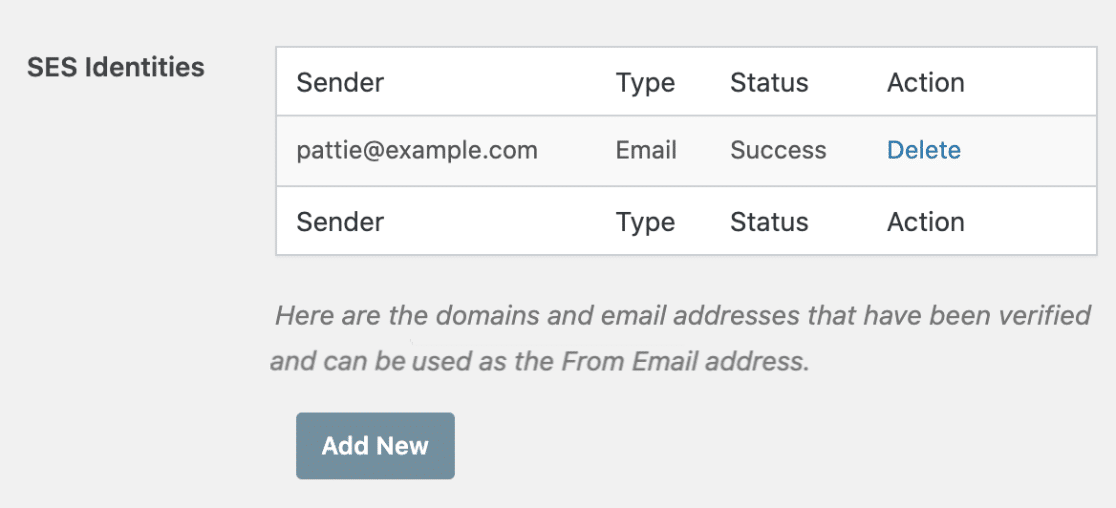
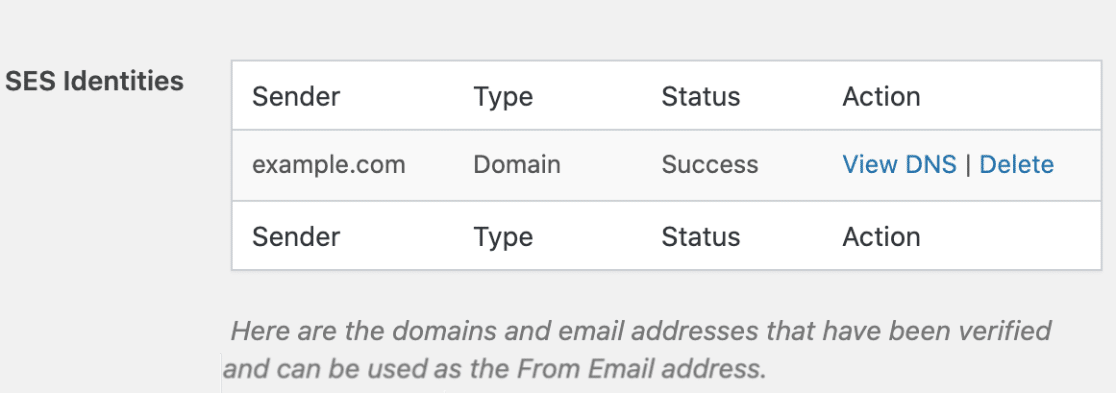
Scroll down to the SES Identities section and confirm that either the exact From Email address appears in the list with a Success status, or the domain part of the From Email (everything after the @) appears as a verified domain.
If the From Email doesn’t match any verified identity, correct it to match one and click Save Settings.
After that, send a test email to ensure everything works as expected.
If the error is gone, you’re done. If it persists, continue second troubleshooting method.
Method 2: Verify the Sending Identity
If the From Email is correct but the identity itself is missing or pending in the SES Identities table, verify it now. If the identity already shows Success, skip to Step 3.
Go to WP Mail SMTP » Settings and scroll down to the SES Identities section.
If the identity shows Pending, the DNS records may not be in place yet. Click View DNS to see the required CNAME records and add any that are missing to your domain’s DNS settings. Skip to step 4 below to wait for propagation.
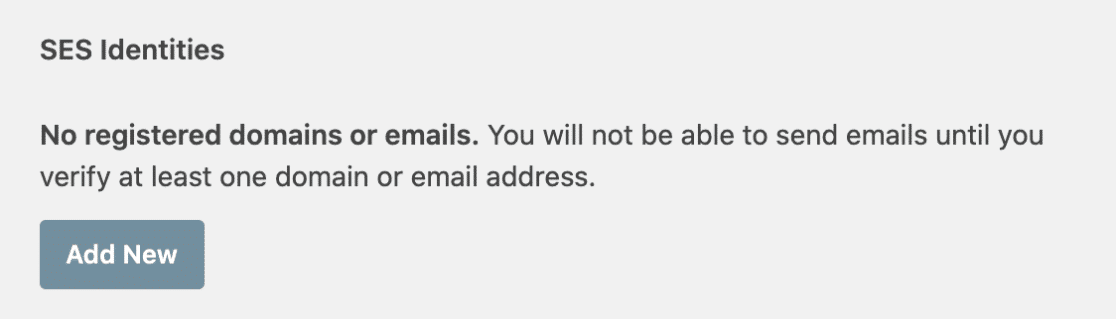
If your From Email address or domain doesn’t appear in the table at all, click Add New.
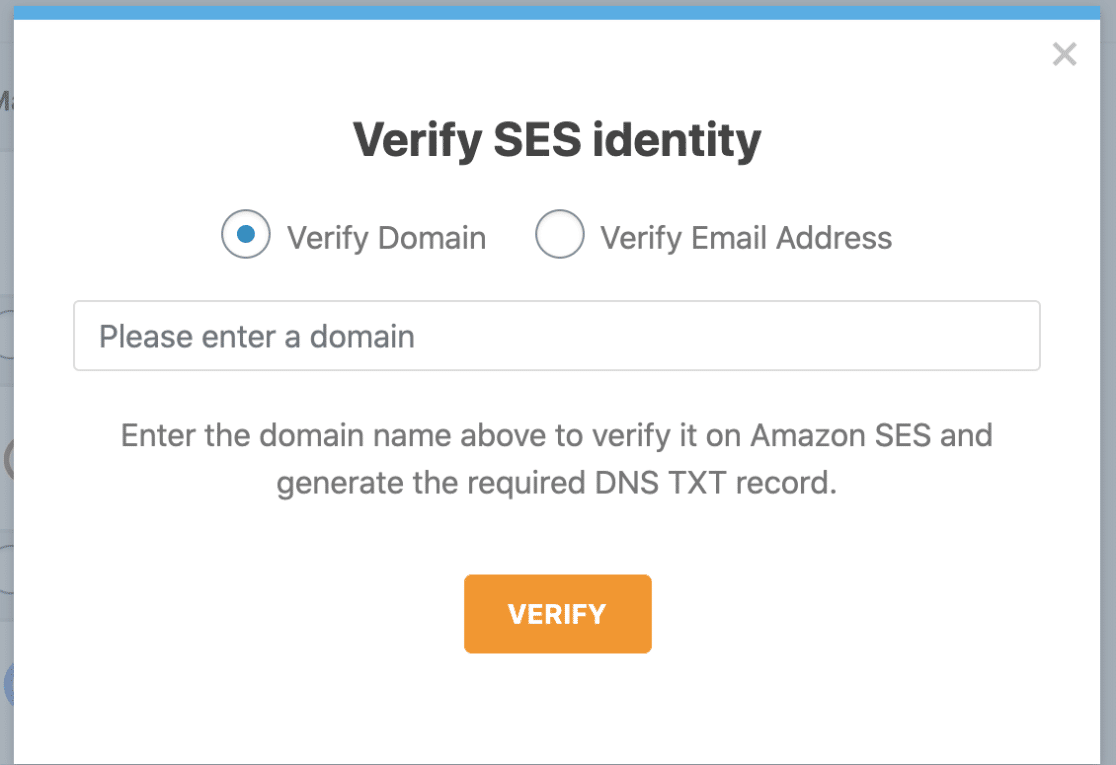
To verify a domain (recommended):
Select the Verify Domain option. Then enter your domain in the Please enter a domain field and click VERIFY.
The plugin displays three CNAME records. Add all three Name and Value pairs to your domain’s DNS settings.
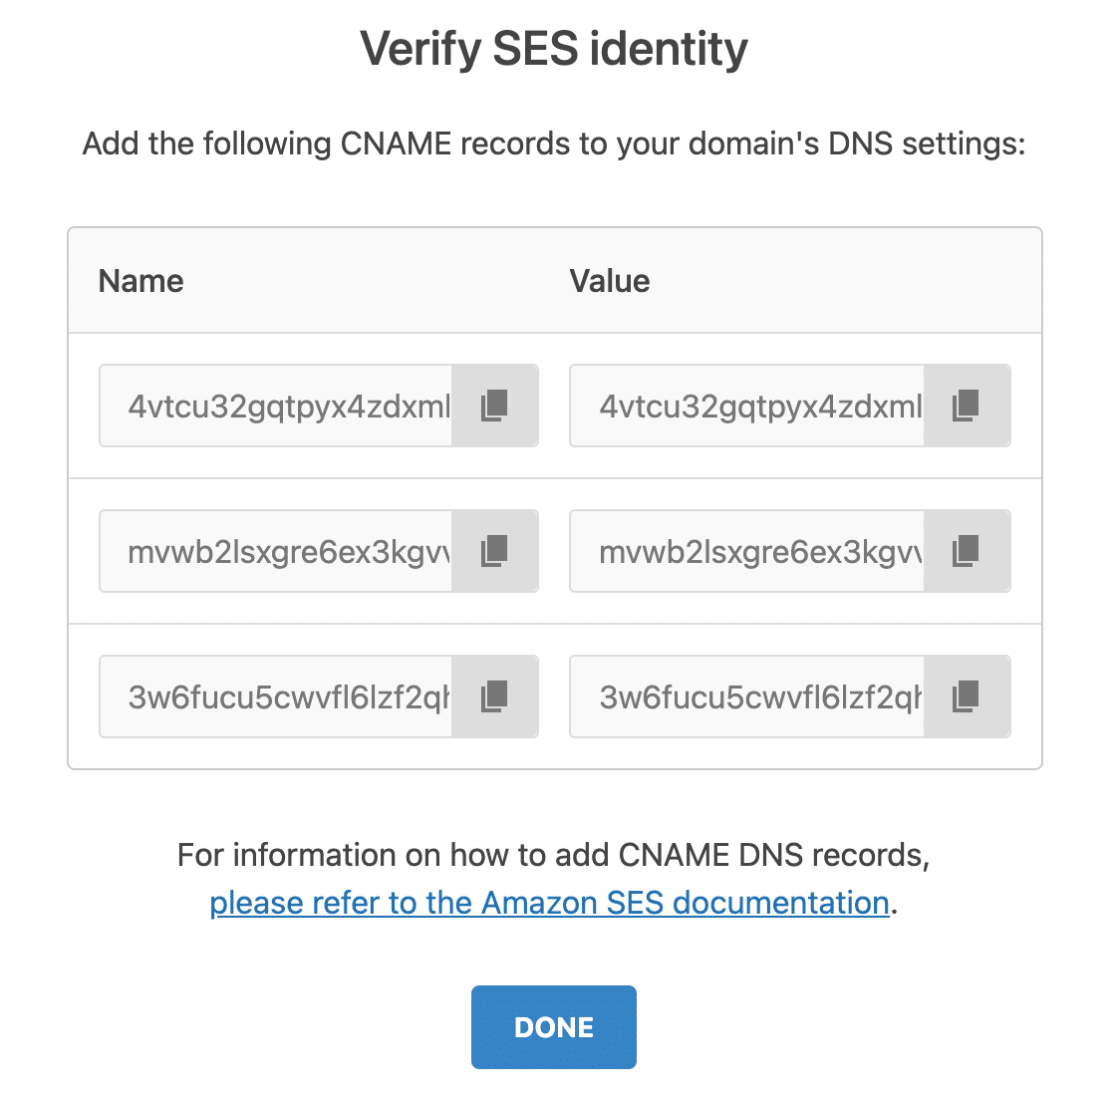
DNS propagation can take up to 24–48 hours, though it’s usually faster.
After adding the DNS records, return to WP Mail SMTP » Settings and refresh the page. The domain should show as verified.
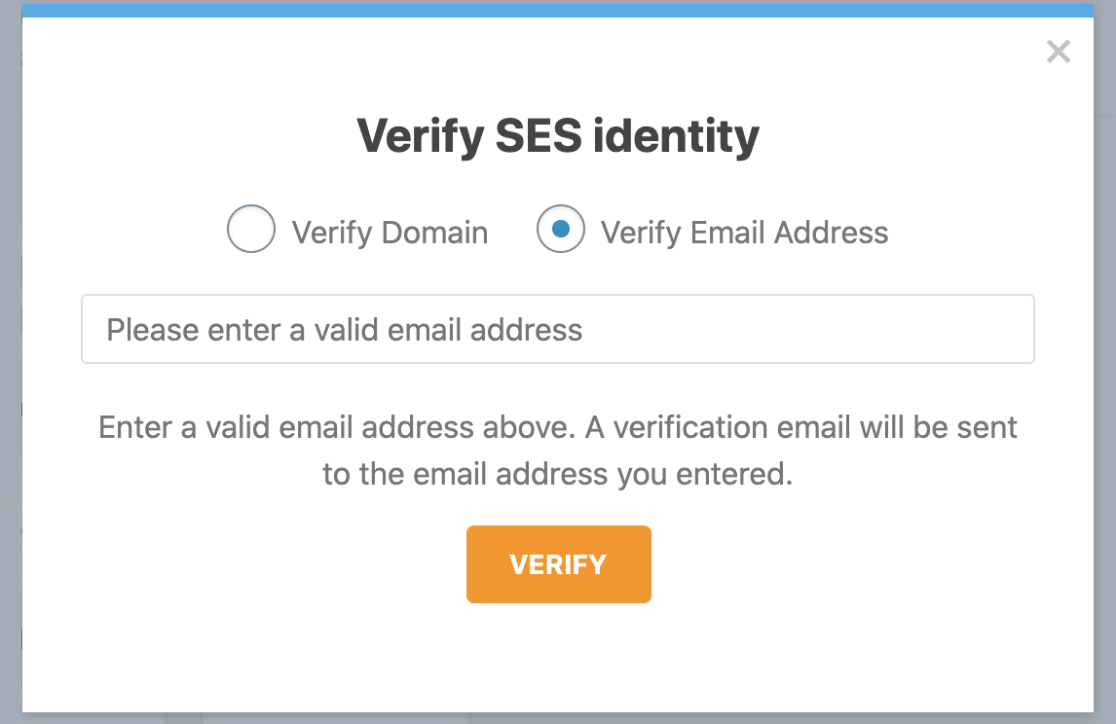
To verify an email address (simpler):
Select the Verify Email Address option. Then enter the email address in the Please enter a valid email address field and click VERIFY.
Check your email inbox for a verification email from AWS.
Click the verification link within 24 hours.
Once verified, return to WP Mail SMTP » Settings and refresh the page. The email should show as verified.
If the error is gone, you’re done. If it persists, continue to Method 3.
Method 3: Verify the Test Recipient
If you just finished setting up Amazon SES and are sending your first test email, your account is almost certainly in Sandbox mode. In Sandbox mode, the recipient email address must also be verified, not just the sender.
To verify the recipient email address, go to WP Mail SMTP » Settings and scroll down to the SES Identities section.
Once there, click Add New.
Next, select the Verify Email Address option. Go ahead and enter the recipient’s email address (the address you’re trying to send to) in the Please enter a valid email address field.
Once done, click VERIFY.
Check the recipient’s inbox for a verification email from AWS. Click the verification link within 24 hours (the link expires after that).
After verifying the email, send a test email to ensure everything works as expected.
If the error is gone, you’re done, but you’ll need to verify every new recipient while in Sandbox mode. To remove this restriction permanently, continue to method 4.
Method 4: Request Production Access
While in Sandbox mode you have to verify every recipient individually. Requesting production access removes this restriction so you can send to any email address.
Navigate to the Amazon Service Quotas dashboard (console.aws.amazon.com/servicequotas).
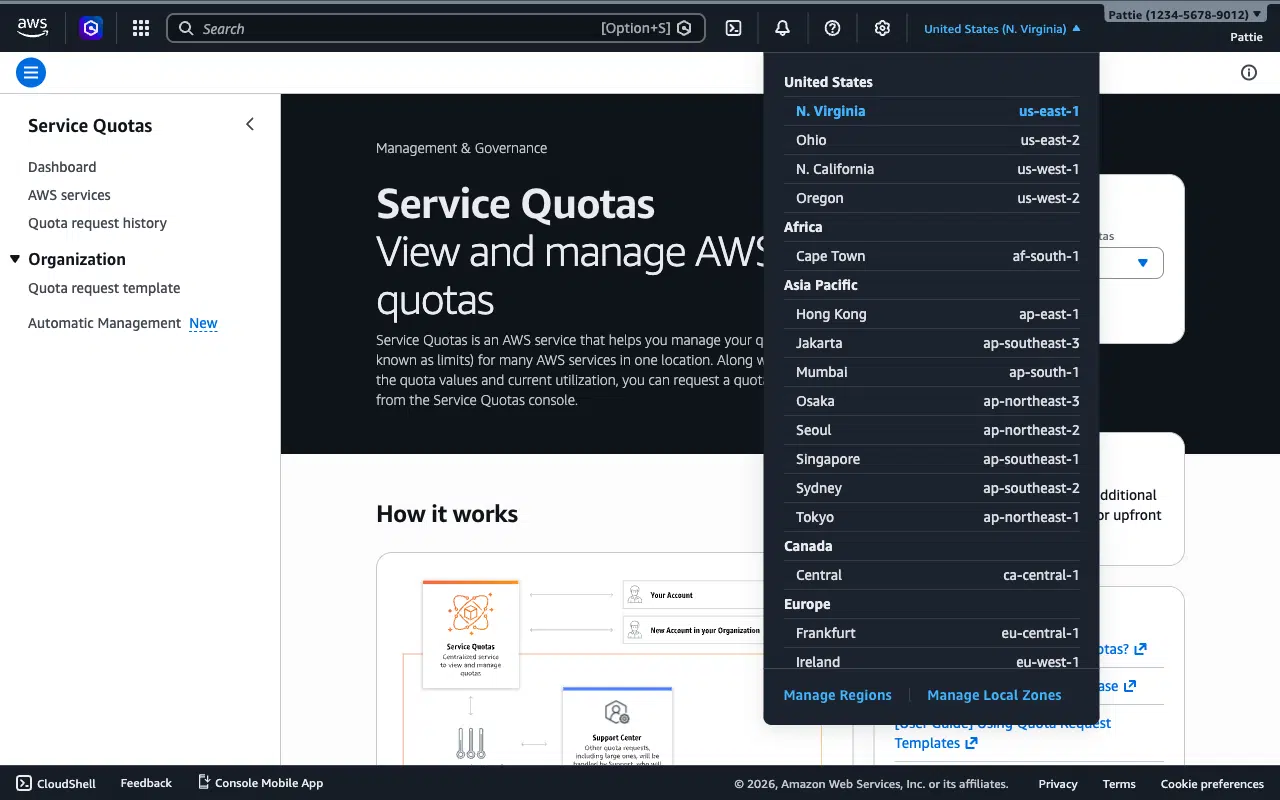
Click the Region dropdown in the top-right corner.
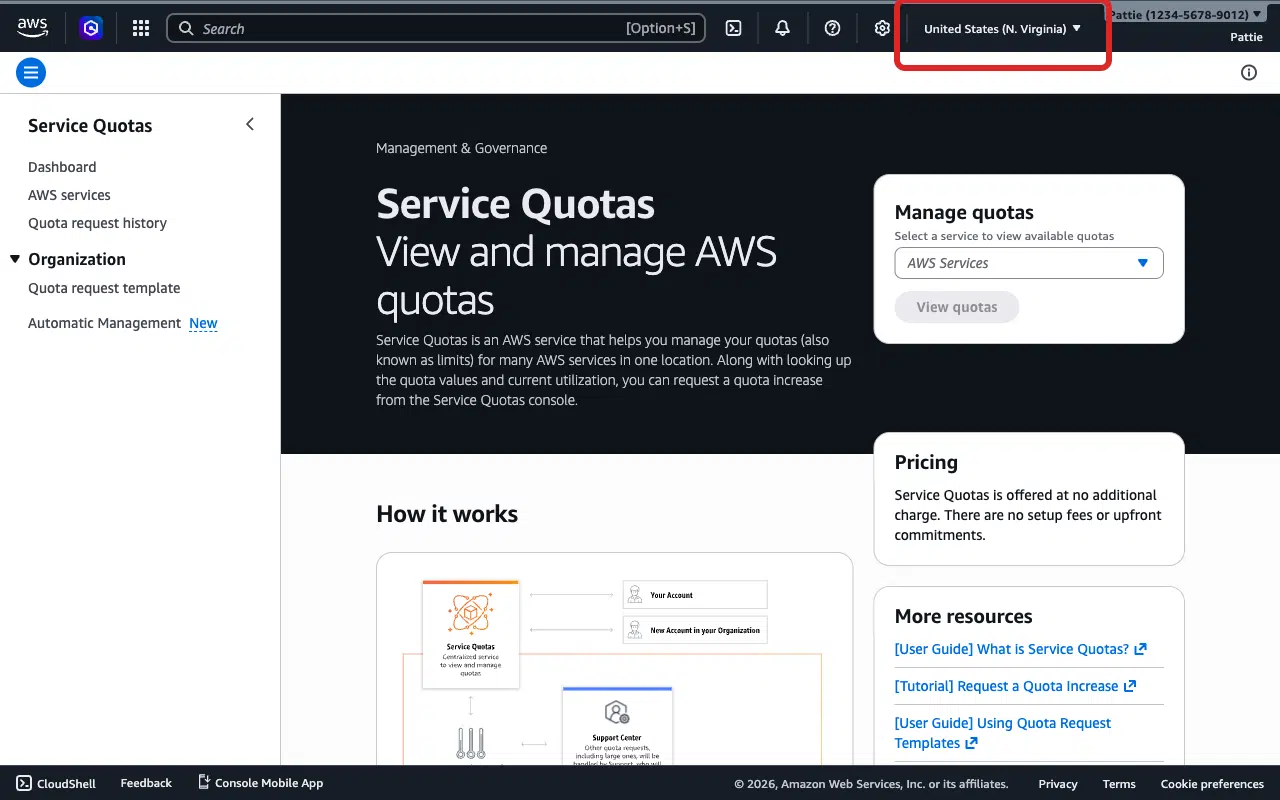
Select the region that matches the Closest Region in WP Mail SMTP.
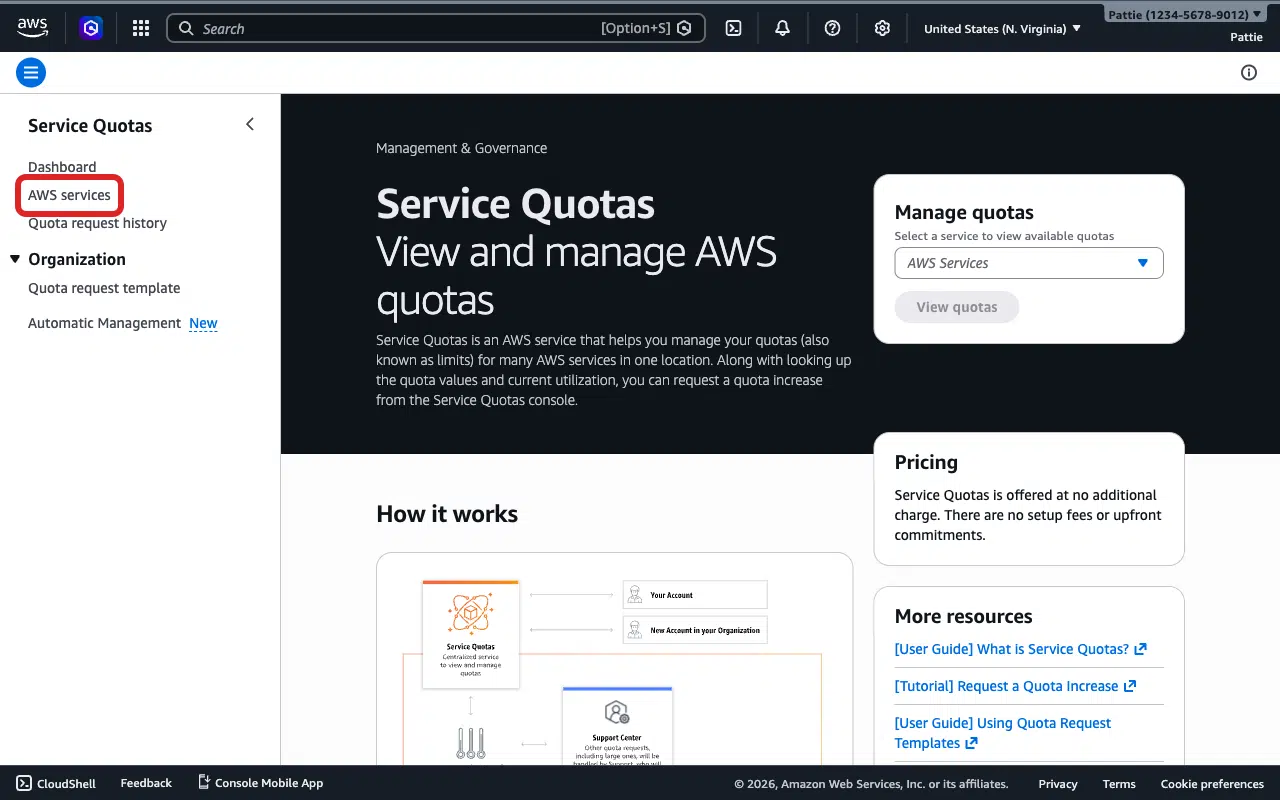
Click AWS services in the left sidebar.
Type Amazon Simple Email Service in the search bar.
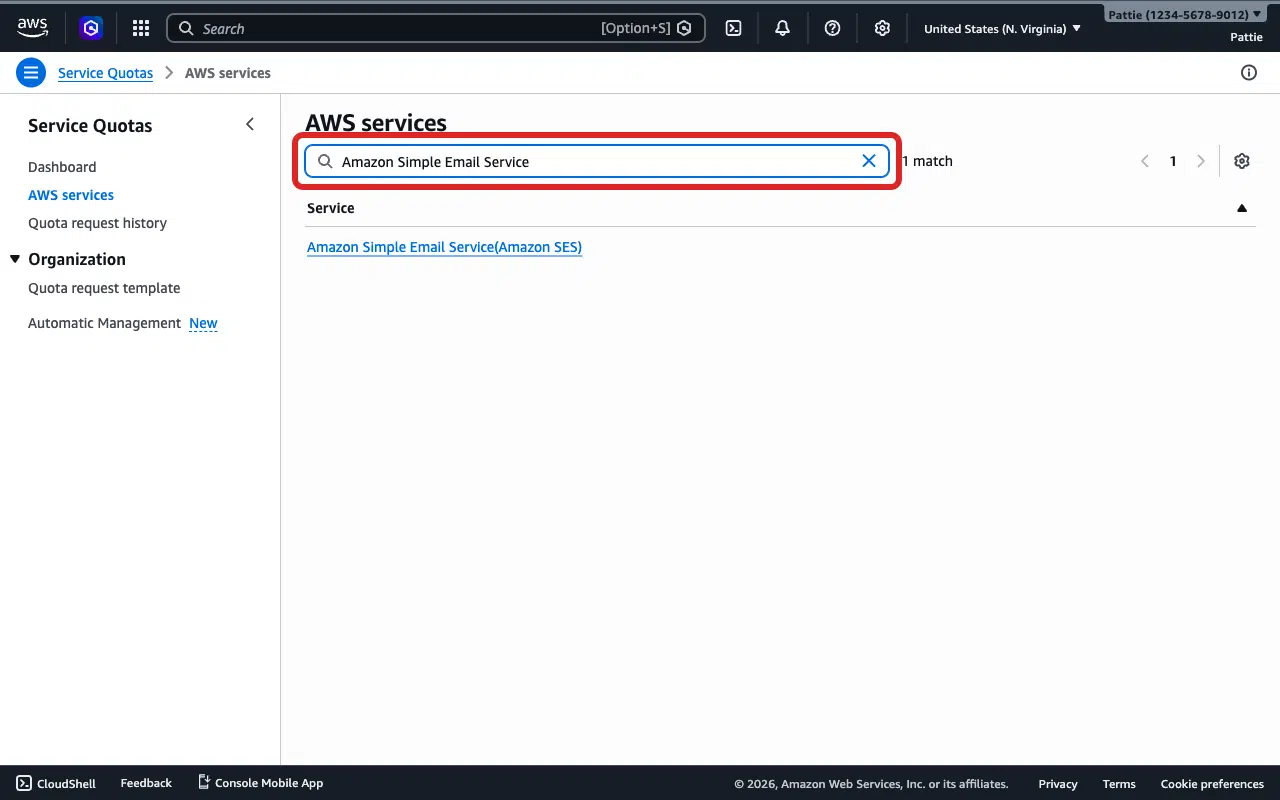
Click the Amazon Simple Email Service (Amazon SES) result.

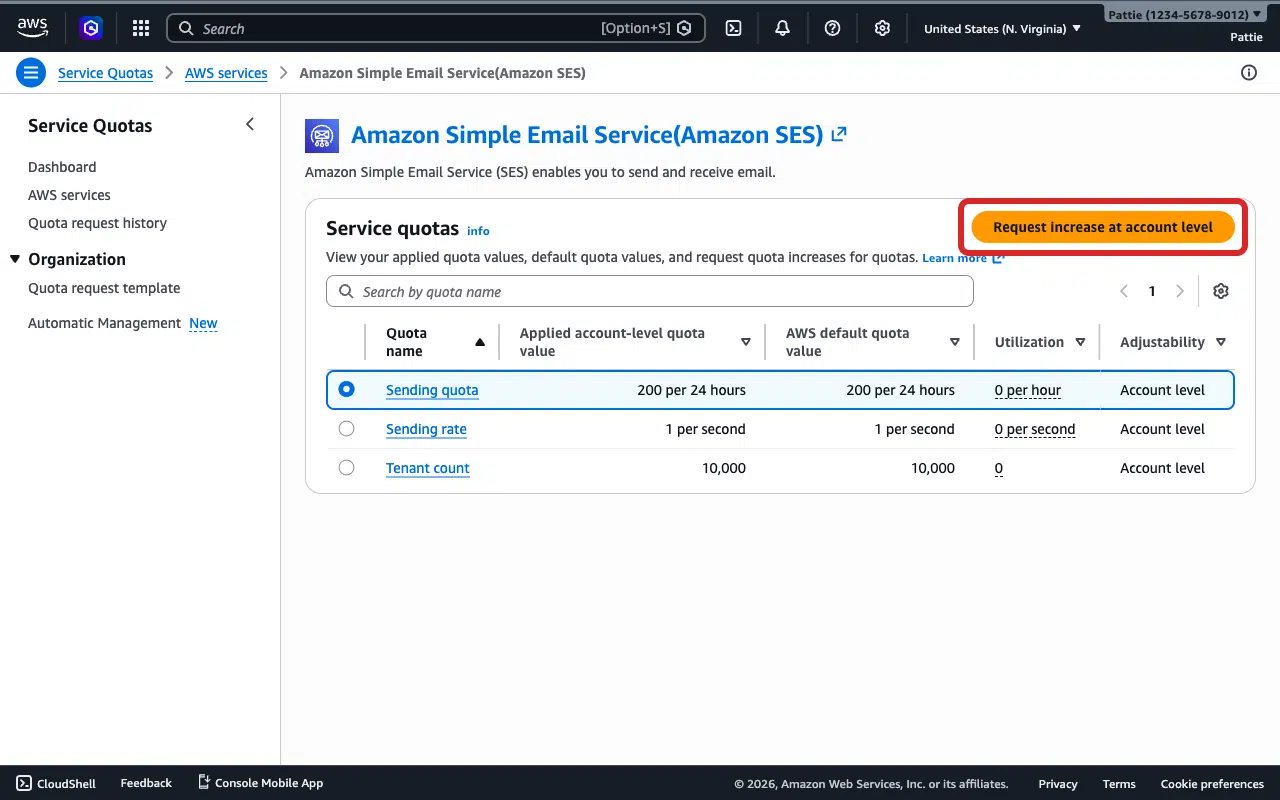
Select the option next to Sending quota.

Click Request increase at account level.
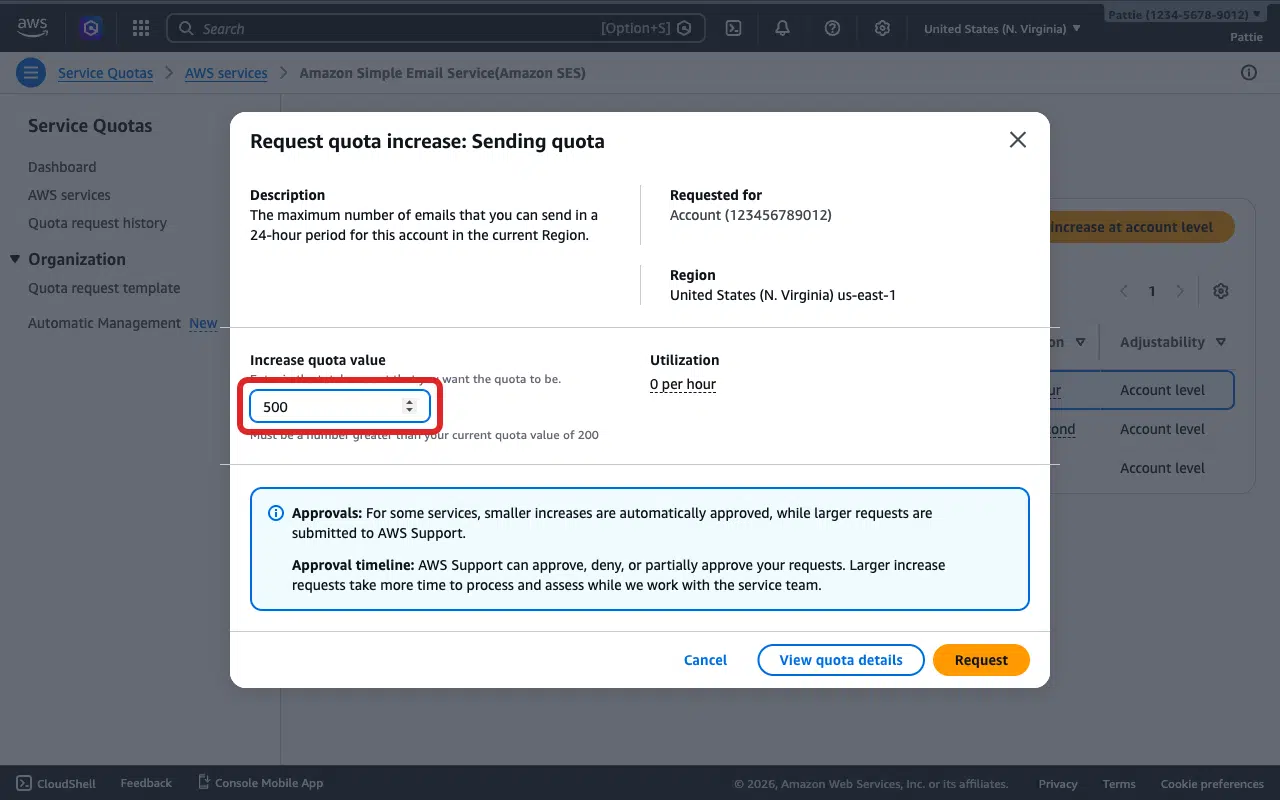
Enter your desired daily sending quota in the Increase quota value field (e.g. 500).
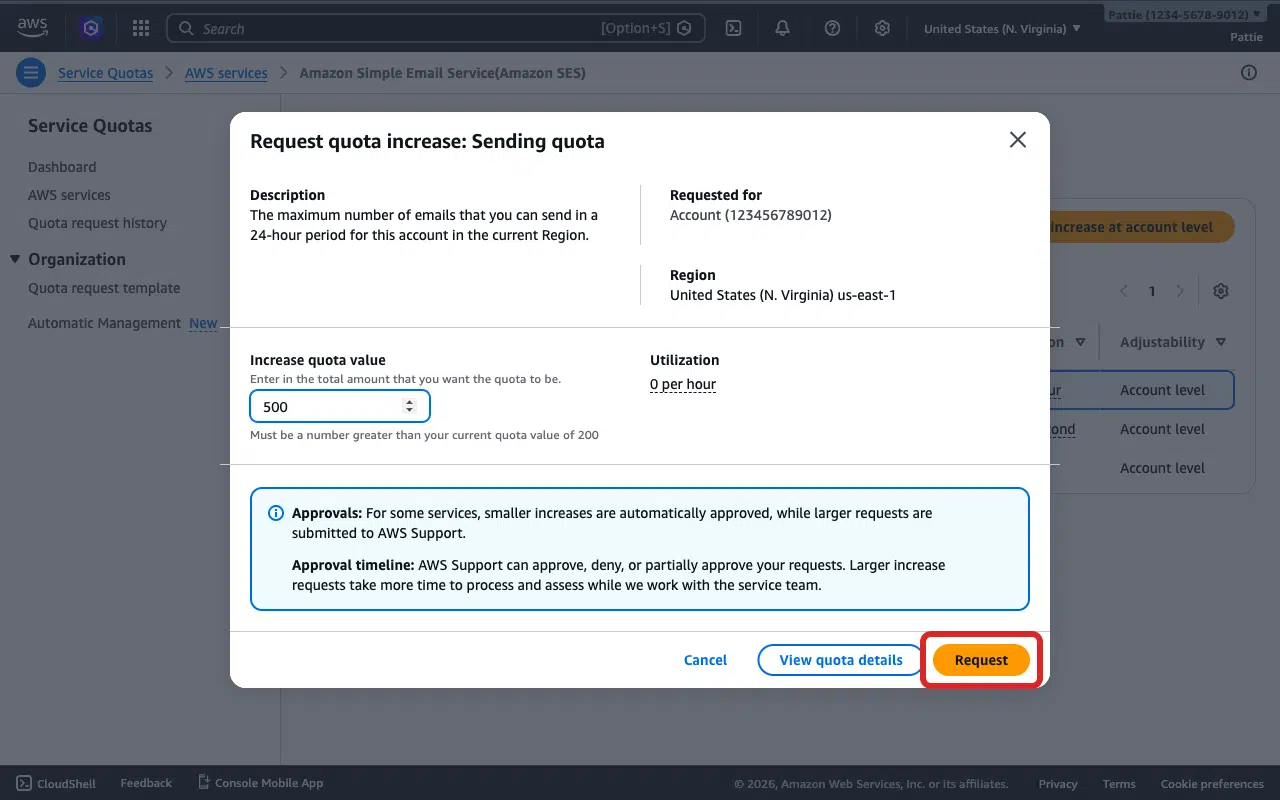
Click Request.
AWS typically reviews and approves production access requests within one business day. Once approved, you can send to any email address without recipient verification.
Send a Test Email
After resolving the issue, make sure to send a test email to ensure everything works as expected.
To do so, go to WP Mail SMTP » Tools and click the Email Test tab.
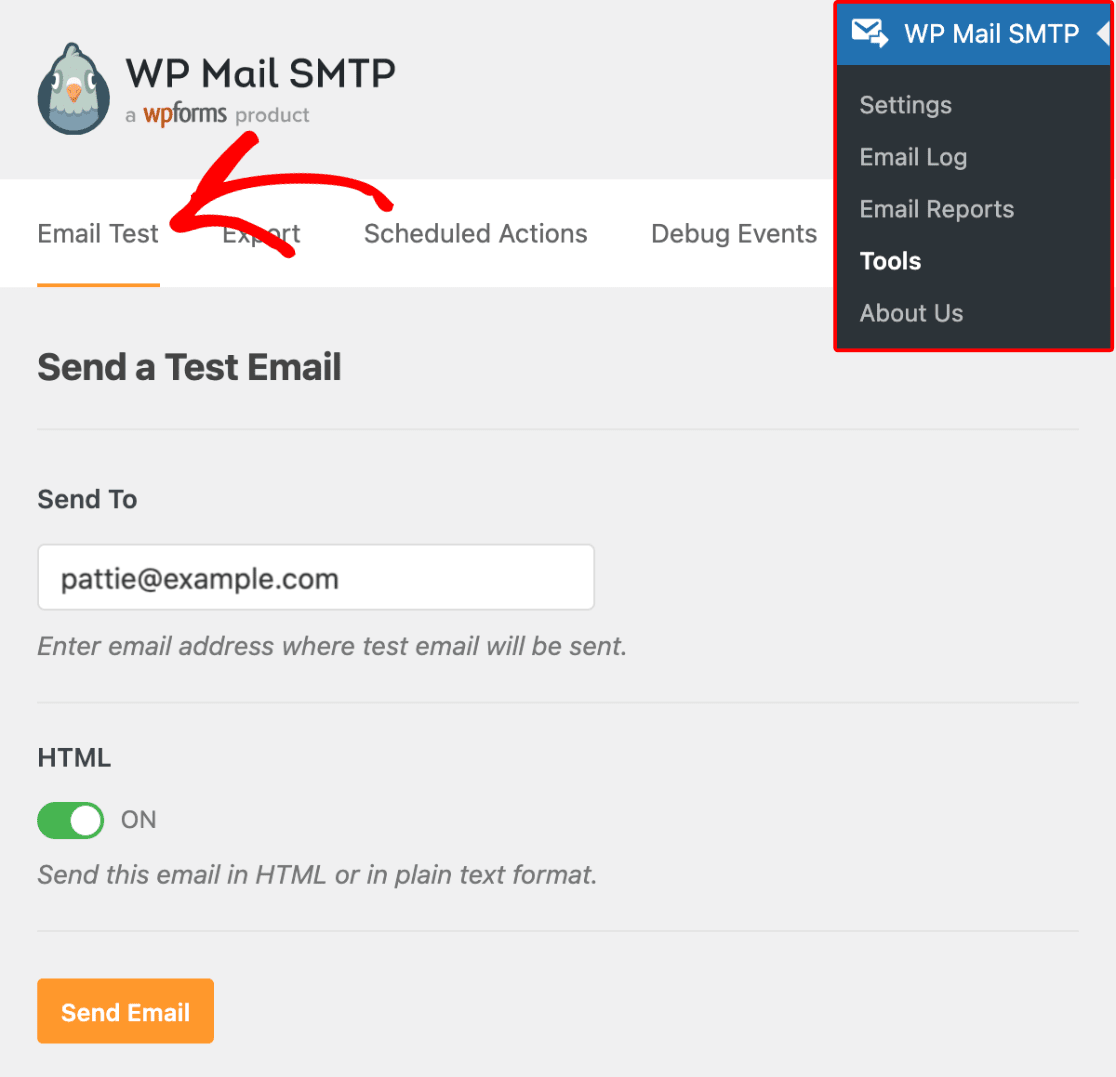
Next, enter a recipient email in the Send To field. Leave the HTML toggle ON.
Once done, click Send Email.
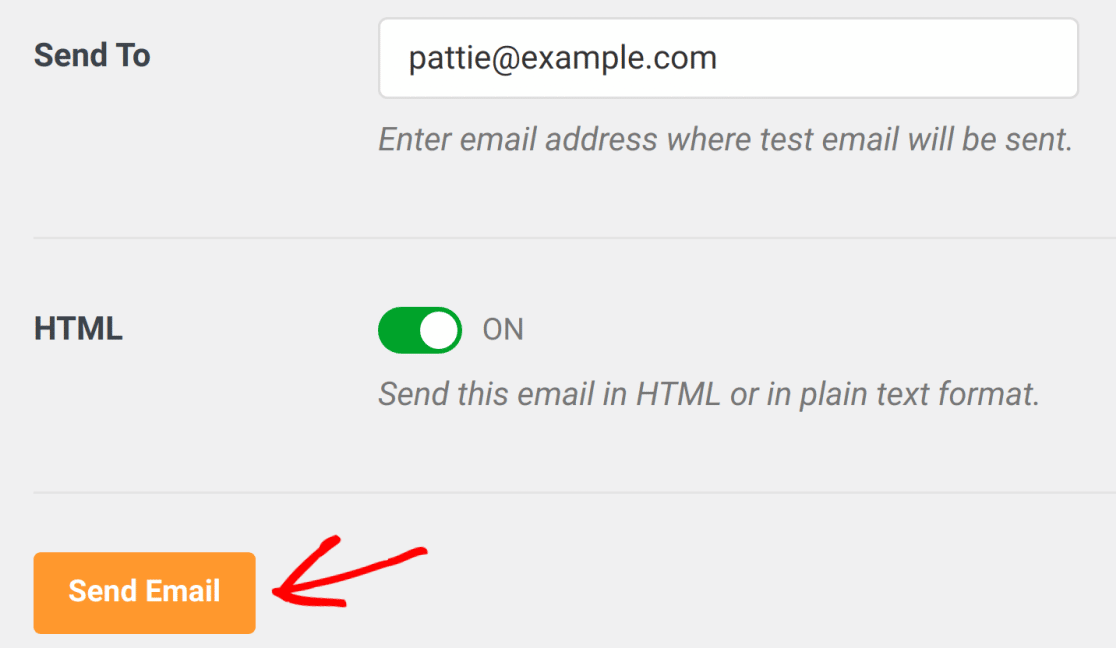
Look for the success message, then check your inbox to confirm the email arrived.
Notes
- Verifications are region-specific. If WP Mail SMTP is set to US East (N. Virginia), verify identities in that same region. If the Closest Region doesn’t match, you’ll get this error even with verified identities.
- The verification email link expires within 24 hours. Use Resend in the SES Identities table on a pending email identity to re-trigger it.
- Use View DNS on a pending domain identity to re-display the CNAME records if needed.
That’s It! You now know how to fix the ‘Email Address Not Verified’ error in Amazon SES and get your emails sending again through WP Mail SMTP.