AI Summary
Are you looking to use MailerSend email service to improve email deliverability on your WordPress site? MailerSend offers a robust email delivery service with advanced features like real-time analytics and a modern API that helps ensure your emails reach their intended recipients.
This tutorial will show you how to set up the MailerSend mailer in WP Mail SMTP.
What Is MailerSend?
MailerSend is a comprehensive email delivery service combining powerful sending infrastructure and advanced marketing features. Businesses worldwide trust it to handle transactional and marketing emails with high deliverability rates.
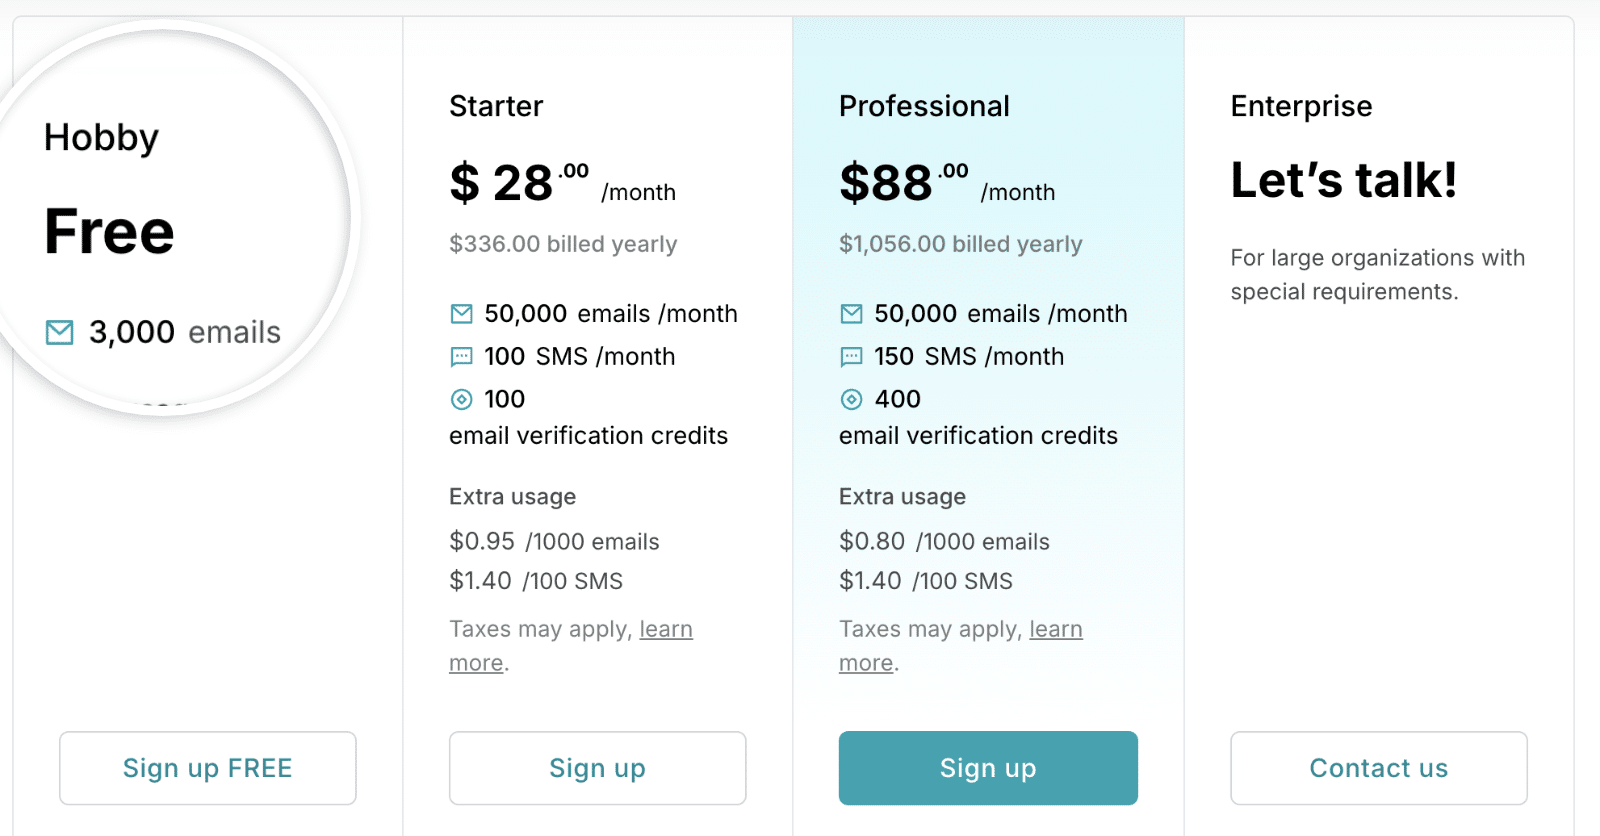
- Cost: MailerSend offers a free plan that includes up to 3,000 emails monthly (with a daily limit of 1000 emails). Paid plans start with higher sending limits and include additional features like live chat support, A/B testing, and advanced analytics.
- From Email Requirements: You’ll need to use an email address at your domain (e.g., [email protected]) to use MailerSend with WP Mail SMTP.
- Bottom Line: MailerSend is an excellent choice for businesses of all sizes, offering a scalable email delivery infrastructure combined with marketing capabilities.
Note: For more information about our supported mailers, please check out the complete guide to mailers in WP Mail SMTP
Setting Up Your MailerSend Account
To start, you’ll need to create a MailerSend account (if you don’t have one already). For this, visit MailerSend’s pricing page and choose the plan that best fits your needs.
For our example, we’ll choose their free plan. However, the setup process will be the same regardless of the plan you choose.
After signing up and verifying your email, you’ll be directed to your MailerSend account dashboard, where you can begin setting up your account.
Authorizing Your Domain
MailerSend provides test credentials for testing out their email service. You can use it if you’d like to test their email service before adding your domain.
We’ll skip this step and proceed to add a sending domain. This process verifies that you own the domain you’re sending from and helps improve your email deliverability.
Adding Your Sending Domain
To add a sending domain, log in to your MailerSend account and then navigate to Email » Domains.
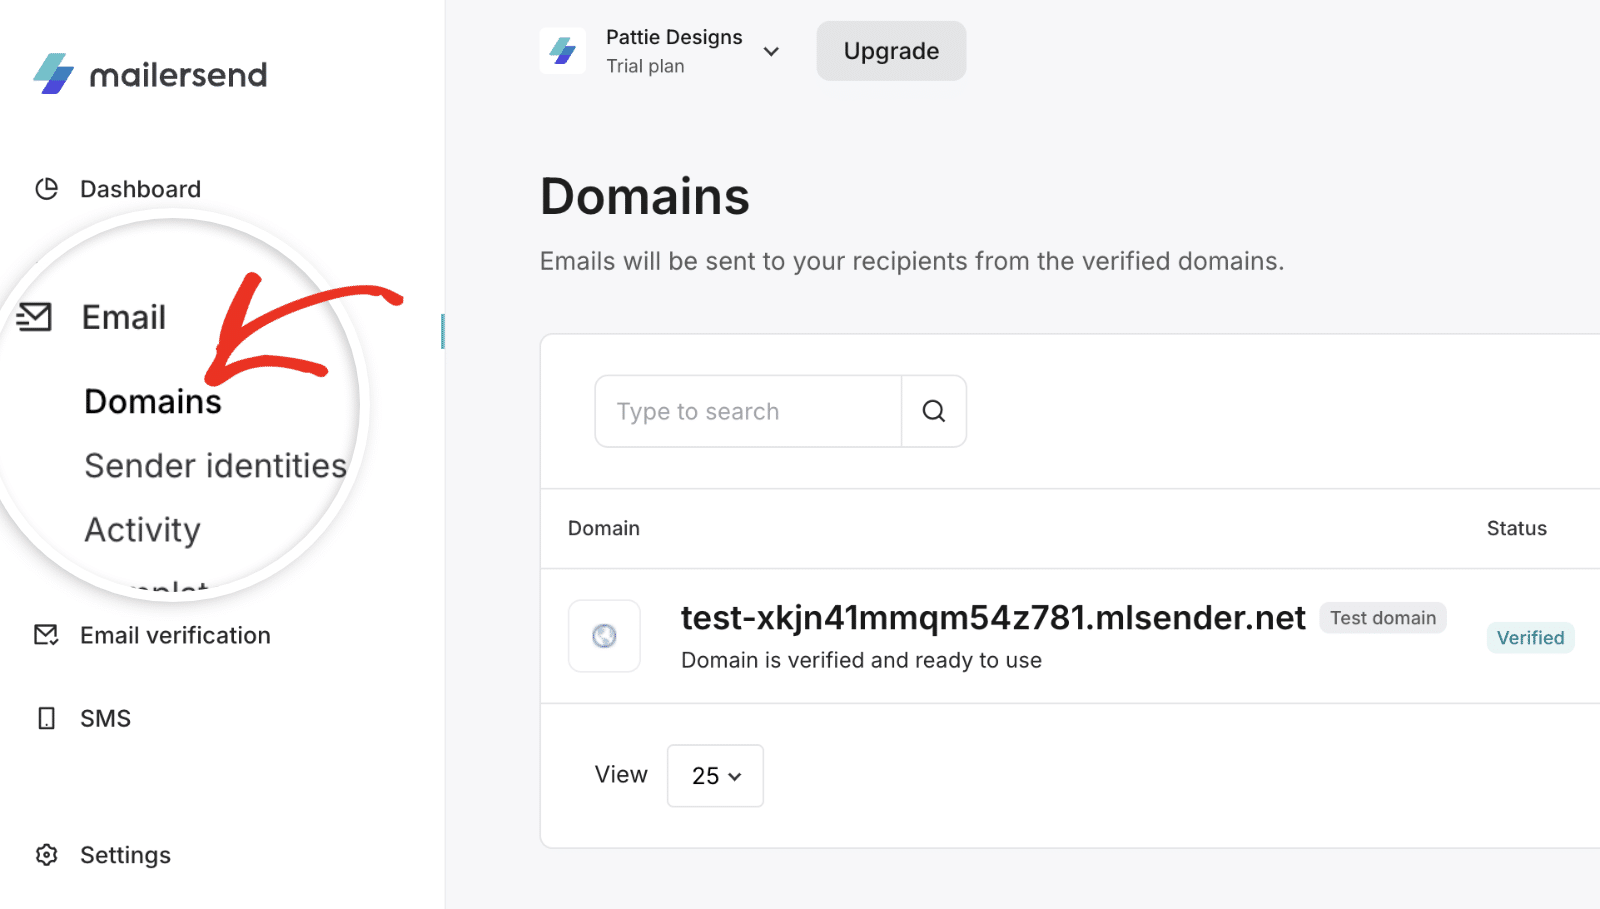
Here, you’ll see your test domain details. To add a new domain, click the Add domain button.

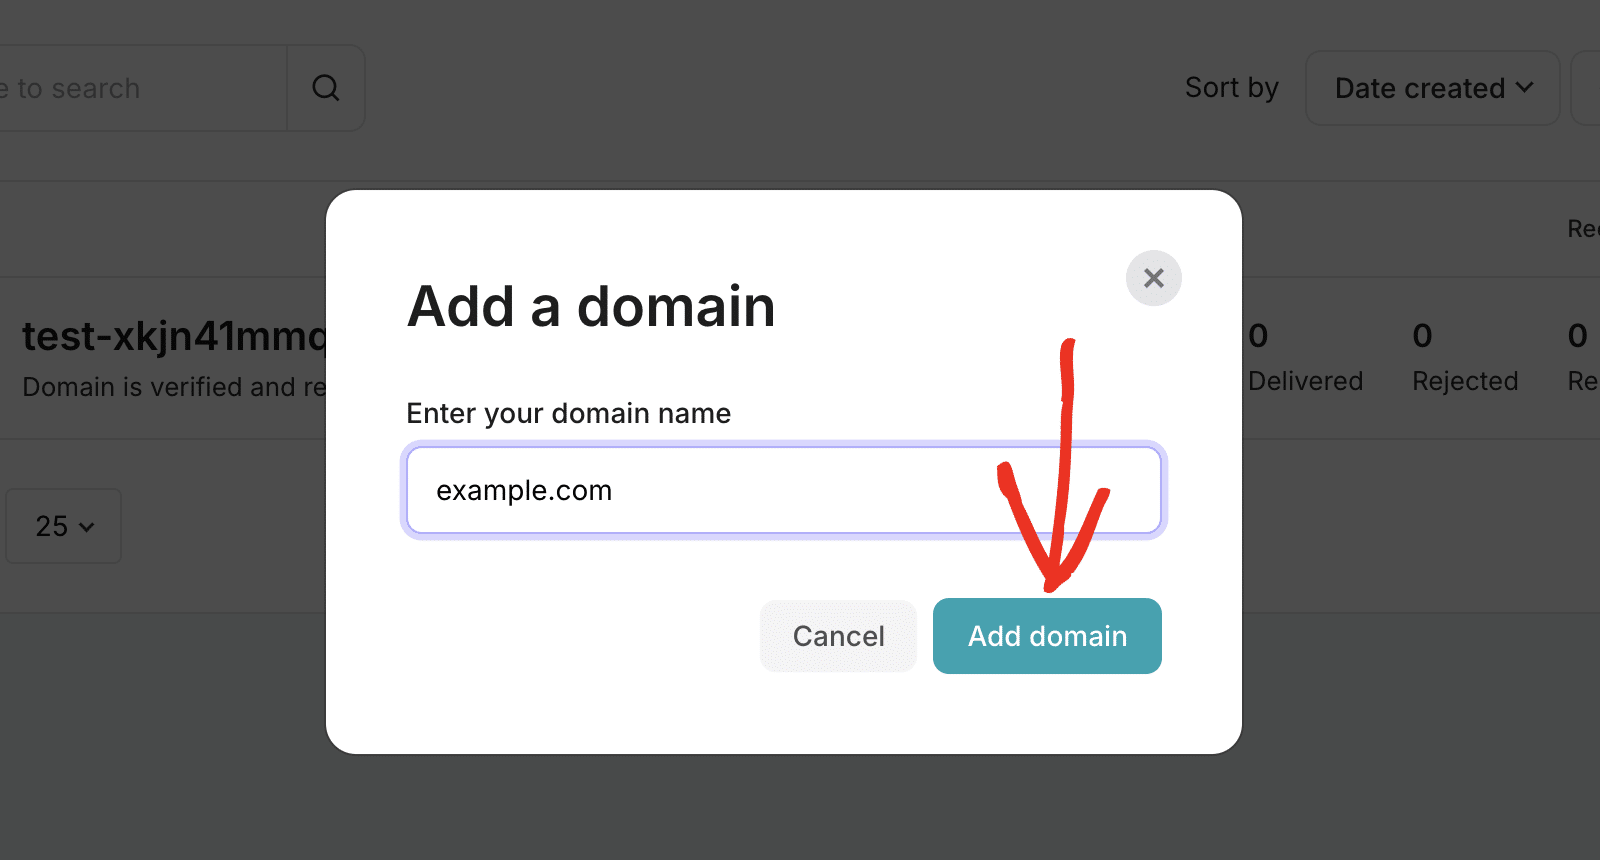
In the overlay that appears, enter your domain name and click Add domain to proceed.
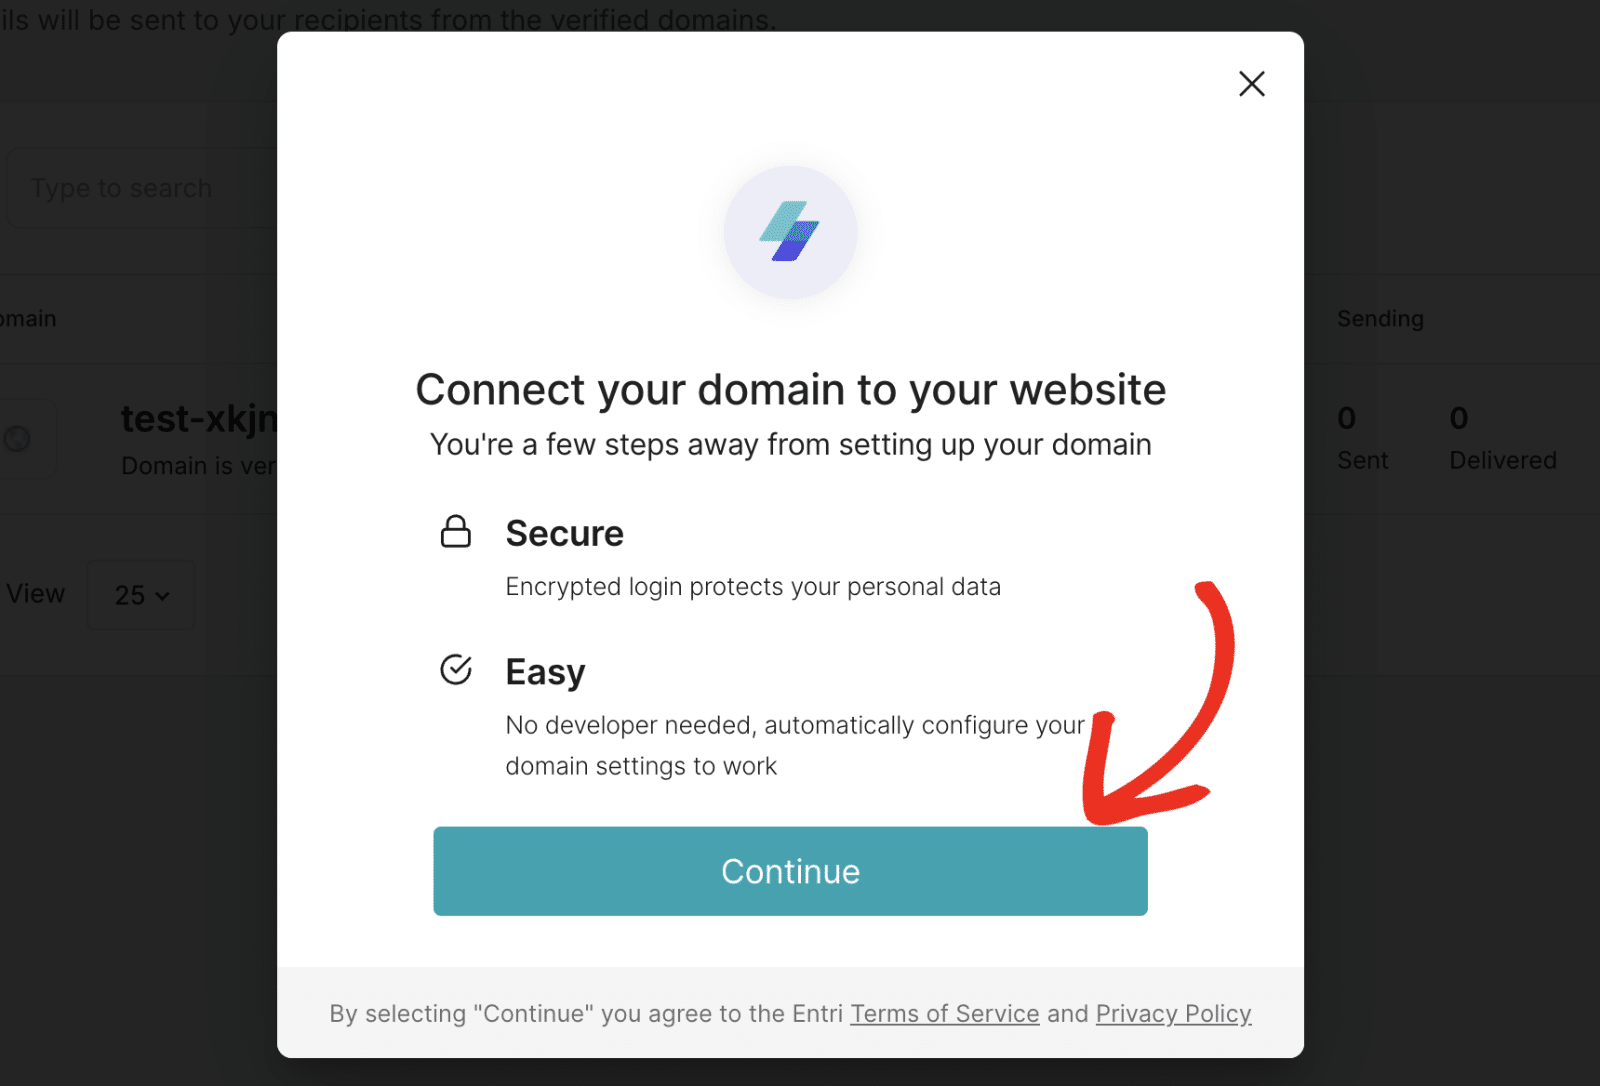
After that, click the Continue button to proceed.
MailerSend will take a moment to detect your domain host and suggest DNS record settings based on your hosting provider.
After confirming your domain host, MailerSend will present you with two validation methods. The first option is straightforward and only requires you to log in to your domain host’s account and authenticate your MailerSend account.
Alternatively, you can use their manual verification method to validate your sending domain. This method requires you to add DNS records to your domain settings.
We’ll cover both methods in the guide. We’ll use Cloudflare as the domain host in this tutorial. But the steps are similar for most domain registrars.
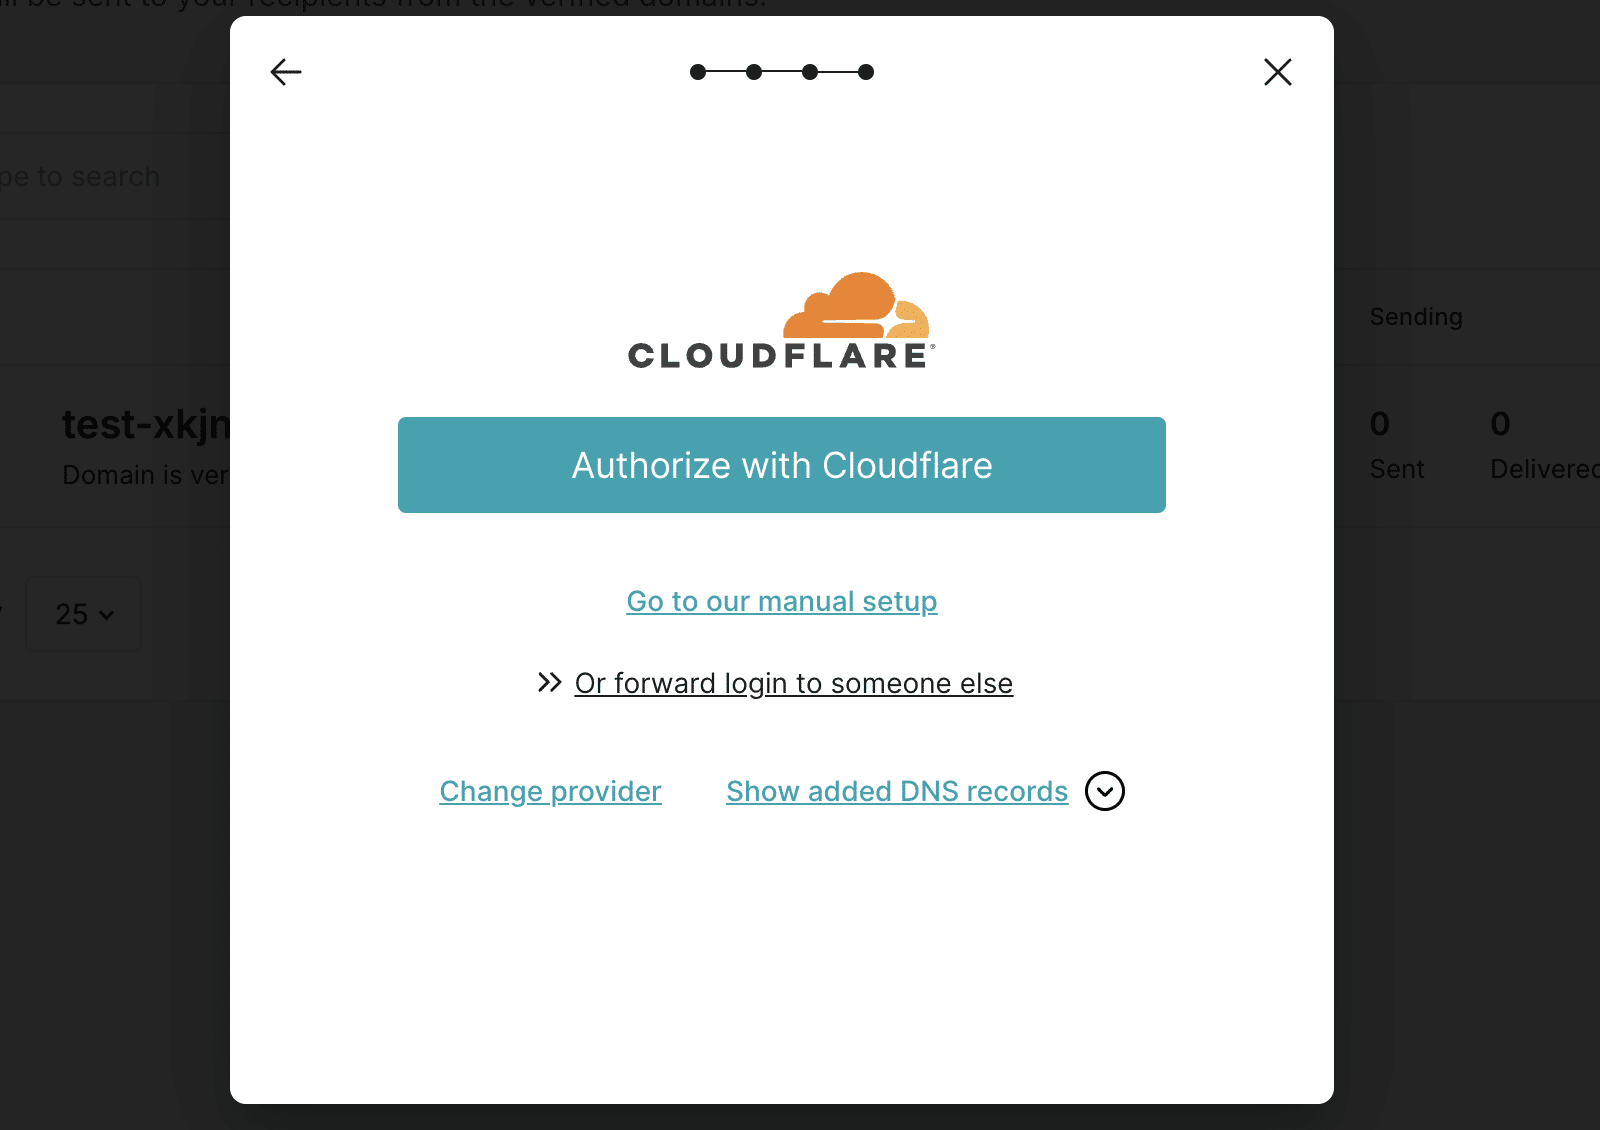
Validating Your Domain With One-Click
To use the one-click method, click the Validate with Cloudflare button to proceed.
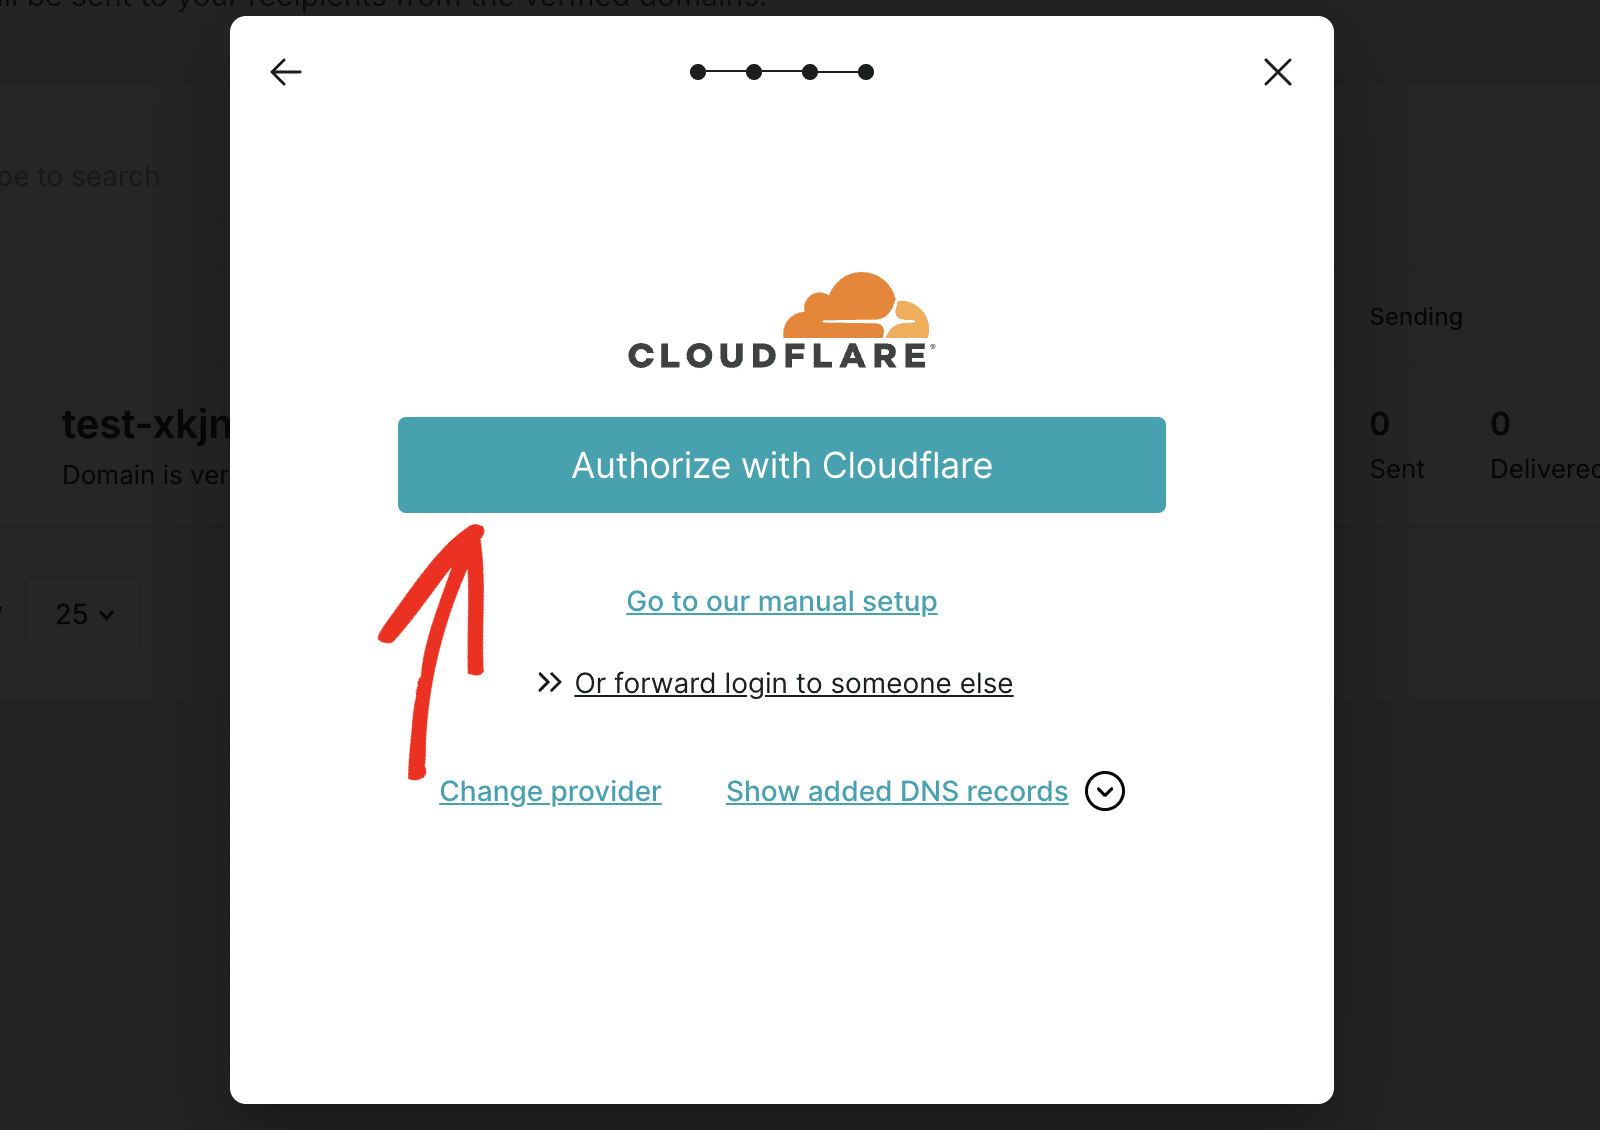
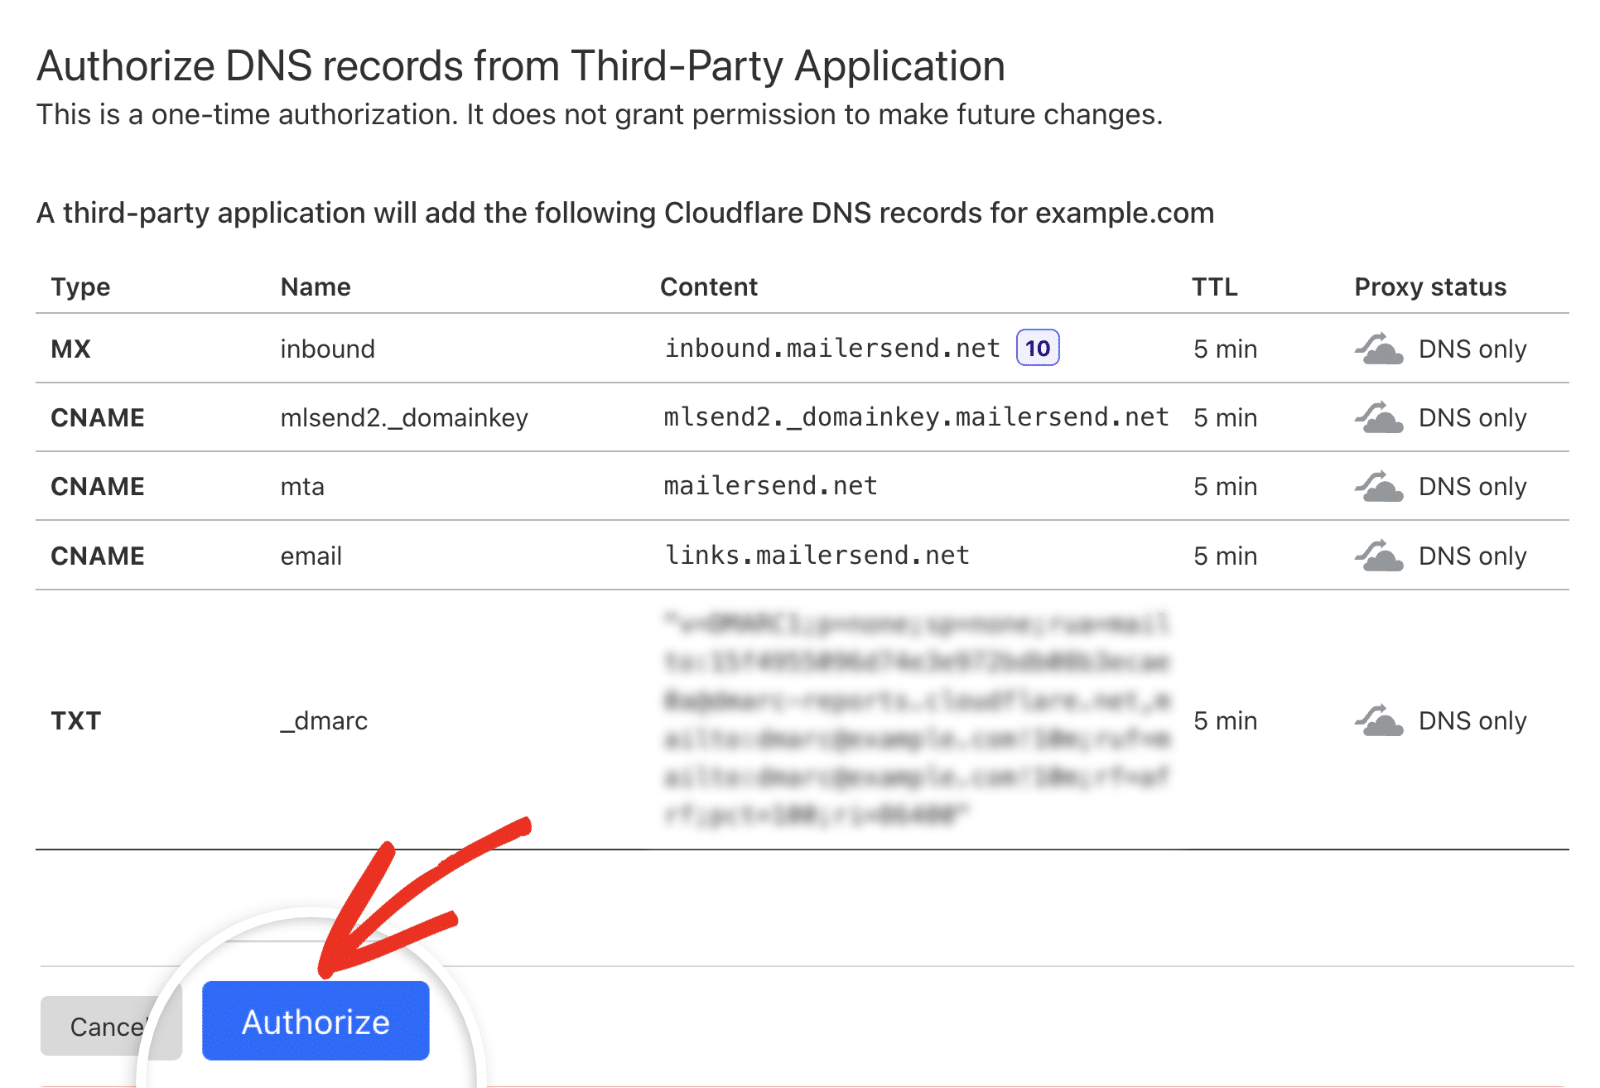
After clicking the button, you’ll be directed to your domain host’s dashboard. MailerSend will request permission to automatically add 5 DNS records to your DNS settings. Go ahead and click the Authorize button to proceed.
Manually Verifying Your Sending Domain
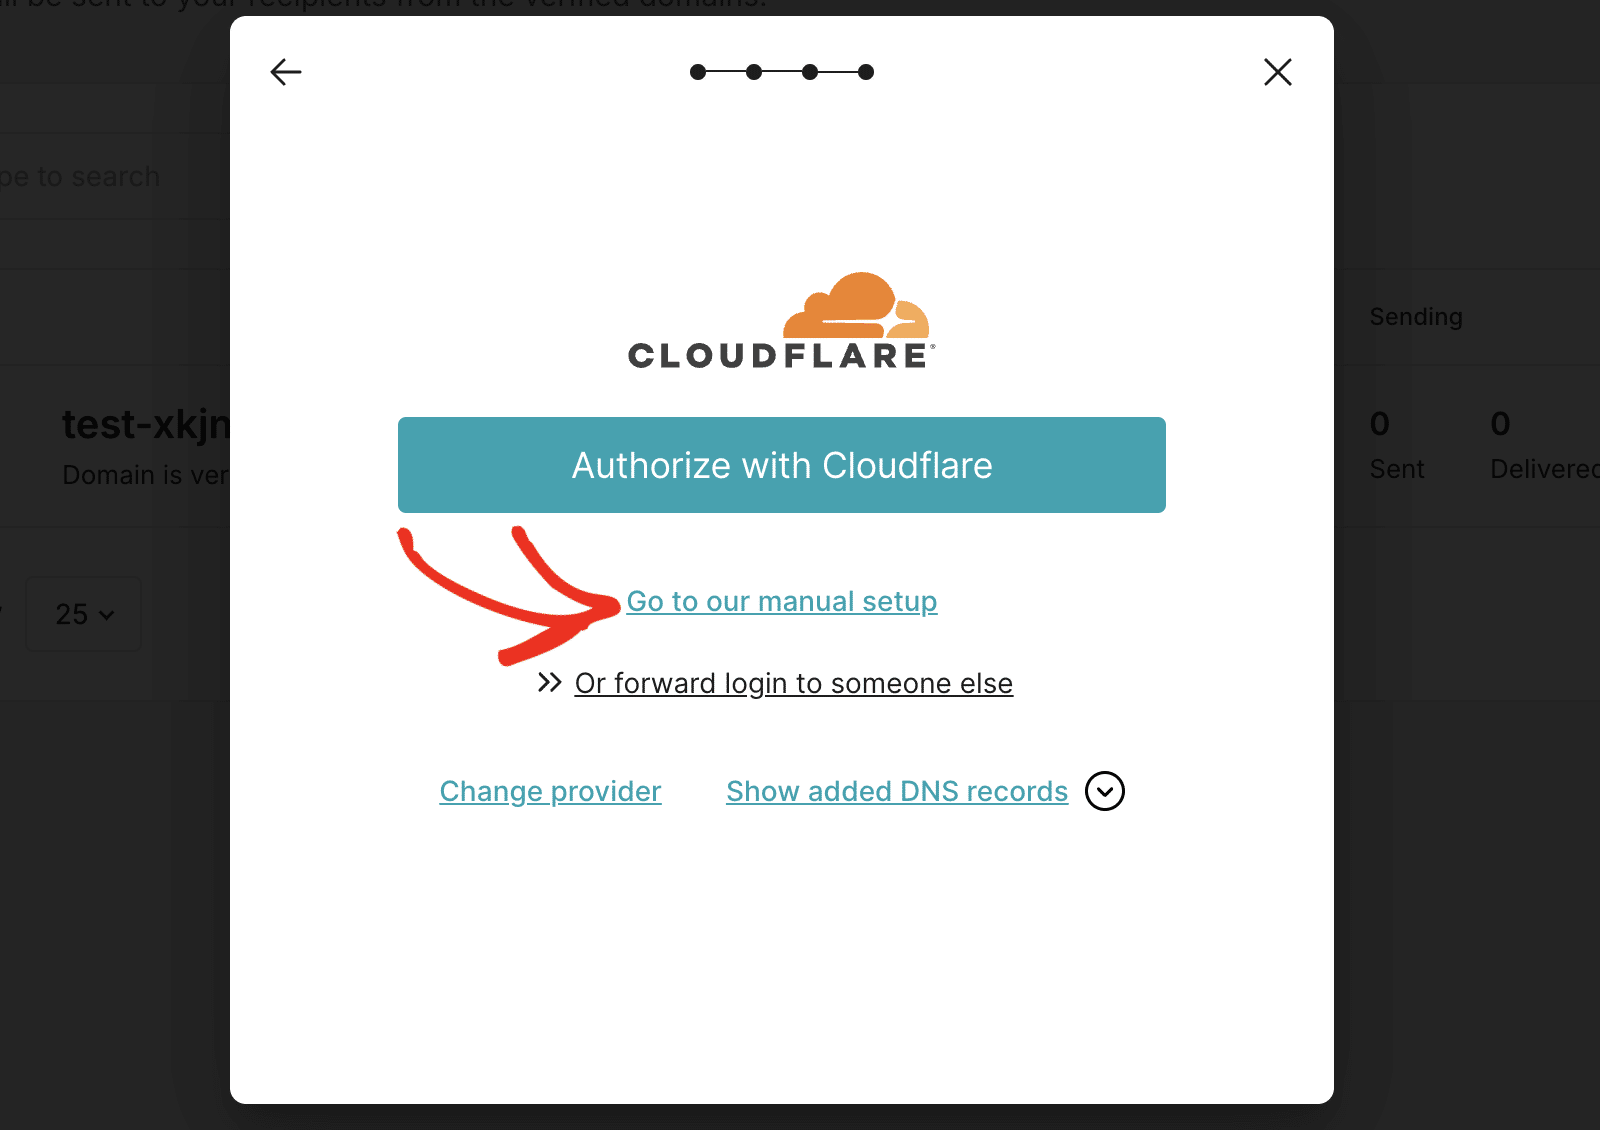
If you prefer not to grant a third-party application access to your DNS settings, you can manually add the DNS records provided by MailerSend. To proceed, click the Go to our manual setup link.
MailerSend will provide 3 DNS records that you’ll need to add to your domain settings.

We have a detailed guide on how to locate and add DNS records for various domain registrars. Please see our tutorial to learn how to add DNS records for WP Mail SMTP mailer settings.
Verifying Your DNS Records
After adding the DNS records, you’ll need to wait a few minutes for the DNS changes to propagate. Keep in mind that it might take up to 48 hours in some cases.
Next, scroll down and tick the I have added DNS records checkbox.
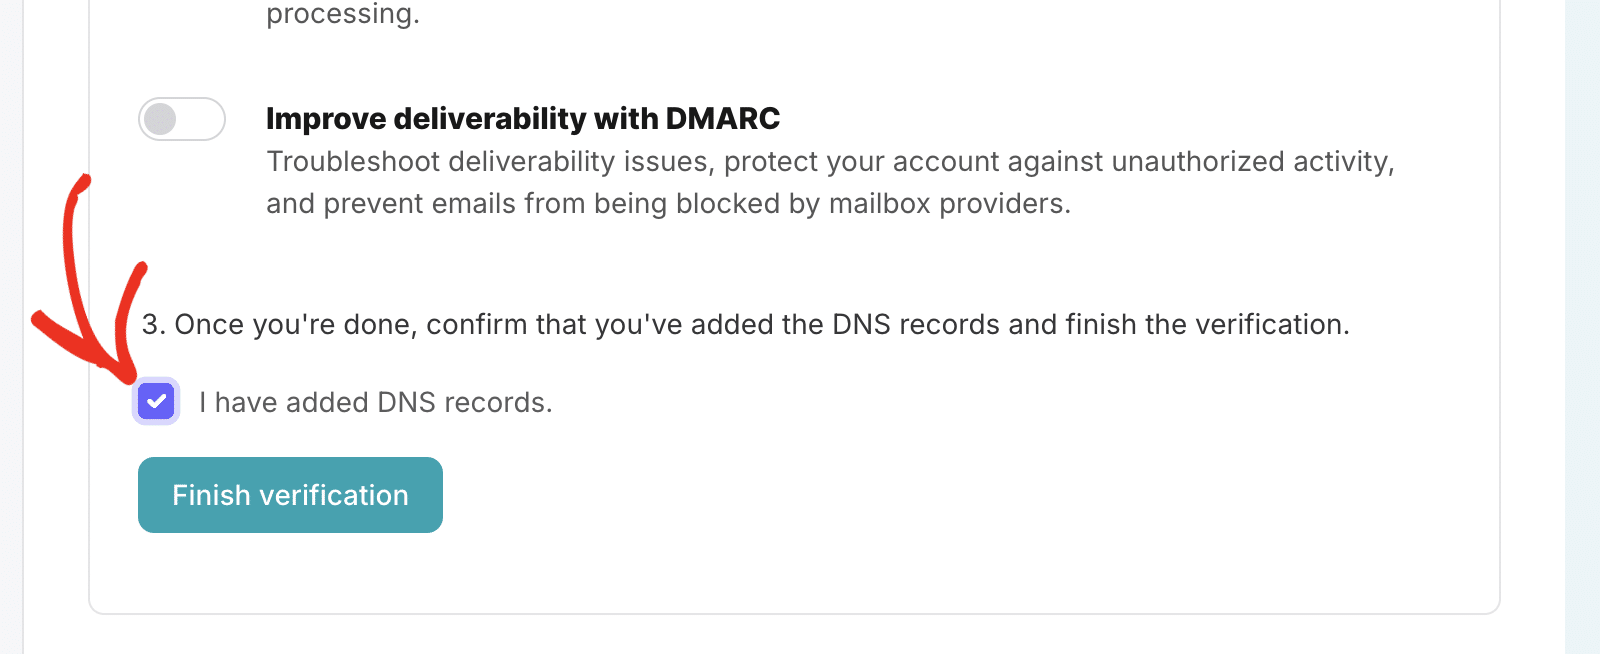
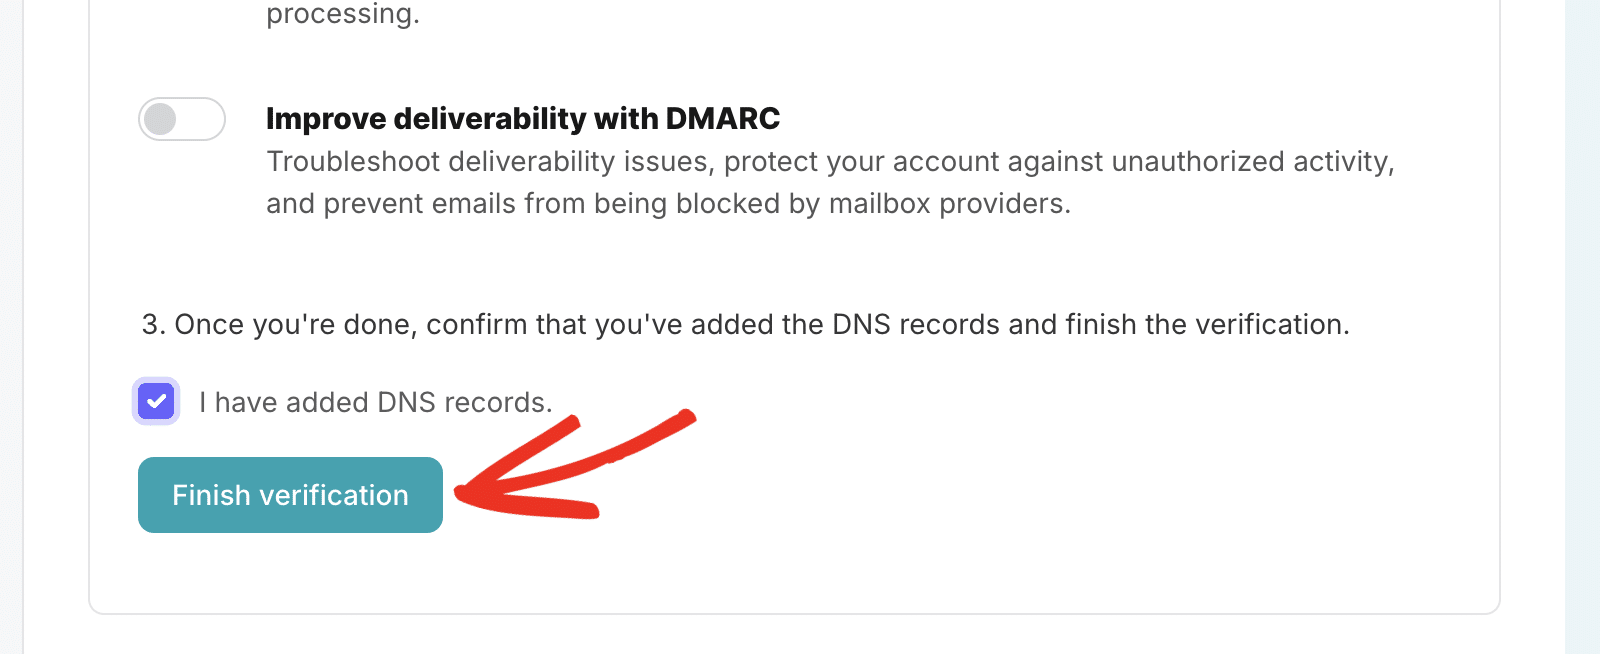
Then click the Finish verification button to continue.
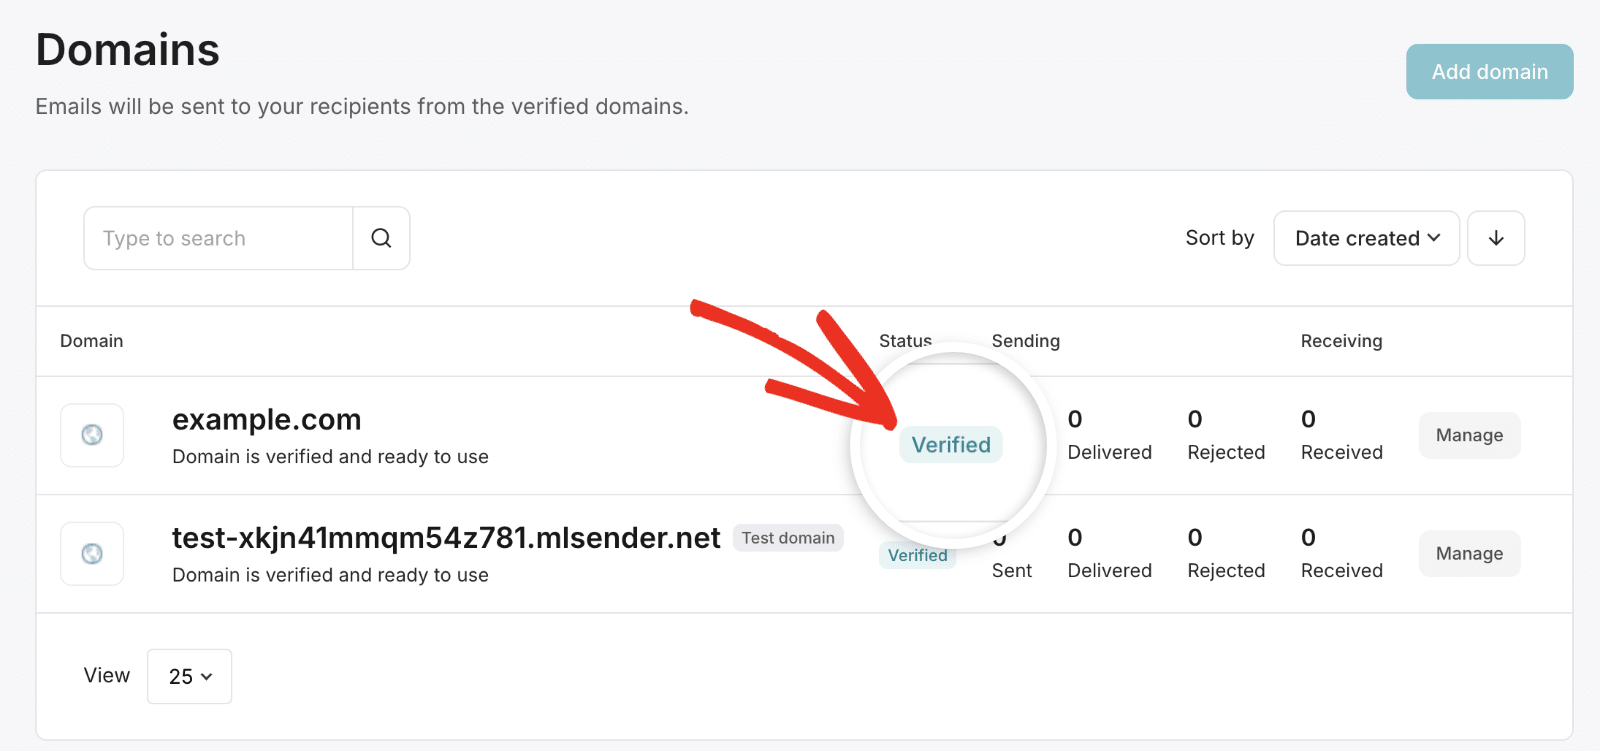
If your DNS records are propagated, you’ll see a Verified status next to the domain.
However, there’s no need to wait on this just yet! You can move ahead to the next step while you wait for this verification to complete. Just be sure to keep this tab or window open, as we’ll need it a little later.
Setting Up WP Mail SMTP
Now that you’ve set up your MailerSend account and verified your domain, you can configure WP Mail SMTP to use MailerSend to send your WordPress emails.
Before you get started on this section, be sure to install and activate the WP Mail SMTP plugin.
Once WP Mail SMTP is installed, go to WP Mail SMTP » Settings and select the General tab to open the plugin settings page.

We’ll discuss each of these settings in detail below.
From Email
The From Email is the address your site’s emails will be sent from. This must be an email address at the domain you verified with MailerSend.
For example, if you authorized example.com, the From Email address must contain example.com (e.g., [email protected]).

If you’d like the From Email to be the same site-wide, toggle the Force From Email option. This option will save you the trouble of editing the email settings throughout your site, such as in other plugin settings.

Note: For more details, see our guide to understand how the Force From Email setting works.
From Name
The From Name will, by default, be set to your site name. However, you can change this to any text you’d like.

You can also choose to enable the Force From Name option to apply this setting to emails site-wide.

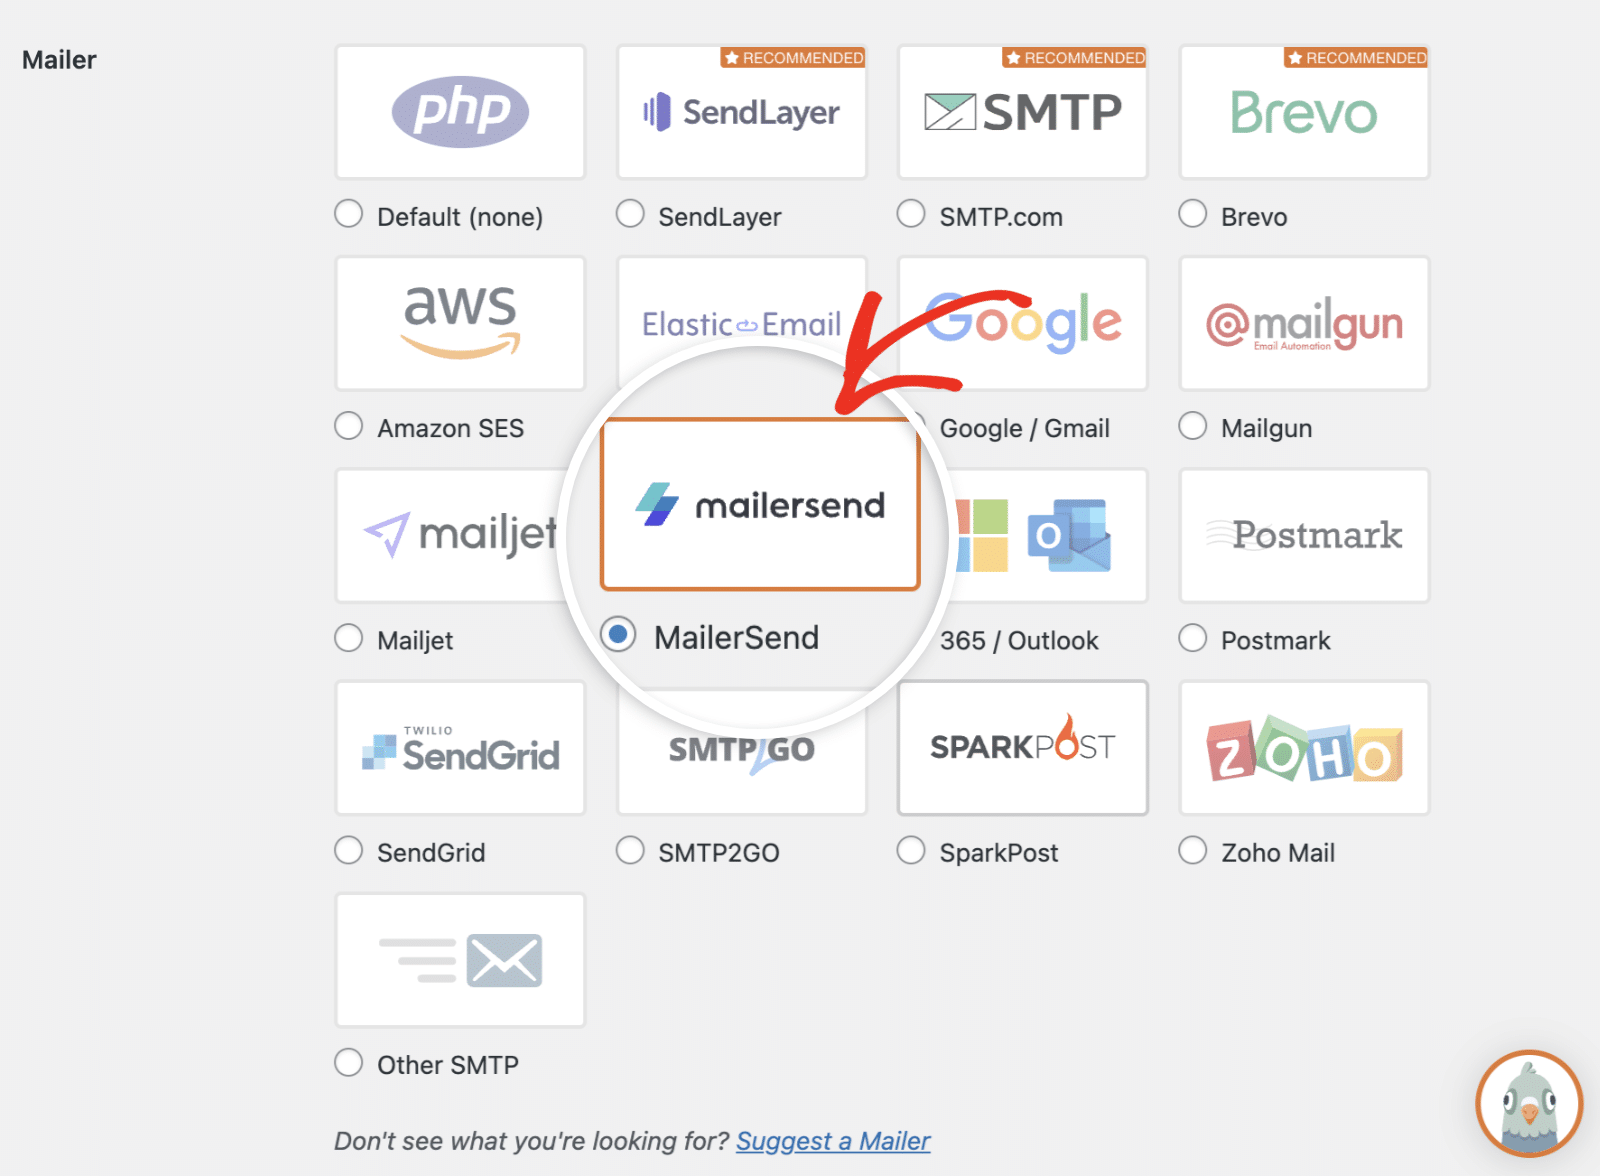
Mailer
Under the Mailer section, select MailerSend.
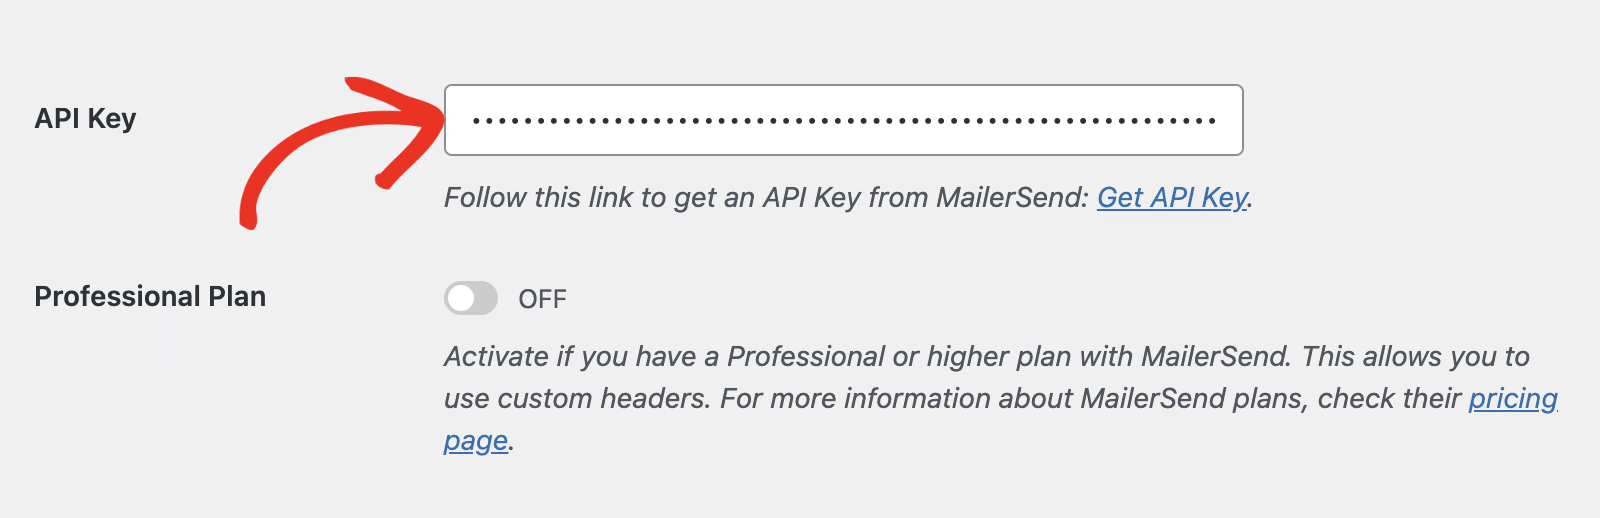
After that, you’ll see a text field where you’ll need to enter your MailerSend API key.
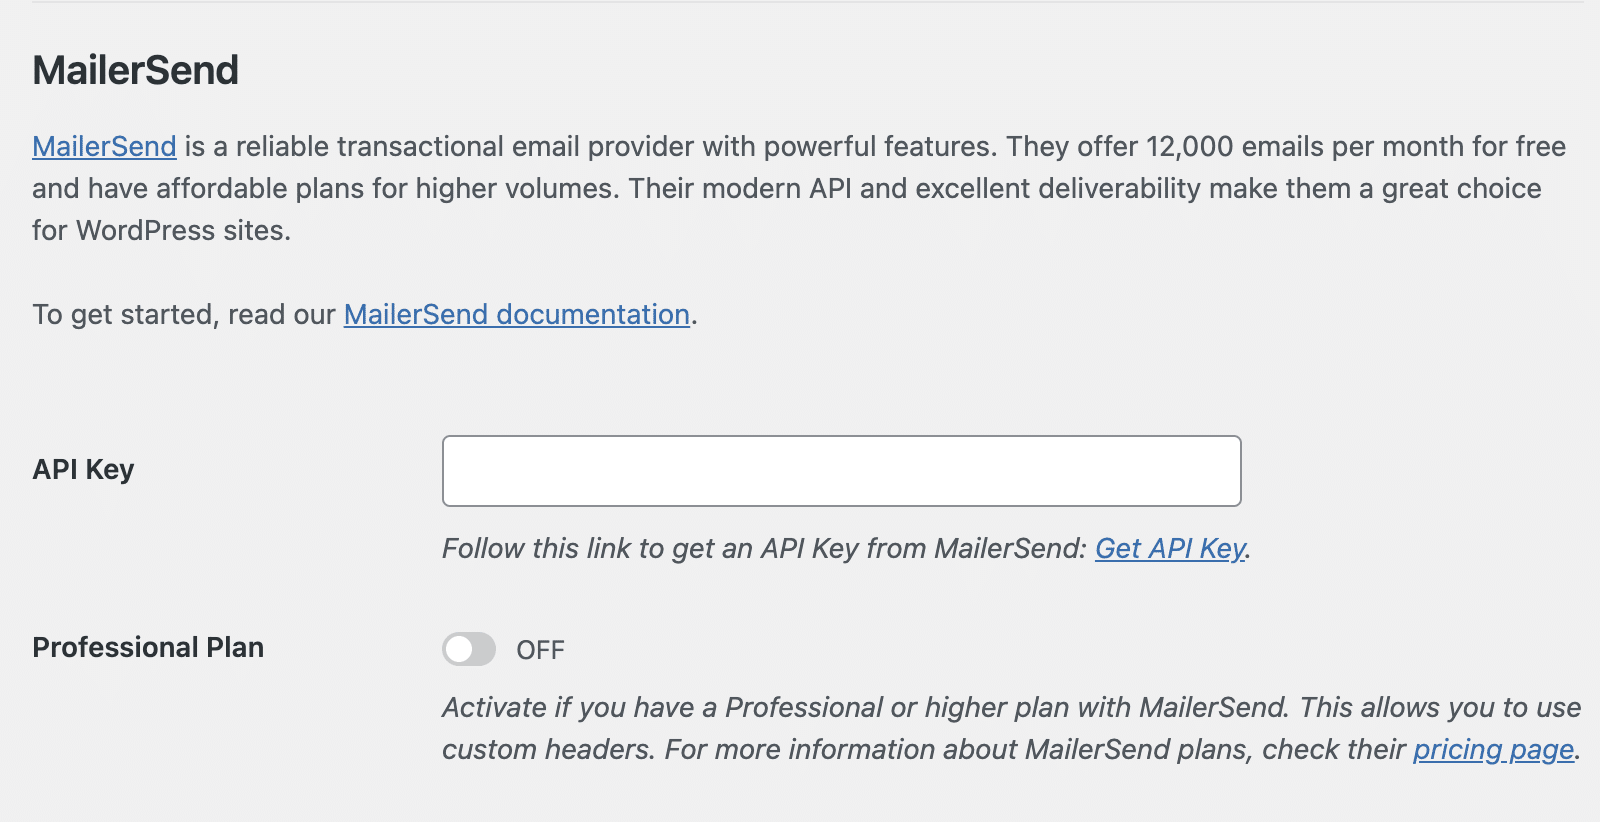
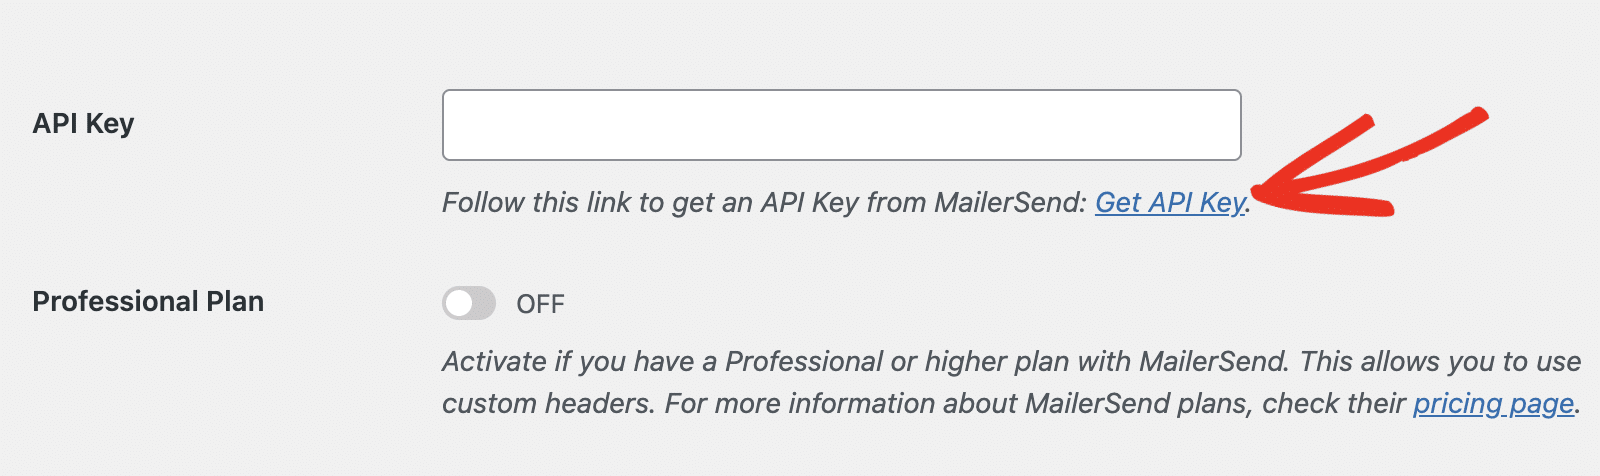
API Key
To create your API key, click the Get API Key link.
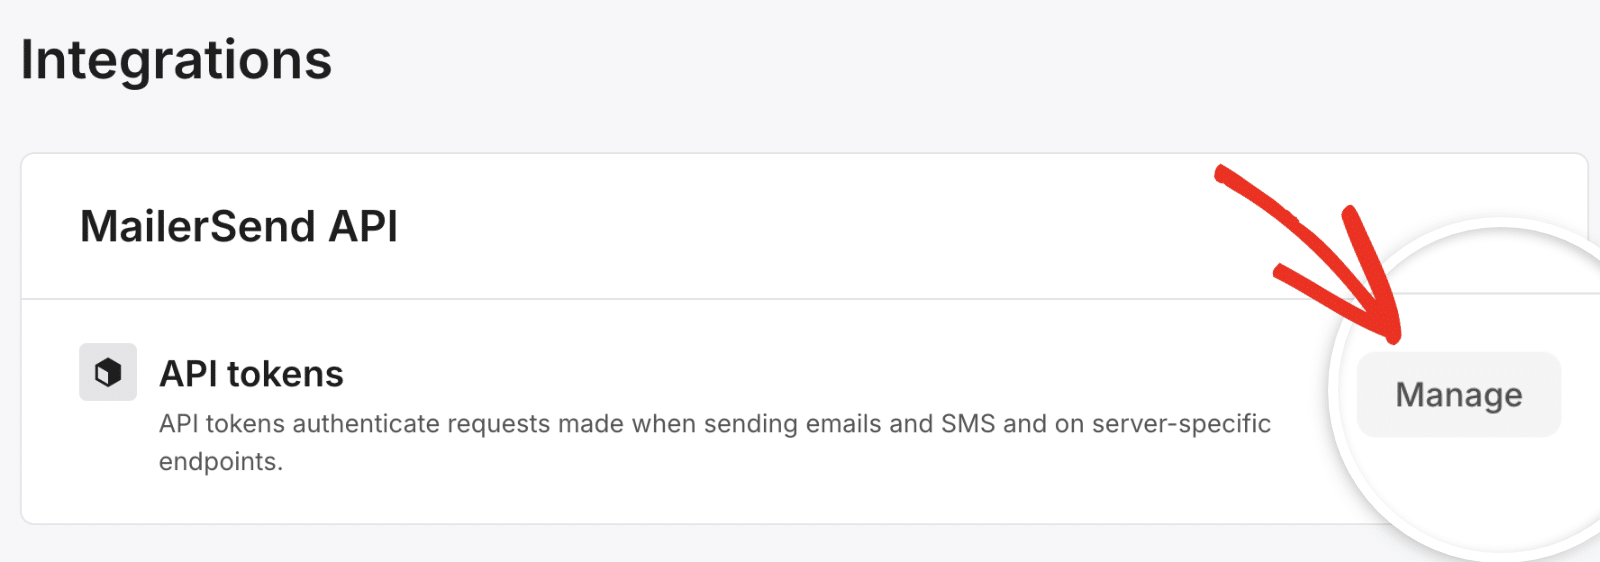
Alternatively, you can access this page from your MailerSend account by navigating to the Integrations page.
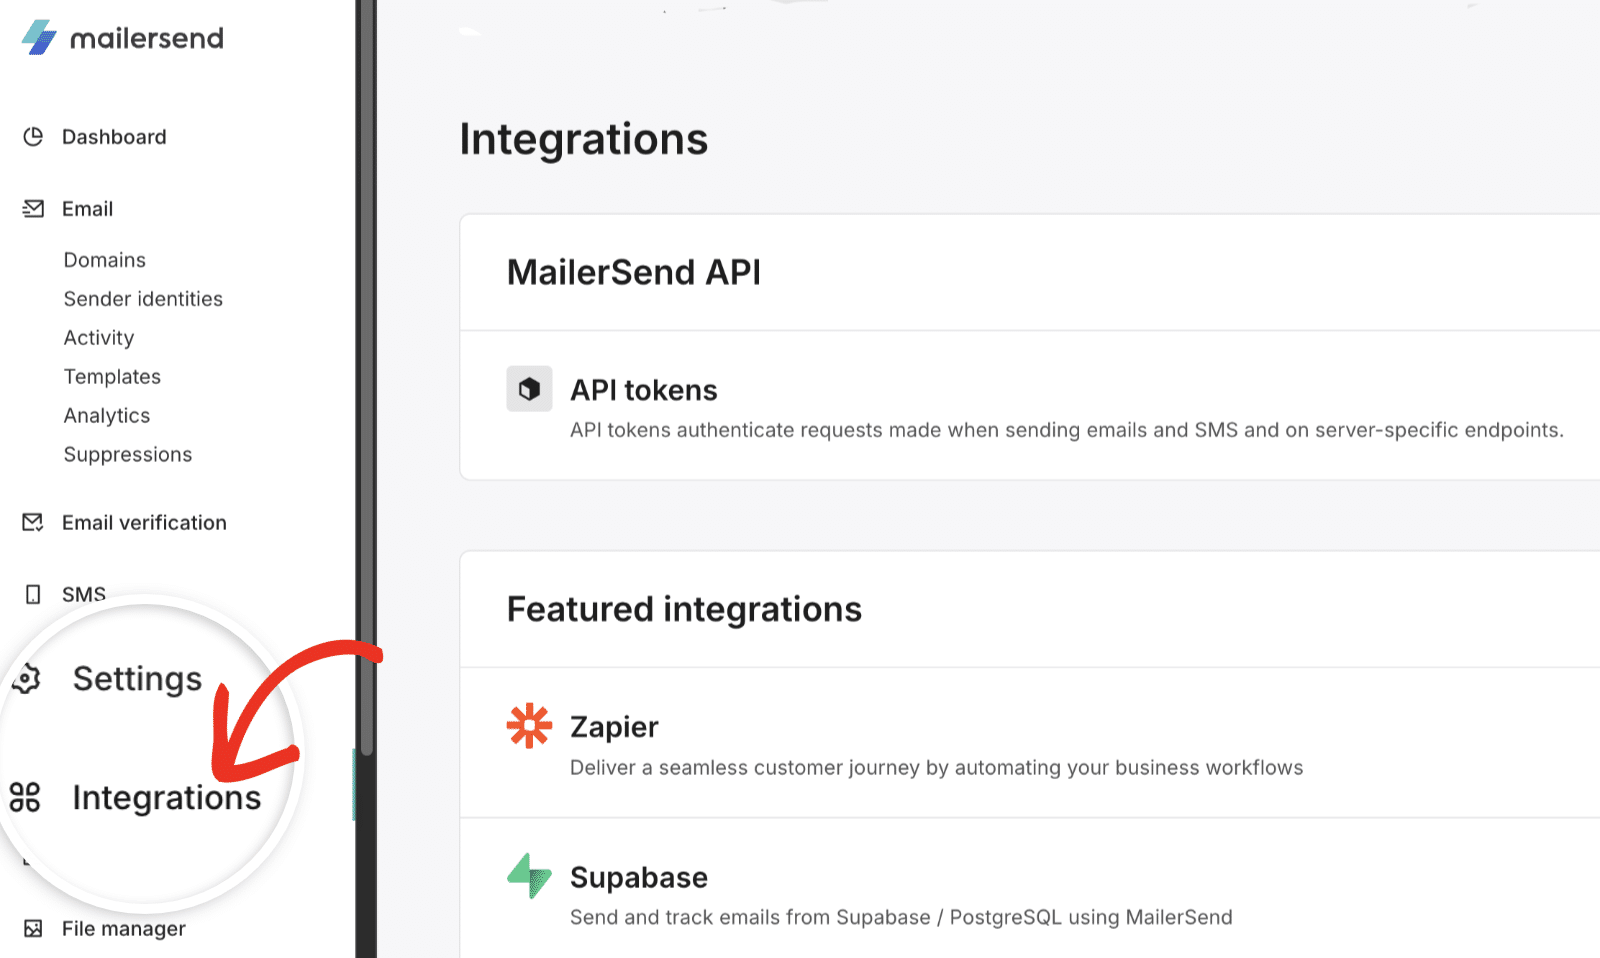
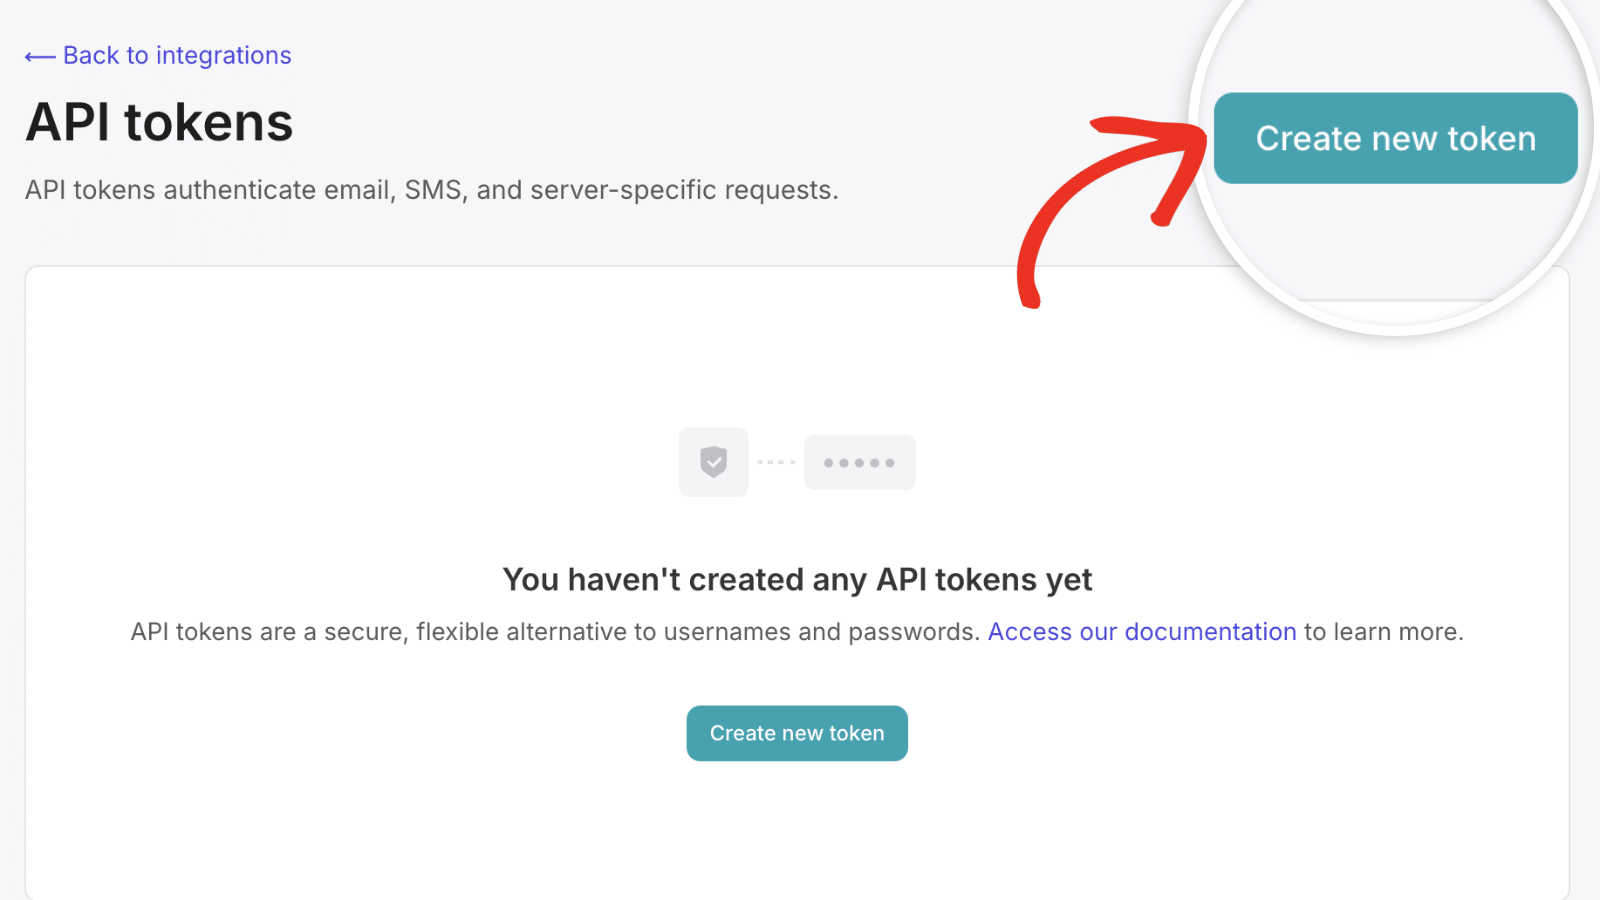
Then click on the Manage button next to API tokens.
In the API tokens screen, you’ll see all your available API keys. To create a new key, click the Create new token button.
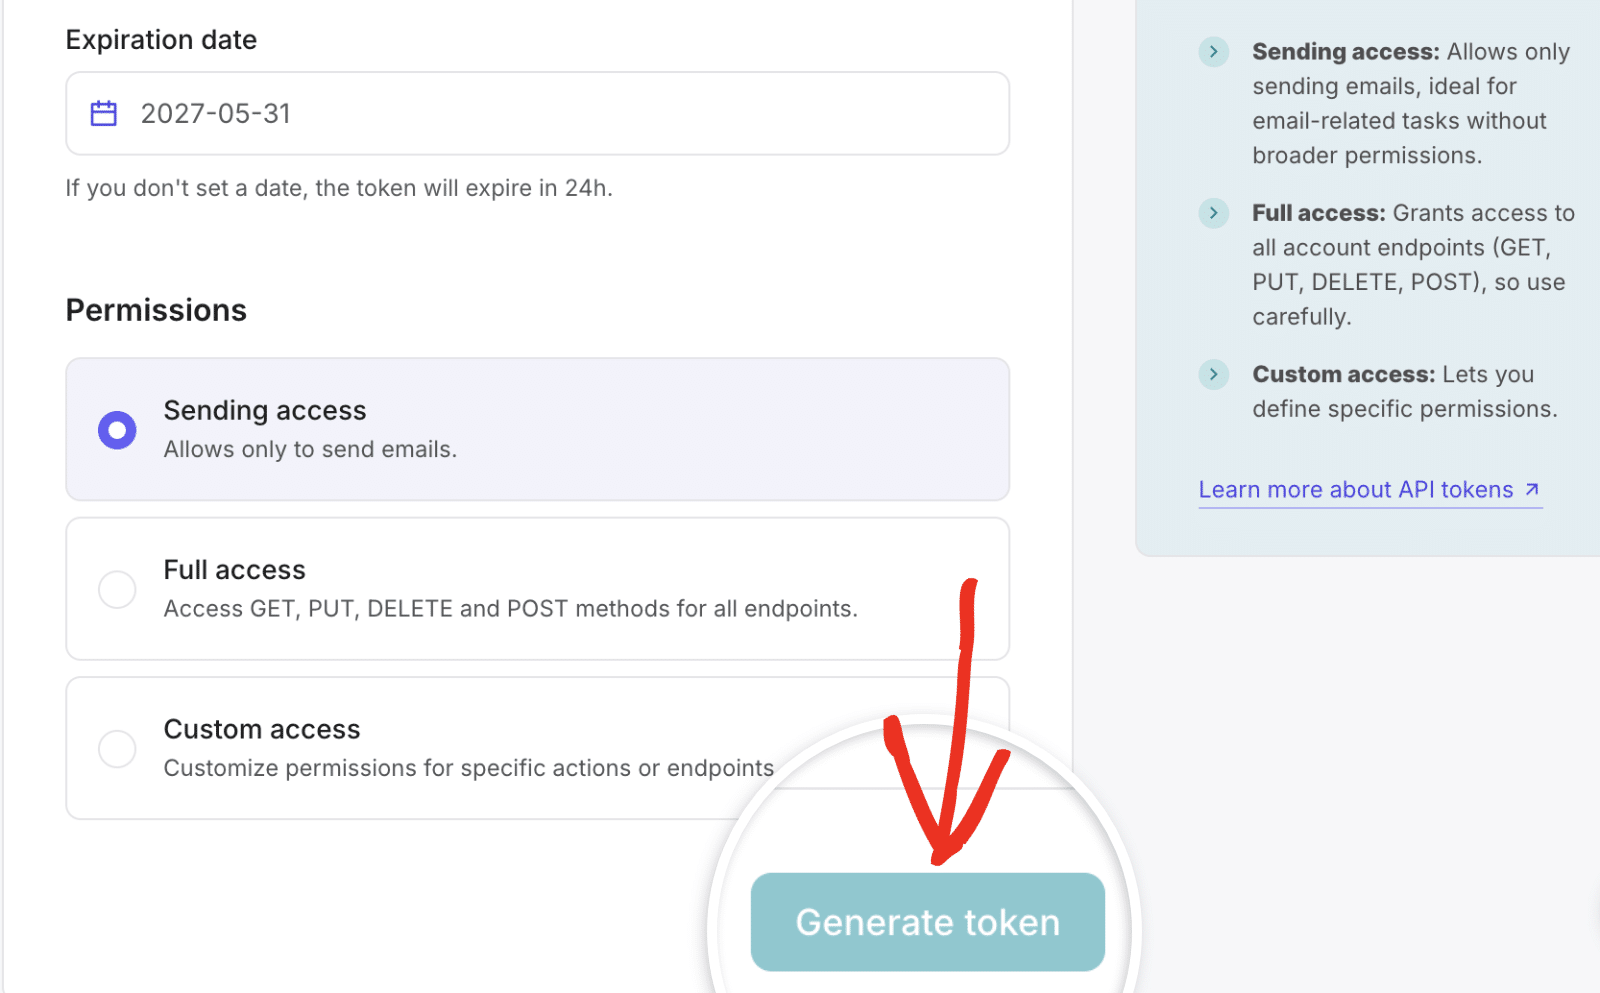
In the New API token page, you’ll need to specify a name for your token. This is for internal purposes only, so you can use any name you like.
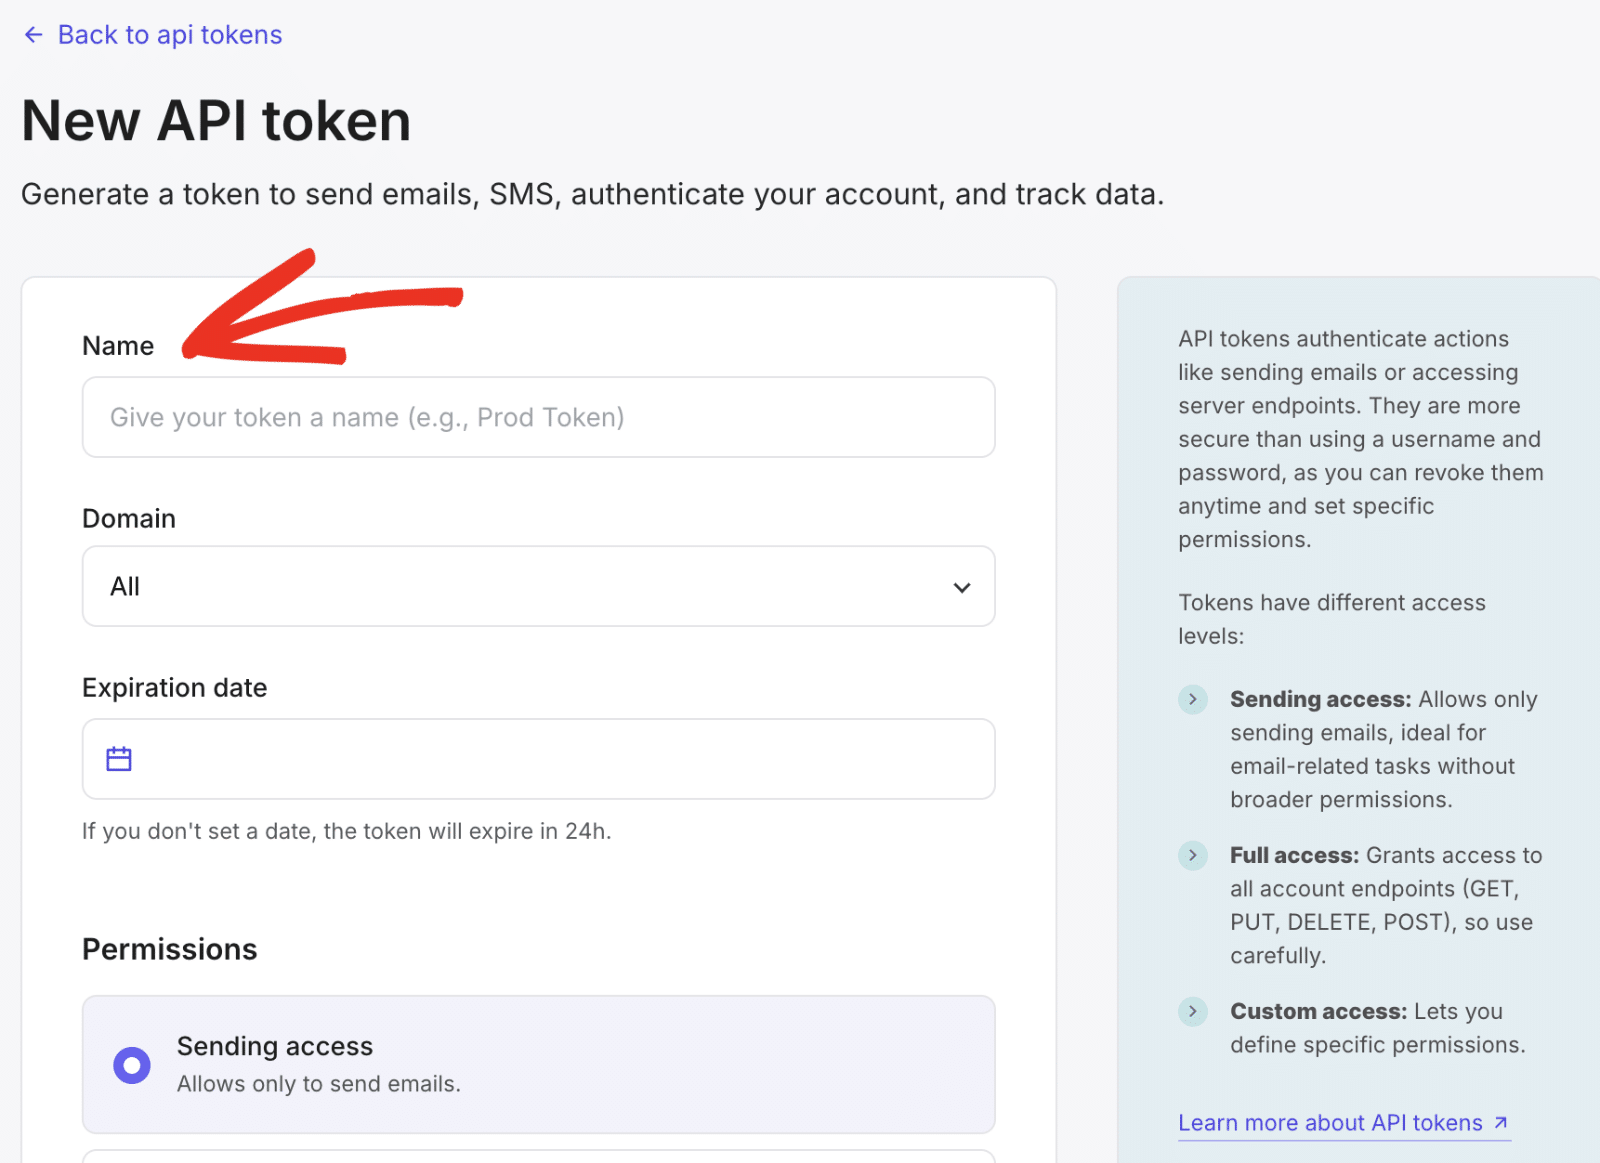
Next, choose your site’s domain if you’d like to restrict the API key.

In the Expiration date field, choose a future date like a 1-year or 2-year validity period. If you don’t specify a date, the API token will expire after 24 hours.
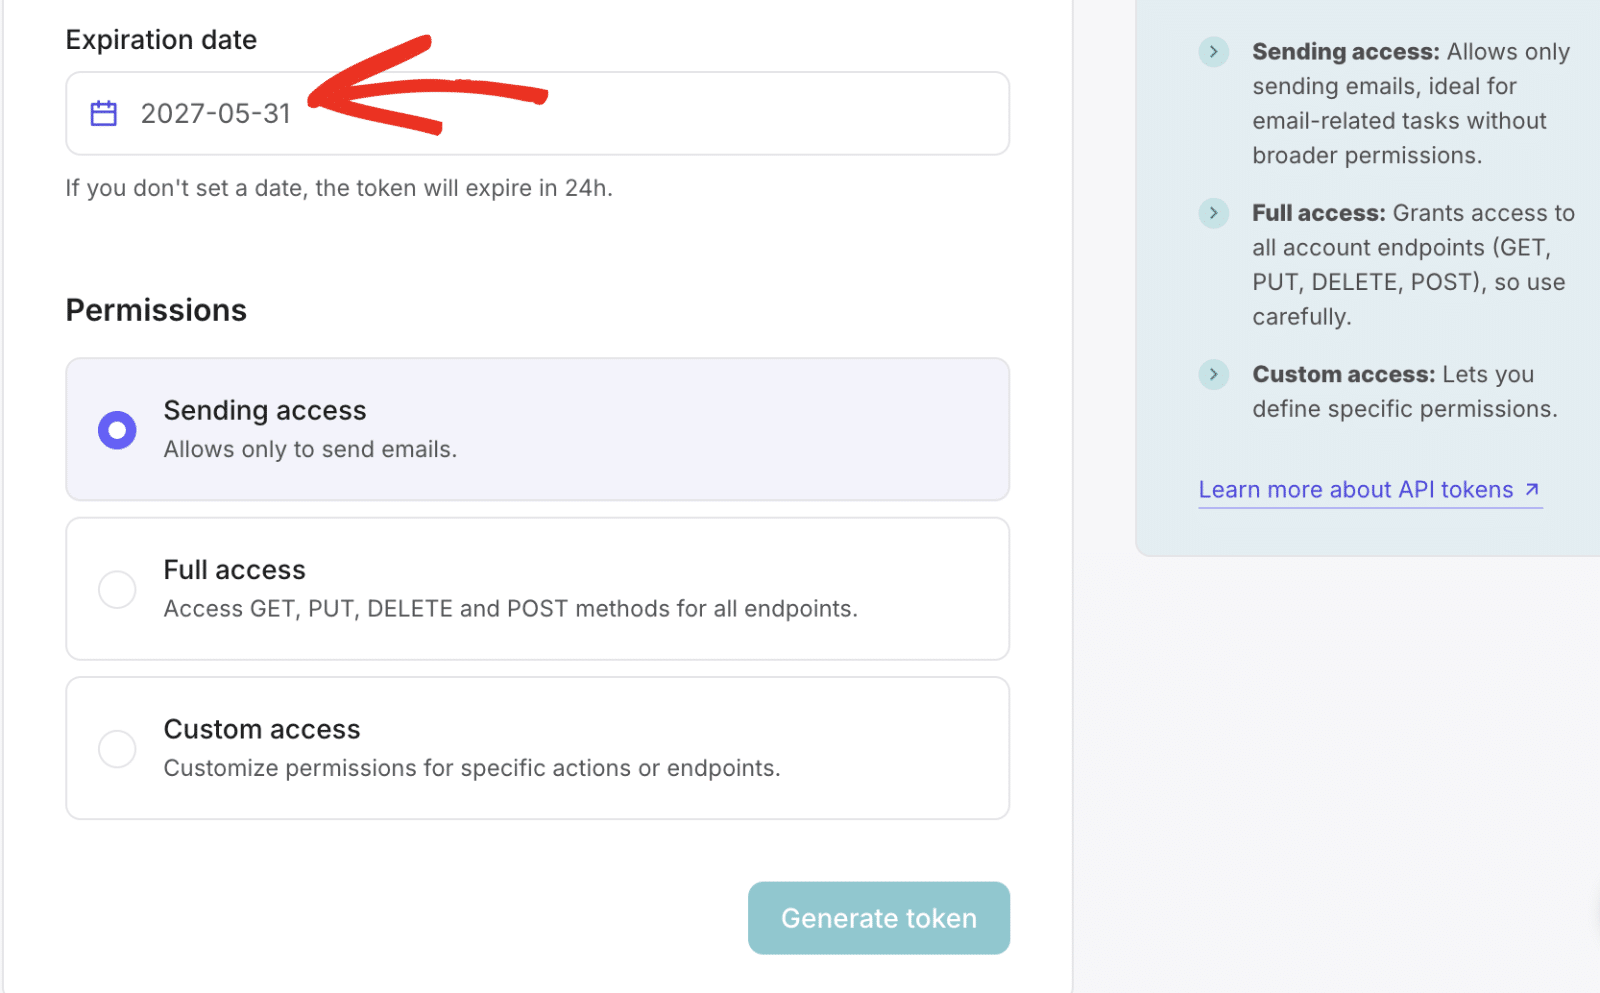
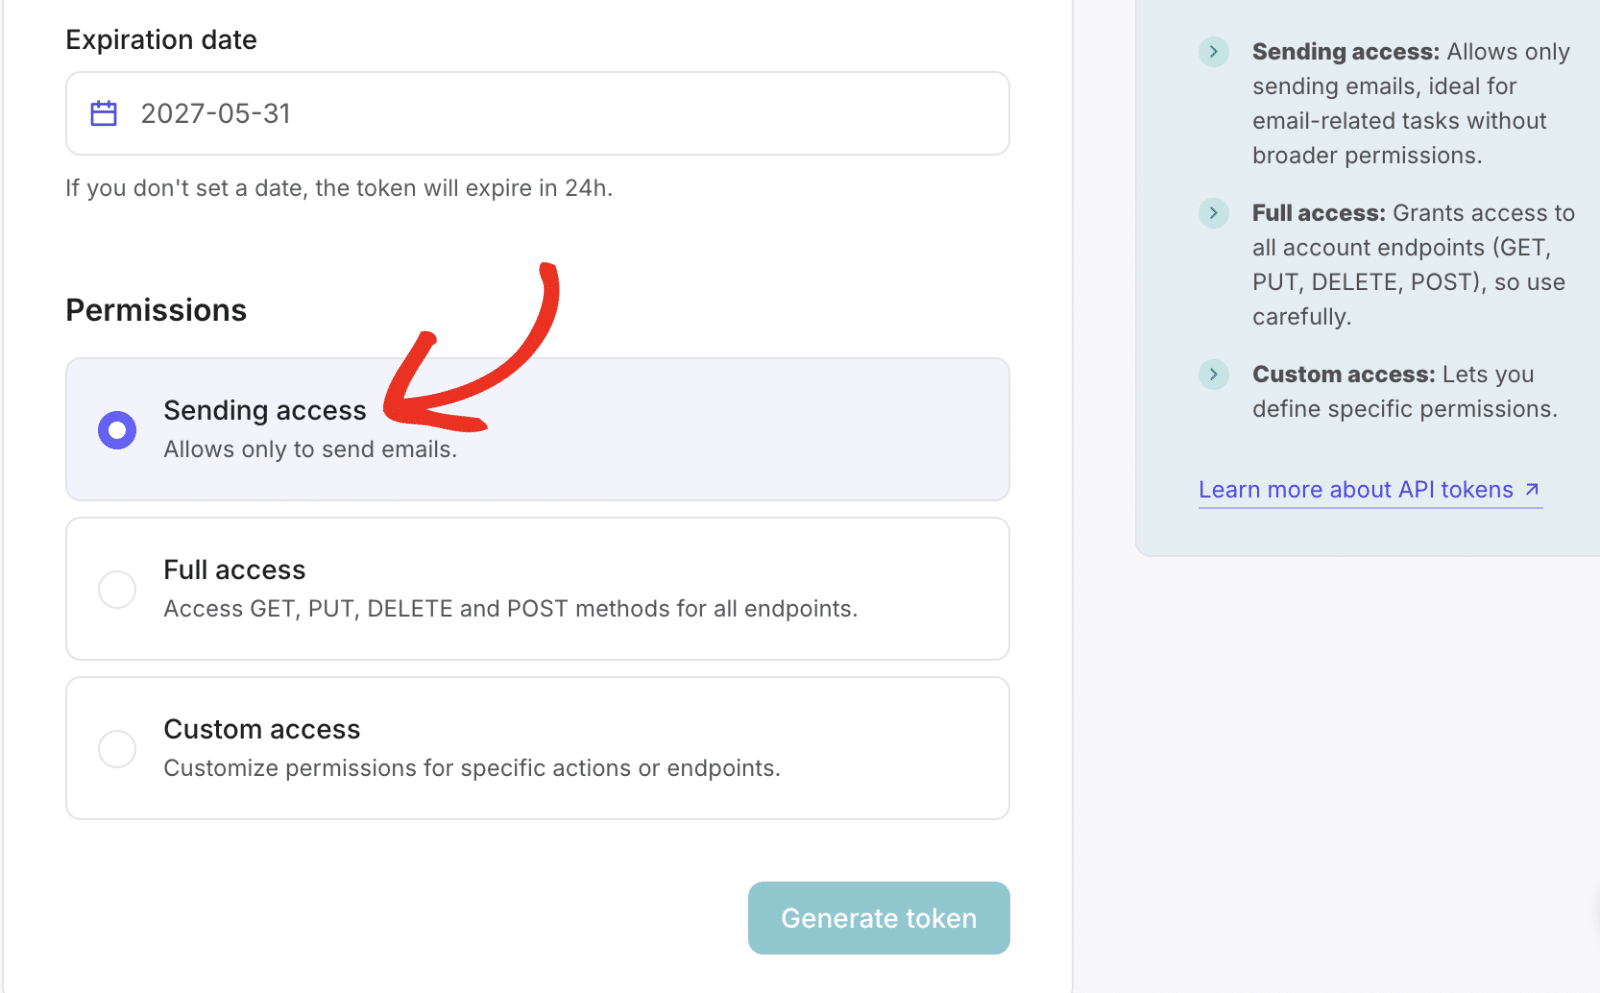
You can leave the Permissions option set to Sending access. This means you’ll only be able to send emails with the API token.
Once done, click the Generate token button to create your API key.
This will generate an API key for your account. Click on the generated token to copy its value.
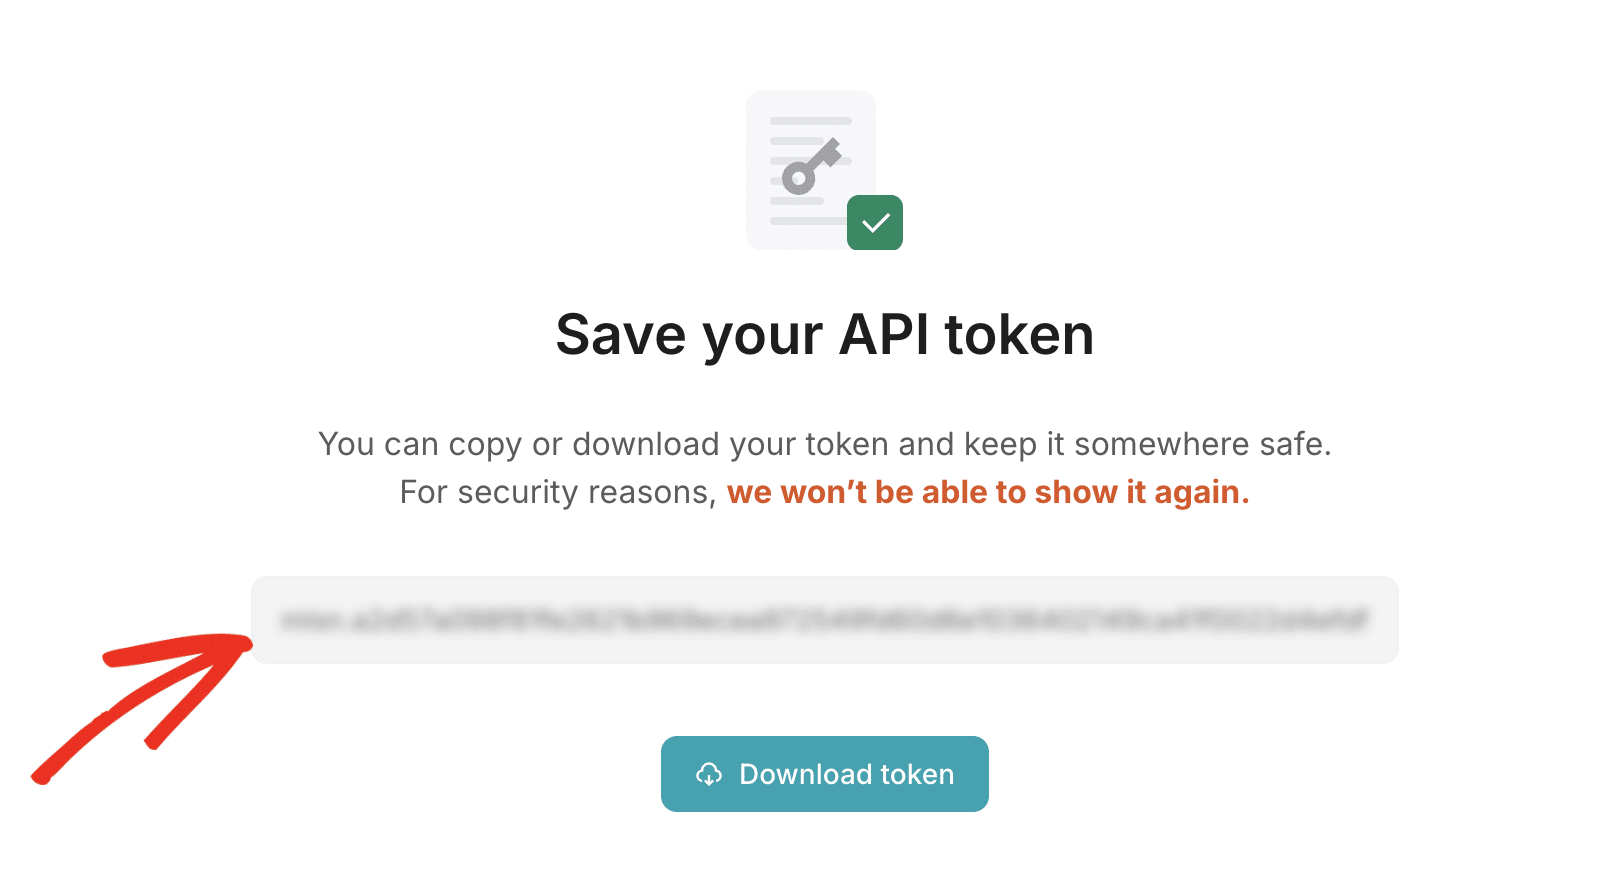
After copying the API token, return to the WP Mail SMTP settings page. Then paste the key you just copied from MailerSend into the API Key field.
Backup Connection
Setting up a Backup Connection is optional and isn’t required to complete your Mailjet mailer setup. However, to further improve email deliverability, we recommend configuring an additional connection to serve as a backup in case your Primary Connection fails.

Once you’ve configured your mailer, be sure to click the Save Settings button.

Sending a Test Email
Note: Your MailerSend domain verification needs to be completed before you can send a test email.
After configuring your settings, you should send a test email to verify everything is working correctly. To do so, go to WP Mail SMTP » Tools, and select the Email Test tab.

In the Send To field, you can enter any email address whose inbox you have access to. We recommend leaving the HTML setting toggled ON unless you know you’ll only be sending plain text emails.
Note: If you’ve set up an additional connection, you’d be able to choose between your Primary Connection and other connections when sending a test email.
Next, click the Send Email button to send your test email.

After sending the email, you should see a success message.

If you check the inbox for the email address you entered, you should have received the email for this test.

That’s it! You’ve successfully set up MailerSend with WP Mail SMTP. Your WordPress site should now be able to send emails more reliably.
Next, would you like to receive alerts whenever your site fails to send an email? Our guide on setting up email alerts covers the steps to configure alerts for various platforms.