AI Summary
Note: This guide applies to the Mailgun mailer in WP Mail SMTP.
What This Error Means
Mailgun rejected the API request because the API key is invalid, or because the request is hitting the wrong regional endpoint (US or EU).
Common Causes
- The Region in WP Mail SMTP doesn’t match the region of the sending domain in Mailgun (US or EU)
- Invalid or deleted API key
- Using a key with insufficient permissions (e.g. an account has multiple API key types and the wrong one was copied)
- API key has been regenerated in Mailgun but not updated in WP Mail SMTP
How to Fix
Here is the complete step-by-step guide to resolving the error.
Step 1: Check the Region Setting
A wrong region setting causes a 401 even with a valid API key, because WP Mail SMTP is hitting the wrong Mailgun endpoint. This is the fastest thing to check.
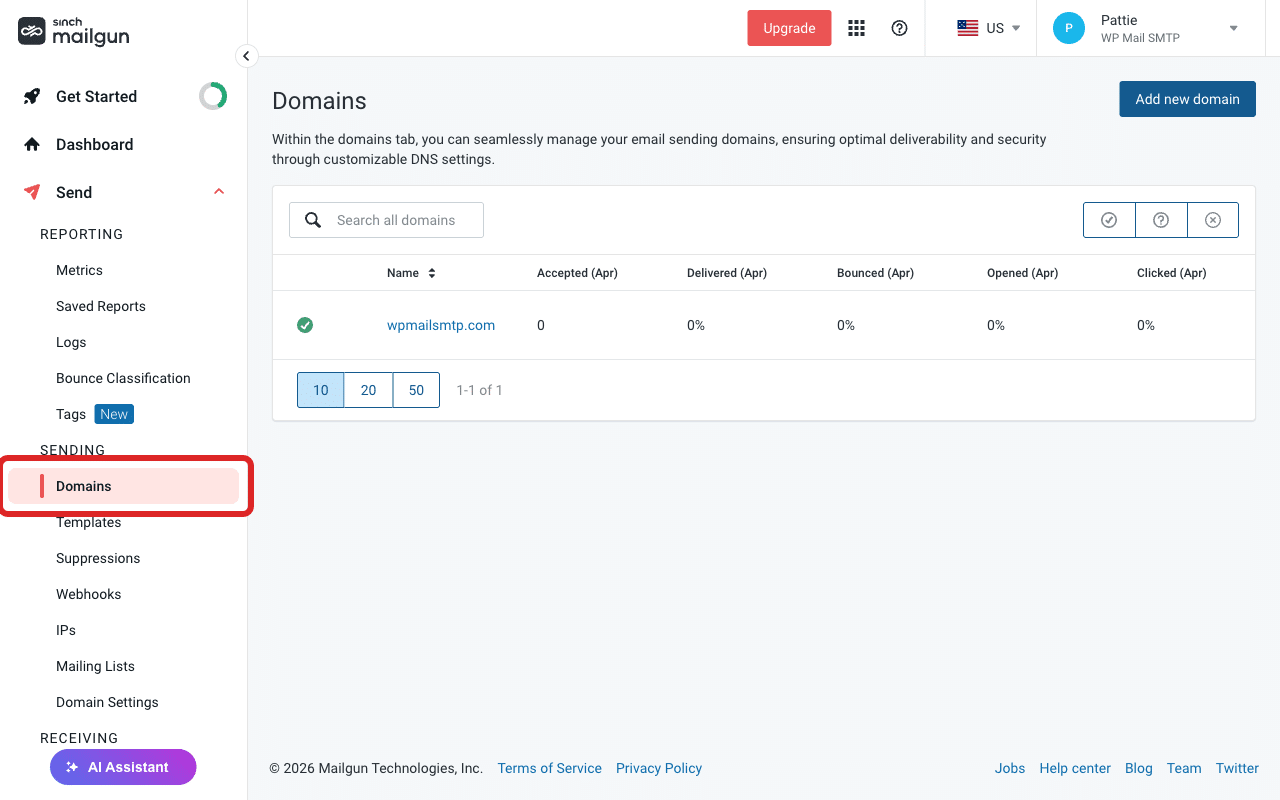
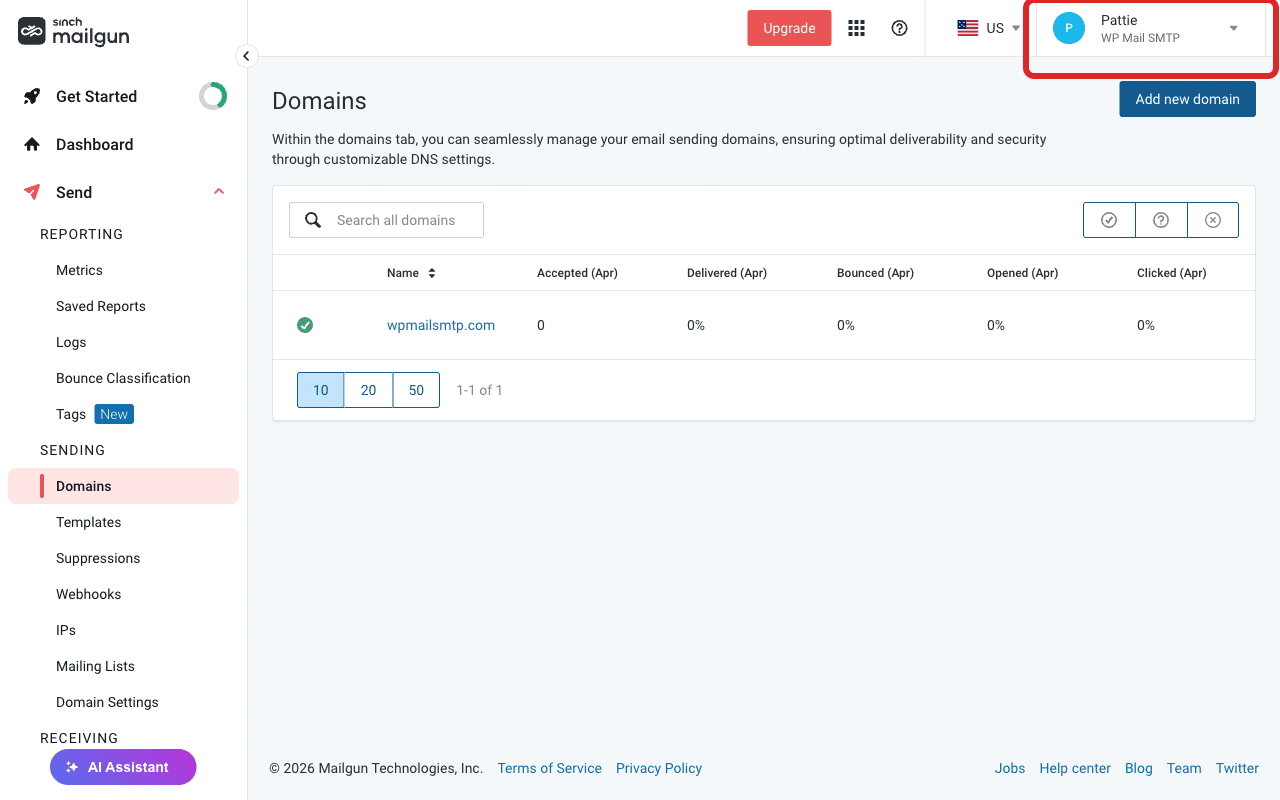
Start by logging in to Mailgun. Then, in the left menu, click Send to expand the menu and select Domains under the Sending section.
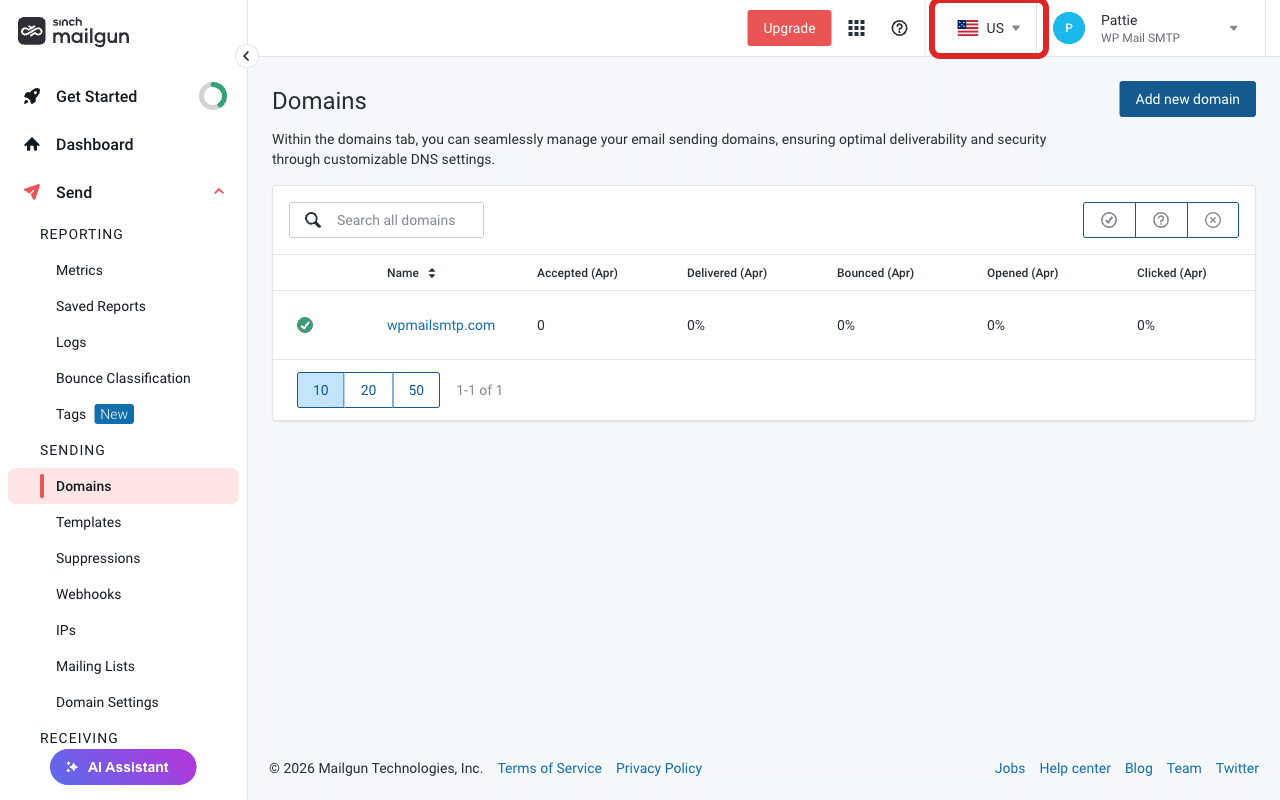
Next, check the region selector in the top-right corner of the header bar. It shows US or EU with a flag icon. Note which region is selected.
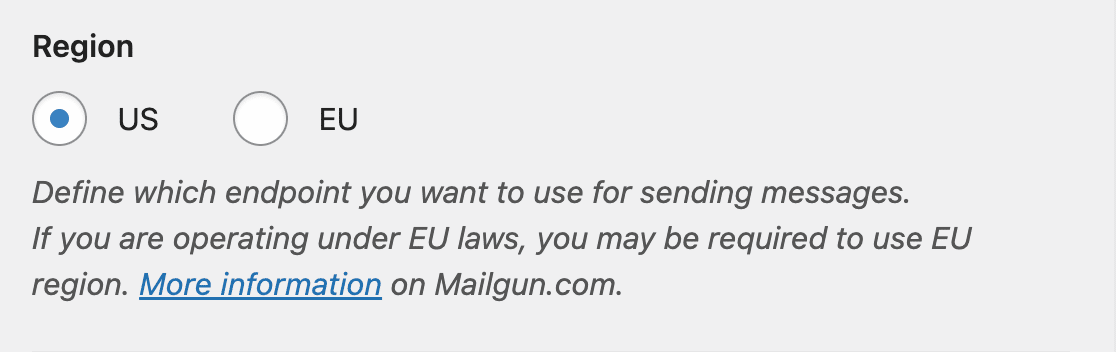
After that, return to your WordPress admin area and go to WP Mail SMTP » Settings. Scroll to the Mailgun section and check the Region dropdown. It must match the region shown in Mailgun. If it doesn’t match, select the correct region and click Save Settings.
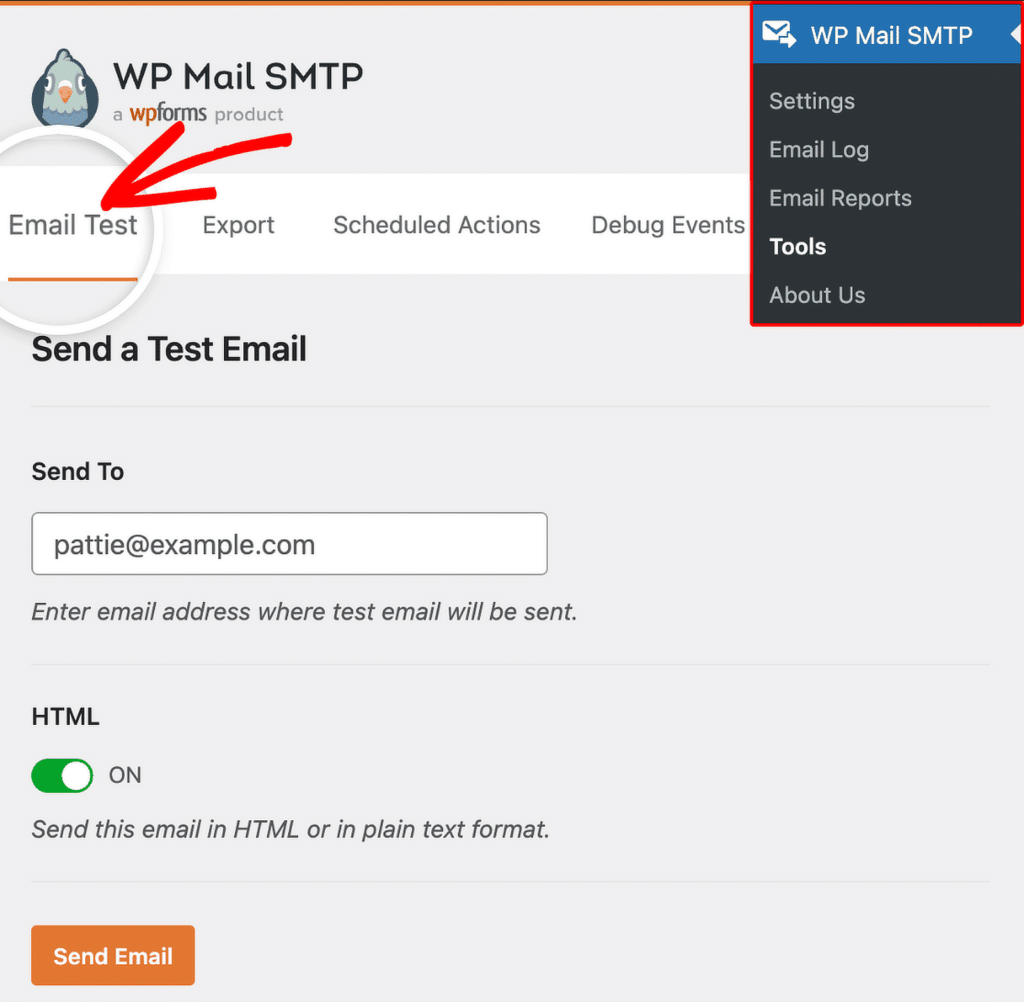
To test the fix, go to WP Mail SMTP » Tools, click the Email Test tab, enter a recipient email in the Send To field, leave the HTML toggle ON, and click Send Email.
Finally, look for the success message and check your inbox to confirm the email arrived. If the error is gone, you’re done. If it persists, continue to Step 2.
Step 2: Generate a New API Key
If the region is correct, the API key itself may be invalid, deleted, or the wrong type. Mailgun only shows API keys once at creation, so you can’t re-copy an existing one. Generate a new one.
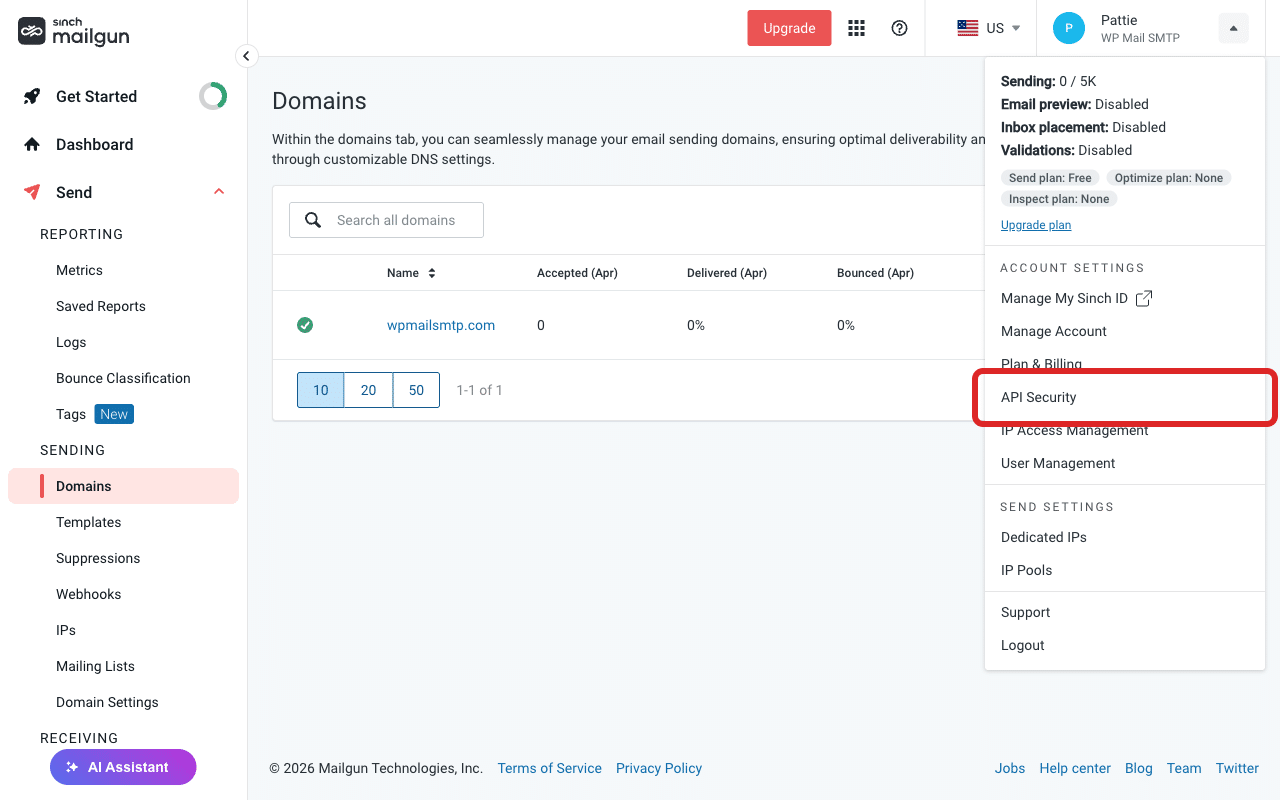
Start by clicking your profile circle with initials in the upper-right corner of Mailgun.
Then, click API Security in the dropdown menu.
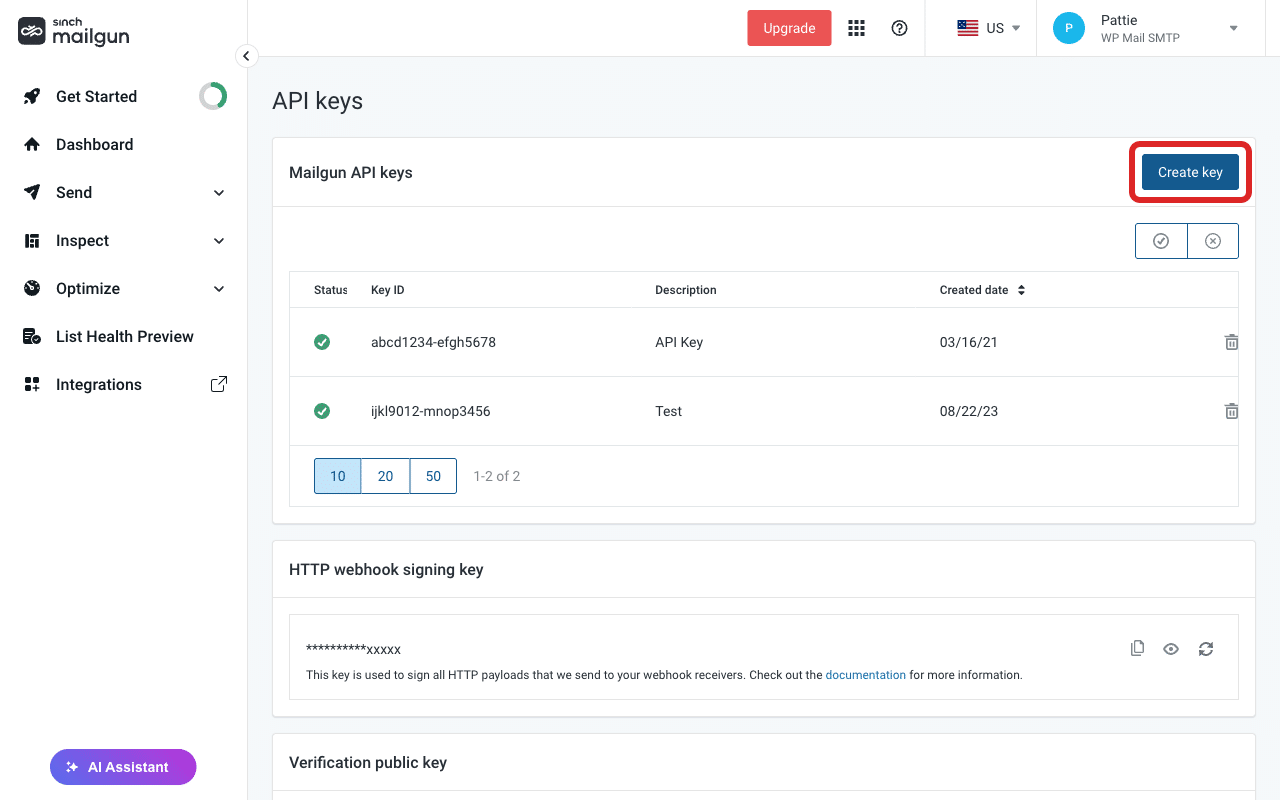
Under Mailgun API keys, click Create key.
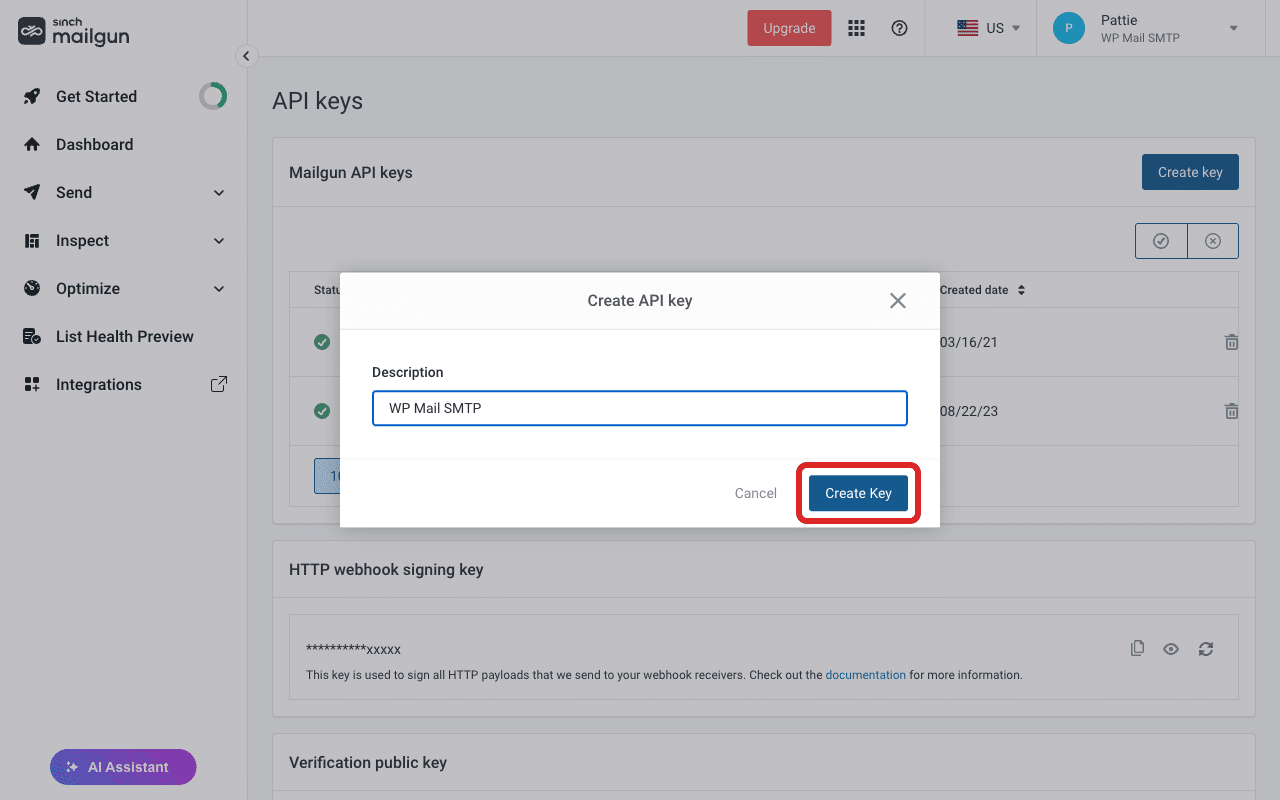
Then, enter a description (e.g. “WP Mail SMTP”) and click Create Key.
Next, copy the API key immediately.
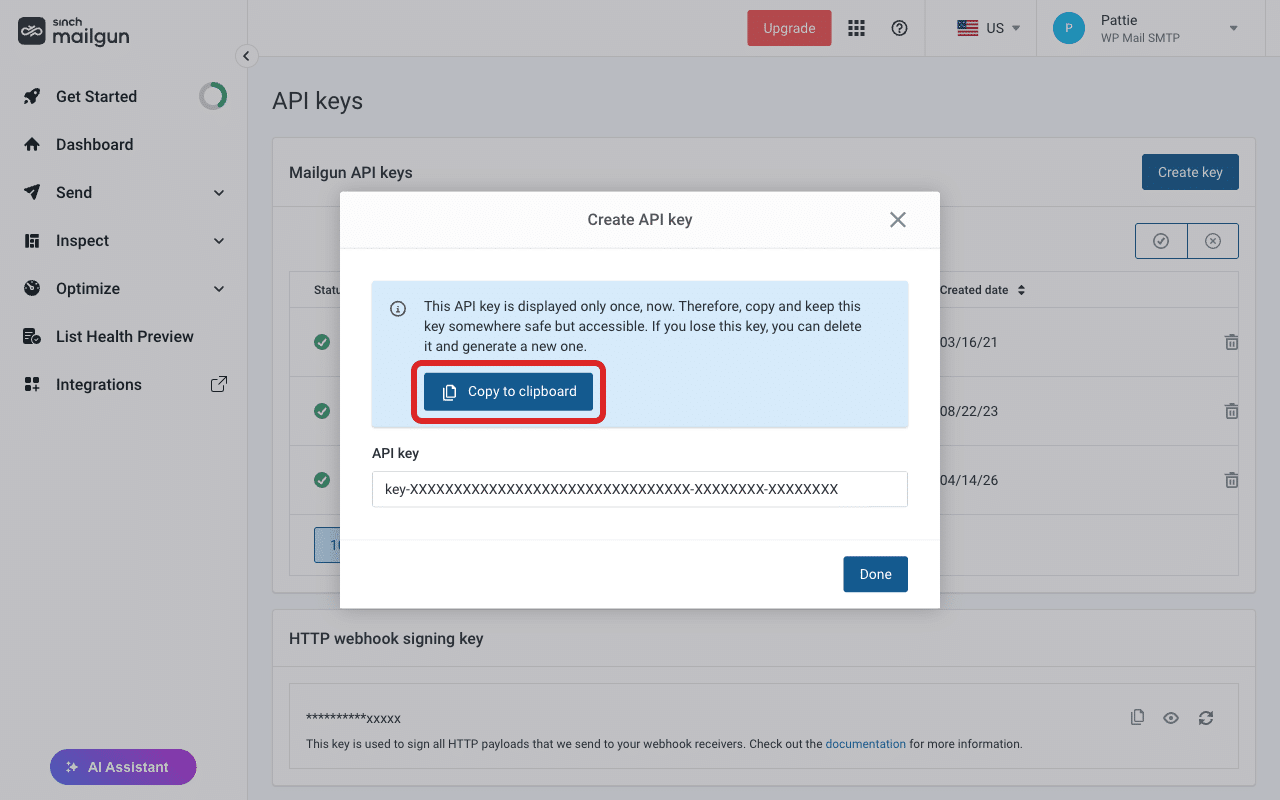
Note: Mailgun only shows the full key once. After closing this dialog, you can’t retrieve it. Store it in a secure location before closing.
After that, return to your WordPress admin area, go to WP Mail SMTP » Settings, and scroll to the Mailgun section.
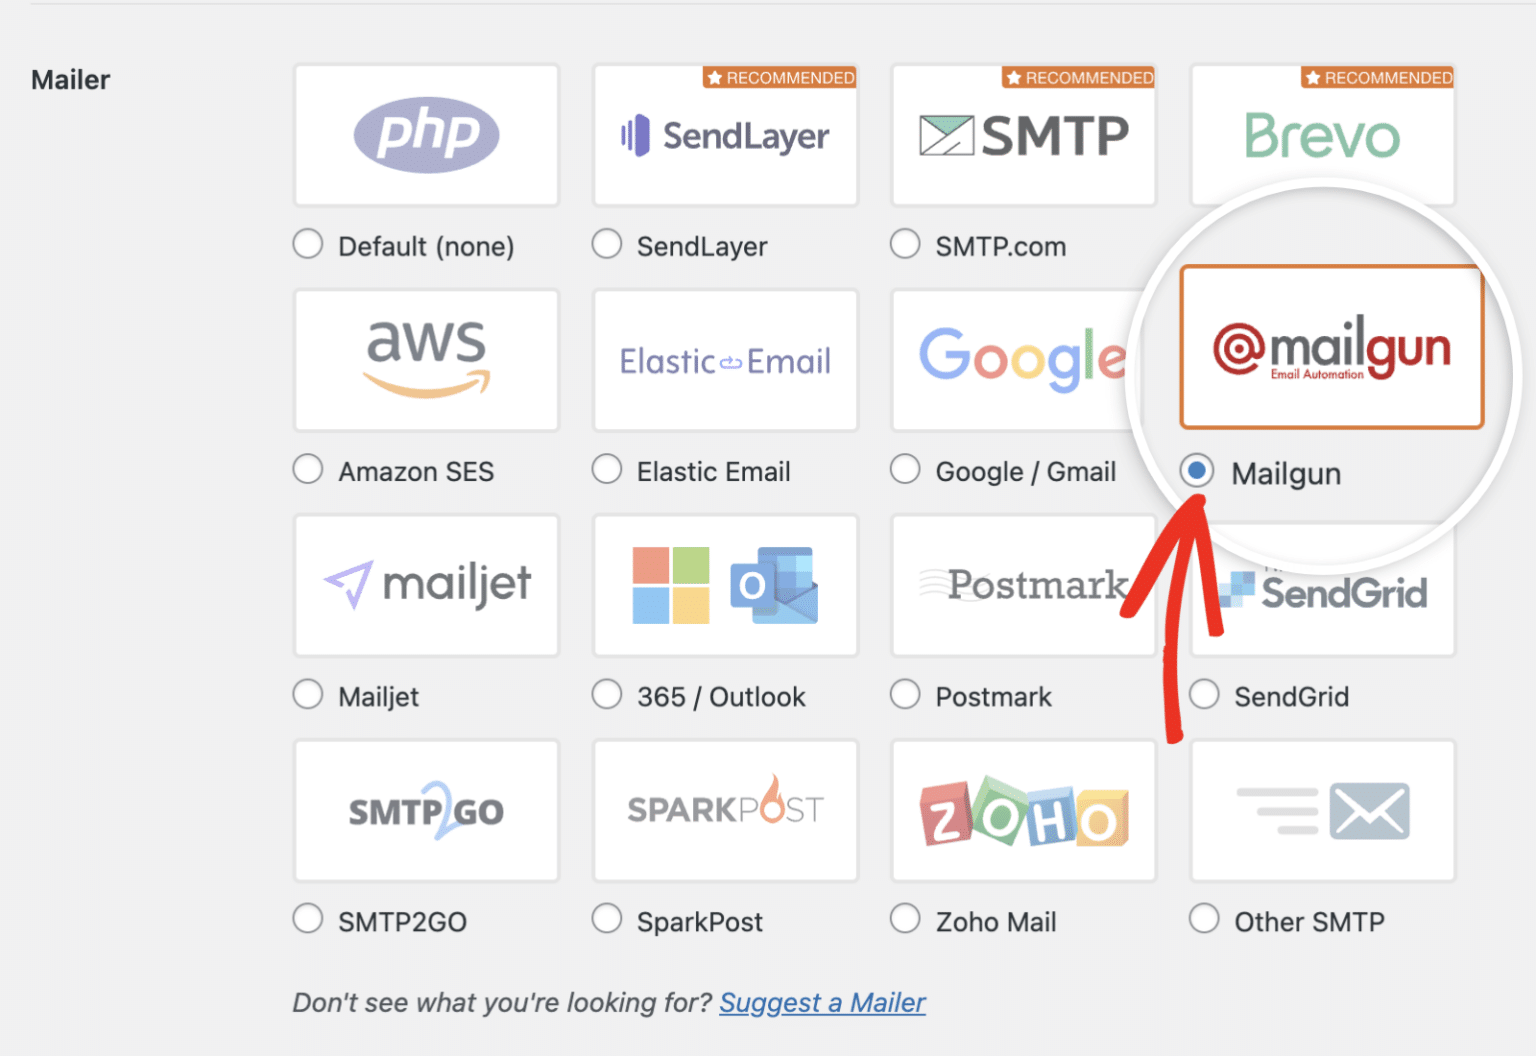
Paste the new key into the Mailgun API Key field.

Finally, verify the Region still matches your domain’s region and click Save Settings. Then, send another test email from WP Mail SMTP » Tools » Email Test to confirm the fix.
Notes
- Mailgun API keys are global. The same key works in both regions. However, the Region setting in WP Mail SMTP controls which endpoint WP Mail SMTP uses: US domains use
api.mailgun.netand EU domains useapi.eu.mailgun.net. A wrong region setting causes a 401 even with a valid key. - Mailgun has three API key types on the API Security page: Verification Public, HTTP Webhook Signing, and Mailgun API. Use the key from the Mailgun API keys section.
- Older Mailgun accounts may have API keys that include a
key-prefix. If your key starts withkey-, include the prefix when pasting it into WP Mail SMTP.
That’s It! You now know how to fix the ‘401 Unauthorized or Forbidden’ error in Mailgun and get your emails sending again through WP Mail SMTP.