


AI Summary
Note: This guide applies to the SendLayer mailer in WP Mail SMTP.
What This Error Means
The recipient email address you’re trying to send to is in SendLayer’s suppression list. A suppression list is an automatic block list that email services maintain. It prevents delivery to addresses that have previously bounced, marked messages as spam, or unsubscribed. SendLayer adds addresses to this list automatically to protect your sending reputation.
Common Causes
- Recipient email previously hard-bounced (the address doesn’t exist or is invalid)
- Recipient previously marked an email sent through SendLayer email as spam
- Test email address added to suppression during testing with an invalid address
- Address manually added to suppression list
How to Fix
Here is the complete step-by-step guide to resolving the error.
Step 1: Remove the Address From the Suppression List
Before removing an address from the suppression list, confirm the recipient email address is real and correctly spelled. If the address is invalid, then removing it will cause another bounce and re-suppression.
Important: Only remove addresses from the suppression list when you’re confident the address is valid. Re-adding an invalid address will cause more bounces and damage your sending reputation.
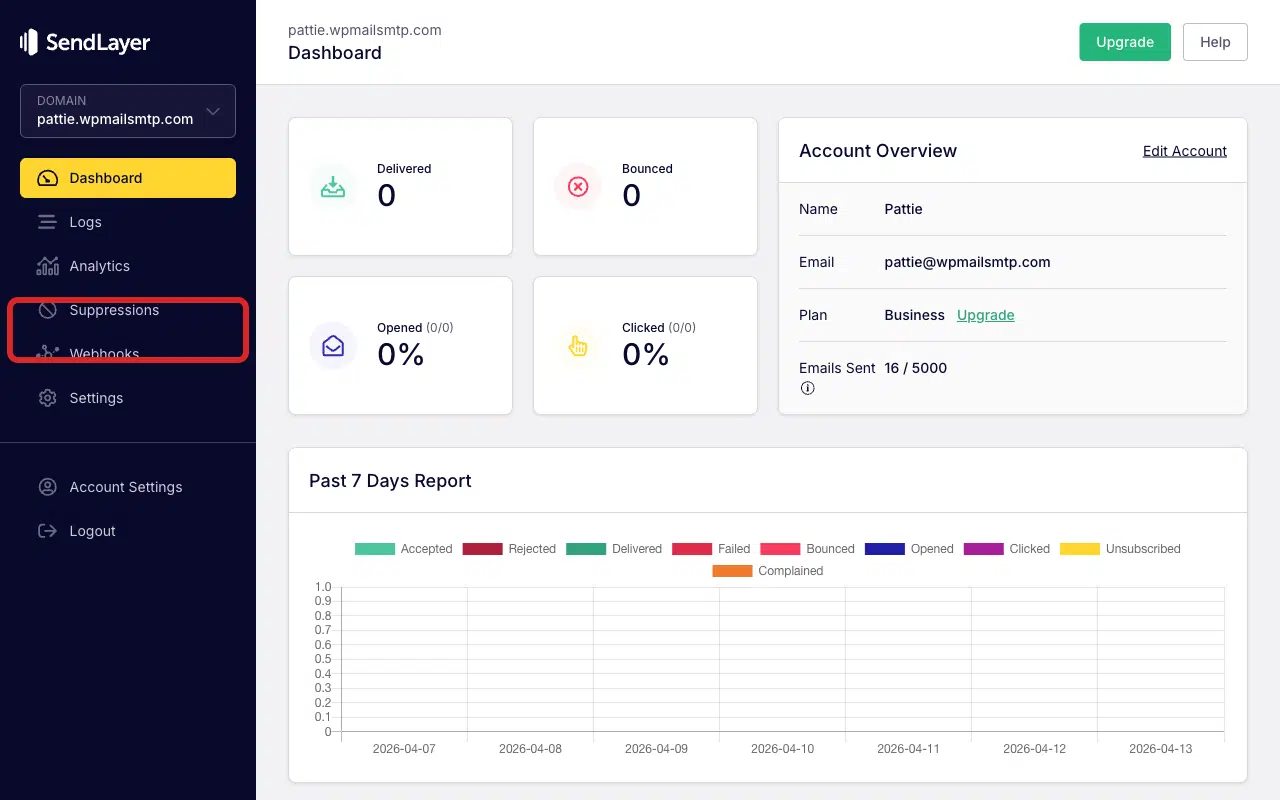
To manage your suppression list, log in to your SendLayer account. Once you’re logged in, click Suppressions in the sidebar.
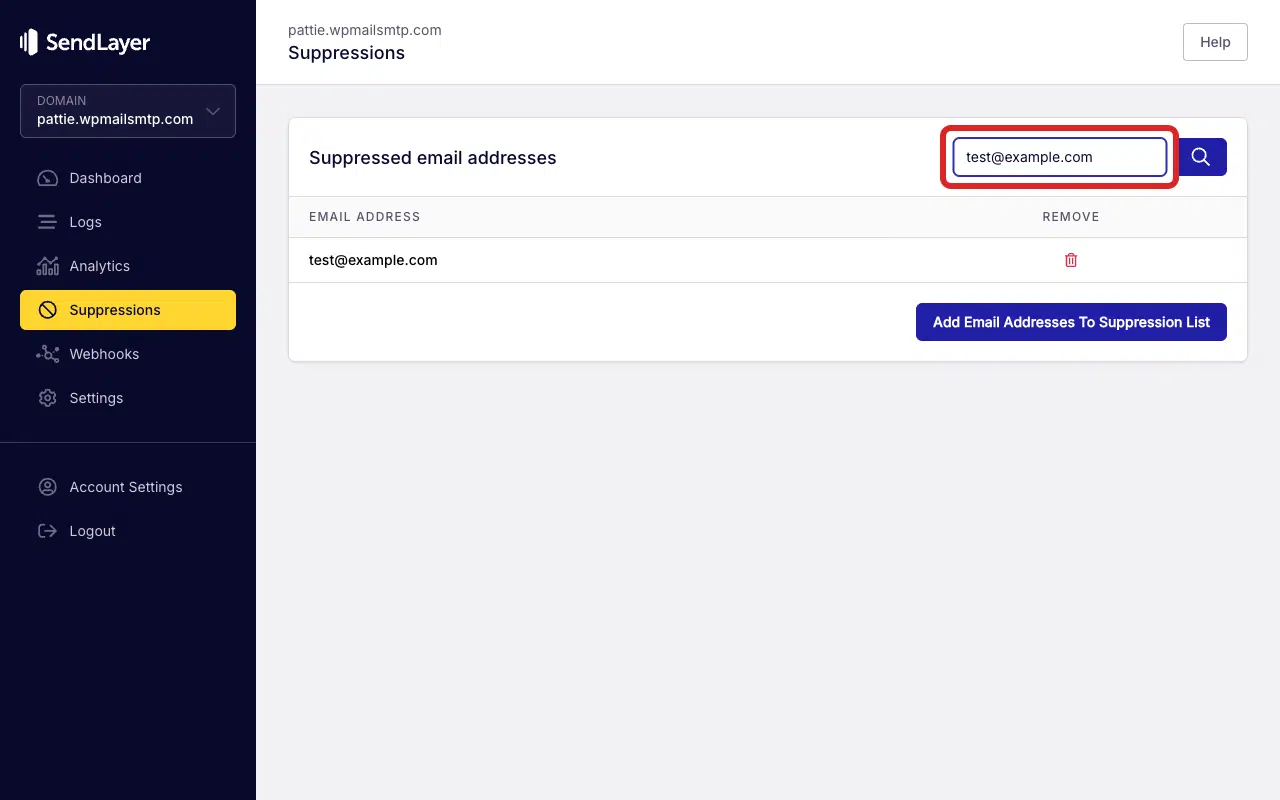
Then, enter the recipient email address in the Search suppressions field.
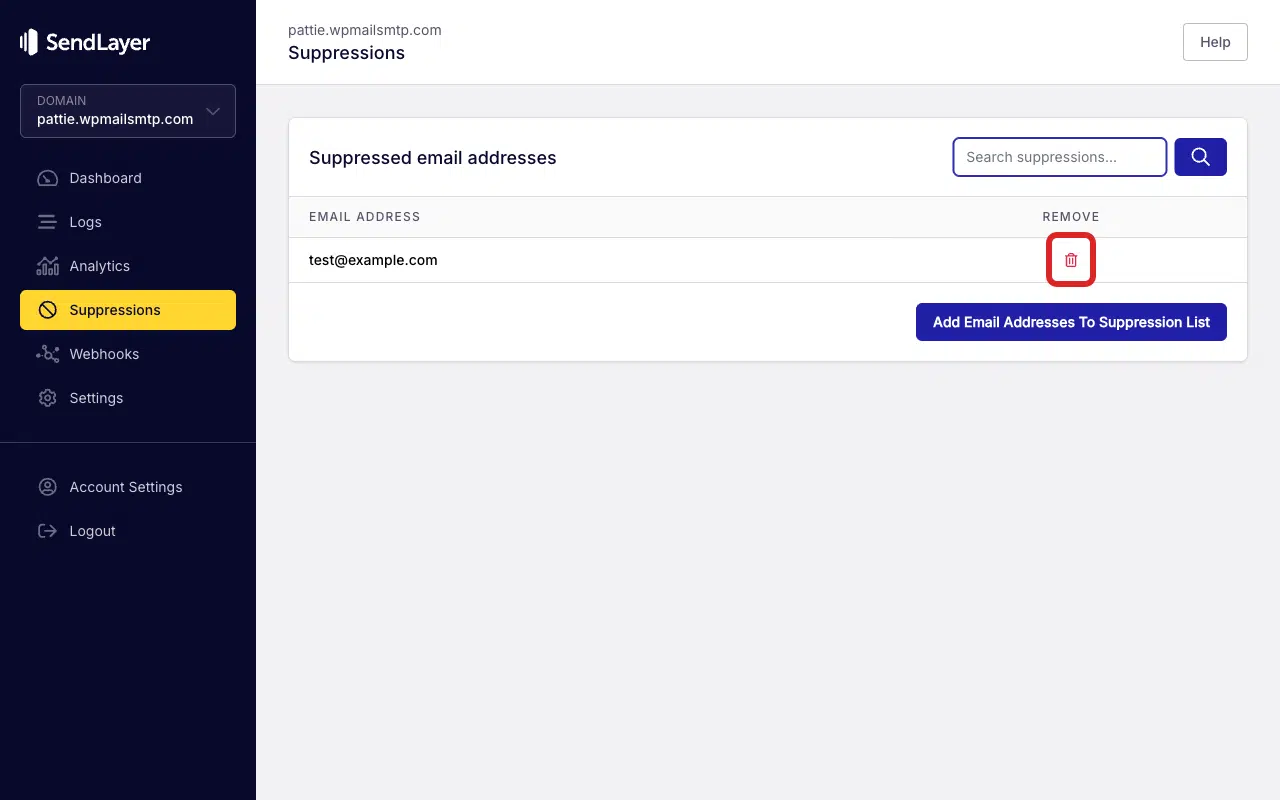
Next, click the trash icon in the Remove column next to the email address.
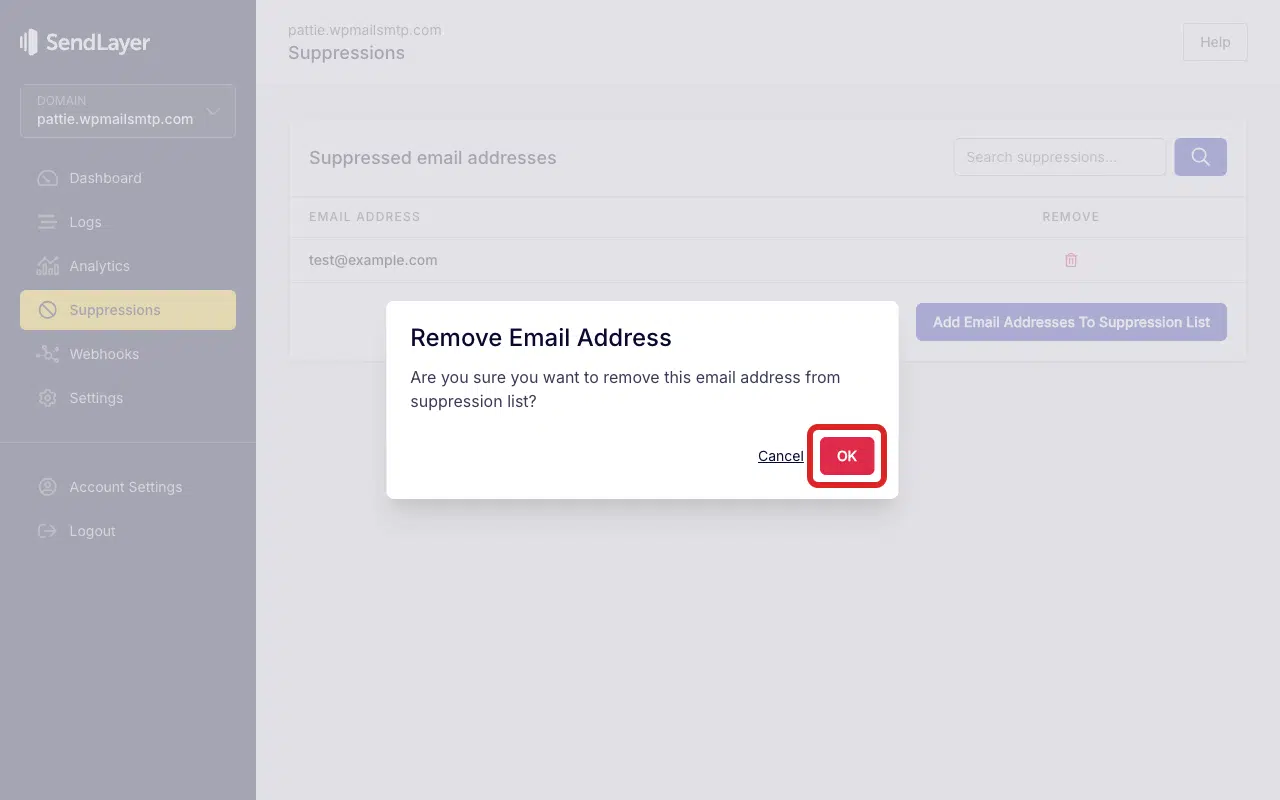
In the overlay that appears, click OK to confirm the removal.
Step 2: Send a Test Email
To test the fix, log in to your WordPress admin area and go to WP Mail SMTP » Tools, click the Email Test tab, enter the previously suppressed address in the Send To field, leave the HTML toggle ON, and click Send Email.
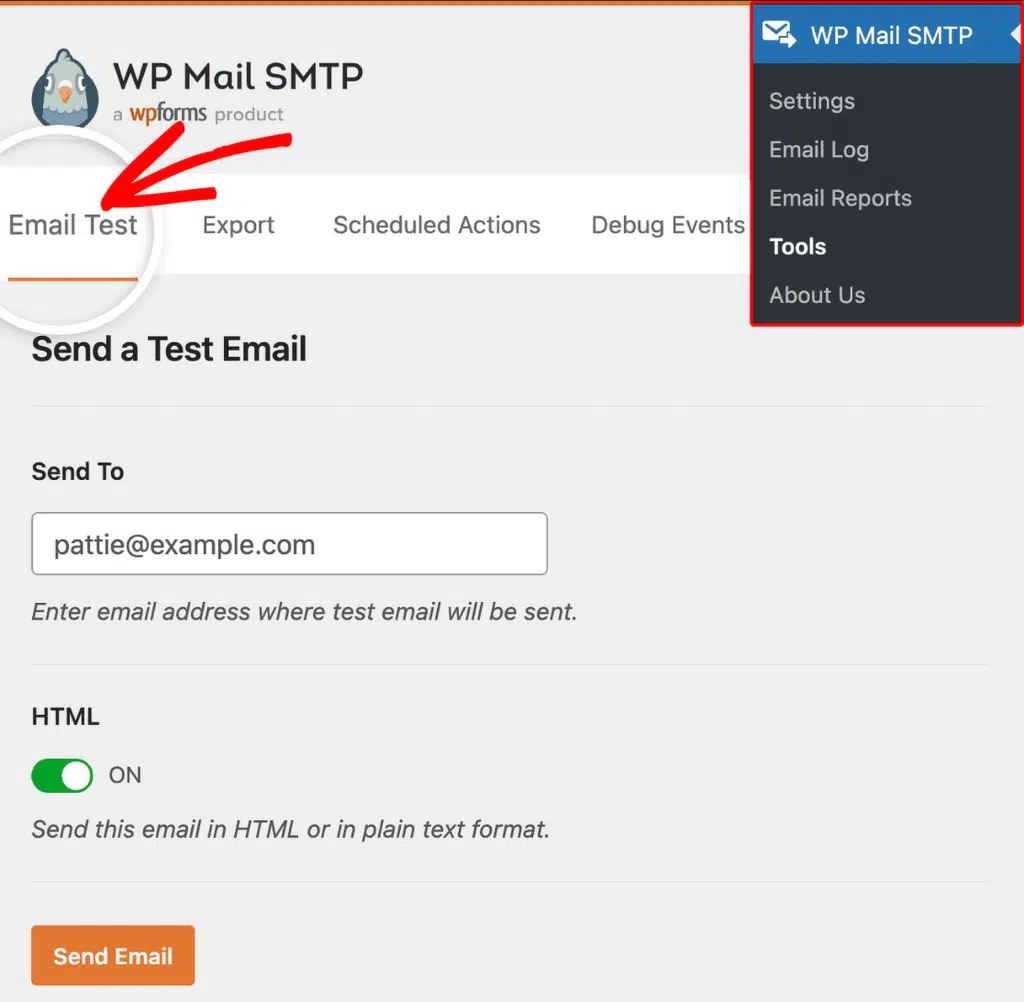
Once done, look for the success message and confirm the email arrived in the inbox.
Notes
- Only remove addresses from the suppression list if you’re confident the address is valid and SendLayer suppressed it in error. Re-adding an invalid address will cause more bounces.
- If you’re testing with a real address and SendLayer suppressed it, it’s safe to remove.
- For the test email flow in WP Mail SMTP, try a different email address if the current one is suppressed and you’re testing connectivity.
That’s It! You now know how to fix the ‘Email Address in Suppression List’ error in SendLayer and get your emails sending again through WP Mail SMTP.