AI Summary
Would you like a private email setup on your WordPress site using Amazon SES? This guide is tailored for setting up WP Mail SMTP to hide user identities and restrict email domains.
This tutorial covers the steps to enhance privacy and domain restrictions using WP Mail SMTP with Amazon SES mailer.
In This Article
Note: Before proceeding with this guide, ensure you have followed the Amazon SES guide to set up your AWS SES mailer.
This additional tutorial is for users who require advanced privacy measures, like hiding the SES identities table within the WP Mail SMTP plugin and creating a new IAM user for sending emails from a specific identity.
Hiding the SES Identities Table
To enhance the privacy and security of your WordPress site, especially when you’re not the owner of the SES account, you may opt to hide the SES identities table in your WP Mail SMTP settings. This is useful in scenarios such as when freelancers or agencies maintain client sites but want to limit access to SES details.
Hiding Identities
To hide the SES identities table, you will need to modify the wp-config.php file in your site’s directory.
Note: If you’re not sure how to locate and edit the wp-config.php file, check out WPBeginner’s guide for more details.
After opening the wp-config.php file, paste the following line of code before the comment that says /* That's all, stop editing! Happy publishing. */.
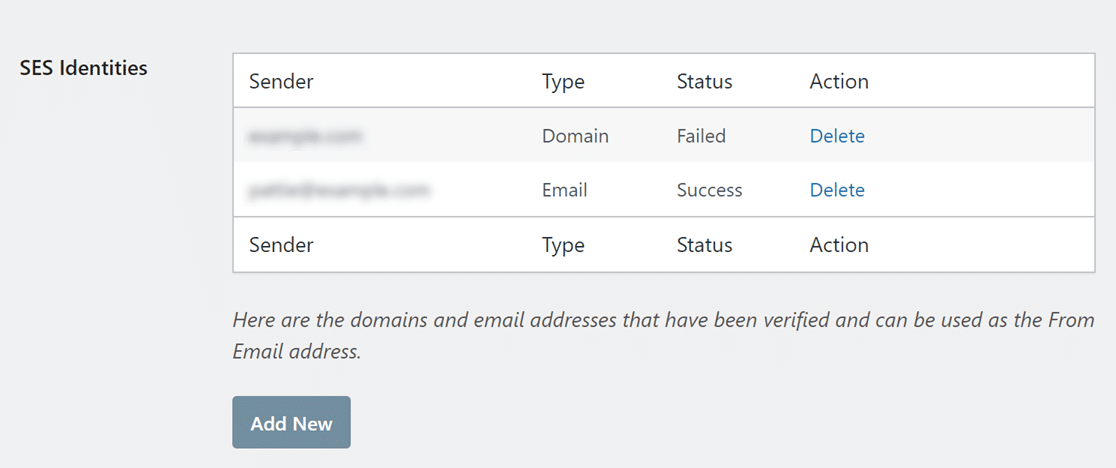
By adding this code snippet, you will hide the SES Identities table from the SES Mailer settings in the plugin, which can be found under:
- Settings » General » SES Mailer
- Settings » Setup Wizard » SES Mailer
- Settings » Additional Connections » SES Mailer
Creating a New IAM User and Policy
If you want tighter control over who can send emails from your site, consider setting up a new IAM user and policy. This is an optional, advanced step that lets you limit email sending to certain identities, like specific domains or email addresses, for better security and management.
Creating an IAM User
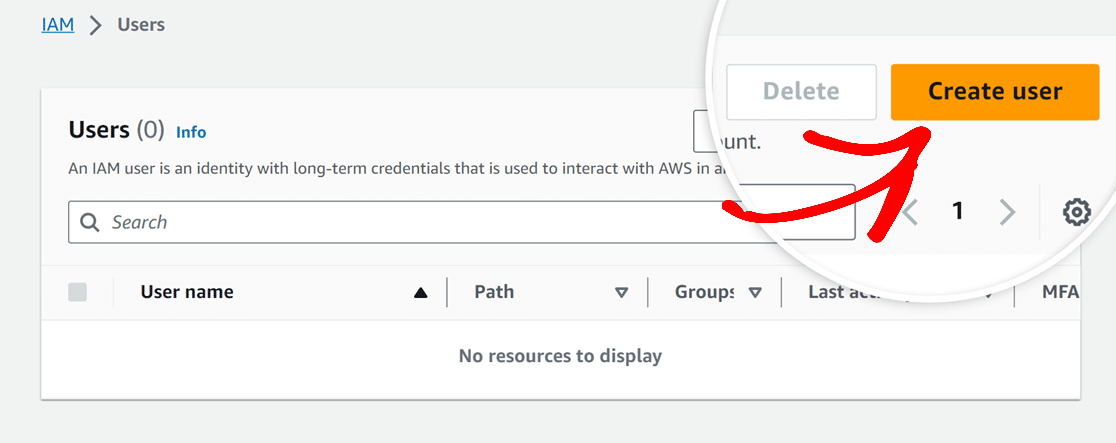
First, you’ll need to open the Amazon Web Services’ IAM Users page.
Within this page, click the Create user button.
Next, you’ll need to set up a new user. In the User name field, you can add any name you’d like. However, we recommend using the following name format:
yourdomain_wpmailsmtp
For example, for WPForms.com we would use the following user name: wpformscom_wpmailsmtp. If you need to set up or edit users down the road, this will make it easy to keep track of which site is connected to each user.
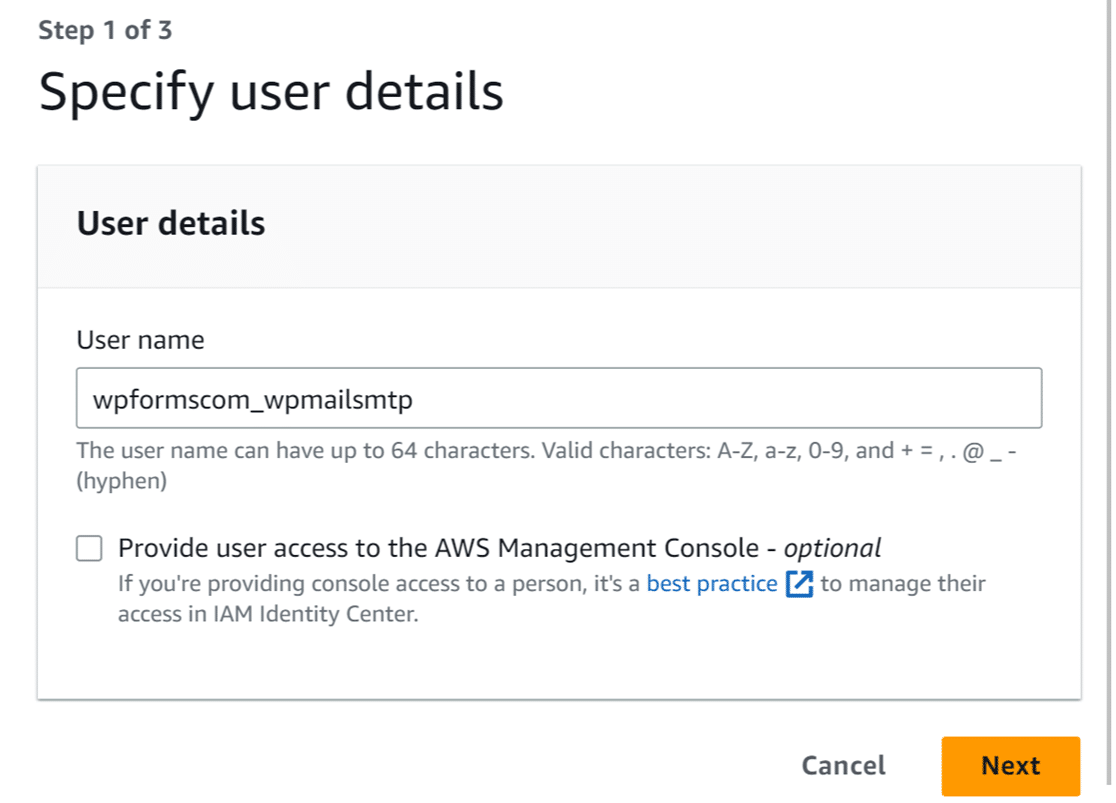
When you’re ready, click the Next button to proceed.
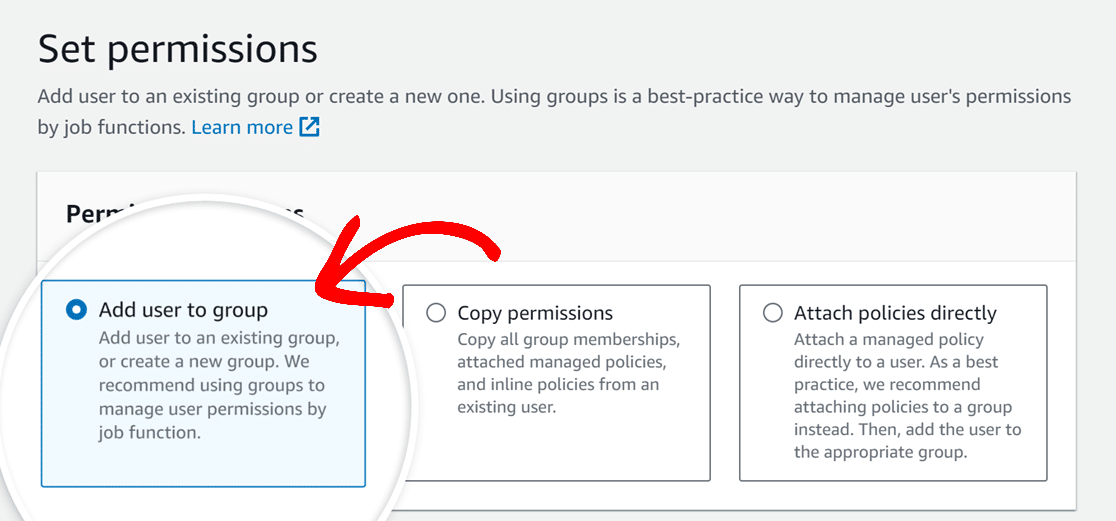
For the next step, we’ll leave the Add user to group option selected and proceed by clicking the Next button.
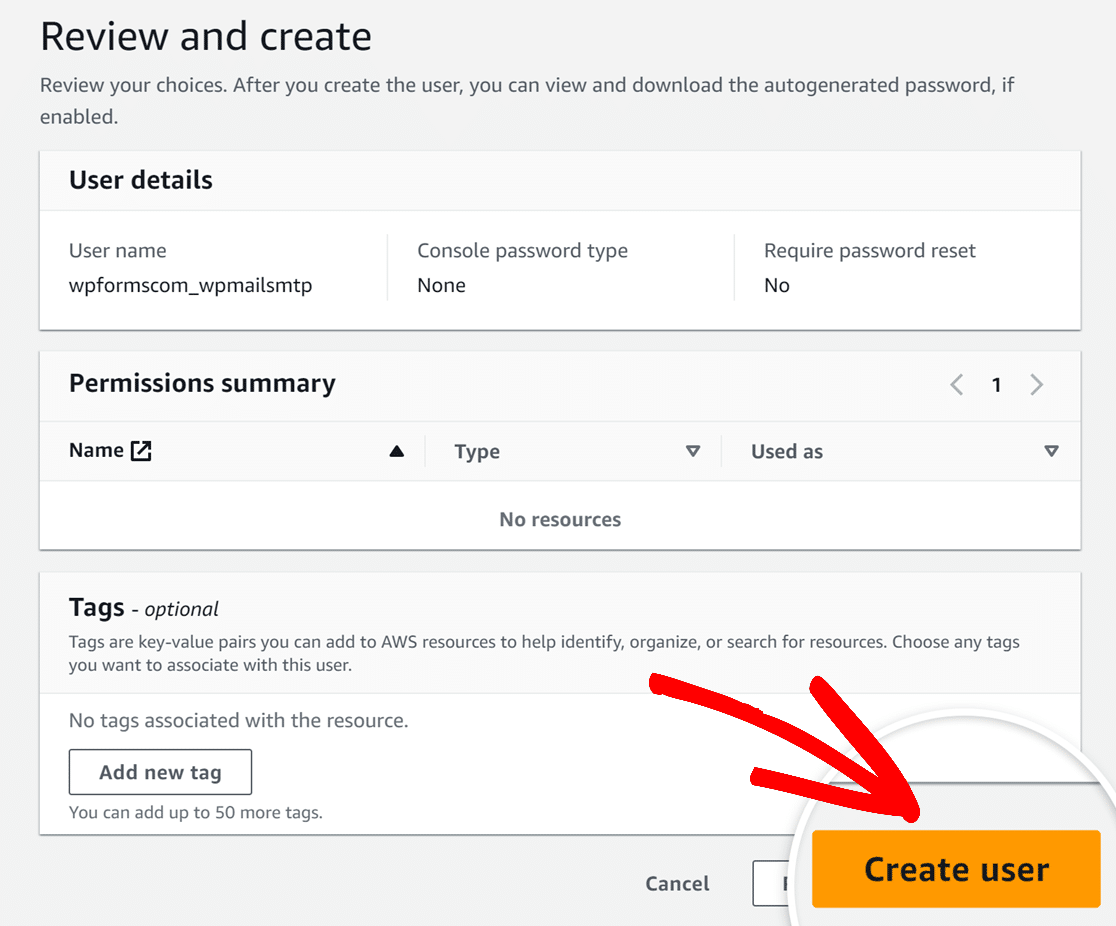
On the next page, you’ll be shown all the details you’ve chosen for this user. You can double-check that everything looks correct, then click the Create user button.
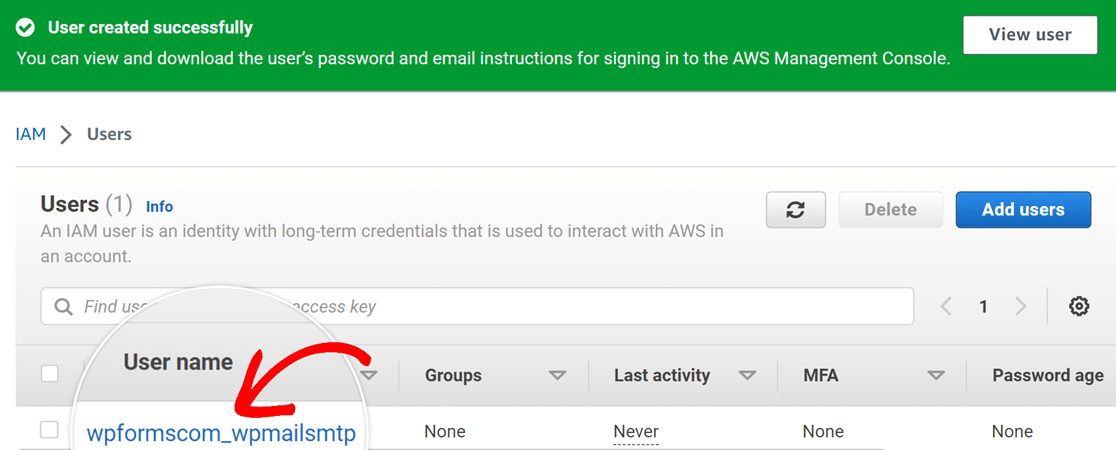
After completing the previous step, AWS will show a success message and automatically direct you to the Users page.
Generating an Access Key
On the Users page, click on the User name of the user you created to proceed.
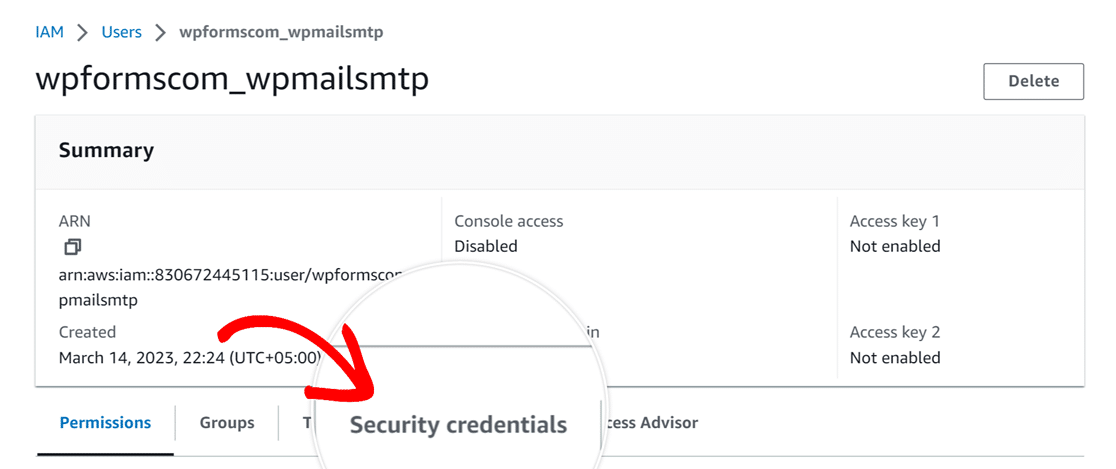
Next, from the tabs which are displayed, click on Security credentials.
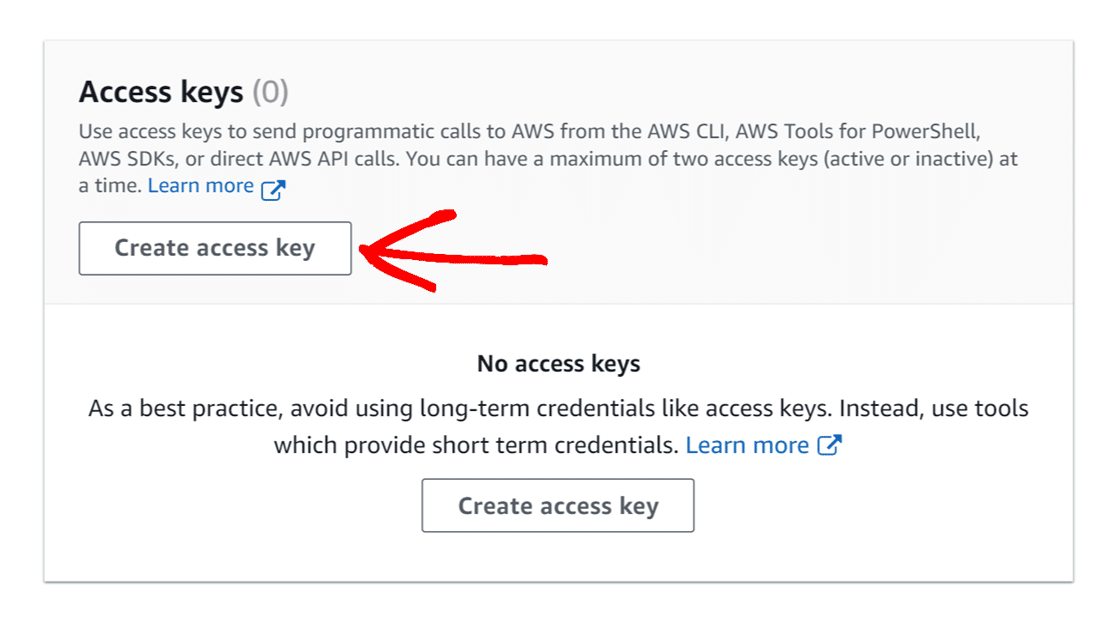
Then, scroll down to the Access keys section and click on the Create access key button.
Next, select Other for the Access key best practices & alternatives section.
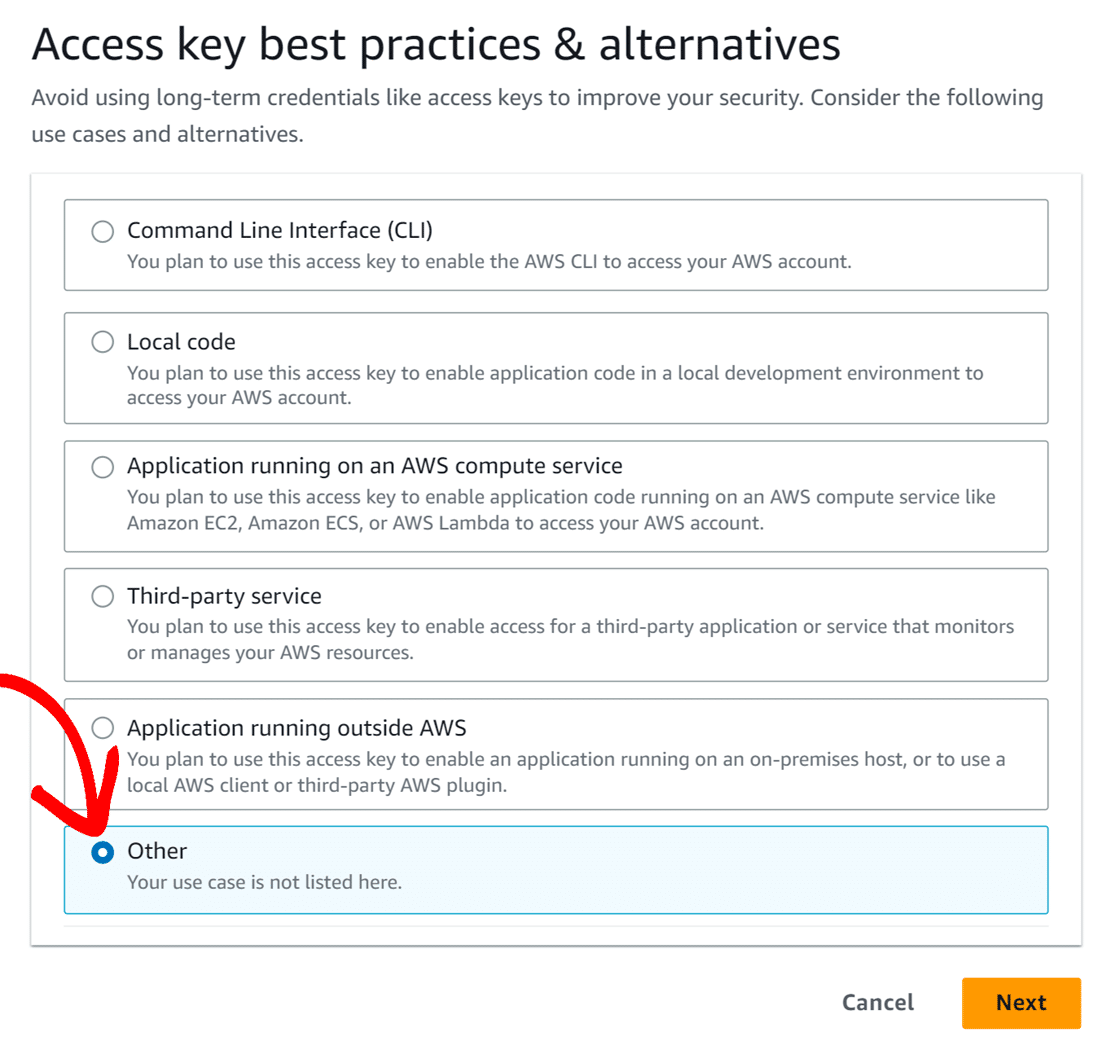
When you’re ready to move forward, click the Next button.
On the next page, you can skip the description tag and simply click the Create access key button to proceed.
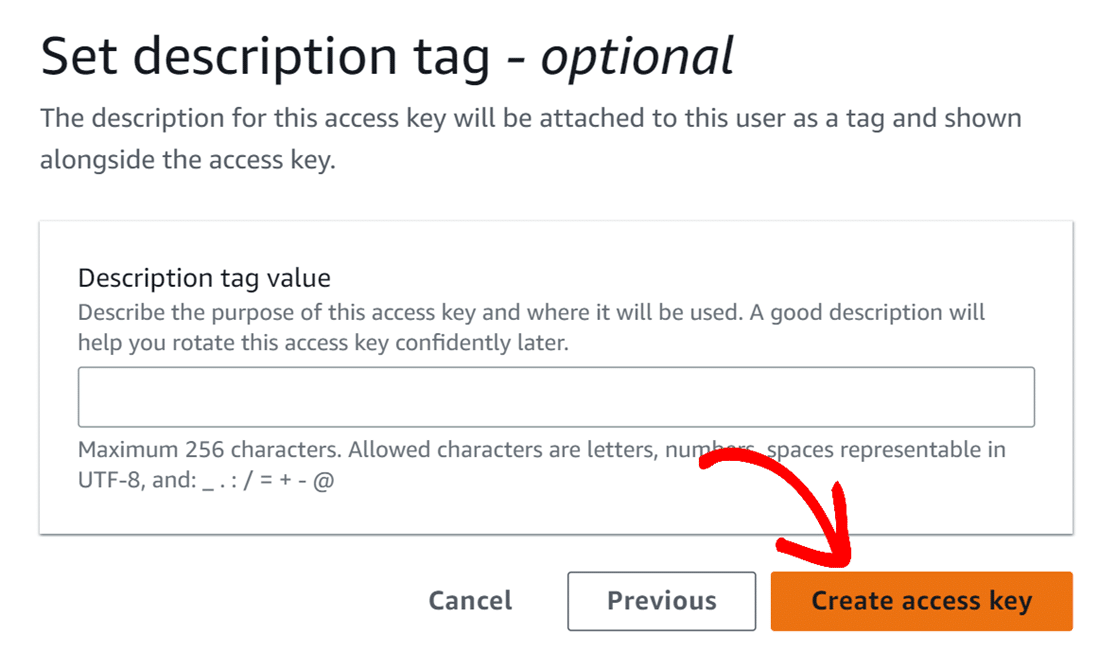
AWS will now display a success message along with the Access key ID and Secret access key for your user. Don’t forget to take a moment to securely save a copy of these keys.
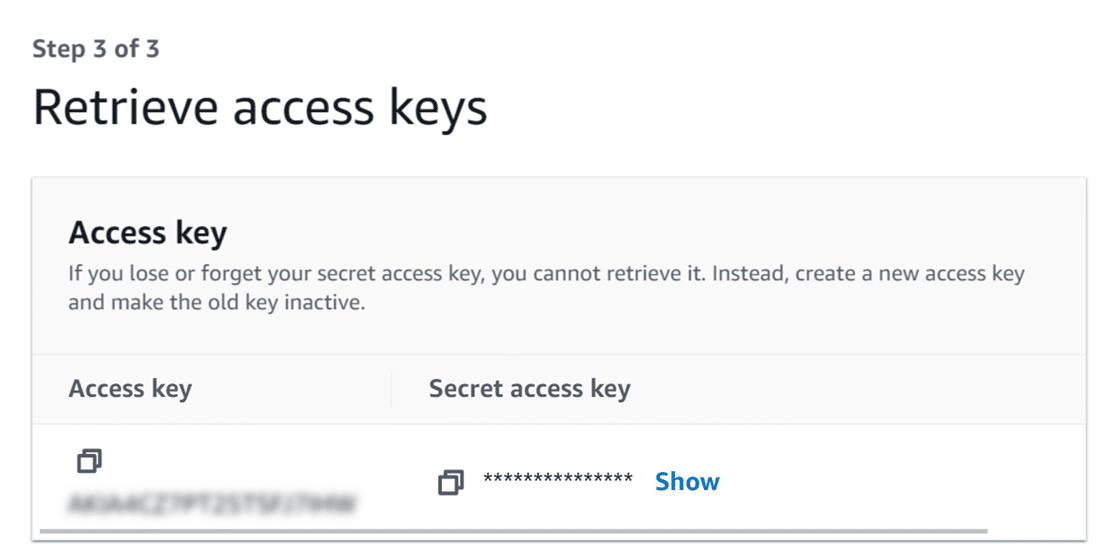
Note: You will not be able to see this Access key ID and Secret access key again once you close this page. Be sure to download a CSV with these details and/or copy them into a safe location.
Once you’ve copied the secure keys, click on the Done button to go to the overview page of the user.
You can also keep this window open for now, as we’ll need to come back here later to copy the Amazon Resource Name (ARN), which is crucial for the next step in the setup process.
Creating a Sending Authorization Policy
After you’ve generated the secure keys, the next step is to create a verified identity.
First, you’ll need to open the Amazon SES console.
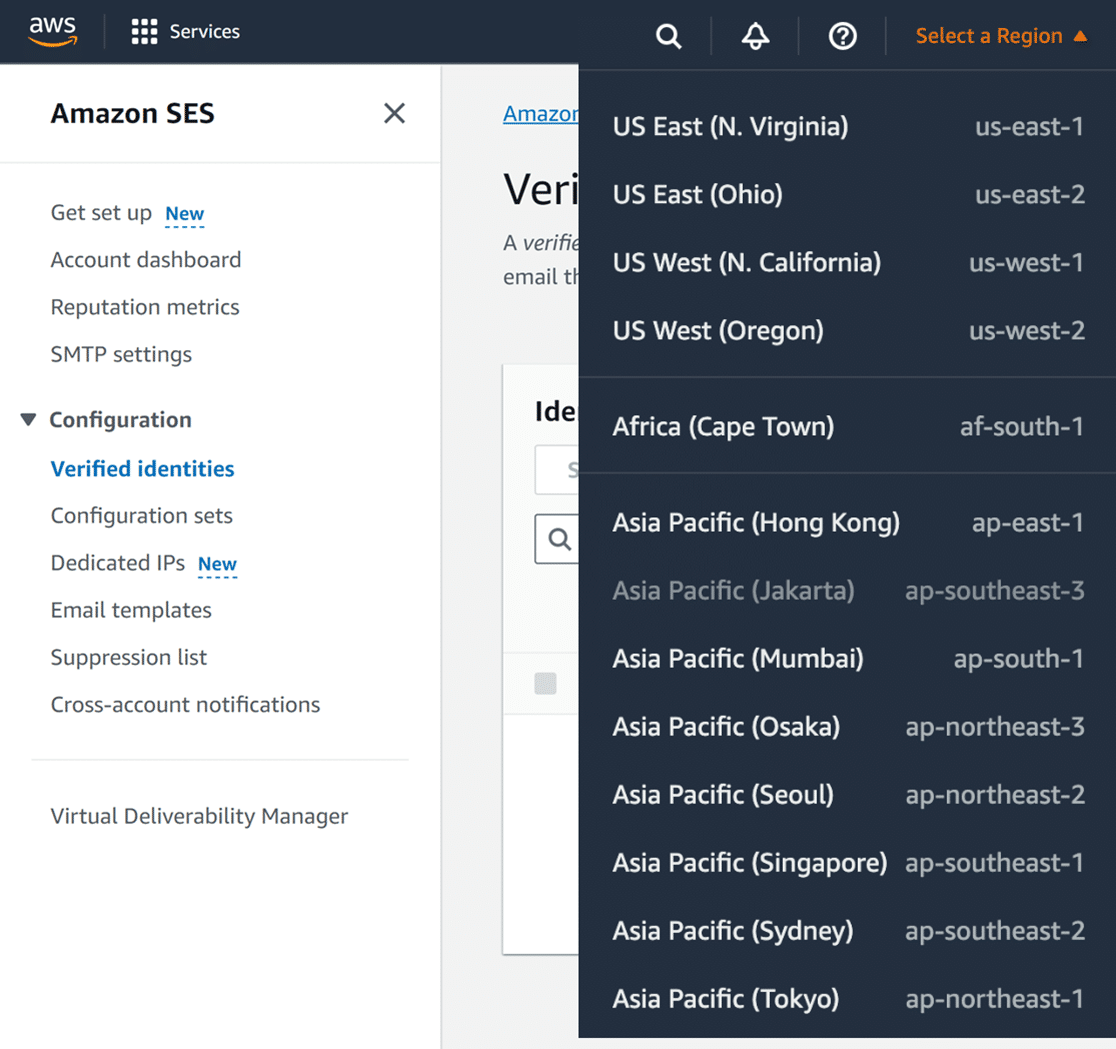
Within this page, click on the Verified identities option in the sidebar menu.
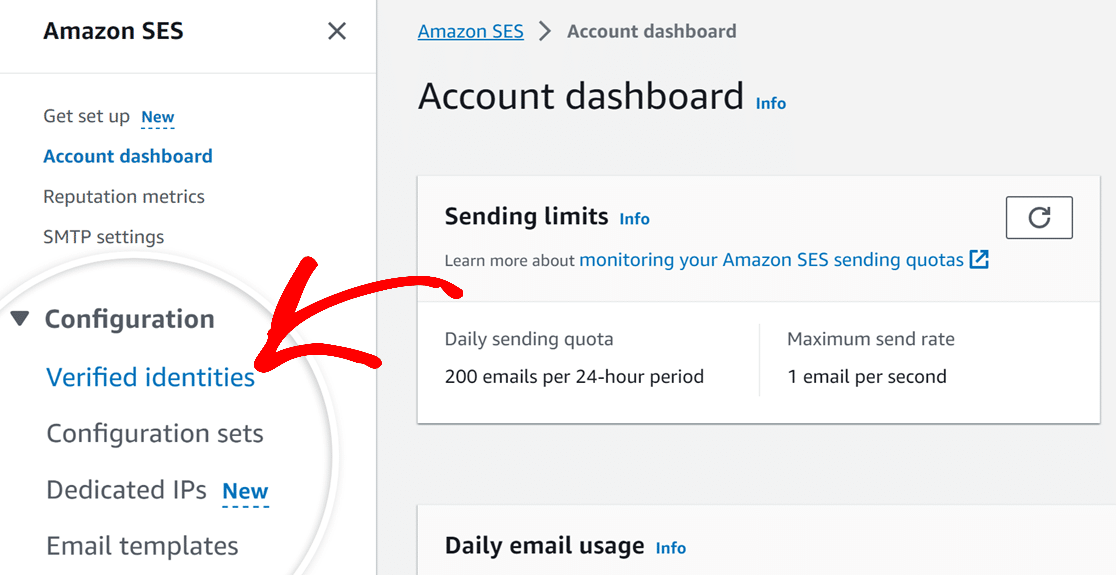
Next, you’ll need to select your region by clicking the Select a Region dropdown and locating your region in the dropdown list. Be sure to select the same region your identities are defined in.
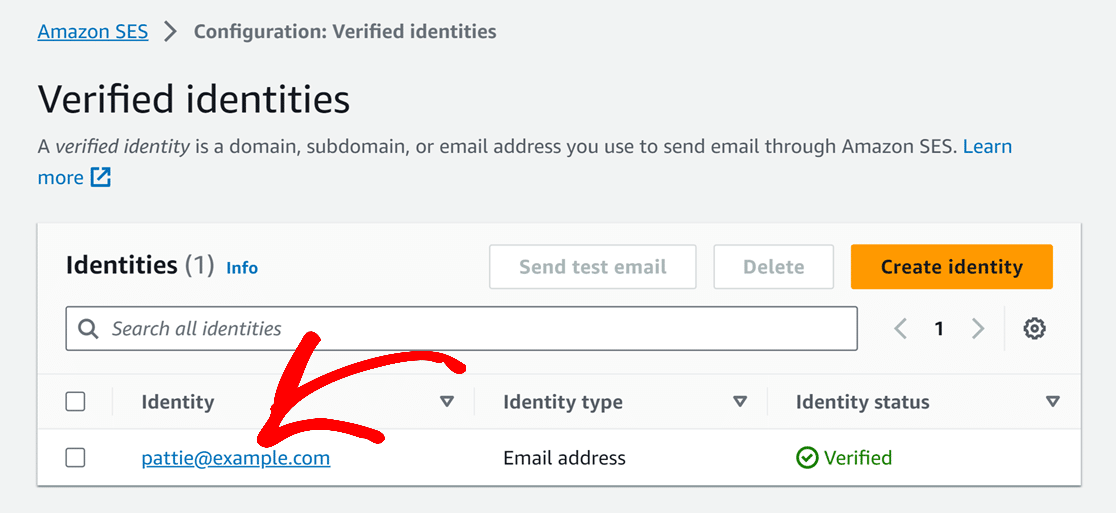
On the Verified Identities page, you will find a list of identities that you have established with Amazon SES. These identities can be either domains, subdomains, or specific email addresses that you use for sending emails.
Click on the identity that you’ve already verified and want to allow a delegate sender to use for sending emails on your behalf.
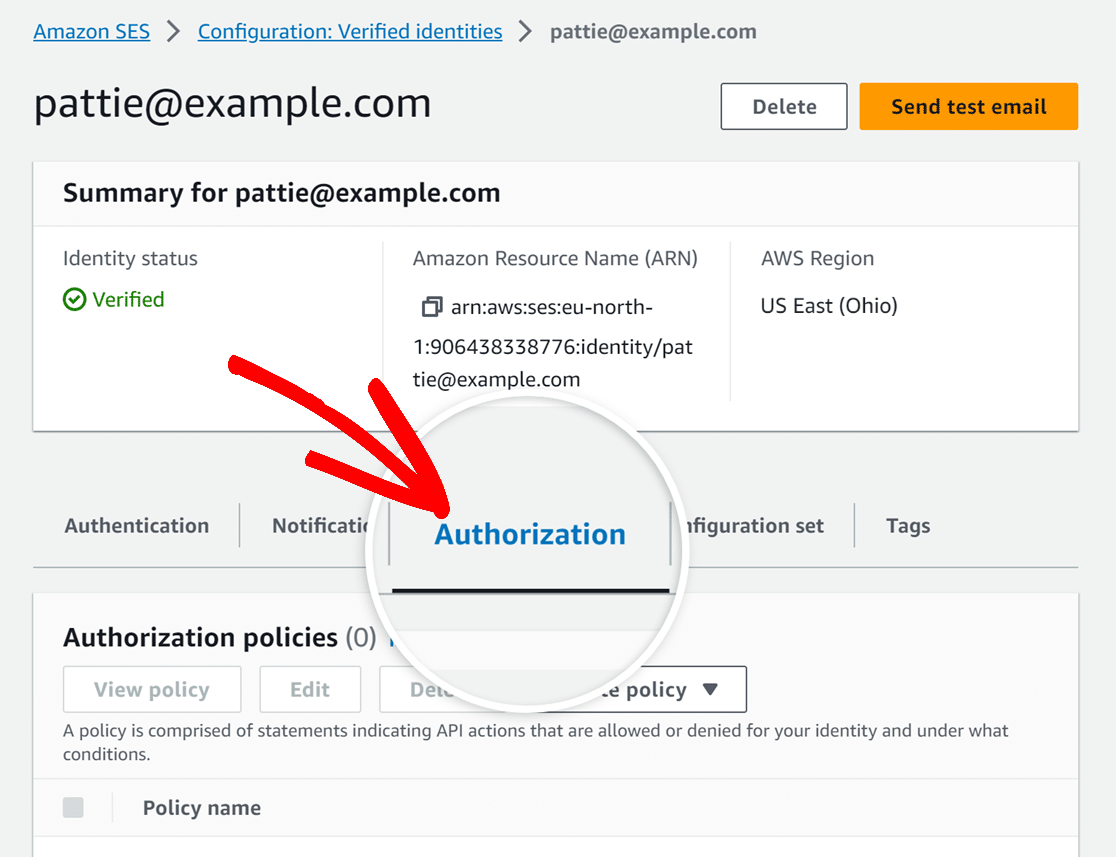
Next, from the tabs which are displayed, click on Authorization.
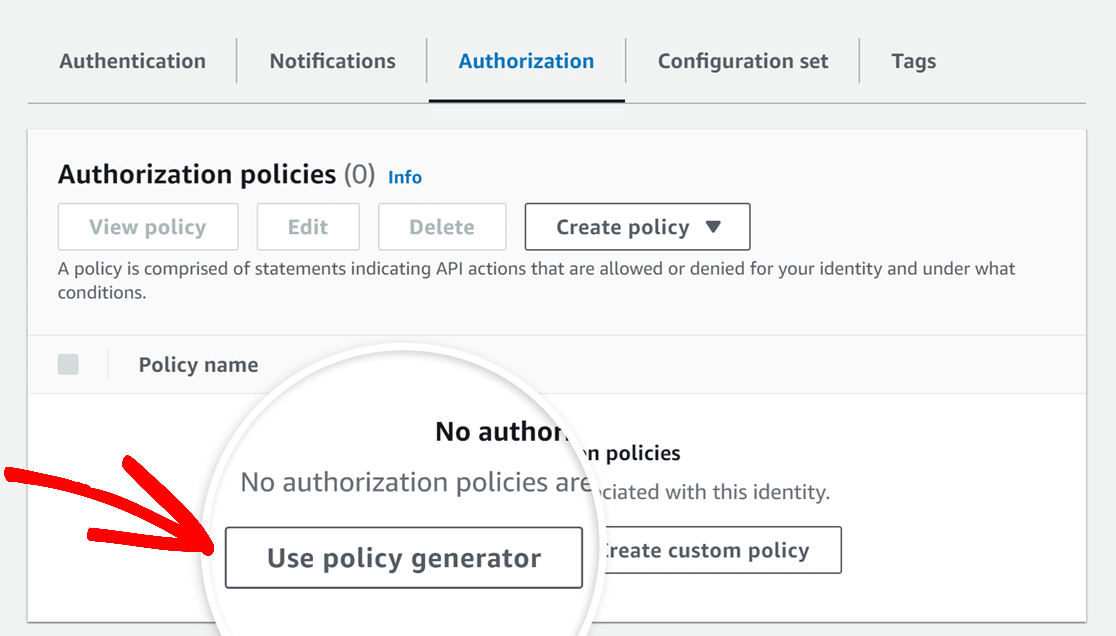
Then, click on the Use policy generator button from the Authorization policies section.
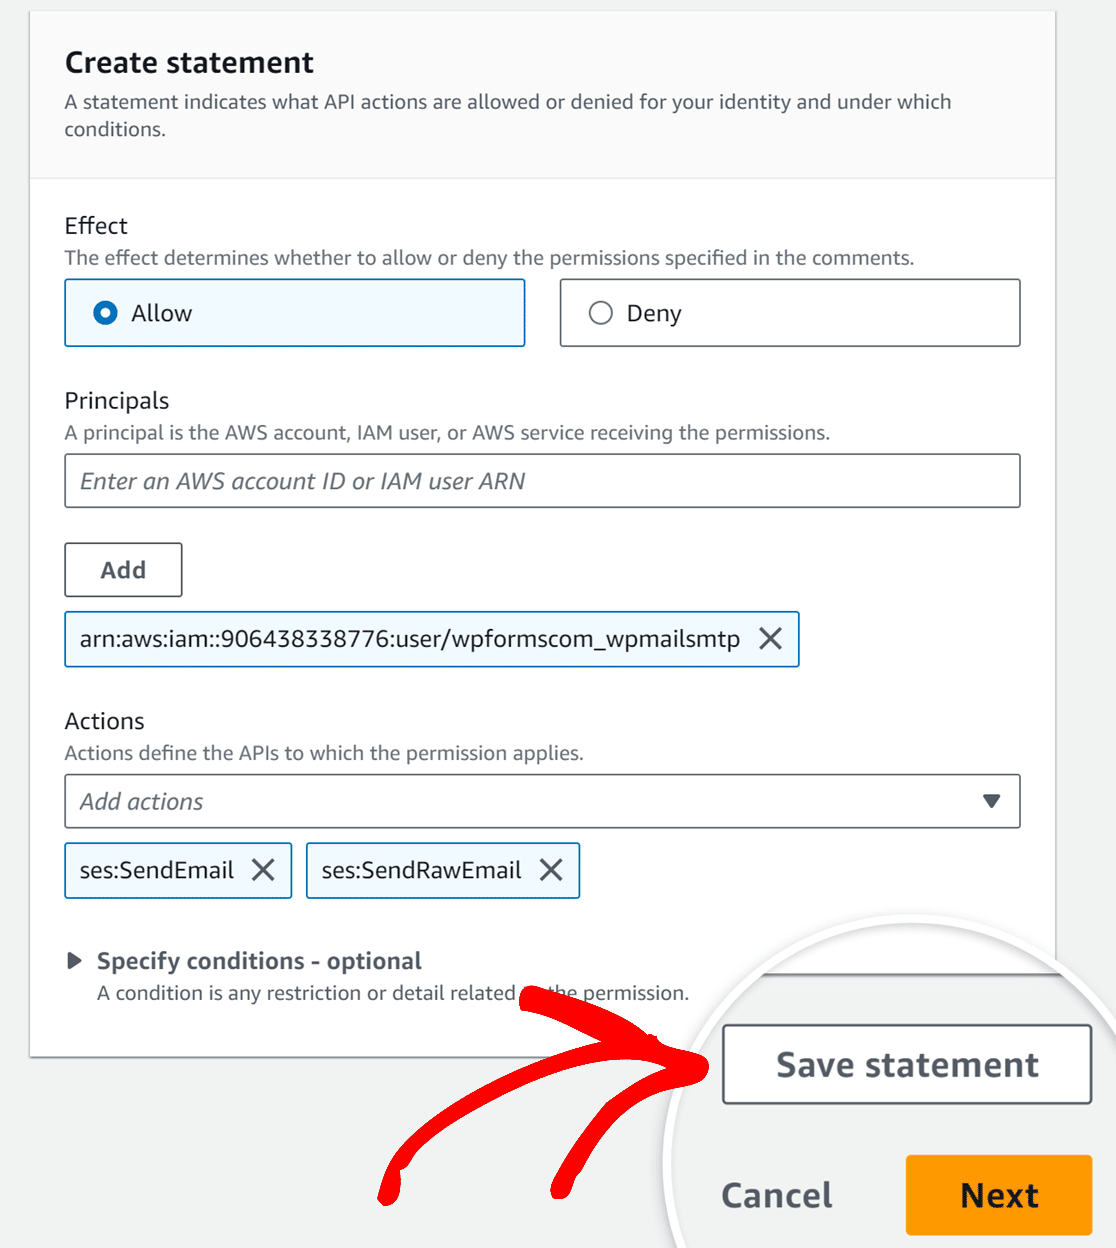
In the next screen, set the Effect option to Allow.
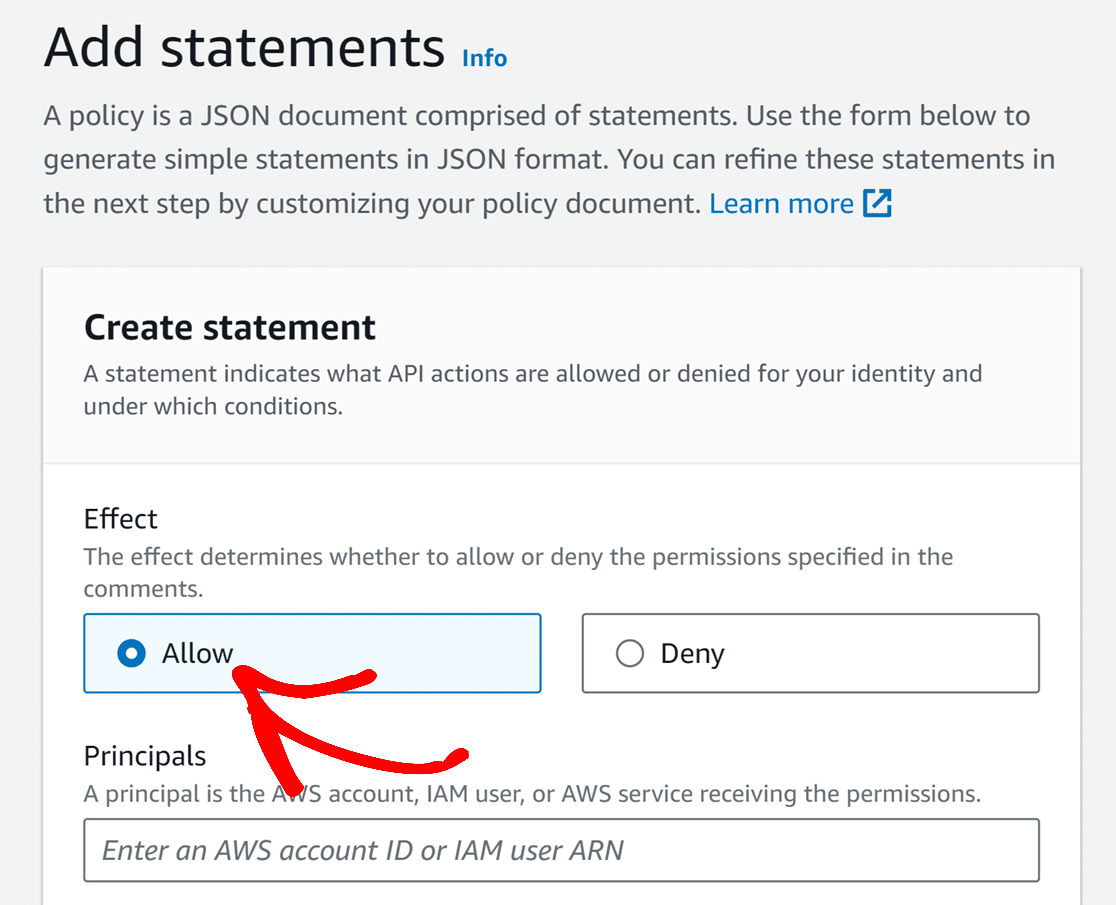
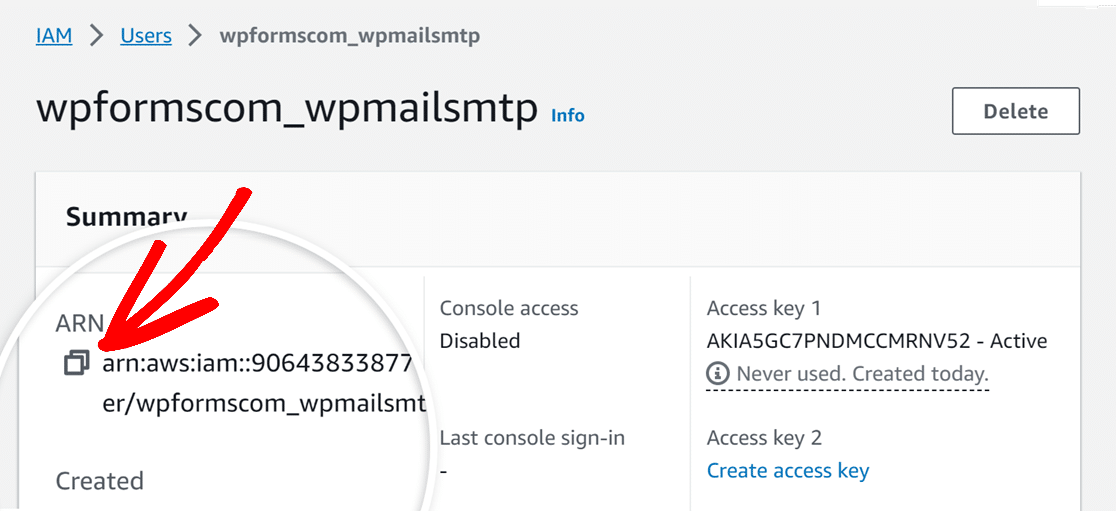
For the Principals field, return to the user’s overview page where the ARN is located. This can be done by either going back to the browser tab or window you left open, or if it’s closed, by visiting the Amazon IAM Users page. Once there, select the user you created.
On the user’s page, find and copy the ARN by clicking on the copy button.
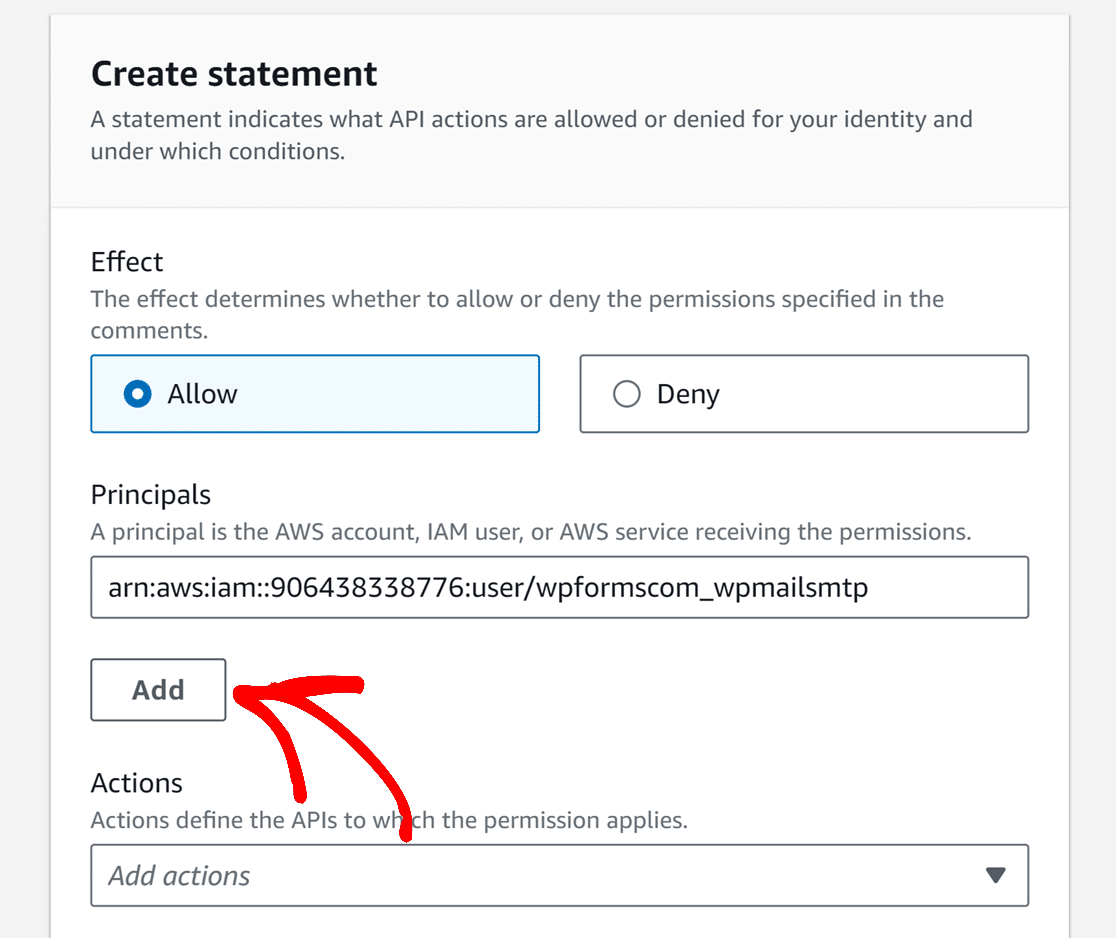
Then paste this value into the Principals field in the Create Statement screen and click on the Add button.
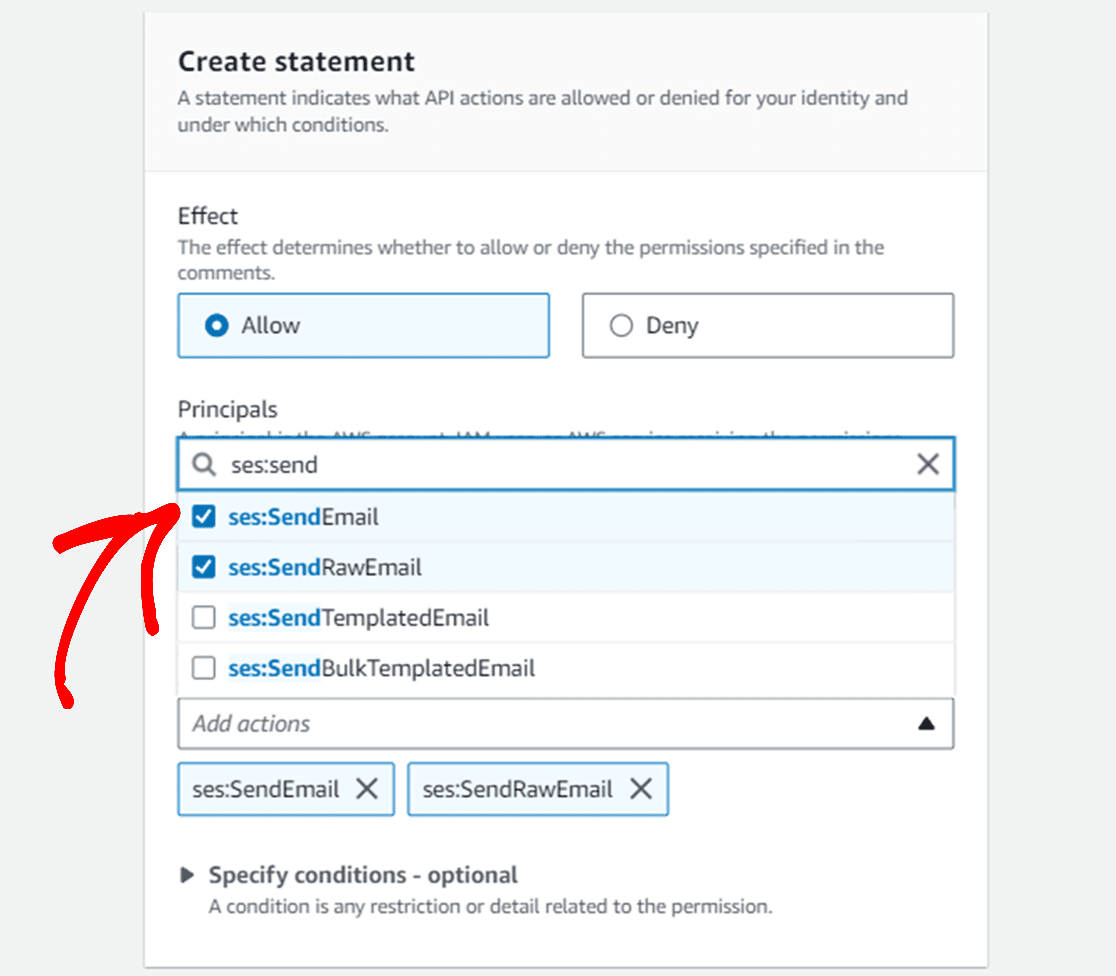
Next, click on the dropdown in the Actions field, and enter ses:Send in the searchbar. Now, select ses:SendEmail and ses:SendRawEmail from the options.
Once you’ve added all the information, click on the Save statement button. Then click on the Next button to proceed.
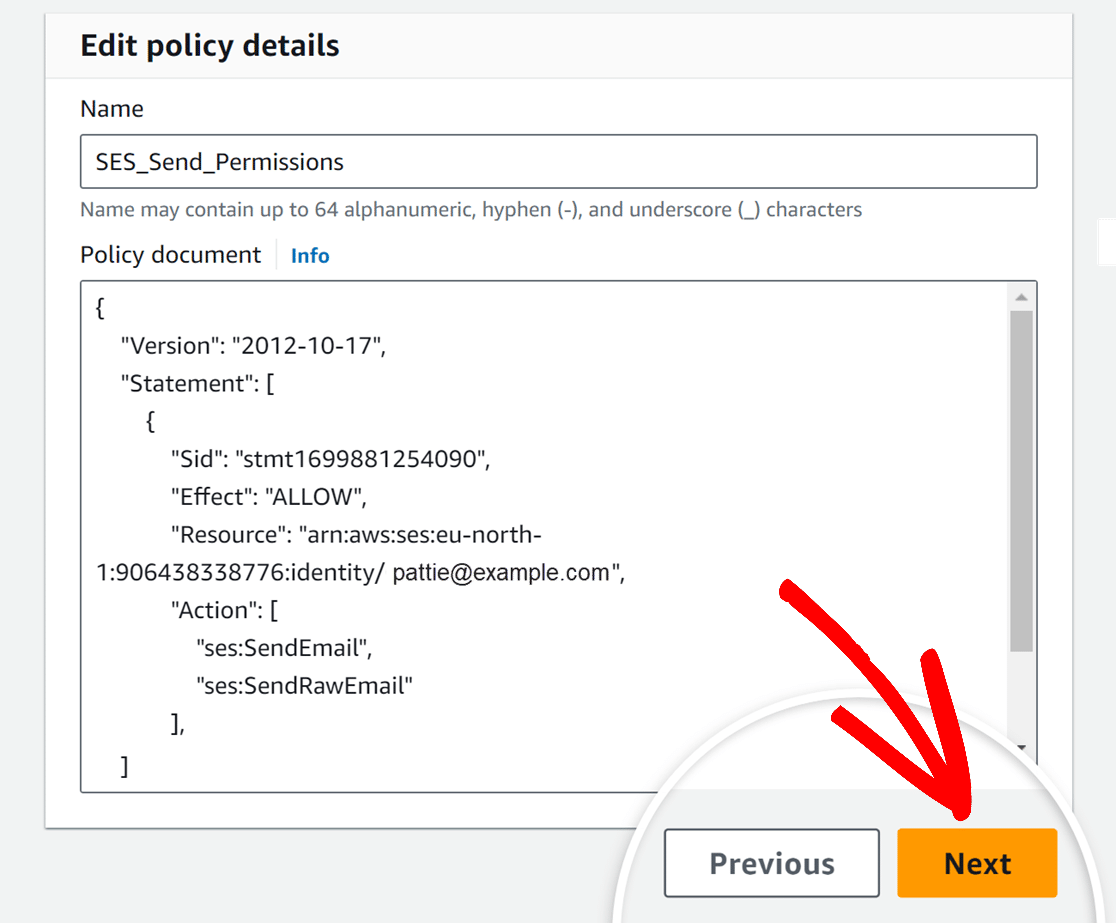
On the next screen, you have the option to give your policy a descriptive name so it can be easily identified later.
Once you’re ready, click on the Next button to proceed.
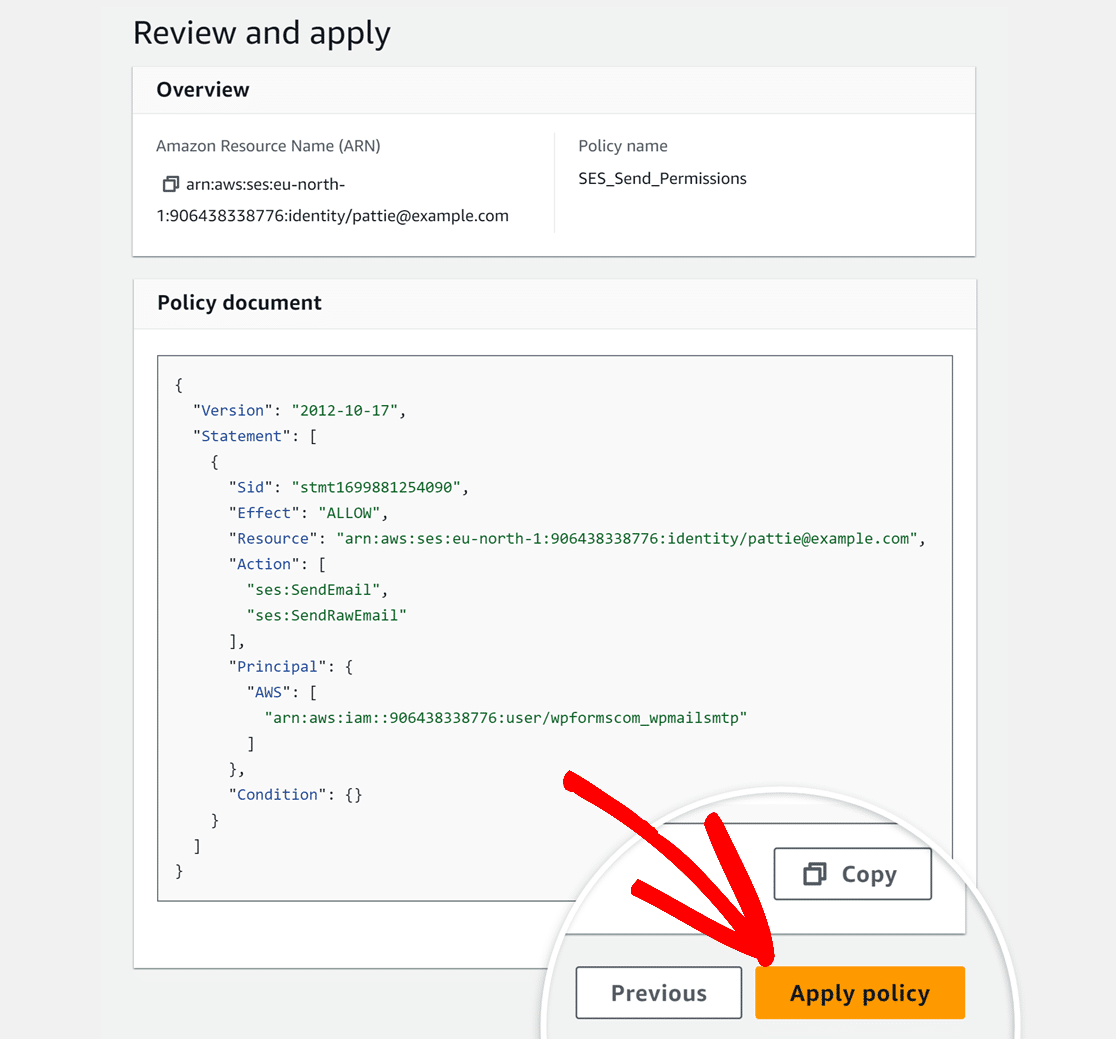
On the next page, you’ll be shown all the details you’ve chosen for this policy. You can double-check that everything looks correct, then click the Apply policy button.
Updating WP Mail SMTP Settings
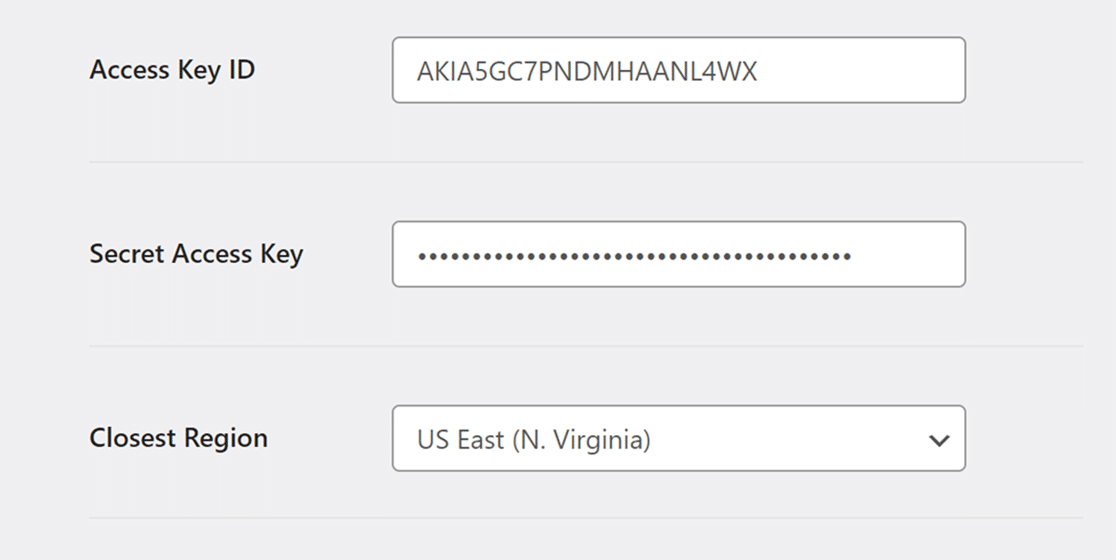
After creating your IAM user and policy, we’ll need to update the Access Key ID and the Secret Access Key with the new credentials.
To do so, go to WP Mail SMTP » Settings, then select the General tab.
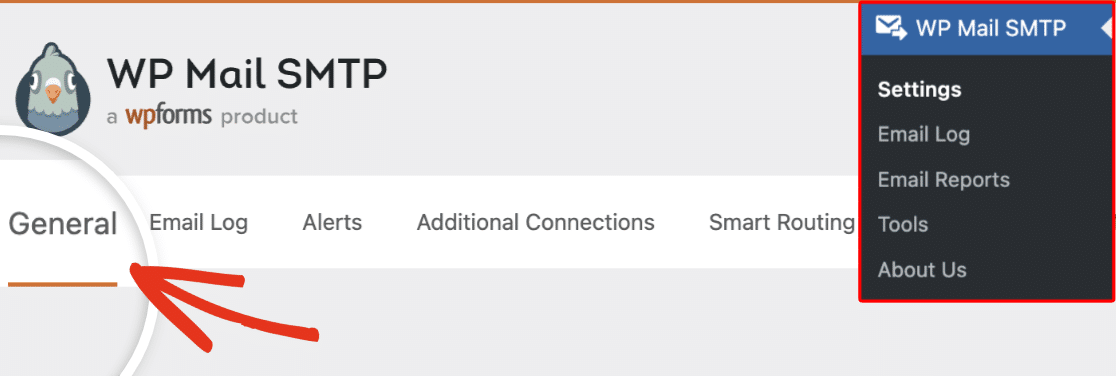
Next, scroll to the Amazon SES section.
Amazon SES
Here, you’ll need to update the access keys you created in your AWS account earlier. Go ahead and paste the Access Key ID and Secret Access Key, and click the Save Settings button.
That’s it! You’ve now successfully configured Amazon SES with WP Mail SMTP to enhance email privacy on your WordPress site.
Next, would you like to know how to effectively troubleshoot issues in WP Mail SMTP? Be sure to check out our tutorial on troubleshooting WP Mail SMTP for more details.
