AI Summary
Would you like to improve email deliverability for your WordPress site in just a few steps? By setting up Simple Mail Transfer Protocol (SMTP), you can quickly fix email delivery issues.
This tutorial will show you how to use the Other SMTP mailer in WP Mail SMTP to improve email delivery for your site.
Note: The Other SMTP mailer is less secure than other mailer options in WP Mail SMTP because it stores your email login and password in your WordPress dashboard. Other WordPress administrators have access to this, so whenever possible, we recommend using one of WP Mail SMTP’s more secure mailers.
Additionally, many hosting providers block their SMTP ports by default, which prevents an SMTP connection. In such cases, you’ll have to contact your web host to see if anything can be done to fix the issue.
What Is Other SMTP?
The Other SMTP mailer allows you to send emails from any email address, using standard SMTP (Simple Mail Transfer Protocol). As a result, it is easier to set up than most other mailers.
When using this mailer, you are more likely to run into server configuration issues. Also, if you change your email account’s password, you will have to update your mailer password settings. These and other limitations can make for a less-than-ideal experience.
- Cost: There is no cost with the Other SMTP mailer.
- From Email Requirements: Can be used with any From Email address, but this address must be used site-wide.
- Bottom Line: Set up with the Other SMTP mailer is quick and easy, compared to most other options. It is useful for sites that cannot use other mailers, but it should not be the first choice, due to its security limitations.
Note: For more information about all the available mailers, please view the complete guide to mailers in WP Mail SMTP.
Setting Up WP Mail SMTP
Before you get started, be sure to install and activate the WP Mail SMTP plugin.
Once you’ve installed the plugin, click on WP Mail SMTP » Settings in your WordPress sidebar menu. Then select the General tab to open the plugin’s Settings page.
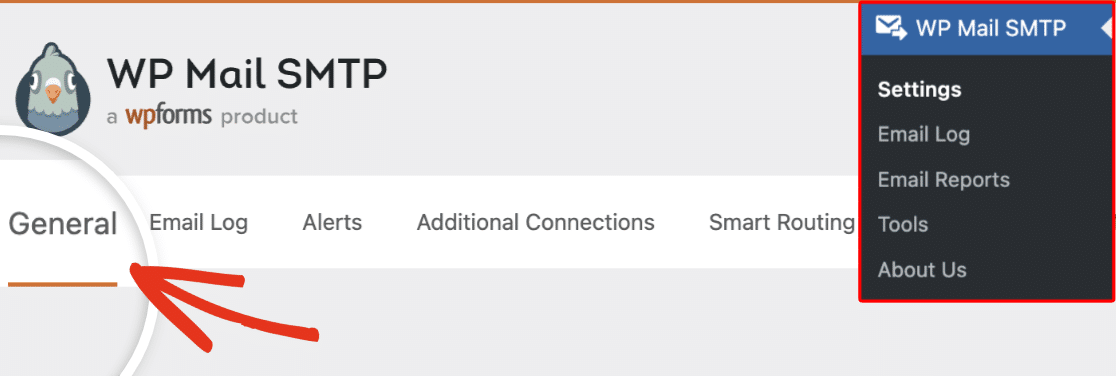
We’ll cover each of the available options to set up a Primary Connection below.
From Email
This is the email address which all of your site’s emails will be sent from.
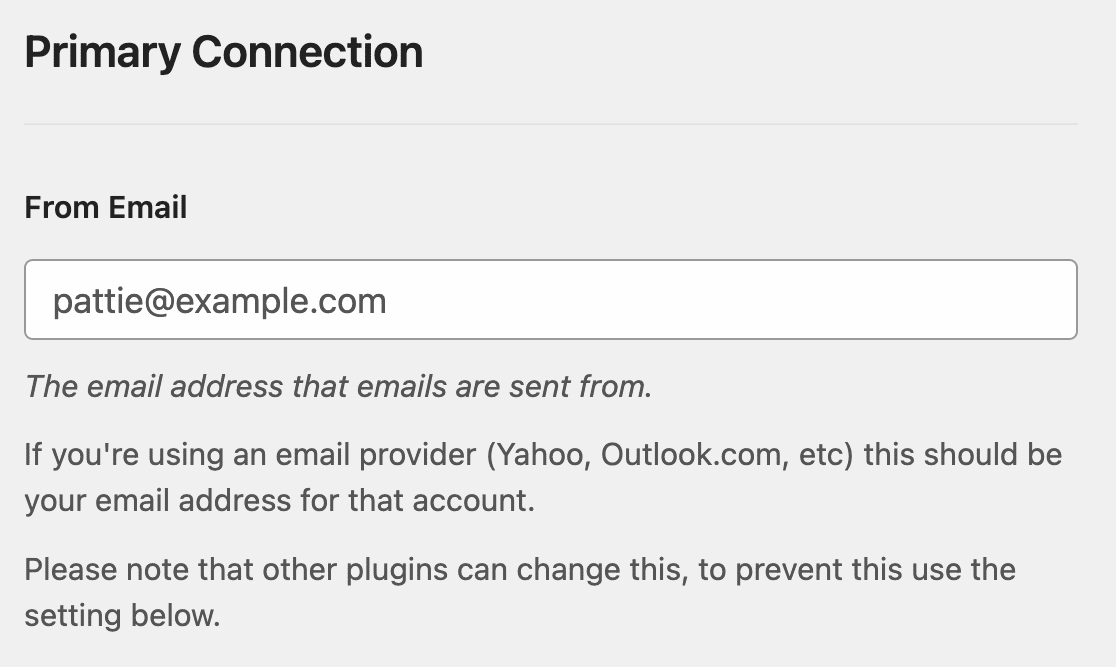
Note: Make sure to enter the email address you will be using to send SMTP emails (this would be the email address associated with your Yahoo account, Gmail account, etc.).
We recommend that you also check the box labeled Force From Email. Doing so will ensure that the From Email setting within WP Mail SMTP matches the From Email settings for all plugins site-wide.

Note: For more details, see our guide to understand how the Force From Email setting works.
From Name
By default, the From Name will be set to your site’s name. However, you can change it to anything you’d like.
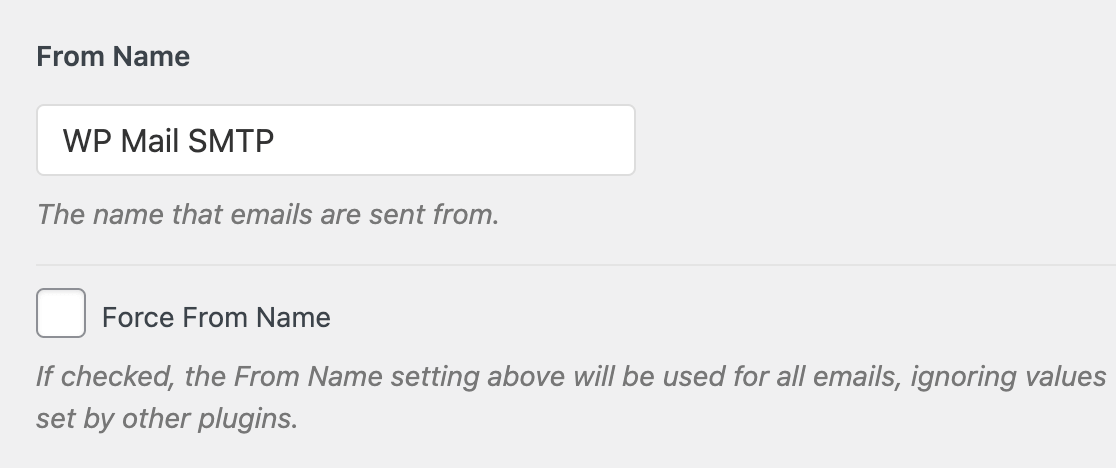
You can also choose to enable the Force From Name setting to apply this name to all emails site-wide.

Return Path
We recommend checking the optional Return Path checkbox to Set the return-path to match the From Email. With this setting enabled, you’ll receive an email if any messages bounce due to issues with a recipient’s email.

Mailer
In the Mailer field, you’ll need to select the Other SMTP option.
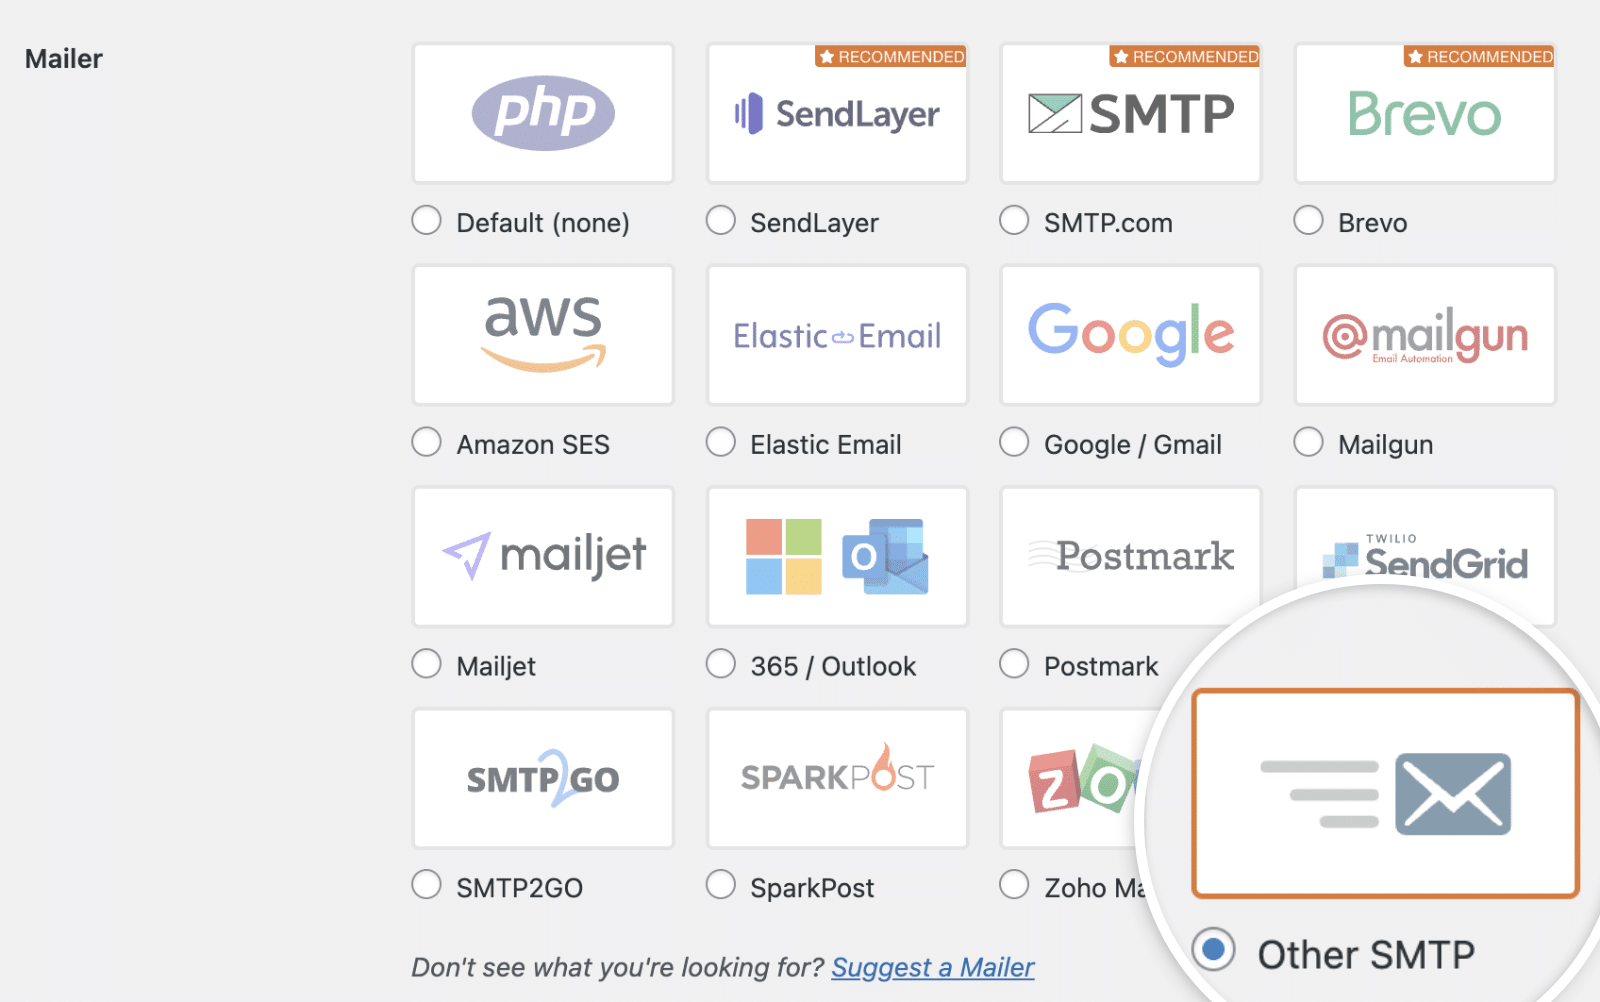
Configuring the Other SMTP Mailer
Once you’ve selected Other SMTP as your mailer, a new section will appear with additional SMTP settings for you to configure.
- SMTP Host: The outgoing server listed in your email provider’s SMTP settings.
- Encryption: The type of encryption used for the SMTP connection (TLS, SSL, or none).
- SMTP Port: The port your provider uses for SMTP connections.
- Authentication: Turns authentication on or off. Most providers require it to be on.
- SMTP Username: Your email address.
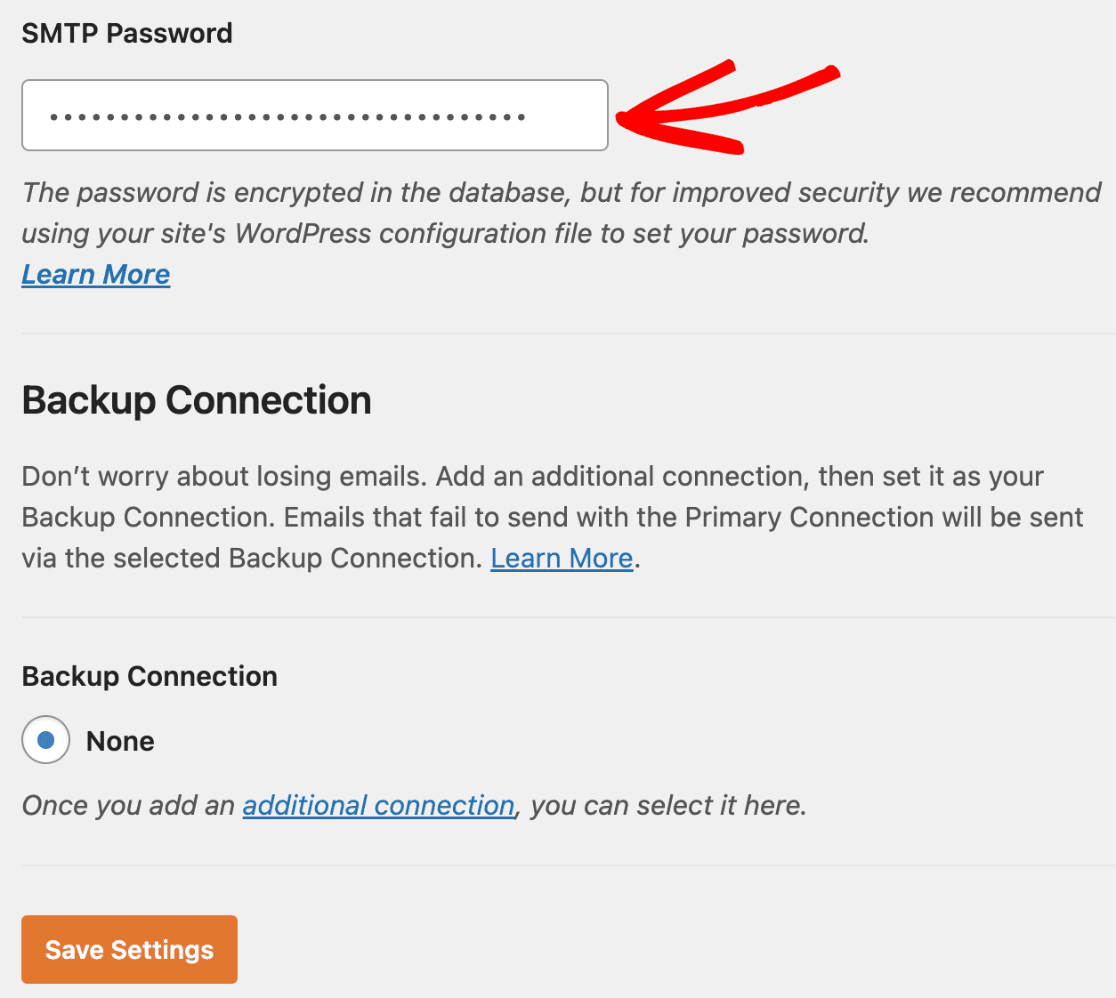
- SMTP Password: You’ll need to generate an app password for your account, as detailed later in this tutorial.

Each email provider requires slightly different SMTP configurations. We’ve compiled a list of SMTP configurations for popular email providers below if you’re not sure what to enter for these settings.
Note: For better security, we recommend adding your SMTP Username and SMTP Password to your site’s configuration file using constants. Check out our guide to using constants for WP Mail SMTP for details.
Here are the SMTP settings you’ll need for the most popular email providers:
- SendLayer
- Gmail or Google Workspace
- Outlook (including Hotmail or Live)
- Yahoo Mail
- Yahoo Business (Verizon Small Business Essentials)
- AOL
- Zoho
- Proton Mail
- DreamHost
- Mailchimp
- HostGator
- Mailjet
- iCloud Mail
SendLayer Settings
SMTP Host: smtp.sendlayer.net
Encryption: TLS
SMTP Port: 587
Authentication: On
Username: Generated when you authorize your domain
Password: Generated when you authorize your domain
Note: SendLayer generates credentials for your site automatically when you authorize your domain. Check out SendLayer’s guide to managing SMTP credentials for more information.
Gmail or Google Workspace SMTP Settings
SMTP Host: smtp.gmail.com
Encryption: TLS
SMTP Port: 587 (or 465 using SSL encryption)
Authentication: On
Username: Your Gmail account email address (e.g., [email protected])
Password: You will need to generate an app password in Google
Note: We recommend using our built-in Gmail integration instead of the less secure Other SMTP mailer.
Outlook (Including Hotmail or Live) SMTP Settings
SMTP Host: smtp.office365.com
Encryption: TLS
SMTP Port: 587
Authentication: On
Username: Your Outlook account email (e.g., [email protected])
Password: You will need to generate an app password for your account
Yahoo Mail SMTP Settings
SMTP Host: smtp.mail.yahoo.com
Encryption: SSL
SMTP Port: 465
Authentication: On
Username: Your Yahoo Mail account email (e.g., [email protected])
Password: You will need to generate an app password for your account
Yahoo Business (Verizon Small Business Essentials) SMTP Settings
SMTP Host: smtp.bizmail.yahoo.com
Encryption: SSL
SMTP Port: 465
Authentication: On
Username: Your Yahoo Business email address
Password: You will need to generate an app password for your account
AOL SMTP Settings
SMTP Host: smtp.aol.com
Encryption: TLS
SMTP Port: 587
Authentication: On
Username: Your AOL screen name
Password: You will need to generate an app password for your account
Zoho Mail SMTP Settings
Zoho offers two types of email addresses: free accounts (i.e., [email protected]) and domain-based accounts (i.e., [email protected]). Each type of email requires different SMTP settings. We’ve shared both sets below.
Note: We recommend using the built-in Zoho Mail option instead of connecting Zoho through the Other SMTP mailer.
Emails @zoho.com
Host: smtp.zoho.com
Port: 587 (or 465 using SSL encryption)
Username: Your Zoho Mail account email (e.g. [email protected])
Password: You will need to generate an app password for your account
Encryption: TLS
Emails @yourdomain.com
Host: smtppro.zoho.com
Port: 587 (or 465 using SSL encryption)
Username: Your domain-based email (e.g. [email protected])
Password: You will need to generate an app password for your account
Encryption: TLS
Proton Mail SMTP Settings
SMTP Host: smtp.protonmail.ch
Encryption: TLS
SMTP Port: 587
Authentication: On
Username: You will need to generate an SMTP username for your account
Password: You will need to generate an SMTP password for your account
DreamHost
SMTP Host: smtp.dreamhost.com
Encryption: TLS
SMTP Port: 587
Authentication: On
Username: Your DreamHost account email (e.g., [email protected])
Password: Your DreamHost account email’s password
Mailchimp
SMTP Host: smtp.mandrillapp.com
Encryption: TLS
SMTP Port: 587 (or 465 using SSL encryption)
Authentication: On
Username: The email address associated with your Mailchimp account
Password: You will need to generate a transactional API key for your account
HostGator
SMTP Host: gator12345.hostgator.com
Encryption: SSL
SMTP Port: 465
Authentication: On
Username: The email address associated with your HostGator account
Password: Your HostGator account’s password
Note: Your SMTP Hostname can be found in your welcome email or in HostGator’s customer portal. Check out HostGator’s guide on finding your server name for more information.
Mailjet
SMTP Host: in-v3.mailjet.com
Encryption: TLS
SMTP Port: 587 (or 465 using SSL encryption)
Authentication: On
Username: You will need to generate an SMTP username for your account
Password: You will need to generate an SMTP password for your account
iCloud Mail
SMTP Host: smtp.mail.me.com
Encryption: TLS
SMTP Port: 587
Authentication: On
Username: Your iCloud Mail email address (e.g., [email protected])
Password: You will need to generate an app password for your account
Backup Connection
Setting up a Backup Connection is optional and isn’t required to complete your Other SMTP mailer setup. However, to further improve email deliverability, we recommend configuring an additional connection to serve as a backup in case your Primary Connection fails.
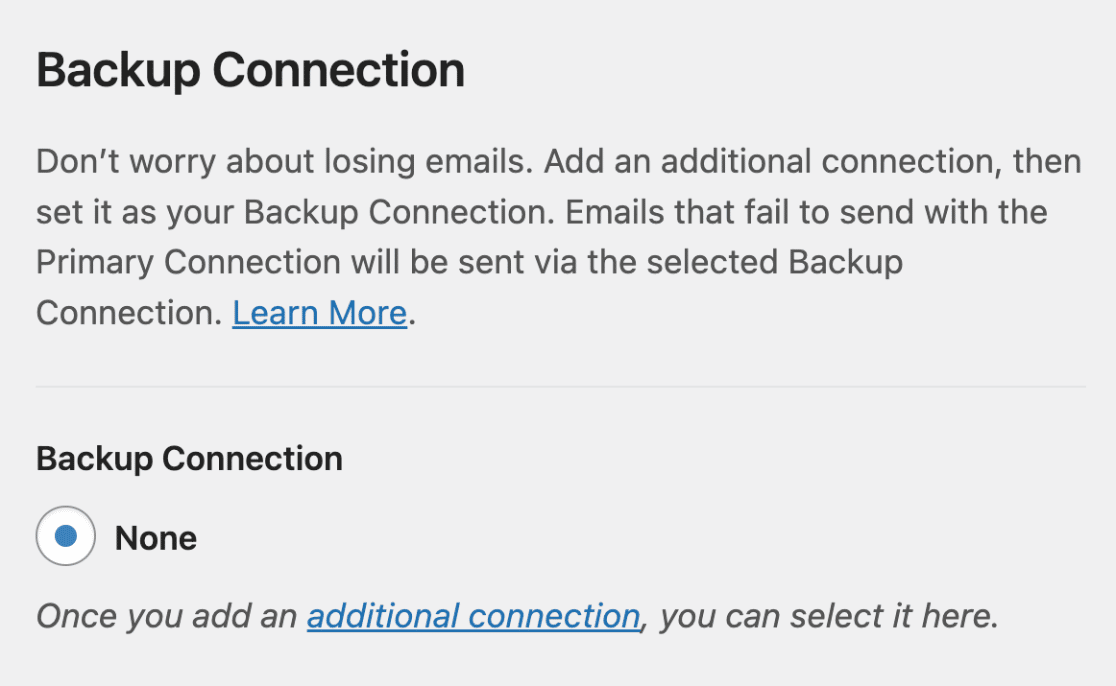
Note: Want to route your emails through a specific additional connection based on a set of rules or conditions? Be sure to check out our tutorial on Smart Routing to learn how.
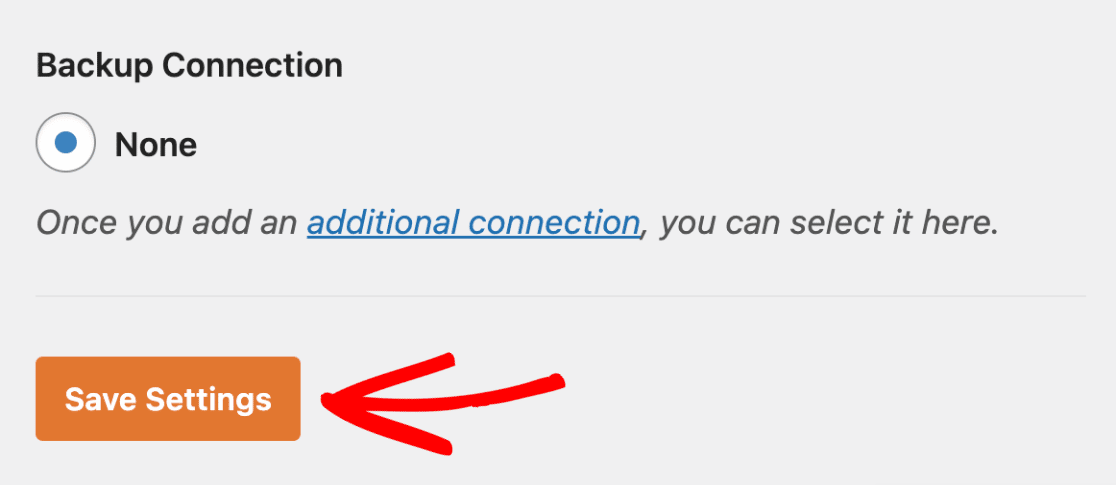
Once you’ve entered these details, be sure to click the Save Settings button at the bottom of the screen.
Generating an App Password
To use SMTP on your WordPress site, you’ll most likely need to generate an app password in your email account. Below, we’ll show you how to do this for the following email providers:
Generating an App Password in Gmail
Note: Before you can generate an app password in Gmail, you’ll need to turn on Google’s 2-Step Verification.
To create an app password in Gmail, log in to your Gmail or Google Workspace account.
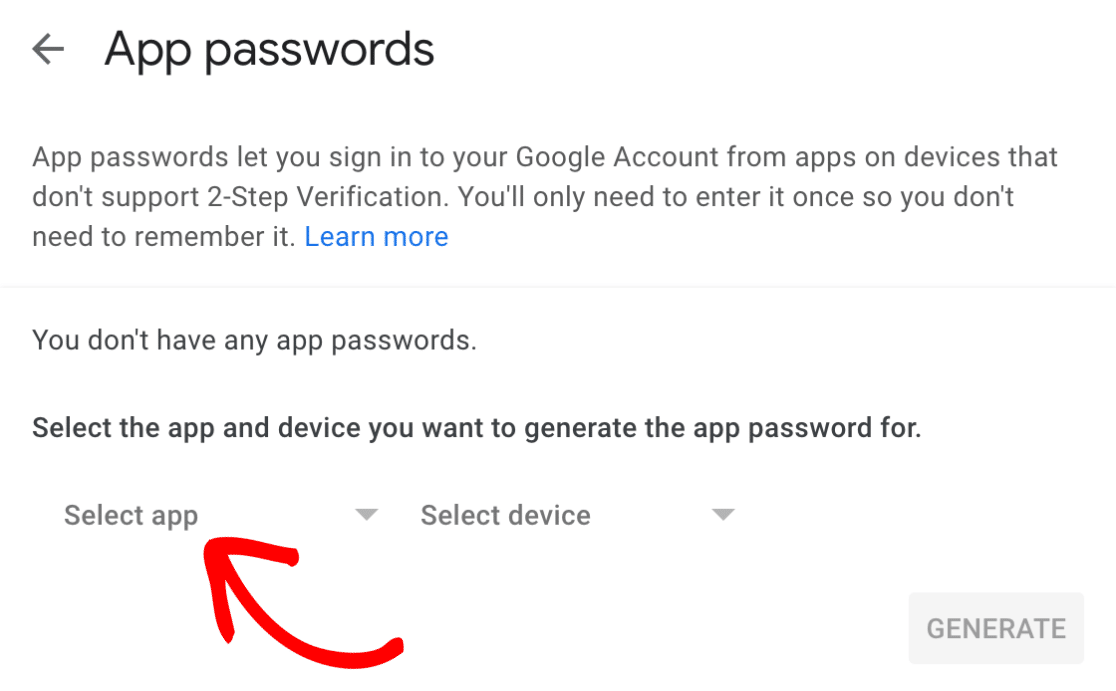
Then, go to App passwords in your security settings. On this page, click on the Select app dropdown.
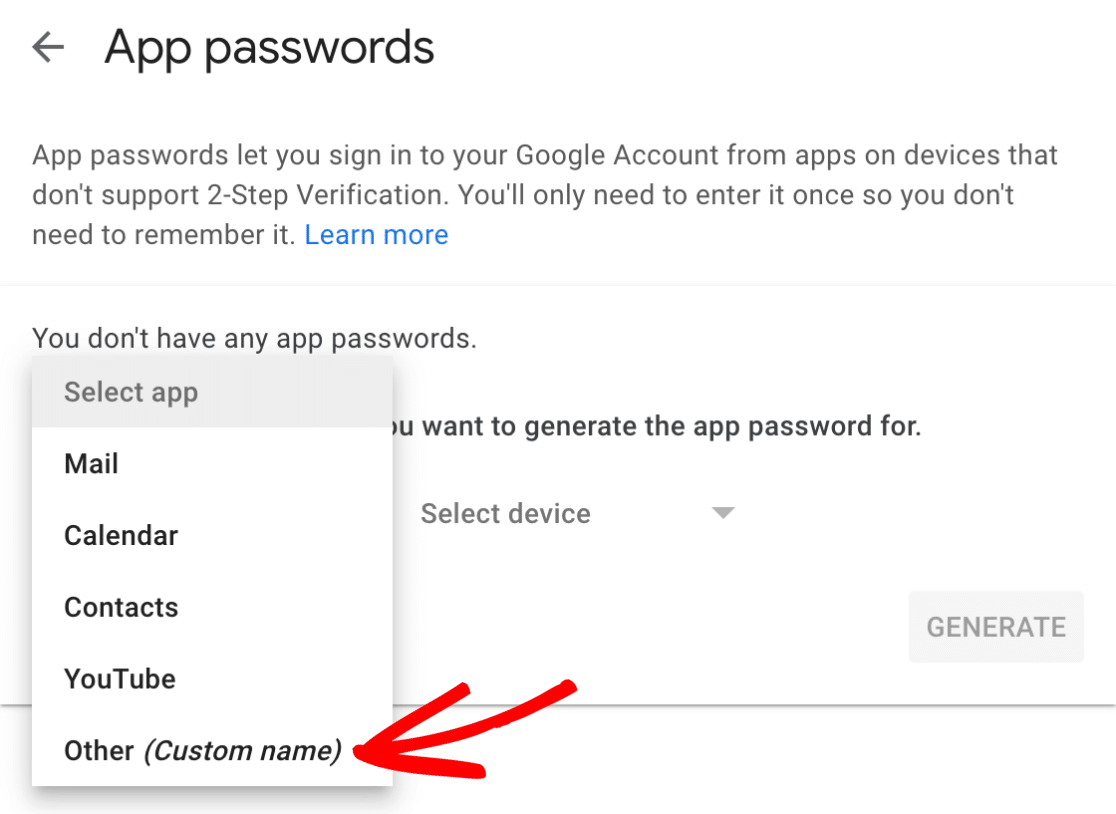
Next, select the Other (Custom name) option from the dropdown menu.
Then, enter WP Mail SMTP in the field provided and click the blue GENERATE button.
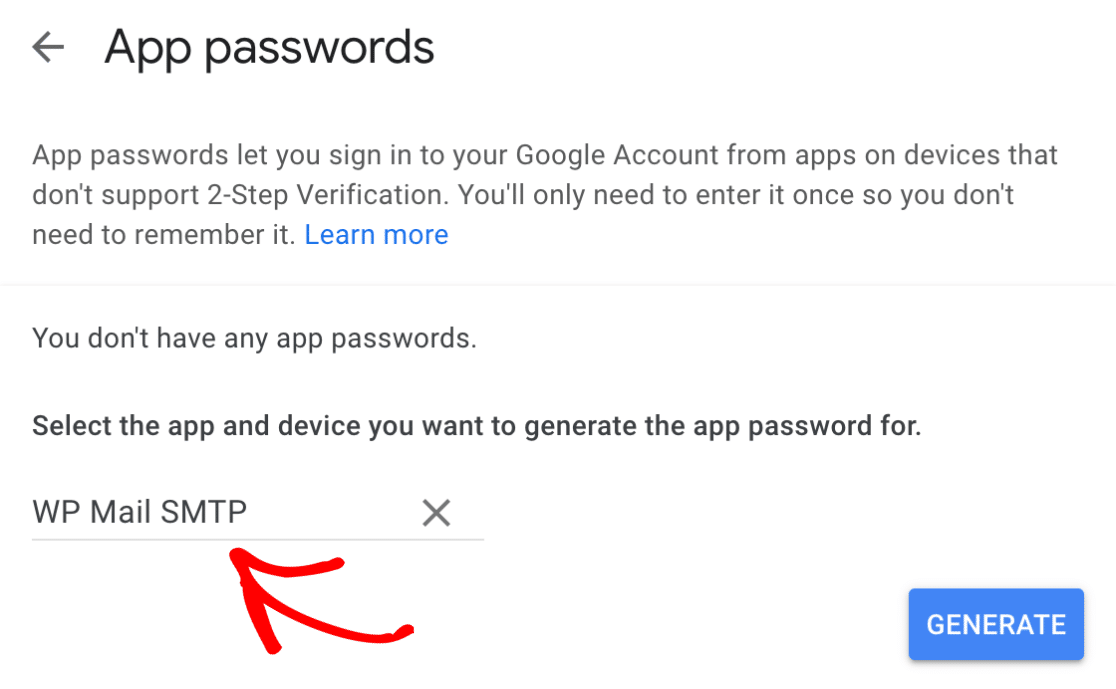
This will generate an app password that you can use for your WP Mail SMTP setup.
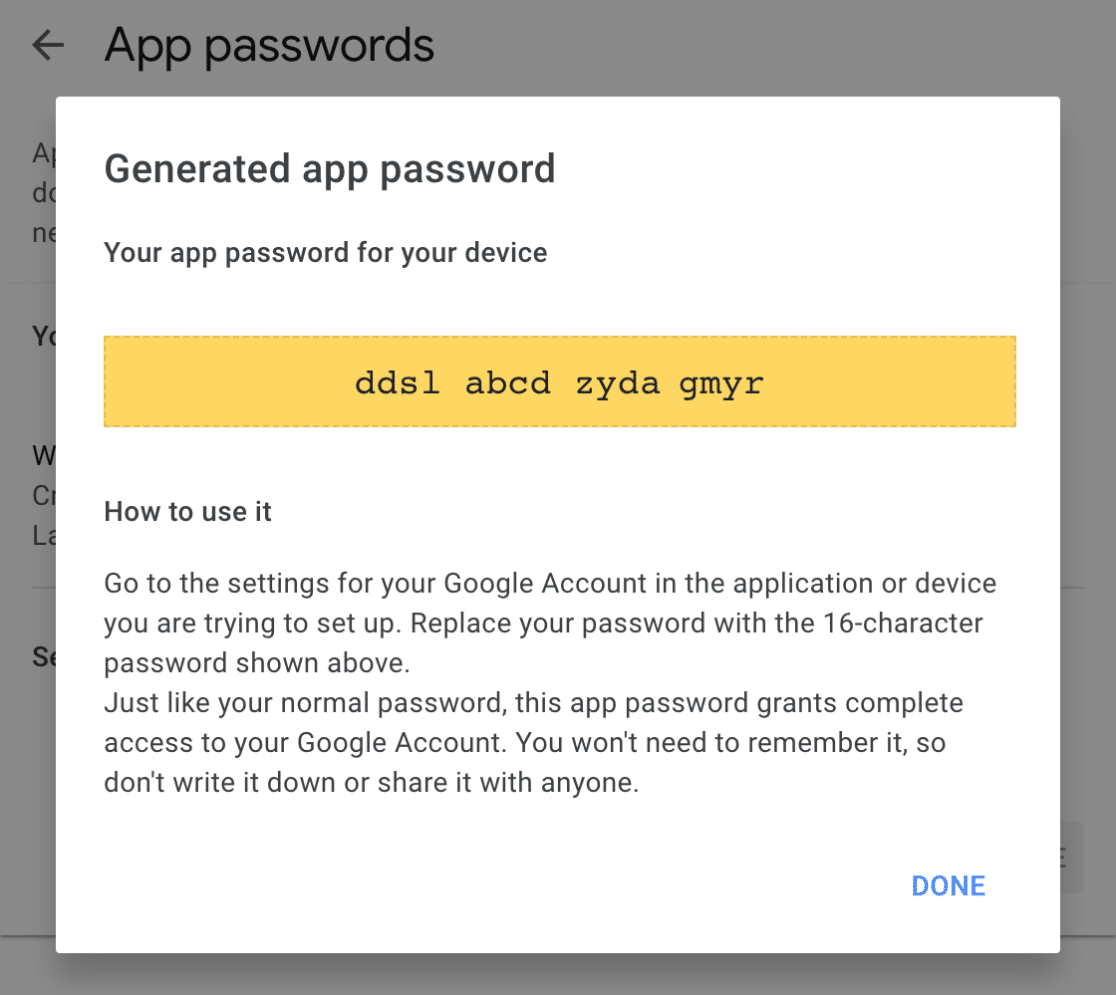
You’ll want to copy this password, then return to your WP Mail SMTP settings in your WordPress dashboard. From here, paste the password into the SMTP Password field and save your settings.
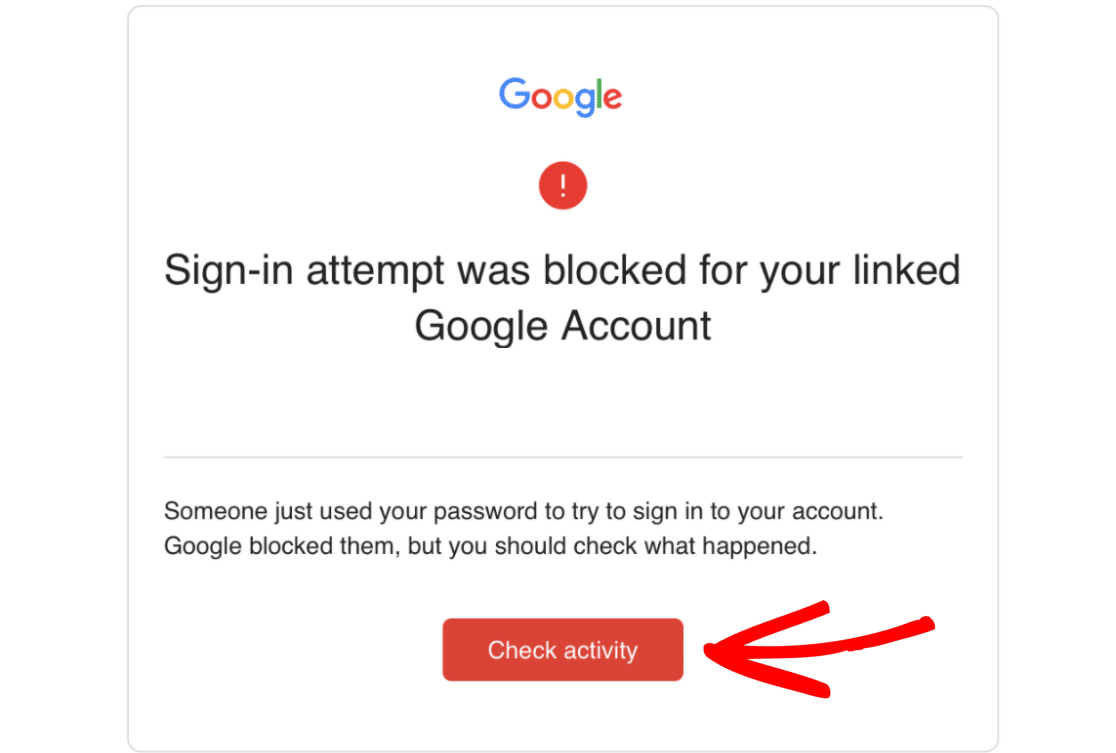
Note: Sometimes Gmail may automatically block the sign-in used by SMTP for security reasons, even when using an app password. When this happens, an email will be sent to your recovery email address with a sign-in attempt warning (see below).
To remove this block, you’ll need to click the Check Activity button in the email (or visit your account’s Notifications page) and follow the instructions provided to let Google know this was a legitimate login attempt.
Generating an App Password in Yahoo
Note: For Yahoo Business (Verizon Small Business Essentials), please see the official documentation on managing app passwords for instructions on finding the correct settings to generate your app password. Then you can follow the remaining steps below.
First, log in to your Yahoo account. Then open your account’s security settings.
In your account’s settings, you’ll need to generate a special password for your WP Mail SMTP integration. To do so, scroll to the External connections section and click Create app password.
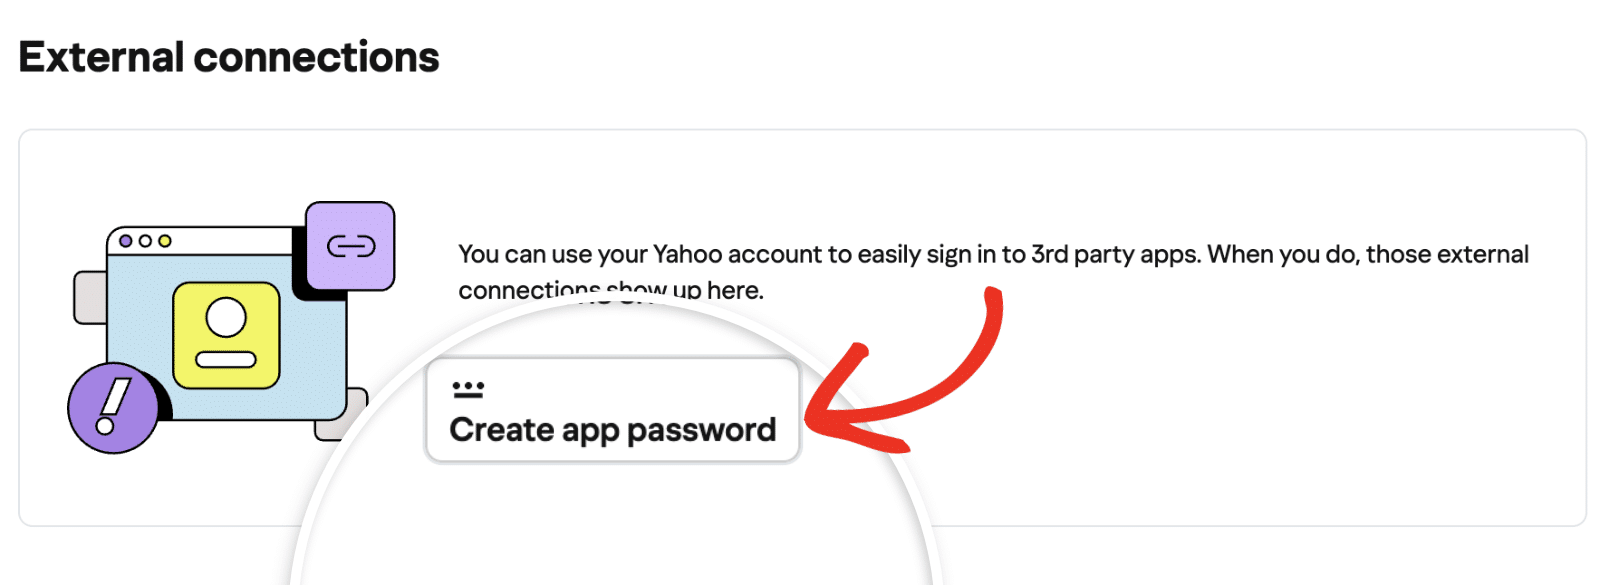
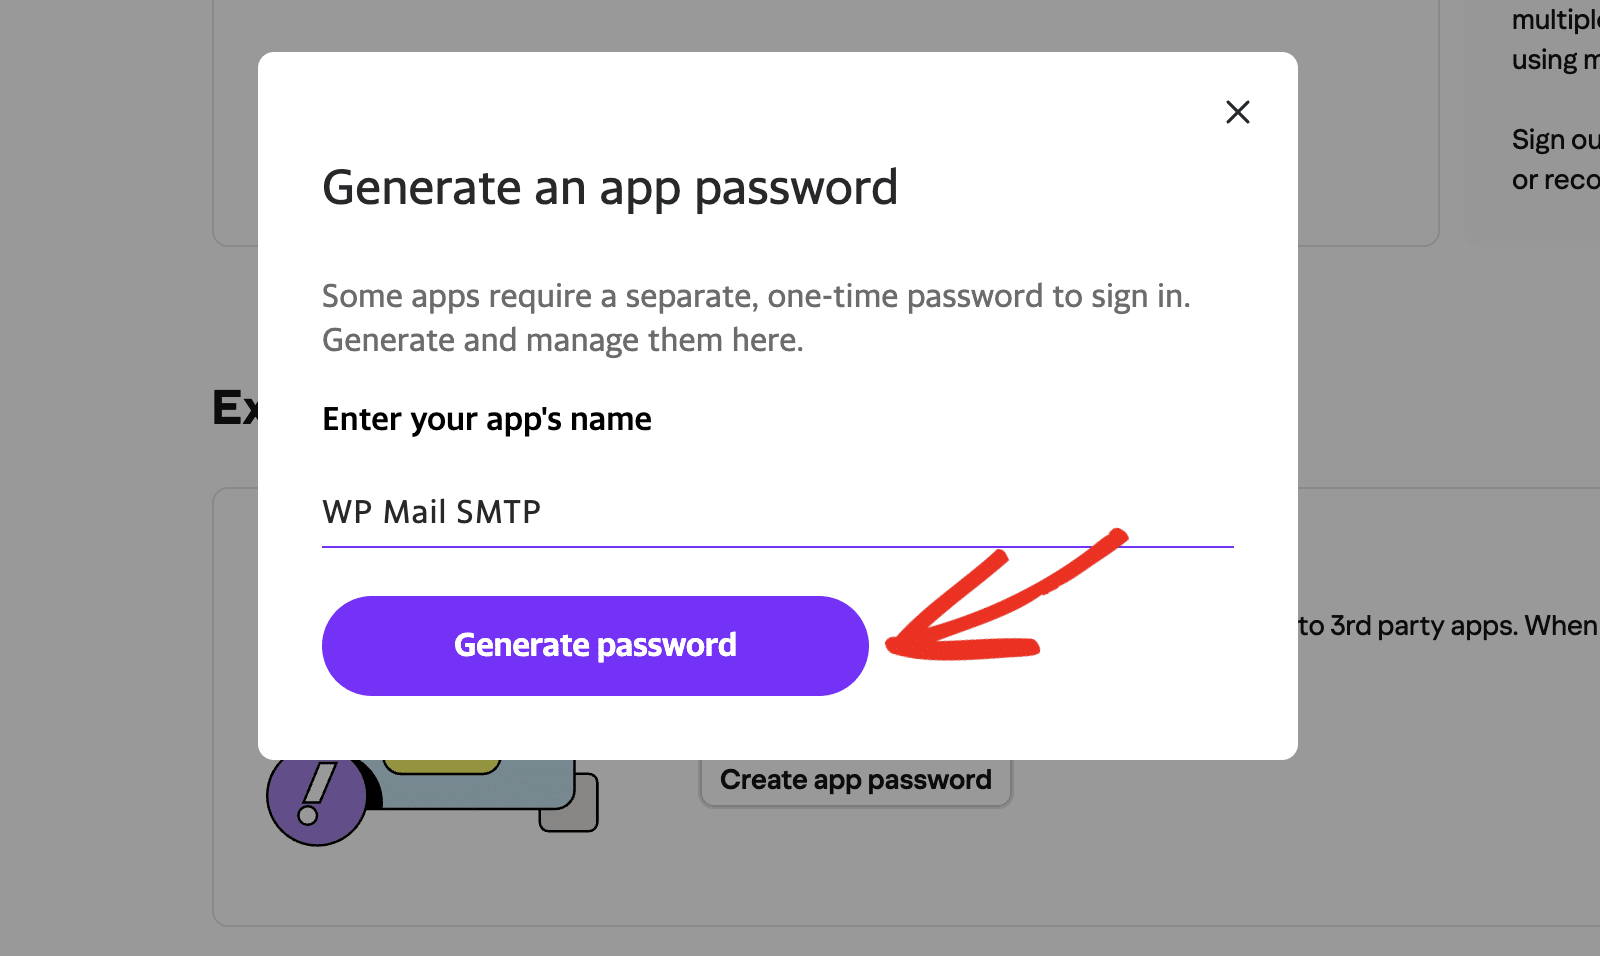
In the overlay that appears, enter a name for the password you intend to create. This name is for internal use only. We recommend using a name that relates to the service for which you’re creating the app password. After entering the name, click the Generate password button.
This will generate a one-time password that you can use with WP Mail SMTP.
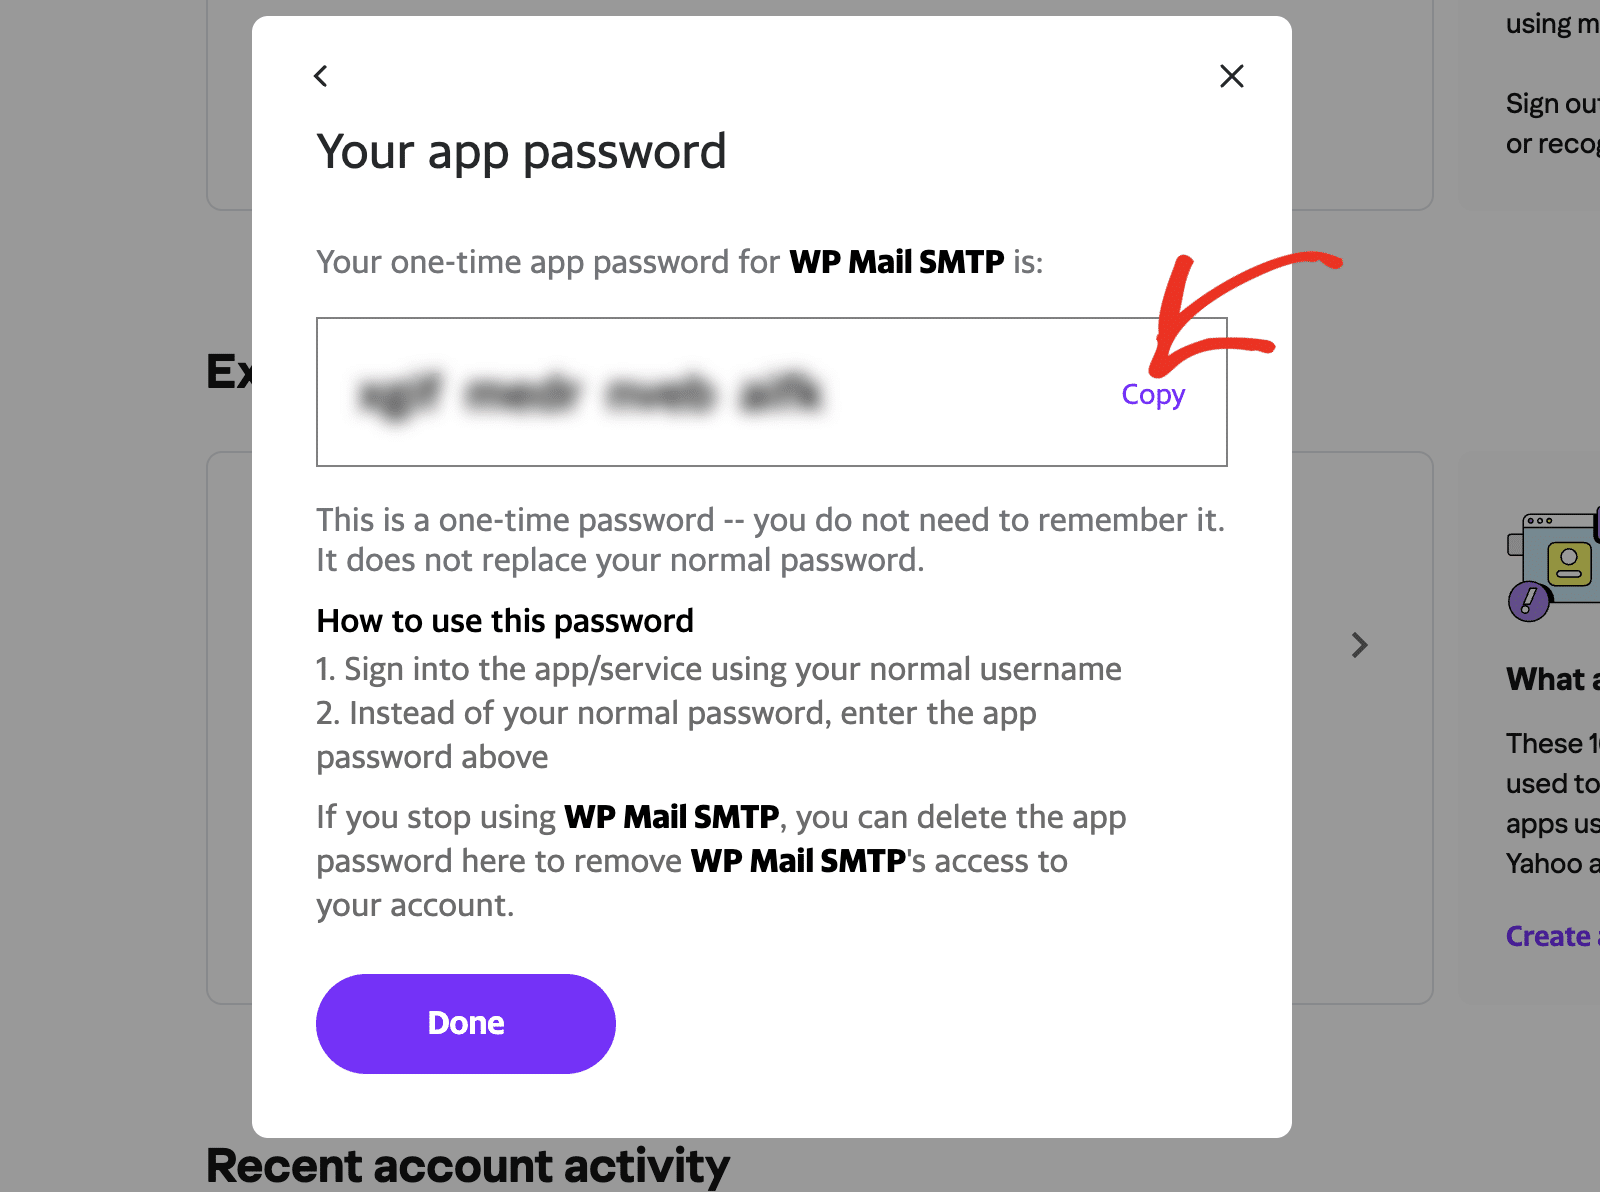
Note: You won’t be able to access the app password after closing the overlay. Make sure to store it in a secure location for future reference.
Copy this password, then go back to your WP Mail SMTP settings in your WordPress dashboard. Paste the password into the SMTP Password field and save your settings.

Generating an App Password in AOL
To generate an app password in AOL, log in to your account. Then open your security settings.
You’ll need to generate a special password for your site’s WP Mail SMTP integration in your account’s settings. To do so, click on Generate app password.
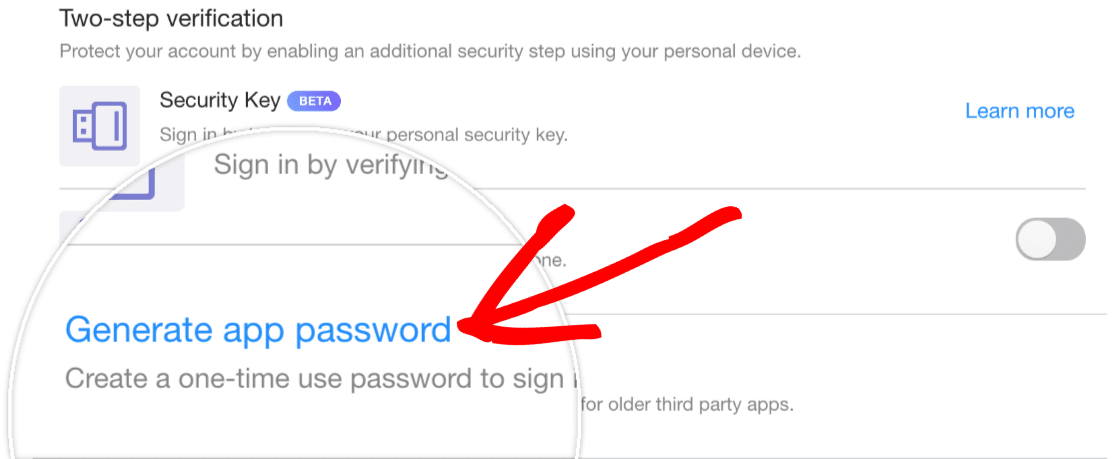
This will open up an overlay, where you’ll need to select the app you’ll be granting permission to. From the dropdown, choose the Other option and enter WP Mail SMTP in the field provided. Then click the Generate button.
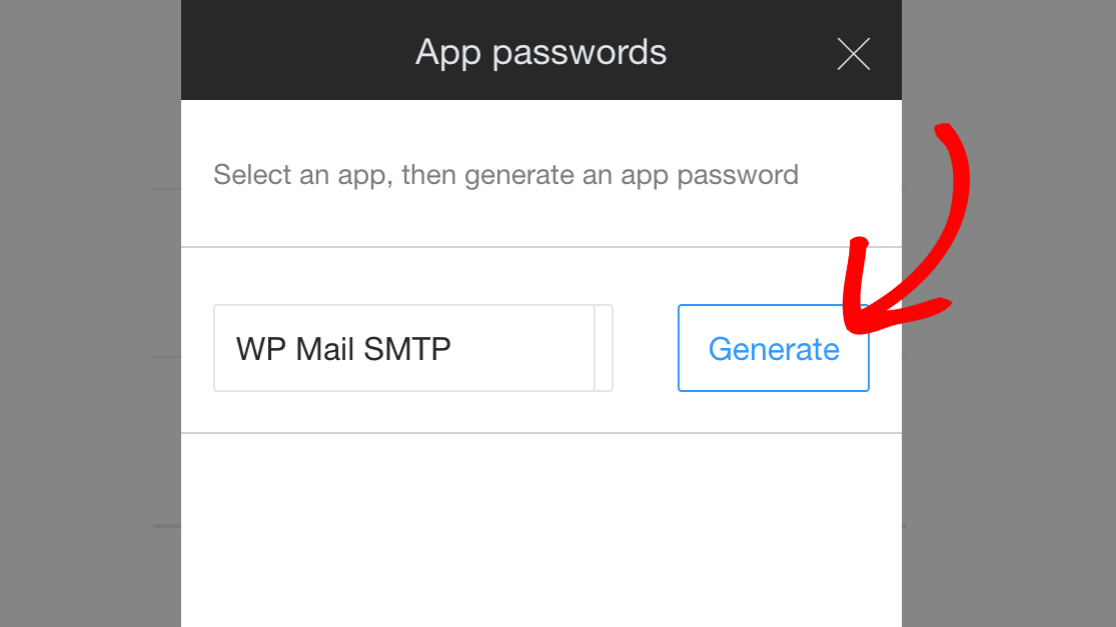
This will generate a one-time password that you can use with WP Mail SMTP.
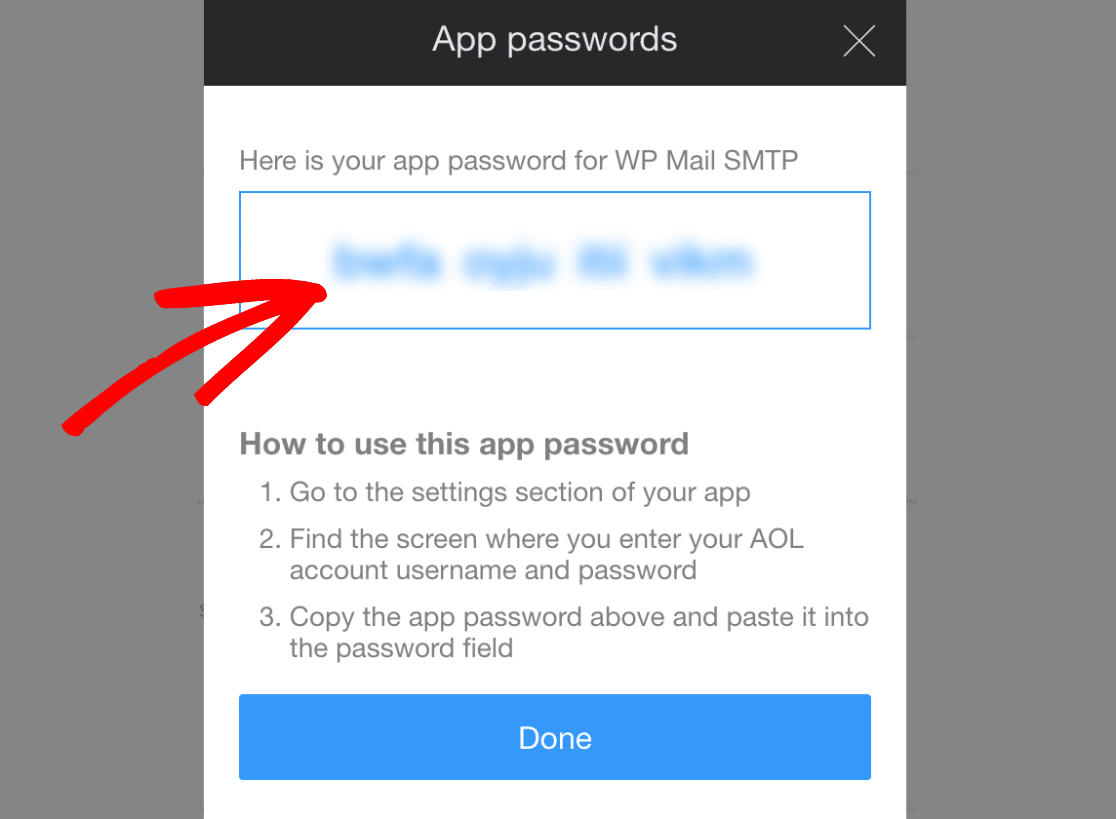
Copy the password, then return to your WP Mail SMTP settings in your WordPress dashboard. Paste the password into the SMTP Password field and save your settings.

Generating an App Password in Outlook
To create an app password in Outlook (including Live and Hotmail accounts), you’ll first need to log in to your account. Then open your account’s security settings.
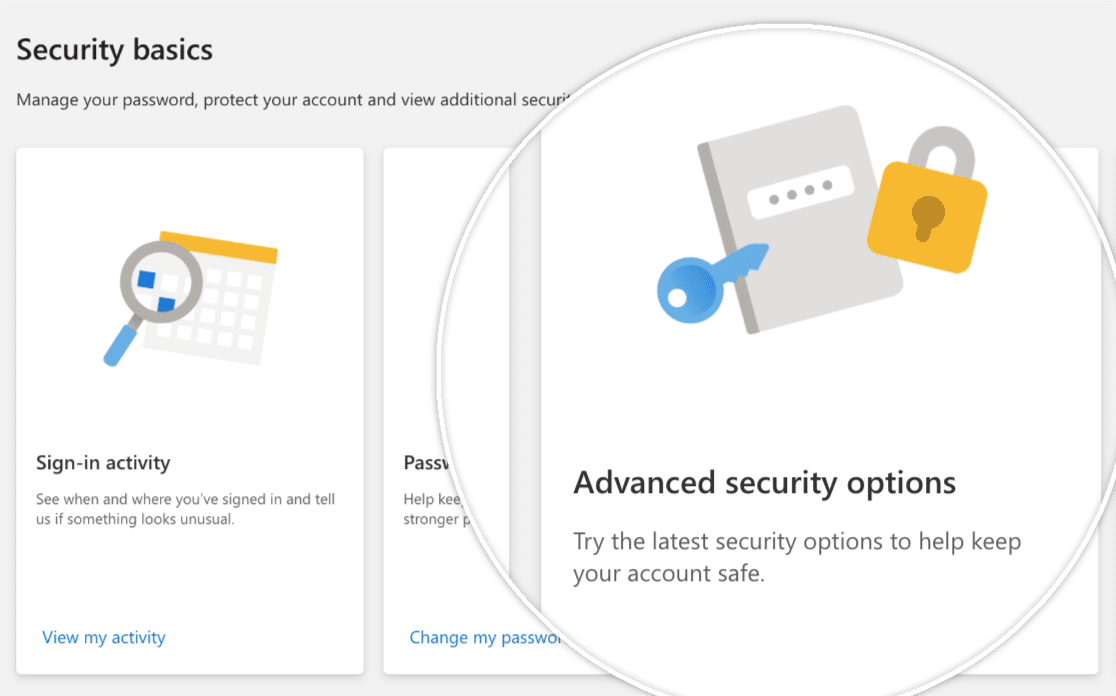
From here, select the Advanced security options to open up additional security settings.
Next, you’ll need to activate 2-Factor Authentication (2FA) for your account, if you haven’t already.
Once you’ve enabled 2FA for your account, you’ll return to the Security page, where you’ll need to generate an app password to use with WP Mail SMTP.
To generate your app password, scroll to the App passwords section and click on Create a new app password.
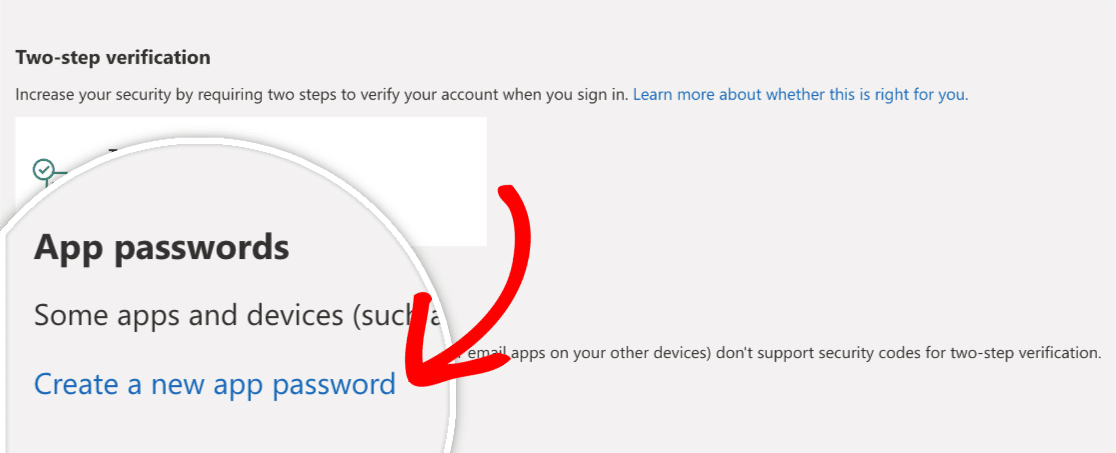
This will generate a random password that you can use for your account.
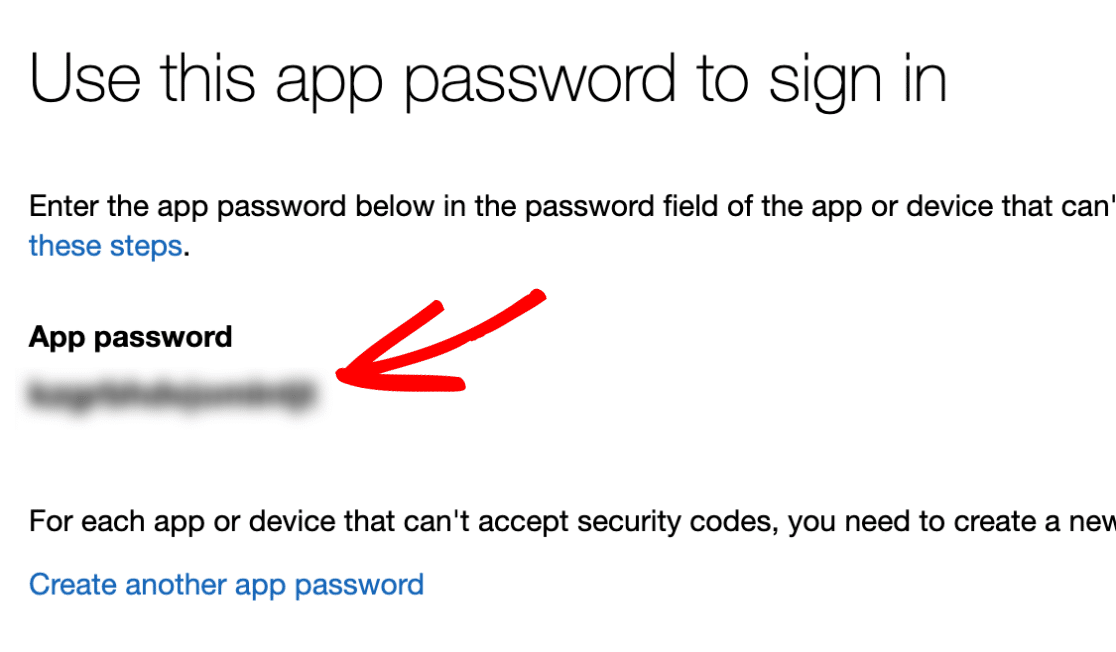
Copy the password, then go back to your WordPress dashboard and WP Mail SMTP settings. Paste the password into the SMTP Password field and save your changes.

Generating an App Password in Zoho
To generate an app password for Zoho, you’ll first need to log in to your account.
Once you’re logged in, head to your account’s security settings.
From here, scroll to the Application-Specific Passwords section and click the Generate New Password button.
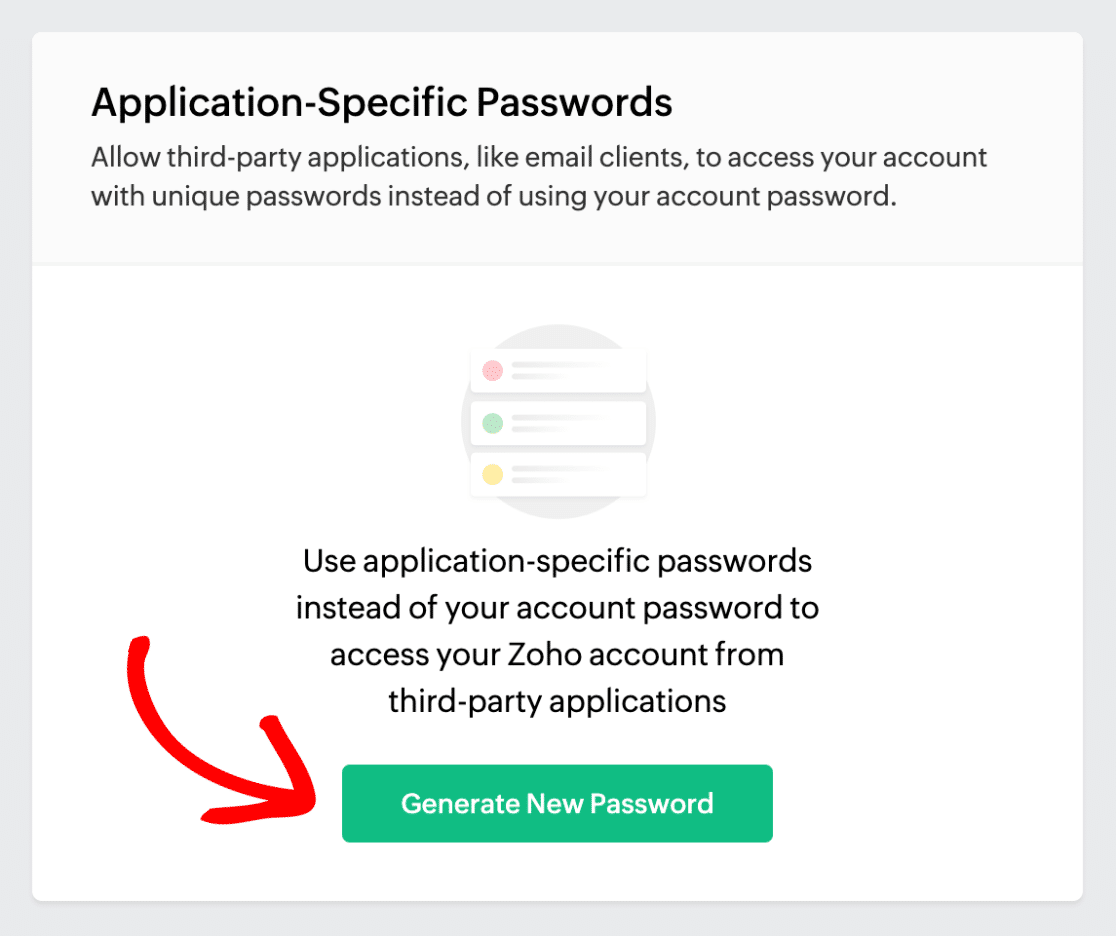
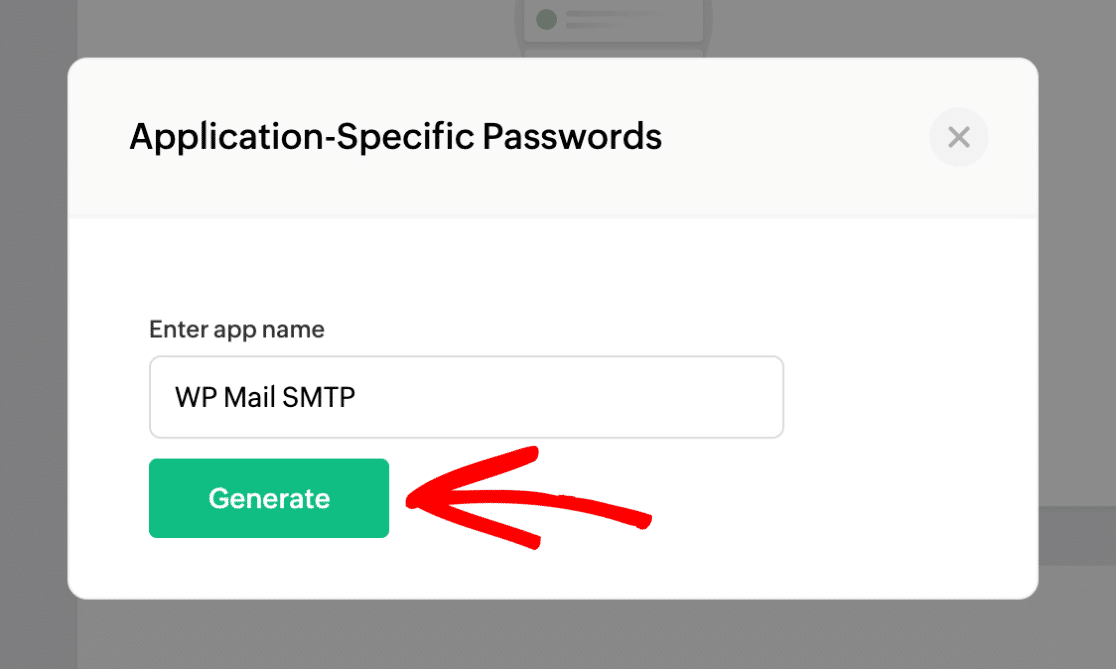
In the field that pops up, enter WP Mail SMTP and click the Generate button.
Next, copy the password that Zoho has generated for you.
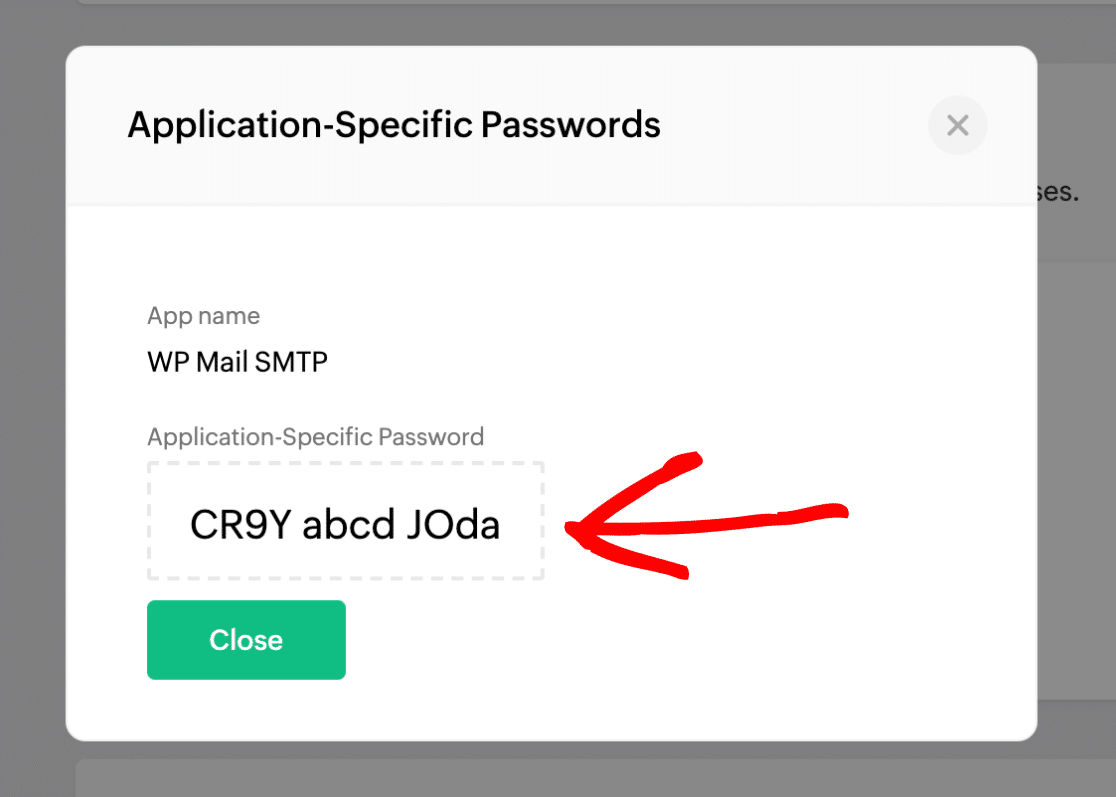
Then, head over to your WP Mail SMTP settings. Be sure to paste this password into the SMTP Password field and save your settings.

Generating a Username and Password in Proton Mail
Note: Before getting started, you’ll need to add and verify a domain on your Proton Mail account dashboard. For a detailed guide, please see Proton Mail’s custom domain documentation.
After verifying your domain, proceed to generate your SMTP tokens. For this, log in to your Proton Mail account and open your account settings.
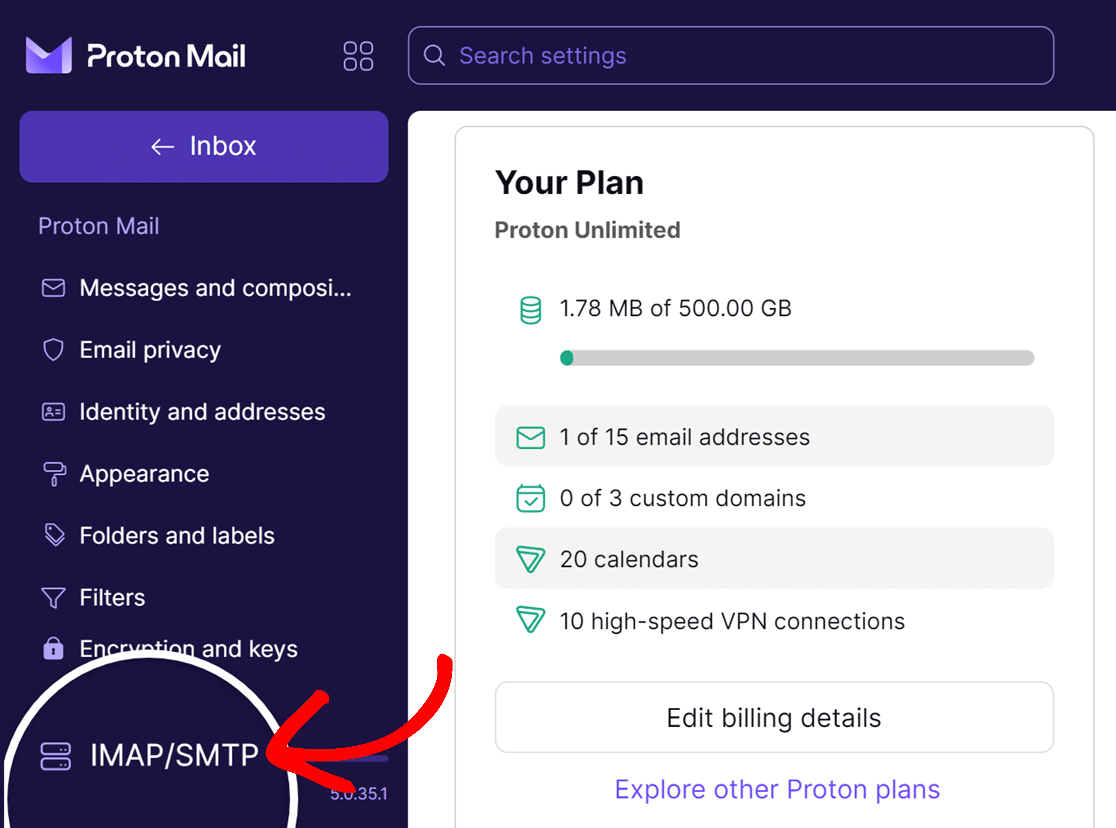
On your Account settings page, click IMAP/SMTP near the bottom of the left sidebar.
On the next page, scroll to the SMTP submission section and click the Generate token button.
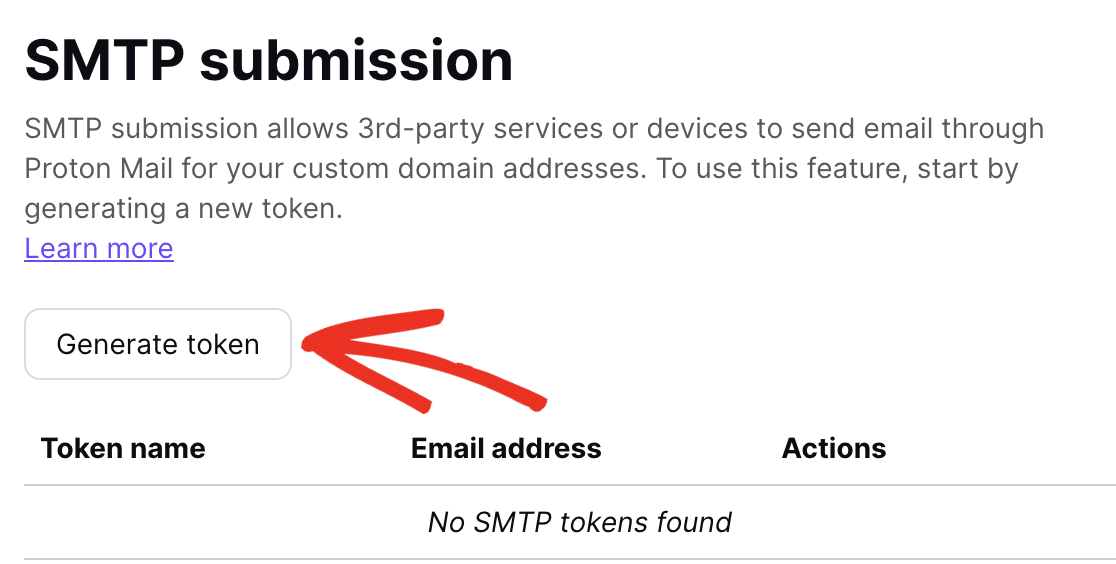
Note: If you don’t see the Generate token button, you’ll need to reach out to Proton Mail’s support to enable SMTP submission for your account.
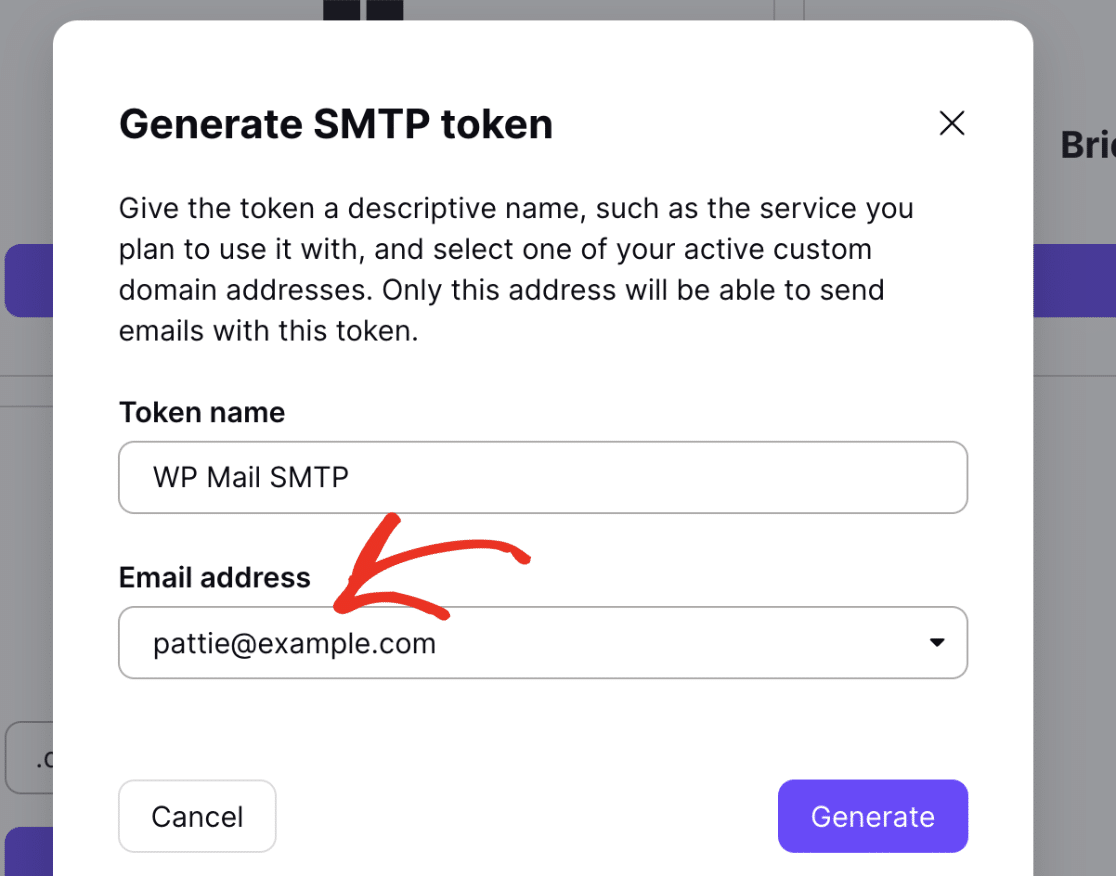
In the overlay that appears, enter WP Mail SMTP in the Token name field and select one of your active custom domain email addresses from the Email address dropdown.
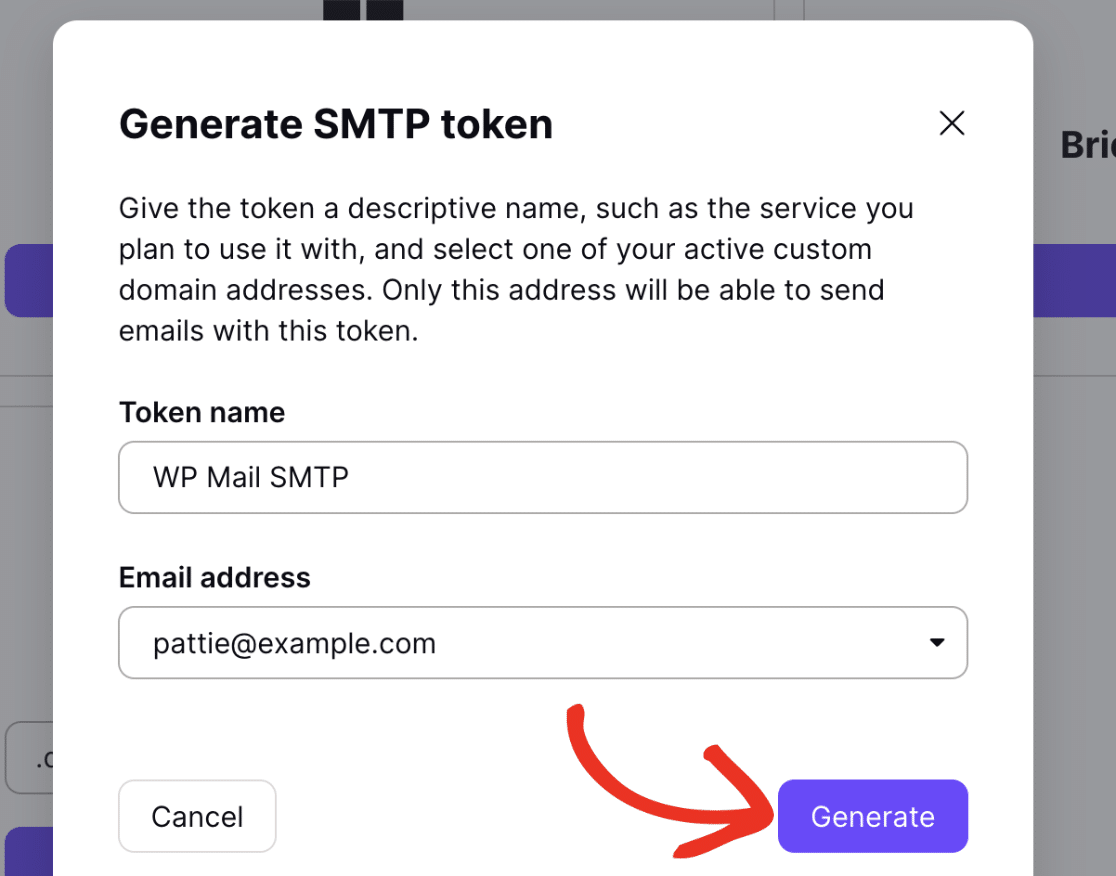
Then click the Generate button to continue.
As an additional verification step, you’ll need to enter your account password and click Authenticate to proceed.
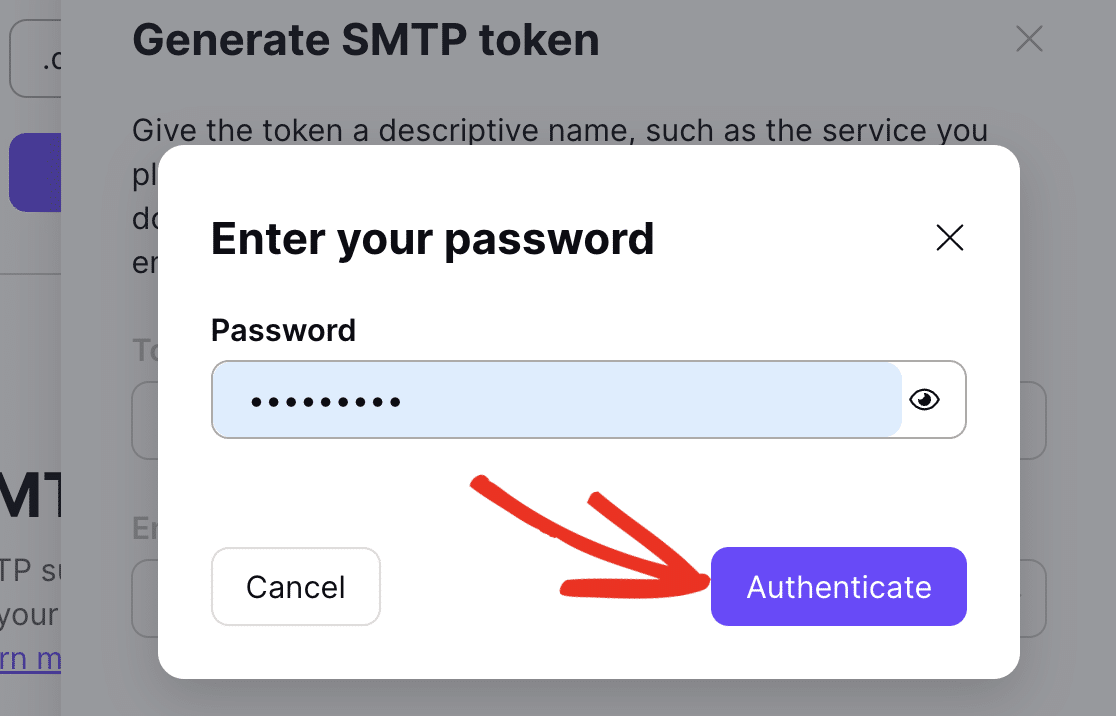
This will generate an SMTP username and SMTP token (password) for you to use with WP Mail SMTP.
Note: The SMTP username will be the same as the custom email address you selected. Also, SMTP token is the SMTP Password you’ll use in WP Mail SMTP.
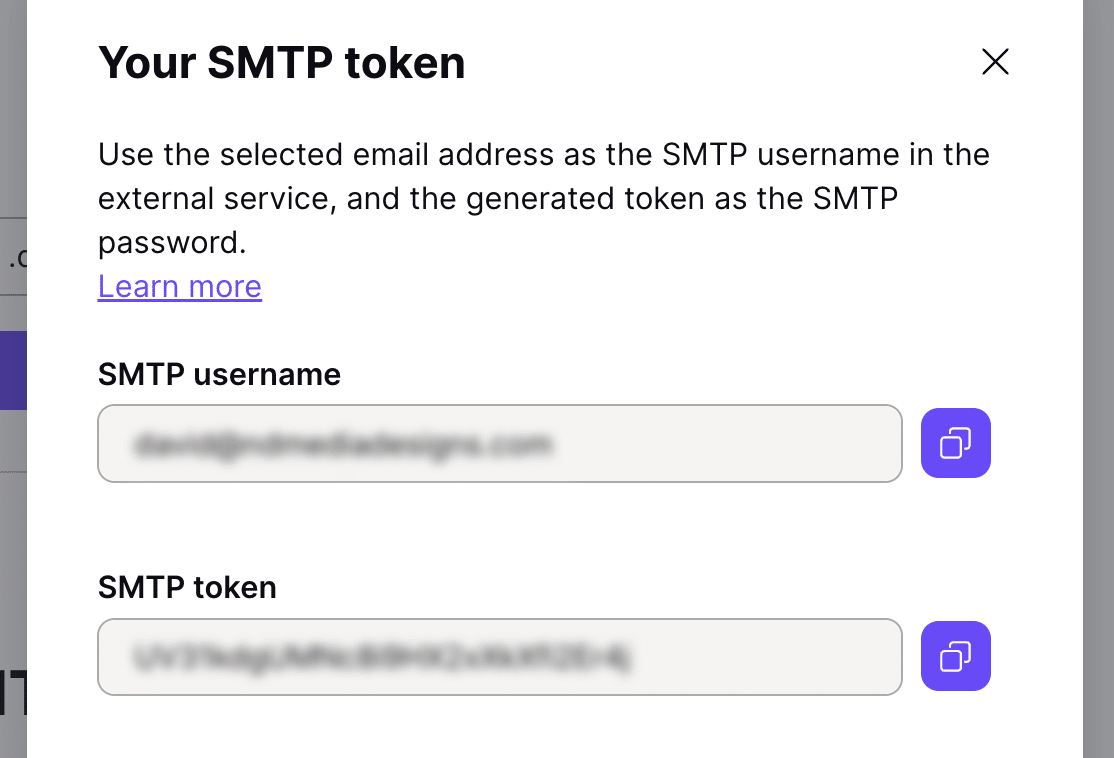
Go ahead and copy the username and password. To copy a value, click the Copy icon next to it.
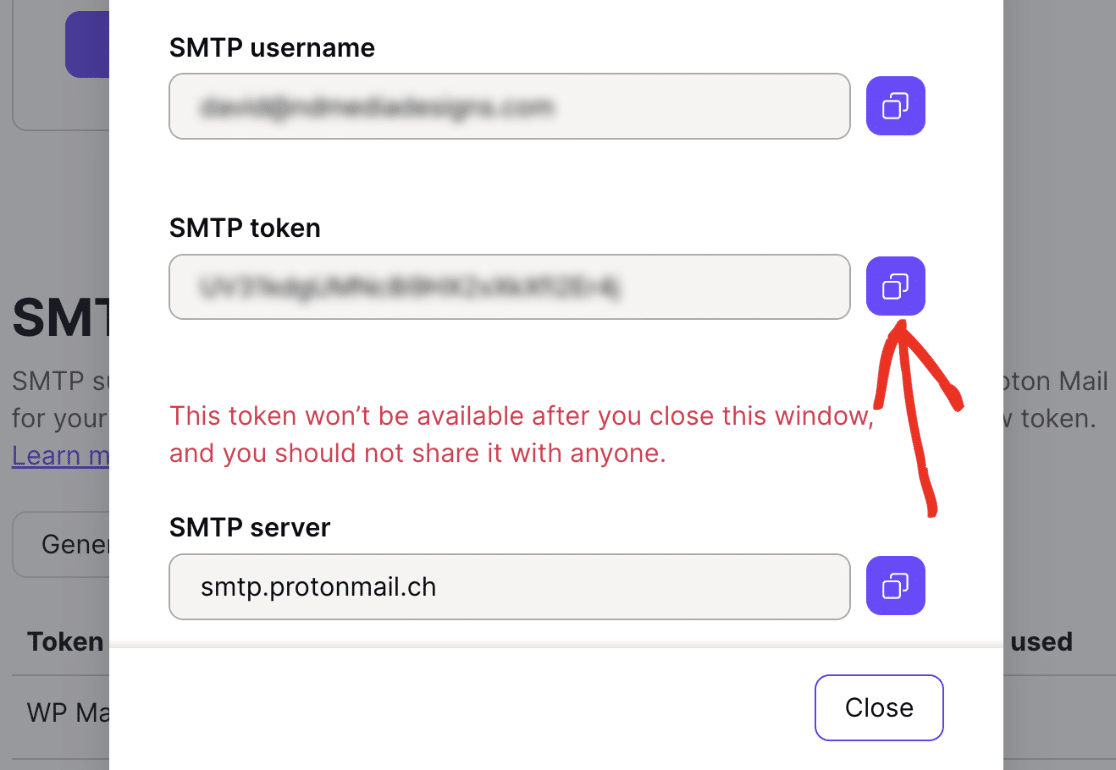
Note: You won’t be able to access your SMTP token (password) again after closing the overlay. We recommend storing this value in a secure location in case you need to refer back to it. However, you can always generate a new token if you need to.
After copying your SMTP token values, return to WP Mail SMTP settings in your WordPress dashboard. Next, paste the copied username and password into the corresponding SMTP Username and SMTP Password fields.
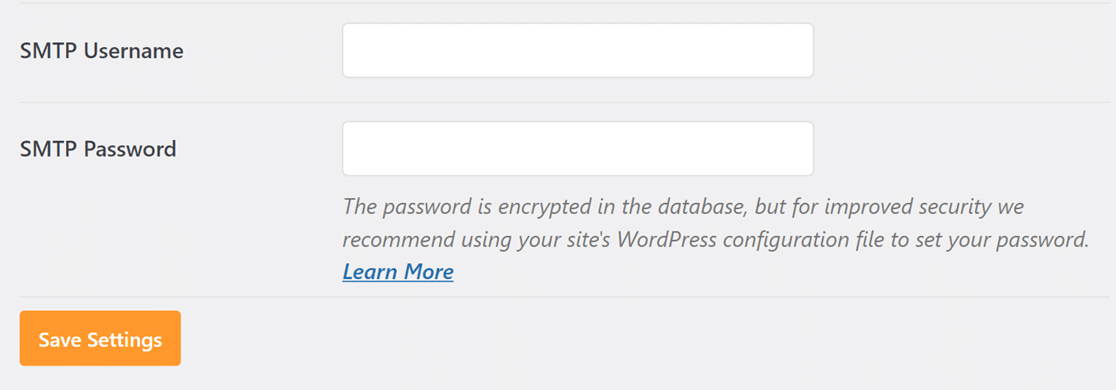
Be sure to save your changes afterward.
Generating a Transactional API Key in Mailchimp
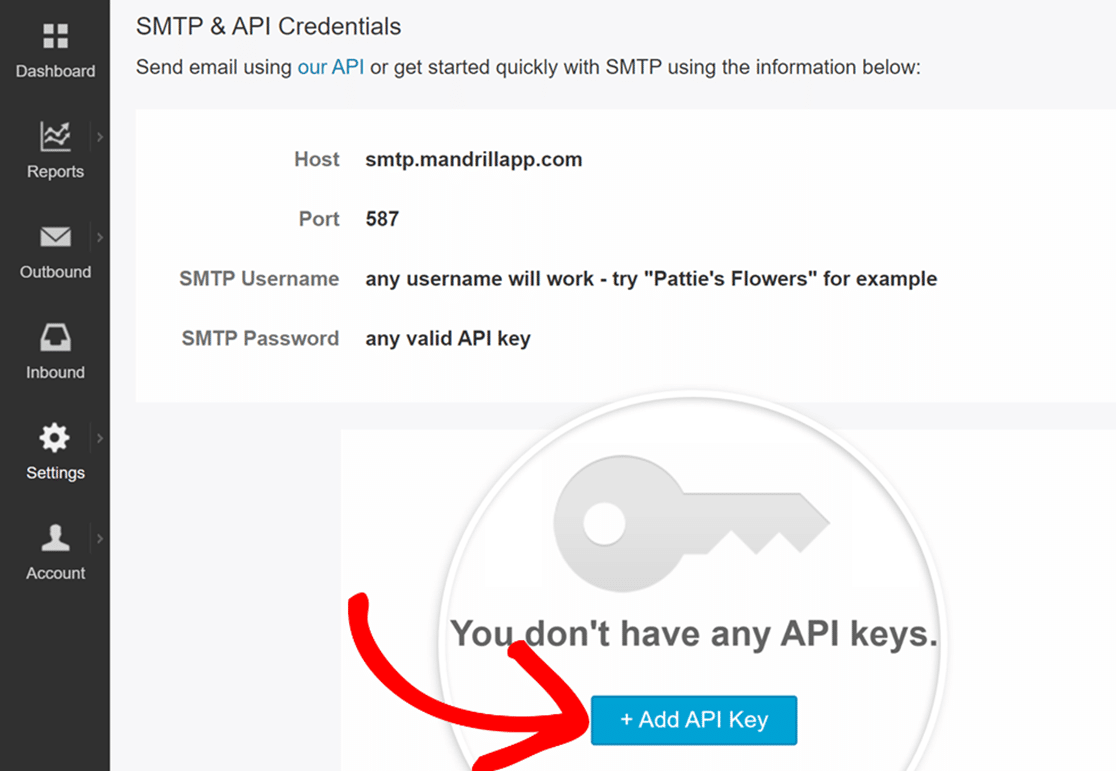
To generate a transactional API key for Mailchimp, you’ll first need to log in to your Mandrill account. Then open your account’s settings.
From there, click on the + Add API Key button.
Next, copy the API key that Mailchimp has generated for you.
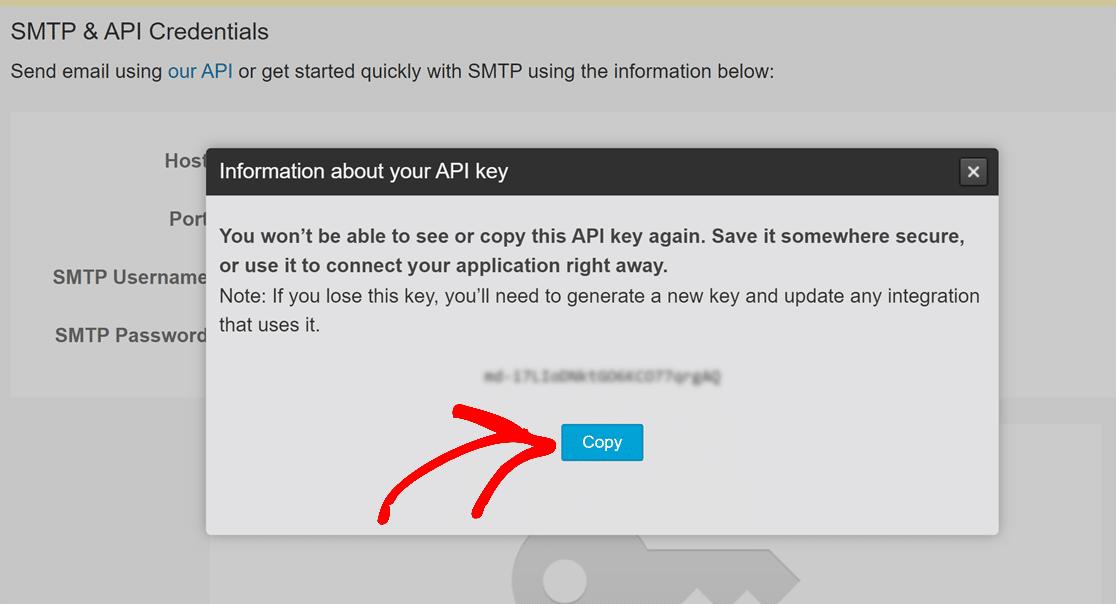
Then, head over to your WP Mail SMTP settings. Be sure to paste this API key into the SMTP Password field and save your settings.

Generating a Username and Password in Mailjet
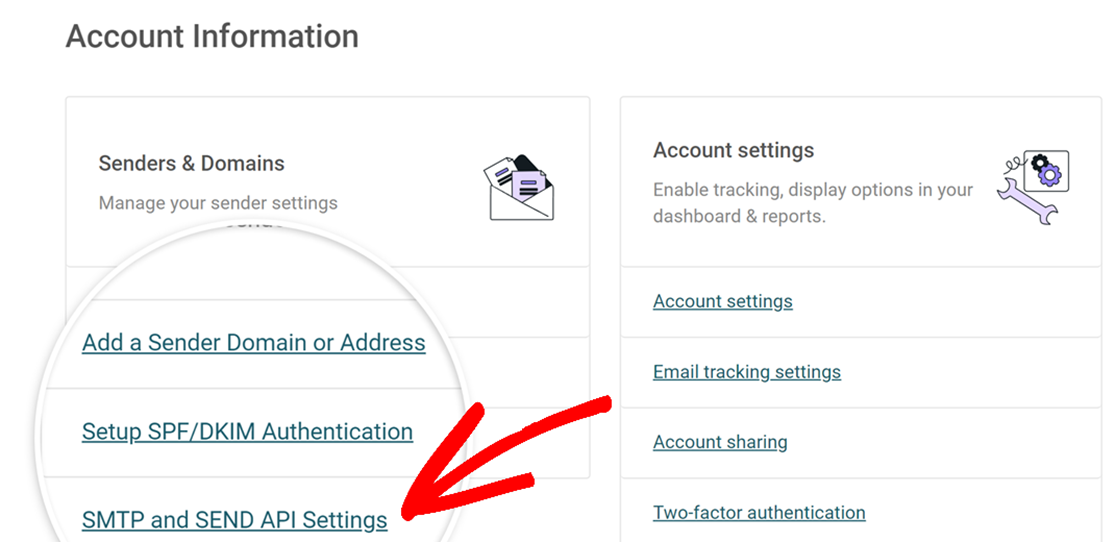
To generate an app password in Mailjet, log in to your account. Then open your account settings.
Next, click on SMTP and SEND API Settings in the Senders & Domains section.
Then, click on the See all API credentials button on the next page.
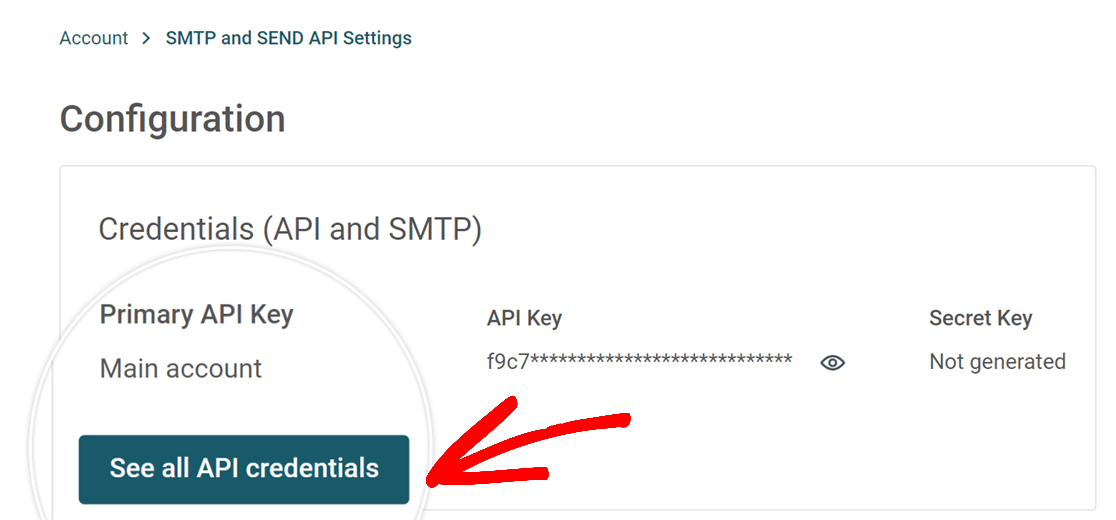
Next, click on the Generate Secret Key button on the next page.
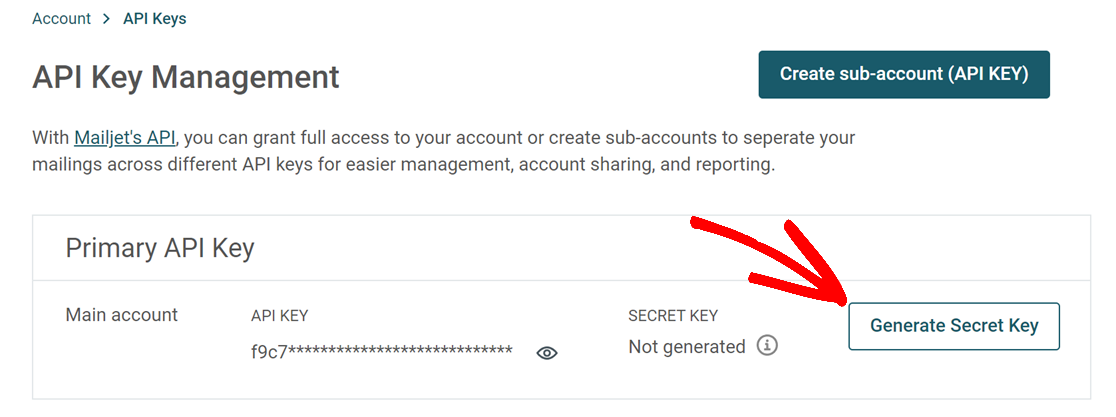
This will generate and display the API Key (SMTP Username) and Secret Key (SMTP Password) for you to use with WP Mail SMTP. To copy a value, click the Copy icon next to it.
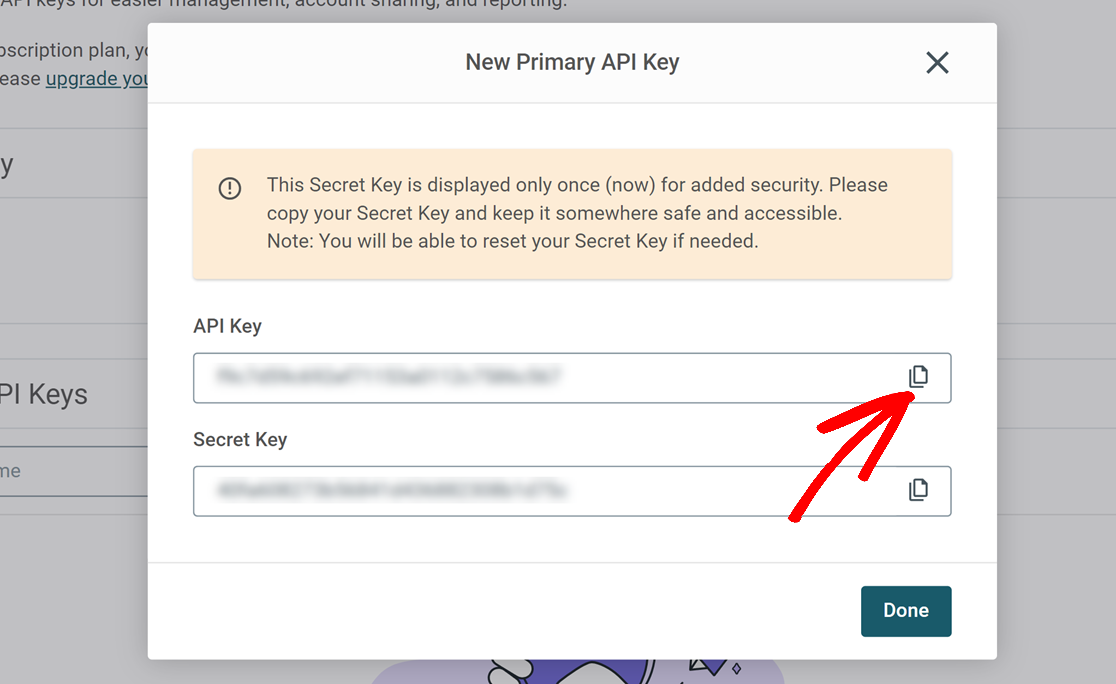
After copying your API Key and Secret Key values, return to WP Mail SMTP settings in your WordPress dashboard. Next, paste the copied username and password into the corresponding SMTP Username and SMTP Password fields.

Be sure to save your changes afterward.
Generating an App Password in Apple iCloud Mail
Note: Before you can generate an app password in iCloud Mail, you’ll need to turn on Apple’s two-factor authentication.
To generate an app password for iCloud Mail, log in to your Apple account. Then, from the Sign-In and Security settings, click on App-Specific Passwords.
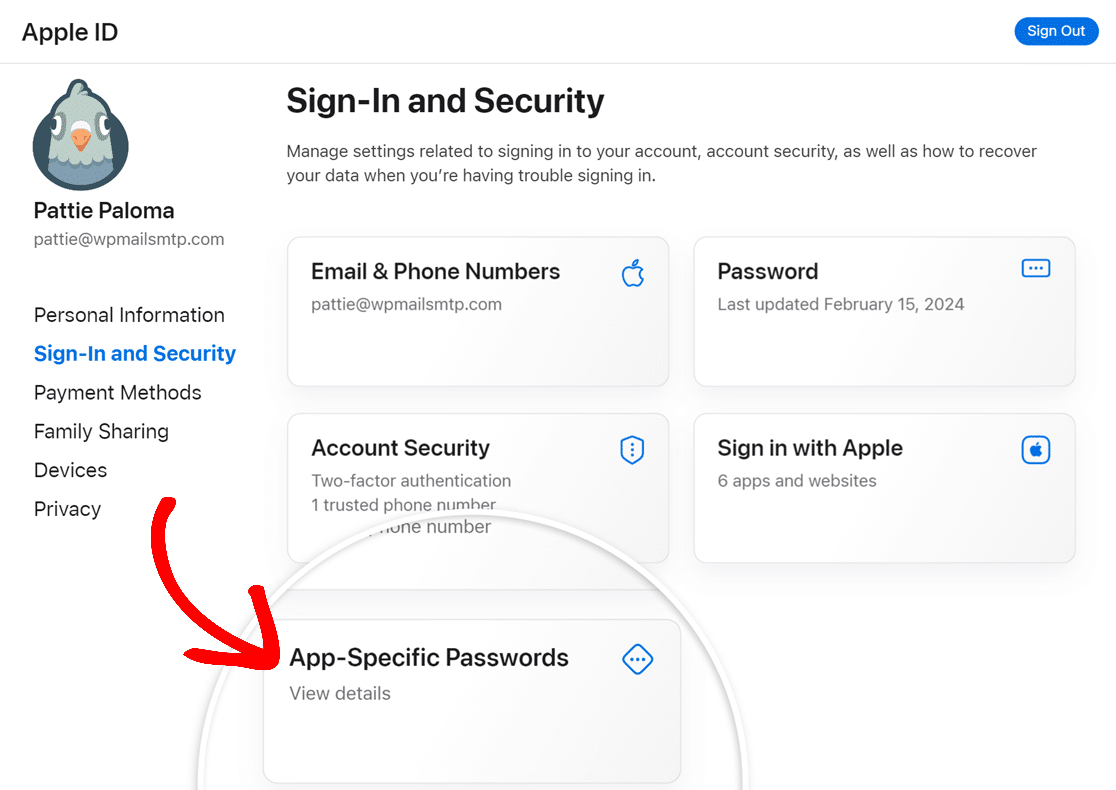
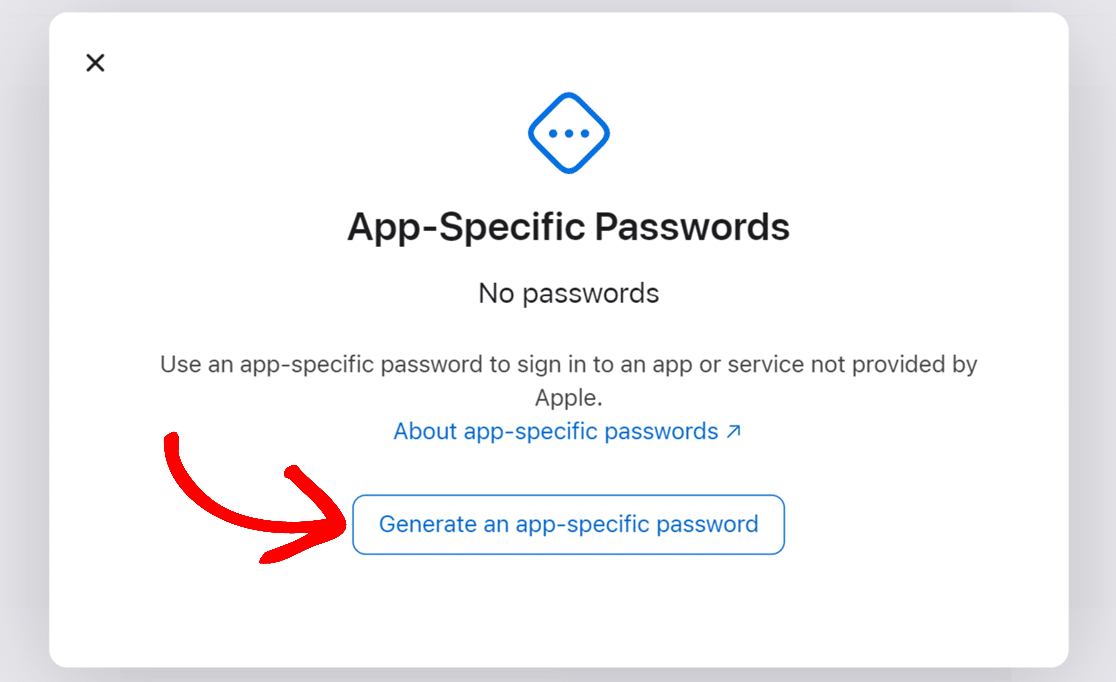
Next, click on the Generate an app-specific password button from the overlay that appears.
Then, enter WP Mail SMTP in the field provided and click on the Create button.
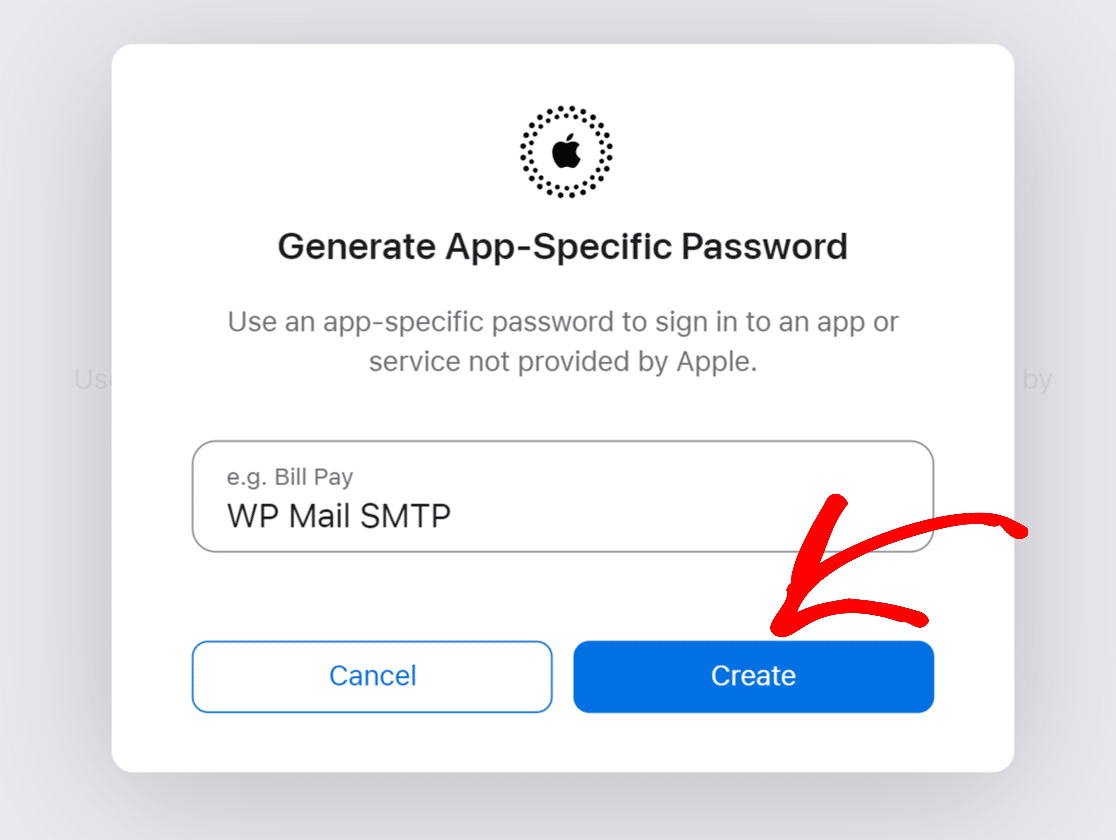
This will generate an app password that you can use for your WP Mail SMTP setup.

Copy the password, then return to your WP Mail SMTP settings in your WordPress dashboard. Paste the password into the SMTP Password field and save your settings.

Sending a Test Email
Now that all of your SMTP settings are in place, the next step is to make sure everything is working correctly. To do so, go to WP Mail SMTP » Tools and click on the Email Test tab.
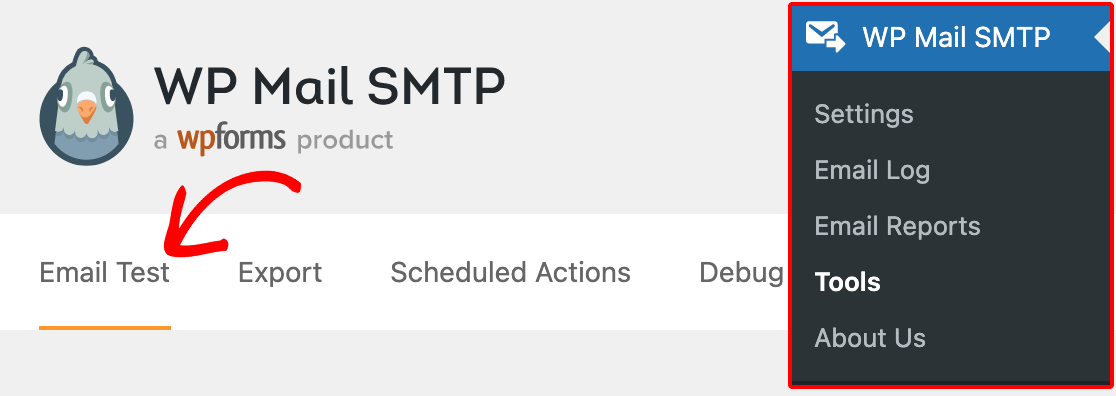
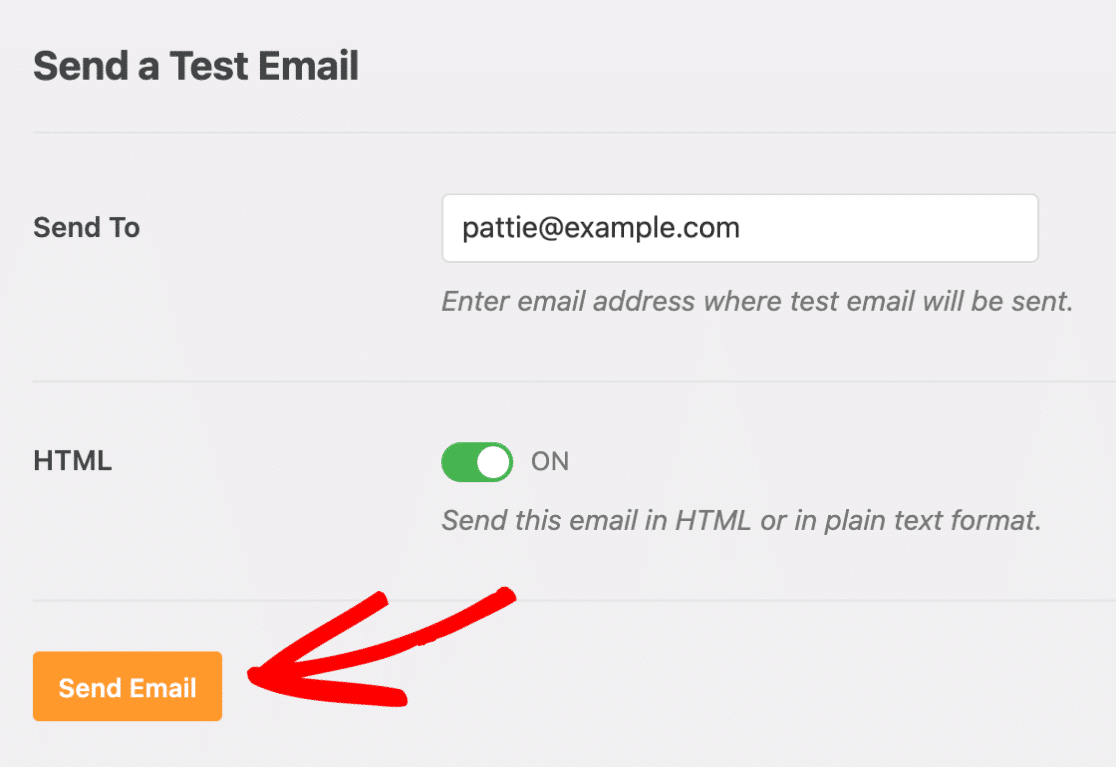
In the Send To field, you can enter any email address whose inbox you have access to.
Note: If you’ve set up an additional connection, you’d be able to choose between your Primary Connection and other connections when sending a test email.
Next, we recommend leaving the HTML setting ON unless you know you’ll only be sending plain text emails.
After you’ve filled out the required settings, go ahead and click the Send Email button to send your test email.
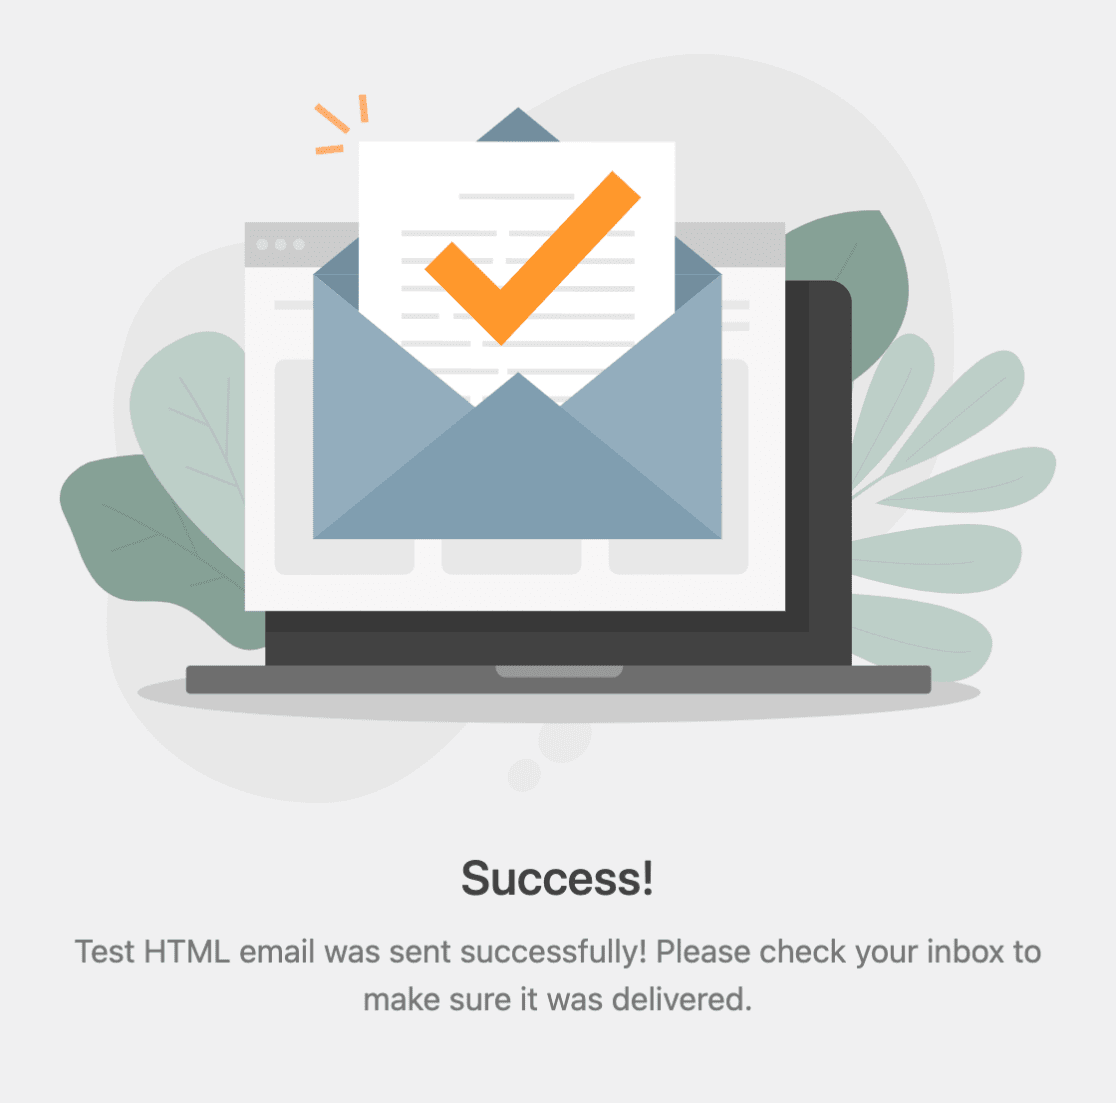
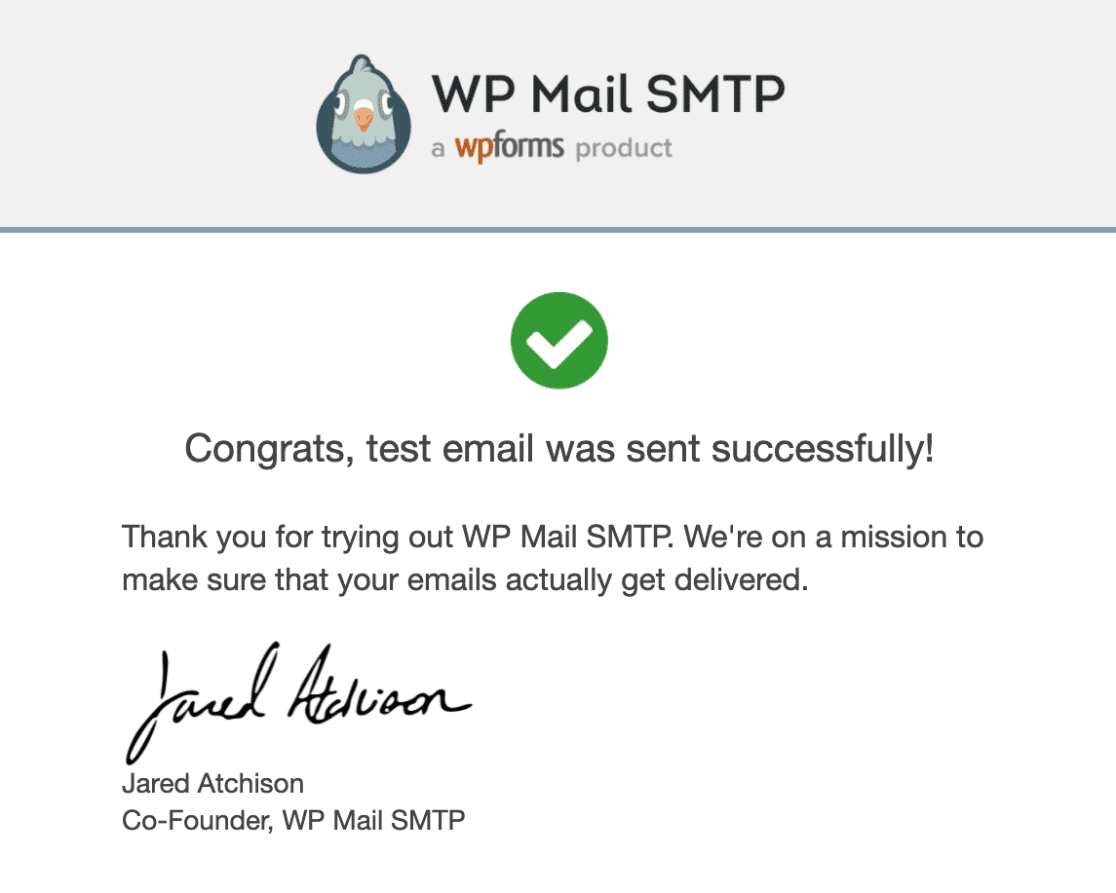
Once the test email has been sent, you should see a success message that reads, “Success! Test HTML email was sent successfully! Please check your inbox to make sure it was delivered.”
If you check the inbox for the email address you entered, you should see the email for this test.
Note: If you’re using a Yahoo email address, it may take 5–10 minutes for emails to arrive in your inbox (including test emails).
Note: If you have forms that send emails through your site, be sure to also test these out by submitting a couple of test entries. That way, you can be certain that these SMTP settings apply to your form emails as well.
Frequently Asked Questions
Below, we’ve answered the top questions we receive about using the Other SMTP mailer with WP Mail SMTP.
Why am I getting the following error?
SMTP Error: Could not authenticate
In the sections below, we’ll go over some of the causes of this issue, and a few courses of action you can take to fix it:
Incorrect SMTP Username and Password
In your WP Mail SMTP settings, double-check that your SMTP Username and SMTP Password are correct.
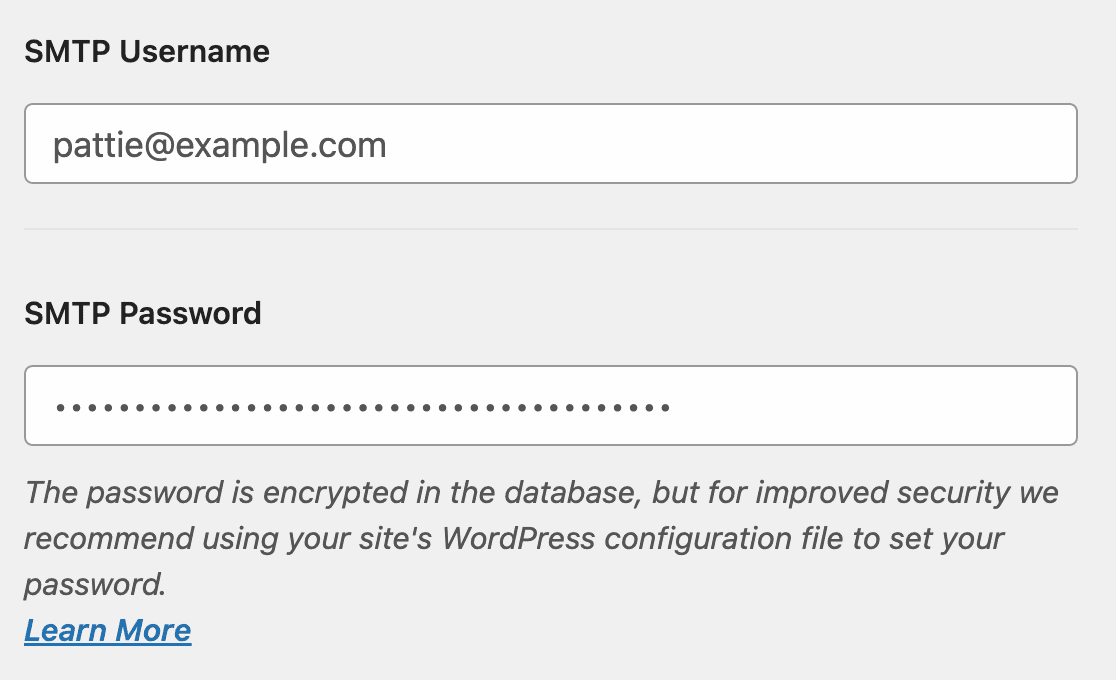
Note: The following mailers require you to generate an app-specific password: Gmail, Yahoo, Yahoo Business, and AOL. For details on generating passwords for each of these apps, please refer to the Generating an App Password section.
Misplaced Constants
If you are using constants to set up WP Mail SMTP, please double-check to be sure you’ve added them in the correct place. Please refer to our guide on securing SMTP settings with constants for more details.
Adding a Custom Filter
The WordPress (PHPMailer) uses these auth types in order:
CRAM-MD5, LOGIN, PLAIN, XOAUTH2
If the receiving SMTP server is not configured correctly, it will fail at the first one.
If you’ve covered the two troubleshooting options above, and you’re still receiving the error, you can try adding the following filter:
Note: For extra guidance, please see WPBeginner’s tutorial on adding custom code.
How do I fix the ‘Could not connect to SMTP host’ error?
This is a common SMTP error that occurs on WordPress sites. It indicates that your site was unable to establish a connection with the SMTP server you configured.
The error can occur due to a variety of reasons. The most common causes are incorrect SMTP settings, firewall restrictions, or server downtime.
To learn more about troubleshooting this error, be sure to check out our guide on fixing the could not connect to SMTP host error in WordPress.
Can I use Outlook mail server to connect to the Other SMTP mailer?
No. Microsoft disabled authentication with username and password for Outlook mailboxes. This means you won’t be able to connect Microsoft’s email API through the Other SMTP mailer. We suggest using our dedicated Outlook mailer to connect your site. Please see our tutorial on using the Microsoft 365 / Outlook.com mailer.
That’s it! You’ve now configured the Other SMTP mailer on your WordPress site, and your site’s emails should start delivering successfully and reliably.
Next, would you like to keep a record of all the emails sent out from your WordPress site? Be sure to check out our doc on setting up email logging so you can always see what emails have been sent.
