AI Summary
Would you like a reliable, secure email delivery solution that works with a variety of email addresses? SendGrid is a popular and affordable option for WordPress users.
This tutorial will walk through how to set up the SendGrid mailer for WP Mail SMTP.
What Is SendGrid?
SendGrid is a popular method of improving email delivery. They do this through an API, which provides a more secure method than traditional SMTP. Furthermore, they offer a free trial plan and various paid options depending on the number of emails you need to send each month.
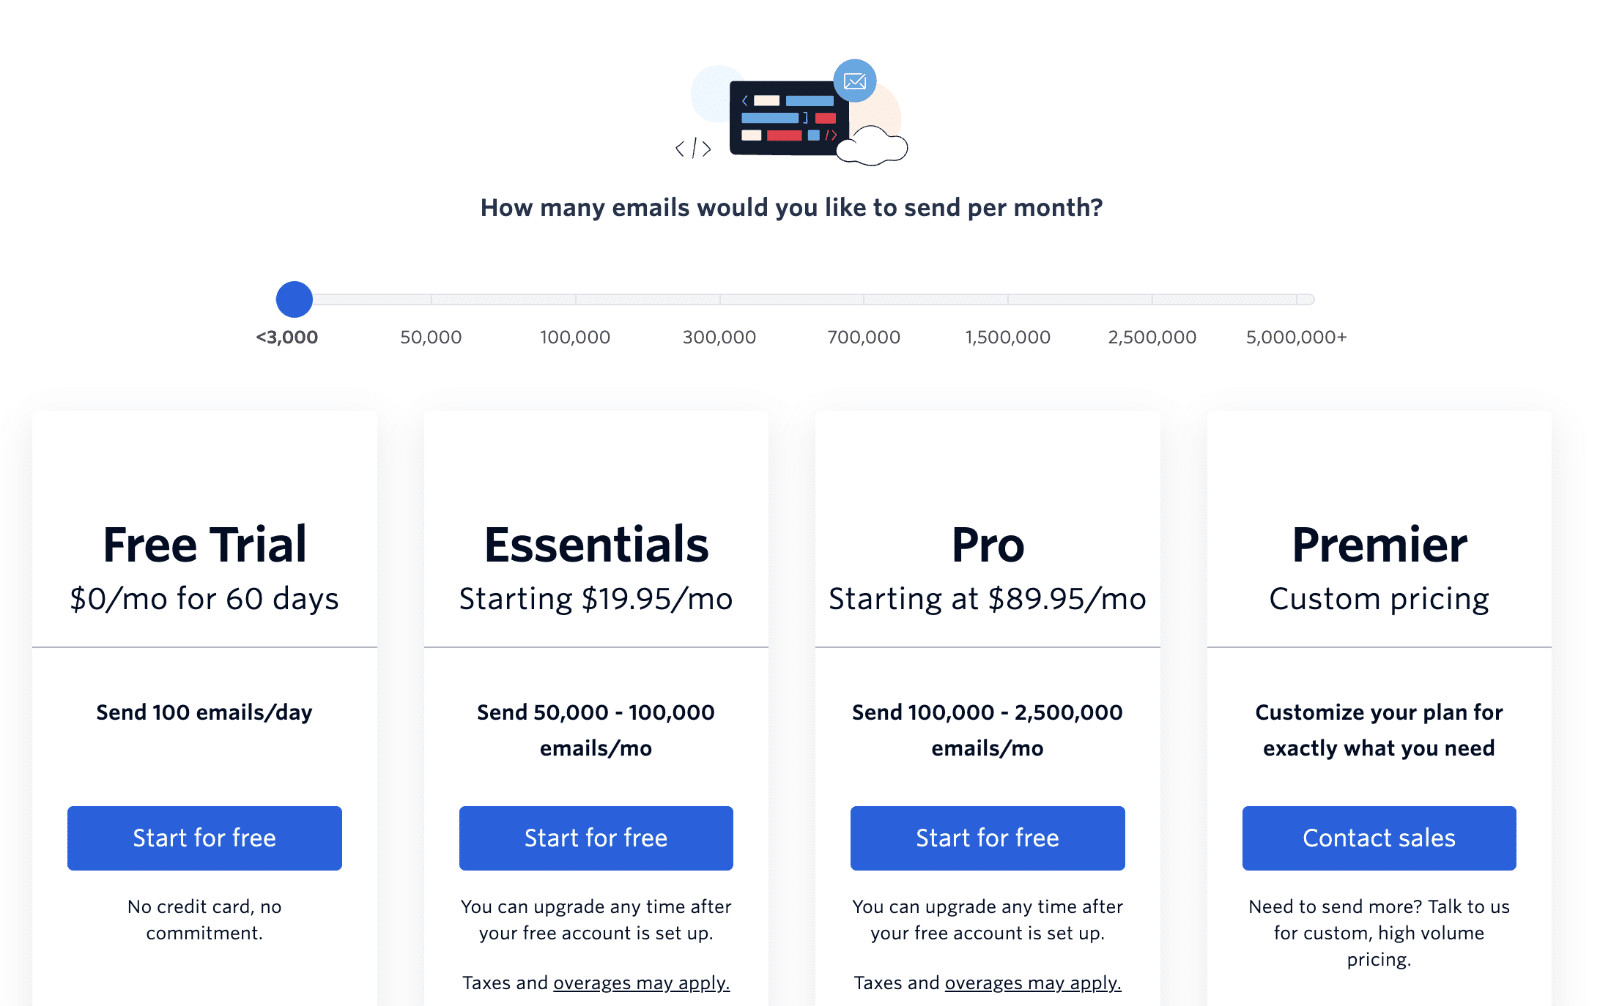
- Cost: Free trial for 60 days to send up to 100 emails daily. You’ll need to upgrade to a paid account after your 60-day trial period expires.
- From Email Requirements: To use SendGrid effectively, you’ll need to have an email address associated with a domain you own. Emails that are @gmail.com, @yahoo.com, etc., are not recommended for use with this mailer.
- Bottom Line: SendGrid is a super reliable option, and offers a free plan that works well for smaller businesses. It’s worth noting that it requires DNS (Domain Name System) access to properly authenticate your domain and complete the setup process.
Note: Check out our complete guide to mailers in WP Mail SMTP for more information about supported mailers.
Configuring Your SendGrid Account
In order to connect your website with SendGrid, you’ll first need to set up a SendGrid account and create a sender identity.
Creating Your SendGrid Account
If you haven’t already, you’ll need to sign up for a SendGrid account by visiting their Pricing page. From here, you can choose the account type that fits your site’s needs.
For our example, we’ll be signing up for their free trial plan (limited to 60 days and offers 100 emails/day). However, the setup process will be the same no matter which plan you choose.
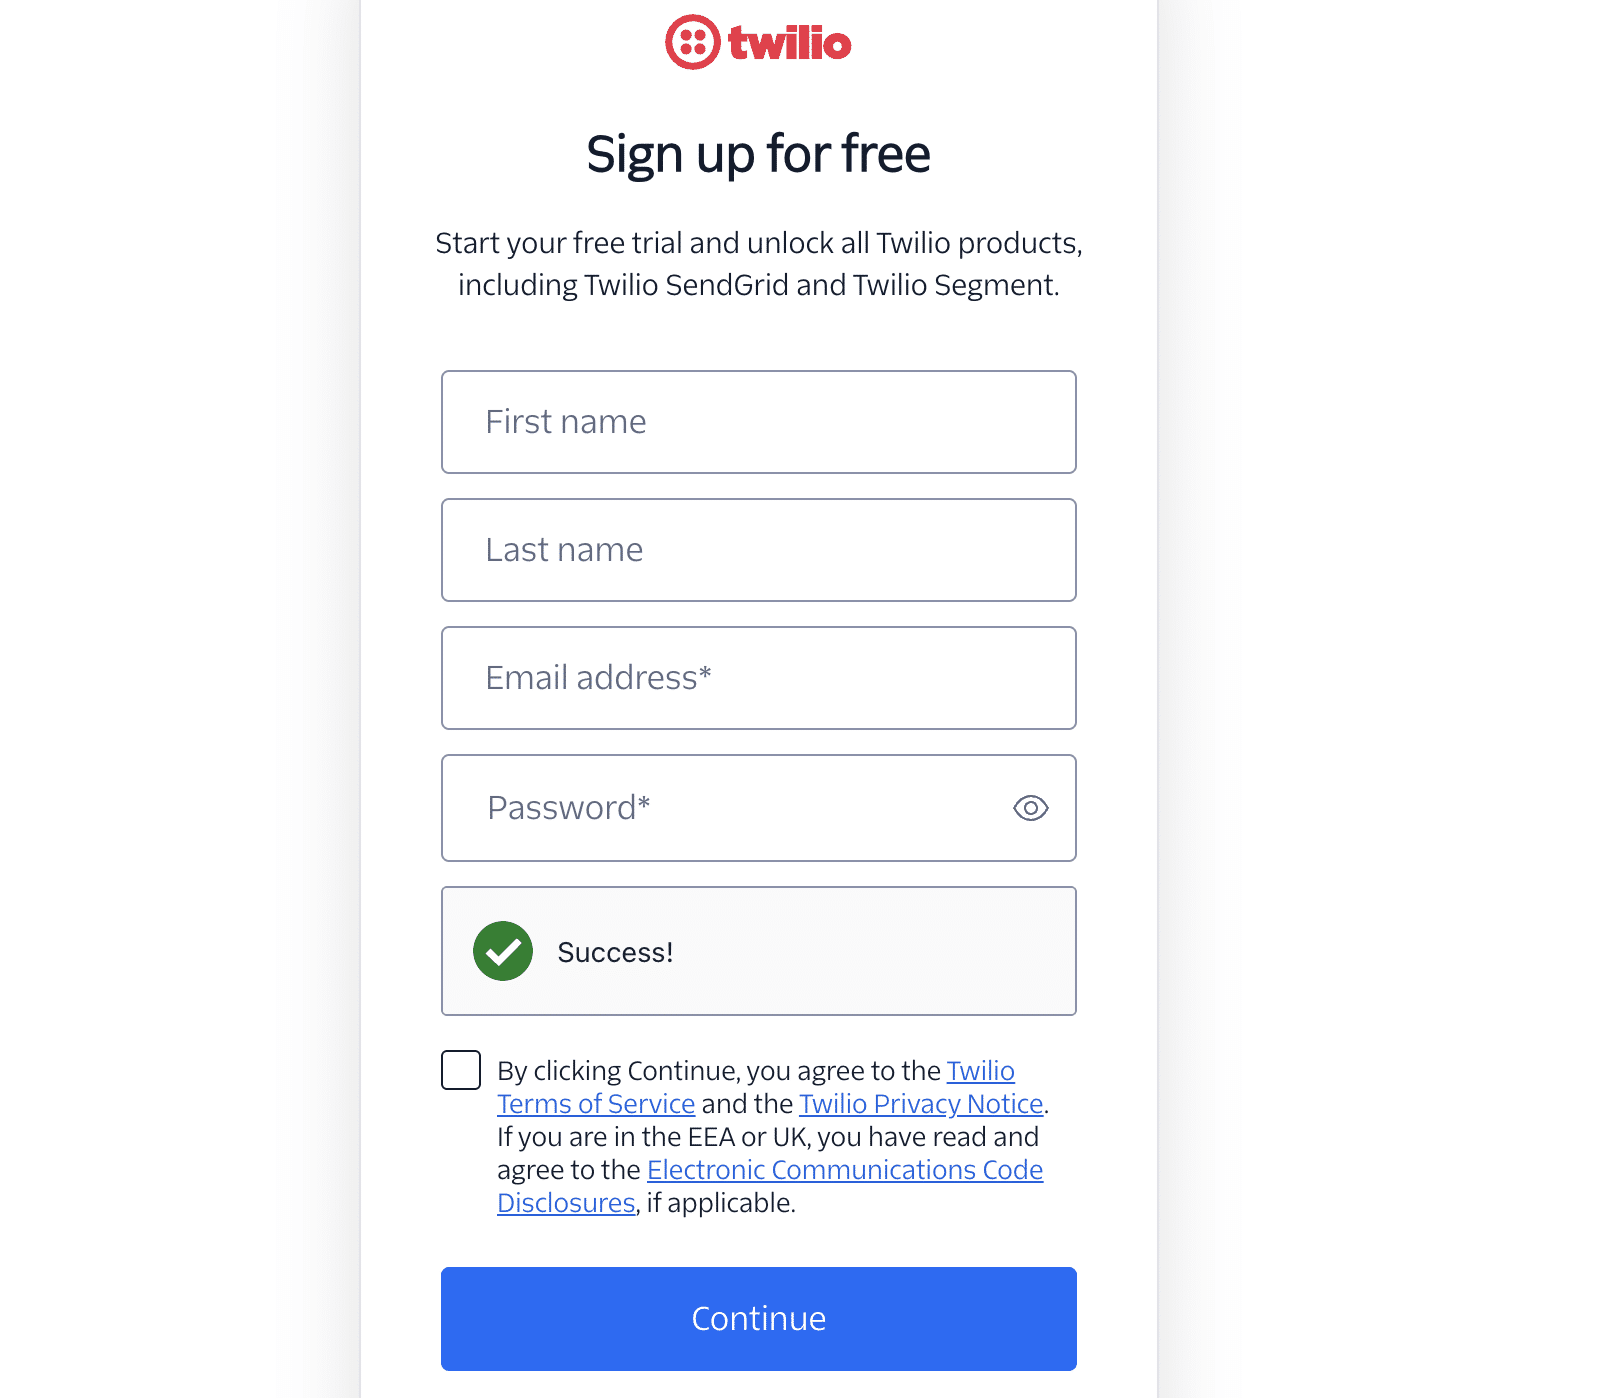
Next, SendGrid will ask you to create your account’s username and password.
Then, SendGrid may ask you some additional questions about your business to help personalize your account.
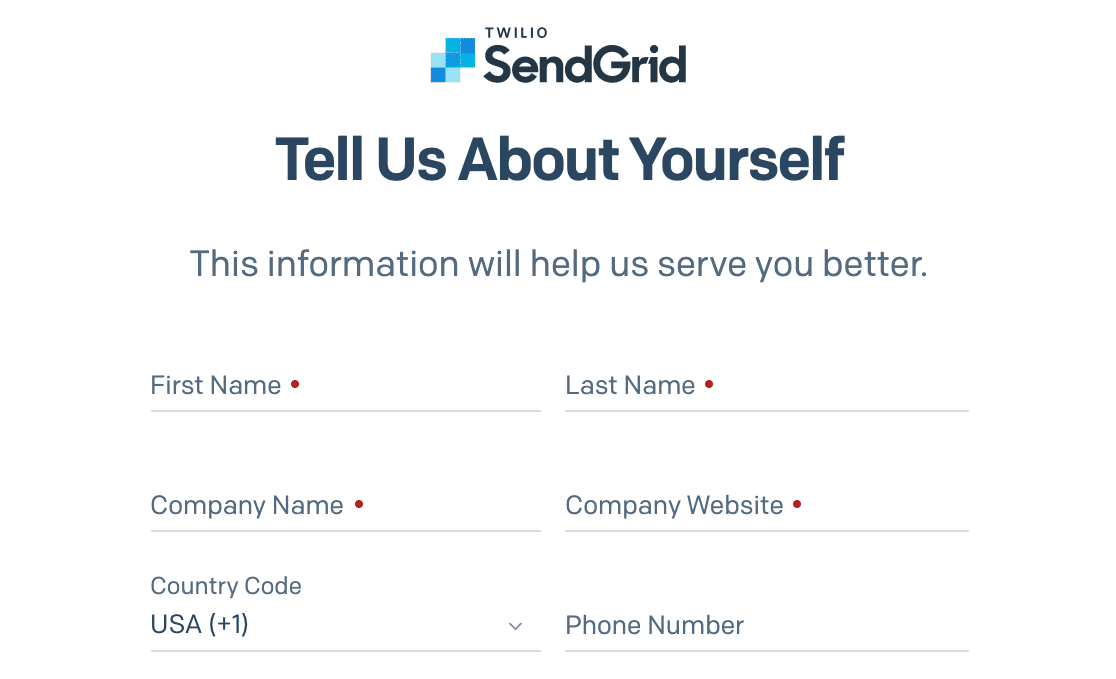
Fill out all the required fields, then click Get Started! to continue.
Creating Your Sender Identity
In order to start sending emails with SendGrid, you’ll need to set up a sender identity. There are two options: creating a single sender identity or authenticating your website’s domain.
We recommend authenticating your domain, as this method is better for ensuring your emails are delivered consistently. However, we’ve covered both options below.
Note: Although you can get your SendGrid integration up and running with a single sender identity, this option will not ensure email delivery. We recommend authenticating your domain instead.
Adding a Single Sender to Your SendGrid Account
In SendGrid, you can create a single sender to set up an approved sender email address.
To do this, go to Settings » Sender Authentication in the SendGrid dashboard menu.
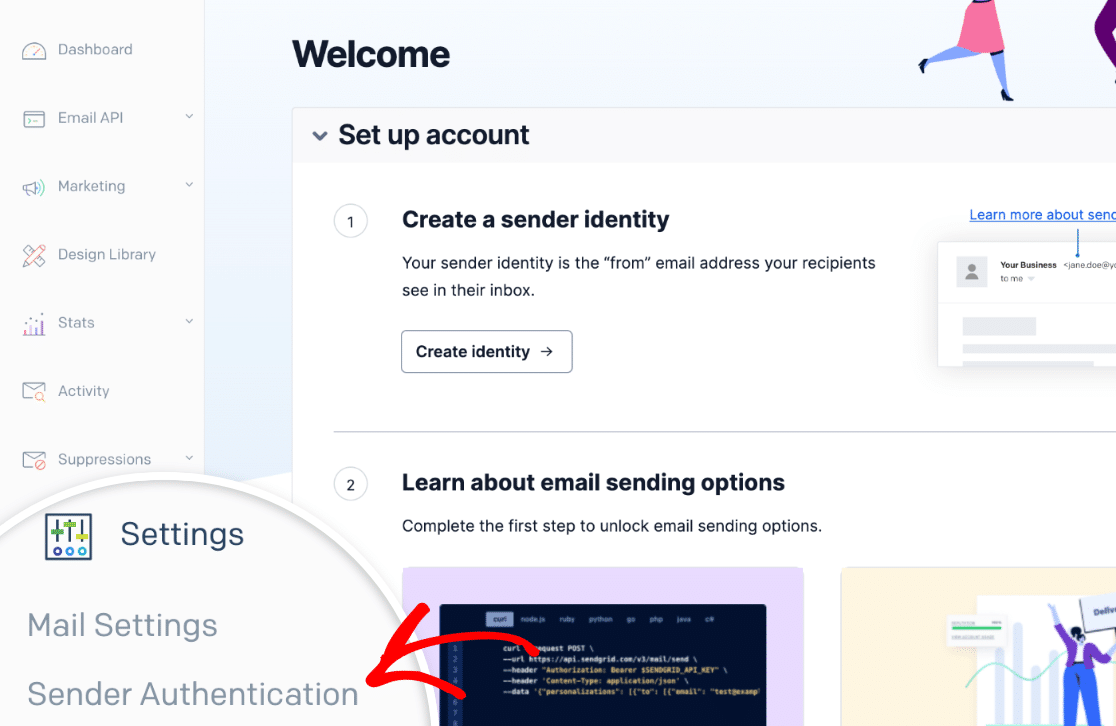
Then, locate the Single Sender Verification section and click the Get Started button.

You’ll now see a panel prompting you to input the sender’s name, email, and physical mailing address. After filling in the necessary details, click the Create button.
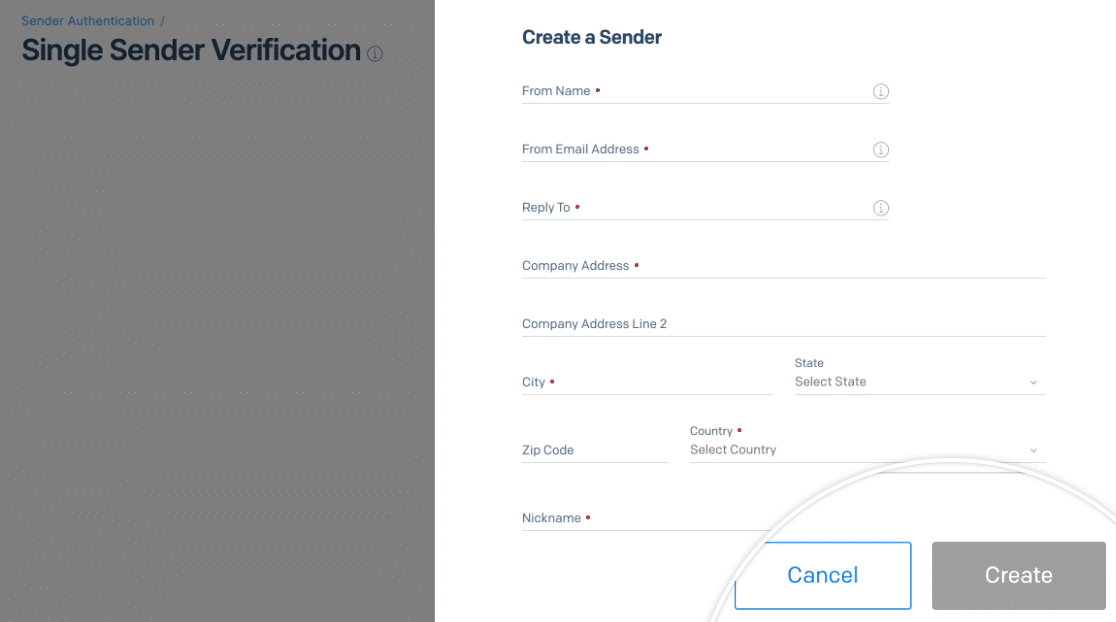
A confirmation message will be sent to the email address you entered. Click on the link in that message to verify your email and finish setting up your single sender identity.
Authenticating Your Domain in SendGrid
Authentication proves that your emails come from a domain that you own. This, in turn, helps your domain’s reputation as a legitimate email source. As an added benefit, authentication will also remove the “via sendgrid.net” message that would otherwise be added to your emails.
Note: In order to move ahead with domain authentication in SendGrid, you’ll need access to your site’s DNS settings.
If you’re not sure where to find your DNS settings or feel unsure about making changes to them, please contact your site’s hosting provider before proceeding. Or, for more details, you can check out WPBeginner’s tutorial on DNS settings.
To get started, go to Settings » Sender Authentication in the SendGrid dashboard menu.

On the next page, locate the Domain Authentication section and click on the Get Started button to access the necessary settings.
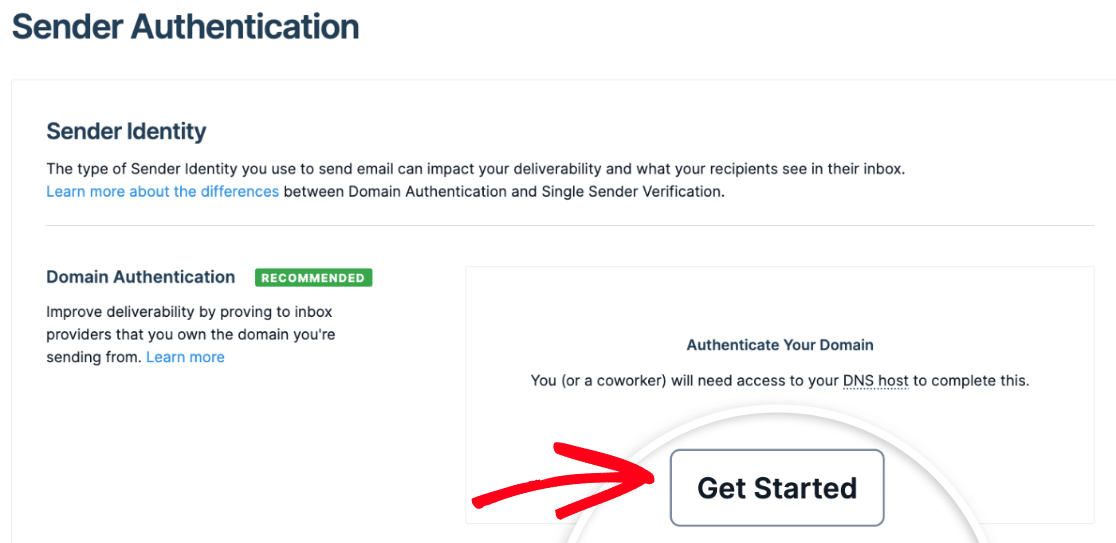
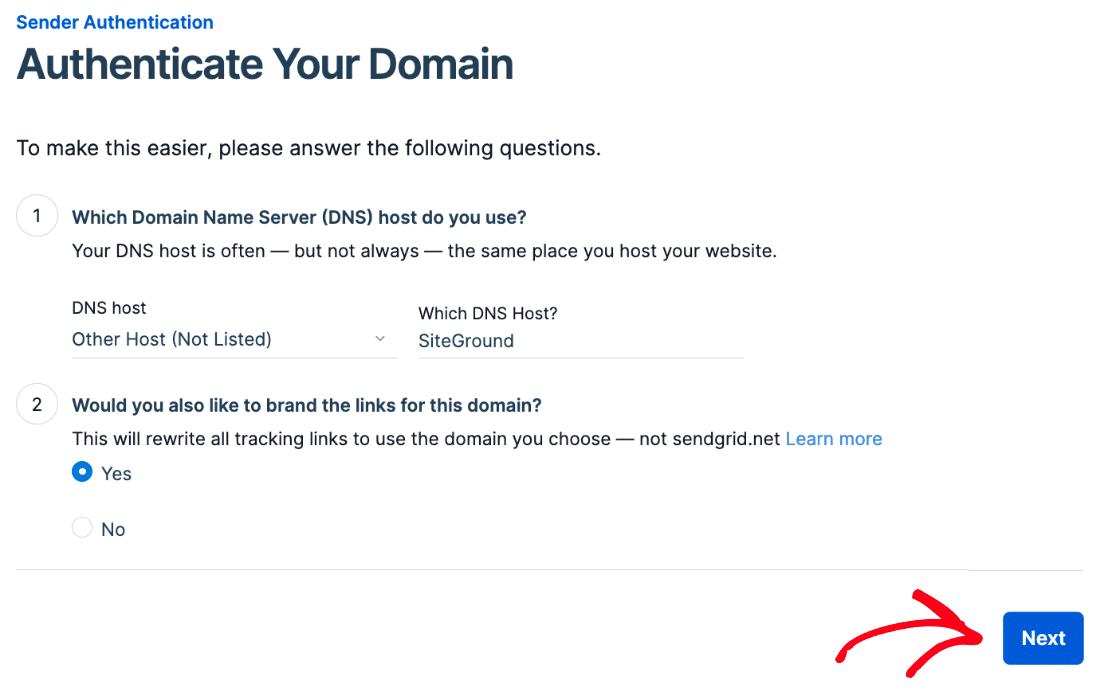
On the first authentication setup page, you’ll need to answer 2 questions:
- Which Domain Name Server (DNS) host do you use? Select your DNS provider from the available list. If you don’t see a match, then choose Other Host (Not Listed).
- Would you also like to brand the links for this domain? We recommend selecting Yes. This will allow any links in the emails sent from your site to use your own domain rather than SendGrid’s. Branded links help to further ensure delivery by keeping all links tied to your own site.
Once you’ve answered these questions, click the Next button to continue.
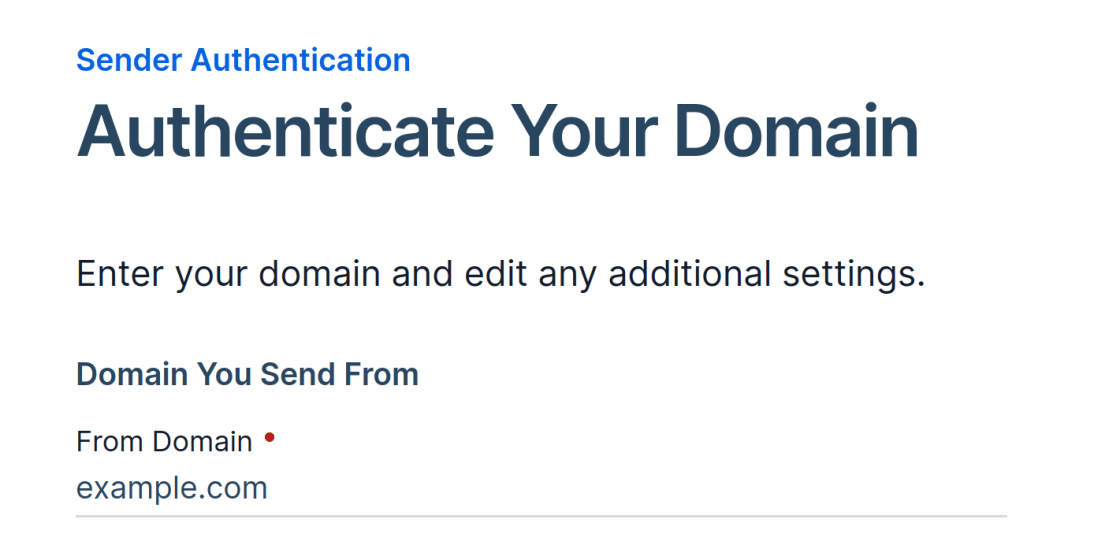
For the next step, you’ll need to enter your site’s domain (e.g., example.com).
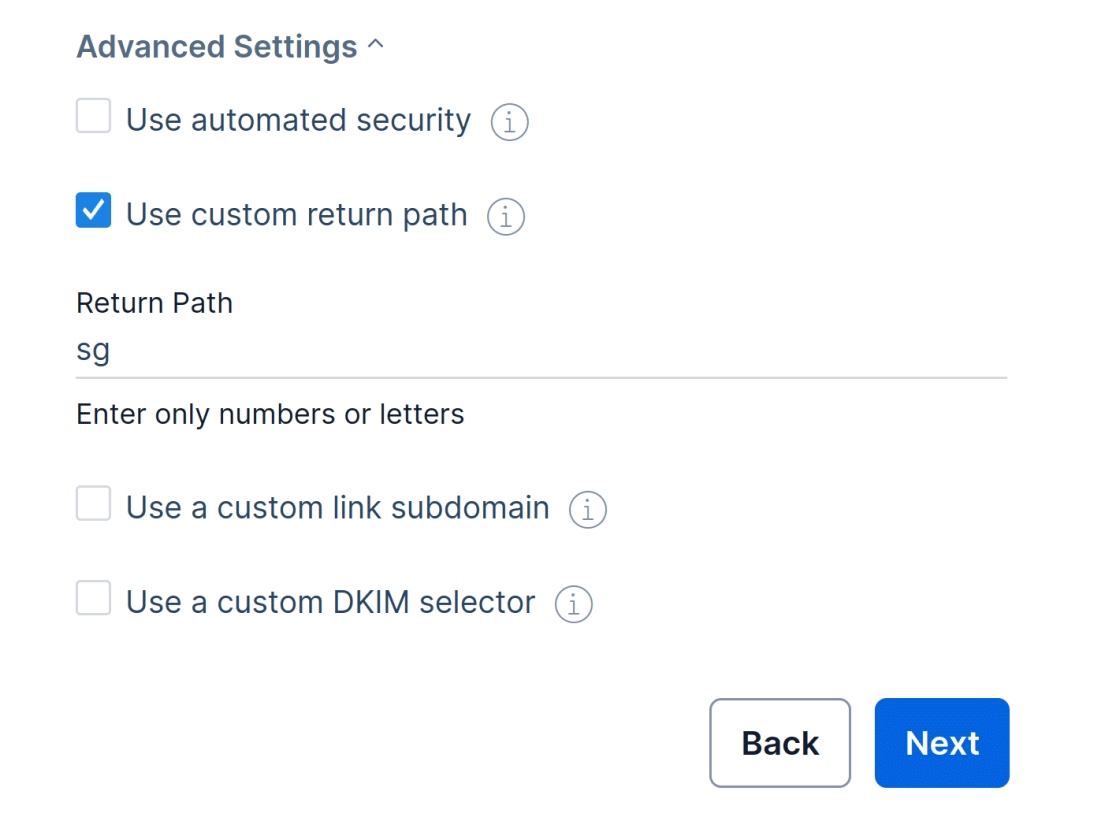
After entering your domain, click on Advanced Settings. You’ll need to make a couple of adjustments here:
- Uncheck the box labeled Use automated security.
- Check the box labeled Use custom return path.
- Add a subdomain in the Return Path field (see below for details).
A subdomain replaces the “www” part of your website’s address (e.g., subdomain.example.com). Subdomains can be used to add separate sections or directories to your website. For example, a site’s blog might be at blog.example.com.
In this case, the subdomain will only be used by SendGrid to send emails and will not be visible on your site at all.
Unless you have a specific subdomain in mind, consider using sg. This is what we’ll use in our example.
Note: The subdomain can be anything you’d like. However, SendGrid recommends:
- Not using “mail,” as many hosting companies already use this subdomain, and it could cause conflicts.
- Not including any underscores (_) as this character may not be compatible with some DNS providers
When you’re ready, go ahead and click the Next button.
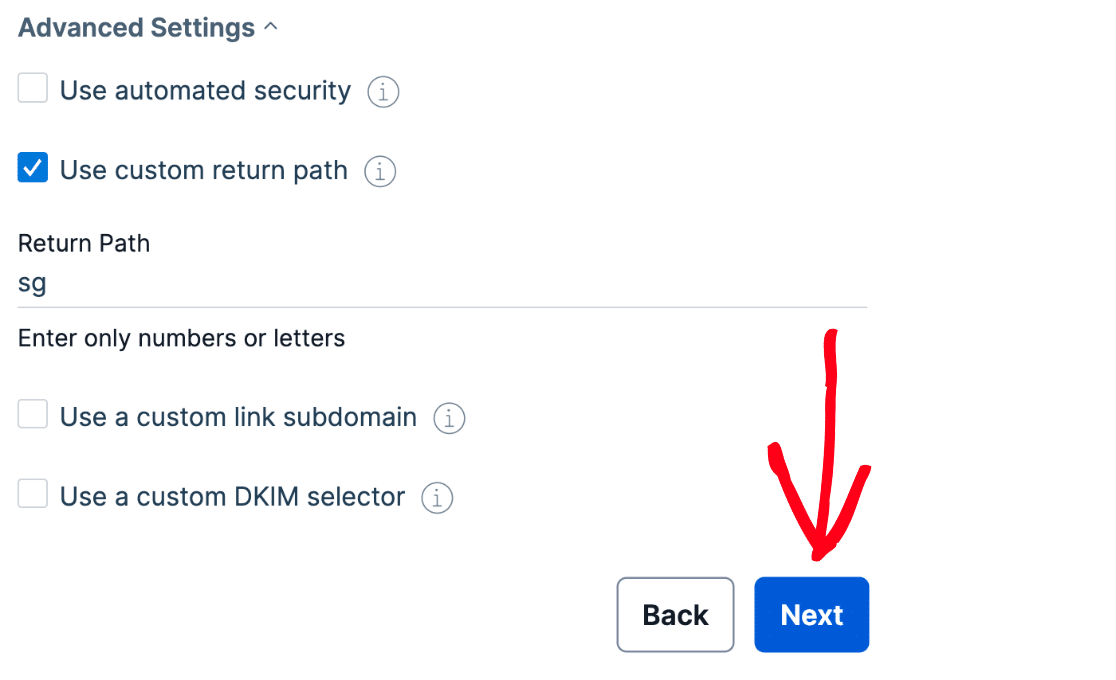
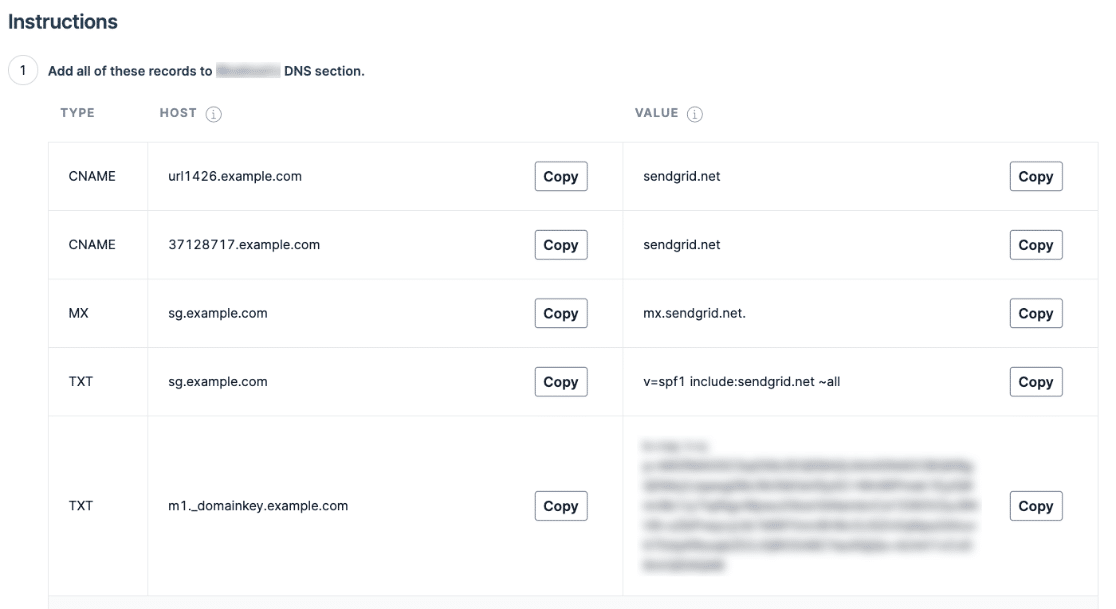
The following page will display a list of DNS records that you’ll need to add to your site’s DNS settings.
Note: To learn more about accessing DNS settings for your domain, please see our tutorial on adding DNS records for a complete walkthrough.
After you’ve opened up the DNS settings for your site, you should see an option to add a new record.
To make it possible for SendGrid to authenticate your domain, you’ll need to add these records to your site’s DNS. Be sure to copy them carefully, as you’ll need the exact values from your SendGrid account for the verification to work.
Note: Some domain host will append your domain when adding the Hostname provided by SendGrid. If that’s the case, you’ll need to remove your normal domain when entering the Hostname into your domain’s DNS. For example, instead of entering sg.example.com for the first TXT record’s Hostname, you’d only enter sg.
You may also see a TTL (Time To Live) field for the record in your site’s DNS settings. If you’re provided with a way to change this, we recommend setting the TTL to one day (or 86400 seconds, depending on the unit your DNS uses).
After adding all the DNS records, check the box in your SendGrid dashboard labeled I have added these records. Then click the Verify button. It can take up to 48 hours for DNS changes to be recognized, so you may need to check back on this later.

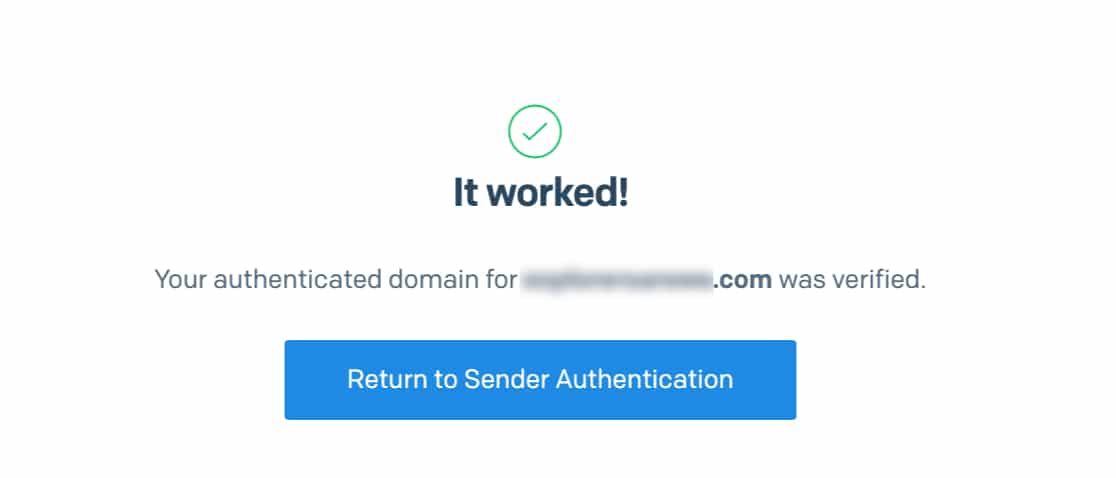
If the verification worked, you should see a success message.
Generating an API Key
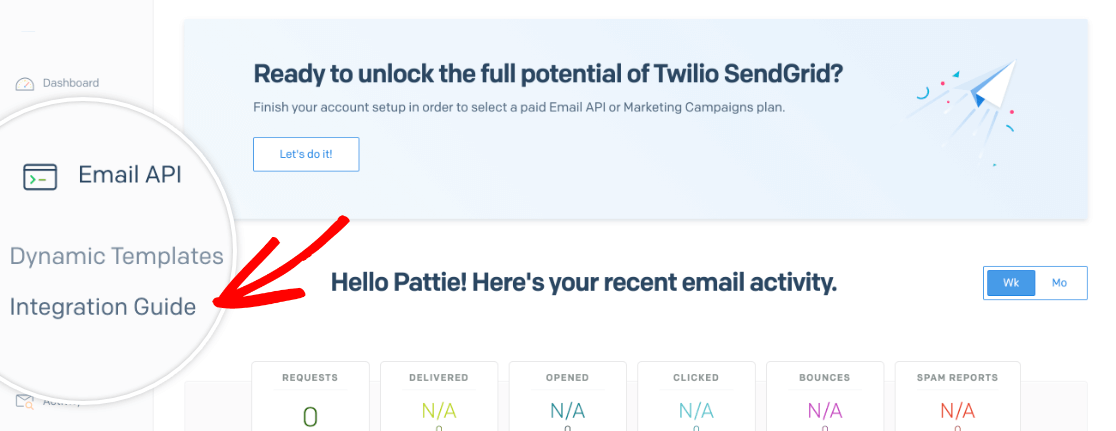
After you’ve created an account and set up your sender identity, you can generate an API key to connect your site to SendGrid and start sending emails. In your account dashboard, click on Email API » Integration Guide in the menu on the left.
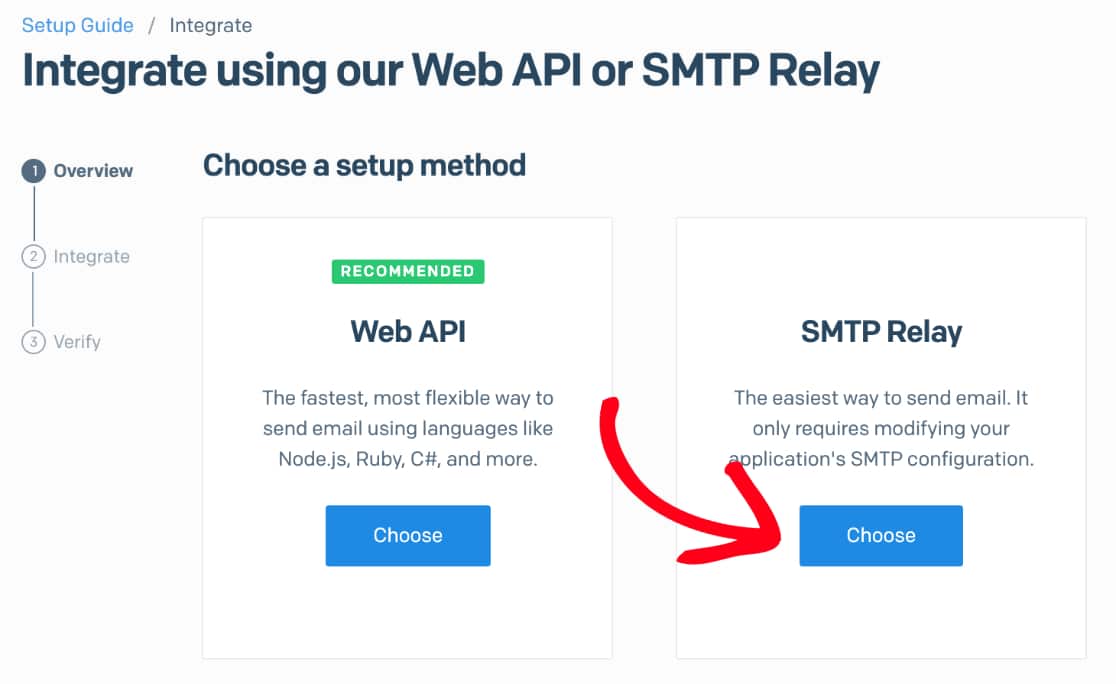
Next, you’ll be asked to choose a setup method. Go ahead and click the Choose button under the SMTP Relay option.
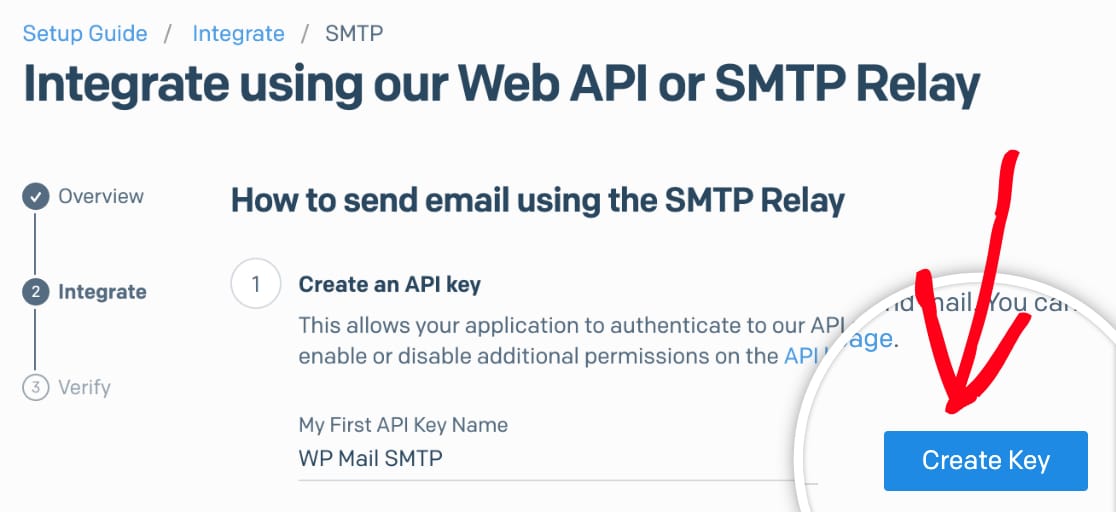
Next, you’ll need to enter an API key name and click Create Key.
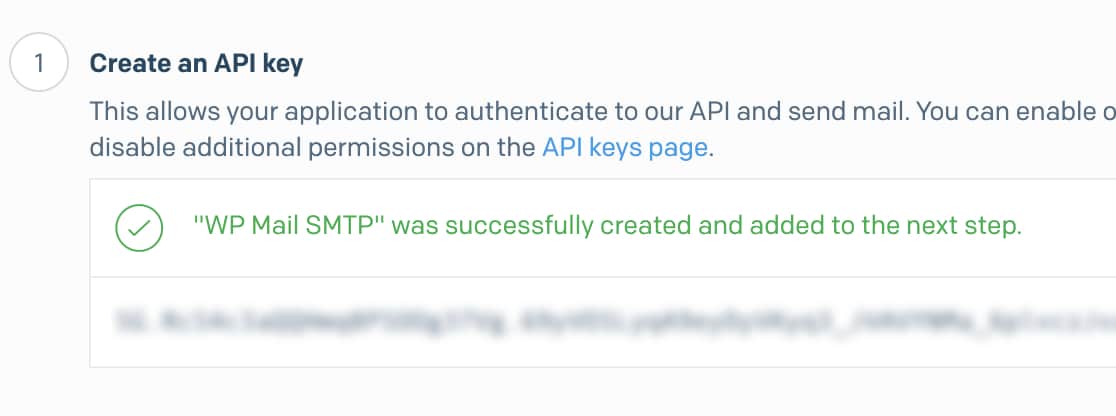
This will generate an API key for you. Be sure to leave this page open, as you’ll need this API key a little later.
Setting Up WP Mail SMTP
Now that your SendGrid account is prepped, you can switch over to your website and set up WP Mail SMTP.
Before you get started with this section, be sure to install and activate the WP Mail SMTP plugin.
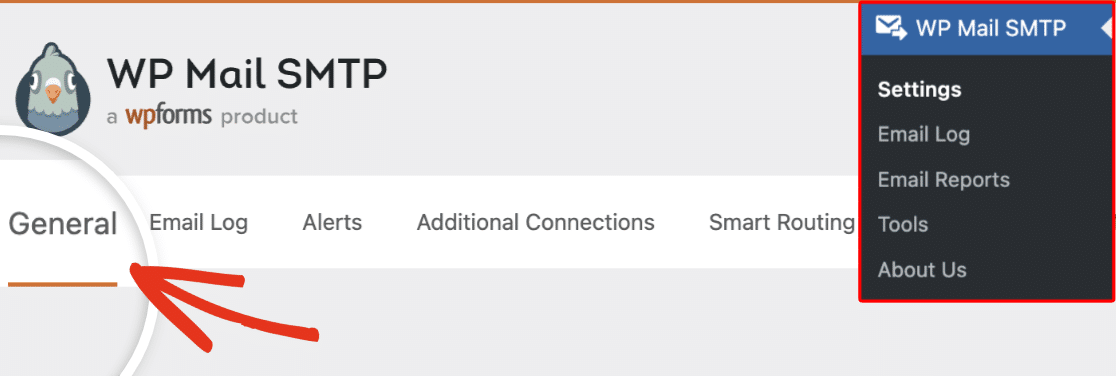
Once you’ve installed WP Mail SMTP, go to WP Mail SMTP » Settings, then select the General tab.
Next, scroll to the Primary Connection section.
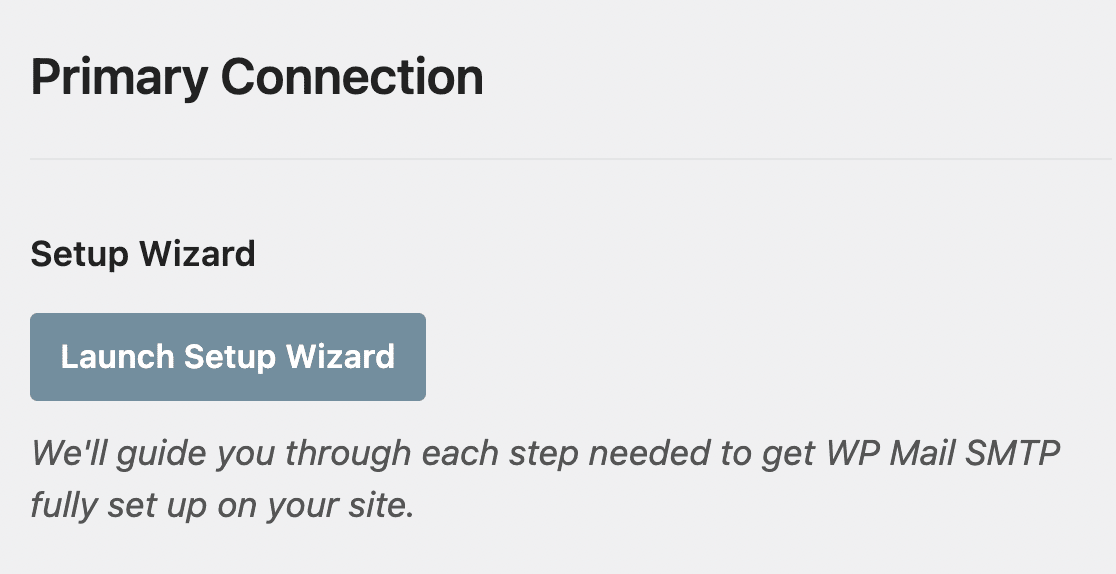
In the next sections, we’ll cover the details for each of the settings located on this page.
From Email
This is the email address that all of your site’s emails will be sent from.
If you’d like the From Email to be the same site-wide, you can choose to check the box labeled Force From Email. This option will save you the trouble of editing the email settings throughout your site, such as in your form notification emails.
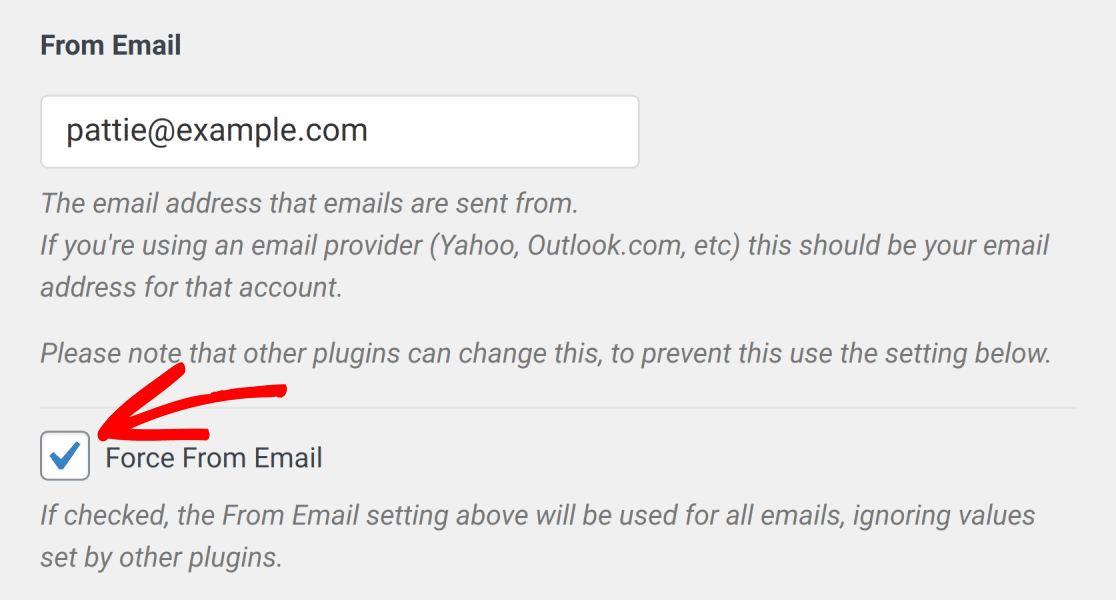
Note: For more details, see our guide to understand how the Force From Email setting works. Also, if you’d like to receive emails to this address, you’ll need to use an email address connected to a working inbox.
From Name
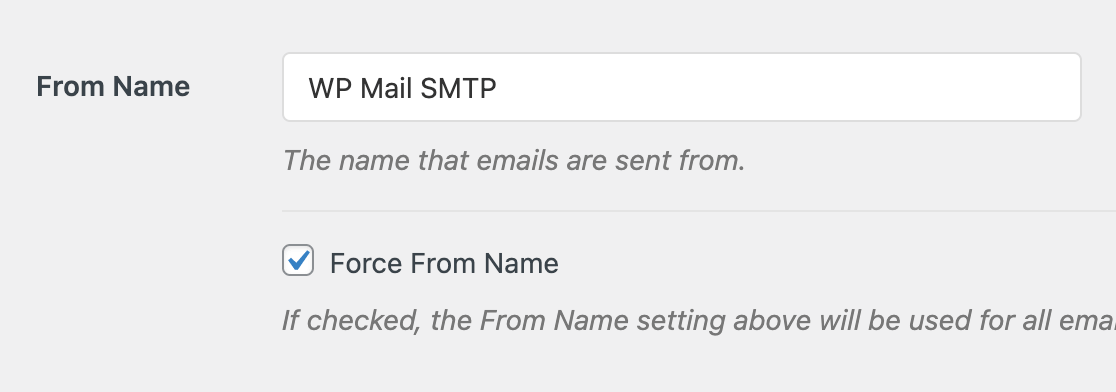
By default, the From Name will be set to your site’s name. However, you can change this to any text you’d like.
You can also choose to Force From Name to apply this setting to emails site-wide.
Mailer
In the Mailer field, you’ll need to select the SendGrid option.
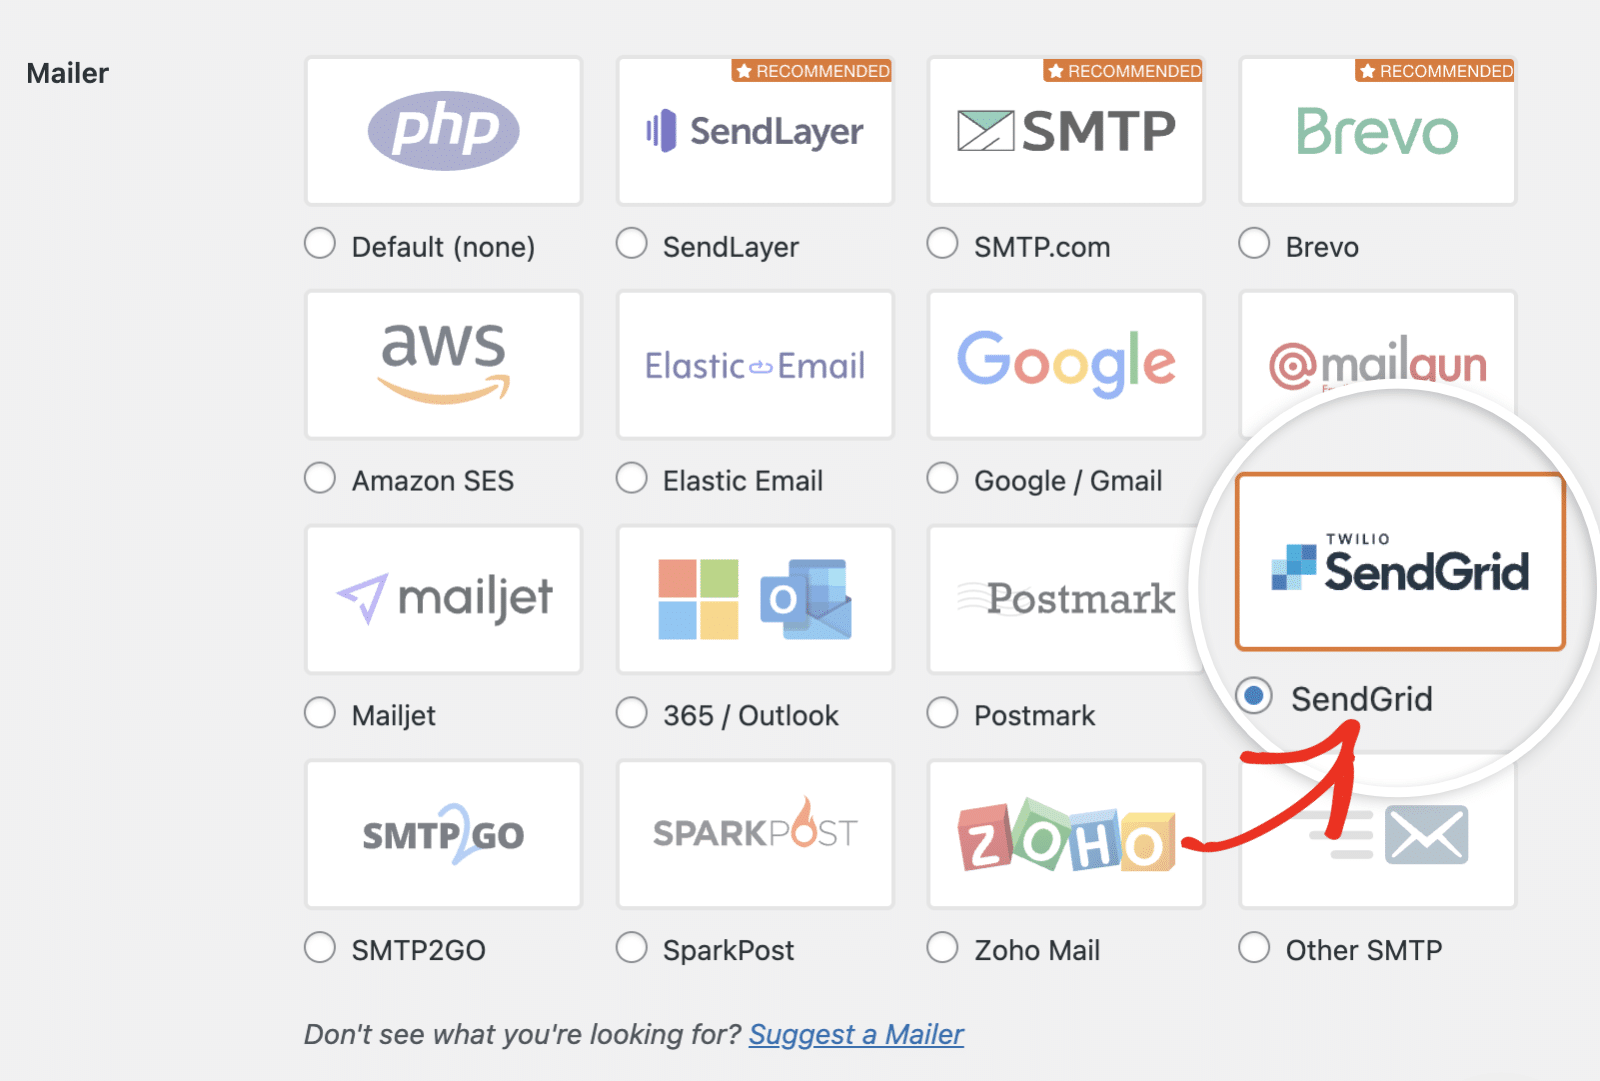
Note: You’ll need to make sure your server uses TLS 1.2 and above. Otherwise, it may result in connection issues. We suggest contacting your web host if you’re at all unsure of the version you’re using.
API Key
Once you’ve chosen SendGrid as your mailer, you’ll need to enter the API Key for your account. Go ahead and flip back to the browser tab or window where your SendGrid account is open and copy the key you generated in the previous step.
Then return to your WP Mail SMTP settings and paste the key into the API Key field.

Leave your SendGrid API key page open, as you’ll need to return to this screen again later in this tutorial.
Sending Domain
The Sending Domain setting is an optional setting that will allow WP Mail SMTP to check for any domain-side errors in your SendGrid setup (e.g., incorrectly configured or missing Sender Policy Framework (SPF) records). This domain check will run each time you send a test email, and will only show an error if a misconfiguration is detected.
The sending domain should match the subdomain you authenticated in SendGrid. You can copy and paste this value here.
Note: Make sure you add your entire SendGrid domain to this setting (e.g., sg.example.com).

Backup Connection
Setting up a Backup Connection is optional and isn’t required to complete your SendGrid mailer setup. However, to further improve email deliverability, we recommend configuring an additional connection to serve as a backup in case your Primary Connection fails.
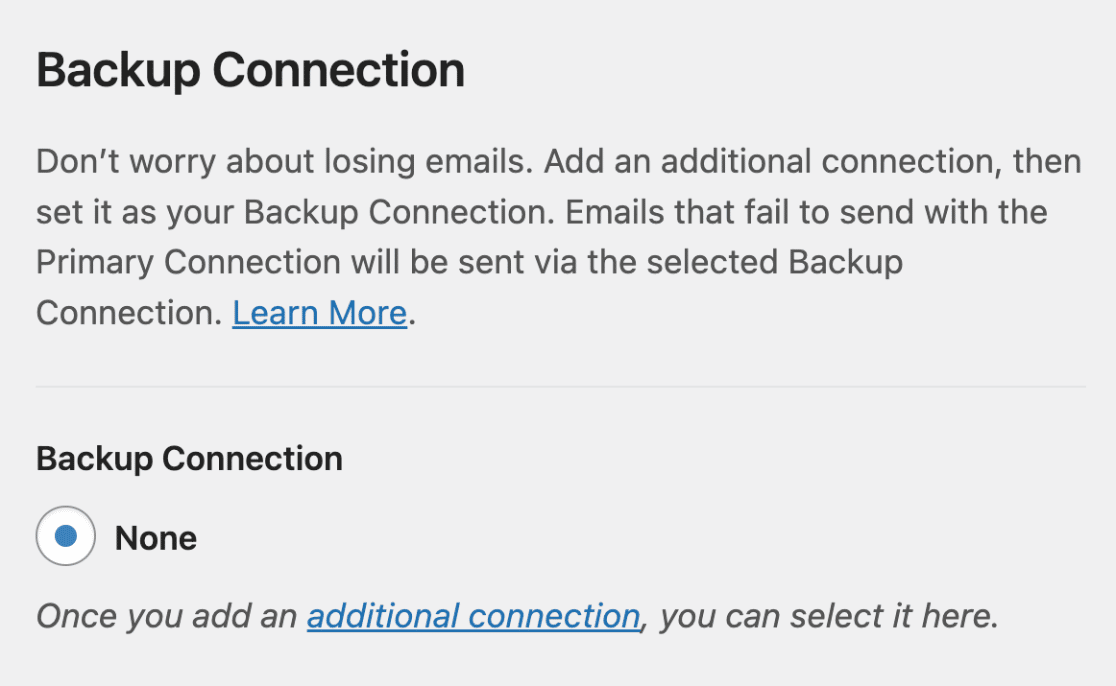
Note: Want to send emails using different connections based on a set of rules or conditions? Be sure to check out our Smart Routing tutorial to learn more.
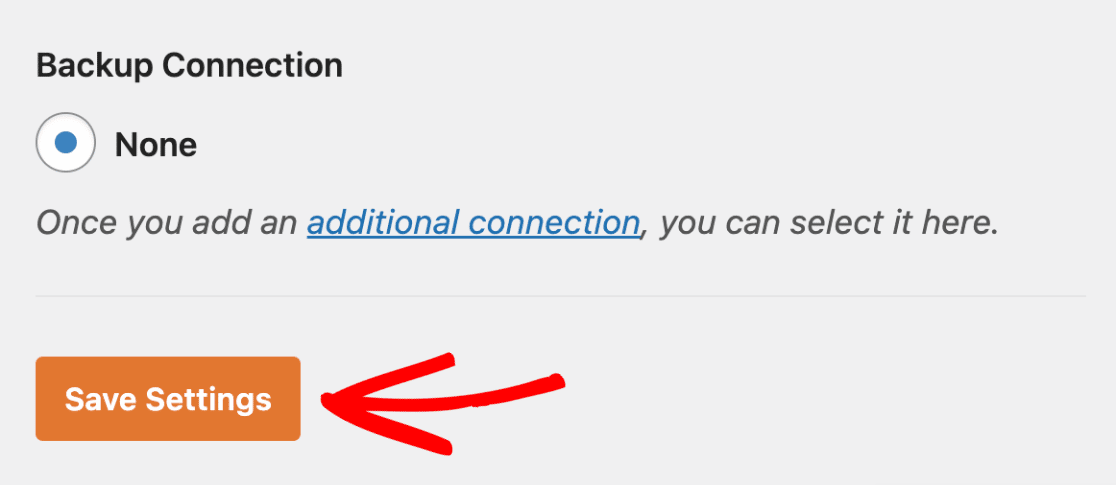
Once you’re done, click the Save Settings button to save the changes.
Verifying SendGrid Integration
Next up, you’ll need to verify the integration that you just created with SendGrid. To get this process started, send a test email from WP Mail SMTP.
Sending a Test Email
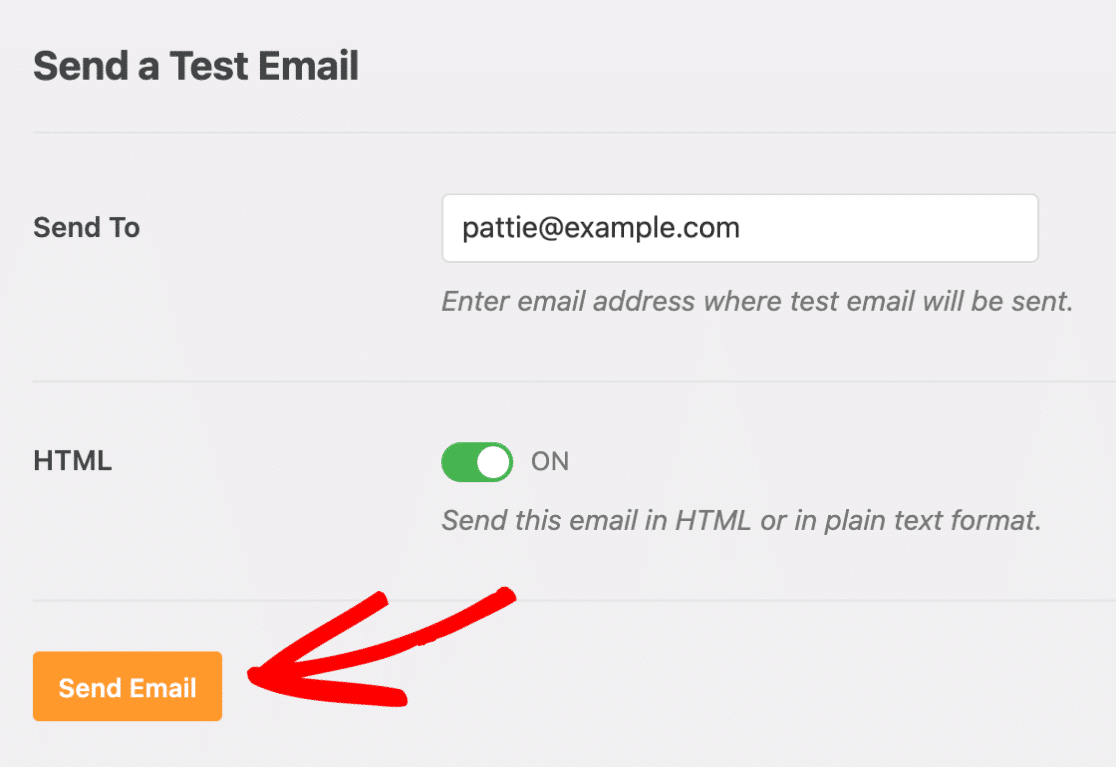
Now that you’ve got your settings configured, you can send a test email to make sure your connection is working as expected. To do so, go to WP Mail SMTP » Tools and click on the Email Test tab.
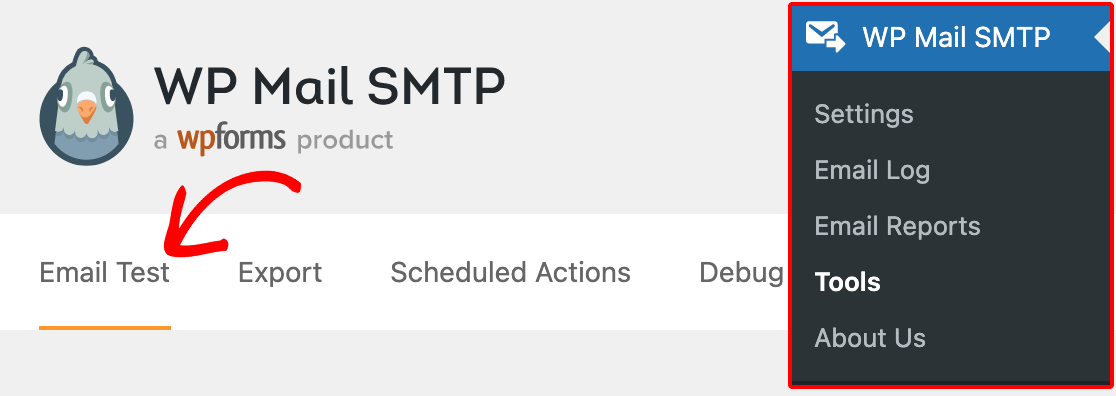
In the Send To field, you can enter any email address whose inbox you have access to.
We recommend leaving the HTML setting ON unless you know you’ll only be sending plain text emails.
Note: If you’ve set up an additional connection, you’d be able to choose between your Primary Connection and other connections when sending a test email.
After you’ve filled out the required settings, go ahead and click the Send Email button to send your test email.
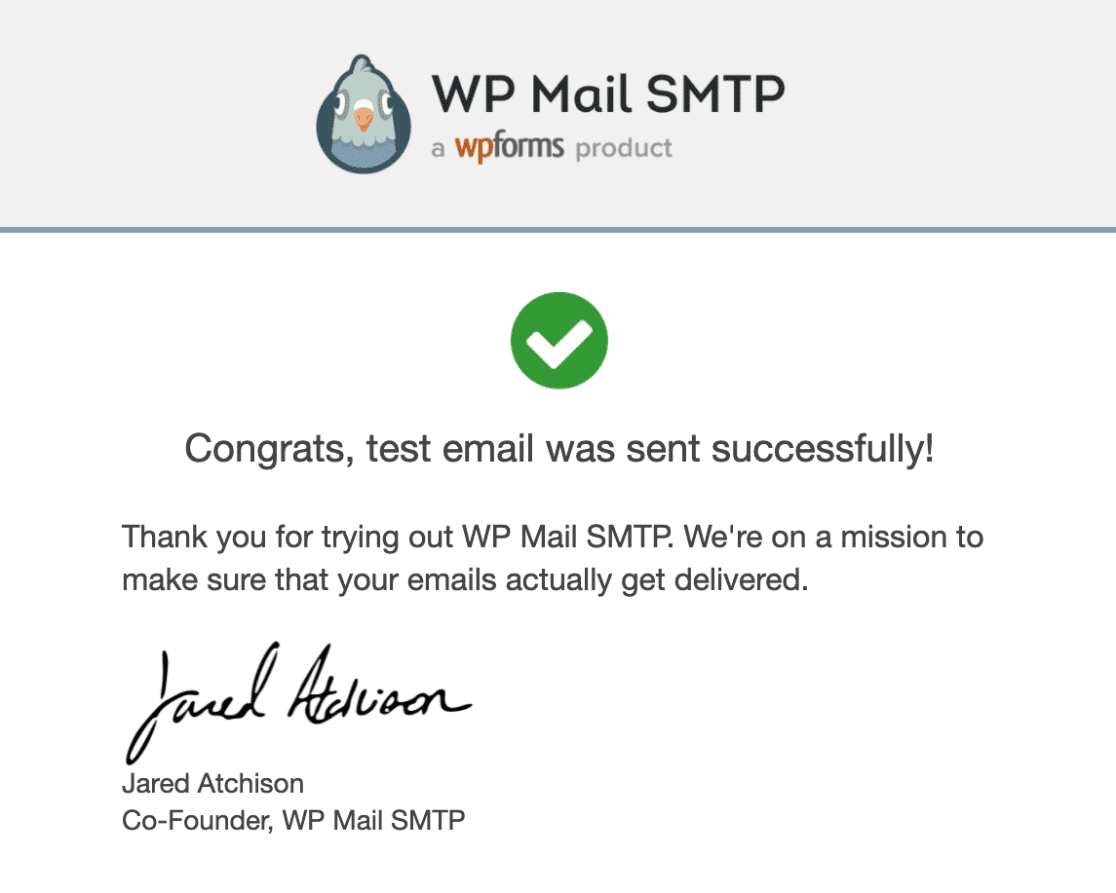
Once the test email has been sent, you should see a success message.

Next, check the inbox for the email address you entered. You should soon receive the email for this test.
Verifying Domain Authentication
At this stage, it’s also important to check that your domain authentication worked. Each email provider will place this information in a different area of your account, but we’ll go ahead and share Gmail/G Suite as an example.
In Gmail or G Suite, click the small arrow under the sender details for your WP Mail SMTP test email.
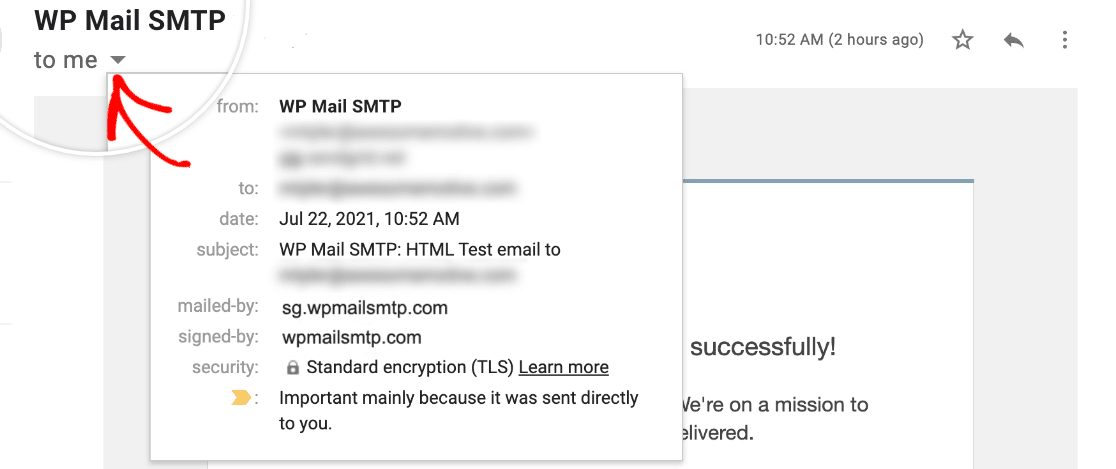
This should open more details about the email header. From here, check that the mailed-by value matches your subdomain (e.g., sg.wpmailsmtp.com). Then check that the signed-by value matches your regular site domain (e.g., wpmailsmtp.com).
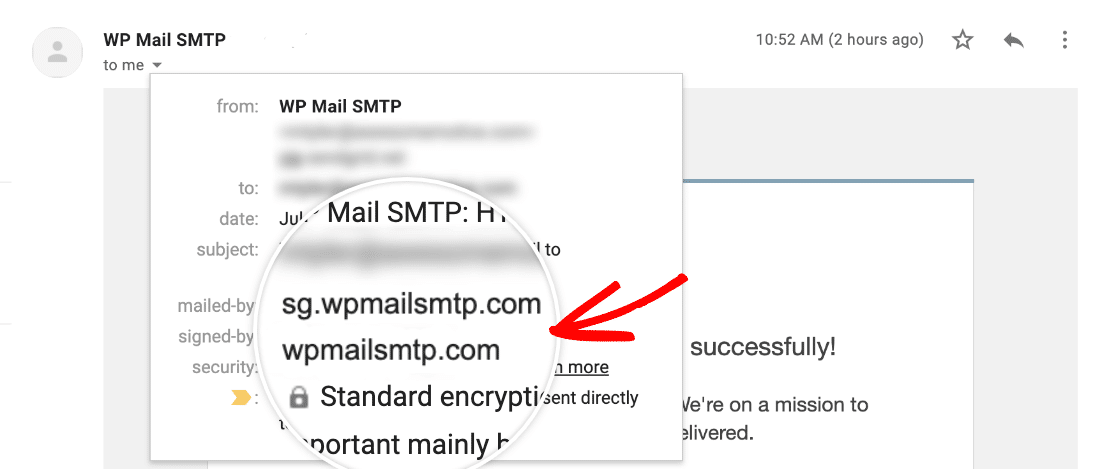
Note: If these domains don’t match your subdomain/domain yet, then SendGrid may require a little more time to fully apply your setup. We recommend waiting at least an hour, then repeating this test process.
Verifying Integration in SendGrid
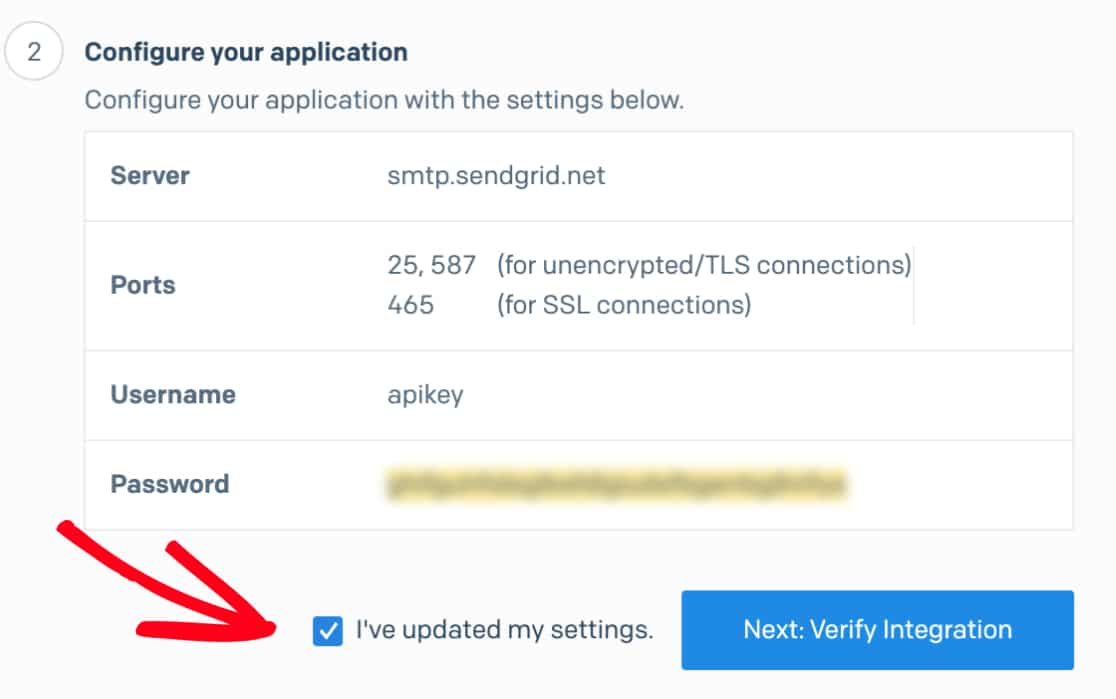
After your test email has been sent successfully, you’ll need to go back to your SendGrid account’s API page. Here, check the box labeled I’ve updated my settings and click Next: Verify Integration.
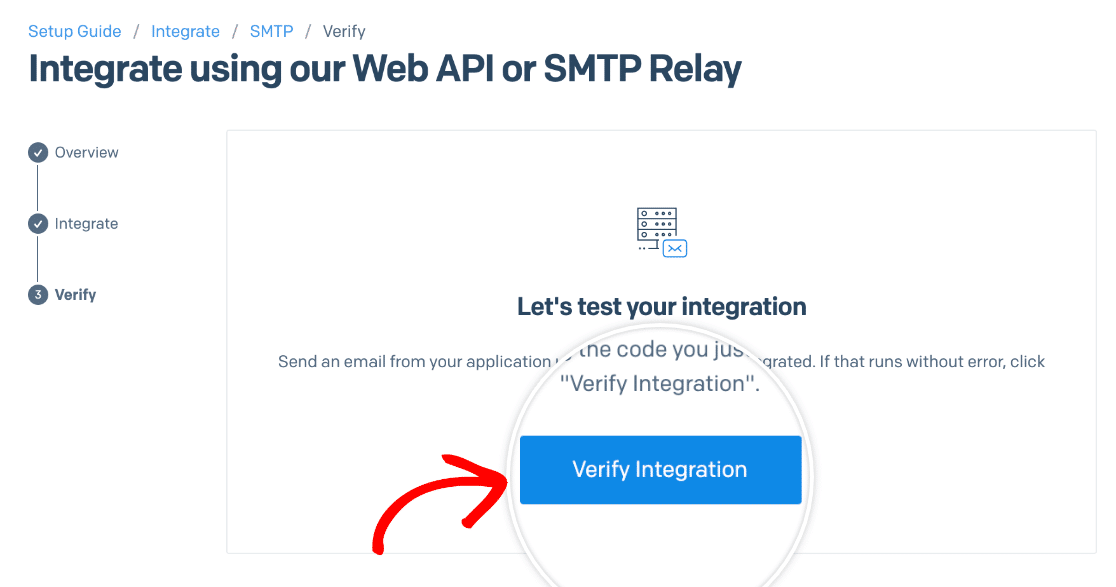
When the next page loads, click the Verify Integration button. This will send an email to SendGrid for verification.
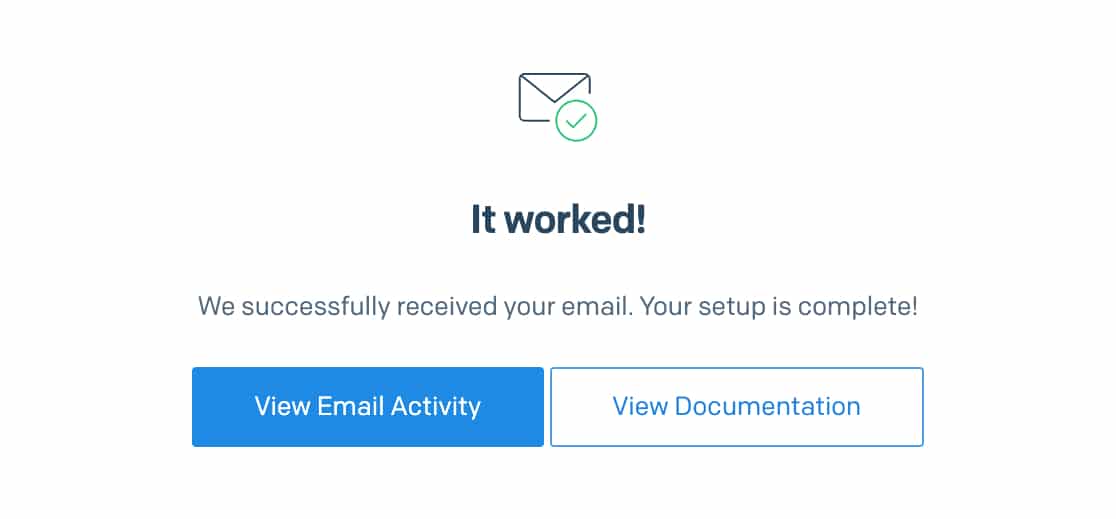
Once SendGrid has detected that your test email has already been sent, they’ll let you know with a success message. This may take a few moments to complete.
Frequently Asked Questions
These are the top questions we get from users regarding the SendGrid mailer.
How can I check if my API Key has the Mail Send access level in SendGrid?
To check that the API key you’ve created has the correct access level configured, first navigate to Settings » API Keys within your SendGrid account. This will bring you to a page with all of your available API keys. Click the gear icon to open up a specific key’s settings.
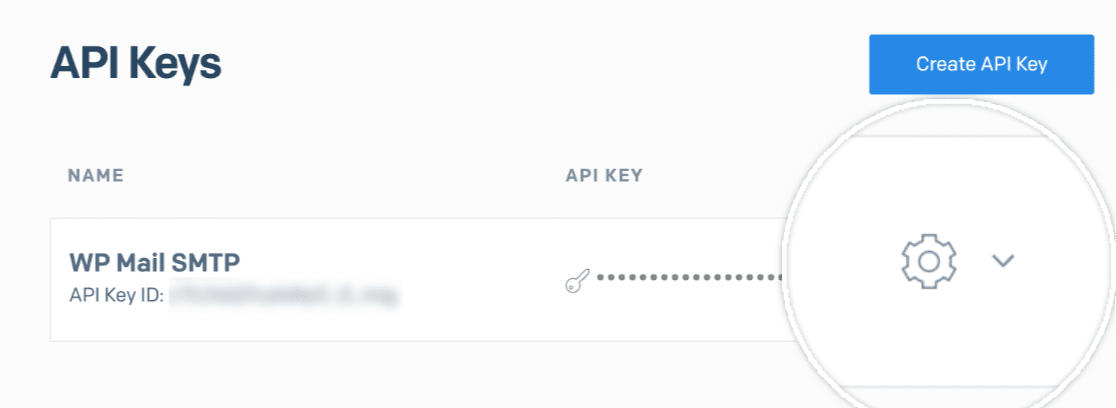
In the key settings, be sure that the Restricted Access option is selected.
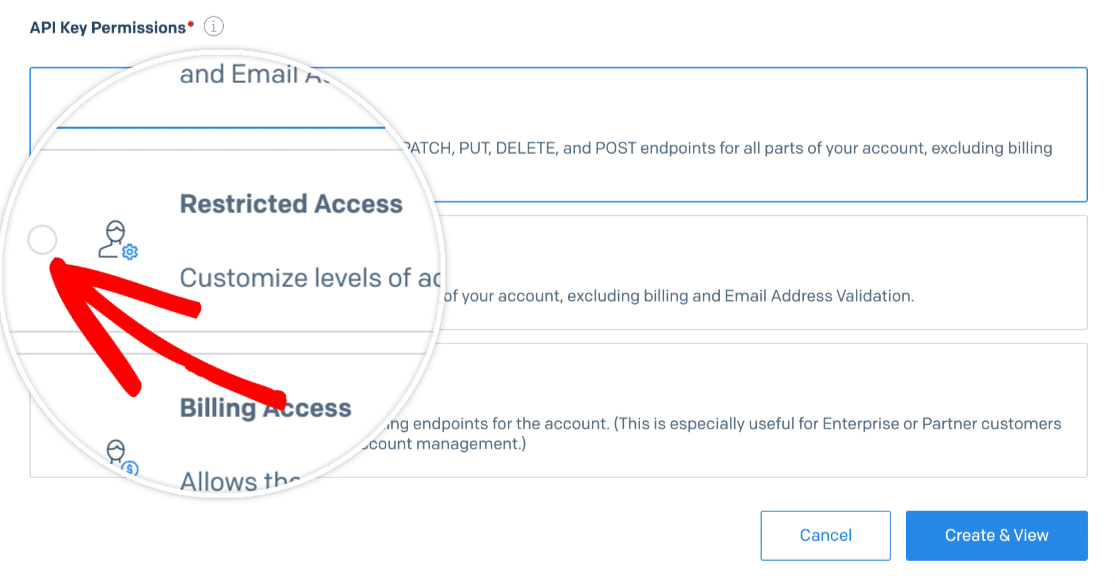
Once this option is selected, additional permissions will appear for you to configure. Scroll down to the Mail Send setting and be sure the permission level is set to Full Access.
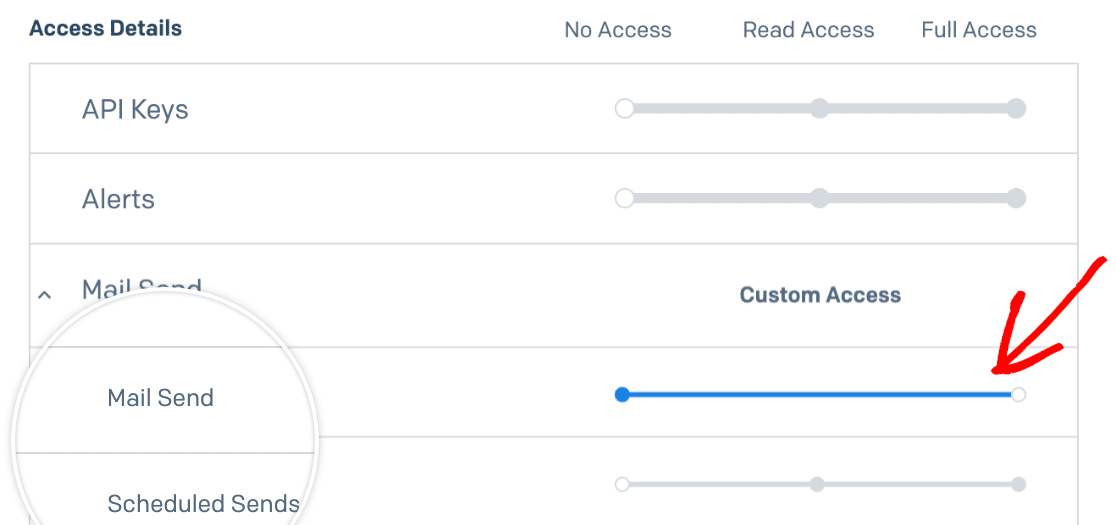
That’s it! Now you can fix your WordPress site’s email delivery issues with SendGrid using WP Mail SMTP.
Next, would you like to set up email logging? Be sure to check out our tutorial on how to log emails that are sent from your WordPress site for more details.
