AI Summary
Have you set up email logging for WP Mail SMTP and now want to view the data you’ve collected? Checking your email logs can help with troubleshooting errors as well as learning more about the emails your WordPress site is sending.
This guide will show you how to view WP Mail SMTP email logs and the different types of information you can store with them.
In This Article
Before you dive into this guide, make sure you’ve installed and activated WP Mail SMTP and verified your license key. You will also need to turn on email logging and may need to wait for your site to collect some data before you can view the information explained below.
Viewing Email Logs
To view your email logs, click on WP Mail SMTP » Email Log in the WordPress admin menu.
This will take you to the main Email Log page, which will display all your site’s logged emails. By default, the newest logs will be shown at the top of the list.
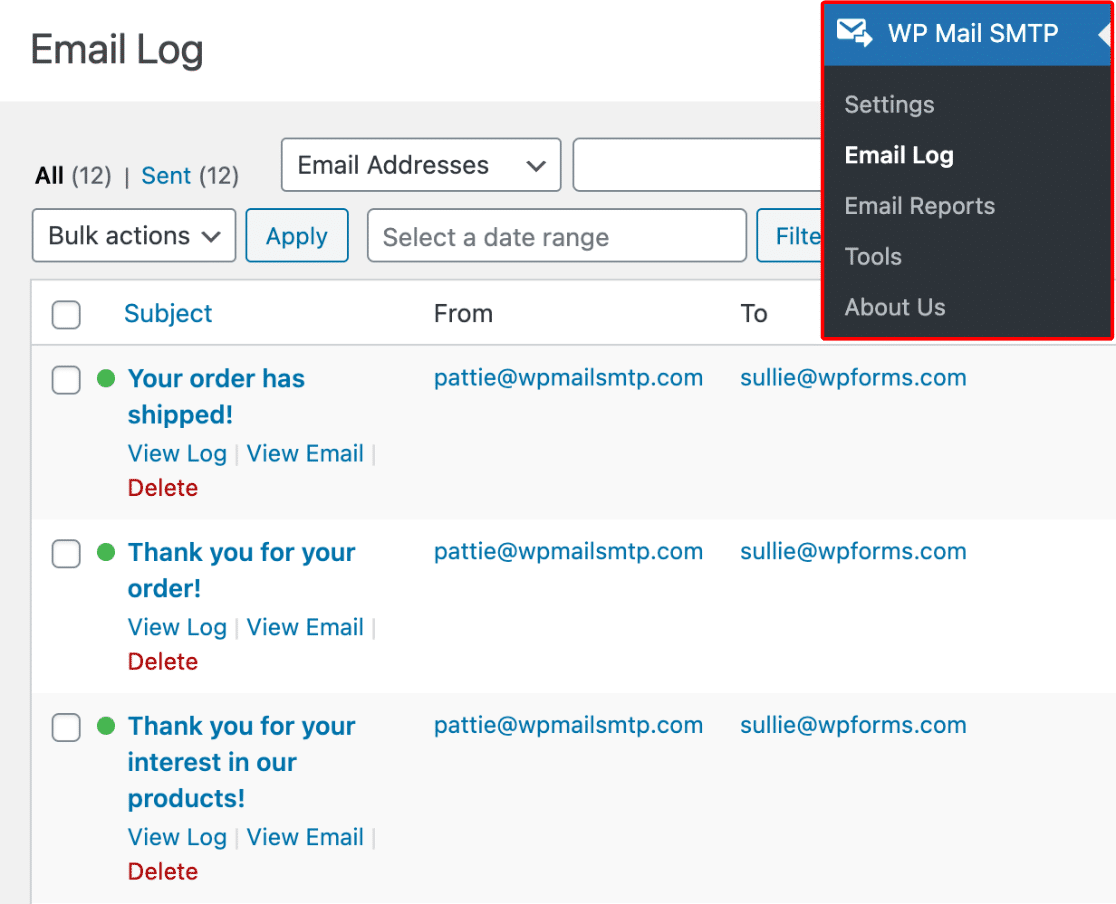
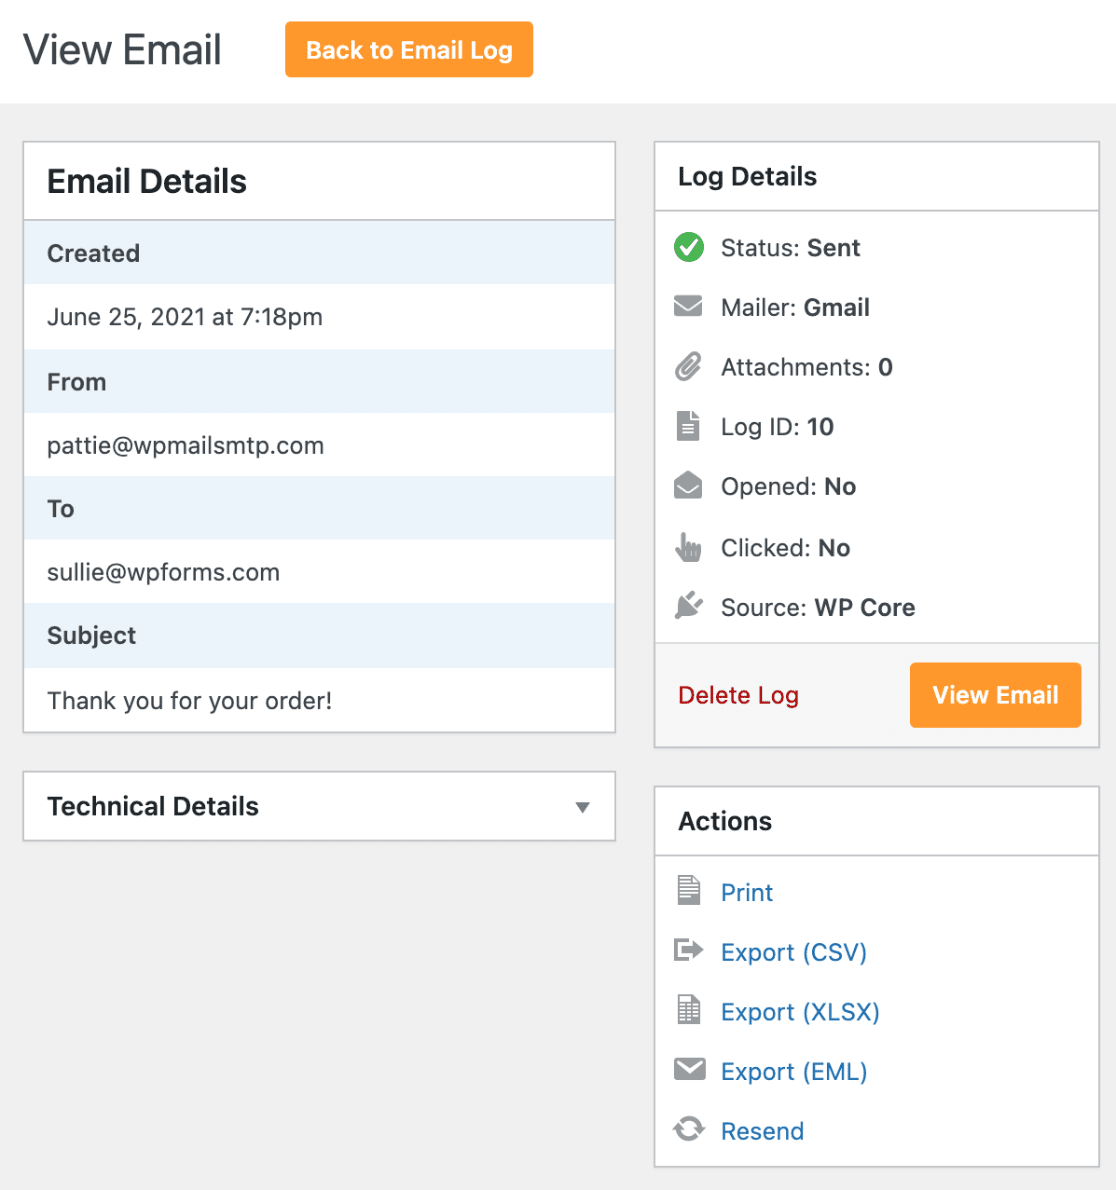
To see more details for a specific entry, click on the Subject for any log. This will open up a page for the individual email log.
Viewing the Network Admin Aggregate Email Log (WordPress Multisite)
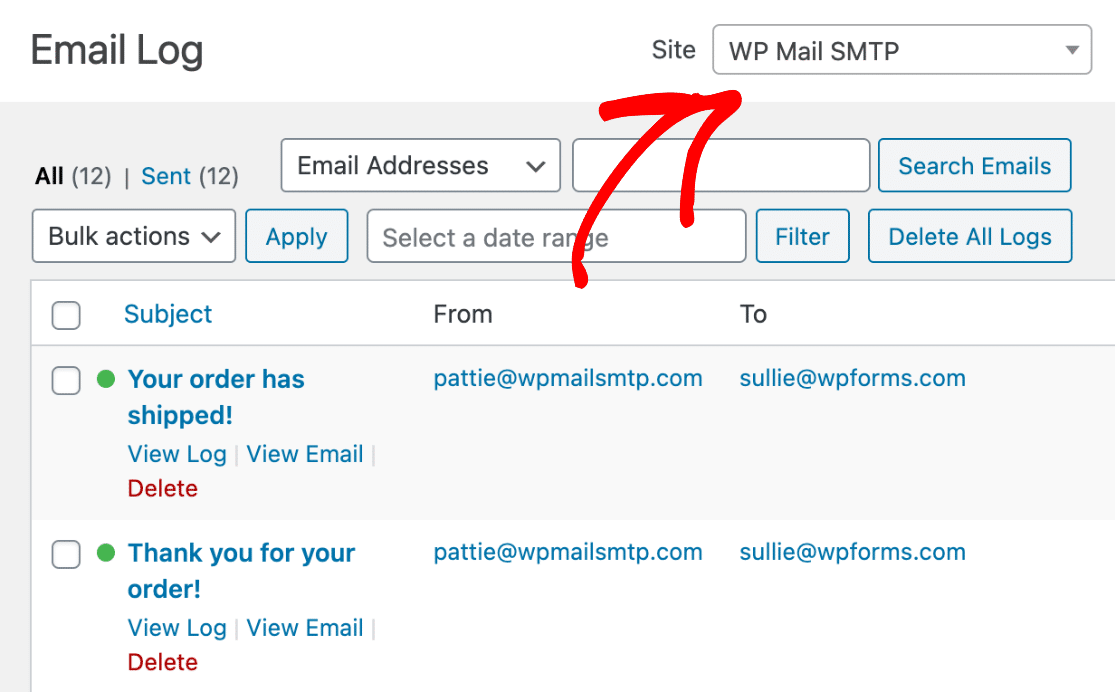
For WordPress multisite installations, you have the option to view an aggregate email log of all your subsites in one place. To do this from the WordPress dashboard, you’ll need to go to My Sites » Network Admin. Then, in the WordPress admin sidebar, navigate to WP Mail SMTP » Email Log.
This will take you to the Email Log page where you can view an aggregate email log for all your subsites. To view an email log for a single subsite, you can select the subsite whose logs you want to view from the dropdown menu in the top right corner of the page, next to Site.
Viewing Email Status
When looking at the Email Log page, you can quickly determine the status of each email by looking at the indicator to the left of the subject line.
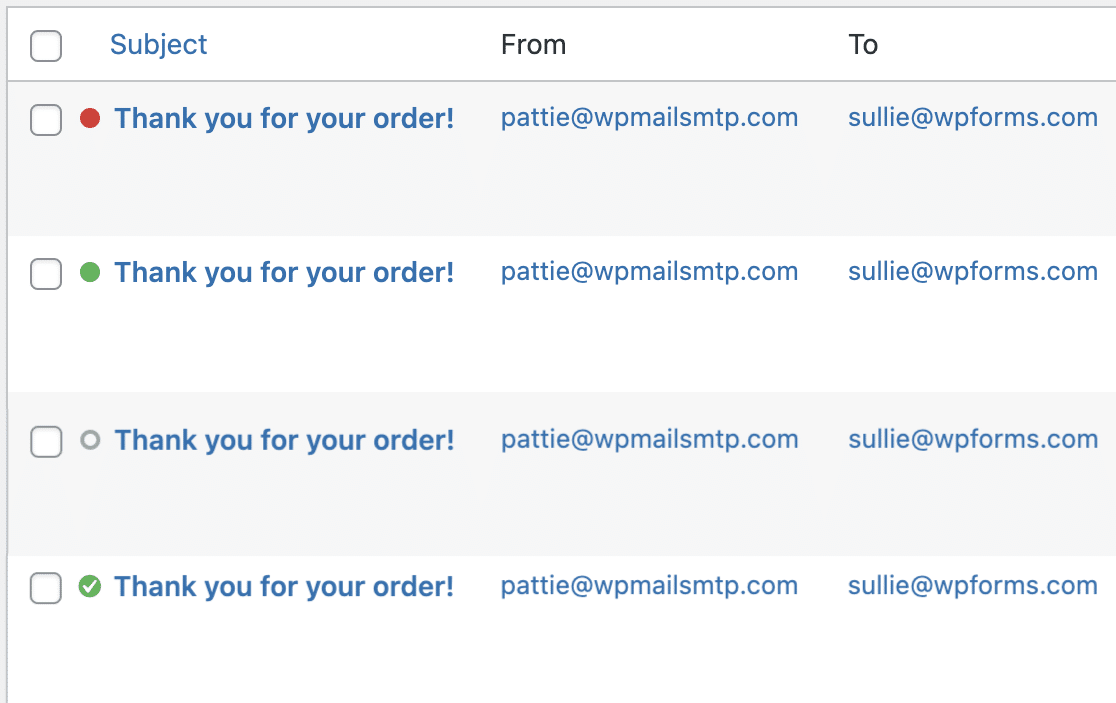
The possible statuses in WP Mail SMTP are:
- Failed: The email was not sent. Indicated by a solid red circle.
- Sent: The email was sent successfully. This status does not tell you whether the email was delivered. Indicated by a solid green circle.
- Waiting: The email has been sent from your site, but WP Mail SMTP has not yet verified if it was delivered or not. Indicated by an open gray circle and only available if you’re using SMTP.com, Brevo, Mailgun, Postmark, or SparkPost as your mailer.
- Confirmed: The email was sent and successfully delivered. Indicated by a solid green circle with a checkmark on it. Only available if you’re using the SMTP.com, Brevo, Mailgun, Postmark, or SparkPost mailers.
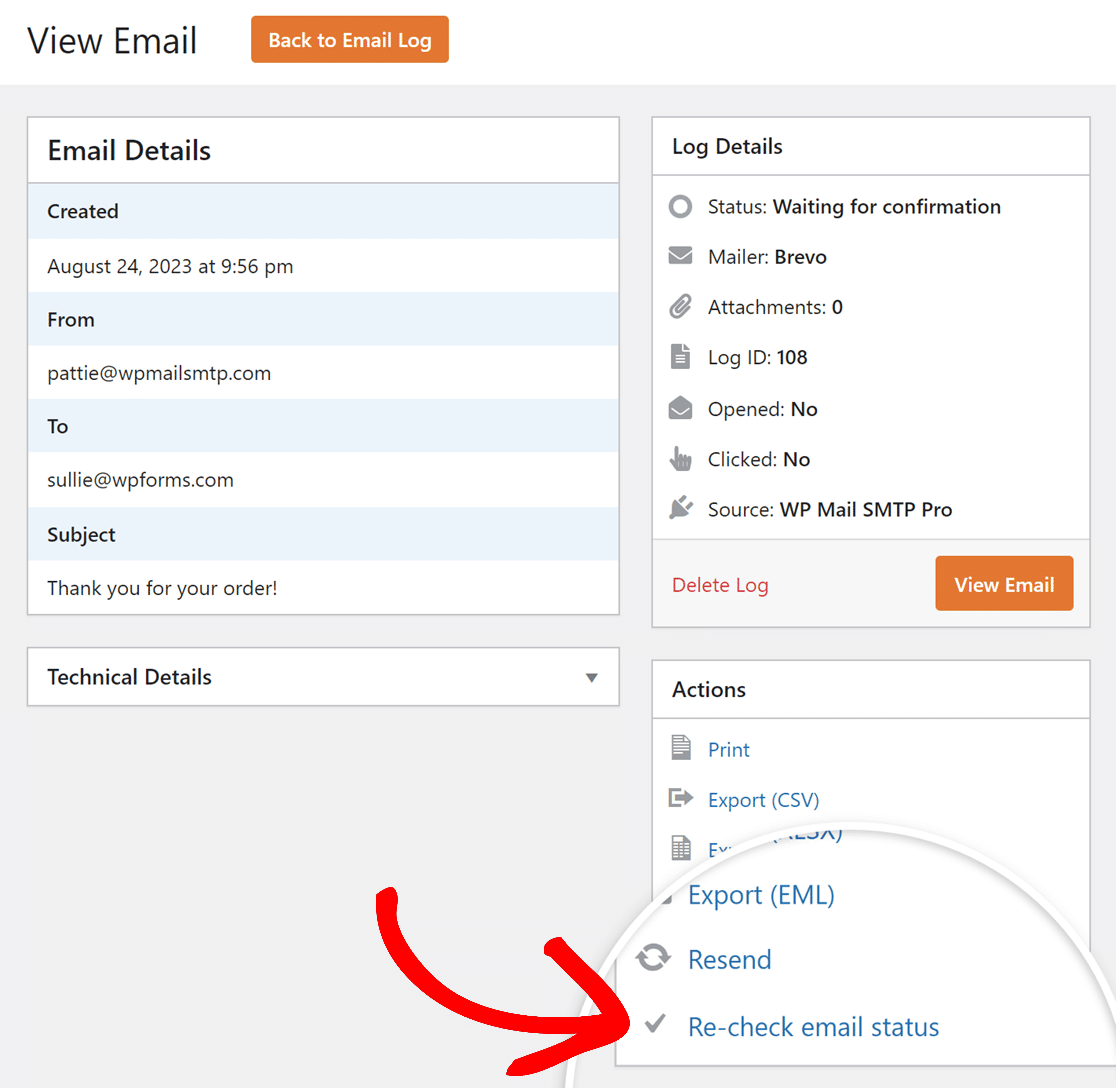
To get a real-time update about an email with the Waiting status, click on its Subject to open the individual email log page. From there, click on Re-check email status under the Actions section to get its latest status.
Viewing Email Content
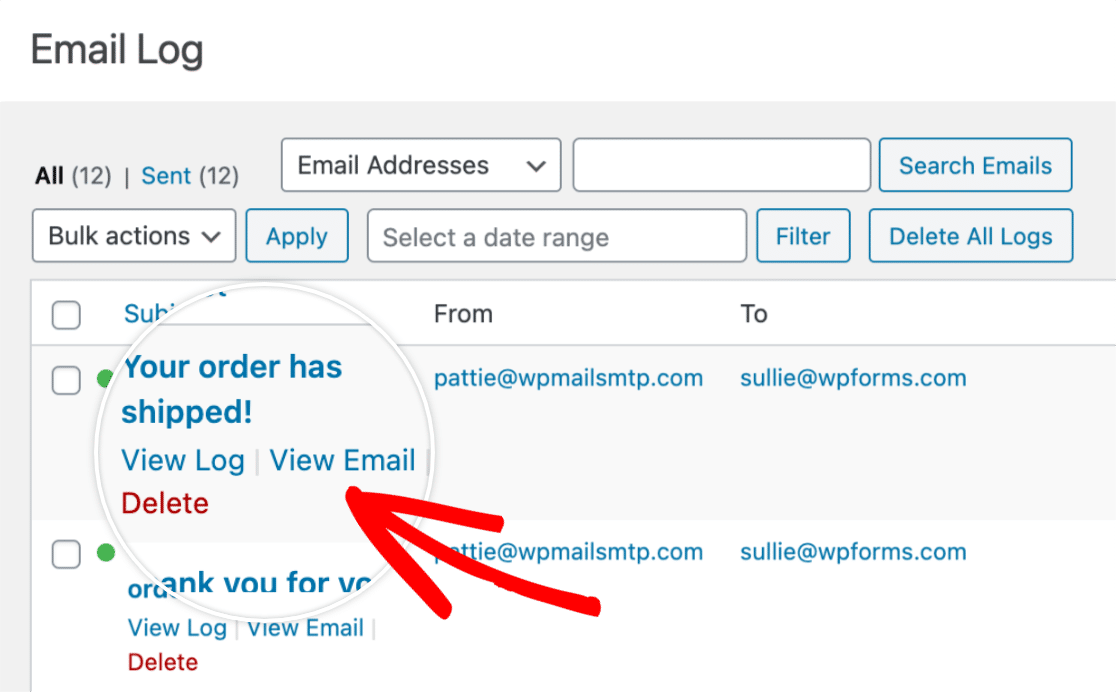
If you’d like to view a logged email’s content, click View Email under its subject on the Email Log page.
This will open an overlay containing the content of the email body.
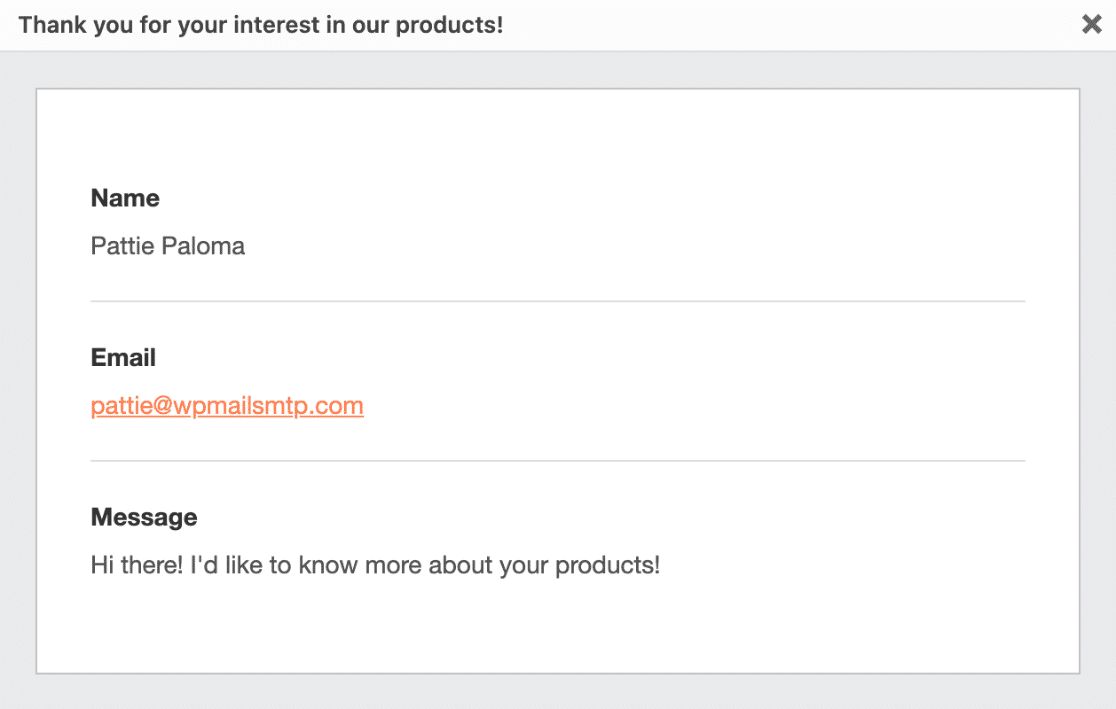
Note: The View Email option will only be visible if you have the email content logging setting enabled.
Viewing Email Source
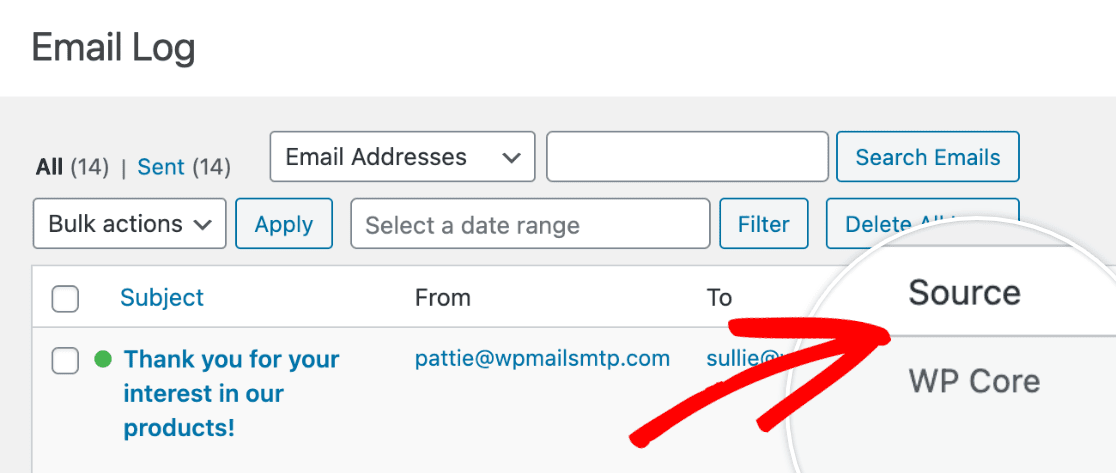
In the email logs, you’ll be able to see which part of WordPress sent the email. The email could derive from a plugin, theme, or WordPress core (WP Core).
To view the source of the email, go to WP Mail SMTP » Email Log and locate the Source column.
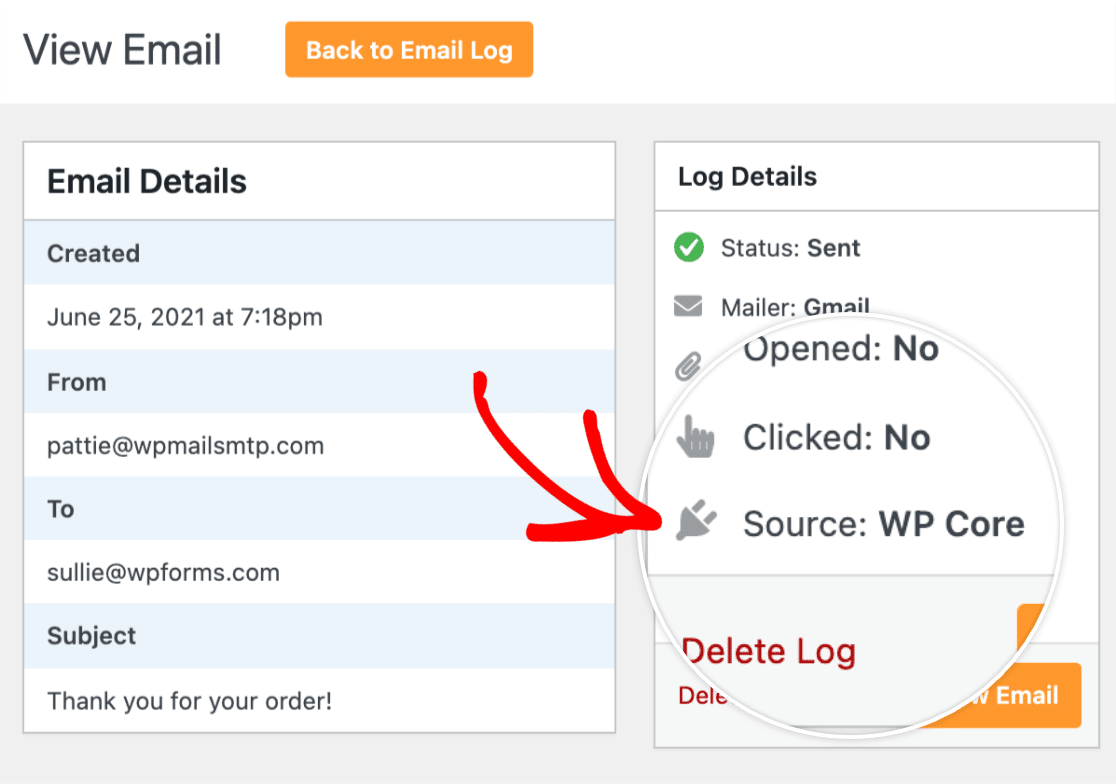
Additionally, you can see the email source in the Log Details section of an individual email log, under Source.
Viewing Technical Details
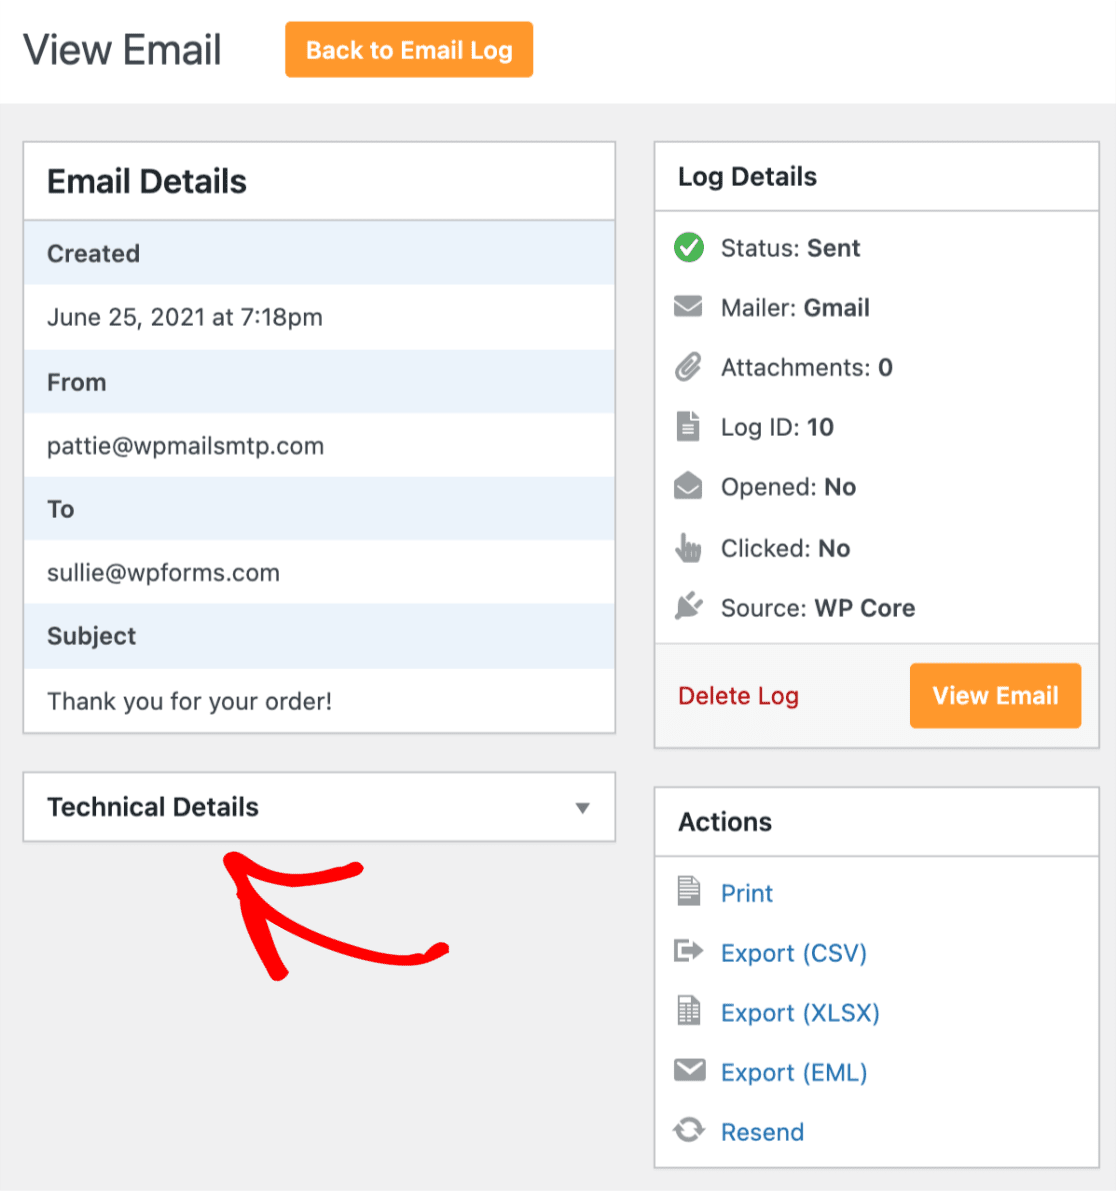
To view technical details about your email, click on the Technical Details section in the individual email log to expand it.
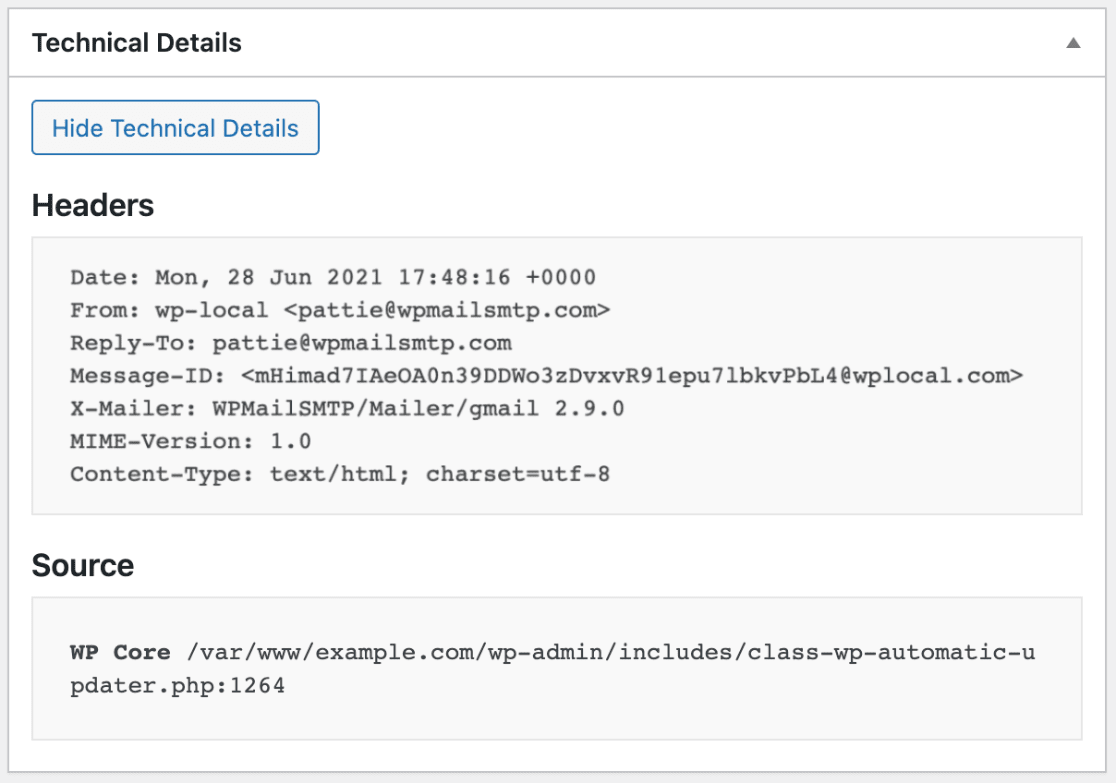
Here you’ll see information such as the email’s headers, source, and error messages for failed email delivery.
That’s it! Now you know how to view email logs and all the information they can store.
Next, would you like to export or print your logs as a backup or for further reference? See our guide to printing and exporting email logs for step-by-step instructions.
