AI Summary
Would you like to view detailed reports of the emails that are sent from your WordPress site? With Email Reports, you can easily keep track of how your emails are performing on your site.
This tutorial will show you how to use Email Reports in WP Mail SMTP.
In This Article
Enabling Email Reports
Before we get started, be sure to install and activate WP Mail SMTP on your WordPress site.
Note: In order to access Email Reports, you’ll first need to set up email logging in WP Mail SMTP.
Once the plugin is activated, and you’ve set up email logging, you’ll need to go to WP Mail SMTP » Email Reports.
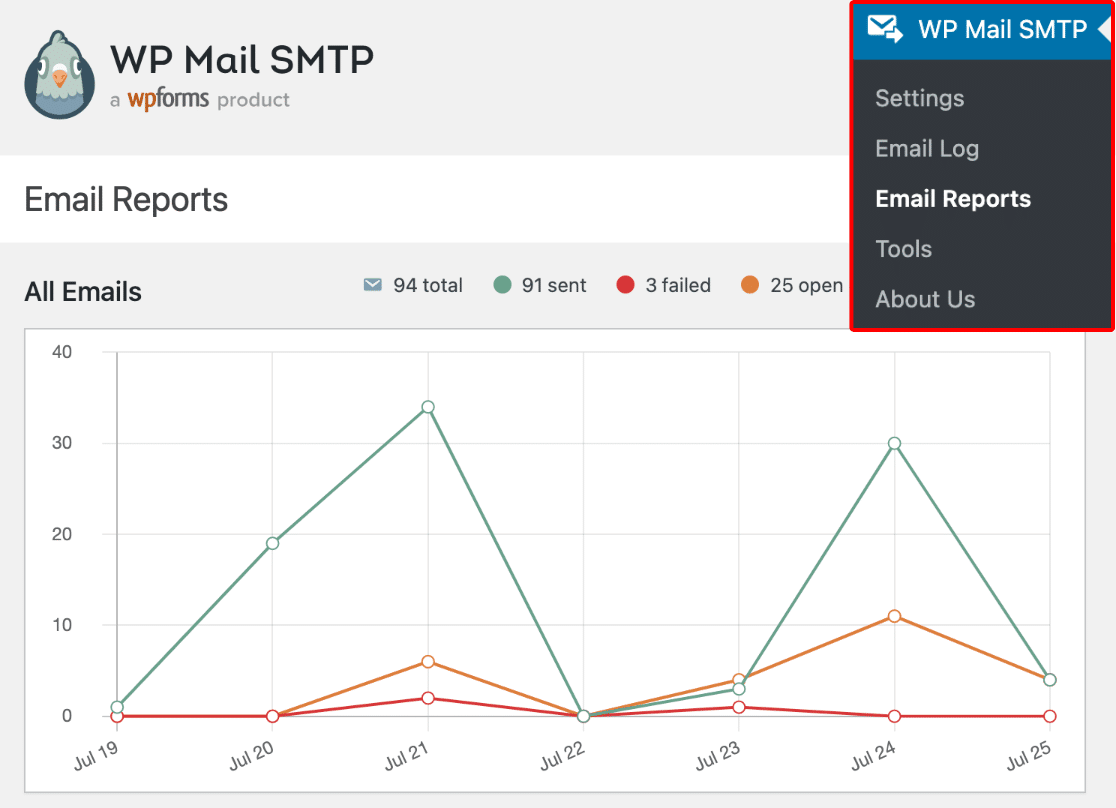
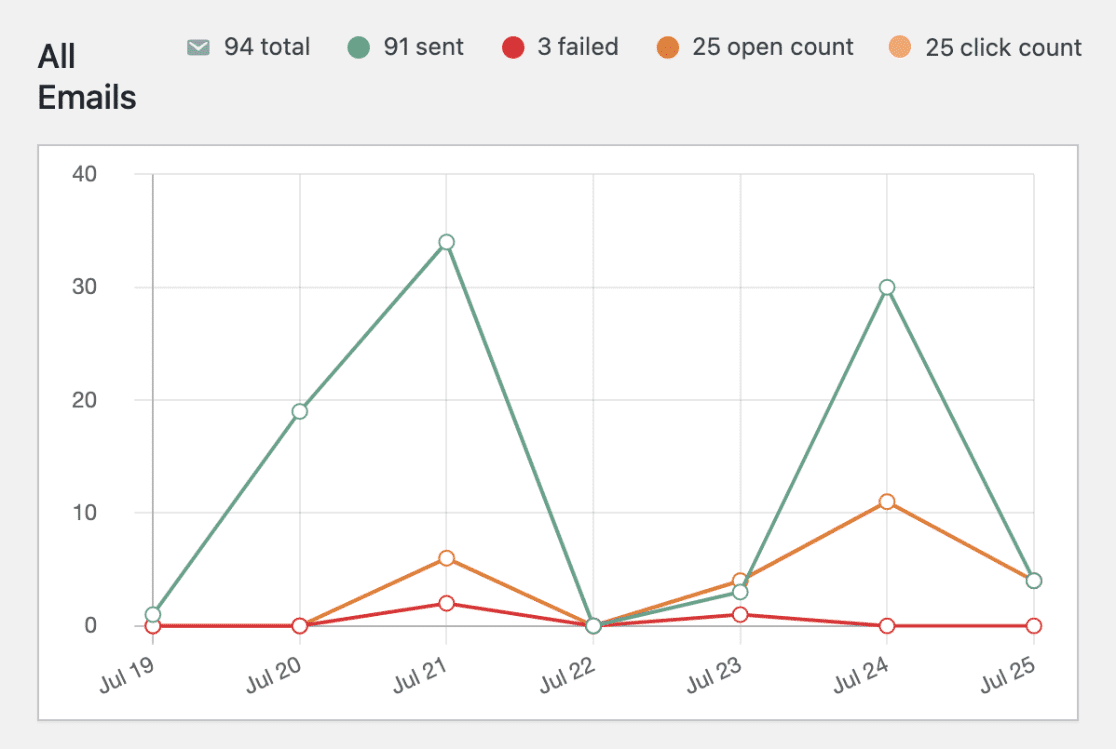
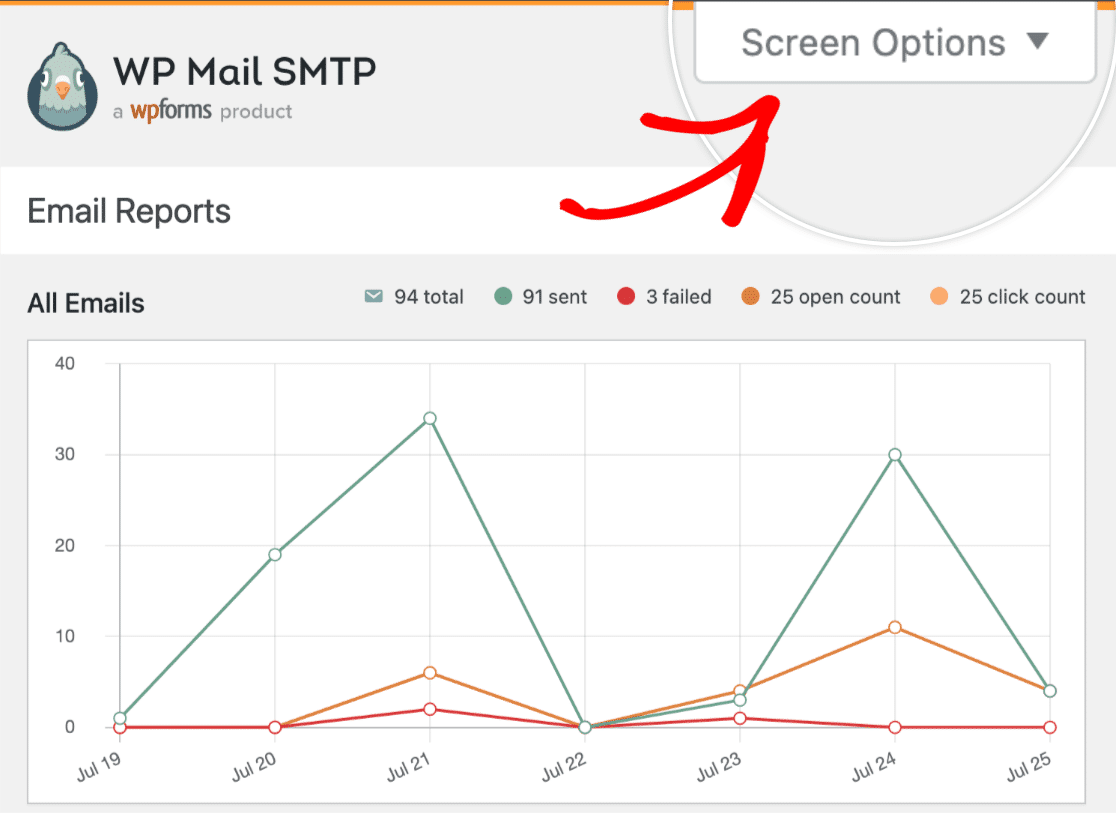
This will direct you to the Email Reports page where you will see a detailed graph of all the emails sent from your site.
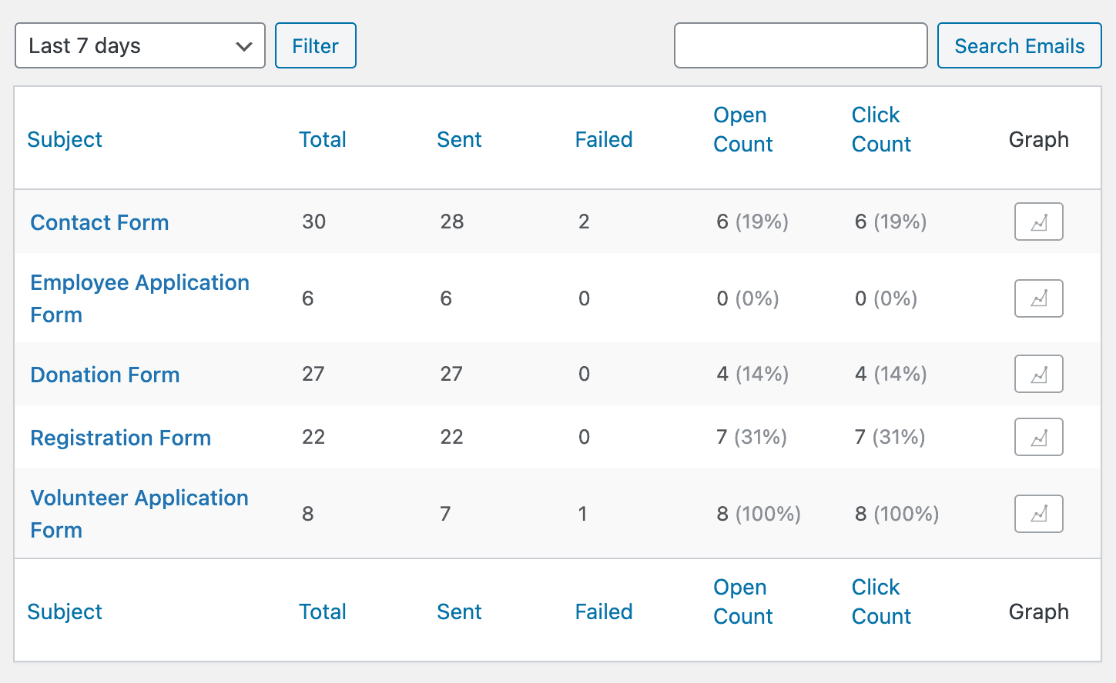
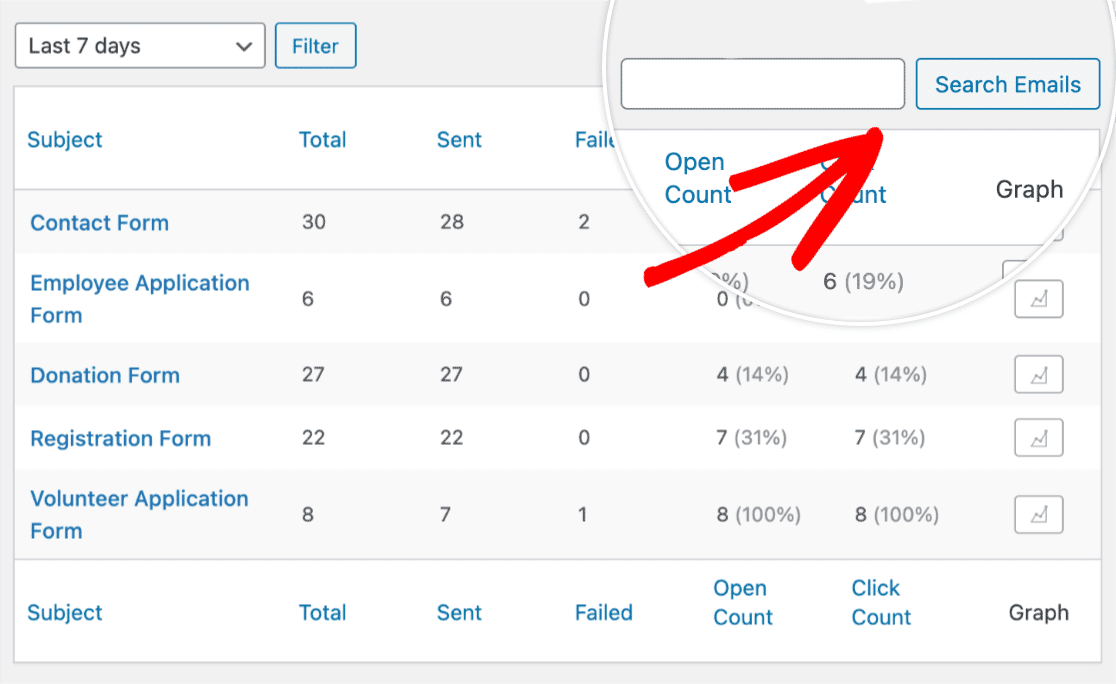
Below the graph, you’ll also find a table that displays data for each email sent from your WordPress site.
The data in both the graph and the table includes the following information:
- Total: This is the total number of emails sent from your site (both successfully and unsuccessfully delivered emails).
- Sent: The total number of emails successfully sent from your site.
- Failed: The sum of emails that failed to send succesfully.
- Open Count: The number of emails that were opened by the recipient(s).
- Click Count: This represents the number of any links that the recipient(s) clicked on within the email.
Viewing an Individual Email Report
To view a report for a single email subject, click on the graph icon within the email report table.
![]()
Once you’ve clicked on the graph icon, you’ll see a graph for a single email subject, instead of an overview of all emails.

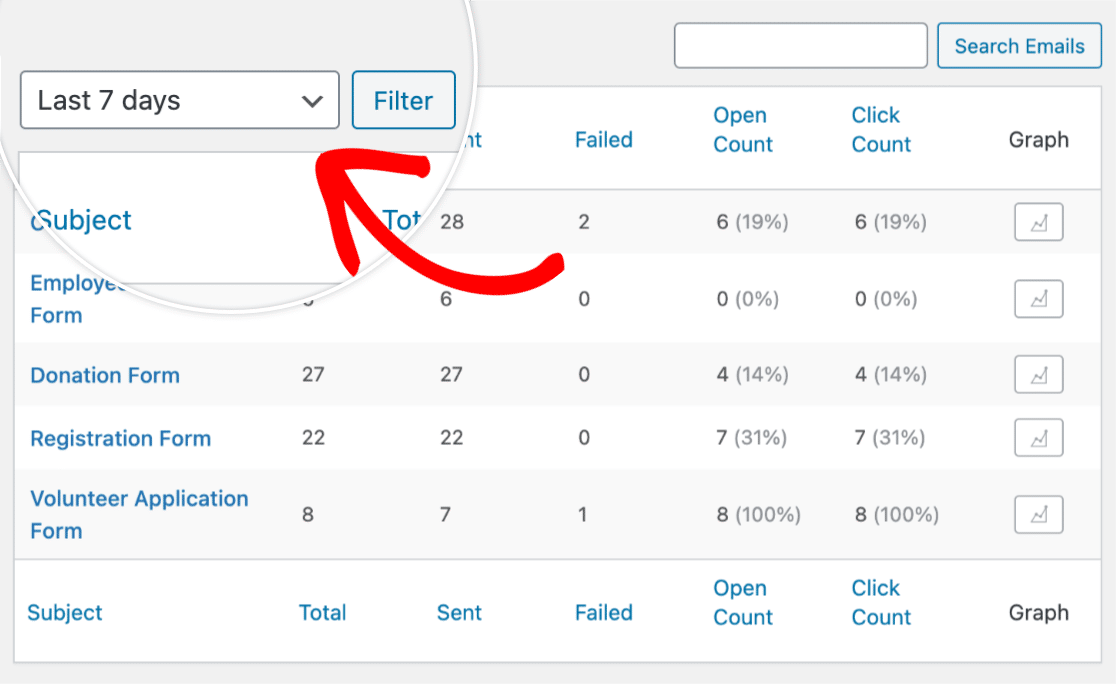
Filtering Email Reports
To filter your emails by date, click on the dropdown located at the top-left of the table. Here you can choose to view a report for emails sent within the Last 7 days, Last 14 days, Last 30 days, or you can select a Custom Date Range.
Be sure to click the Filter button after you’ve selected your date range.
You can also search for a specific email by typing in the email’s subject in the search bar. Once you’ve entered the email’s subject, click the Search Emails button.
Changing the Email Reports Page View
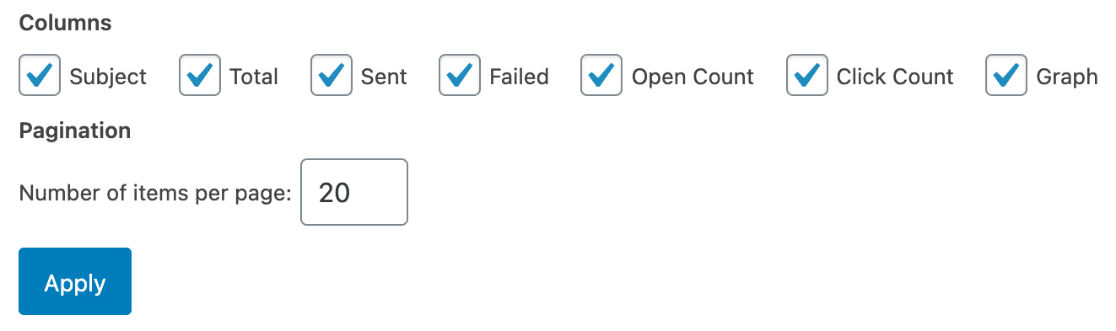
To change the layout of the table on the Email Reports page, click on Screen Options at the top-right corner of the page.
Once you’ve clicked Screen Options, you’ll be able to change the Columns and Pagination of the table.
Weekly Email Summaries
Email Summaries are weekly reports showing a summary of the emails sent from your WordPress site. These weekly emails are sent to your WordPress site’s admin email.
Note: For more detailed information about Weekly Email Summaries, including how to use and manage them, refer to our guide on weekly email summaries in WP Mail SMTP.
That’s it! You can now set up email reports for your WordPress site using WP Mail SMTP.
Next, would you like to make sure your emails are sending successfully? Be sure to check out our tutorial on sending a test email in WP Mail SMTP for more details.