AI Summary
Are you looking to use Resend email service to improve email deliverability on your WordPress site? Resend offers a modern email delivery platform designed for developers, with a focus on simplicity and reliability that helps ensure your emails reach their intended recipients.
This tutorial will show you how to set up the Resend mailer in WP Mail SMTP.
What Is Resend?
Resend is a modern email delivery platform that enables developers to send transactional and marketing emails quickly and reliably. Built with a developer-first approach, Resend provides a simple and intuitive API that makes email integration straightforward.
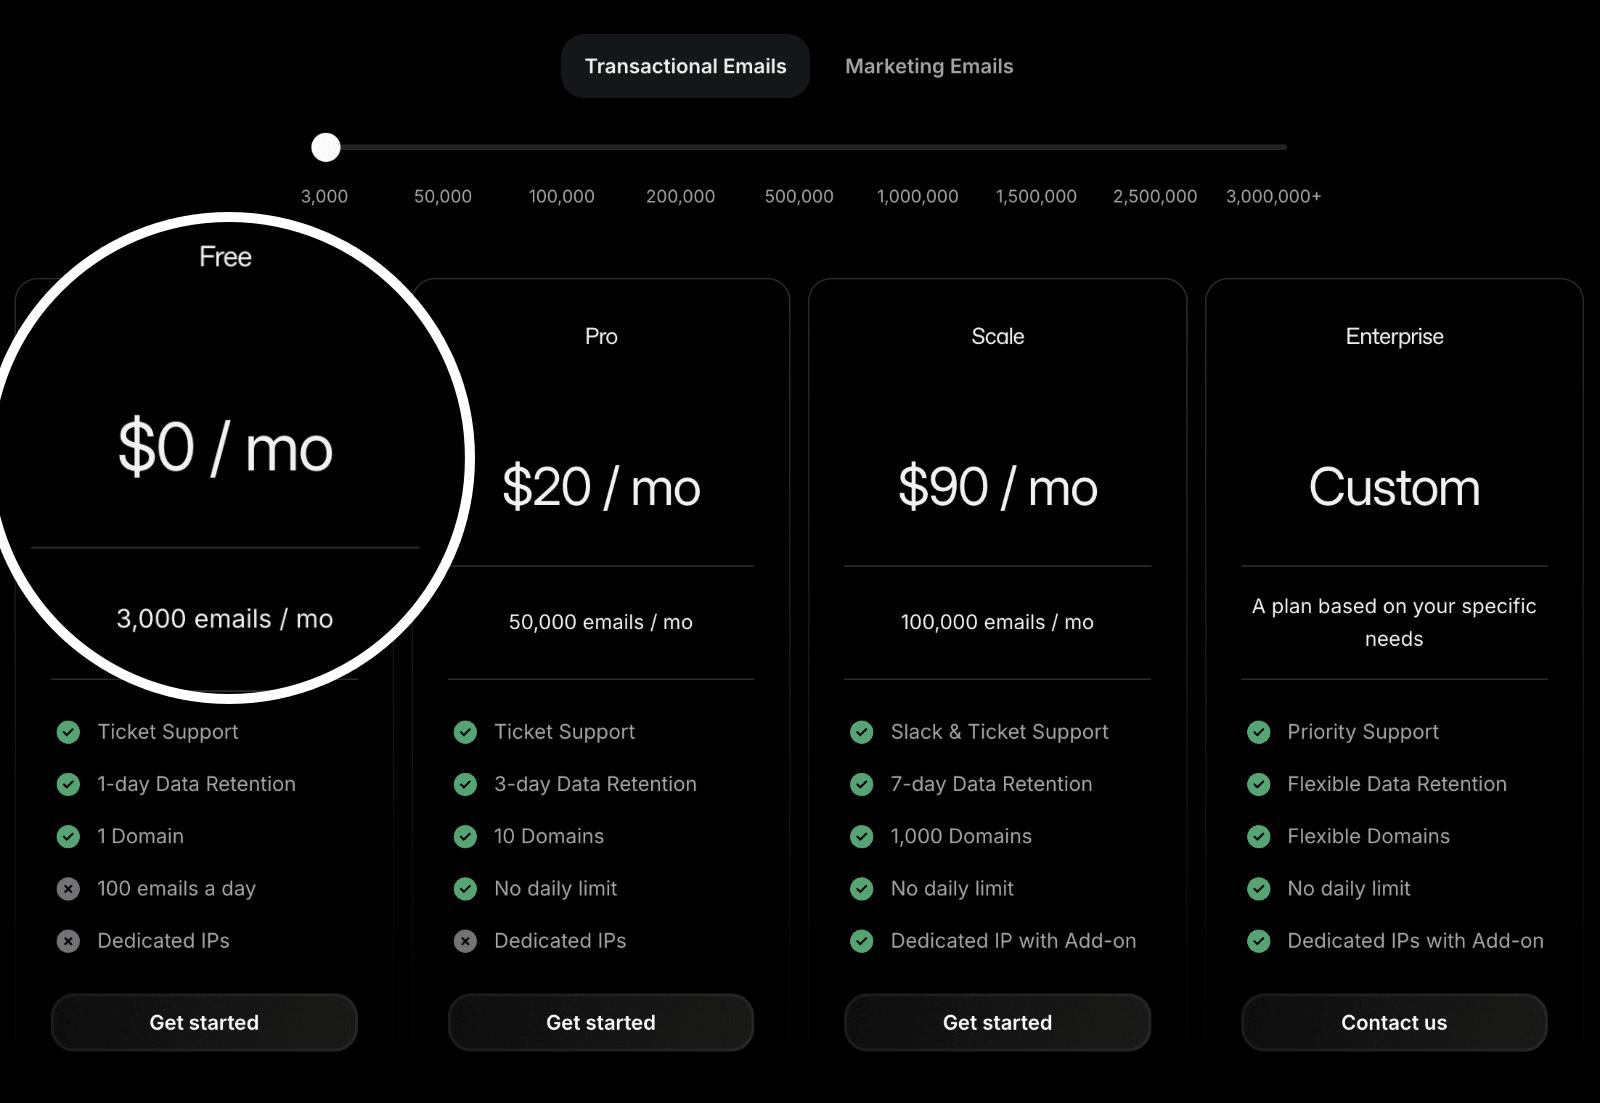
- Cost: Resend offers a free plan that includes up to 3,000 emails monthly (with a daily limit of 100 emails). Paid plans start at $20 per month for 50,000 emails and include features like higher sending limits, additional domains, and no daily sending limits.
- From Email Requirements: You’ll need to use an email address at your domain (e.g., [email protected]) to use Resend with WP Mail SMTP.
- Bottom Line: Resend is an excellent choice for developers and businesses seeking a straightforward, reliable email delivery service with a modern API and developer-friendly tools.
Note: For more information about our supported mailers, please check out the complete guide to mailers in WP Mail SMTP
Setting Up Your Resend Account
To start, you’ll need to create a Resend account (if you don’t have one already). For this, visit Resend’s pricing page and choose the plan that best fits your needs.
For our example, we’ll choose their free plan. However, the setup process will be the same regardless of the plan you choose.
After signing up and verifying your email, you’ll be directed to your Resend account dashboard, where you can begin setting up your account.
Authorizing Your Domain
Before you can send emails with Resend, you’ll need to add and verify your sending domain. This process verifies that you own the domain you’re sending from and helps improve your email deliverability.
Adding Your Sending Domain
To add a sending domain, log in to your Resend account and navigate to Domains from the left sidebar.
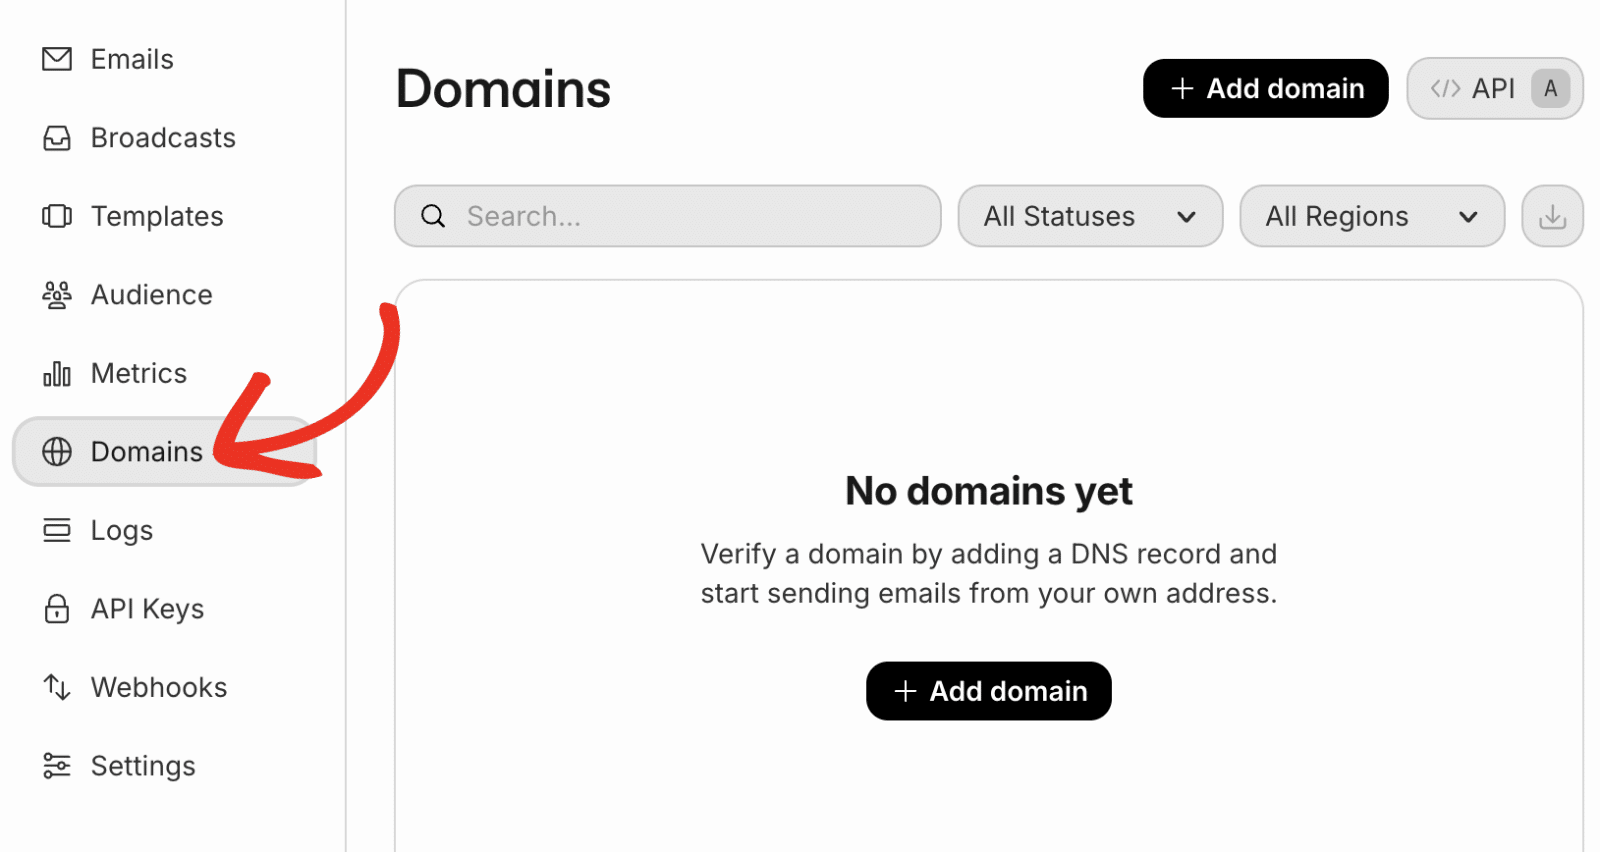
To add a new domain, click the + Add domain button.

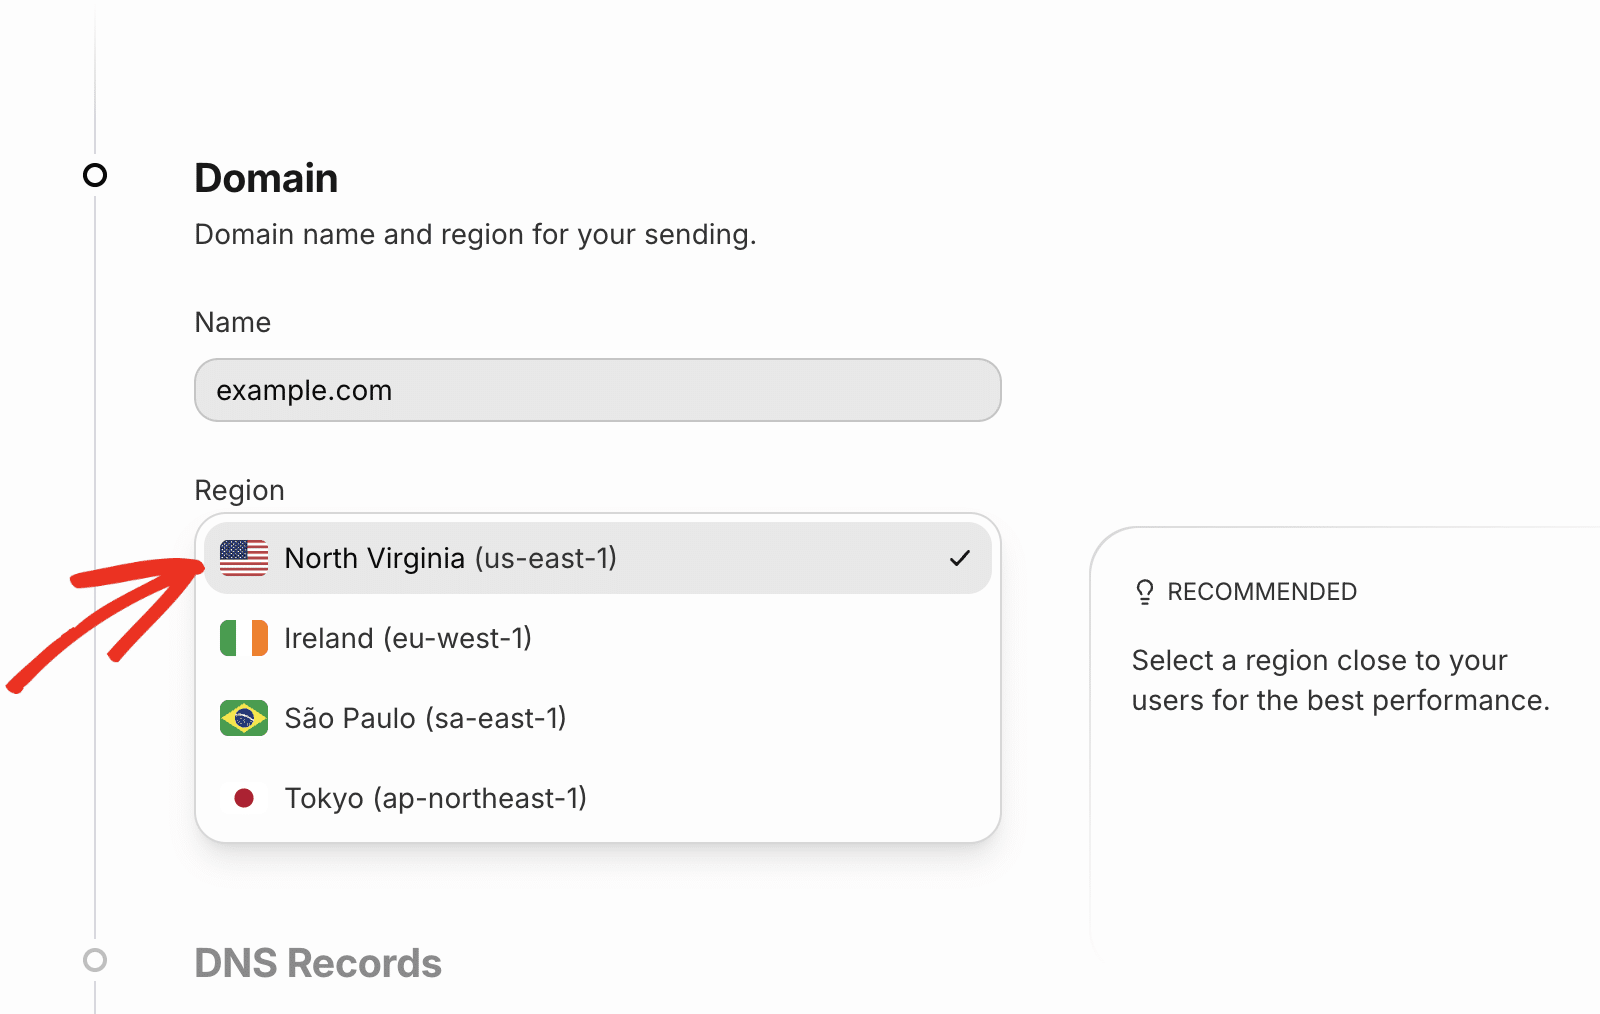
In the overlay that appears, you’ll need to enter your domain name and select a region.
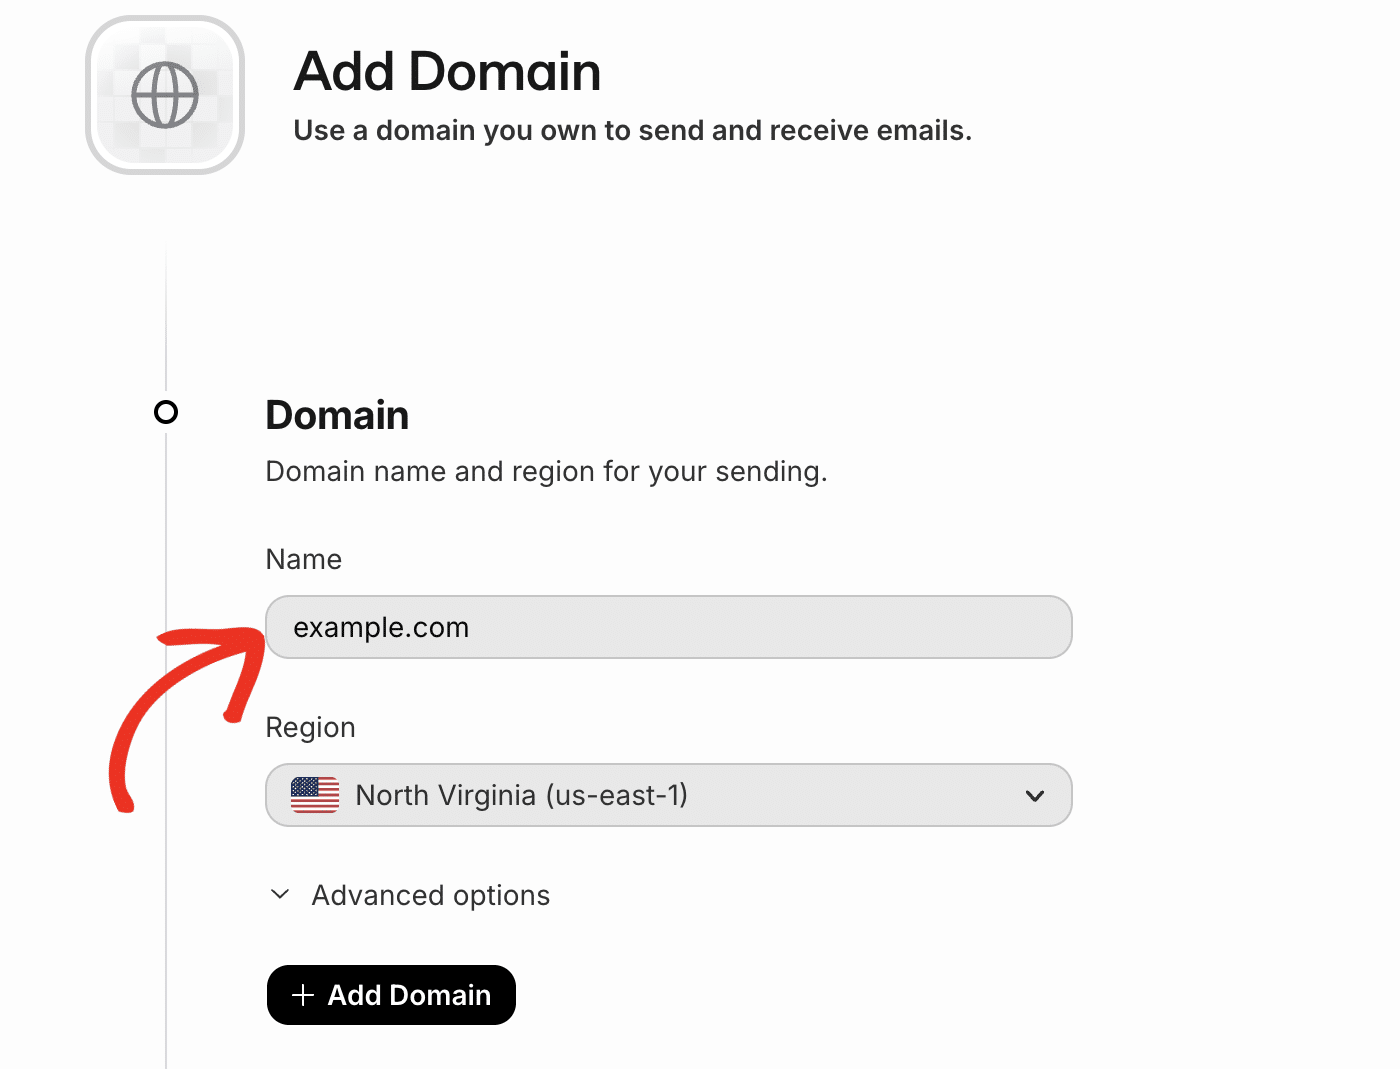
Choose the region closest to your users for the best performance.
After entering your domain details, click the + Add Domain button to proceed.

Verifying Your Domain
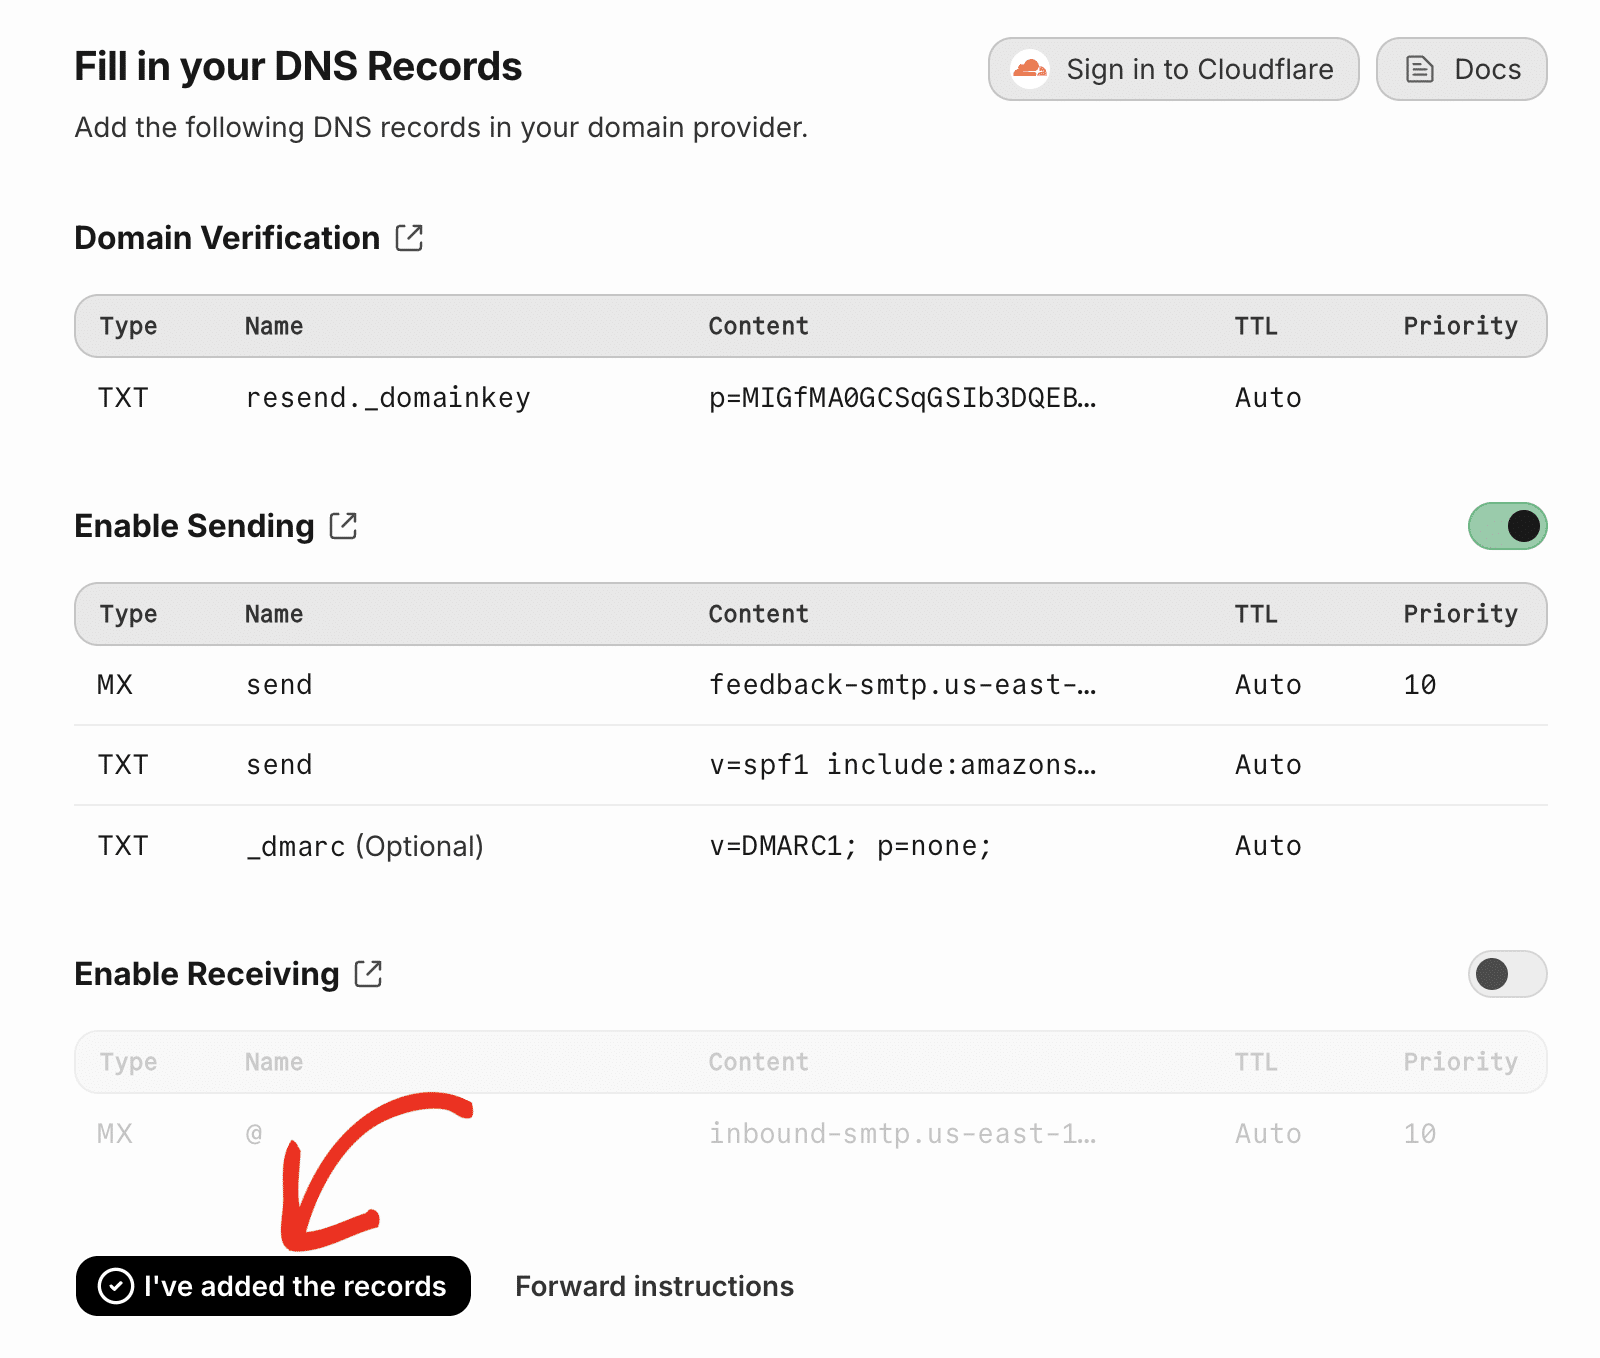
After adding your domain, Resend will present you with DNS records that need to be added to your domain settings. Depending on your domain host, you’ll see options for automatic verification or manual setup.
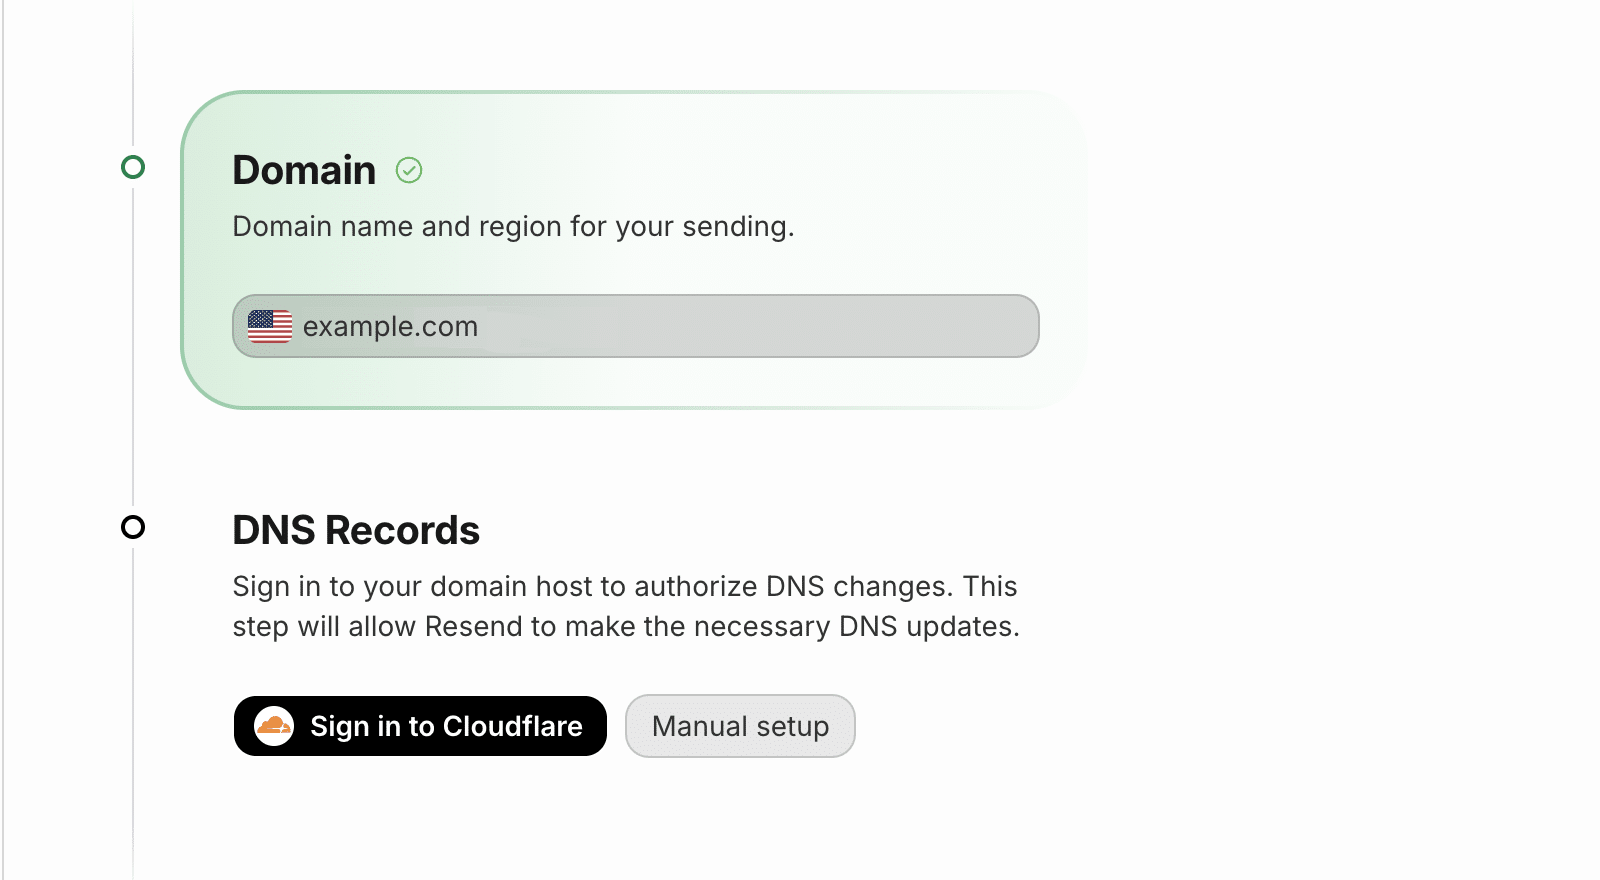
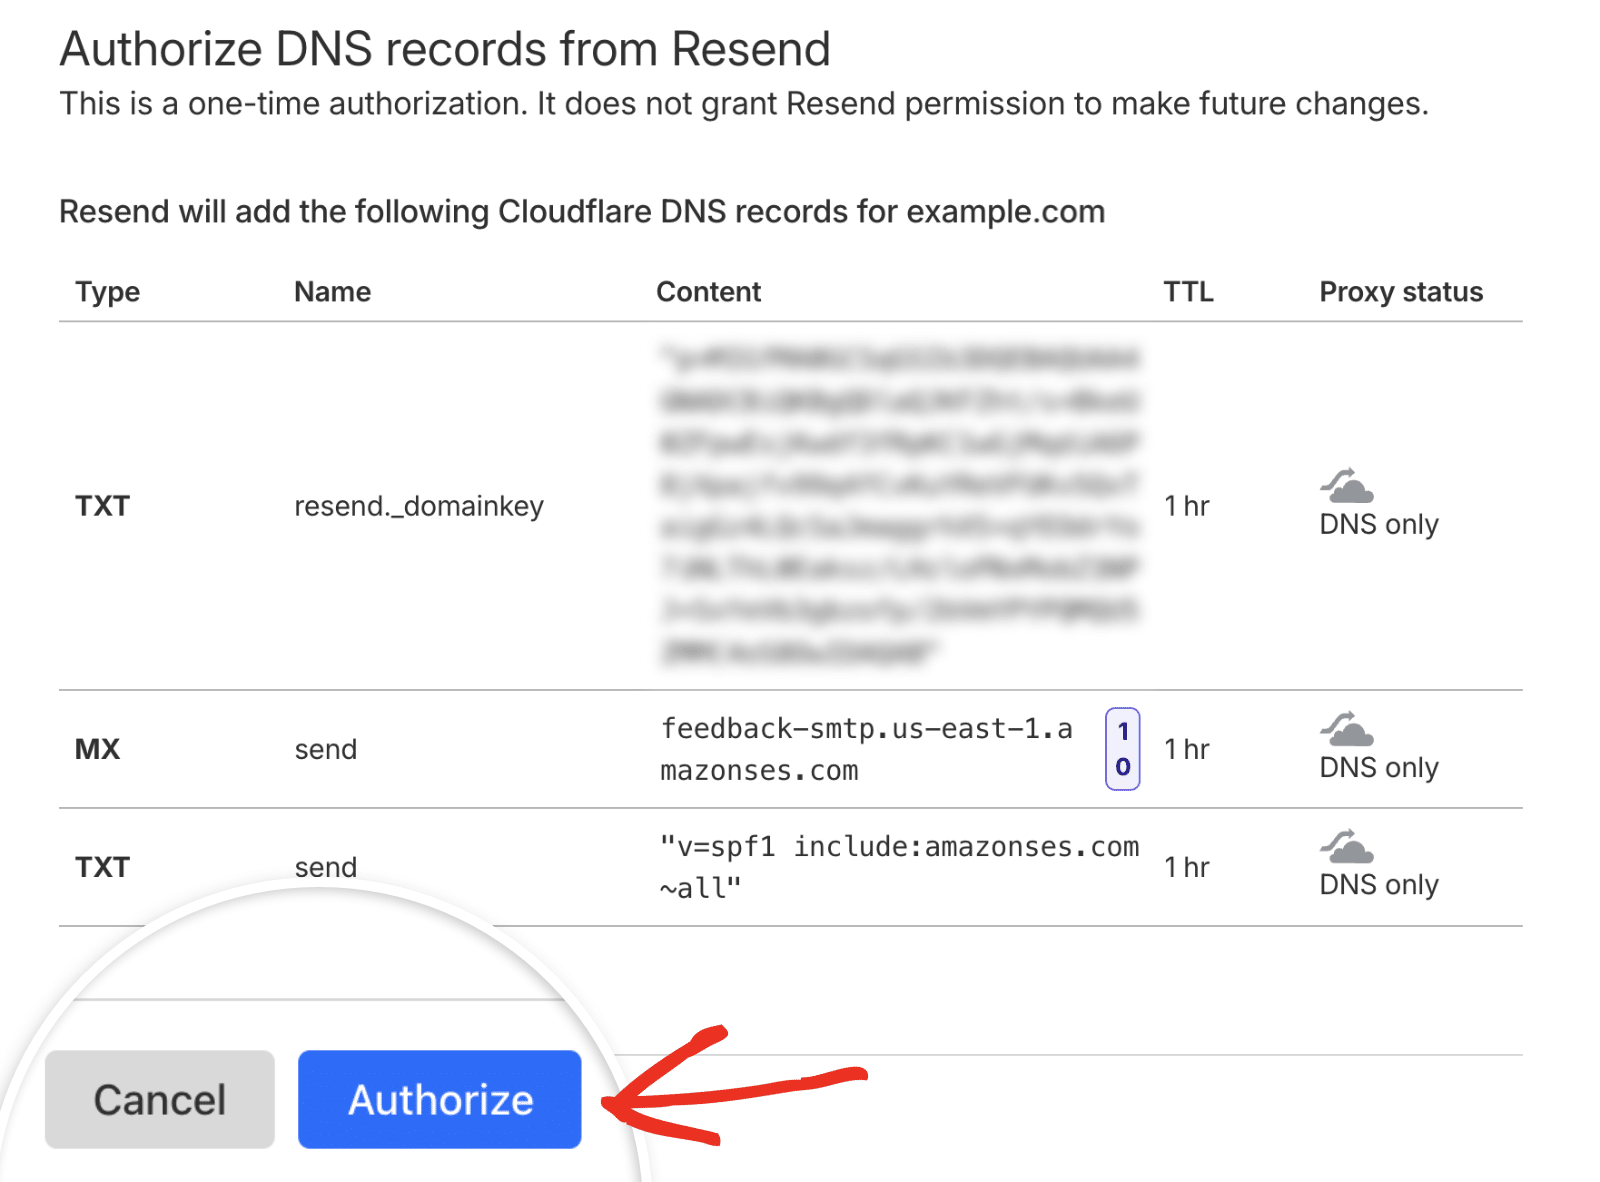
If you use Cloudflare as your DNS provider, you can click Sign in to Cloudflare to automatically add the DNS records. You’ll be directed to your Cloudflare account area. Go ahead and click the Authorize button to add the DNS records.
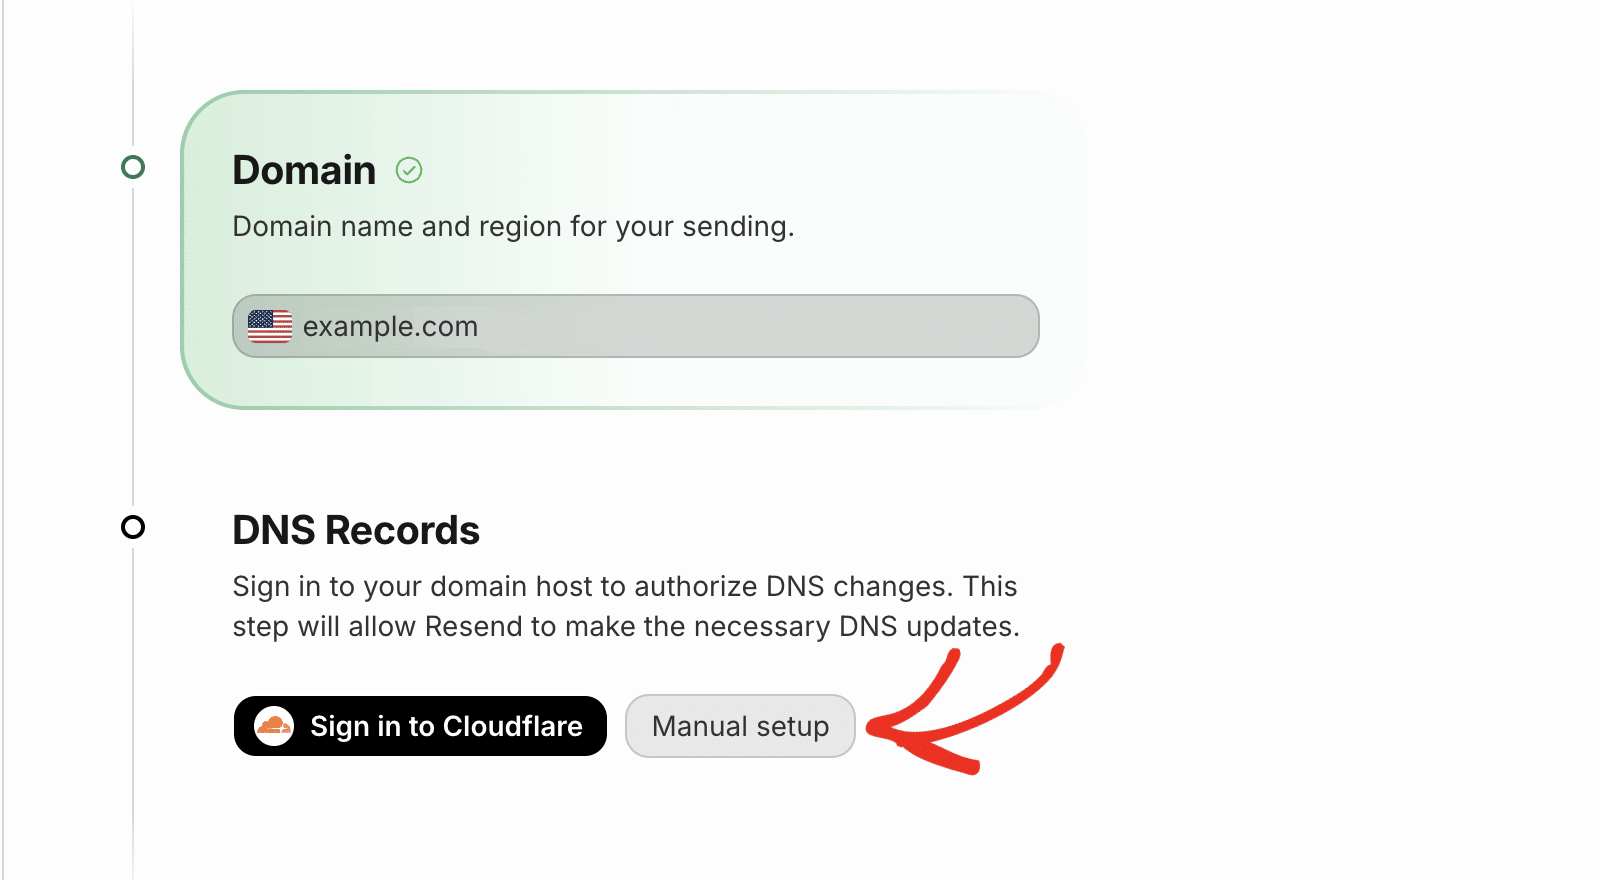
However, if you prefer the manual approach, click Manual setup to view the DNS records you need to add.
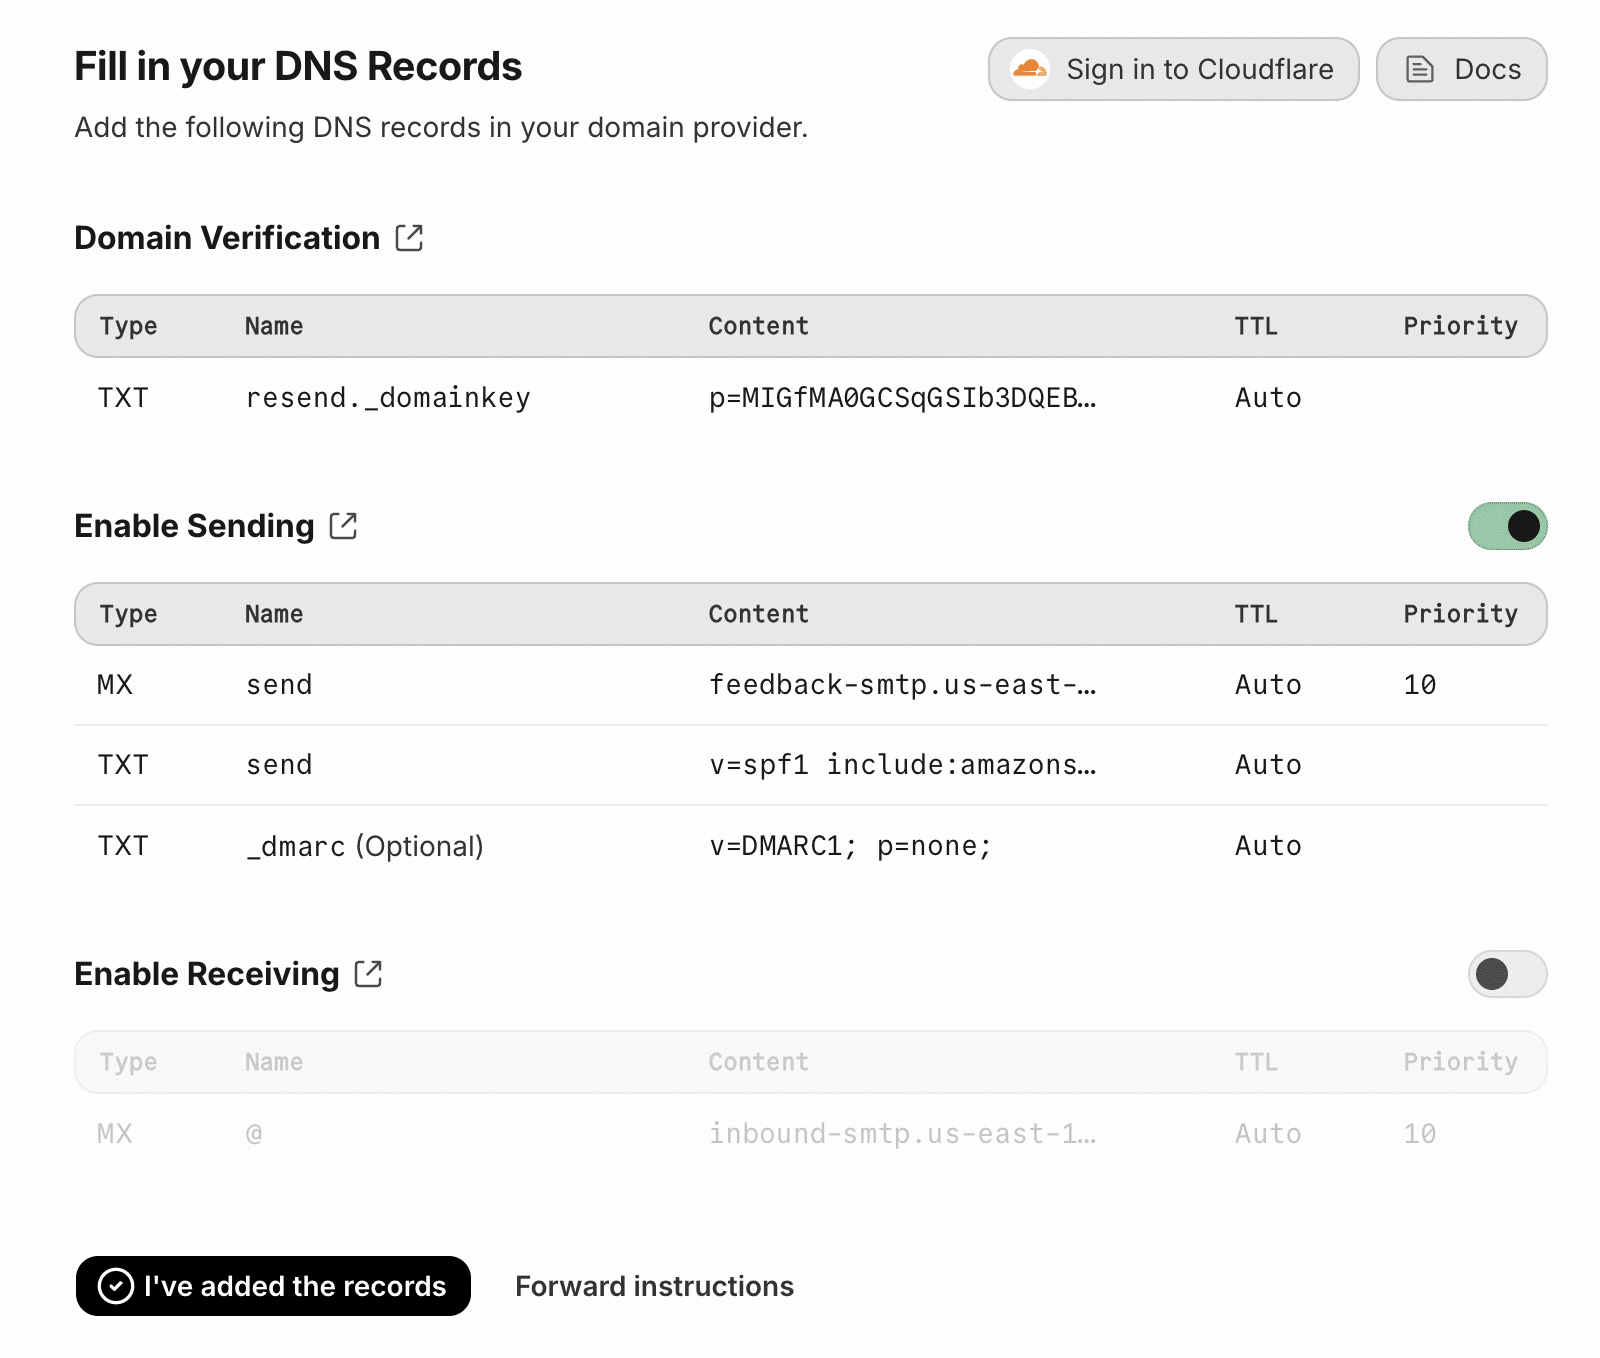
Resend will provide DNS records that you’ll need to add to your domain settings. The records include domain verification (DKIM) and sending configuration (SPF).
We have a detailed guide on how to locate and add DNS records for various domain registrars. Please see our tutorial to learn how to add DNS records for WP Mail SMTP mailer settings.
After adding the DNS records, you’ll need to wait a few minutes for the DNS changes to propagate. Keep in mind that it might take up to 48 hours in some cases.
Once you’ve added the records to your DNS provider, return to the Resend dashboard and click the I’ve added the records button.
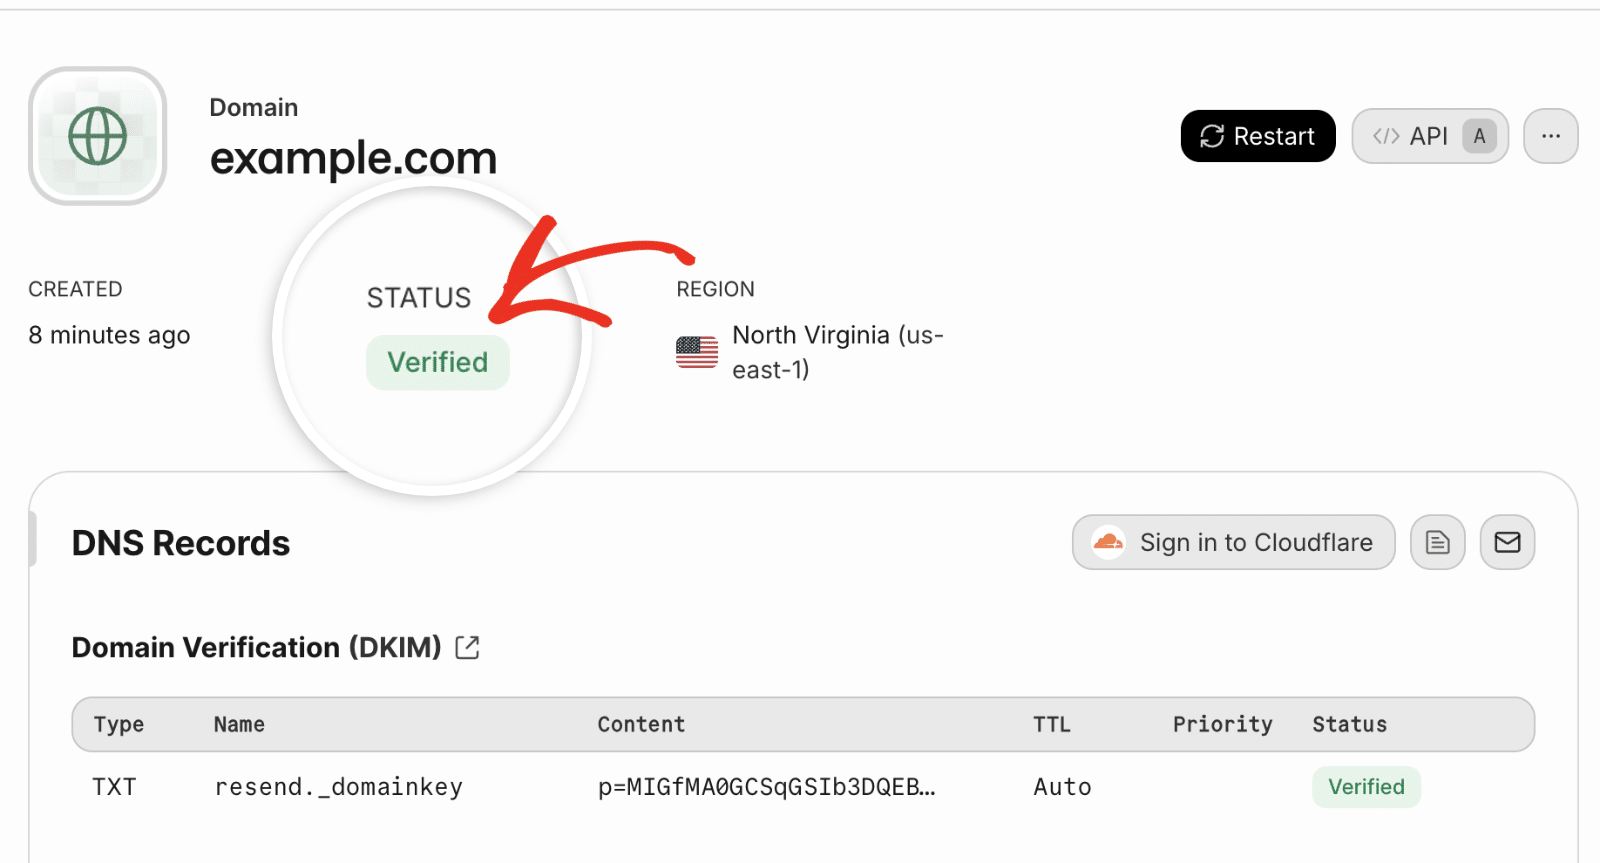
If your DNS records are propagated, you’ll see a Verified status next to the domain.
However, there’s no need to wait on this just yet! You can move ahead to the next step while you wait for this verification to complete. Just be sure to keep this tab or window open, as we’ll need it a little later.
Setting Up WP Mail SMTP
Now that you’ve set up your Resend account and verified your domain, you can configure WP Mail SMTP to use Resend to send your WordPress emails.
Before you get started on this section, be sure to install and activate the WP Mail SMTP plugin.
Once WP Mail SMTP is installed, go to WP Mail SMTP » Settings and select the General tab to open the plugin settings page.

We’ll discuss each of these settings in detail below.
From Email
The From Email is the address your site’s emails will be sent from. This must be an email address at the domain you verified with Resend.
For example, if you authorized example.com, the From Email address must contain example.com (e.g., [email protected]).

If you’d like the From Email to be the same site-wide, toggle the Force From Email option. This option will save you the trouble of editing the email settings throughout your site, such as in other plugin settings.

Note: For more details, see our guide to understand how the Force From Email setting works.
From Name
The From Name will, by default, be set to your site name. However, you can change this to any text you’d like.

You can also choose to enable the Force From Name option to apply this setting to emails site-wide.

Mailer
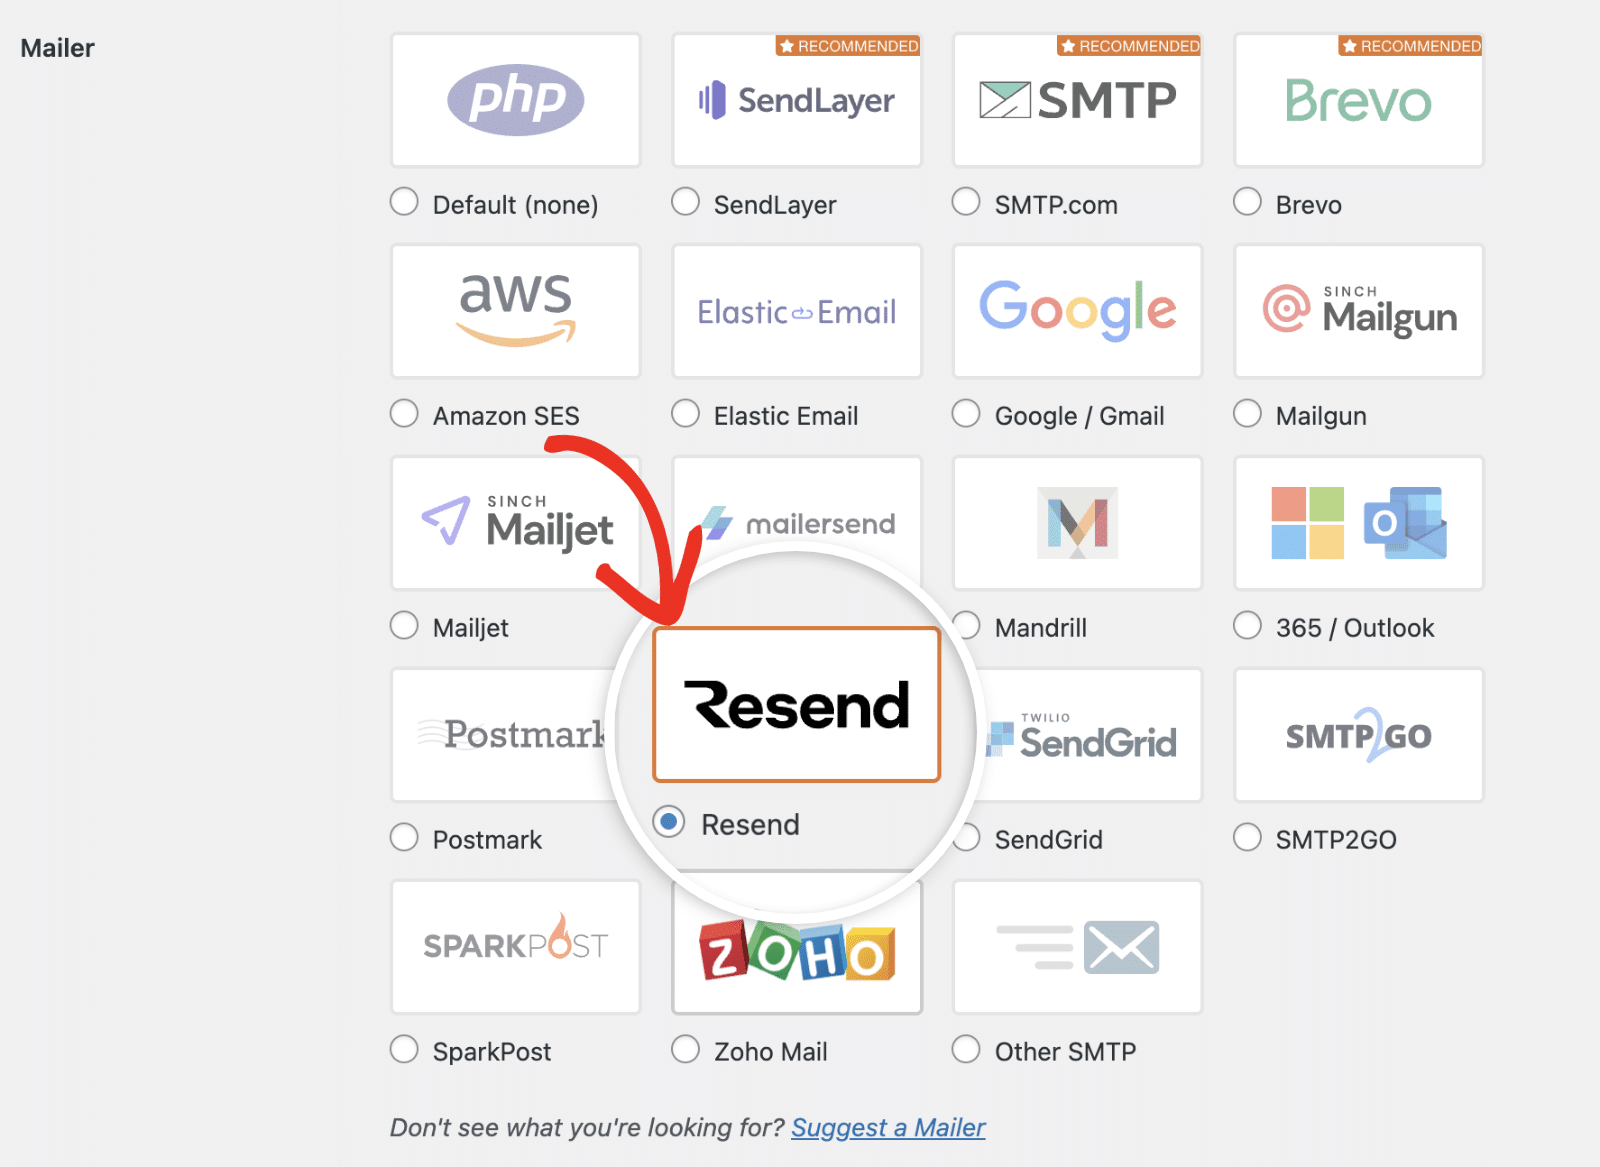
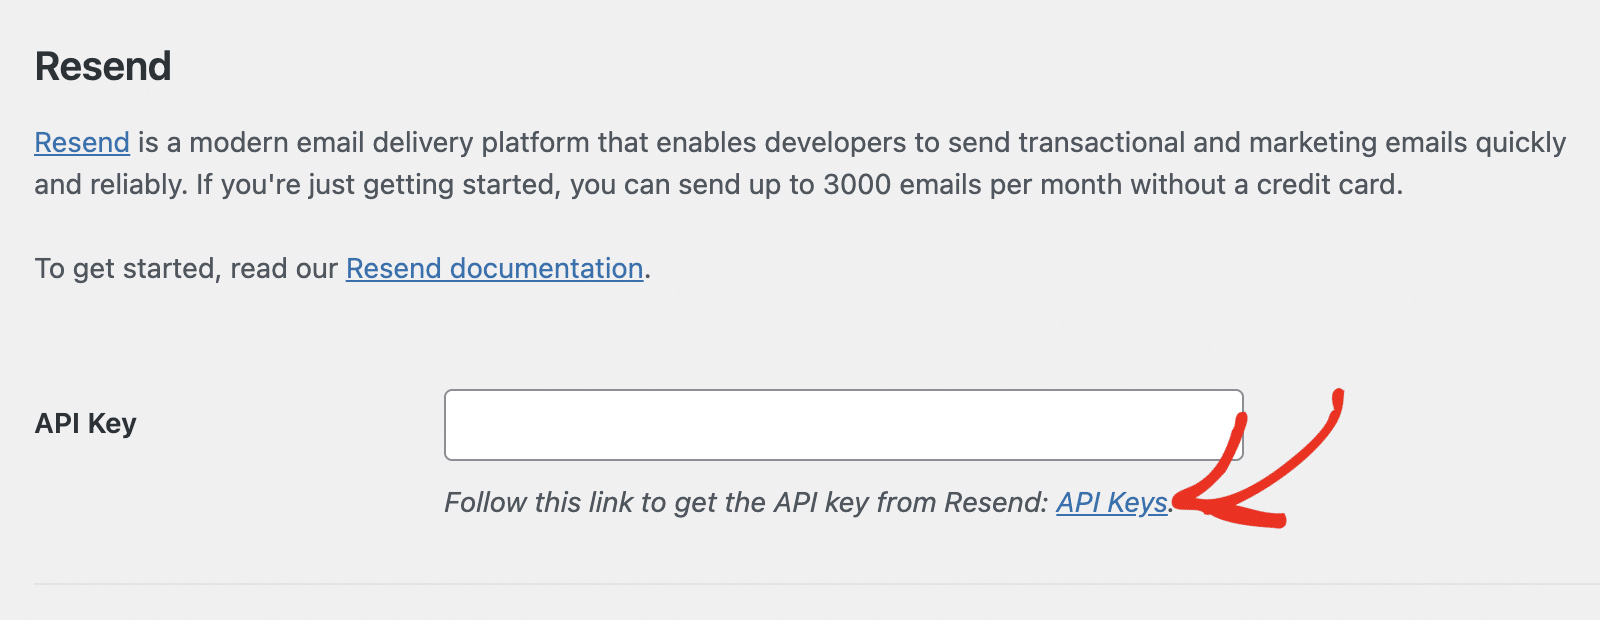
Under the Mailer section, select Resend.
After that, you’ll see a text field where you’ll need to enter your Resend API key.
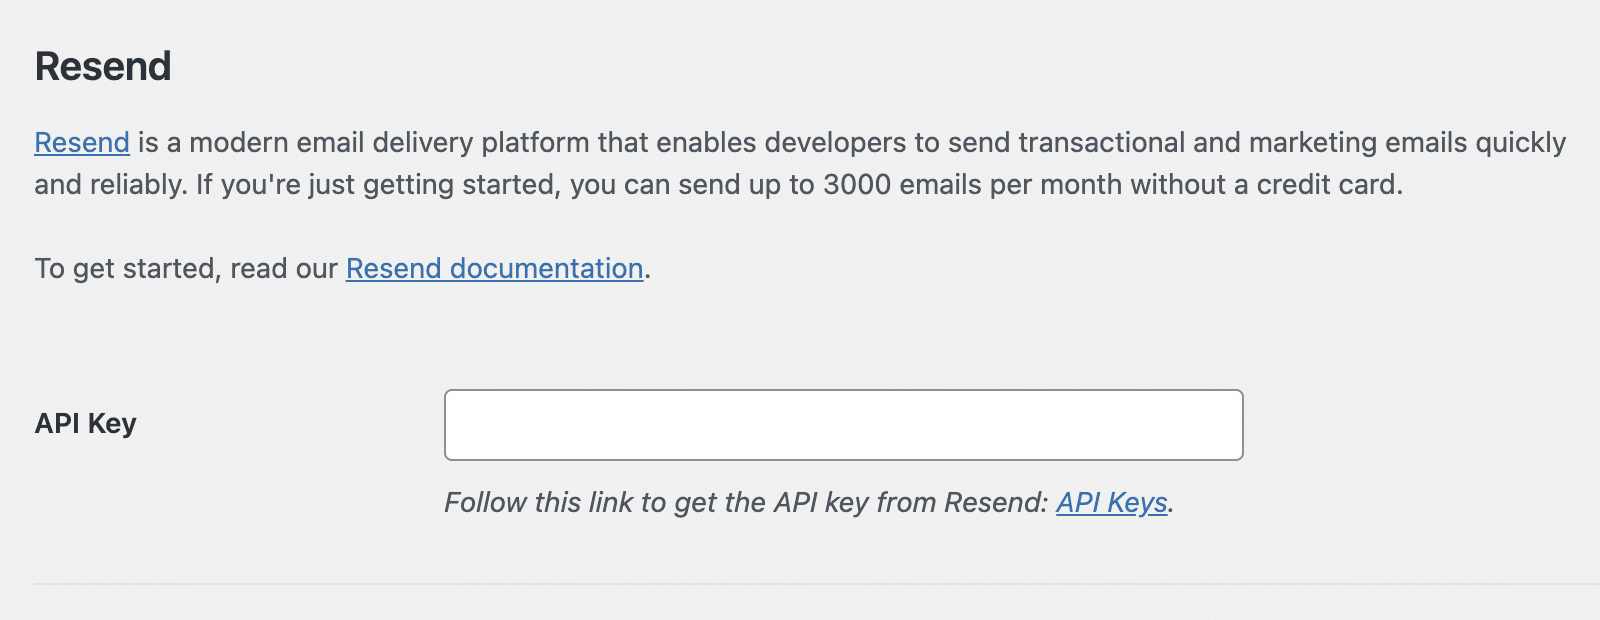
API Key
To create your API key, click the API Keys link.
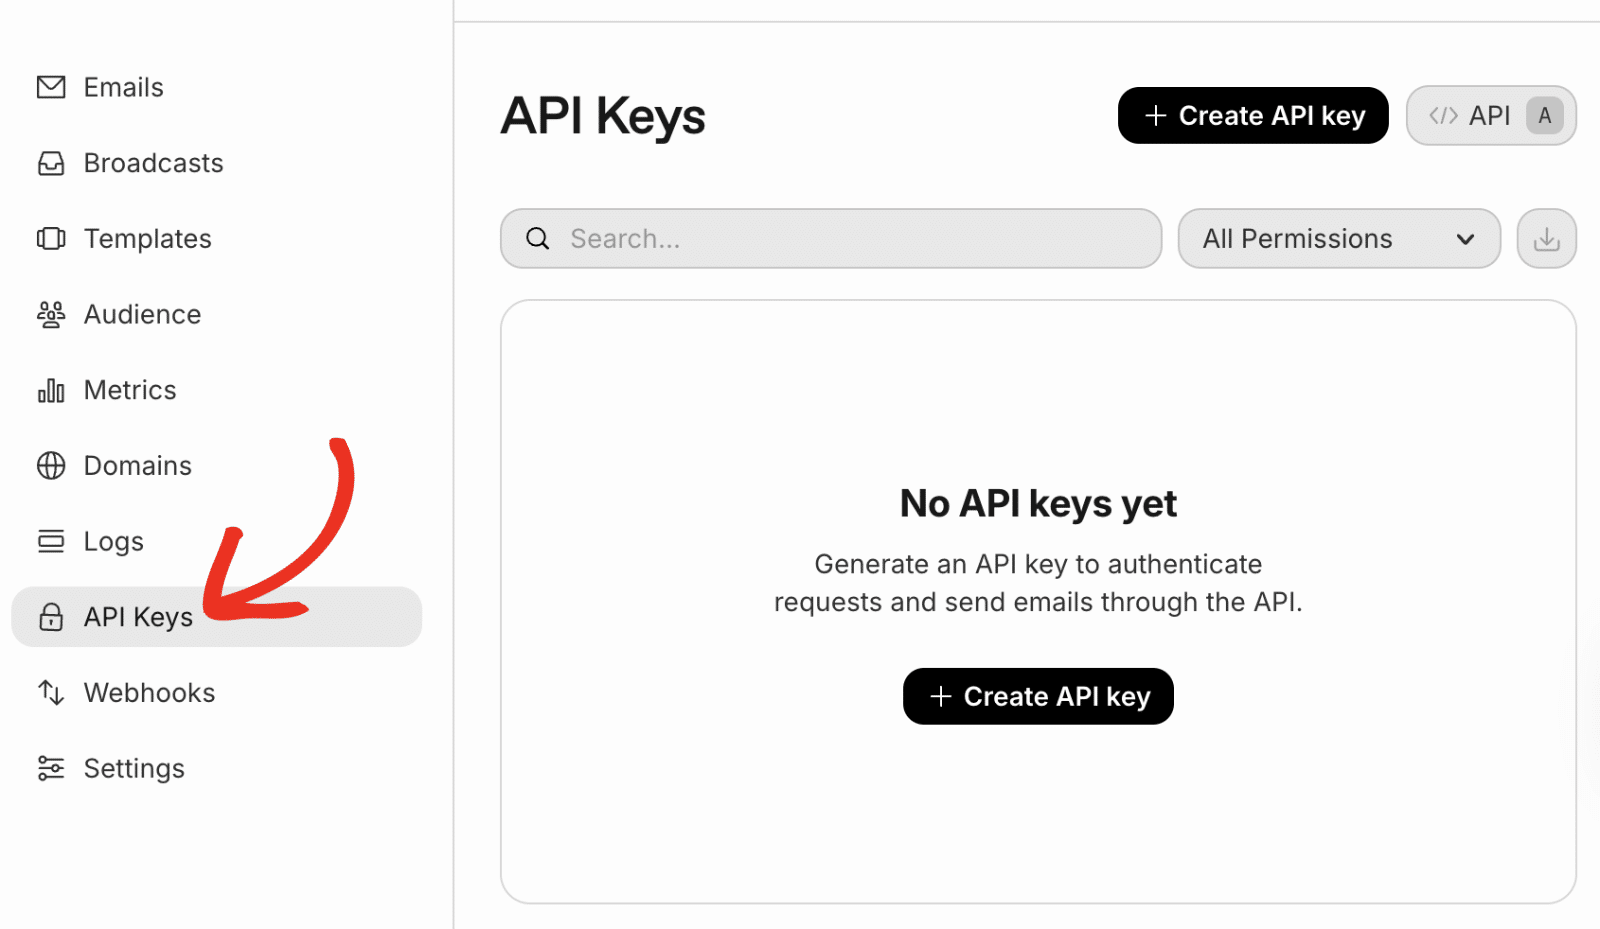
Alternatively, you can access this page from your Resend account by navigating to API Keys from the left sidebar.
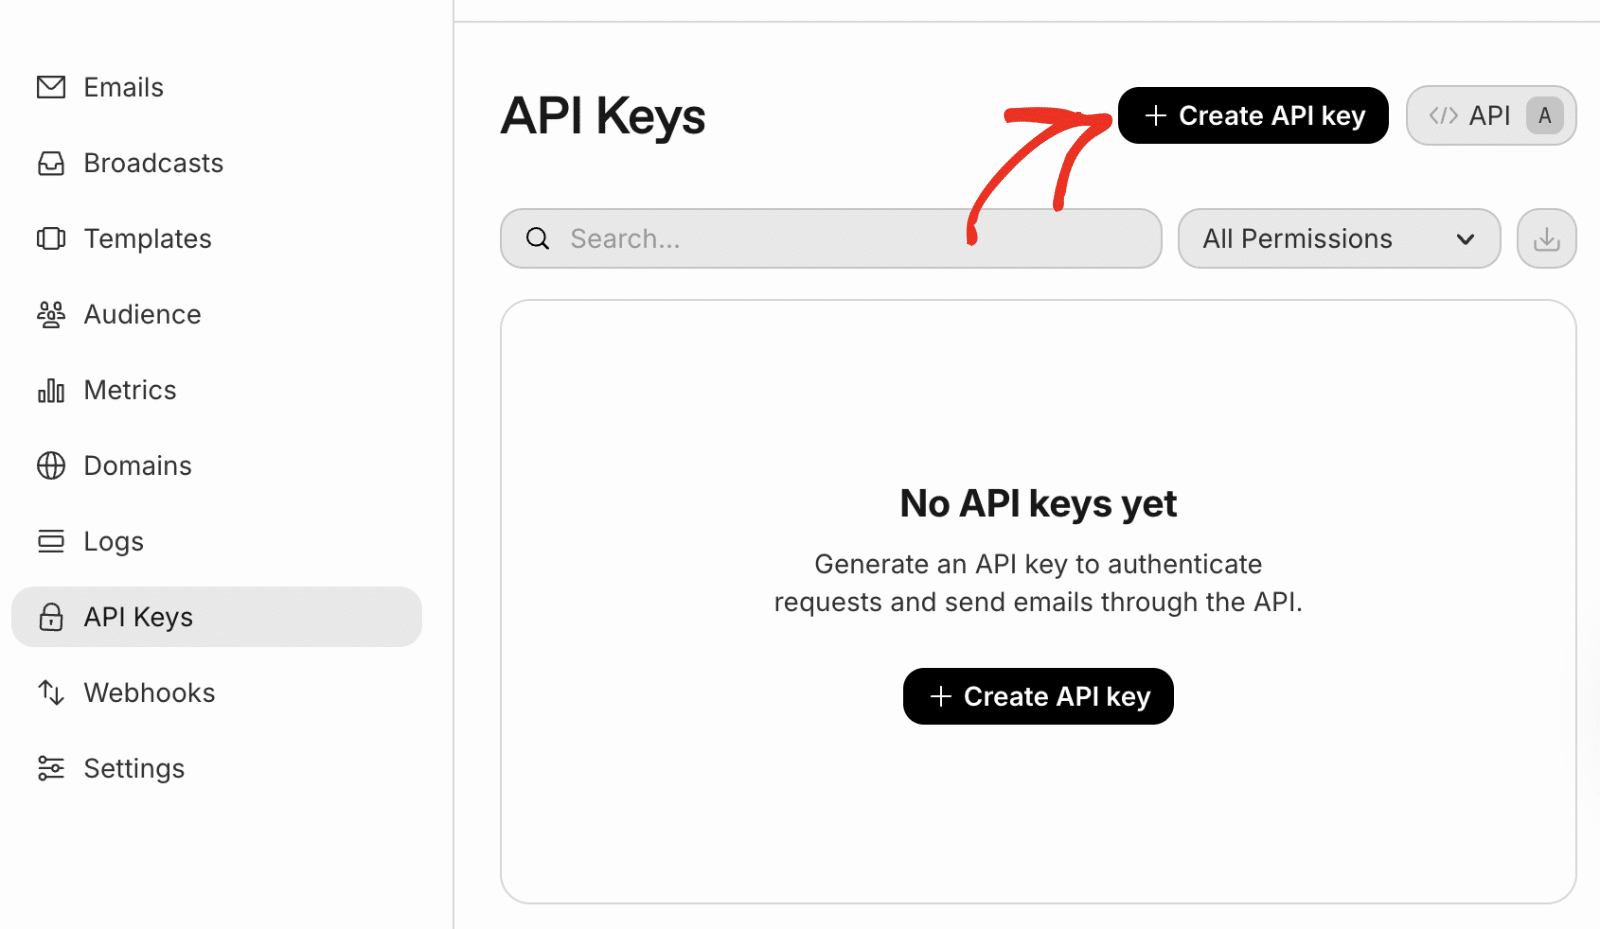
Then, click the + Create API key button.
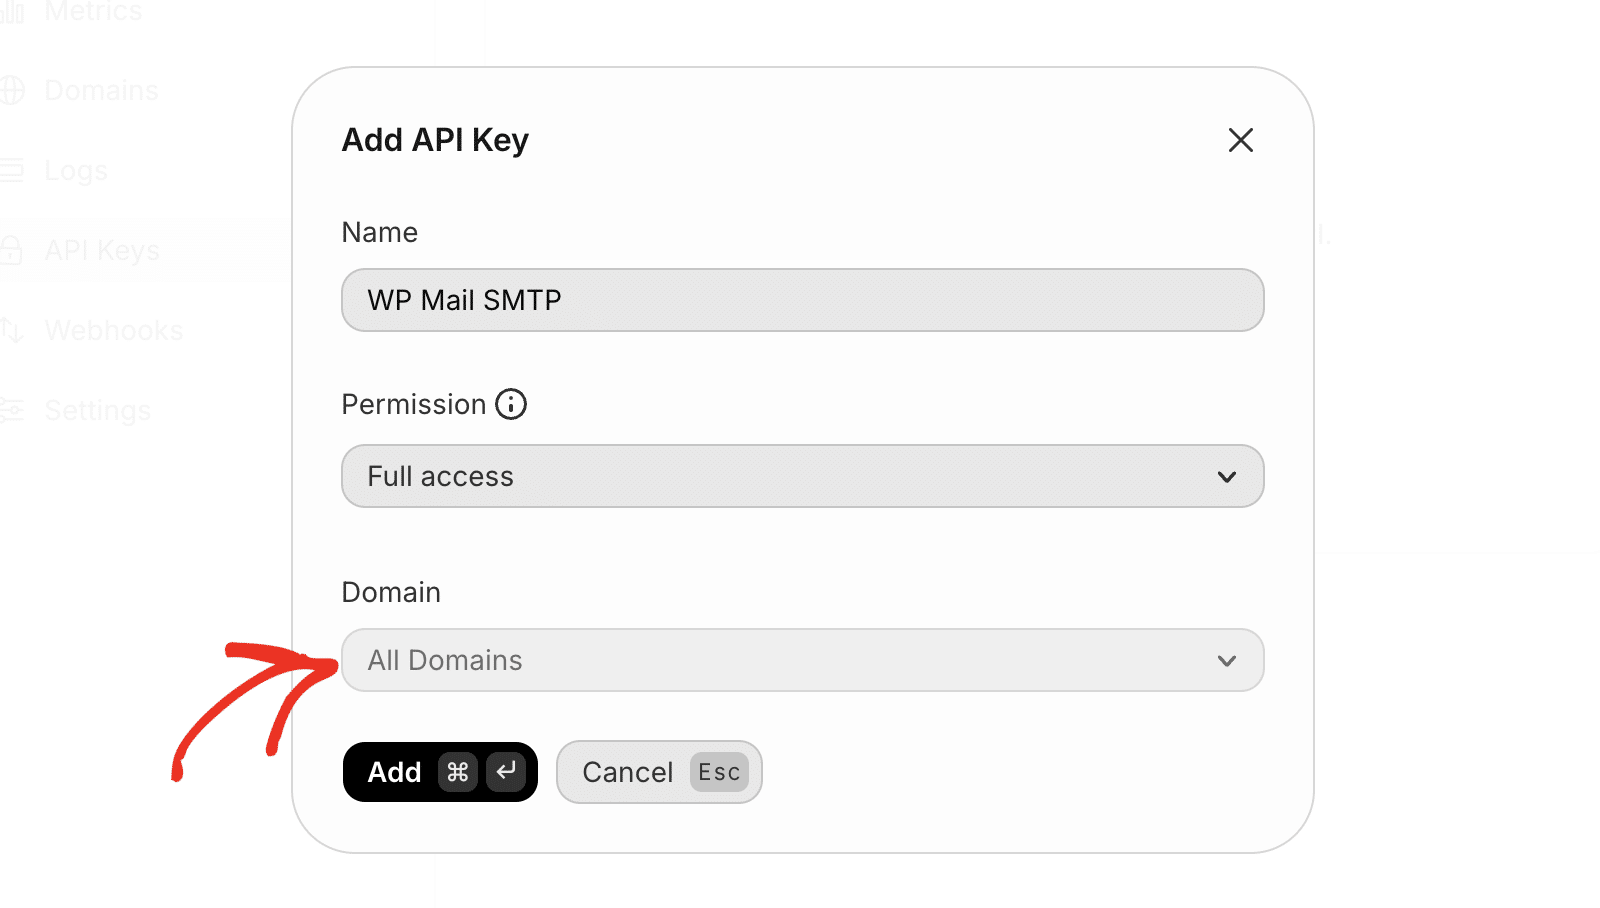
In the overlay that appears, you’ll need to specify a name for your API key. This is for internal purposes only, so you can use any name you like.

Next, set the Permission to Full access. This allows the API key to send emails and access other features.
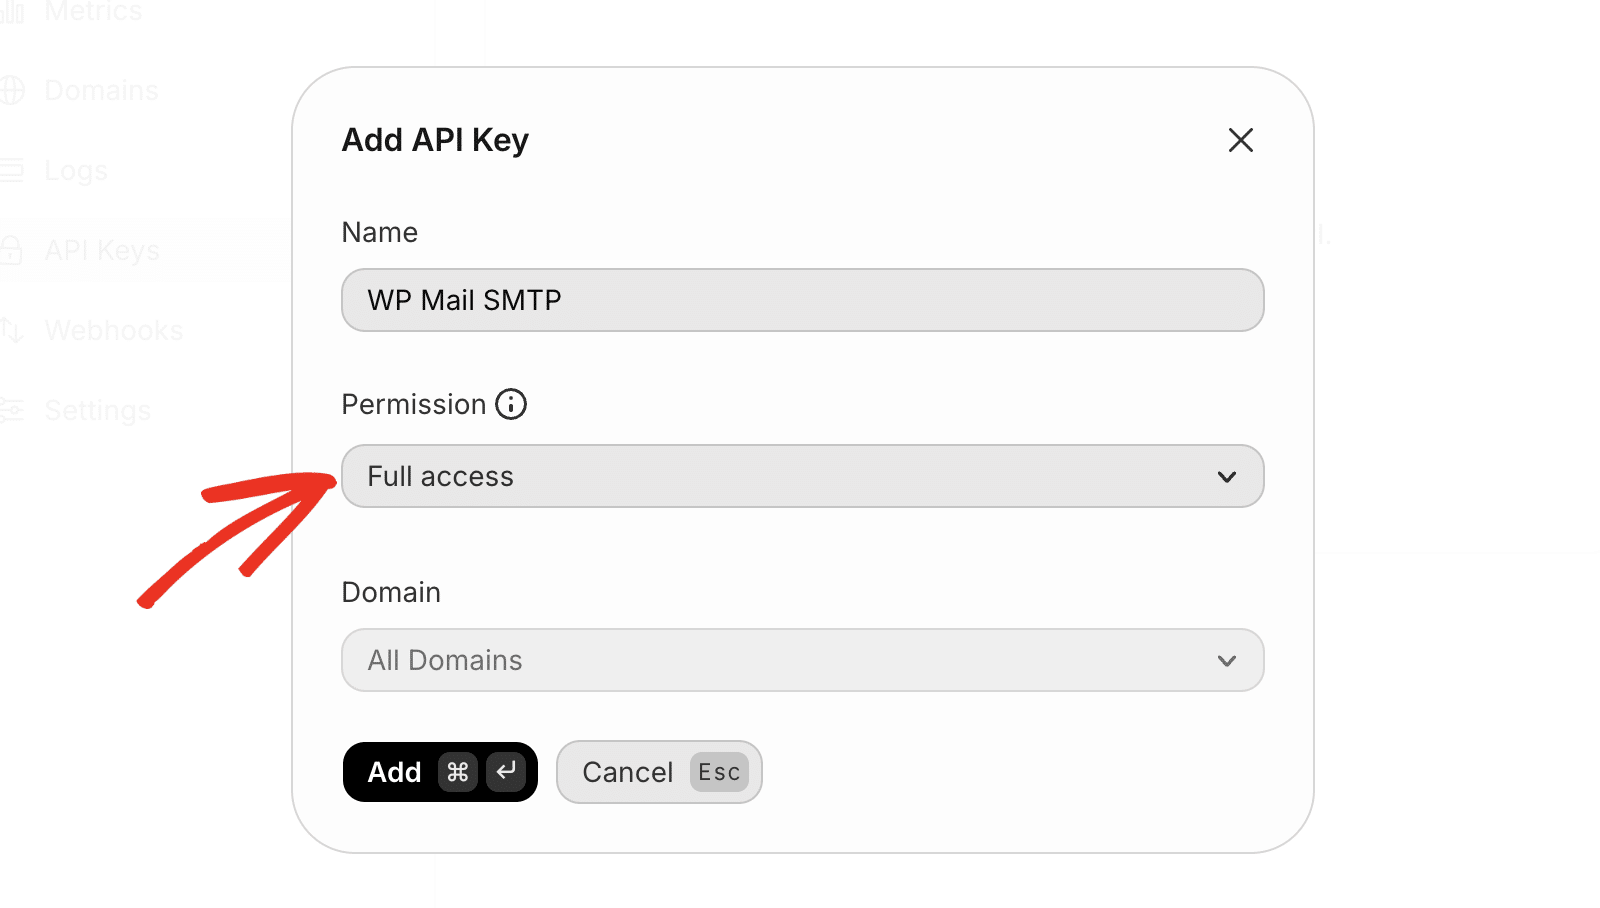
Note: The Full access option is required to allow WP Mail SMTP access to track your email deliverability status.
If you’d like to restrict the API key to a specific domain, you can select it from the Domain dropdown. Otherwise, leave it set to All Domains.
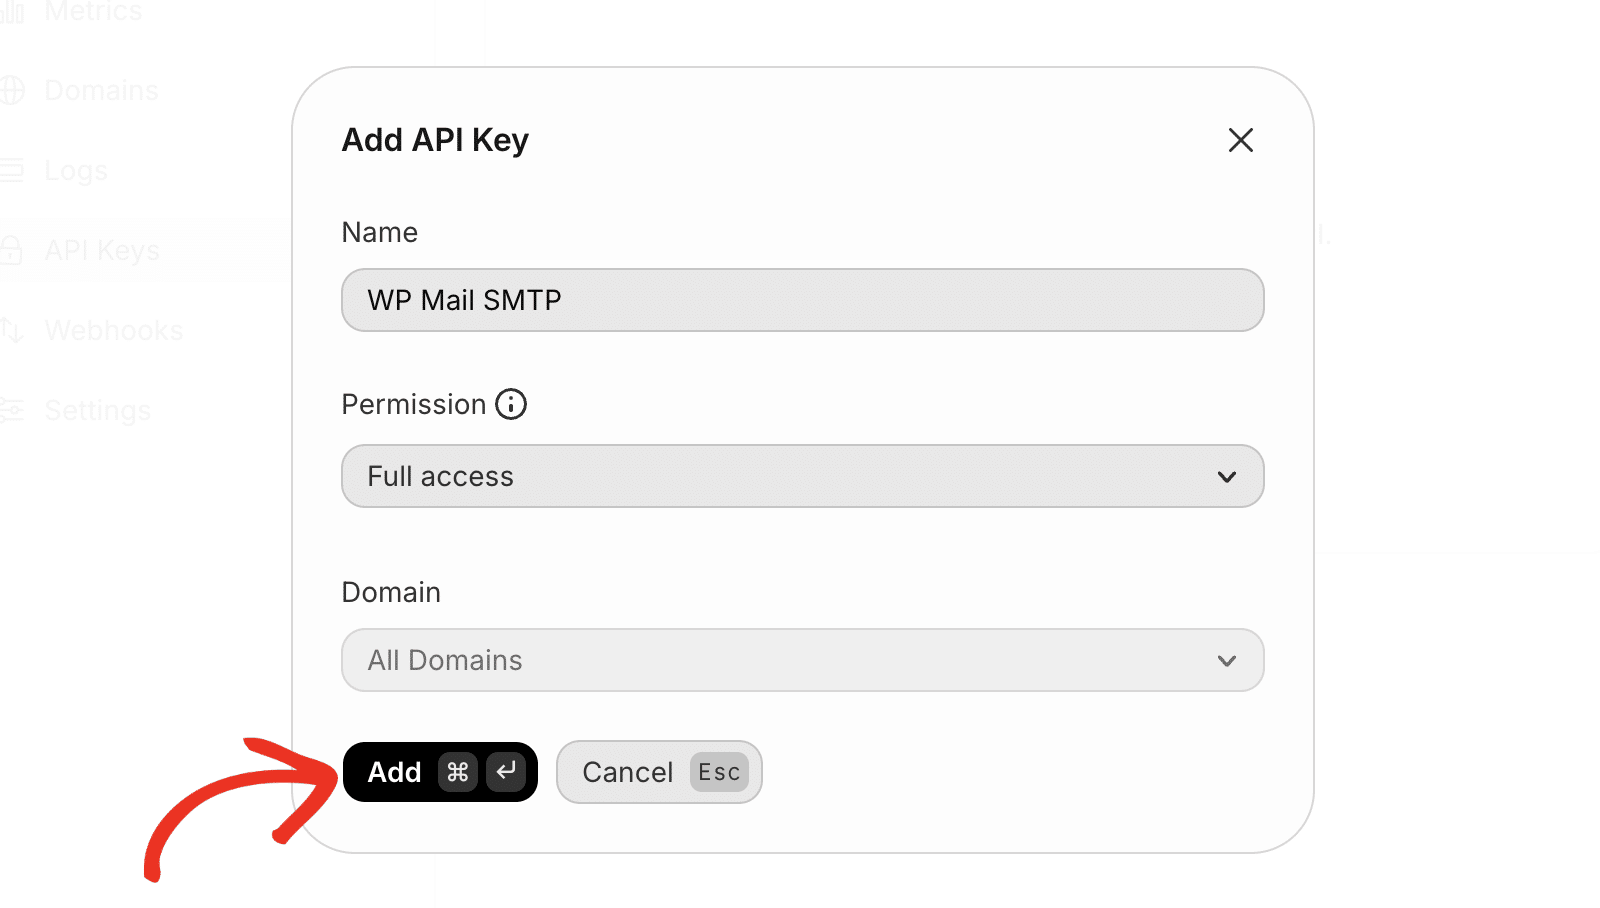
Once done, click the Add button to create your API key.
This will generate an API key for your account. Click the copy icon to copy the API key value.
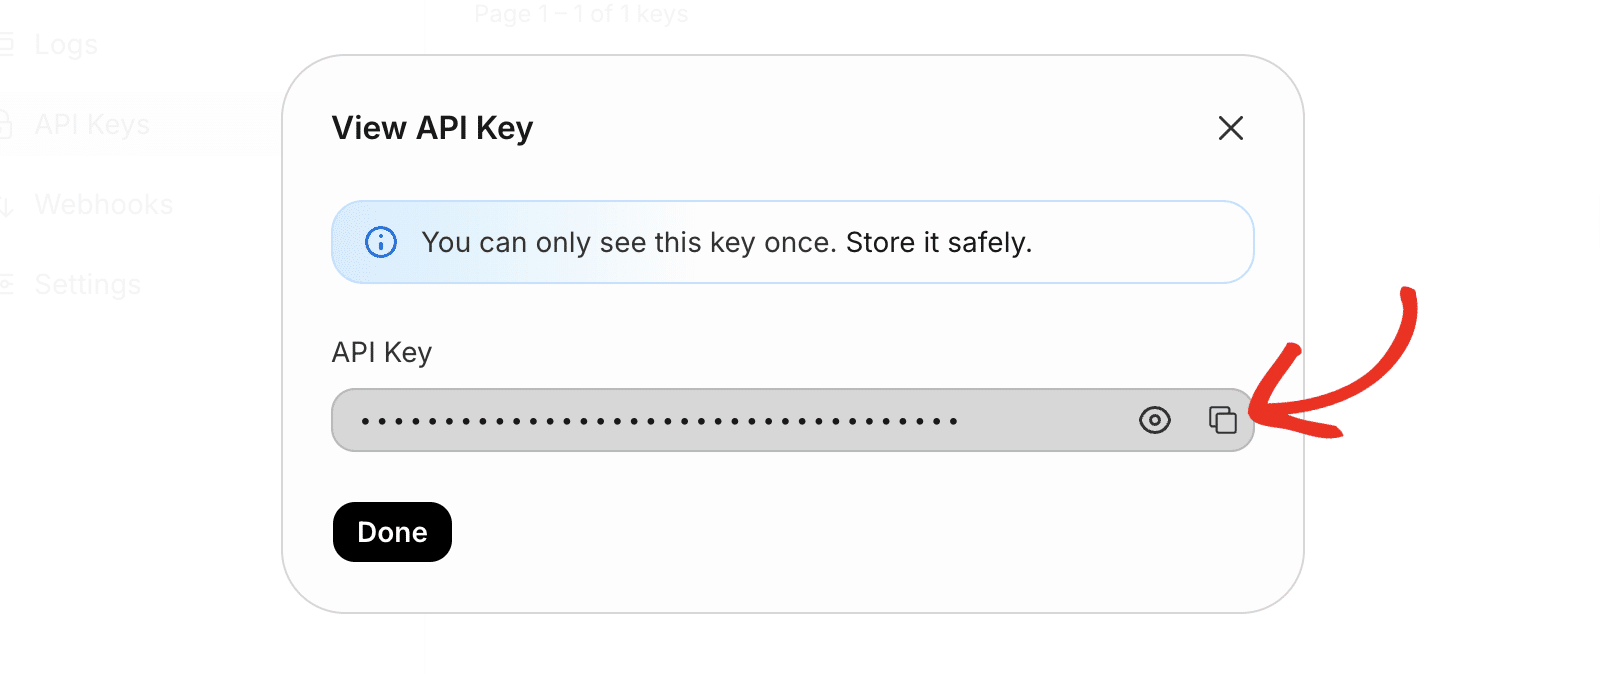
Note: You won’t be able to access the API key after closing this page. Be sure to back it up in a secure location in case you need to refer to it again.
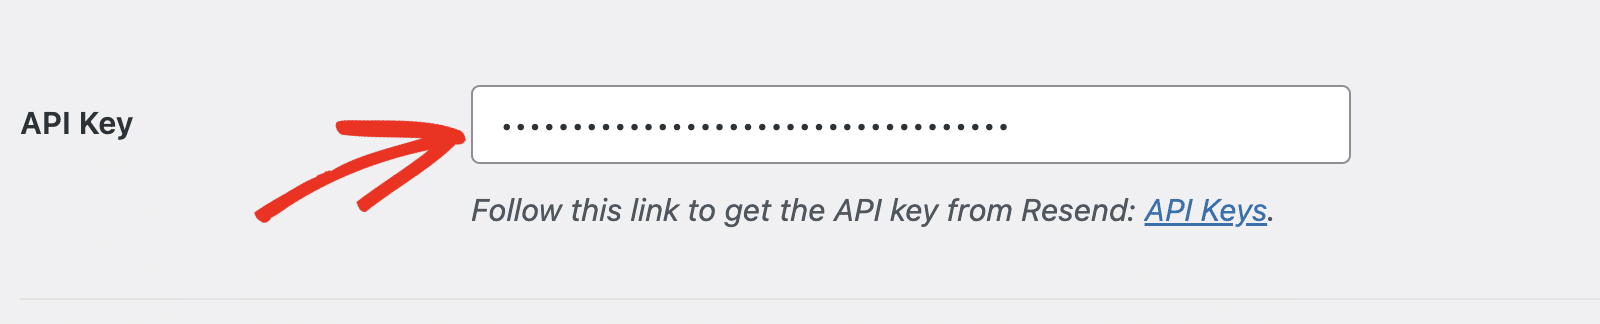
After copying the API key, return to the WP Mail SMTP settings page. Then paste the key you just copied from Resend into the API Key field.
Backup Connection
Setting up a Backup Connection is optional and isn’t required to complete your Resend mailer setup. To further improve email deliverability, we recommend setting up a second connection as a backup in case your Primary Connection fails.

Once you’ve configured your mailer, be sure to click the Save Settings button.

Sending a Test Email
Note: Your Resend domain verification needs to be completed before you can send a test email.
After configuring your settings, you should send a test email to verify everything is working correctly. To do so, go to WP Mail SMTP » Tools, and select the Email Test tab.

In the Send To field, you can enter any email address whose inbox you have access to. We recommend leaving the HTML setting toggled ON unless you know you’ll only be sending plain text emails.
Note: If you’ve set up an additional connection, you’d be able to choose between your Primary Connection and other connections when sending a test email.
Next, click the Send Email button to send your test email.

After sending the email, you should see a success message.

If you check the inbox for the email address you entered, you should have received the email for this test.

That’s it! You’ve successfully set up Resend with WP Mail SMTP. Your WordPress site should now be able to send emails more reliably.
Next, would you like to receive alerts whenever your site fails to send an email? Our guide on setting up email alerts covers the steps to configure alerts for various platforms.