AI Summary
Would you like to use WP Mail SMTP on your WordPress multisite installation? A multisite network can make it easy to manage several sites and share plugins and themes between them.
This tutorial will show you how to set up and configure WP Mail SMTP for your multisite network.
In This Article
What Is WordPress Multisite?
WordPress includes a multisite feature that you can enable to create a network of connected subsites. As the Super Admin, you have access to all the network-wide settings and options. Each subsite in your network can also have a Site Admin, who only has the permissions to make changes to their individual site.
Super Admins are able to install plugins on the network and share them with all of the subsites. Site Admins don’t have access to the WordPress Plugins screen, but they can configure plugin settings for their subsites.
For more information on WordPress multisite and the permissions of each of its user roles, see WPBeginner’s complete guide to multisite.
Installing WP Mail SMTP on Your Multisite Network
For the purposes of this tutorial, we’ll assume you’ve already set up your multisite network.
To install WP Mail SMTP at the network level, you need to open your Network Admin dashboard. Hover over My Sites in the WordPress toolbar, then select Network Admin » Dashboard.

From here, access the Plugins screen by clicking on Plugins in the sidebar menu on the left side of your dashboard. Then click on the Add New button.

Next, download and install WP Mail SMTP as you would on a regular WordPress site. For more guidance, see our tutorial on how to install WP Mail SMTP.
Using WP Mail SMTP at the Network Level
You can use WP Mail SMTP to improve email delivery across your multisite network. The following sections will discuss various ways you can use our plugin at the network level.
Activating WP Mail SMTP for All Sites in Your Network
To activate WP Mail SMTP for every site in your network, click on the Network Activate button immediately following installation.

Or, if you previously installed the plugin on your multisite network, activate it by going to Plugins in your Network Admin dashboard and clicking on Network Activate under WP Mail SMTP.

After you activate the plugin for your network, Site Admins will be able to see WP Mail SMTP’s settings in their subsites’ dashboards. However, since they can’t access the Plugins screen by default, they won’t be able to deactivate or delete WP Mail SMTP from their subsites.
Configuring Network-Wide WP Mail SMTP Settings
WP Mail SMTP gives you the option of configuring the plugin for each subsite individually, or for the network as a whole.
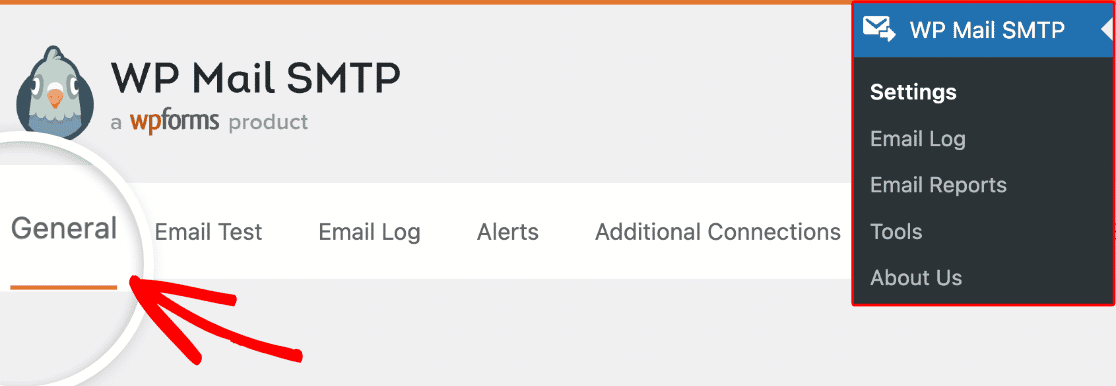
To enable network-wide settings, open your Network Admin dashboard and go to WP Mail SMTP » Settings. Then select the checkbox next to Make the settings gobal network-wide.

Save your changes. This will make all of the plugin’s settings available, and when you save them they will be applied to each subsite in your network.
Additionally, the WP Mail SMTP settings will be removed from your subsites’ dashboards so Site Admins cannot change them.
Note: If you do not turn on global settings for WP Mail SMTP, you or your Site Admins will need to configure the plugin’s setting for each subsite.
Verifying Your WP Mail SMTP License Key in Multisite
Once you’ve turned on global settings for WP Mail SMTP, follow our tutorial to verify your license key.
When you verify your license at the network level, your multisite installation will only count once towards your site limit, regardless of how many subsites you have.
To see how many sites your license allows, check your WP Mail SMTP account or look at our pricing page.
Configuring a WP Mail SMTP Mailer in Multisite
To configure the rest of your network settings for WP Mail SMTP, you will need to choose and set up a mailer.
See our complete list of WP Mail SMTP mailers for the options available and for step-by-step guides to configuring the settings for each of them.
The steps for setting up our mailers in multisite are the same as those for configuring a mailer on a normal WordPress installation. However, keep in mind that options such as forcing the from email and from name will apply across your entire network.
Viewing Email Logs and Reports for Your Multisite Network
In order to give Super Admins an overview of email activity for their networks, WP Mail SMTP enables you to view email logs and reports for each of your subsites from your Network Admin dashboard.
You’ll be able to view your subsites’ logs regardless of whether you’ve configured WP Mail SMTP using global settings or if you’ve allowed Site Admins to set up the plugin for their subsites.
First, you’ll need to turn on email logs in your Network Admin dashboard. Go to WP Mail SMTP » Email Log and click the Enable Email Log button.

Note: For more details on how to enable and set up email logs, please see our full tutorial.
This will reveal some additional settings for you to configure. Once you’ve saved your preferences, WP Mail SMTP will start logging the emails sent from your network.
Note: The Webhooks Status setting is not available for use on multisite installations due to subscription limitations. See the FAQ section below for more details.
On the Email Log screen, you’ll see a list of every email sent from your network’s primary site. Use the dropdown in the top right corner of the screen to switch to any subsite and view email logs for that site.

Any changes you make to your email logs in the Network Admin dashboard will update in the dashboard of the subsite as well.
Email reports work the same way. To view reports for your subsites, go to WP Mail SMTP » Email Reports and use the dropdown in the top right corner to switch between sites in your network.

Note: Want more information on email reports in WP Mail SMTP? Check out our guide to email reports for all the details.
Exporting Email Logs for Your Multisite Network
If you need to export email logs for a particular subsite, you can easily do so from your Network Admin dashboard.
Go to WP Mail SMTP » Tools and click on the Export tab.

Then select the subsite whose logs you want to export from the dropdown in the top right corner of the screen.

Once you’ve customized your export file to suit your preferences, click the Download Export File button.
Using WP Mail SMTP on a Single Site in Your Network
In most cases, using WP Mail SMTP at the network level will be the most effective solution for improving email delivery for all of your subsites.
However, if you only send emails from one subsite, or want to enable Site Admins to use their own WP Mail SMTP licenses instead of sharing yours across your network, you can activate and use our plugin on an individual subsite instead.
Note: Although you can activate WP Mail SMTP and verify license keys for subsites separately, you must still install the plugin in your Network Admin dashboard.
Activating WP Mail SMTP on a Subsite
Before you can activate WP Mail SMTP on a single subsite, you must turn off global settings and deactivate it at the network level.
To do so, go to WP Mail SMTP » Settings in your Network Admin dashboard and make sure the checkbox next to Make the plugin settings global network-wide is deselected.

Save your changes (if any).
Next, open the Plugins screen in your Network Admin dashboard and click on Network Deactivate under WP Mail SMTP.

Then navigate to the dashboard of the subsite you want to use WP Mail SMTP on. Hover over My Sites in the WordPress toolbar, then select the name of the relevant subsite and click on Dashboard.

In the sidebar menu, click on Plugins. Then click on Activate under WP Mail SMTP.

The Site Admin for the subsite you’ve activated the plugin on will then be able to configure its settings in their dashboard. However, they will not be able to deactivate or delete WP Mail SMTP.
Allowing Site Admins to Access the Plugins Screen
Instead of activating WP Mail SMTP on a subsite yourself, you can enable the Site Admin to do it by giving them access to the Plugins screen.
To do so, open your Network Admin dashboard. Then click on Settings in the sidebar menu on the left side of the screen and scroll down to the section labeled Menu Settings.

Under Enable administration menus, check the box next to Plugins and save your settings.

Once your changes are saved, Site Admins will be able to access the Plugins screen in their subsite dashboards like they would on a normal WordPress site. They’ll be able to activate and deactivate WP Mail SMTP, although they still won’t be able to install or delete plugins.
Configuring WP Mail SMTP Settings for a Subsite
To configure the settings for an individual subsite, open its dashboard by selecting it from the list that appears when you hover over My Sites in the WordPress toolbar.
Then go to WP Mail SMTP » Settings.
Note: If you activated WP Mail SMTP at the network level and enabled global settings, the settings menu for WP Mail SMTP will not be visible in the dashboards of individual subsites. Turn global settings off if you would like to configure settings separately for each subsite.
Verifying Your WP Mail SMTP License on a Subsite
To verify your WP Mail SMTP license on a subsite, follow our tutorial on this process in the subsite’s dashboard.
It’s important to note that each individual subsite you activate your license key on counts towards your license’s site limit. To check how many sites you’re allowed, look in your account dashboard or see our pricing page.
Note: Although Site Admins can also verify your license in their dashboards once WP Mail SMTP is activated, we recommend that the Super Admin verify their license key for each subsite.
Sharing your WP Mail SMTP account credentials or license key(s) with others goes against security best practices.
Configuring a WP Mail SMTP Mailer on a Subsite
Once you verify your license on a subsite, you or the Site Admin can configure your mailer of choice. It will only be used to send emails from the subsite you set it up on.
See our complete list of available mailers for details about each option as well as links to step-by-step instructions on how to set them up.
Frequently Asked Questions
These are some of the top questions about using WP Mail SMTP with WordPress multisite.
Why doesn’t the Email Logging Webhooks Status setting work for multisite?
The mailers that use webhooks to verify email delivery have limitations on the number of webhooks subscriptions you can add to your account.
Enabling webhooks for multisite would cause you to reach this limit very quickly, as each subsite would have its own connection. To prevent this, we’ve disabled the Webhooks Status setting for multisite installations.
Instead, email delivery will be verified using Action Scheduler.
That’s it! Now you know how to use WP Mail SMTP to improve email delivery for your entire multisite network.
Next, would you like to learn how you and your Site Admins can monitor the emails sent from your network’s subsites? Check out our tutorial on how to view email reports in WP Mail SMTP.