Are you interested in automating your email-related workflows with WP Mail SMTP? With Uncanny Automator, you can create ‘recipes’ which are simple rules that take care of tasks automatically. This could involve adding users to a list when they open an email, queuing reminders for the sales team, tagging users in campaigns, and much more.
This tutorial will show you how to set up and use Uncanny Automator with WP Mail SMTP.
In This Article
What Is Uncanny Automator?
Uncanny Automator is a WordPress plugin that lets you automate and simplify workflows on your website through the use of ‘triggers’ and ‘actions’.
Consider the following scenario: you set up the opening of a WordPress email as a trigger, and the corresponding action is to receive a Slack notification. This means that every time an email sent through WordPress is opened, you automatically get notified in Slack. This can be extremely valuable in situations like monitoring a subscription or order cancellation email.
This is just one of the nearly endless workflows, or ‘recipes’, you can create with Uncanny Automator. It’s capable of connecting different WordPress plugins and facilitating interactions between your site and various third-party services and applications.
Installing Uncanny Automator
The free version of Uncanny Automator is available to download from the WordPress Plugin Directory. However, it has some limitations as to which integrations and actions you can use.
To access more options, you’ll need to upgrade to a paid license. Visit Uncanny Automator’s Pricing page for details.
Creating an Uncanny Automator Recipe
Before getting started, you’ll need to ensure WP Mail SMTP is installed and activated on your WordPress site and that you’ve verified your license.
After you’ve installed the plugins, click on Automator » Add New in your WordPress sidebar menu.
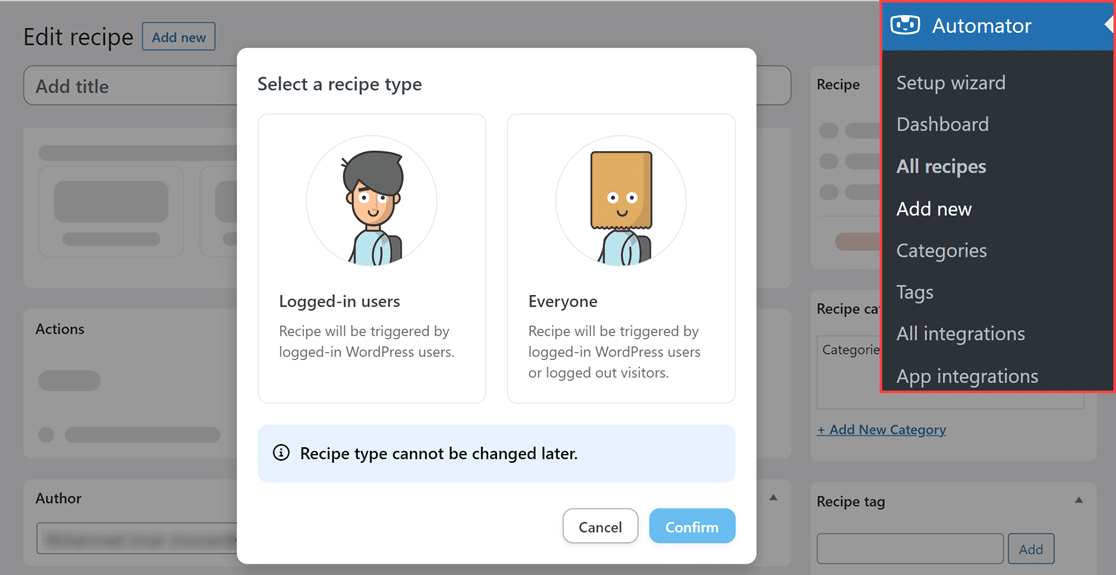
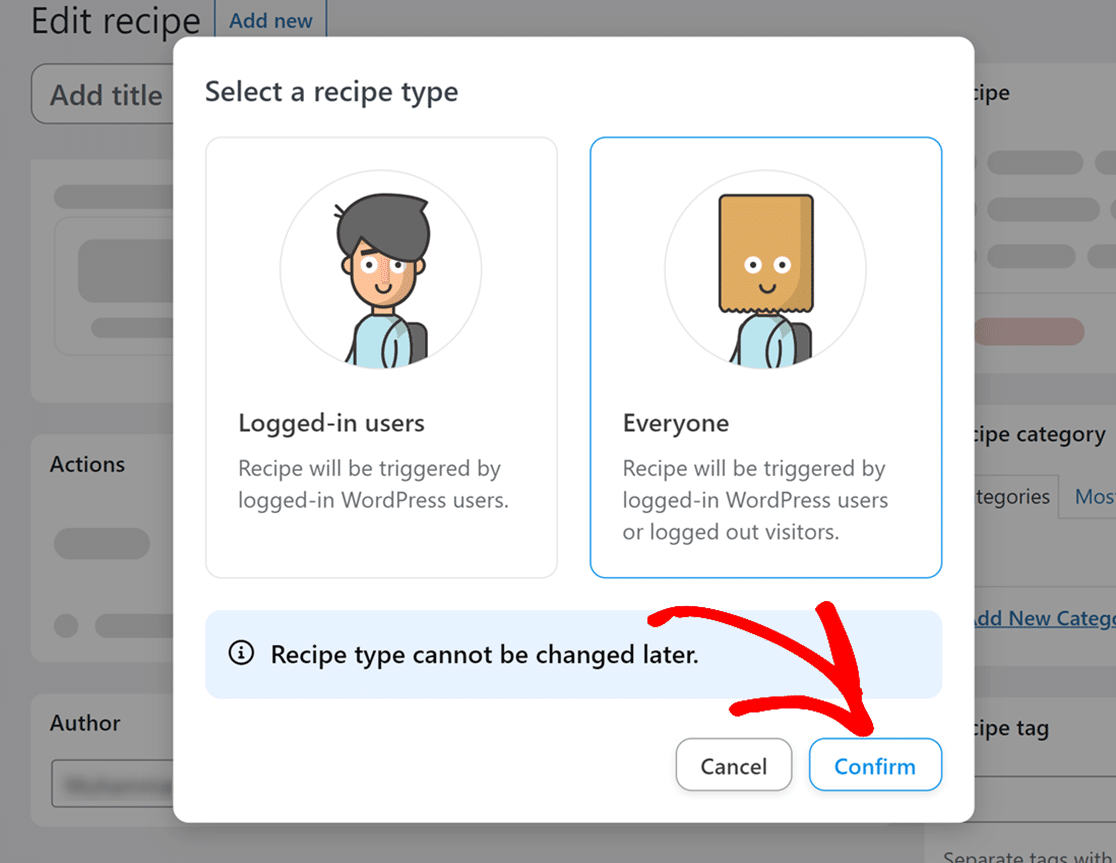
Then, select Everyone from the Select a recipe type popup and click on the Confirm button to proceed.
Next, start creating your recipe by naming it with a title that you’ll easily remember. This will help you know which action it performs, at a glance.
Setting Up the Trigger
Setting up the trigger is the first essential step in the automation process. For our example, we’ll select WP Mail SMTP Pro as the trigger plugin so we can automate an action when your WordPress emails are opened.
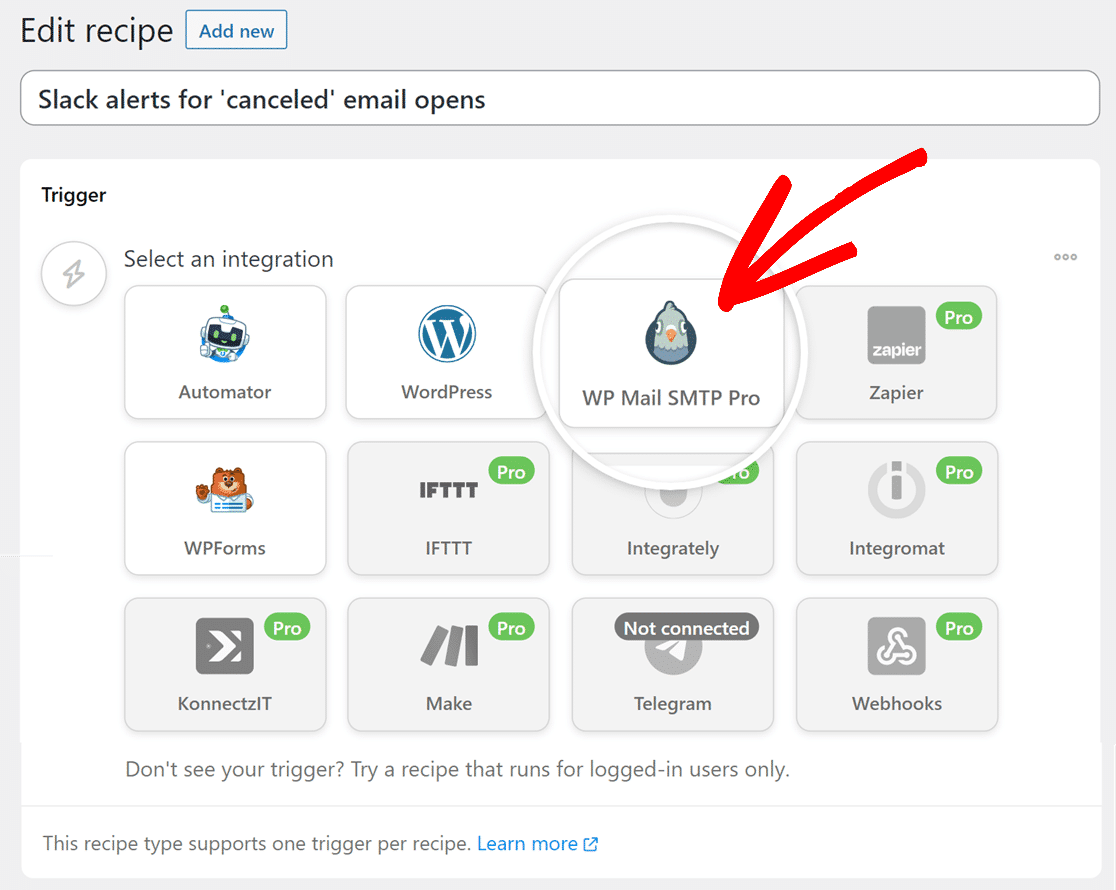
Selecting WP Mail SMTP Pro will open a new set of options where you can select different types of triggers depending on what you need for your workflow.
For our example, we’re going to select the An email with specific text in the subject line is opened trigger.
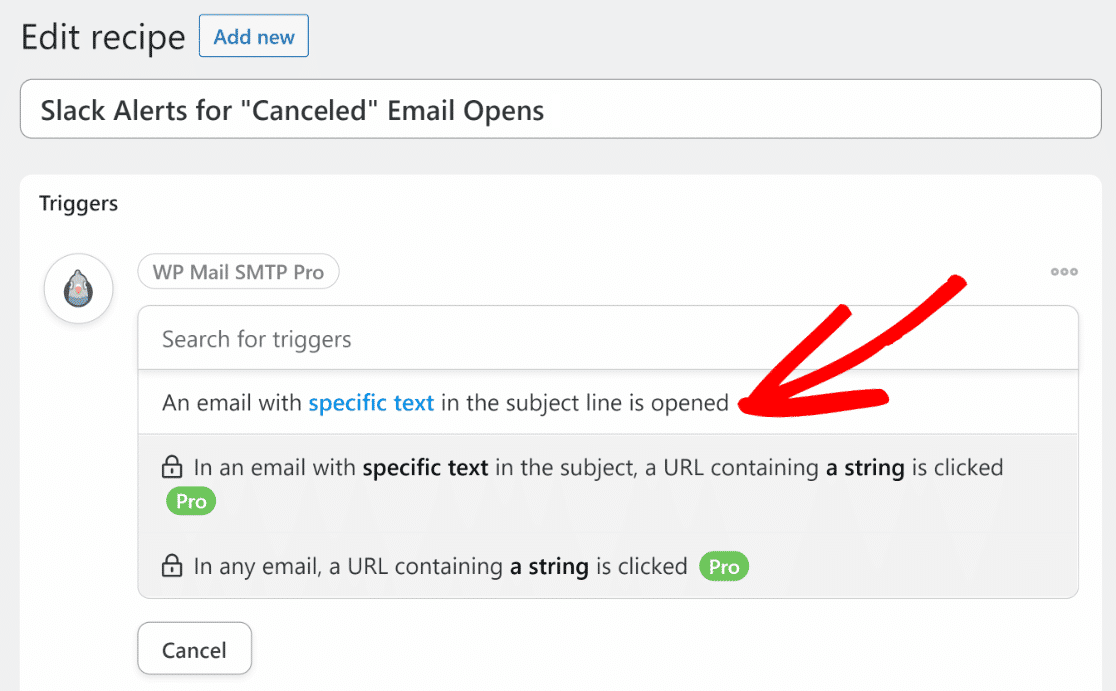
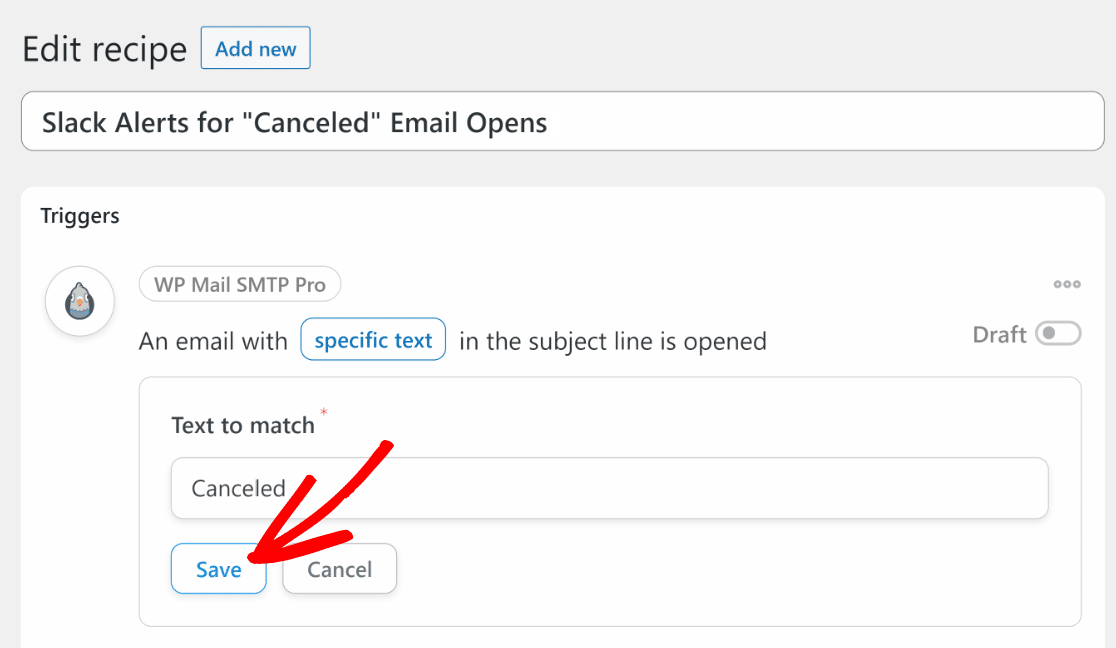
After selecting the trigger, you’ll see the Text to match field. Here, enter the exact subject line of emails that, when opened, should send a Slack notification.
For our example, we’ll enter the word ‘canceled’. This way we’d get a Slack alert whenever a user opens an email with this word in the subject line. Be sure to save your trigger once you’re done making changes to it.
Connecting Slack with Uncanny Automator
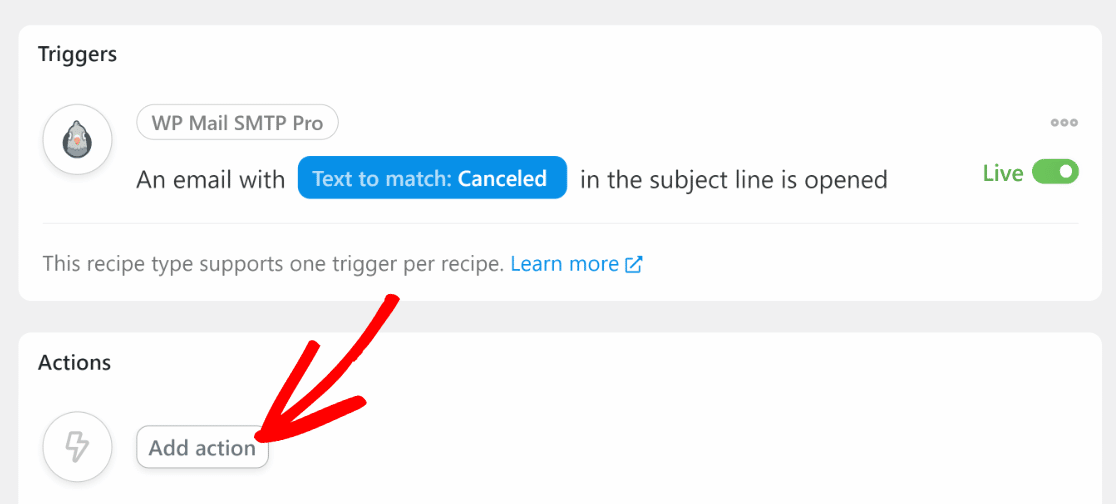
In the Actions section, click on Add action to get started.
Next, you can choose from the apps, services, and plugins that Uncanny Automator enables you to connect WP Mail SMTP to. For our example, we’ll use Slack.
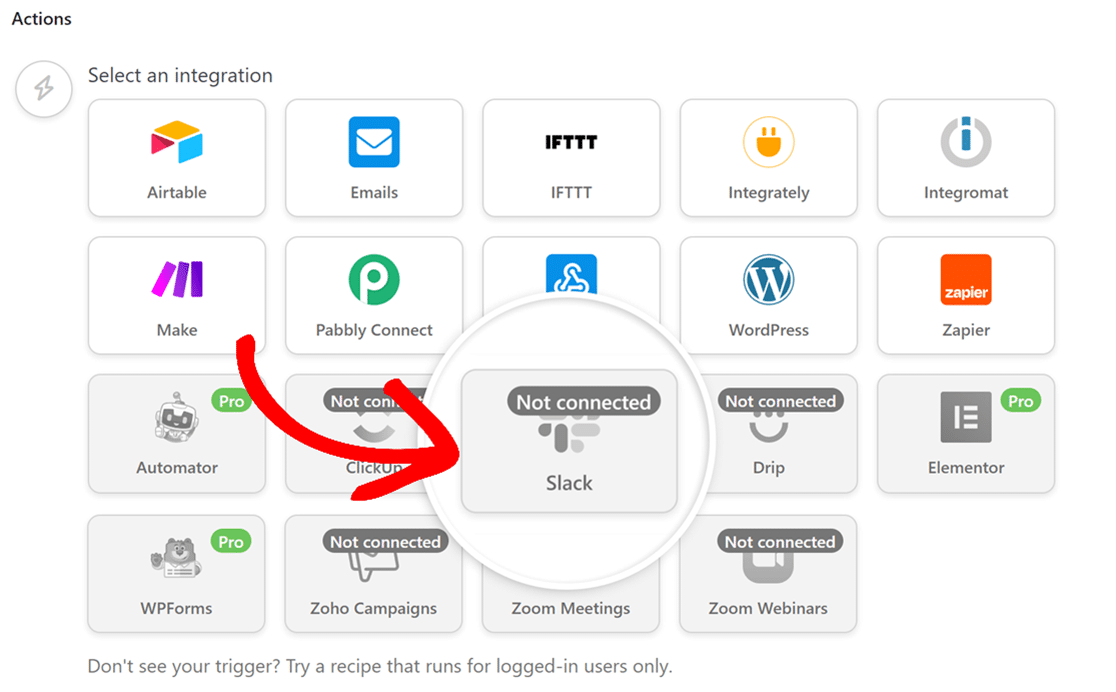
Note: If you’re using Uncanny Automator for the first time, you’ll need to create an account before connecting with Slack.
Once you select Slack, a popup will open, prompting you to sign up for an Uncanny Automator account. Click on Sign up to proceed.
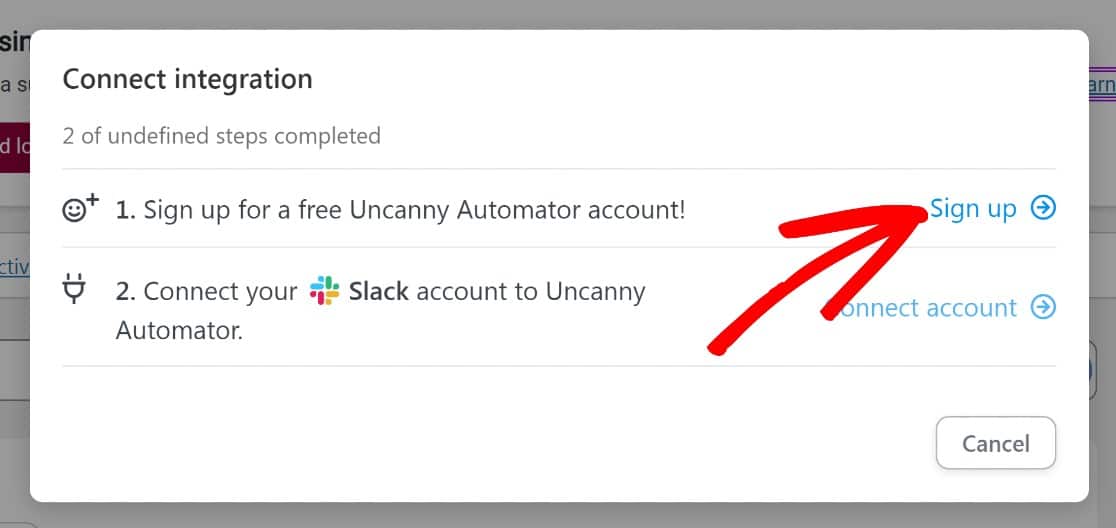
Follow the on-screen instructions to create your account. When you’re done, return to your website and click on the Connect account button to proceed.
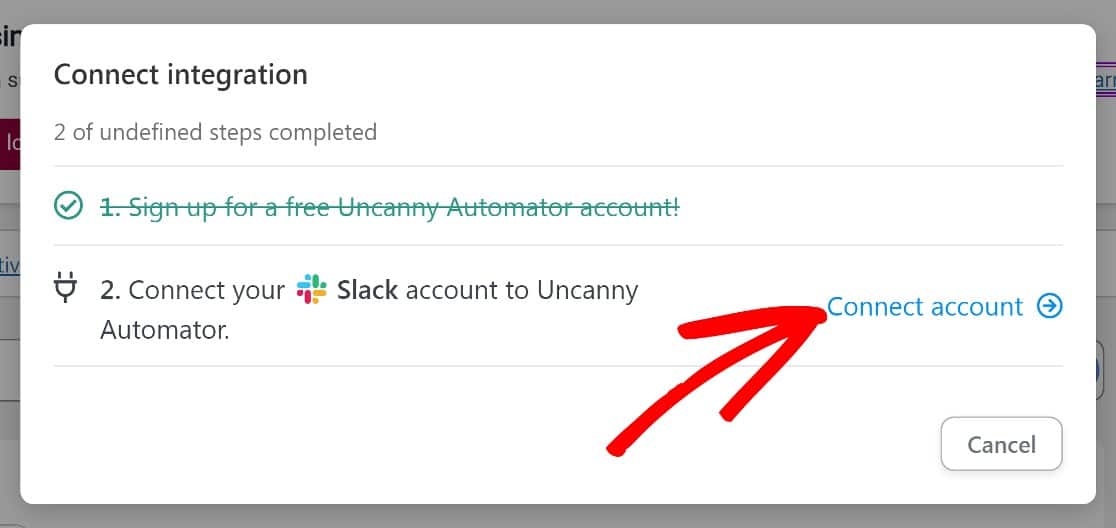
This will open another popup. Click on the Connect Slack workspace button on the bottom to continue.
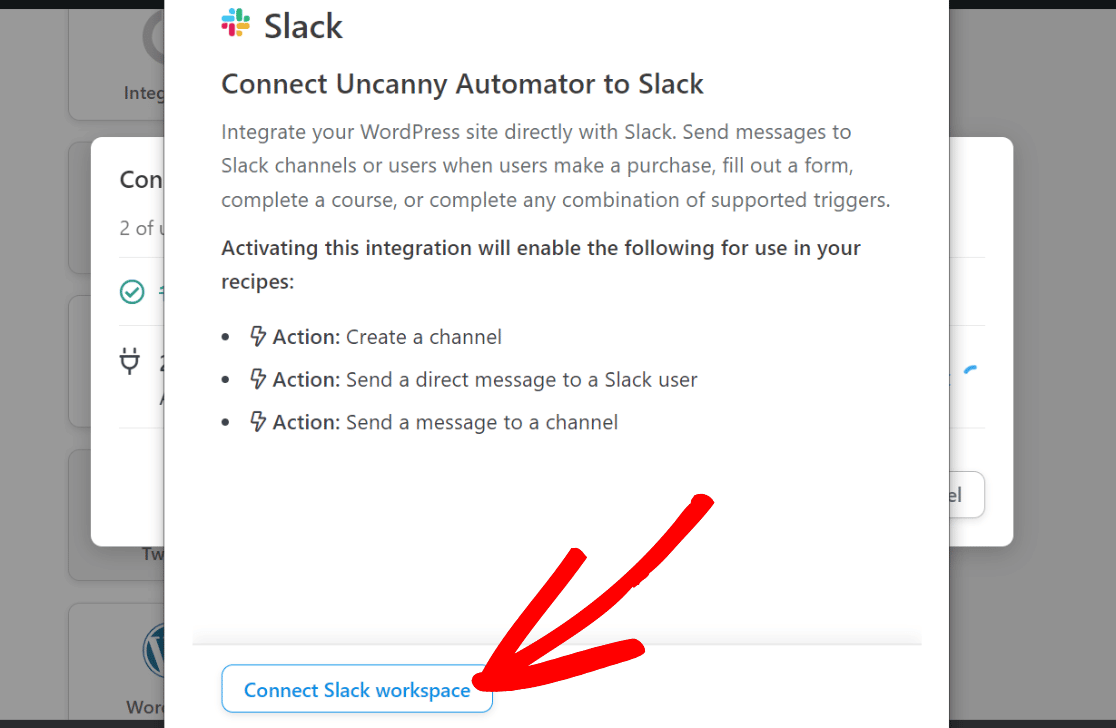
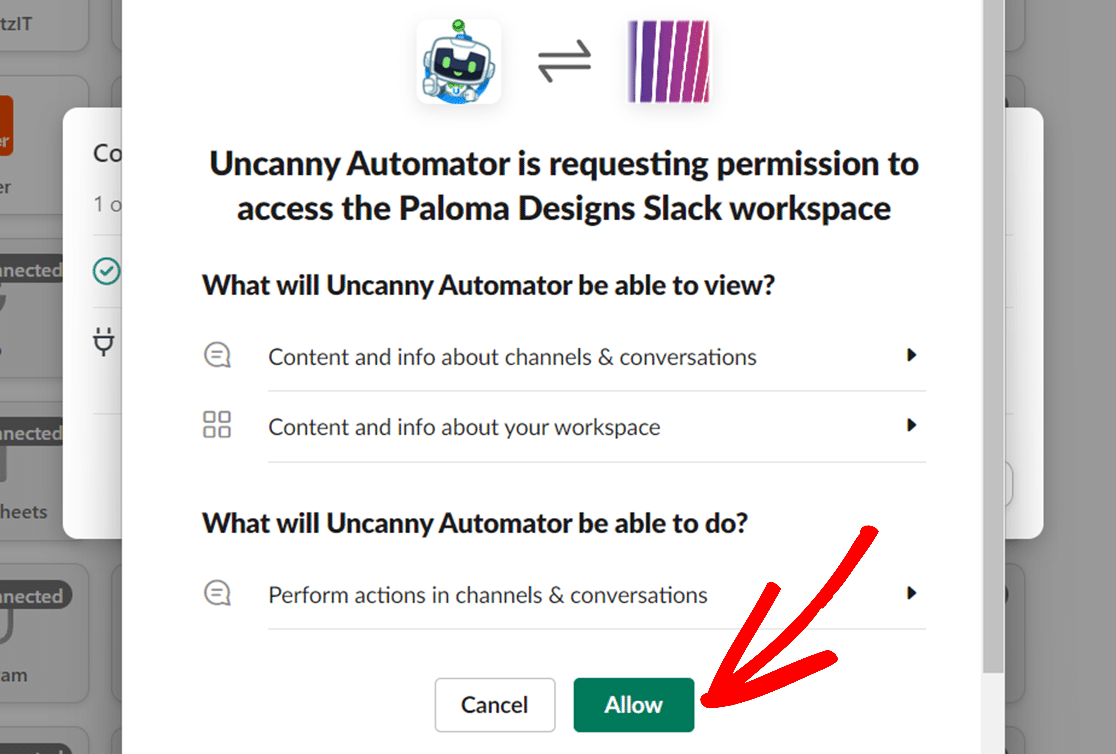
Uncanny Automator will require permission to access your Slack workspace. Click Allow to proceed.
A confirmation should appear, displaying a preview of the Uncanny Automator bot in your Slack workspace. You have the option to modify the bot’s name and icon or keep the default settings.
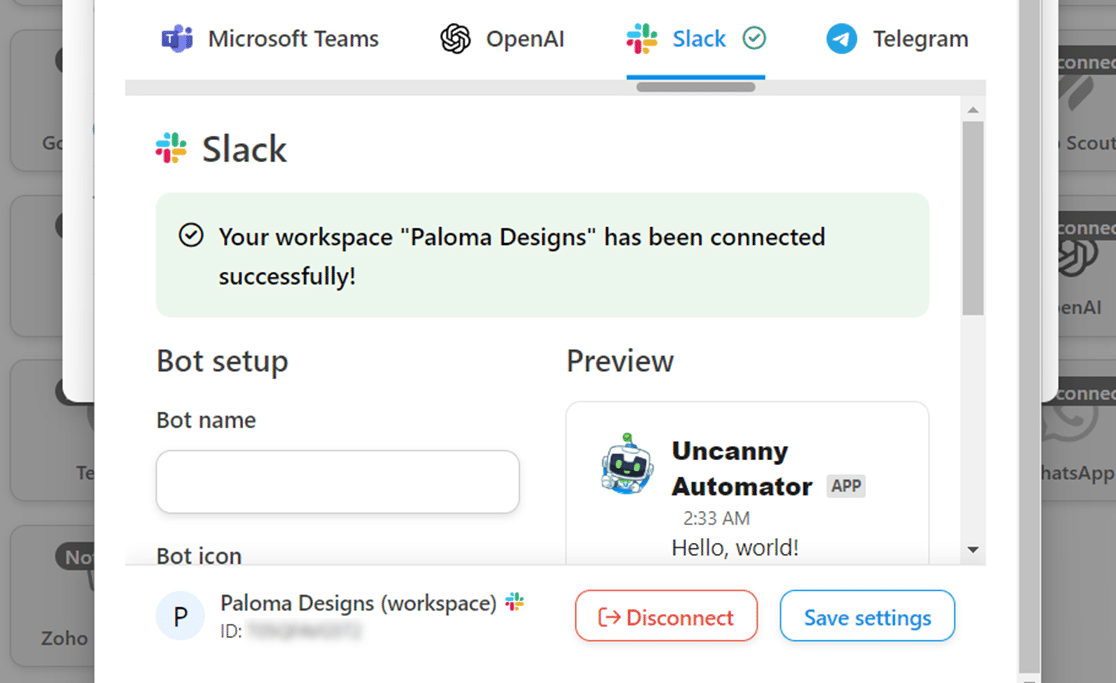
Close this popup to finish the Slack connection process. You can now select the action that you’d like Slack to perform, which we’ll cover in the next section.
Setting Up the Action
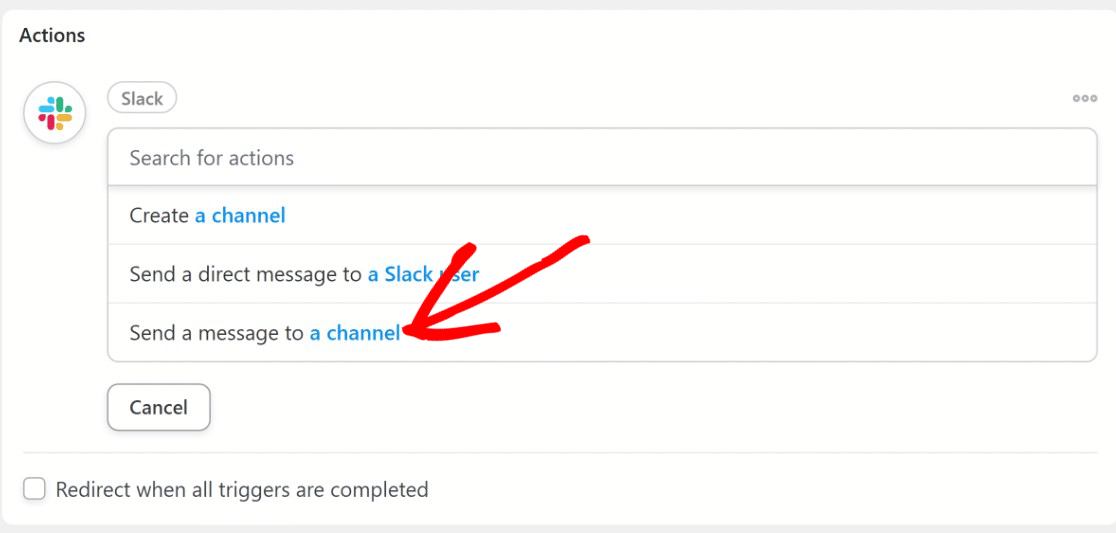
For our example, we’ll select the Send a message to a channel action. This will ensure a Slack notification is received whenever a user opens a WordPress email matching a specific text in the subject line.
Next, select a Slack channel where you want to receive the email open alerts from the Slack Channel dropdown.
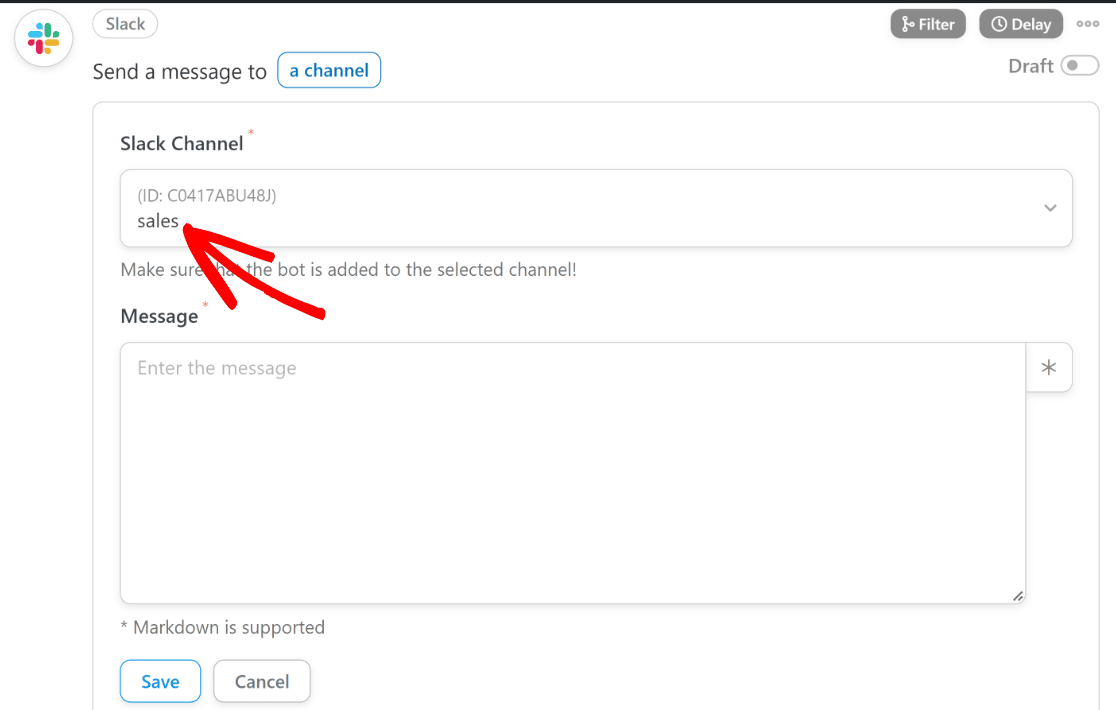
Then, in the Message field, enter the message you’d like the Slack notification to contain.
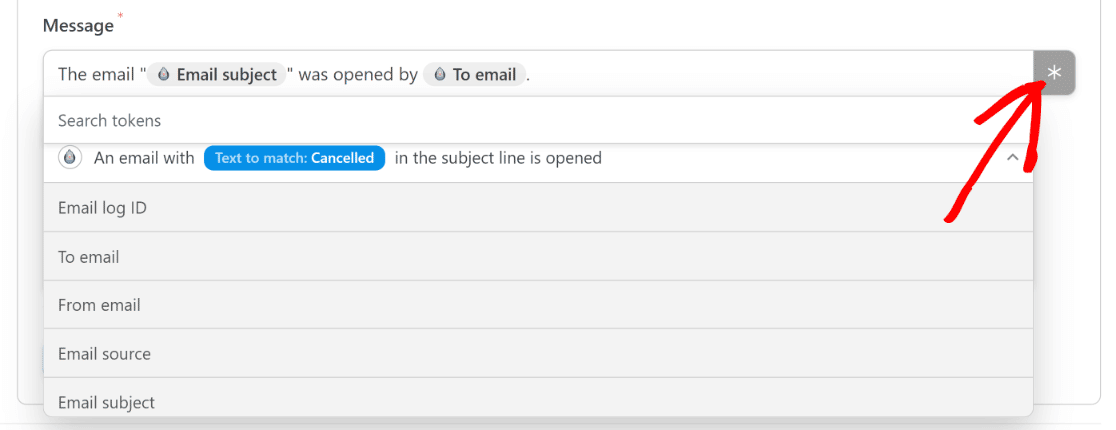
You can also add more information to the notifications by pulling details from the email that sets off the alert. To do this, click the Asterisk (*) button and use search tokens as needed.
For our example, we’ll use ‘Email subject’ and ‘To email’ tokens. This way, every Slack alert will contain the topic of the email and who it was sent to.
In the next step, we’ll add the Uncanny Automator bot to the Slack channel where we want to receive the notifications.
Adding Uncanny Automator Bot to Slack
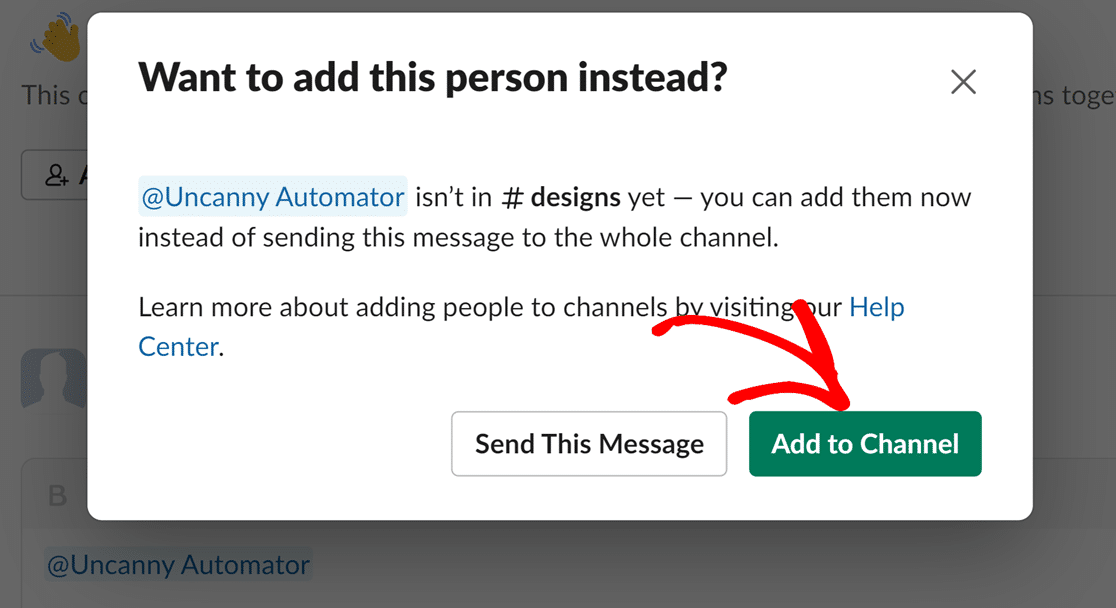
To add the Uncanny Automator bot, navigate to the Slack channel, type ‘@uncannyautomator’, and select Uncanny Automator from the popup. Then press enter to add it to your channel.

You should now see a message asking if you’d like to add Uncanny Automator to your channel. Click on Add to Channel.
Making Your Uncanny Automator Recipe Live
Once you’ve set up both the trigger and the action, you’ll need to activate your recipe. To do so, switch on the toggle button in the Recipe section to the Live position.

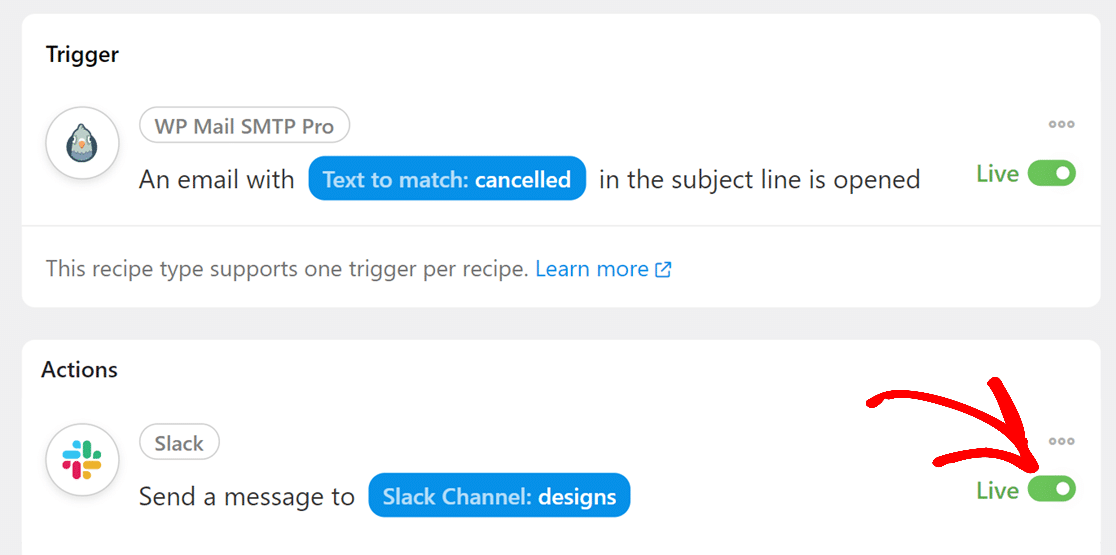
Also, ensure that both your trigger and action(s) are live using the toggle buttons next to each section.
That’s it! Now you know how to set up Uncanny Automator with WP Mail SMTP.
Next, would you like to view detailed reports of emails sent from your WordPress site? With Email Reports, you can easily keep track of how your emails are performing on your site.
