AI Summary
Would you like a step-by-step walkthrough to help you configure your WP Mail SMTP mailer? Our Setup Wizard makes configuring a mailer on your site fast and easy.
This tutorial will show you how to use the WP Mail SMTP Setup Wizard.
Before getting started, be sure you’ve installed and activated the WP Mail SMTP plugin.
1. Launching the Setup Wizard
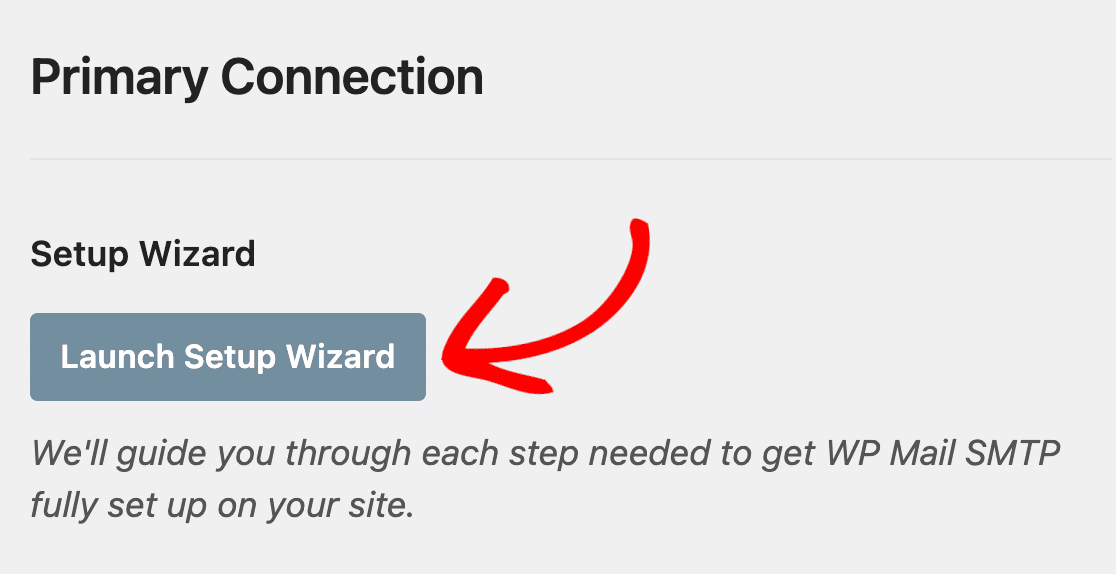
To begin, you’ll need to launch the Setup Wizard from the WordPress dashboard by navigating to WP Mail SMTP » Settings.

Then click on Launch Setup Wizard below the Primary Connection section.
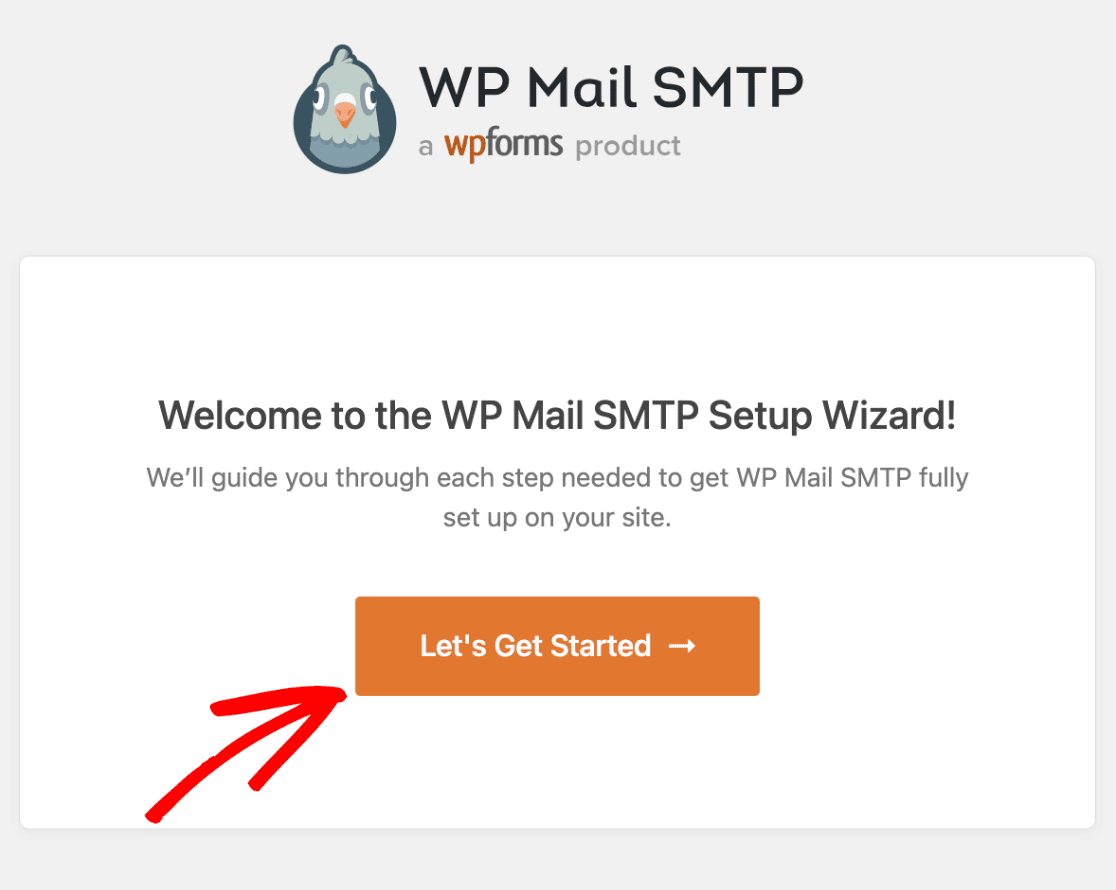
Once the Wizard has launched, click the Let’s Get Started button to begin the setup process.
2. Choosing a Mailer
The first step of the setup process will ask you to choose which mailer you’d like to configure. If you’re not sure which mailer is the best fit for your site, be sure to check out our complete guide to WP Mail SMTP’s mailers for an overview of each mailer.
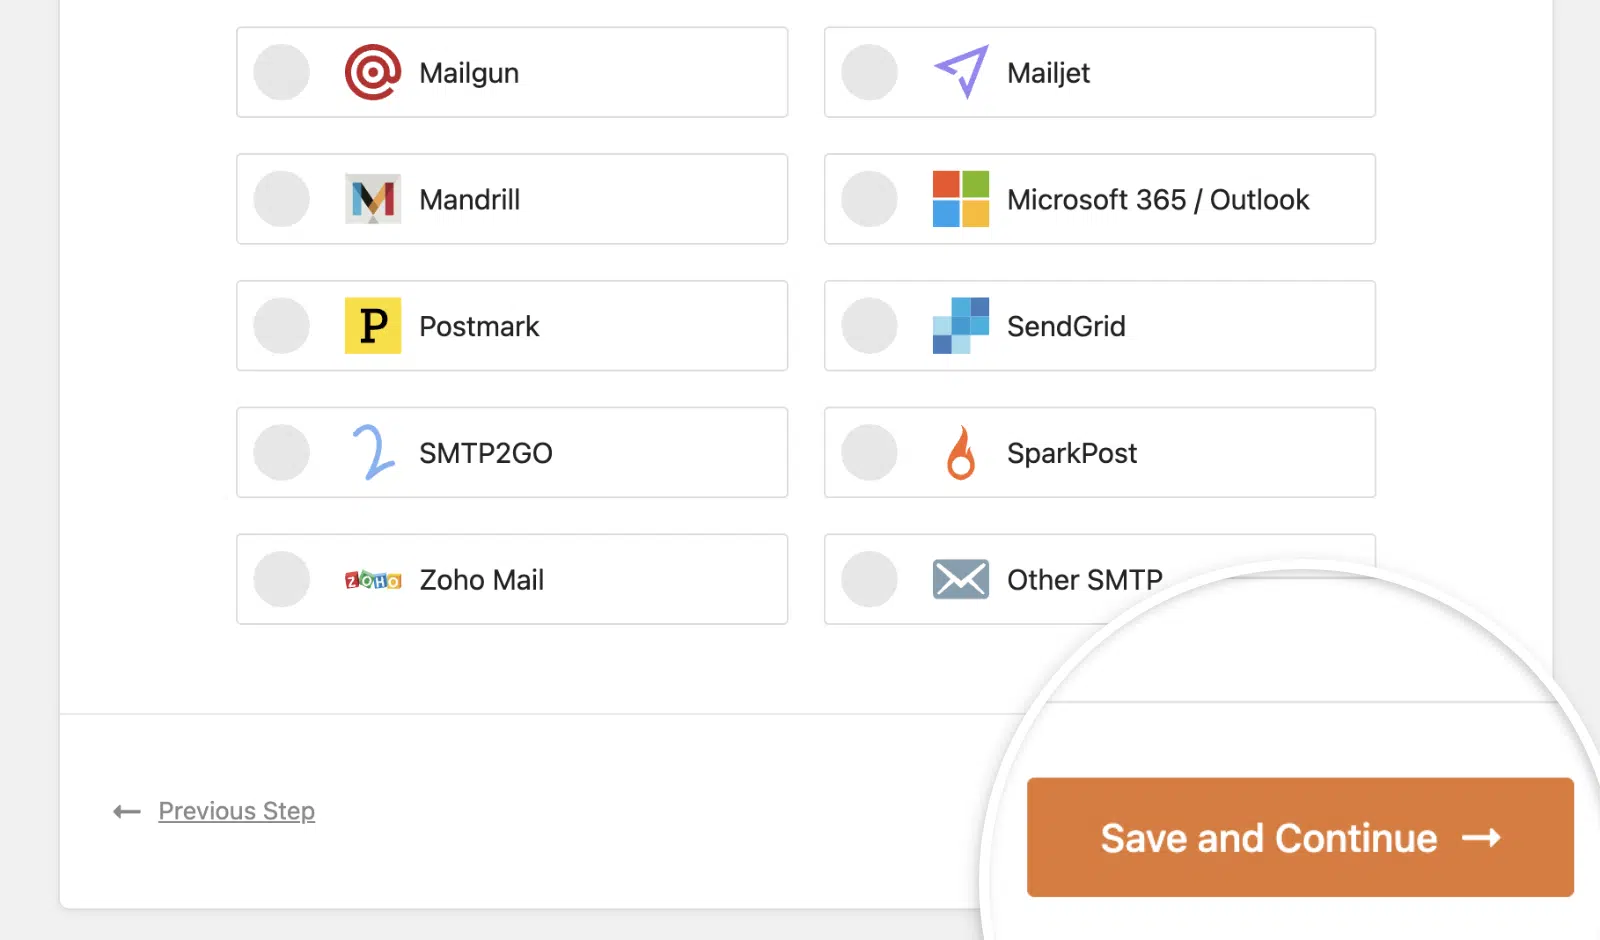
Click on the mailer you’d like to use to select it.
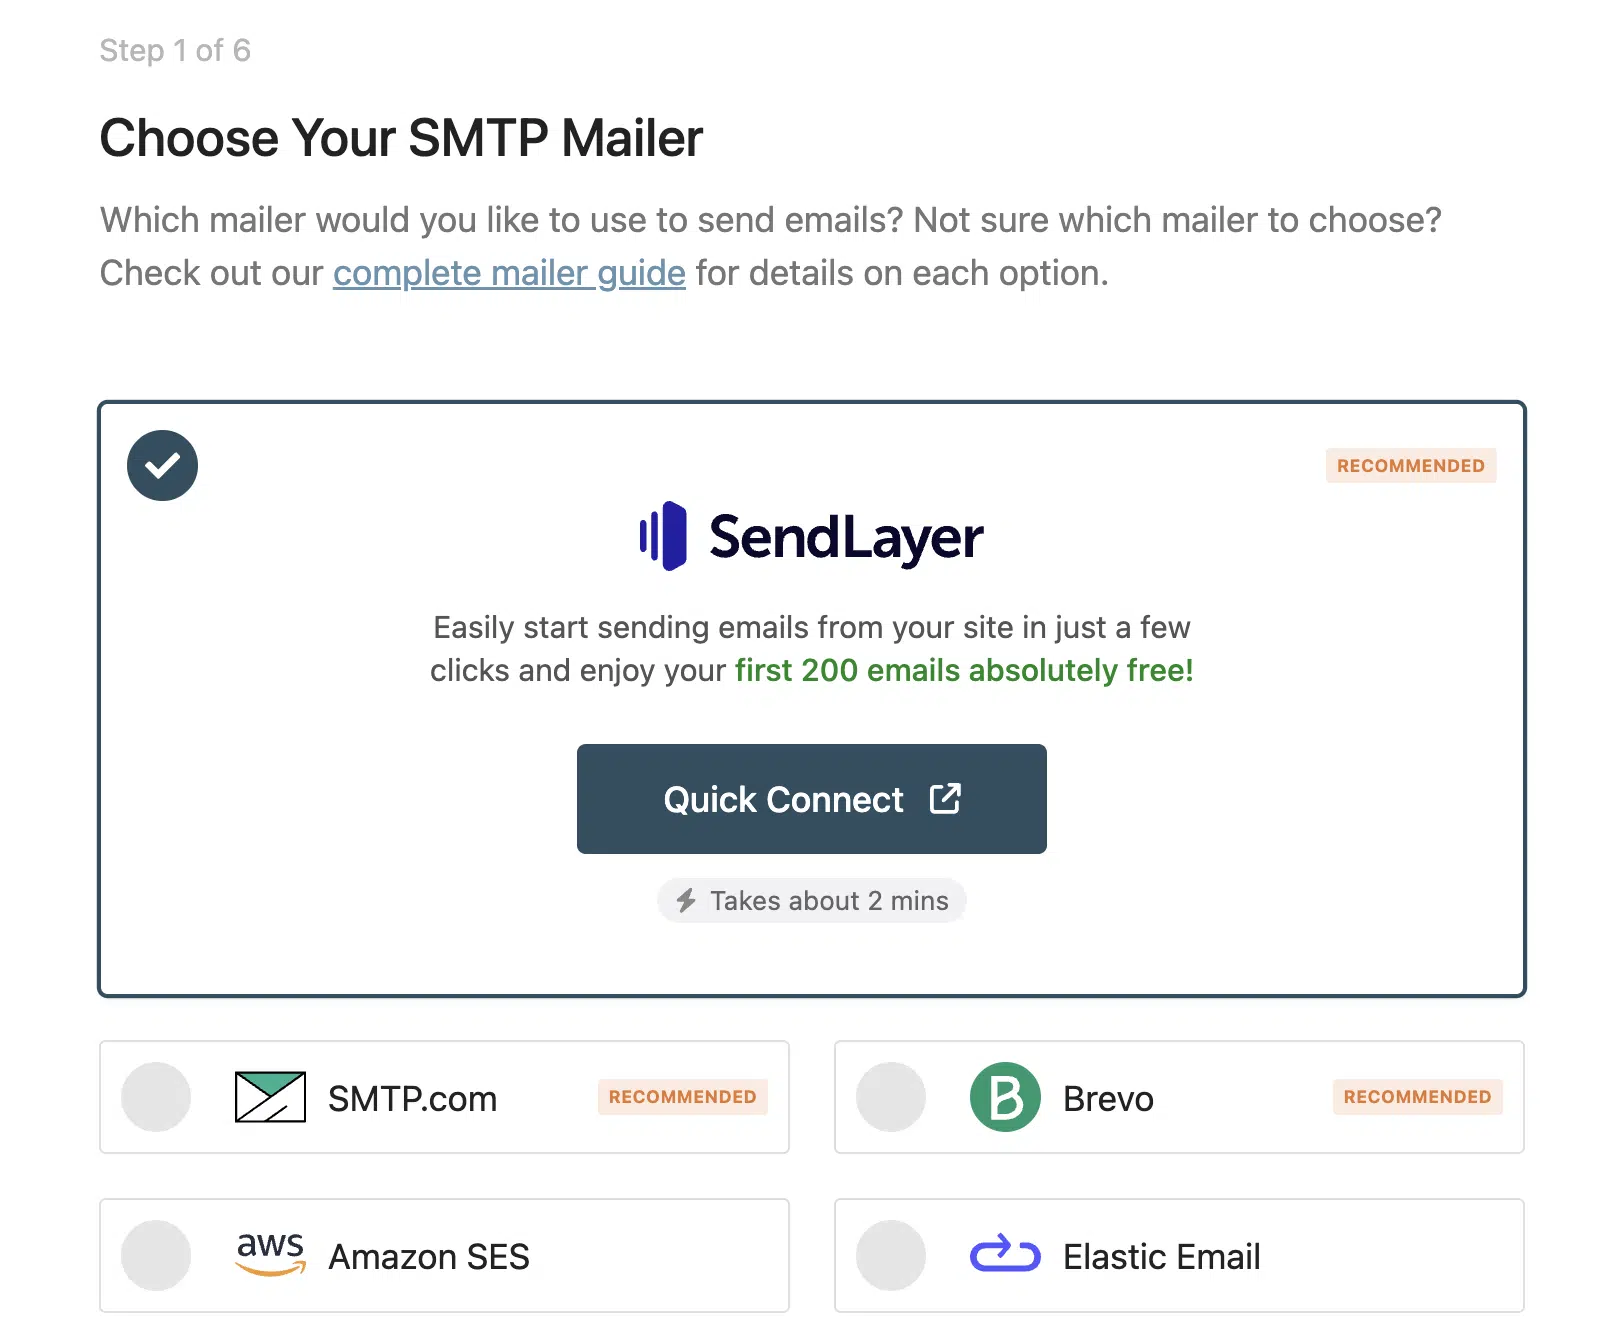
Once you’ve made your choice, click the Save and Continue button to move on to the next step.
3. Configuring Mailer Settings
After you’ve selected a mailer, you’ll need to configure its settings. This process will look slightly different for each mailer. If you need additional guidance, you can find a link to a full walkthrough for your chosen mailer in this step as well.

Below, we’ve covered the settings you may have to fill out to configure your mailer.
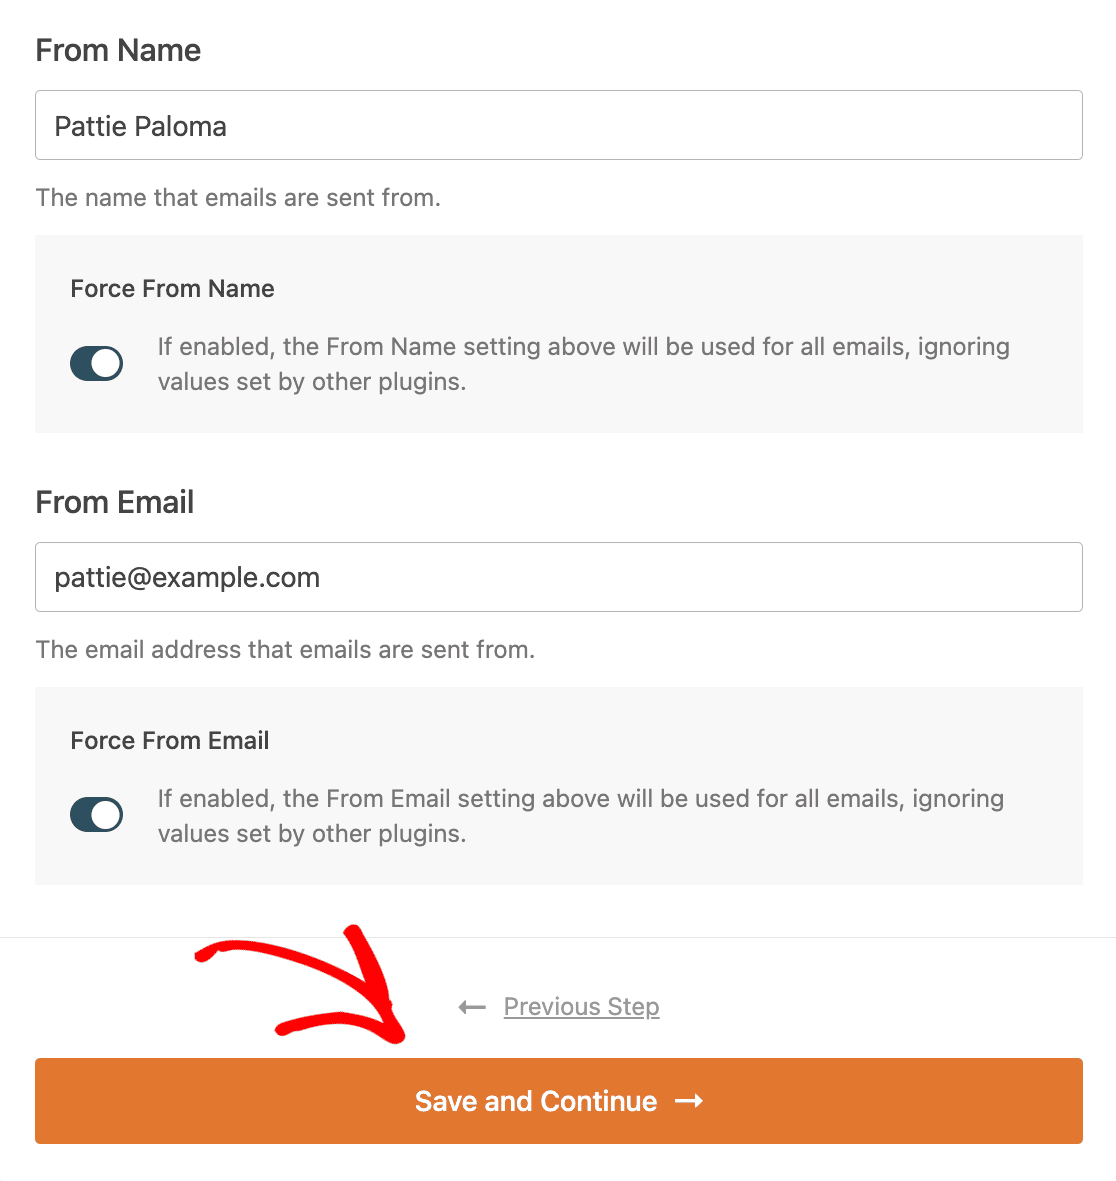
From Name
This is the name that will be listed as the sender of all emails sent from your site. By default, it will be your website’s name. However, you can change it to any text you’d like.
You can also choose to enable the Force From Name option to apply this name to all emails site-wide.
The following mailers require a From Name:
- SendLayer
- SMTP.com
- Brevo (Sendinblue)
- Amazon SES
- Elastic Email
- MailerSend
- Mailgun
- Mailjet
- Mandrill
- Postmark
- SendGrid
- SMTP2GO
- SparkPost
- Zoho Mail
- Other SMTP
From Email
The From Email is the email address that all of your site’s emails will appear to be sent from. In many cases, this must be an email address at your domain (i.e., [email protected]).
We strongly recommend also enabling the option labeled Force From Email. This will save you the trouble of editing the From Email settings throughout your site (in all settings where email could be sent from) and ensure that all of your site’s emails are authenticated.
The following mailers require a From Email:
- SendLayer
- SMTP.com
- Brevo (Sendinblue)
- Amazon SES
- Elastic Email
- MailerSend
- Mailgun
- Mailjet
- Mandrill
- Postmark
- SendGrid
- SMTP2GO
- SparkPost
- Zoho Mail
- Other SMTP
API Key
The API Key field is where you’ll need to enter the API Key generated in your mailer account. This enables your website to communicate with your mailer. Copy your API Key from your account and paste it into the field provided in the Setup Wizard.
The following mailers require an API Key:
Region
Some mailers have servers located in multiple regions around the world. You may need to indicate which region your server is in to complete the setup of your mailer. You’ll find this information in your mailer account.
The following mailers require you to select a region:
Authorization
Certain mailers will require you to click a button authorizing your site to connect to your mailer account. After clicking this button, you may also have to log in to your mailer account.
The following mailers require you to authorize your connection:
Redirect URI or Authorized Redirect URL
This value is provided by WP Mail SMTP. You’ll need to copy it into the application you create in your mailer account.
The following mailers require an Authorized Redirect URL or Redirect URI:
Sending Domain
This is an optional setting that enables WP Mail SMTP to check for domain-side errors when you send test emails from your site. You should enter the domain you authorized in your mailer account in the field provided in the Setup Wizard.
The following mailers require a Sending Domain:
Client ID and Client Secret
Similar to an API Key, your Client ID and Client Secret are credentials that let your website communicate with your mailer. You will typically need to generate these credentials in your mailer account before you can add them to the Setup Wizard.
The following mailers require you to enter a Client ID and Client Secret:
Sender Name (SMTP.com Only)
The Sender Name is a value specific to each SMTP.com account. In order to find your Sender Name, open your Senders page in your SMTP.com account. Then copy this value into the Setup Wizard, making sure there are no extra spaces.
Access Key ID and Secret Access Key (Amazon SES Only)
Much like an API Key, your Amazon SES Access Key ID and Secret Access Key are unique credentials you’ll need to generate in your Amazon SES account. Then you’ll enter them in the Setup Wizard to enable your website to communicate with your Amazon SES account.
Secret Key (Mailjet Only)
Similar to the API Key, the Secret Key adds an extra layer of security. You’ll need to generate this key from your Mailjet account. Then paste it in the Secret Key field after entering your API key.
Domain Name (Mailgun Only)
When setting up your Mailgun account, you’ll need to create a subdomain to send your emails from. Enter this subdomain in the Domain Name field of the Setup Wizard.
Application ID and Application Password (Microsoft 365 / Outlook Only)
In order to use the Microsoft 365 / Outlook mailer, you’ll need to set up a Microsoft Azure application. Once you’ve done so, you’ll copy your Application ID and Application Password and paste them into the fields provided in the Setup Wizard.
Server API Token (Postmark Only)
Postmark uses a Server API Token to enable your website to communicate with your Postmark account. You’ll find this unique value in the details for your Postmark server. Paste it into the field provided in the Setup Wizard.
Message Stream ID (Postmark Only)
The Message Stream ID is an optional setting for the Postmark mailer. It enables you to separate different types of emails (such as marketing and transactional emails) to optimize deliverability.
You can copy your Message Stream ID from your Postmark server’s details page and paste it into the Setup Wizard.
Other SMTP Mailer Settings
If you are using the Other SMTP option, there are several unique settings you’ll need to enter in the Setup Wizard. These include:
- SMTP Host: The outgoing server listed in your email provider’s SMTP settings.
- Encryption: The type of encryption used for your SMTP connection (TLS, SSL, or none).
- SMTP Port: The port your provider uses for SMTP connections.
- Authentication: This option turns authentication on or off. Most providers require it to be on.
- SMTP Username: Your email address.
- SMTP Password: You’ll need to generate an app password for your account. See our Other SMTP setup tutorial for more details.
Once you’ve configured your mailer settings, click the Save and Continue button to move on to the next step.
4. Enabling Email Features
After you’ve configured your settings, the next step is to choose which email features you’d like to enable. These include:
- Improved Email Deliverability: By authenticating your emails through your chosen mailer, WP Mail SMTP ensures your site’s emails are sent successfully and reliably.
- Email Error Tracking: Easily spots errors causing delivery issues.
- Detailed Email Logs: Keeps records of every email that’s sent out from your website. See our tutorial on setting up email logging for more details.
- Complete Email Reports: Monitors email deliverability and performance. Email logs must be enabled to view reports. See our guide to using email reports to learn more.
- Weekly Email Summary: When enabled, this feature sends you an email each week with statistics about the emails you’ve sent. Email logs must be enabled to receive a weekly email summary.
- Instant Email Alerts: This feature sends you notifications via email, SMS, Slack, or webhook when emails fail to send. See our tutorial on setting up email alerts to learn more.
Note: Email logging is only available in the paid version of WP Mail SMTP.
By default, only Improved Email Deliverability and Email Error Tracking will be enabled. If you’d like to turn on other email features, click the circle next to that feature so it displays a checkmark.

To disable a feature, just click on the checkmark to the right of it. Improved Email Deliverability and Email Error Tracking cannot be turned off. When you’re ready to move on, click the Save and Continue button.

5. Configuring Email Logs
If you’ve enabled Detailed Email Logs in the previous step, you’ll need to select the features you’d like to include in the logs. If you didn’t enable Detailed Email Logs, feel free to skip to the next step in the setup process.
The available logging features include:
- Store the content for all sent emails: Enabling this option allows you to resend emails. Email content will be stored in your WordPress database, which can include sensitive data, passwords, and personal details.
- Save file attachments sent from WordPress: Saves all file attachments sent from your site to the WordPress Uploads folder.
- Track when an email is opened: Tracks which emails were opened by the recipients.
- Track when a link in an email is clicked: Tracks which links were clicked in emails sent from your WordPress site.
Go ahead and click the circle next to the logging features you’d like to enable. When you’re ready to proceed to the next step, click the Save and Continue button.
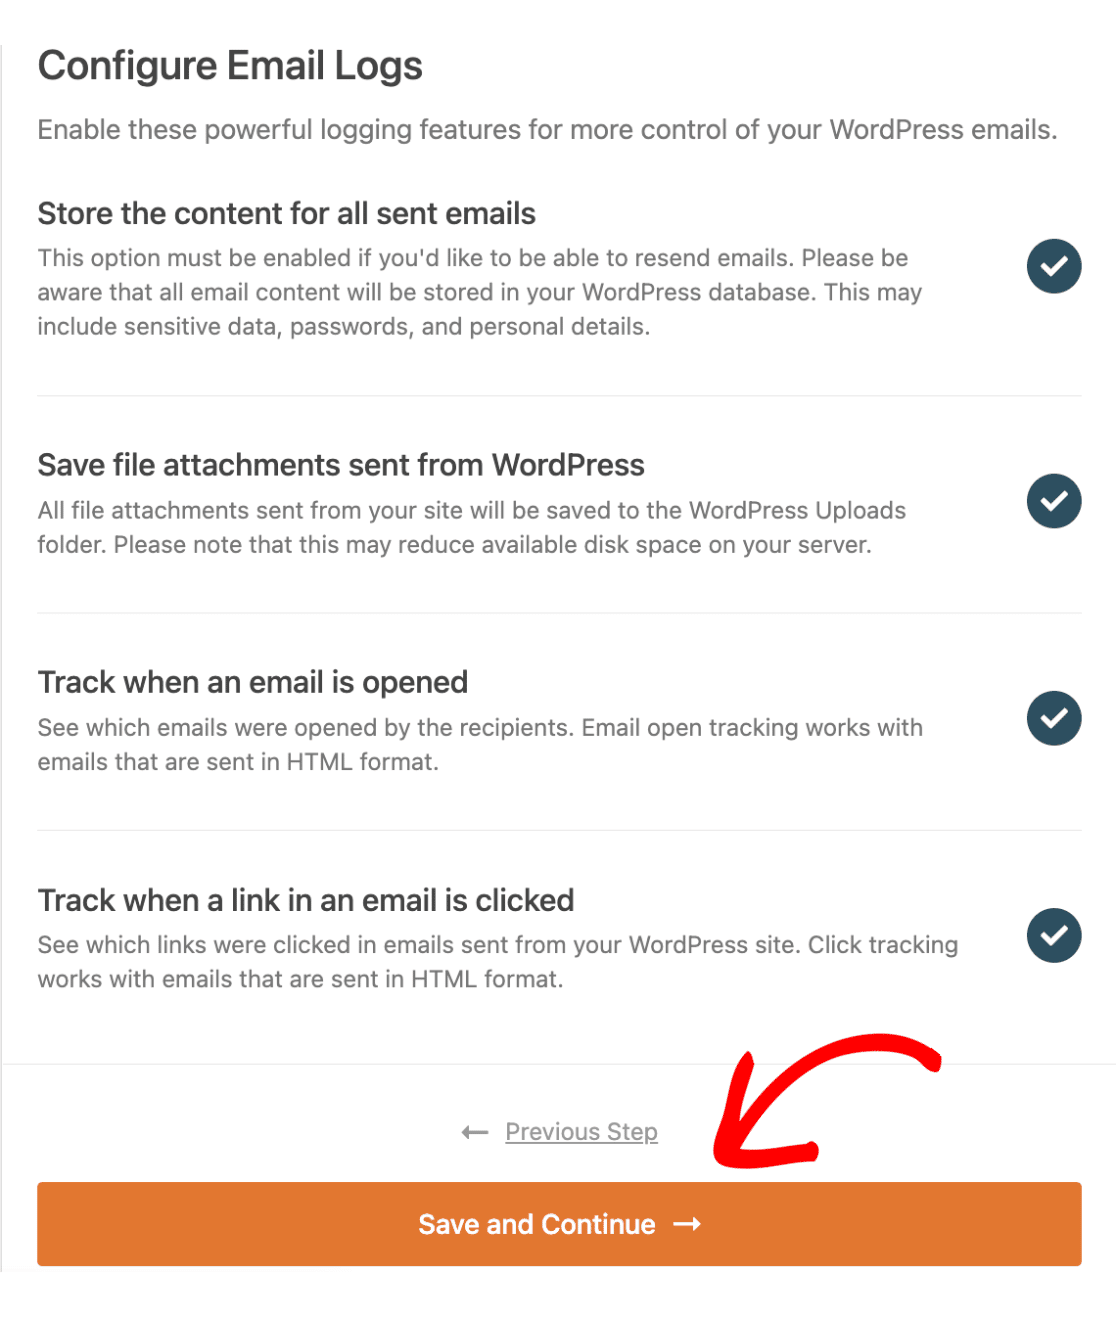
Note: You’ll need a paid WP Mail SMTP license to enable email logging. Be sure to check out our guide to setting up email logging for more details.
6. Entering Your WP Mail SMTP License Key
Once your email features are configured, you’ll then be prompted to insert your license key to unlock automatic plugin updates. If you have your license key on hand, you can paste it into this field and click the Verify License Key button to automatically activate your license.

Otherwise, you can click the Skip this Step button if you’d like to verify your key later.
7. Sending a Test Email
After you’ve set up your license key, WP Mail SMTP will automatically send a test email to confirm if your setup has been configured properly. If everything is working as expected, you’ll see a screen with the message, “Congrats, you’ve successfully set up WP Mail SMTP!” To complete your setup, simply click the Finish Setup button.

If there are any errors during the test, you’ll be shown a screen that says, “Whoops, looks like things aren’t configured properly.” To begin the troubleshooting process, click the Start Troubleshooting button to view any error messages, and be sure to follow the recommended troubleshooting steps.

That’s it! We just showed you how to configure a mailer using WP Mail SMTP’s Setup Wizard.
Next, would you like help fixing an issue with WP Mail SMTP? Be sure to check out our tutorial on how to troubleshoot WP Mail SMTP for more details.