AI Summary
Would you like to receive notifications whenever your site fails to send emails? With our WhatsApp integration, you’ll be able to connect WP Mail SMTP to your WhatsApp account and receive notifications for failed emails on your website.
This tutorial will show you how to configure WhatsApp alerts in WP Mail SMTP.
Before getting started, you’ll first need to make sure WP Mail SMTP is installed and activated on your WordPress site and that you’ve verified your license.
Accessing the Email Alerts Page
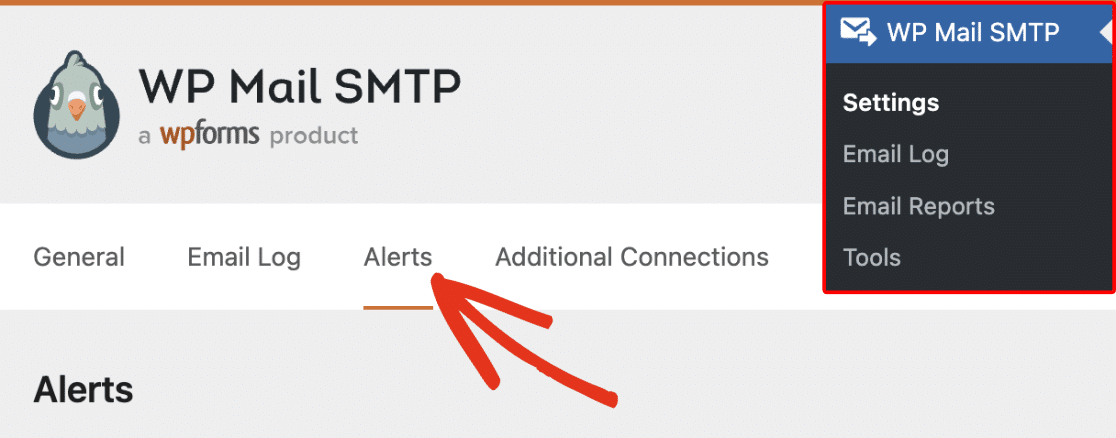
To begin setting up email alerts from the WordPress dashboard, go to WP Mail SMTP » Settings and click on the Alerts tab.
Once here, scroll down to the WhatsApp section. To use the WhatsApp integration, you’ll need to create a custom app on the Meta developer dashboard. Then, enable WhatsApp connection for the app you created and retrieve the authentication details.
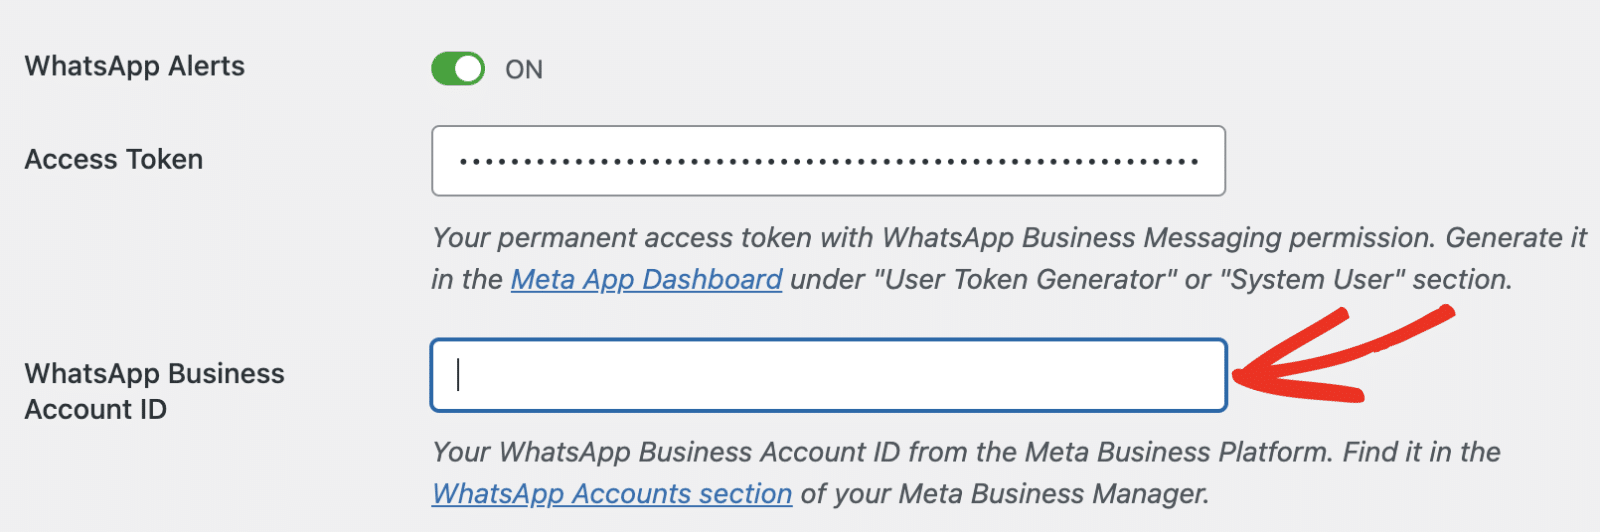
Start by toggling the WhatsApp Alerts option to the ON position.
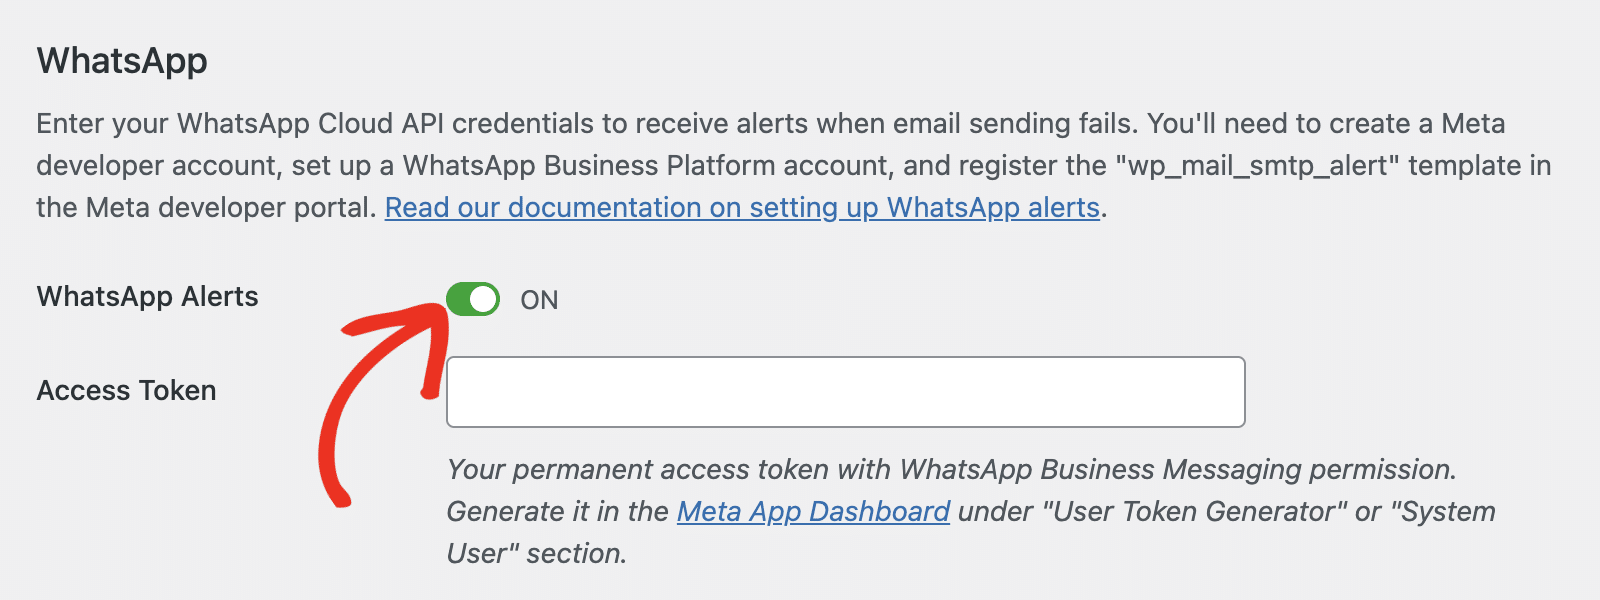
Additional options will appear after enabling WhatsApp Alerts. You’ll need to retrieve your Access Token, WhatsApp Business ID, and Phone Number ID from Meta developer dashboard. Here’s how to get the required details. You can leave this browser tab open as we’ll return to it later.
Creating a Meta App
First, log in to your Meta developer account or create a new one if you already have one.
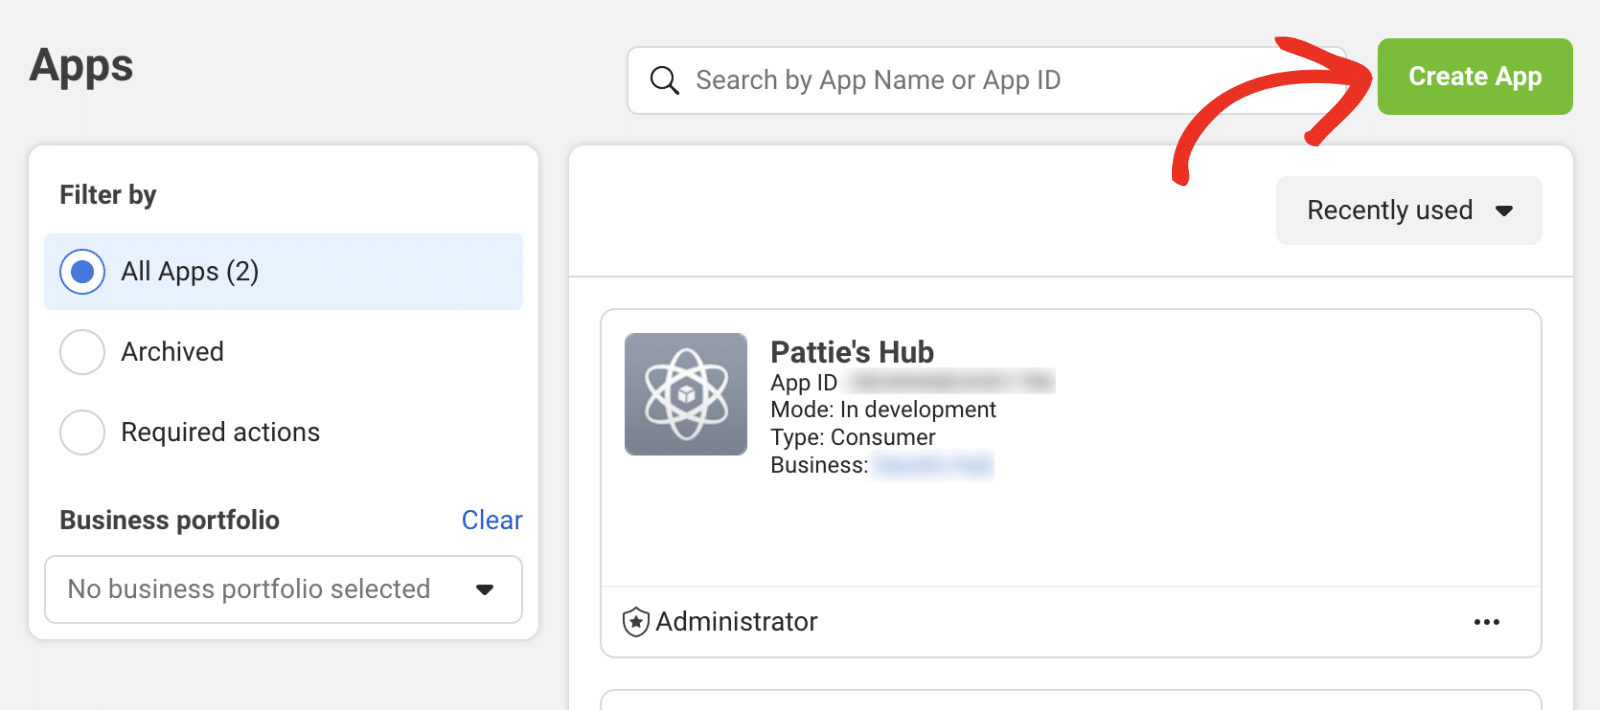
Once you’re logged in, go to the My Apps page and click the Create App button.
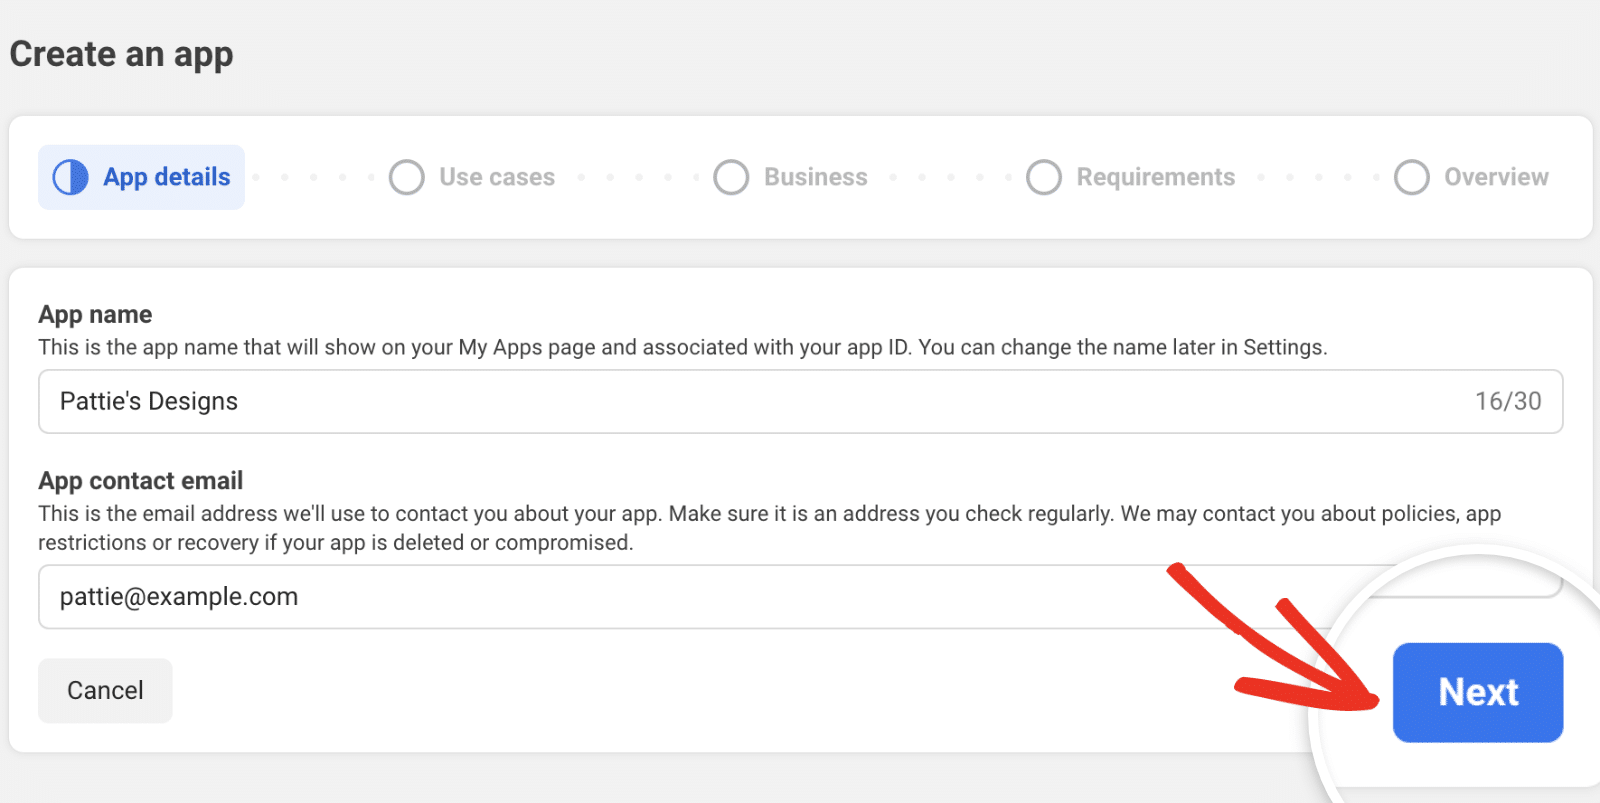
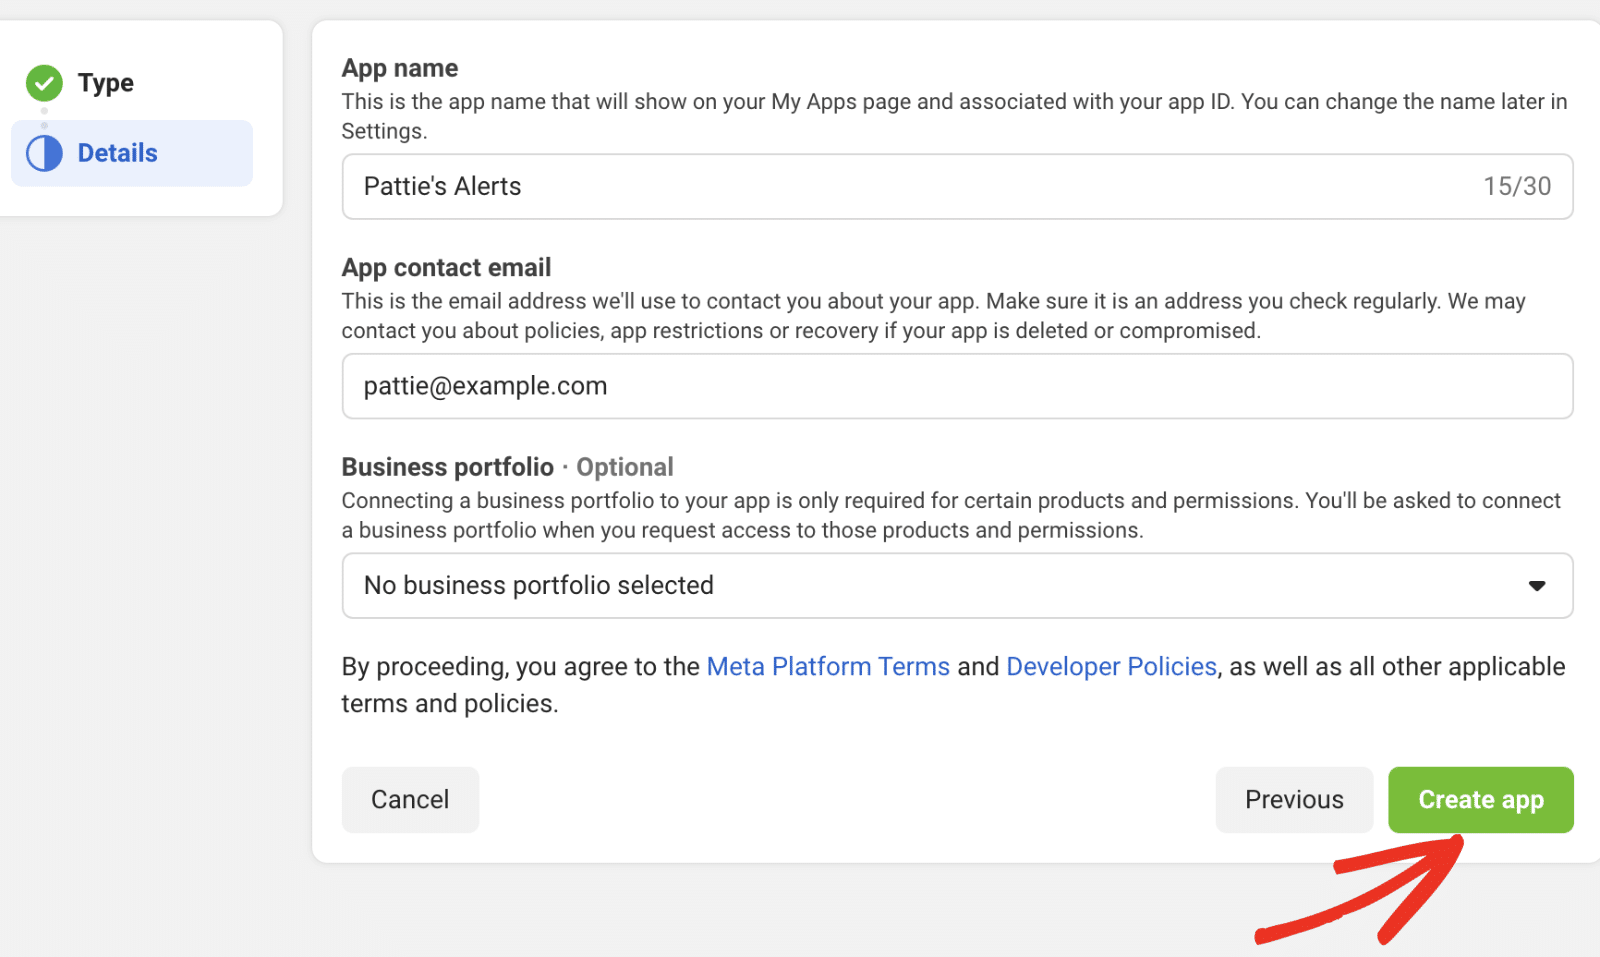
After that, enter a name for your app in the App name field. Then, enter your email in the App contact email field and click Next.
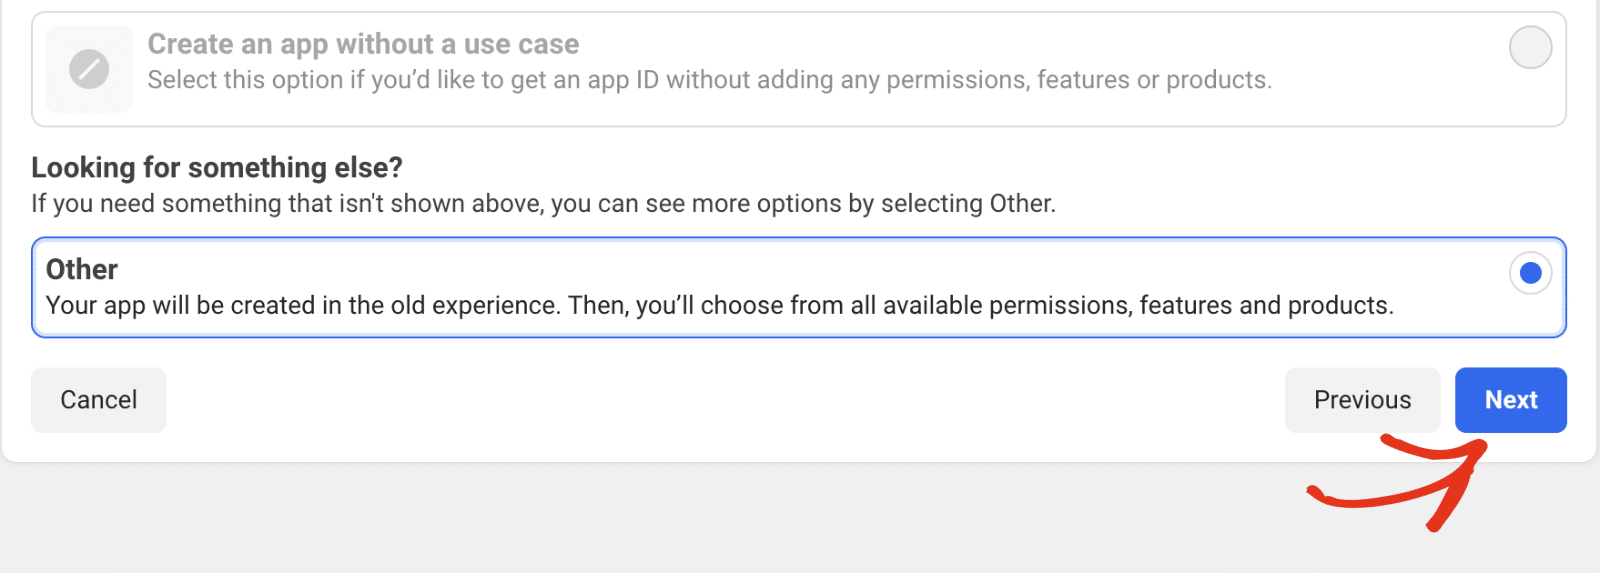
Select the Other option in the Use cases section and click Next to proceed.
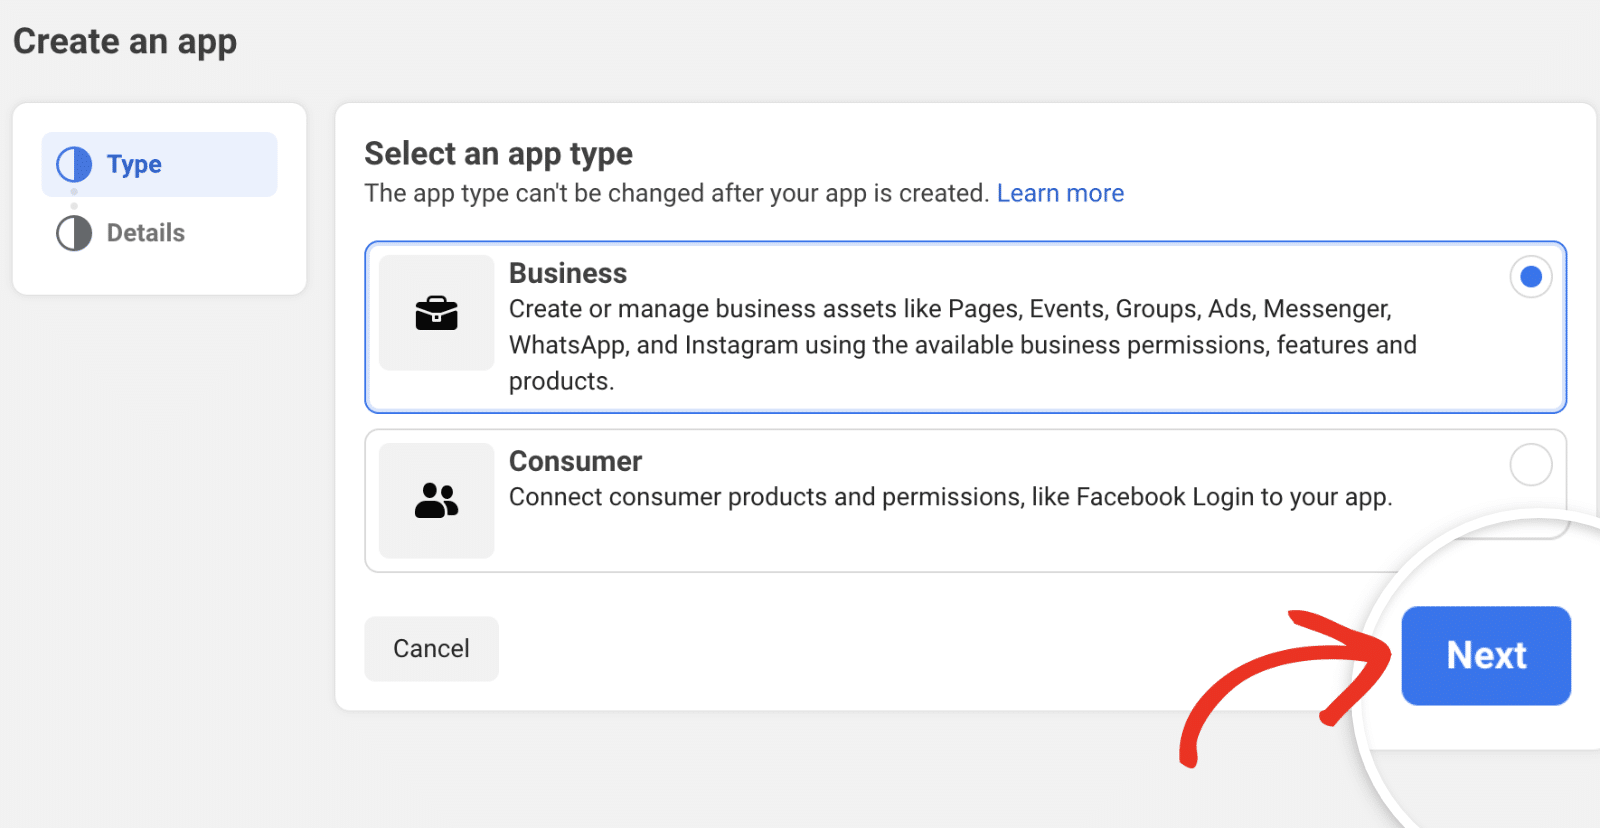
After that, select Business as the app type and click Next.
Finally, confirm your app details and click Create app to complete the app creation process.
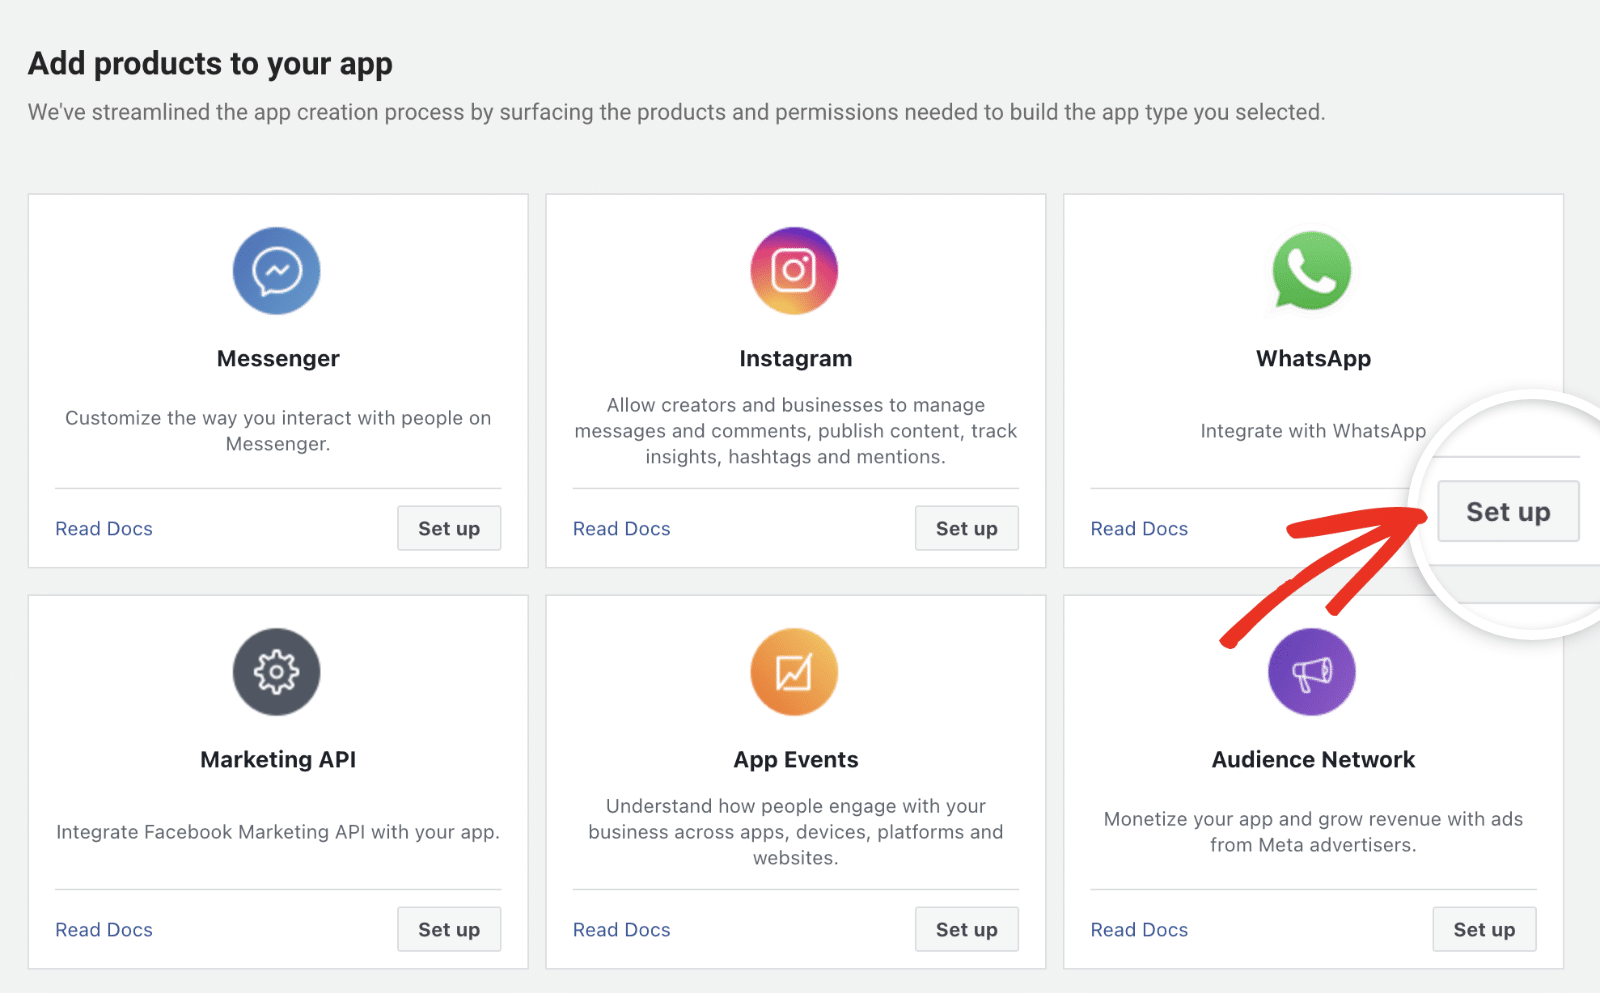
This will direct you to the app dashboard. From there, scroll to the Add products to your app section and click Set up under the WhatsApp section.
WhatsApp Business API requires you to select a business profile to associate your app with. Go ahead and choose a profile from the Select a business portfolio dropdown.
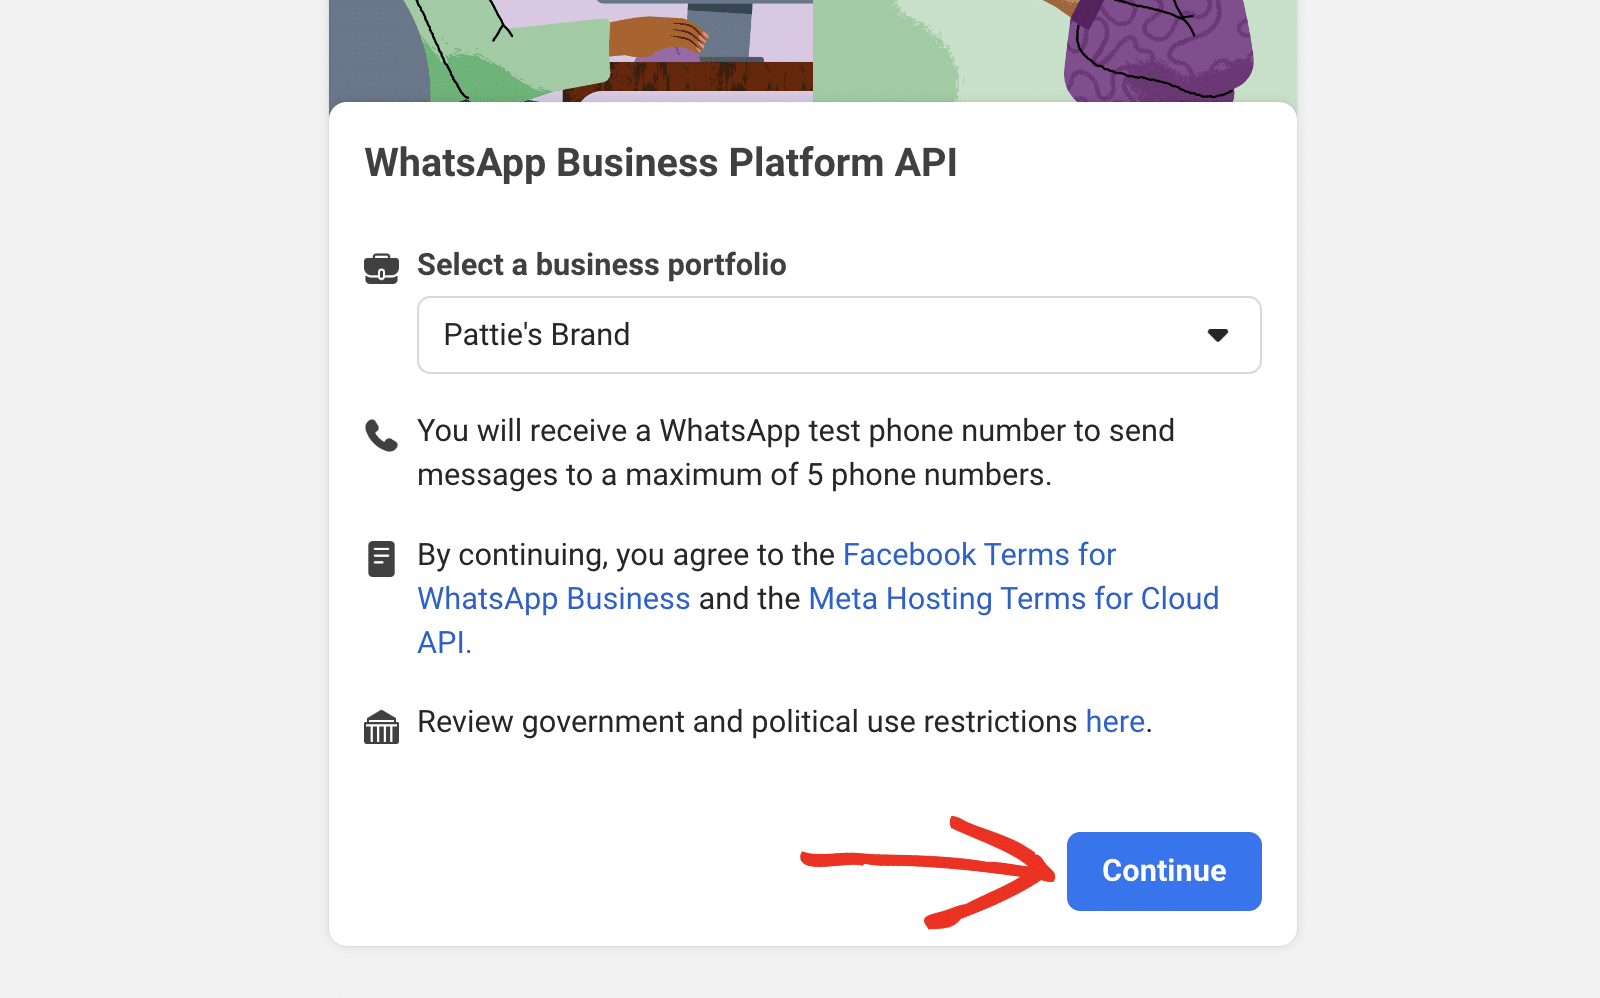
If you don’t have a business profile, you’ll be prompted to create one before proceeding. Click Continue to proceed.

Then, fill out the new business portfolio registration form and click Submit.

Configuring WhatsApp Connection
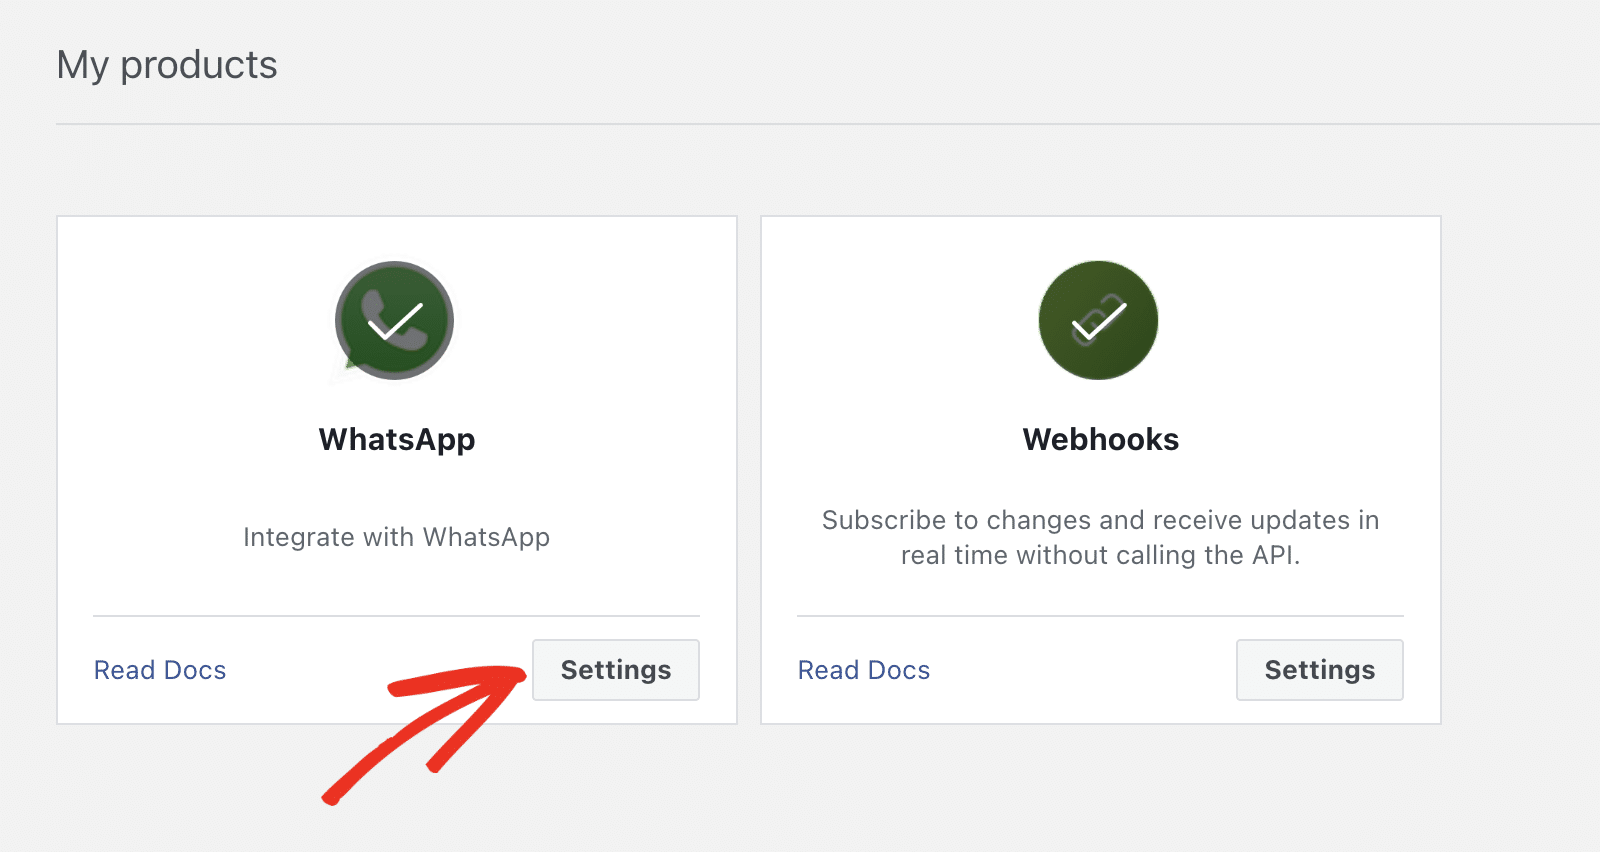
After connecting your business portfolio, scroll to the My products section and click Settings under WhatsApp.
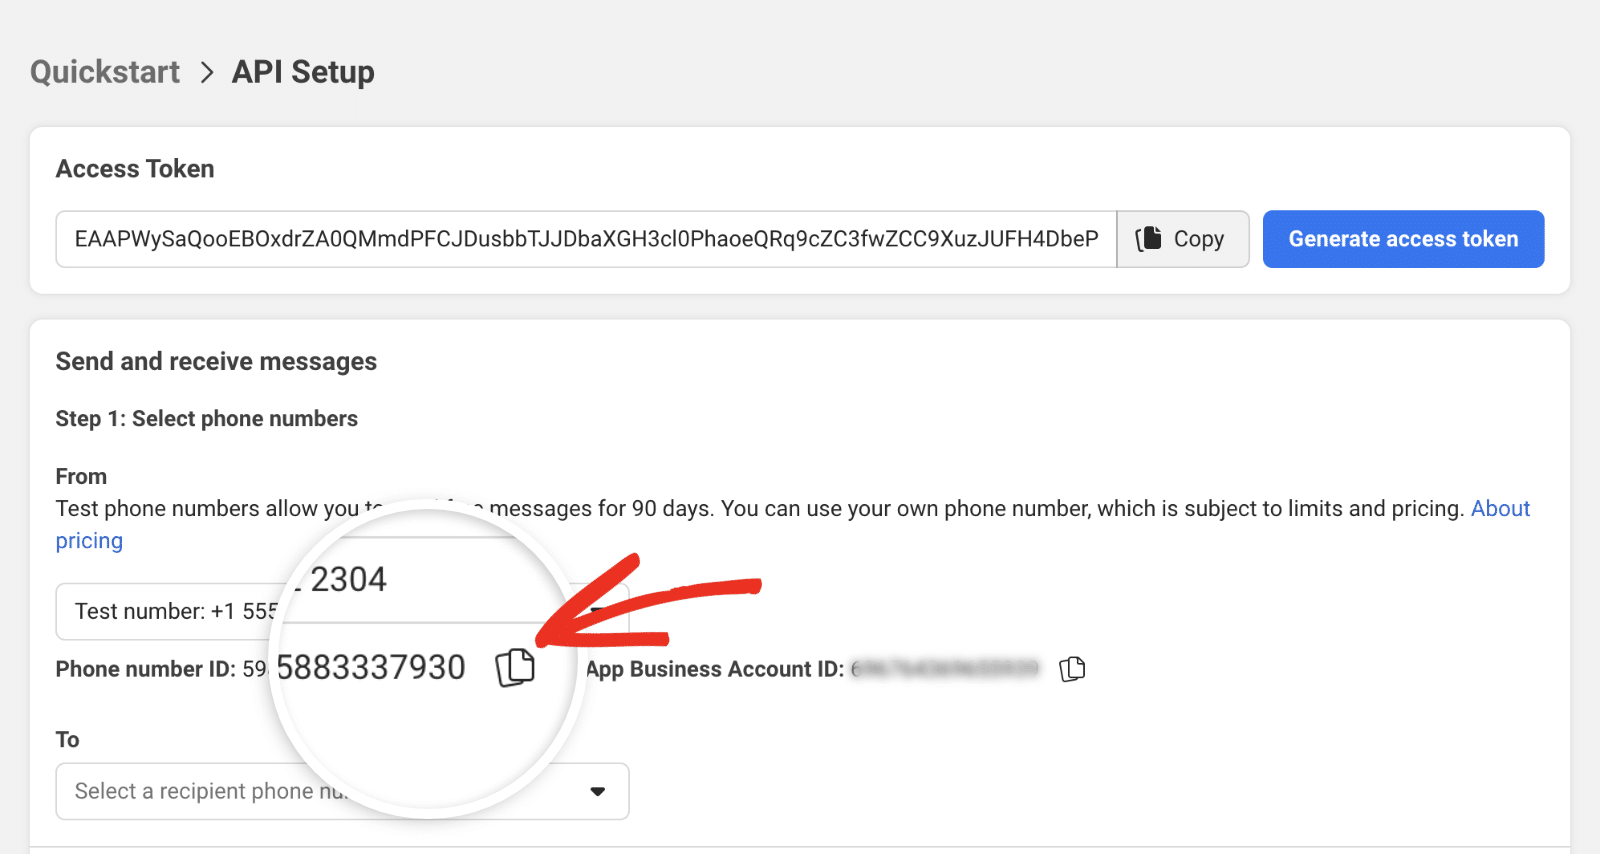
You’ll be directed to the WhatsApp API configuration page. To proceed, navigate to WhatsApp » API Setup.
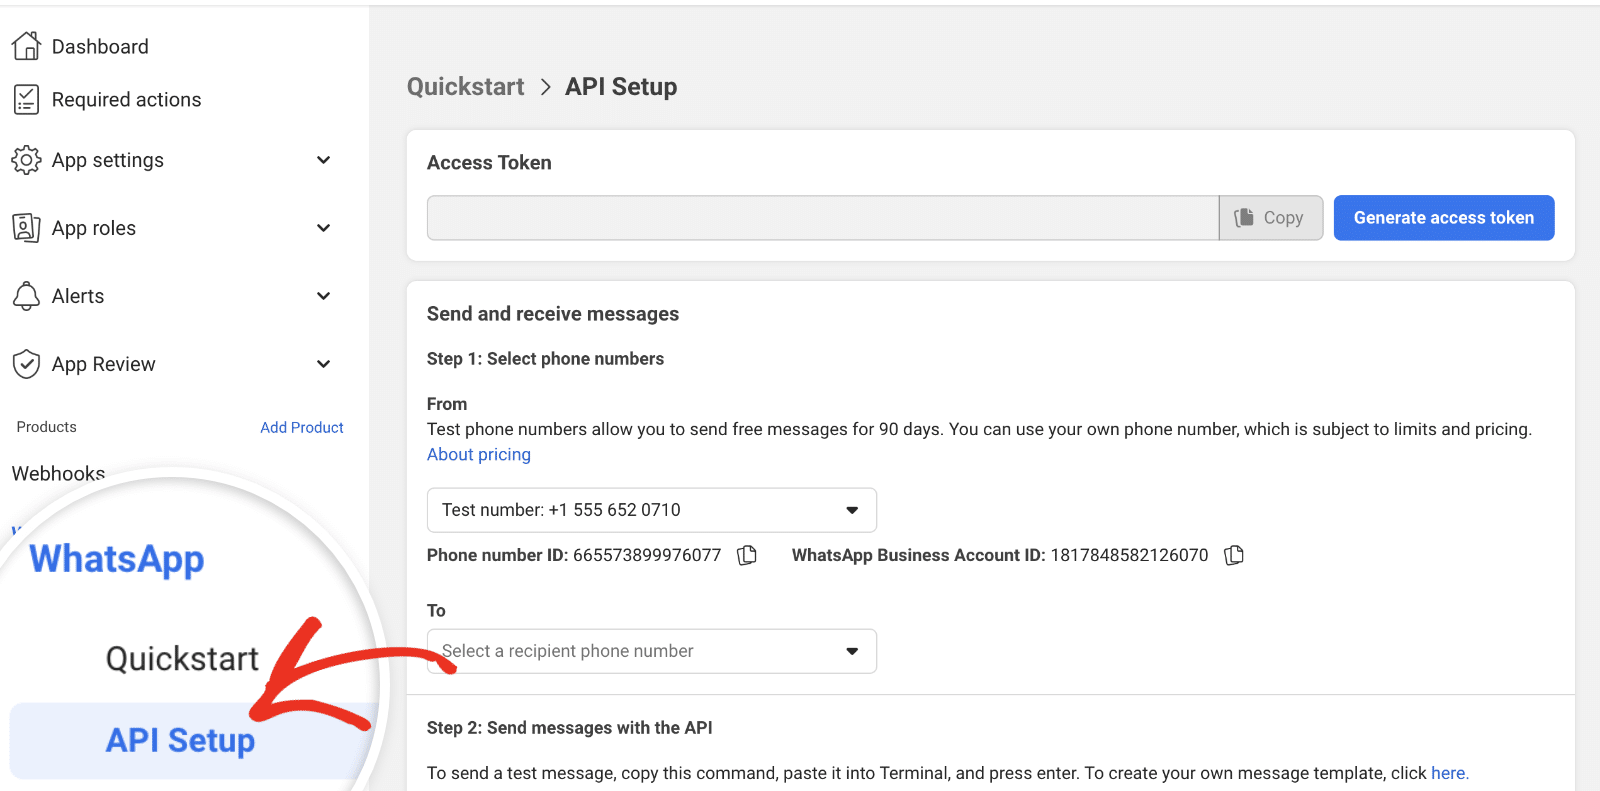
WhatsApp will generate test credentials for your integration. You can use the test credentials to connect WhatsApp to your WordPress site.
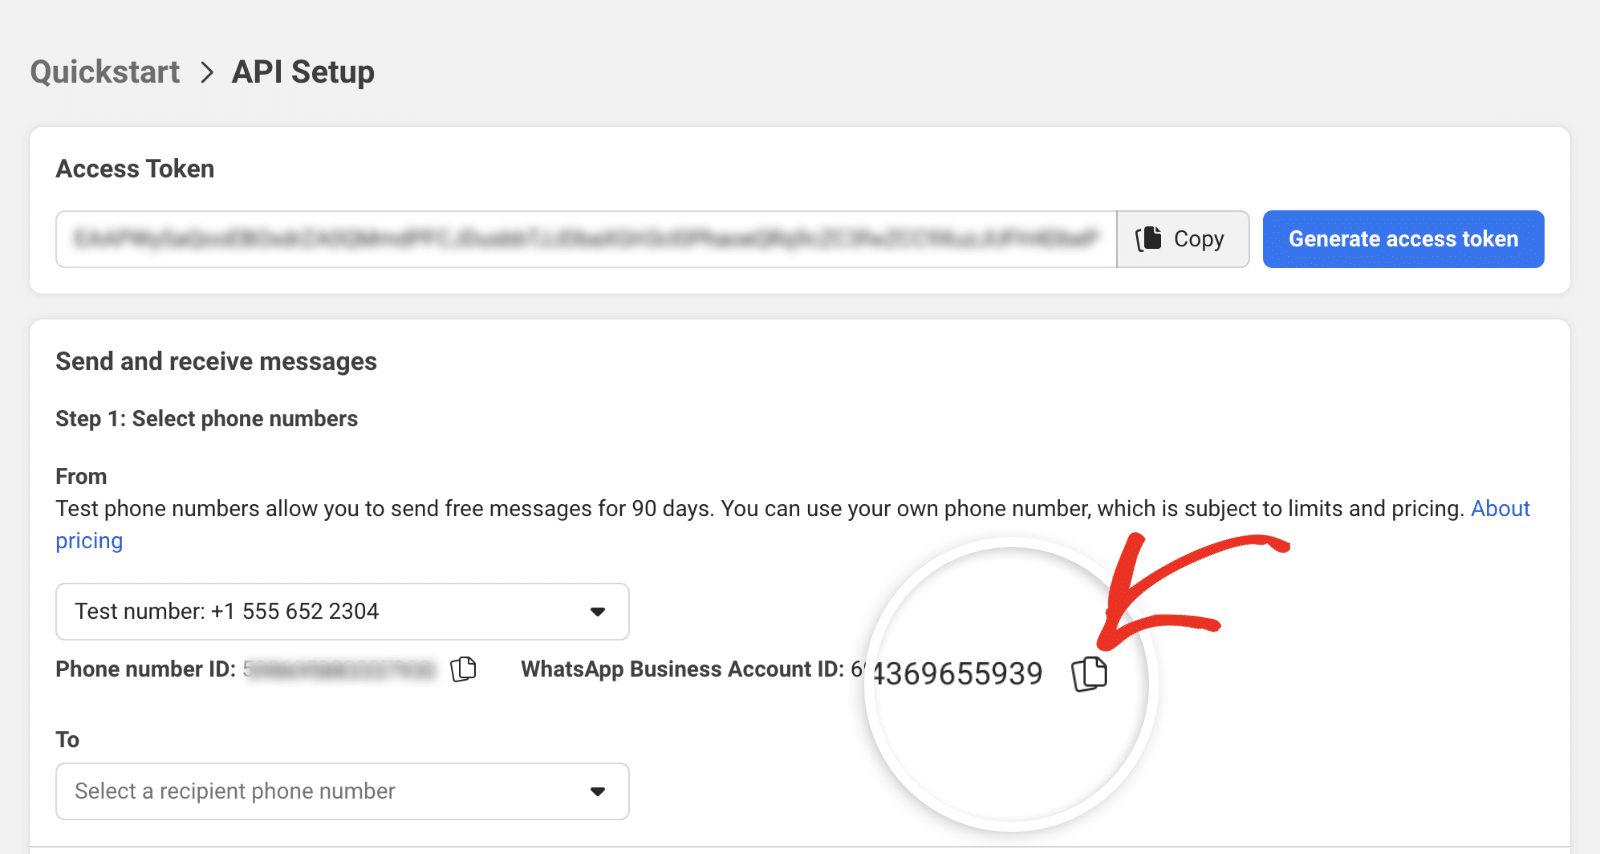
First, copy the WhatsApp Business Account ID from the Meta developer site.
Then return to your WP Mail SMTP settings page and paste it in the WhatsApp Business Account ID field.
After that, return to the Meta developer site and copy the Phone Number ID.
Next, return to the WP Mail SMTP settings page and paste the value in the Phone Number ID field.

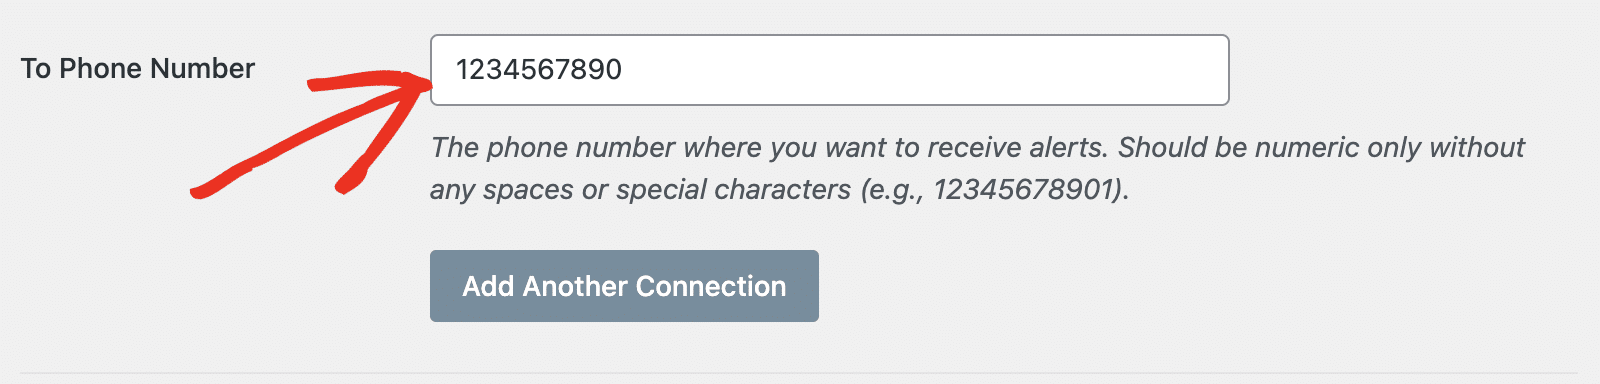
After that, enter the WhatsApp number you’d like to receive the alert at in the To Phone Number field.
Note: You’ll need to register this number in the Meta app before you can receive WhatsApp alerts.
Adding the Recipient’s Phone Number to the Meta App
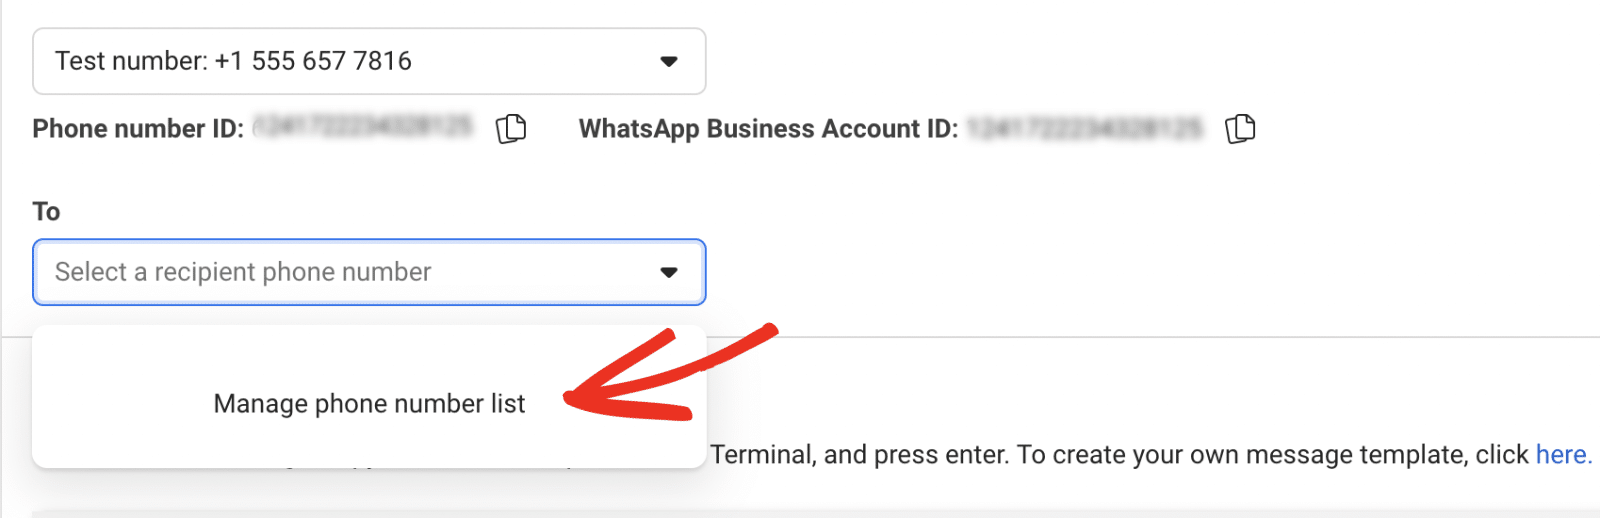
To register the recipient’s phone number, go to WhatsApp » API Setup from your Meta app dashboard. Then click the To dropdown and select Manage phone number list.
In the overlay that appears, make sure to select the correct country code for the phone number you wish to add.
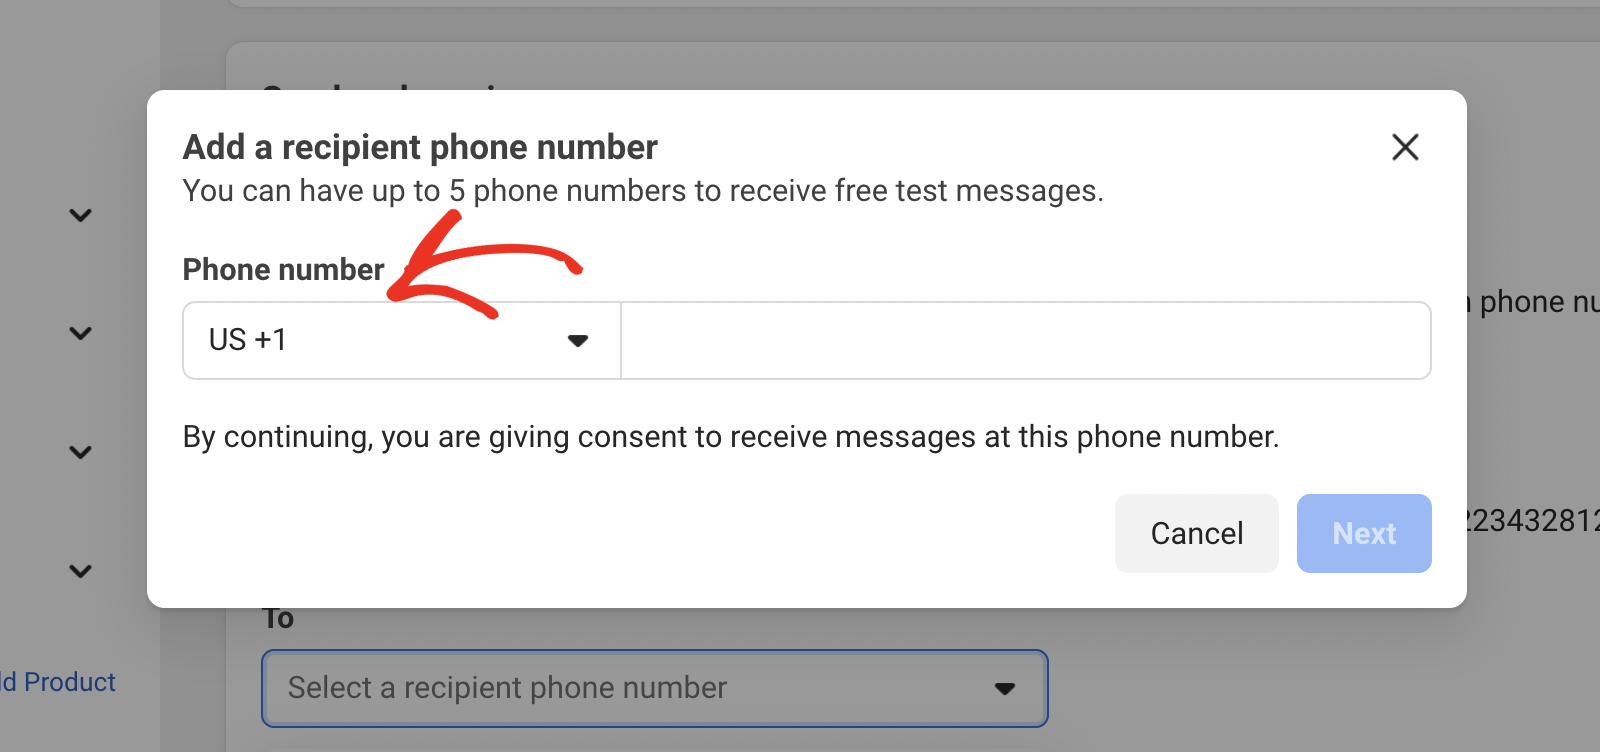
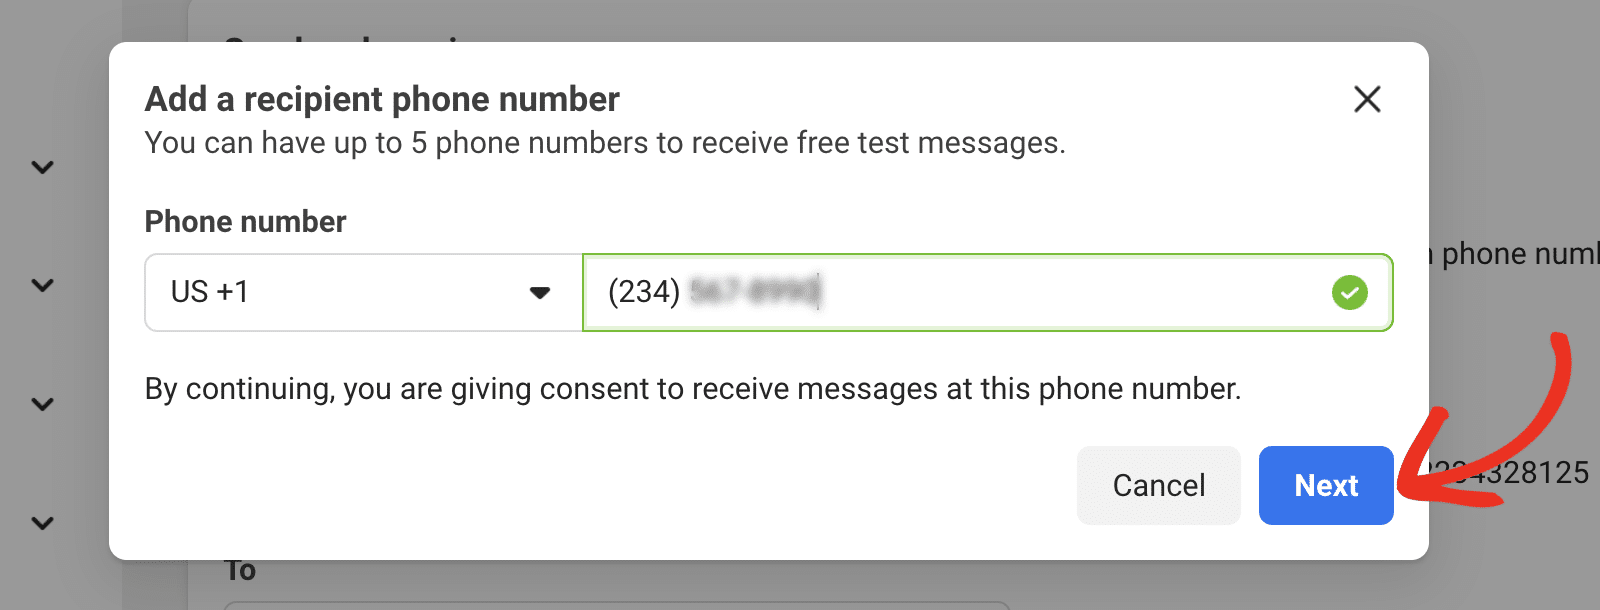
After that, enter the phone number and click Next.
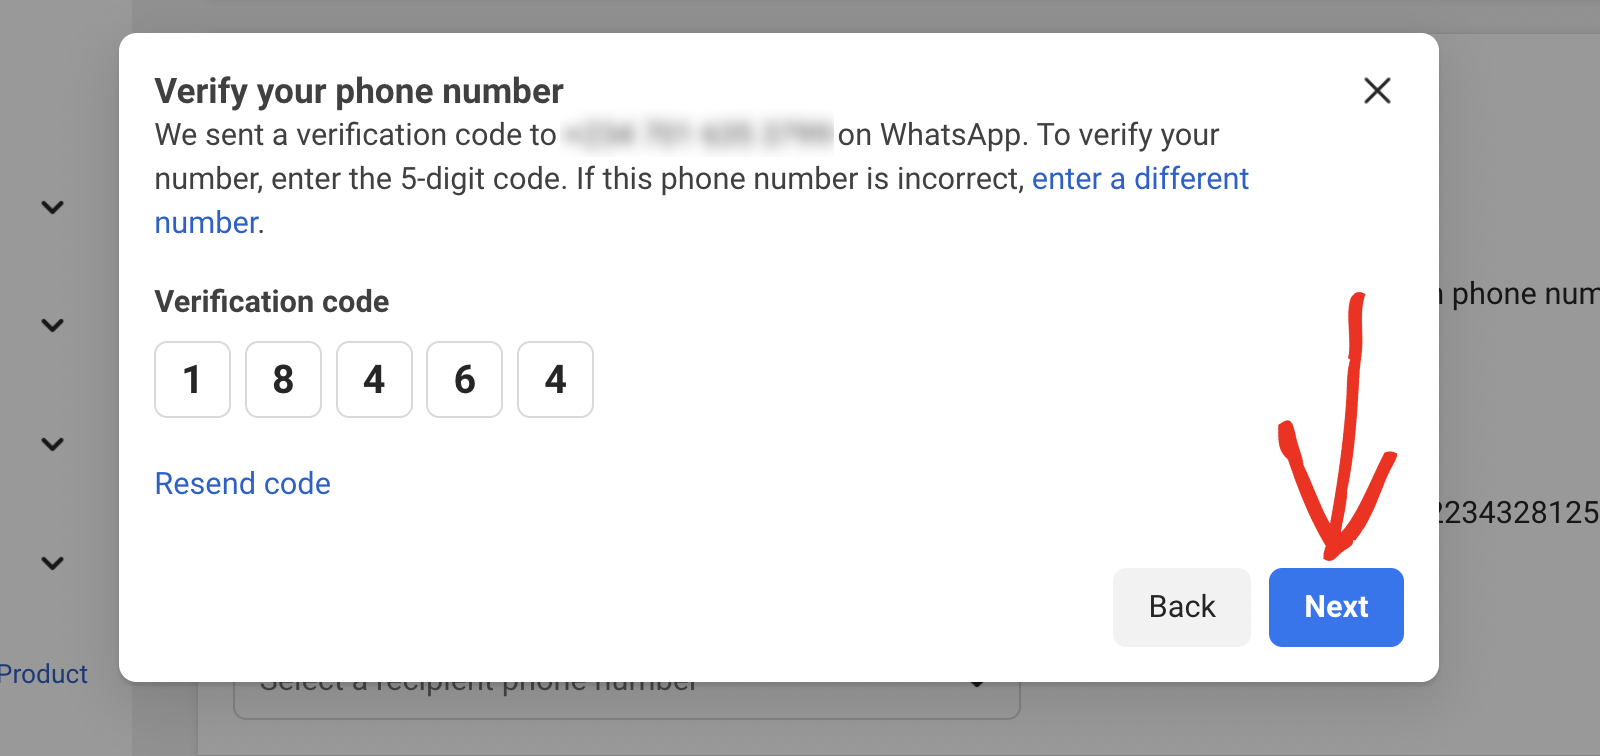
You’ll receive a one-time verification code via WhatsApp. Go ahead and enter the 5-digit code and click Next to register the number.
Generating an Access Token
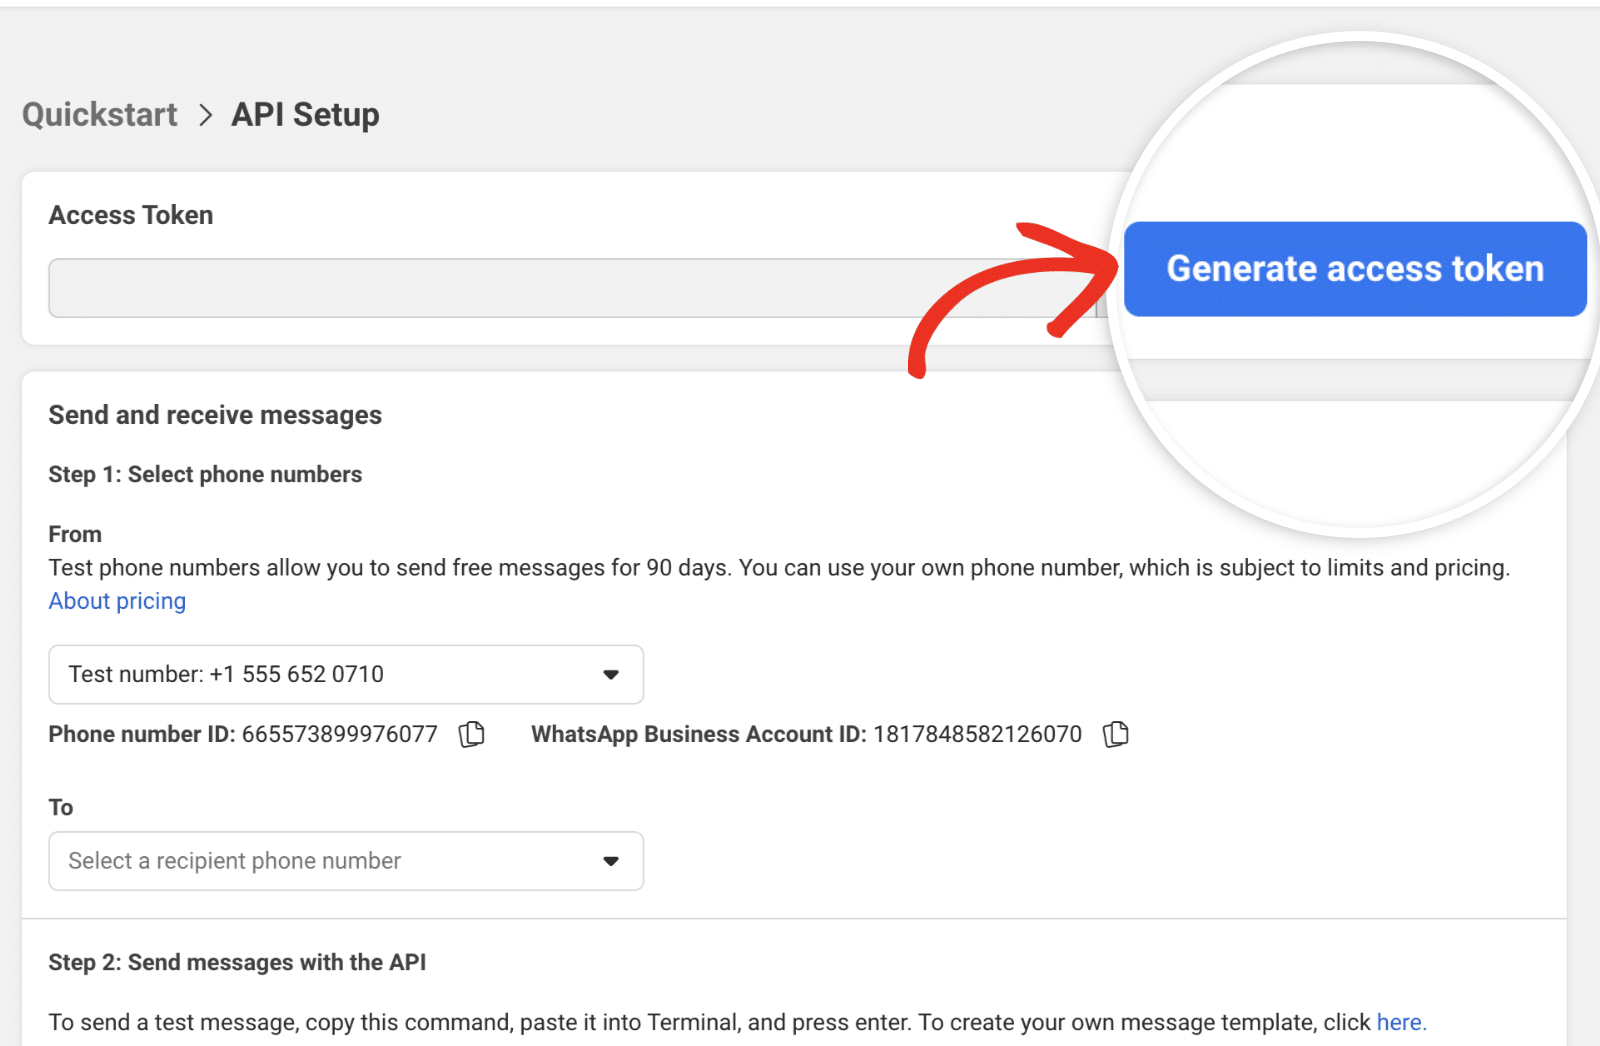
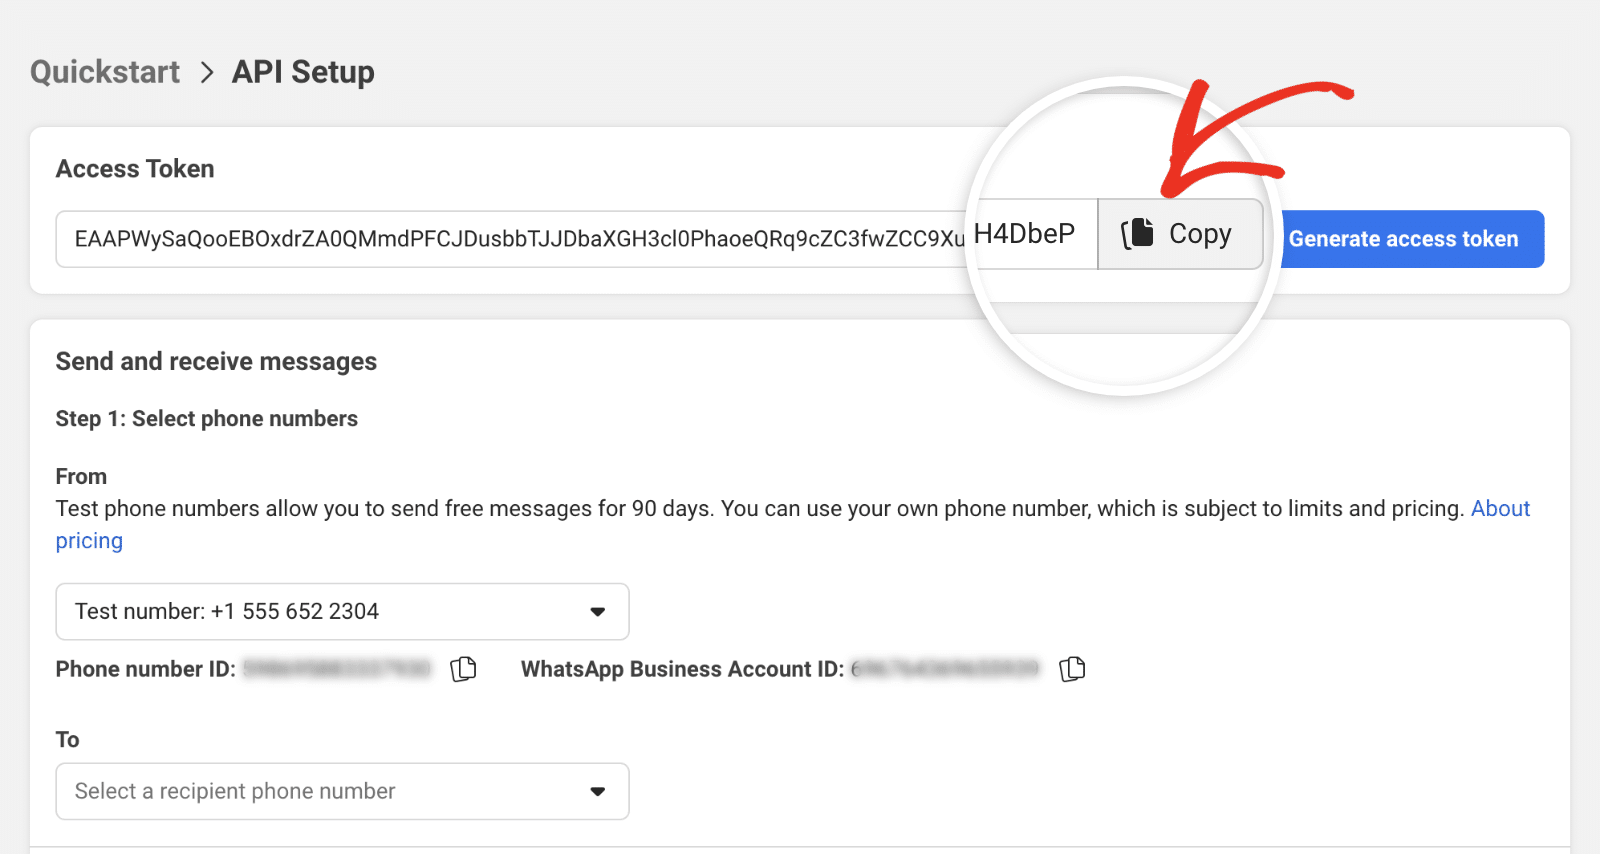
You can quickly generate an access token to test your integration by navigating to WhatsApp » API Setup and clicking the Generate access token button.
In the overlay that appears, go ahead and log in to your Meta account. Then select the WhatsApp Business profile you’d like to associate the access token with. Be sure to restrict it to only the work with the current Meta app you’re creating.
Once the token is generated, click the Copy button next to the generated access token to copy its value.
However, this token is temporary and is valid for 24 hours. This can lead to your messages not delivering because the token might be inactive.
To ensure your WhatsApp alerts messages always get delivered, you’ll need to generate a permanent access token. Here’s how to do it.
Creating a System User
Go to Meta Business Manager and make sure the business portfolio you used for the WhatsApp API connection is selected. Then navigate to the Settings » Users » System users page.
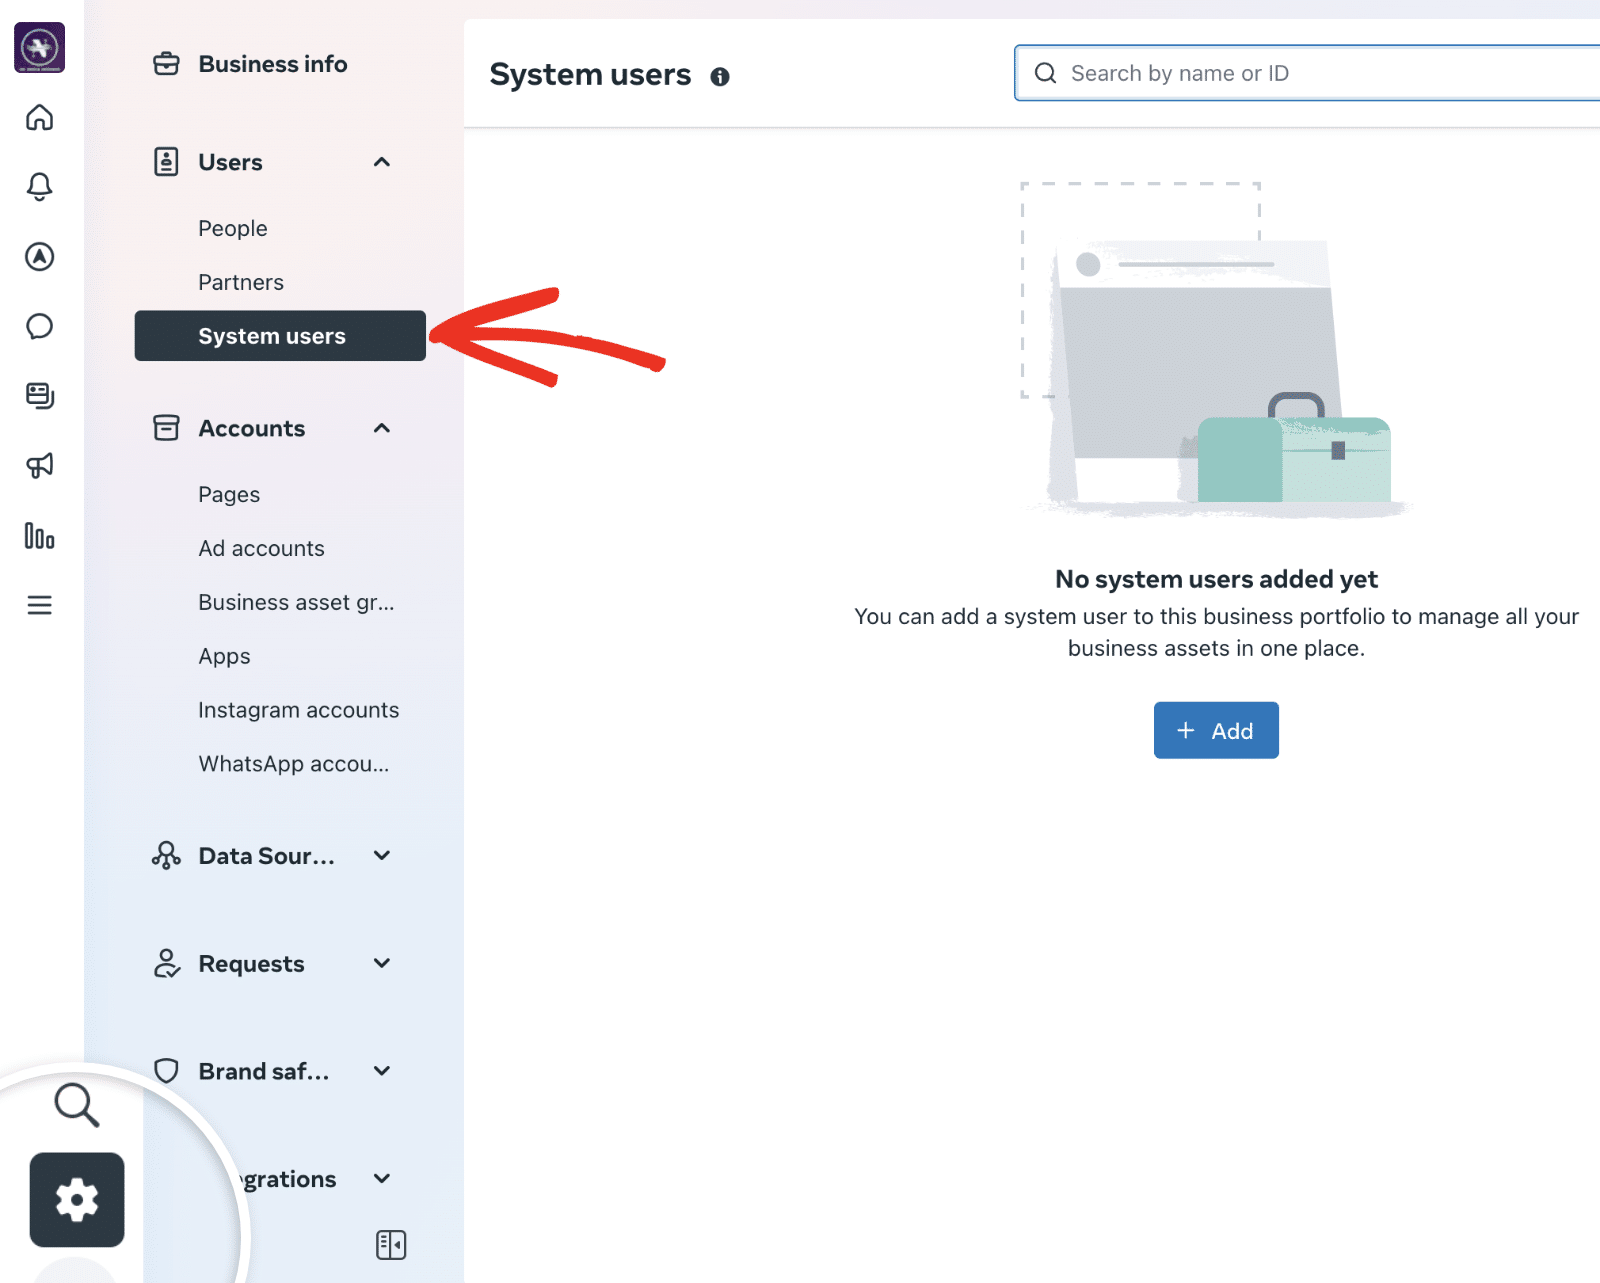
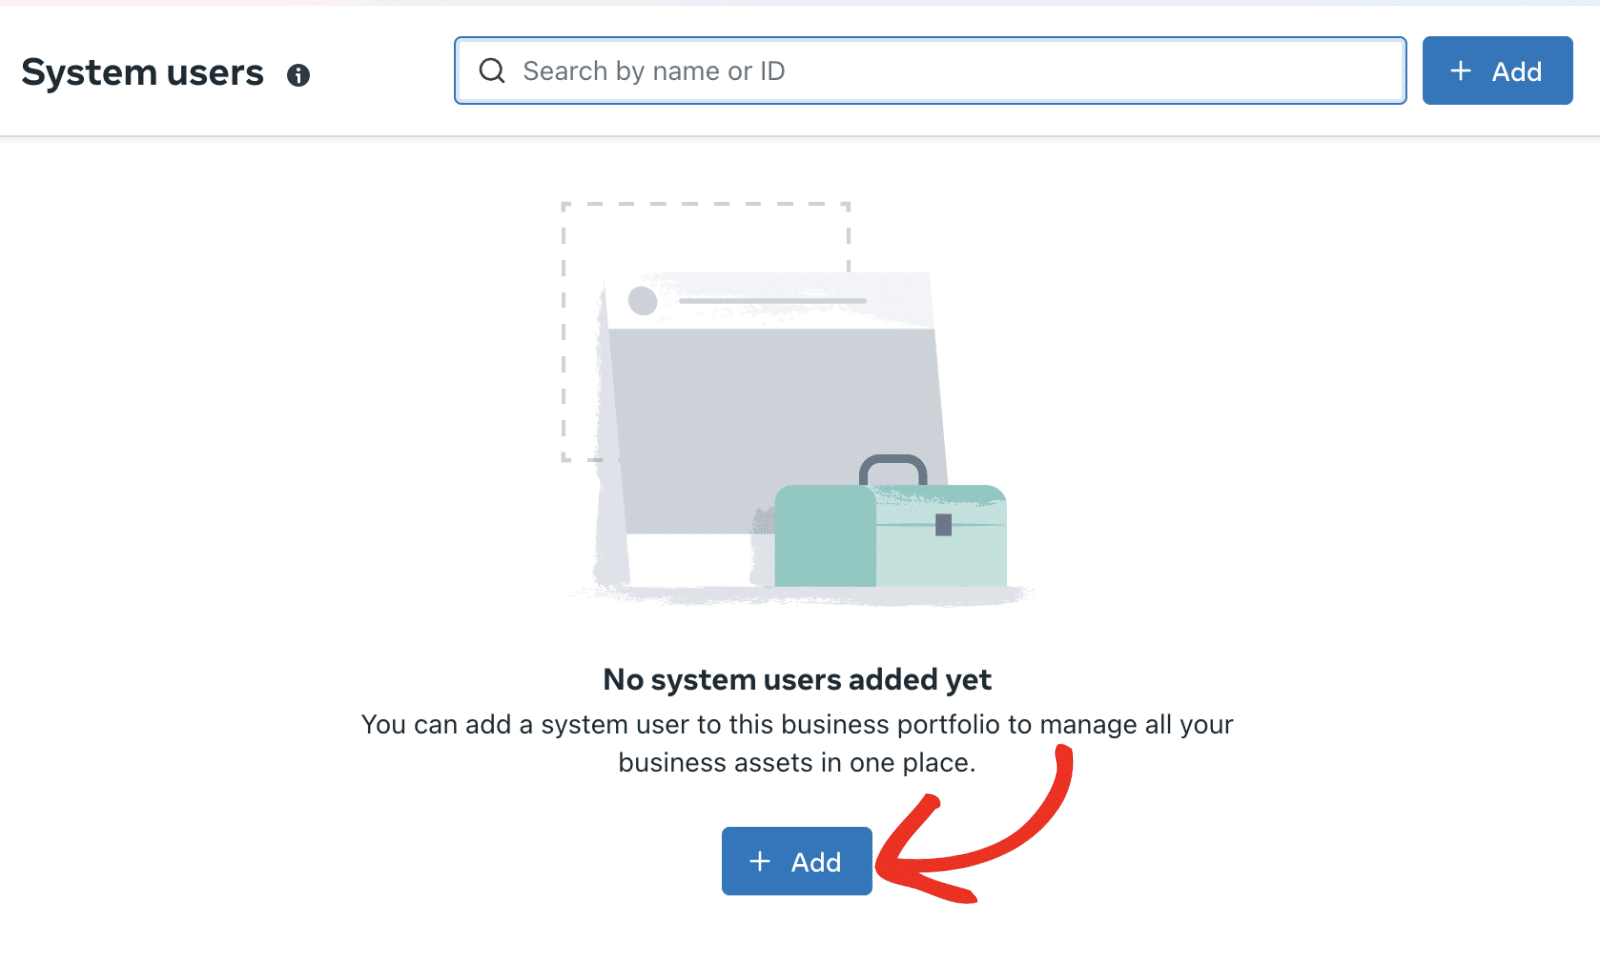
Once here, click the Add button to proceed.
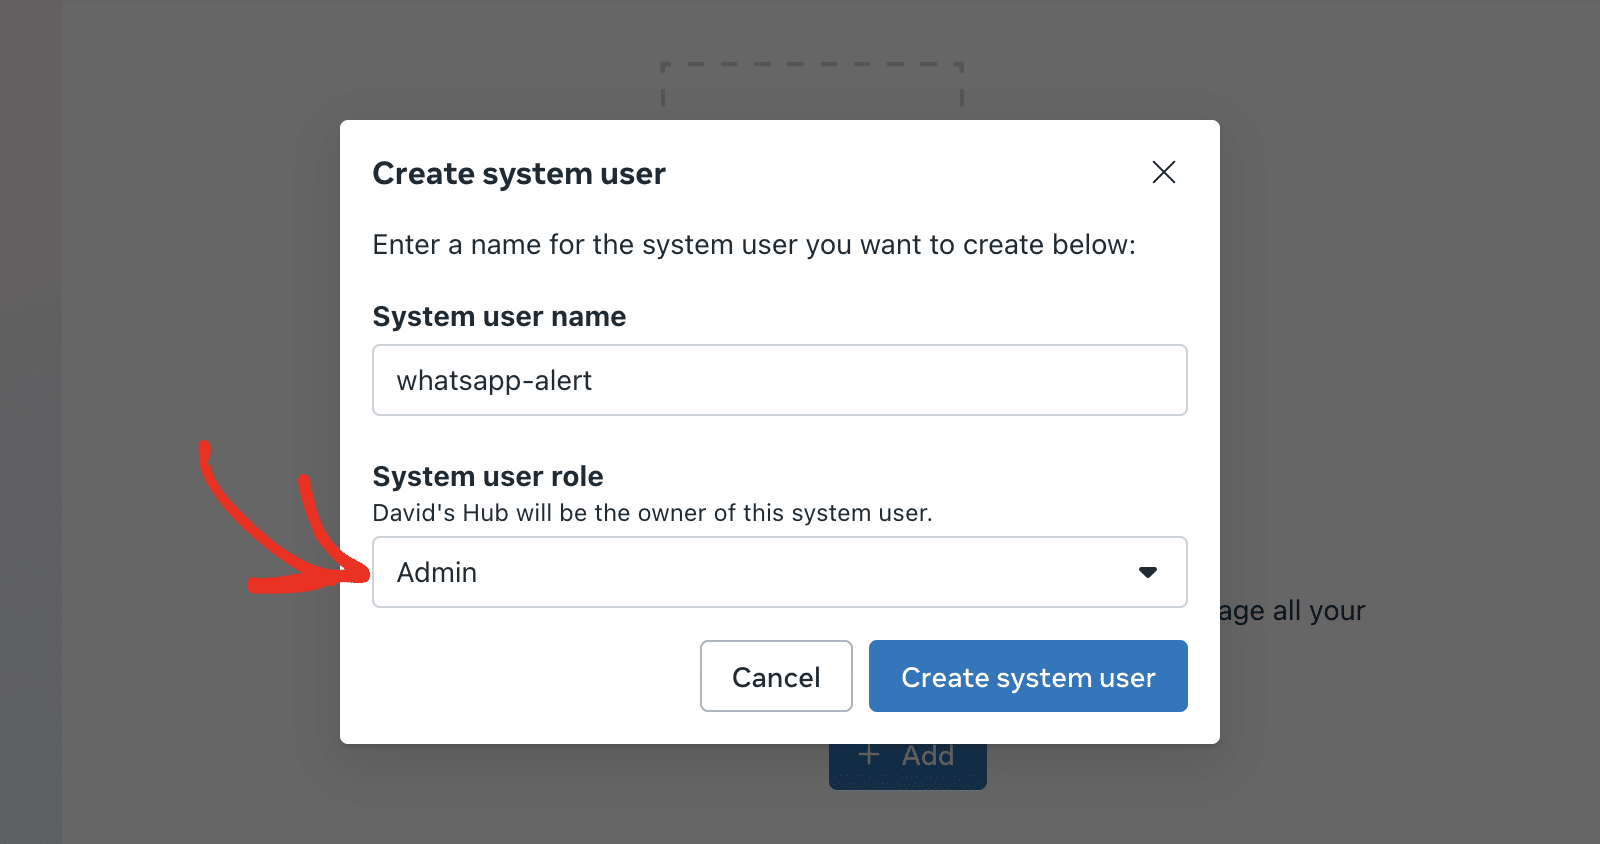
In the overlay that appears, enter a name in the System user name field. This name should ideally be in lower case, separated with a hyphen. For example, ‘whatsapp-alerts’.
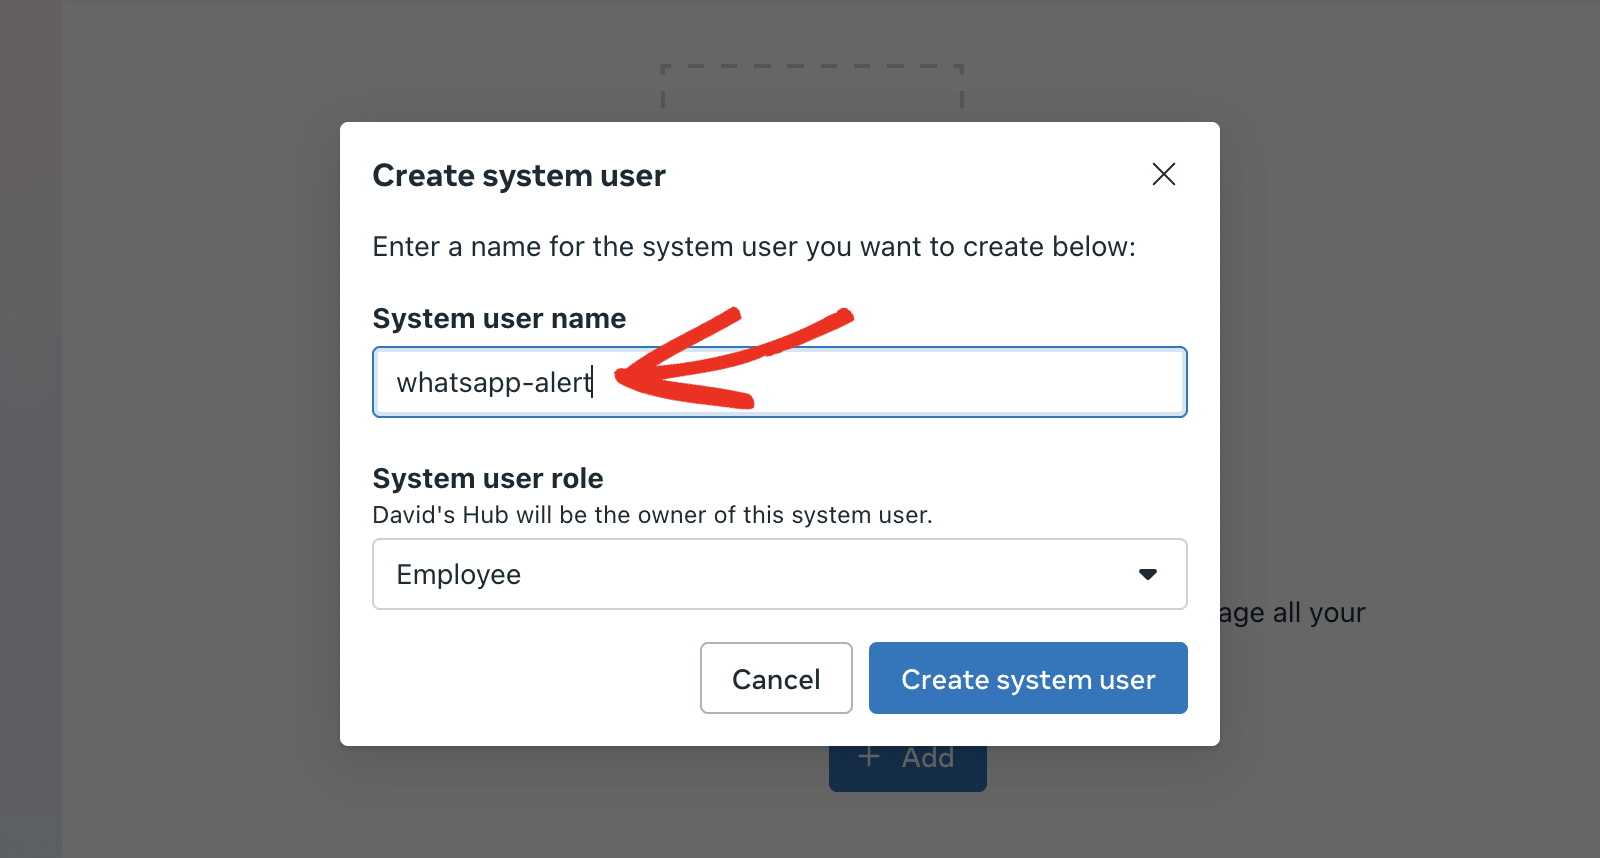
Next, set the System user role to Admin.
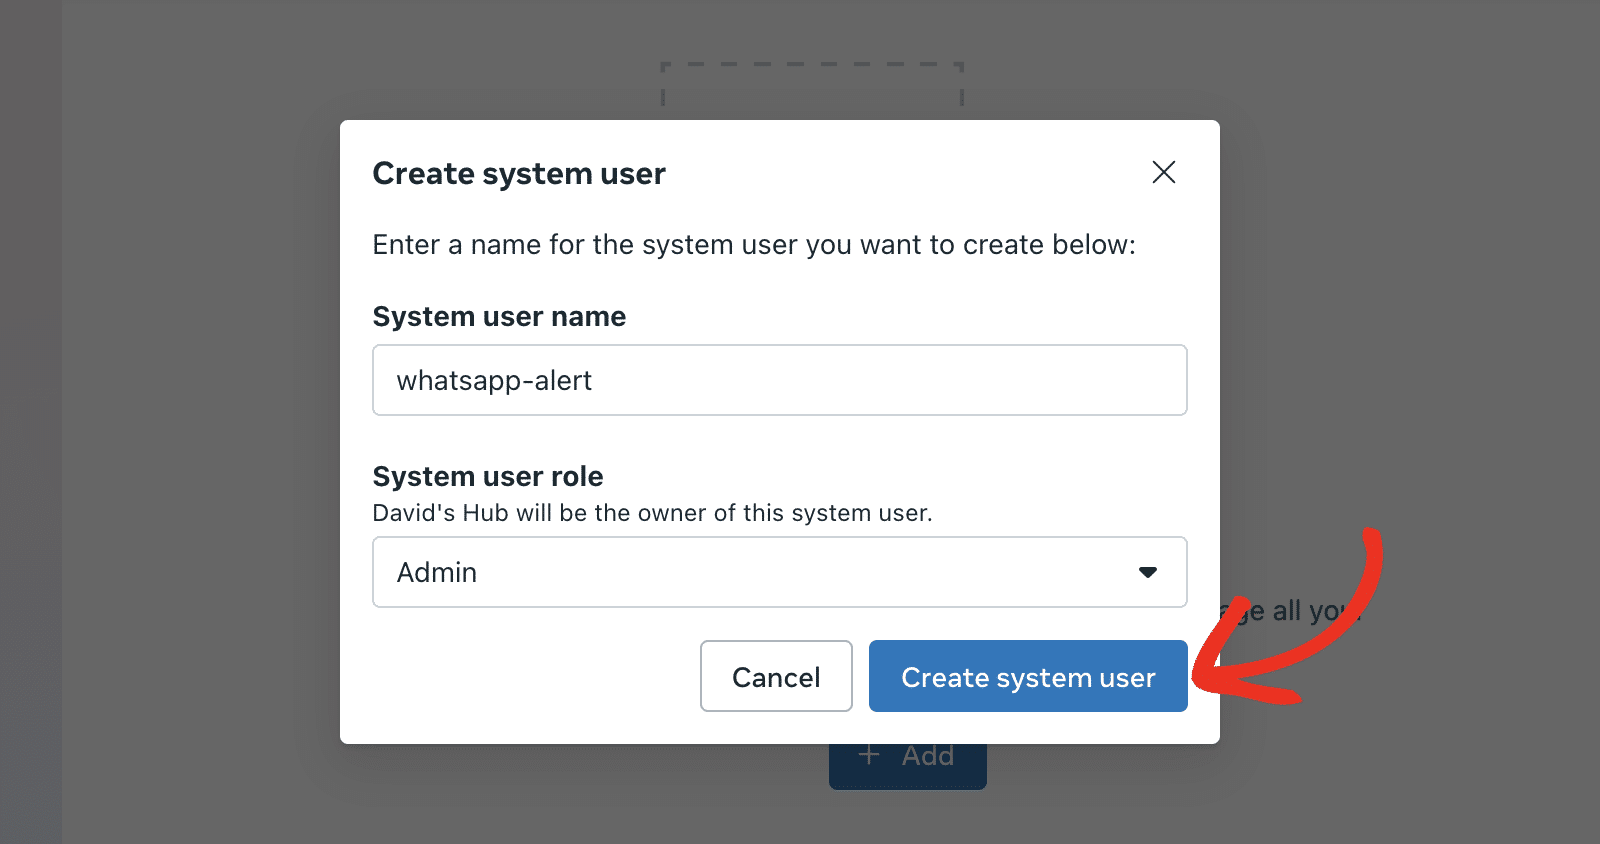
Finally, click the Create system user button to continue.
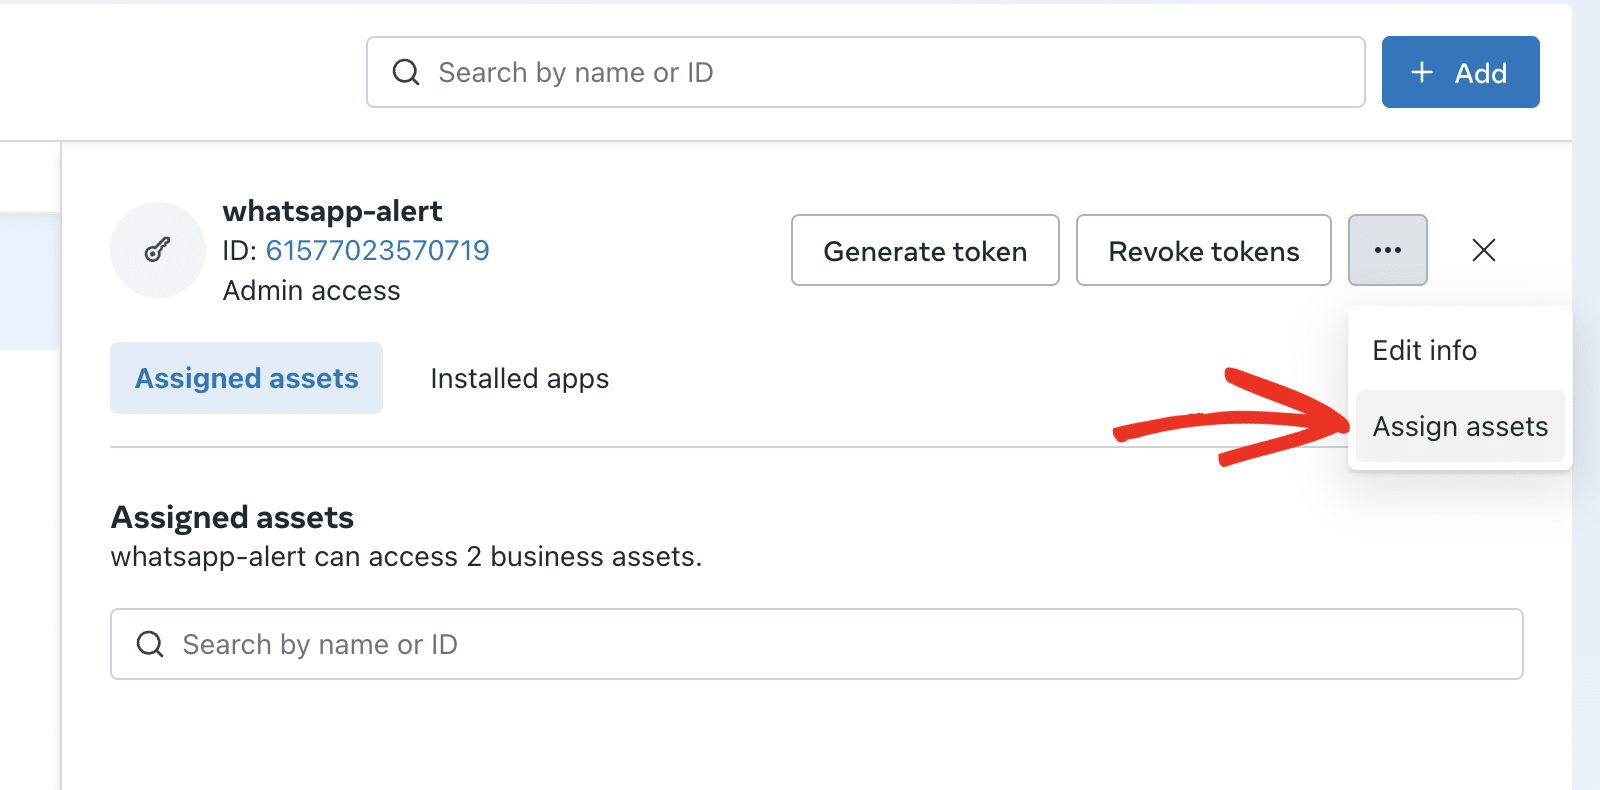
After creating the system user, you’ll need to assign the user access to your Meta app. To do that, click the 3-dot icon and select Assign assets.
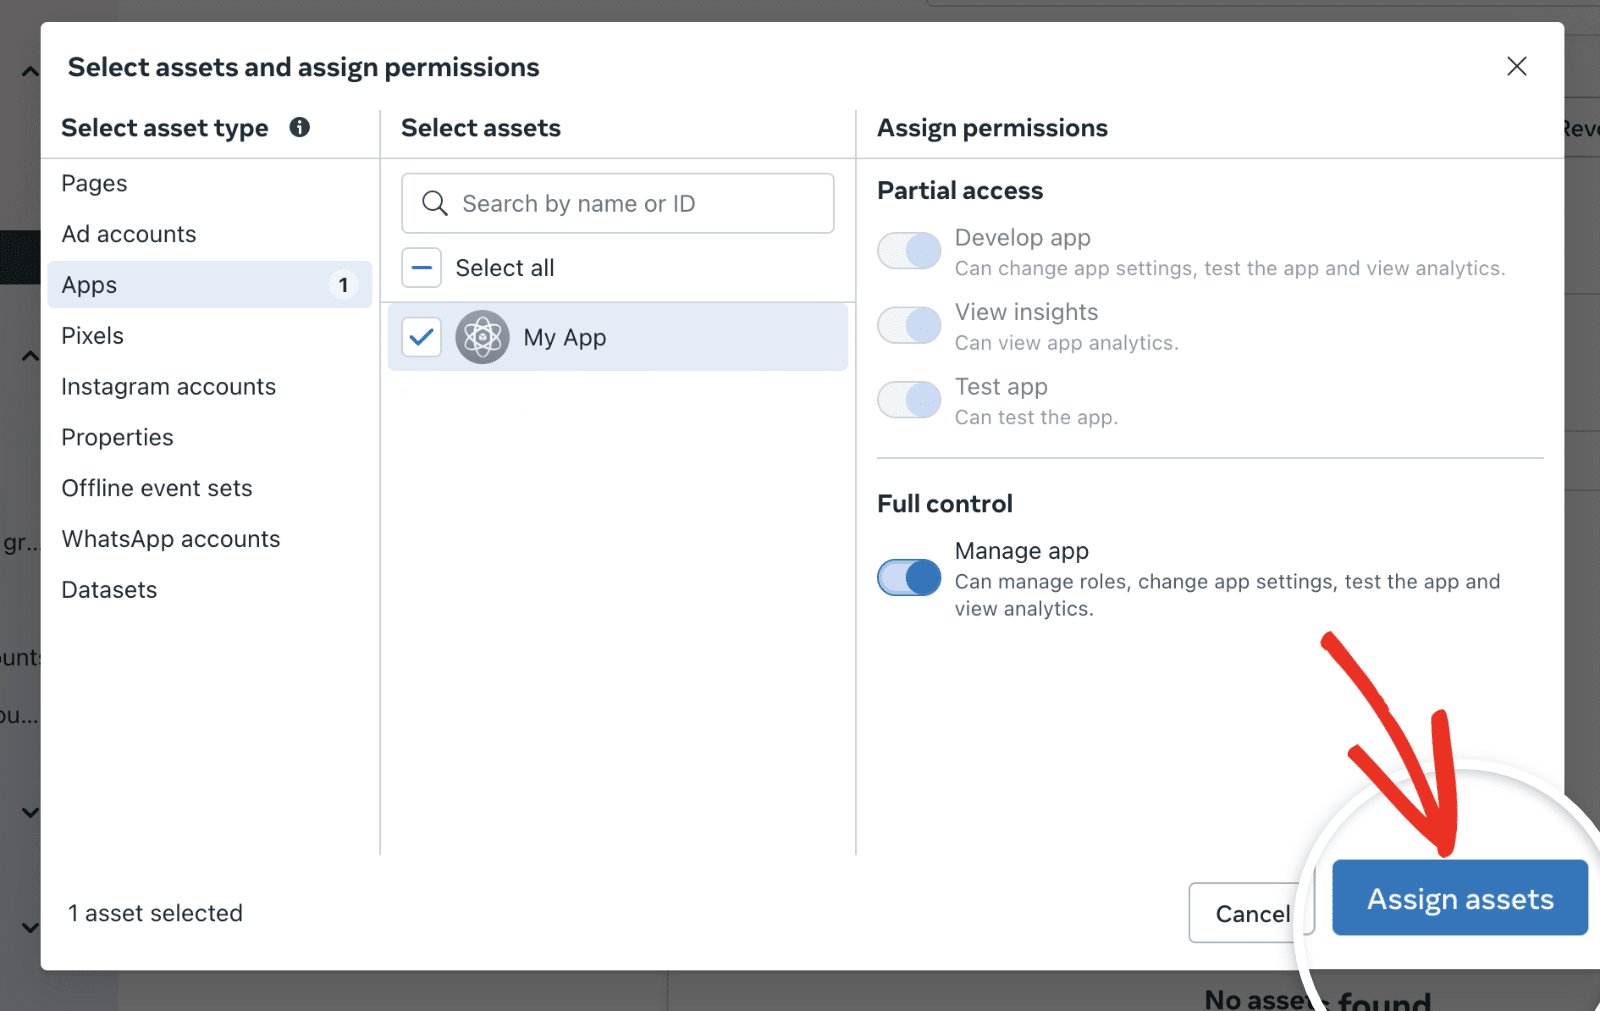
In the overlay that appears, check the box next to your Meta app.
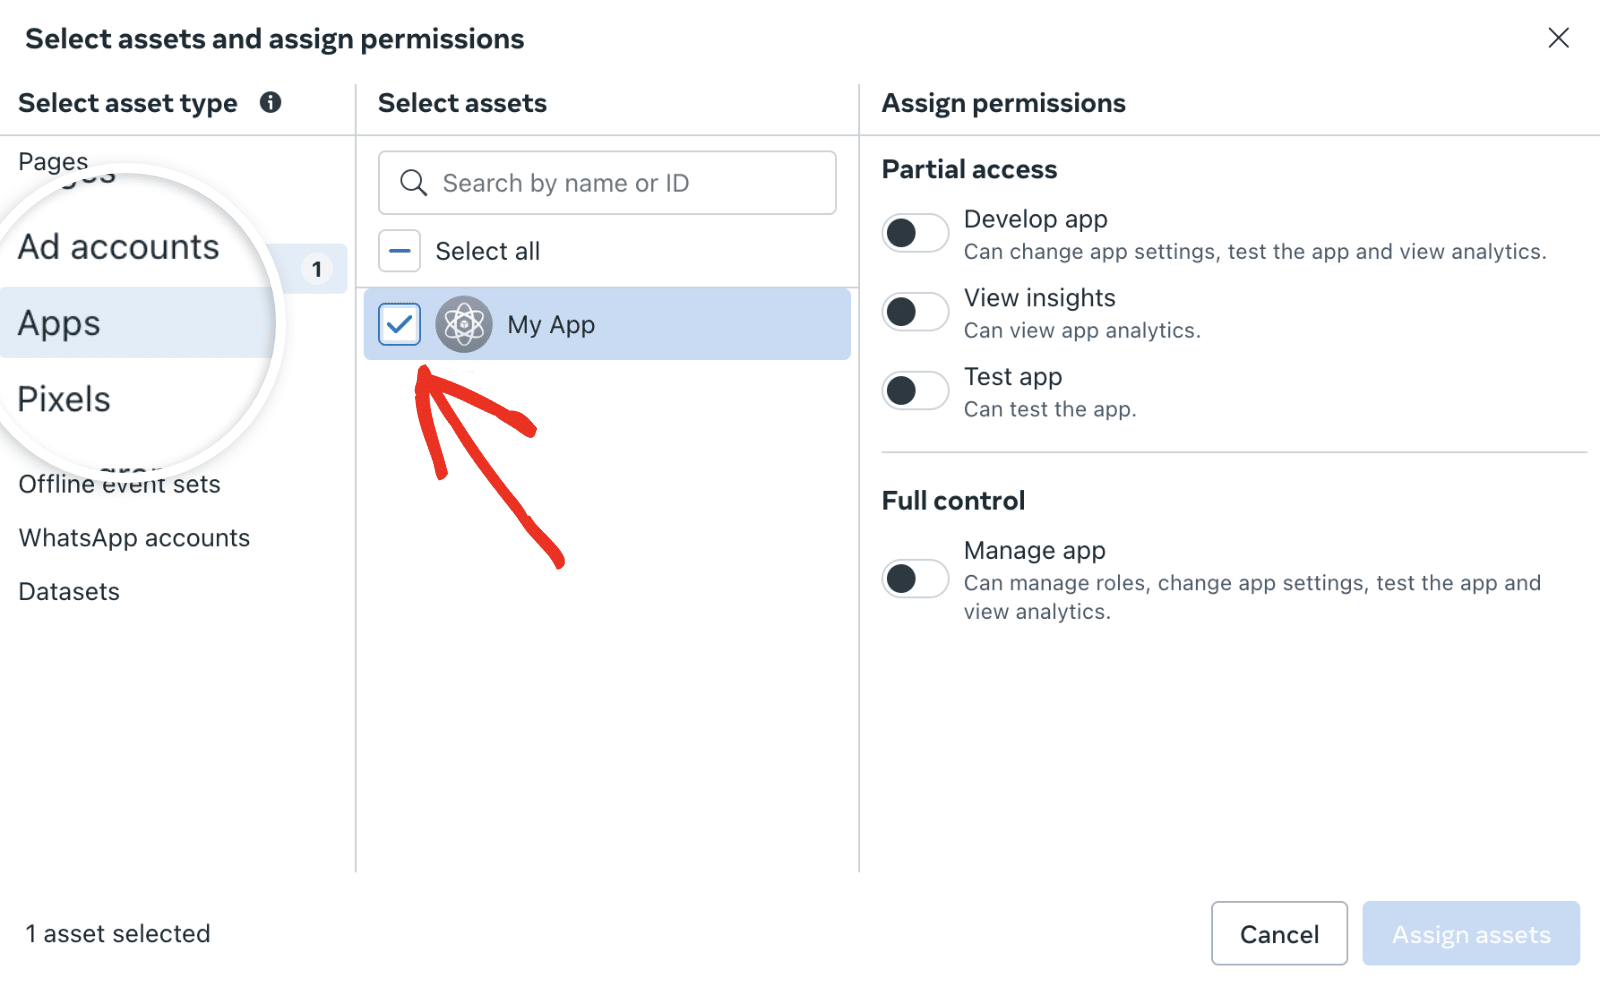
Then, toggle on the Manage app option under Full control.

After that, click the Assign assets button to proceed.
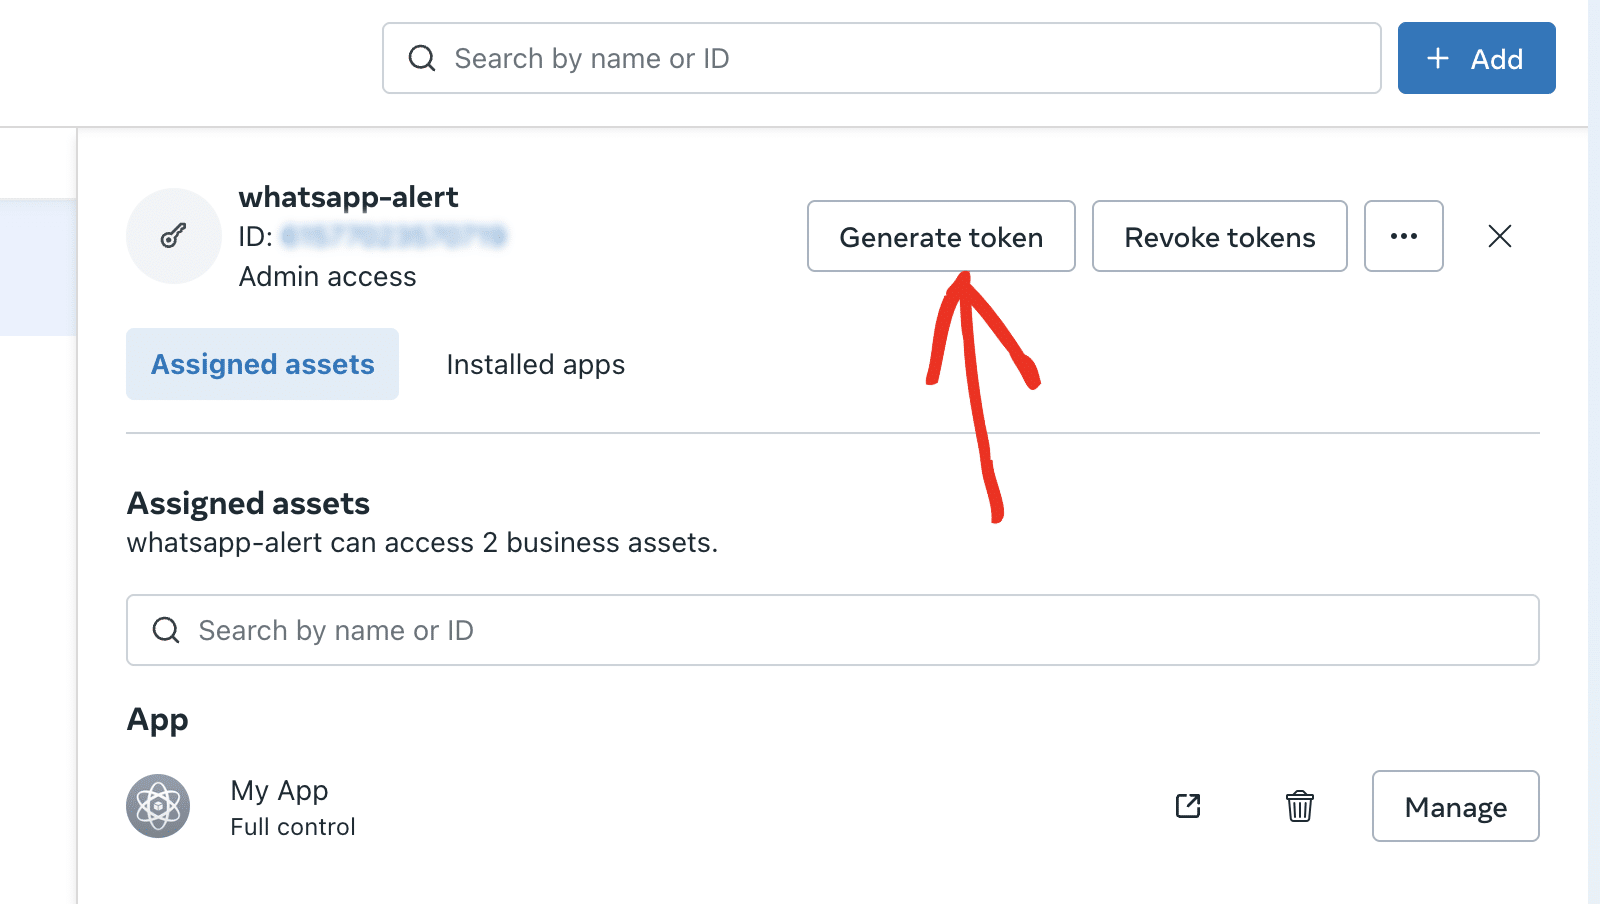
Once you’re done assigning the user role, click the Generate token button to create an access token.
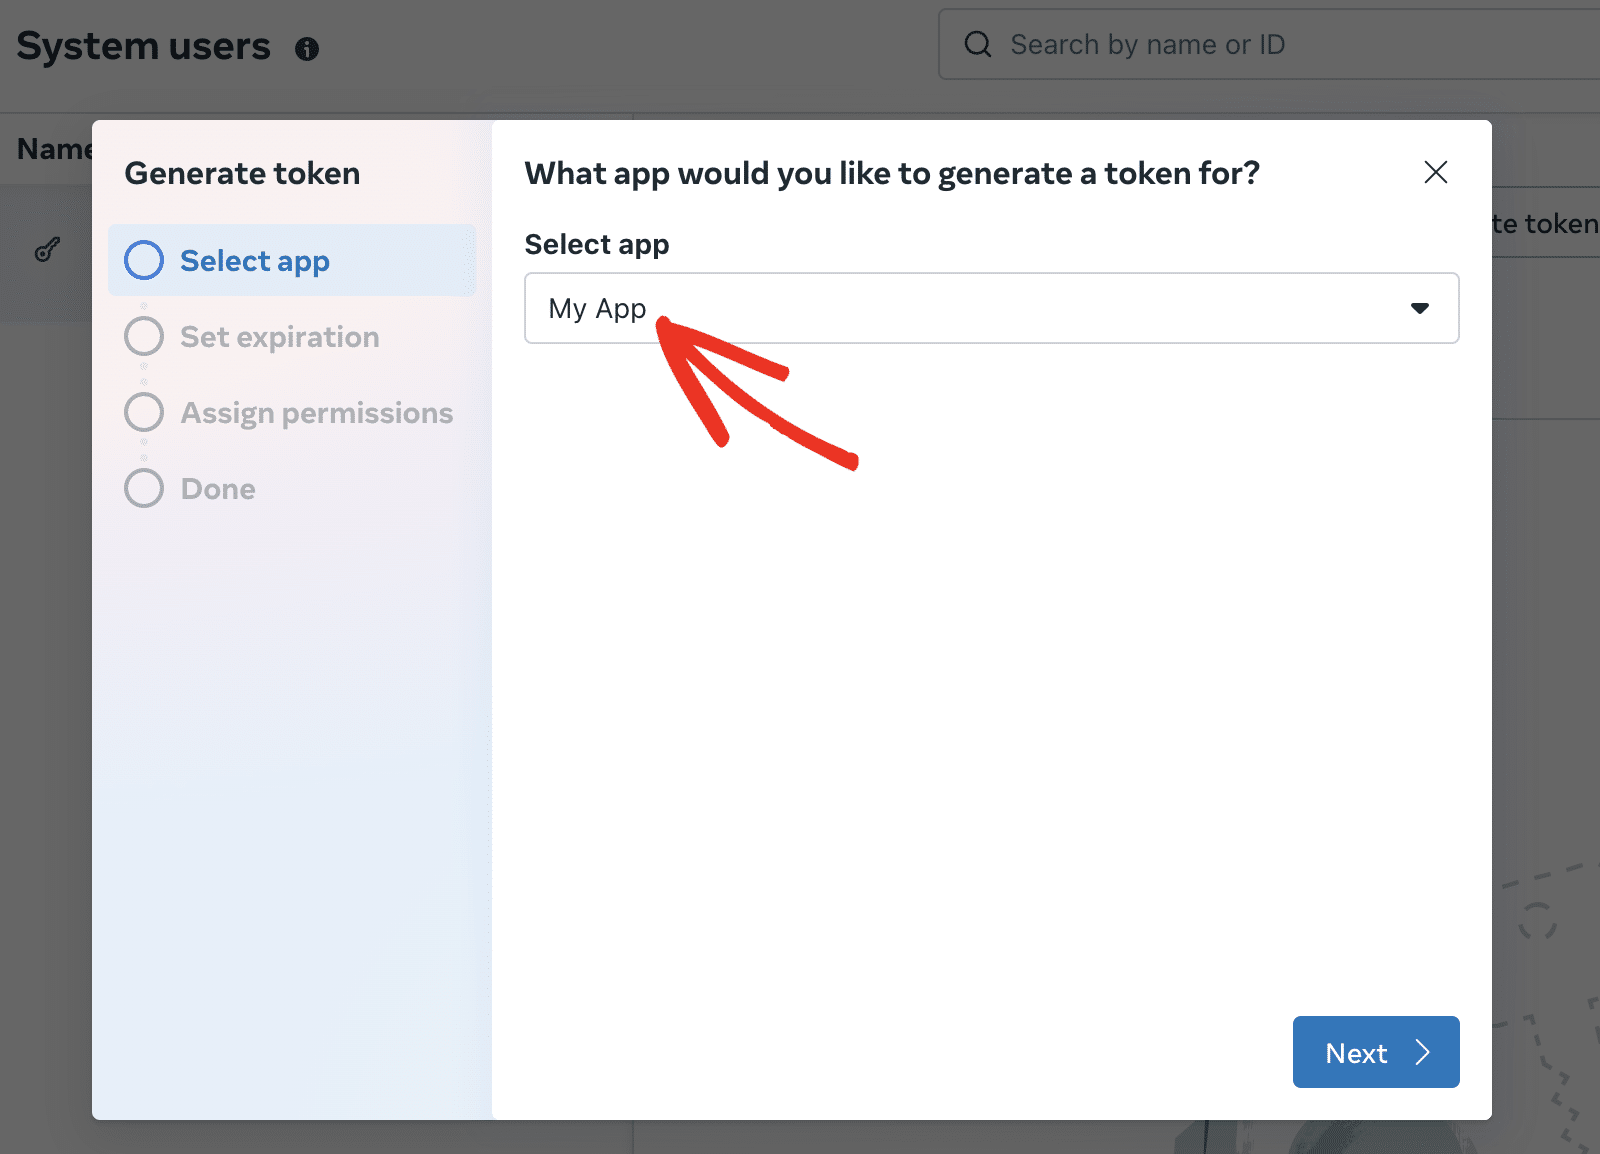
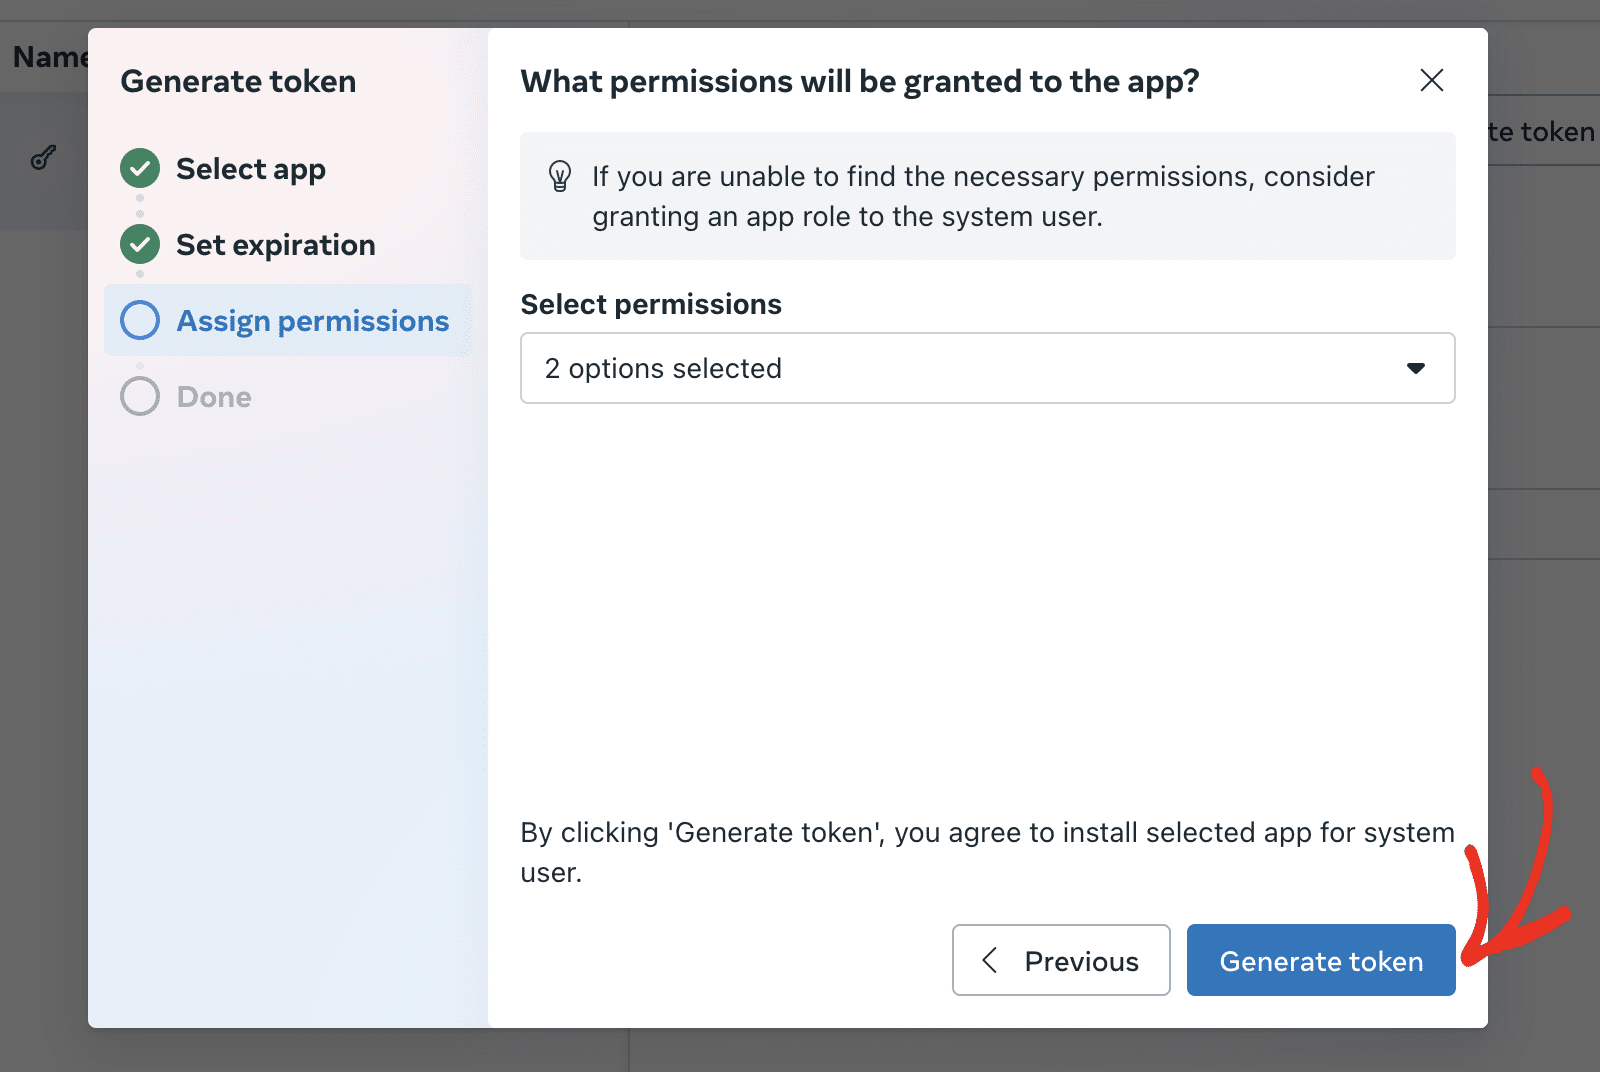
In the overlay that appears, click the Select app dropdown and choose your Meta app. Then click Next to proceed.
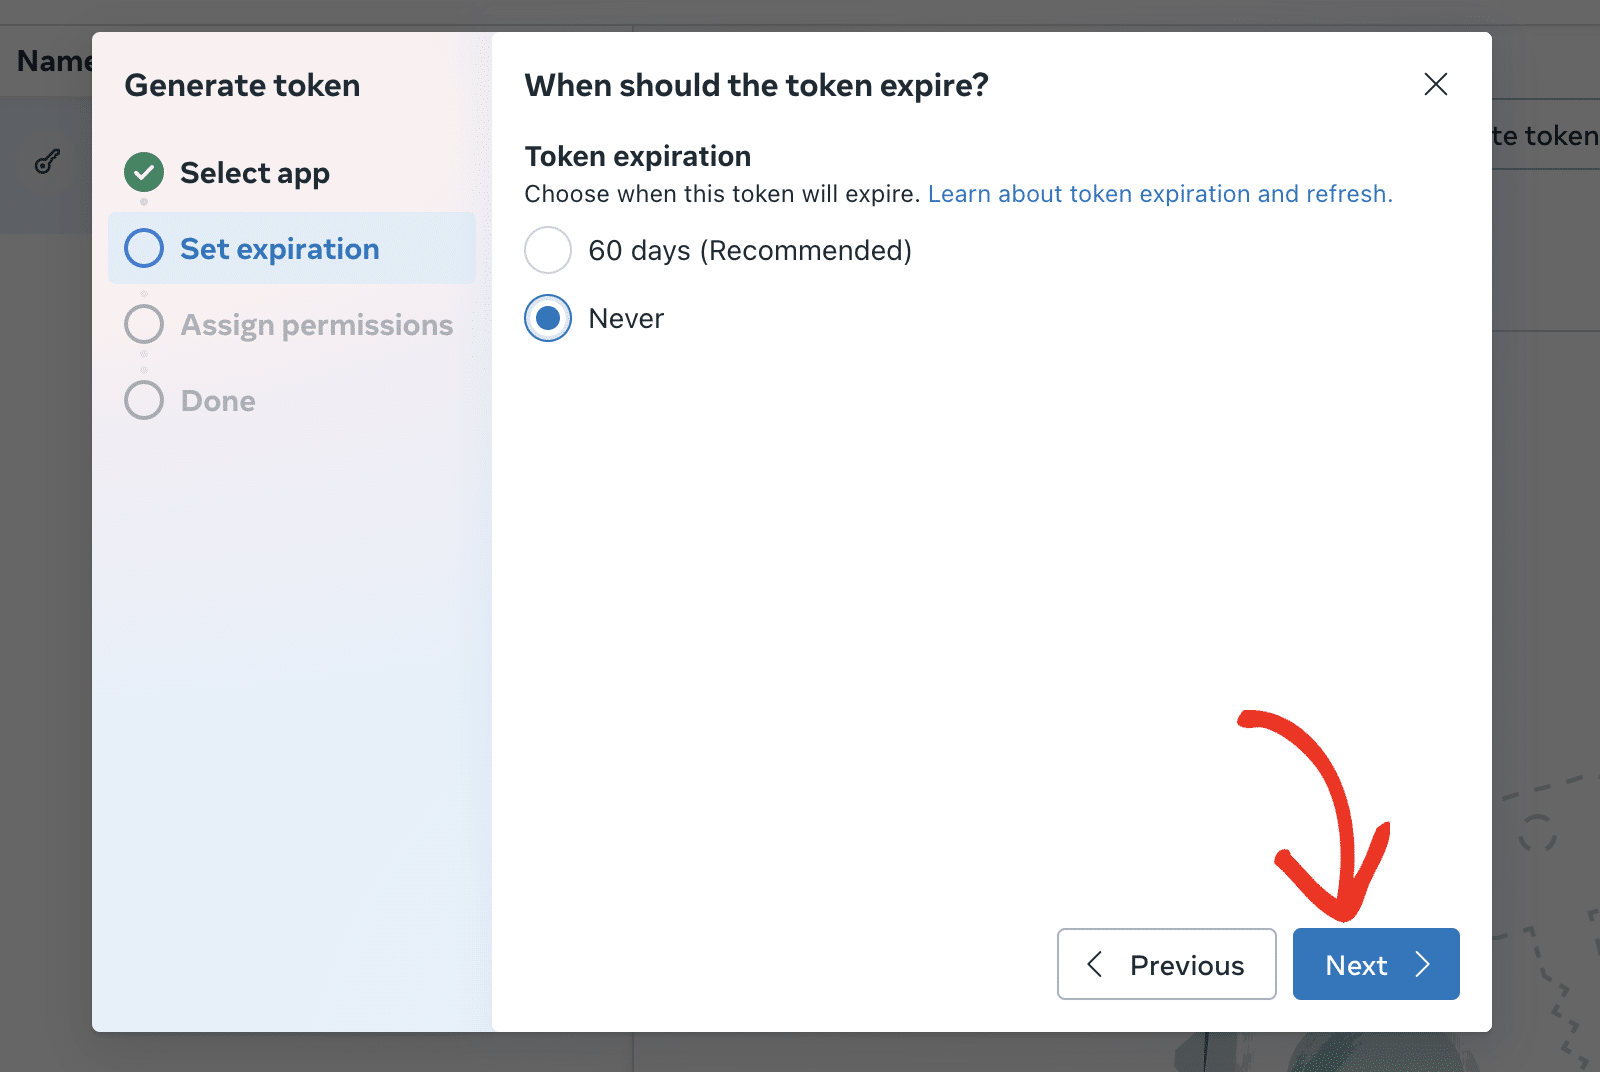
After that, choose Never in the Token expiration section and click Next to continue.
In the Assign permissions section, type ‘whatsapp’ in the search bar and enable the whatsapp_business_messaging and whatsapp_business_management options.

Finally, click the Generate token button to create your access token.
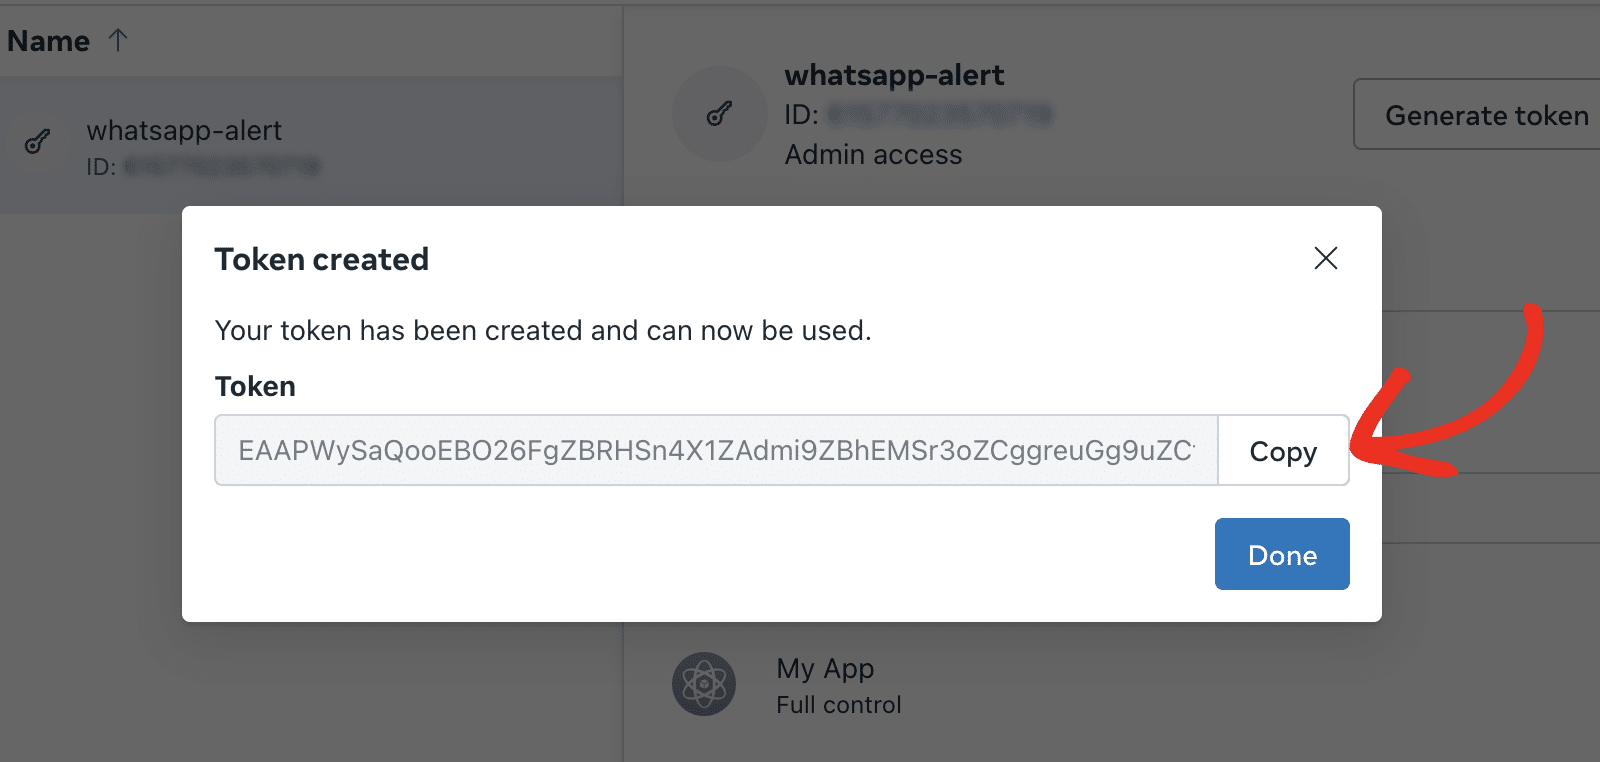
Click the Copy icon to copy the token.
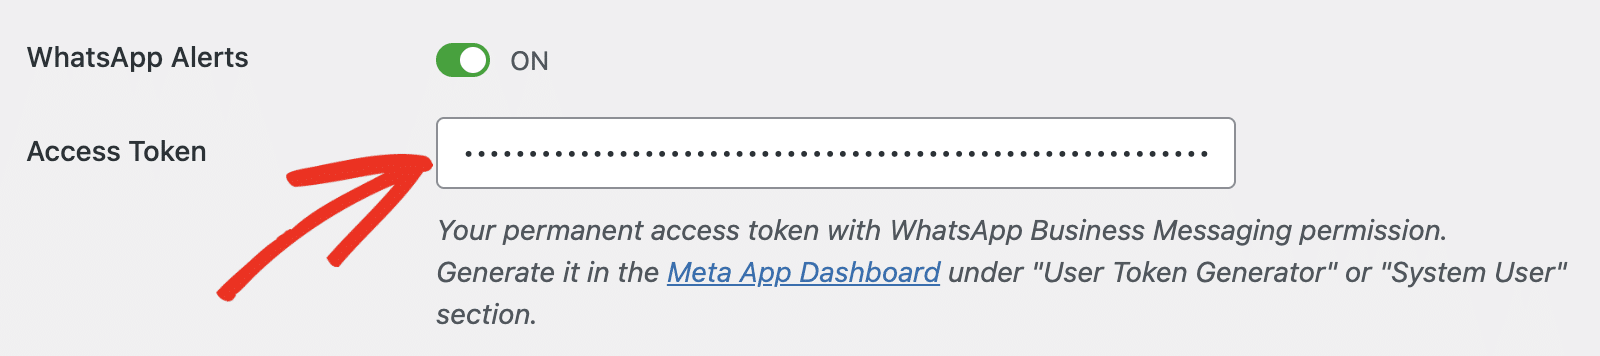
Adding Your Access Token
After that, return to your WP Mail SMTP settings page and paste the value you just copied into the Access Token field.
Once you’ve finished setting up your WhatsApp Alerts integrations, either save your settings or continue to add other integrations. To save your settings, scroll down and click the Save Settings button.

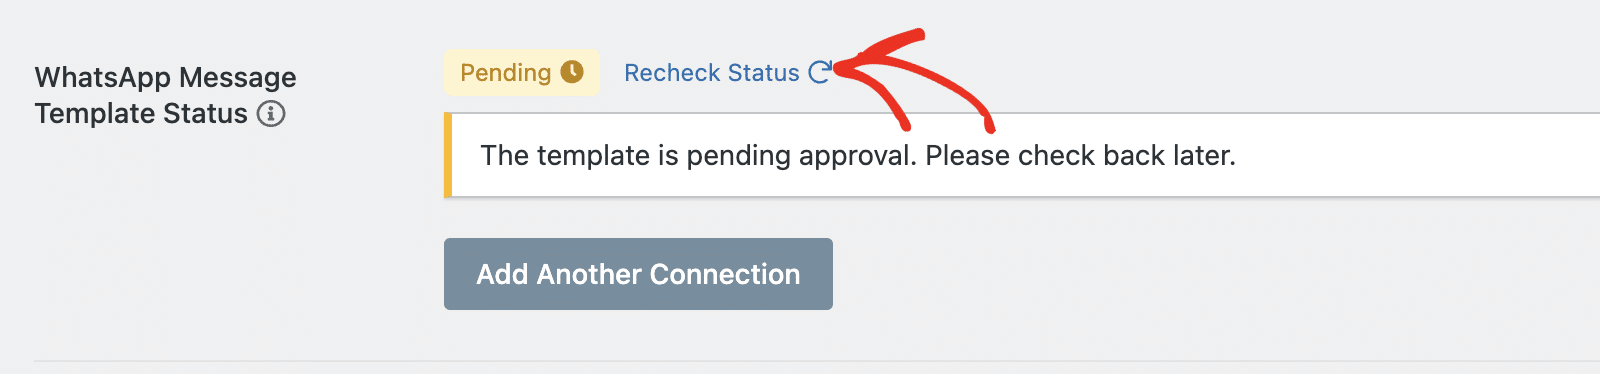
After saving your settings, WP Mail SMTP will automatically generate a template for your site. At first, you might see Pending next to the WhatsApp Message Template Status section. Indicating your template is under review by the Meta team.
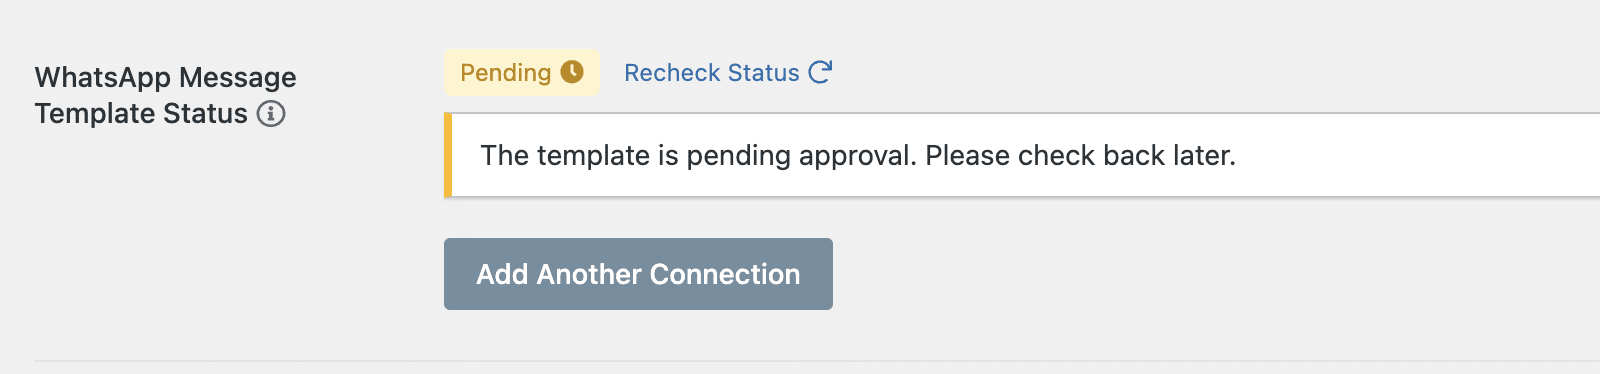
You can click the Recheck Status link to reconfirm the template status.
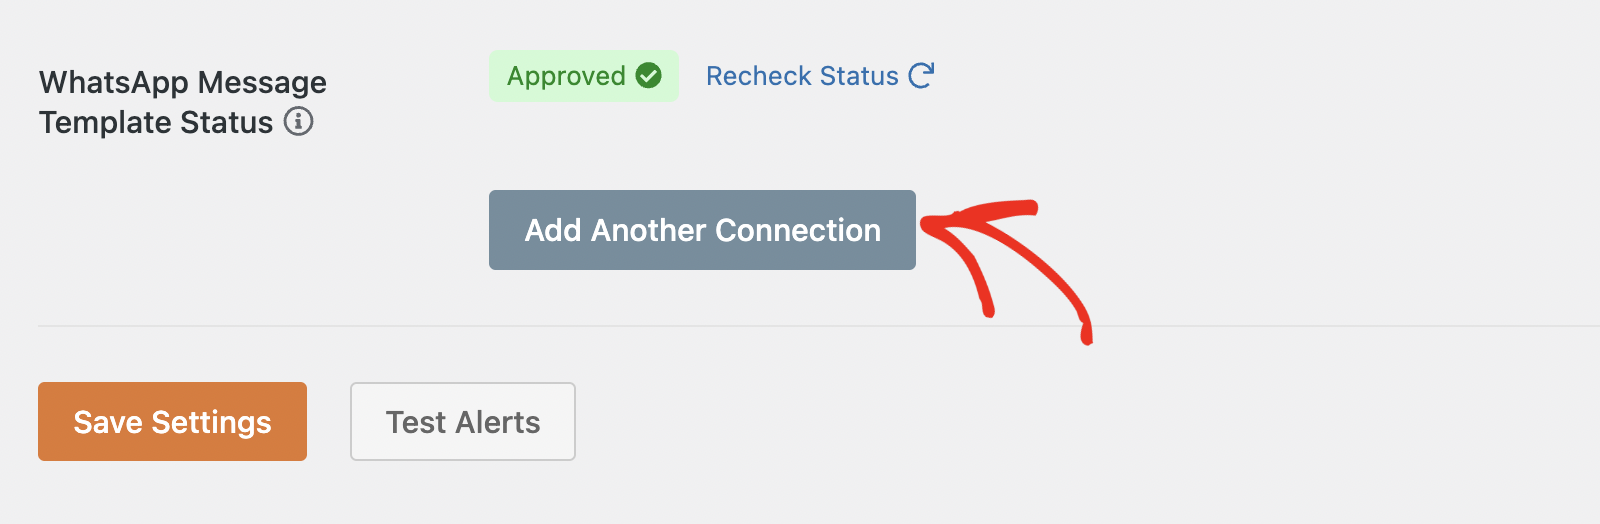
If the template is approved, you’ll see an Approved status next to it.

You can add multiple WhatsApp Alerts integrations on your site. To do so, click the Add Another Connection button.
After that, you’ll need to go through the process to set up a new Meta app and generate an access token for your app.
Note: Each WhatsApp integration you create needs to have its own WhatsApp Business API credentials. So you’ll need to create a separate Meta app for each connection you’d like to add.
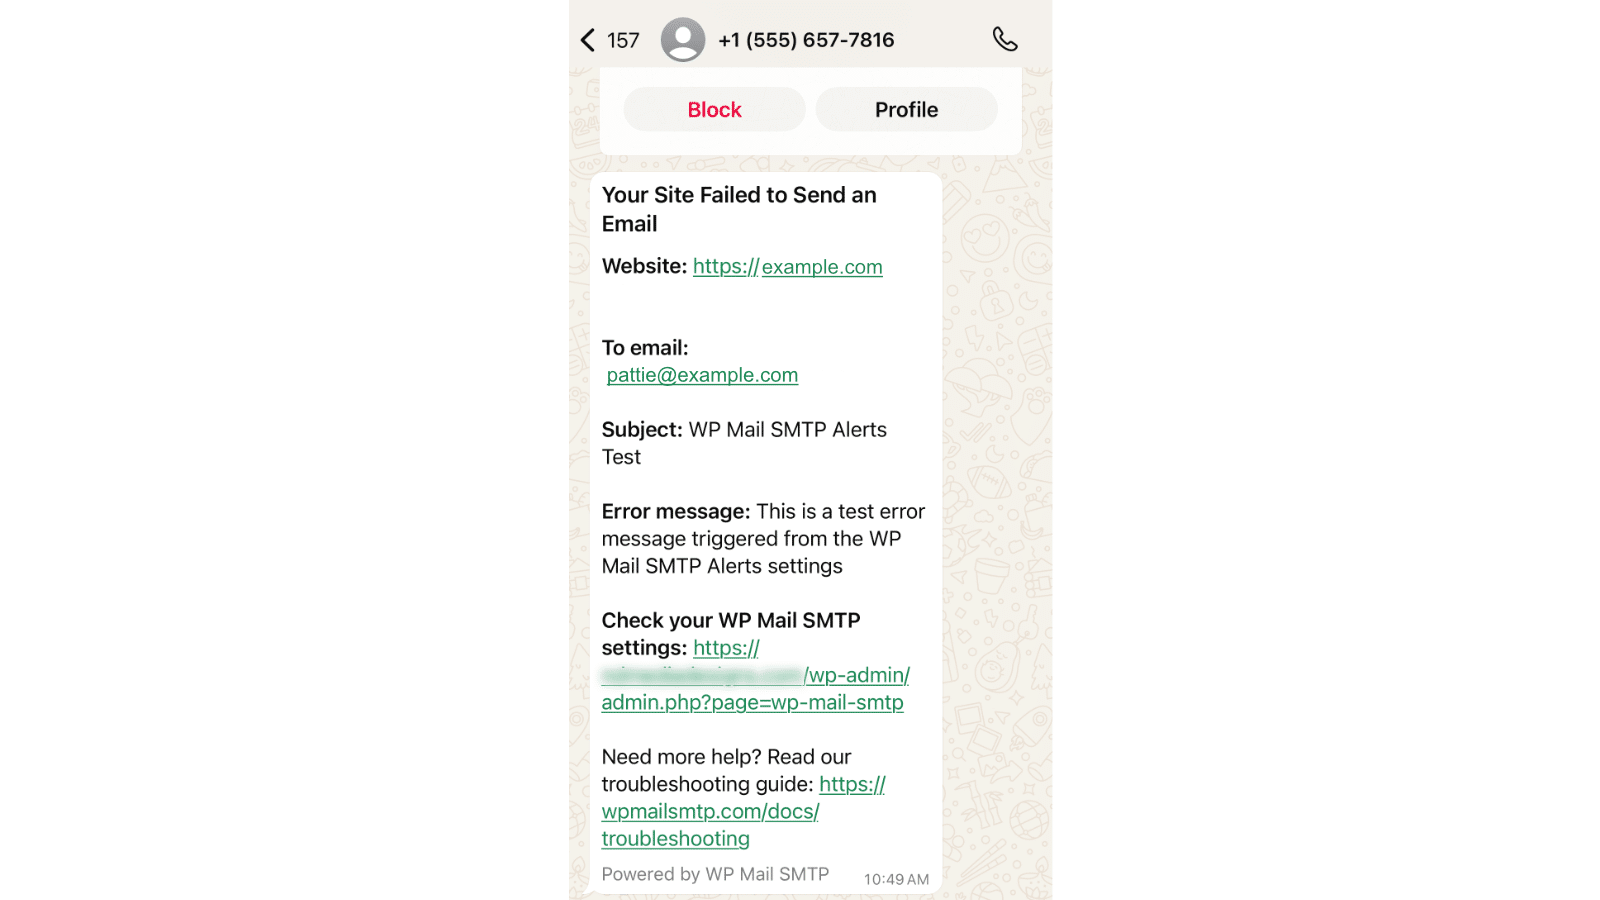
Once everything is set up correctly, you should receive a WhatsApp message whenever your site fails to send an email.
Frequently Asked Questions
Below, we’ve answered some of the top questions we see regarding configuring WhatsApp alerts in WP Mail SMTP.
Why are my WhatsApp alert messages not delivering?
This can occur due to a variety of reasons. To troubleshoot and resolve this issue, first verify that your access token is valid and hasn’t expired. Using the temporary access token generated from the WhatsApp Business API configuration page can also lead to messages not delivering. We recommend creating a system user and generating an access token for the user.
Also, check that the number you added in the To Phone Number field in WP Mail SMTP is formatted properly with the correct country code. Make sure to also add it as a recipient to the WhatsApp Business API.
How do I fix WhatsApp template not approved issue?
After connecting WP Mail SMTP to WhatsApp, our plugin automatically generates an alert template on your business manager profile. You can access this template from the Meta Business Manager dashboard. You’ll see the wp_mail_smtp_alert template. An Active status means your template is working properly.
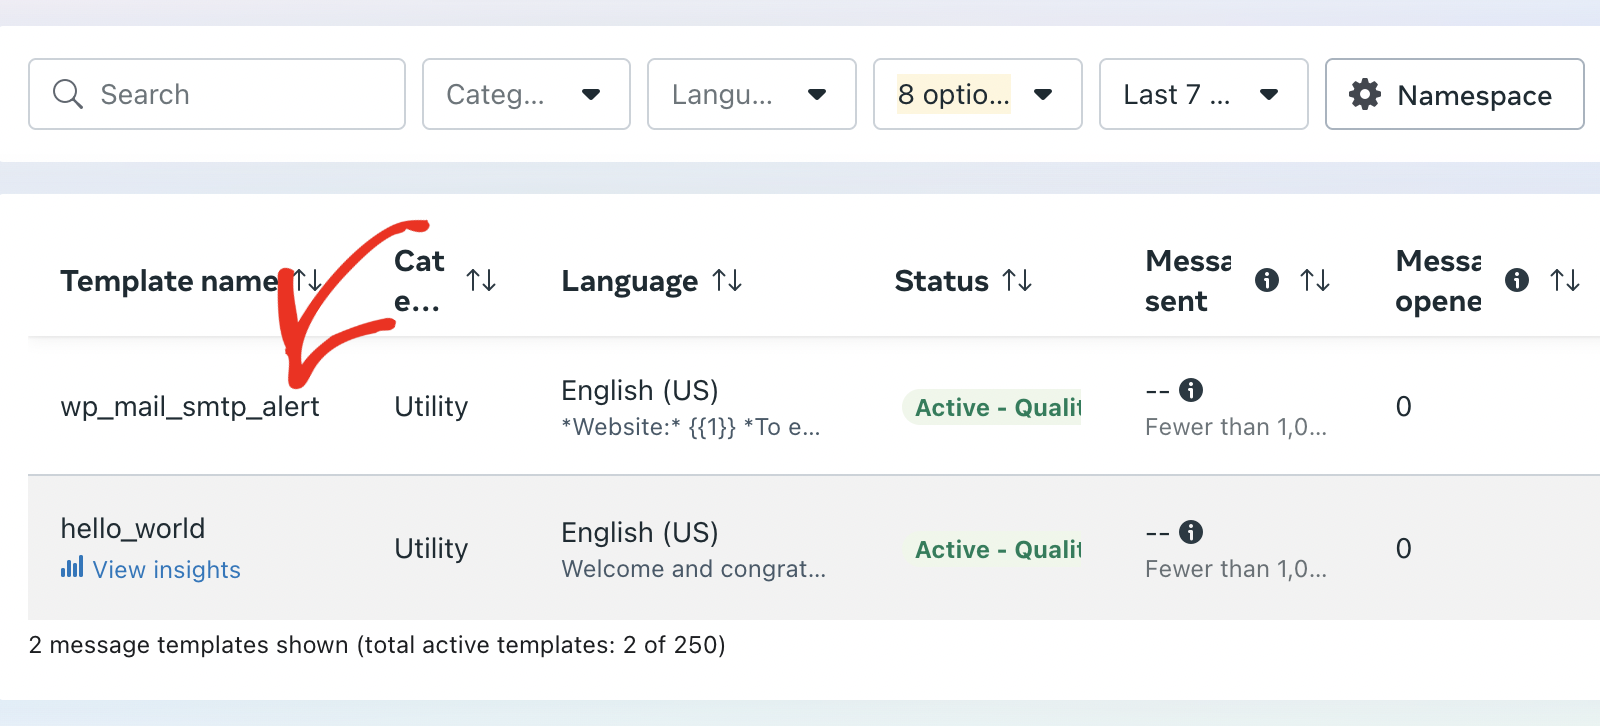
If the status is showing PENDING, you’ll need to wait a little for Meta to approve the template. If the status is REJECTED, it means Meta automatically disapproved the template. When this happens, we recommend resubmitting the template for approval or contacting Meta’s support team for manual review.
That’s it! You’ve now learned how to configure WhatsApp alerts in WP Mail SMTP.
Next, would you like to configure multiple connections? See our tutorial to learn how to configure additional connections in WP Mail SMTP.