
AI Summary
Do you want to change your WordPress notification email address? Sending emails from WordPress with the wrong address can be a real problem.
Not to mention, notifications from WordPress are important because they bring you useful information like new contact form entries, user password change requests, and more.
By default, WordPress uses the admin email you set during installation, but you can change it anytime. In this guide, I’ll show you three easy ways to update the notification email so messages go where you want them
When Are WordPress Notifications Important?
Notifications are a great way to stay up-to-date about any changes occurring on your site. By default, WordPress sends you various kinds of notifications, such as password lost emails, new user registrations, core WordPress updates, plugin updates, and so on.
And as you add more elements to your site, such as contact forms, these generate email notifications every time a user submits an entry. So if you want to be instantly notified whenever an important change occurs on your website, make sure to correctly set up the notification email address.
Bear in mind, though, that most servers block the plain PHP mail function that WordPress uses. Without an SMTP service, messages are often flagged or dropped before they reach the inbox. That’s why it’s important to use a plugin like WP Mail SMTP along with a reliable mailer.

How to Change the WordPress Notification Email Address
Depending on what you’re trying to achieve, there are different ways to change the WordPress email address for notifications. Let’s go over the details.
1. Changing the Site Admin Email Address
When you first set up your WordPress site, it requires an admin email address. But what if you want to change that email address later on?
Thankfully, WordPress lets you change the admin email address at any time. To access the site admin email settings, open your WordPress dashboard and go to Settings » General.

On this page, you’ll find the Administration Email Address field. Enter your new email address in this field.

After that, scroll down and press the Save Changes button. WordPress will now send an email to your new email address to confirm the change.

As soon as you confirm it, your WordPress admin email will now be successfully changed. This means that all administration notifications emails from WordPress will send to your new email address.
2. Changing Contact Form Notification Email
If you’re using contact forms on your site, you can send notifications from your forms to any email address of your choice.
Usually, forms send you notifications to your default WordPress admin email. But if you want to keep your admin email unchanged but need notifications to a different address, there’s an easy solution to this.
The best way to change your contact form notification email is to use a plugin called WPForms, which is a beginner-friendly form builder plugin for WordPress.
Not only does it let you create all kinds of WordPress forms, it also enables you to customize your form notifications and change the email address where you want to receive these. To get started, install WPForms on your site.

After the plugin is installed and activated on your site, you can start building forms. While you’re creating a form, WPForms gives you the ability to set up custom notifications and change the email address.
Let’s see how you can change the form notification email address next. From the form builder interface, go to Settings » Notifications.

This is where you can access the form notification settings. The main setting you want to be looking for here is Send To Email Address. By default, this field contains your WordPress admin email.

To change that, just enter a different email address where you want to receive form notifications. You can repeat this process for other forms on your site and even set up different notification email addresses for different forms.

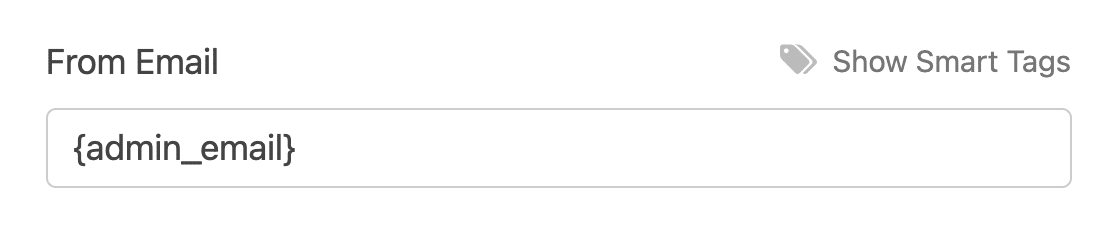
This can be helpful if different people or departments are responsible for monitoring entries from each individual form. Also, WPForms lets you change the From Email settings for your notifications.
The From Email appears as the sender email to your recipients. If you’d like to use a different address as your From Email, just enter it in the field.
When you’re done making changes, make sure to press Save on the top-right of the form builder screen.
3. Override From Email Across the Site
All outgoing WordPress notifications use your site admin email as the From Email by default. But most WordPress plugins also allow you to change the sender email address for that plugin only, irrespective of your default site admin email.
It can be frustrating to change the email address across all plugins on your site one by one if you want all of them to be using the same sender address.
Thankfully, there’s an easy fix to that. WP Mail SMTP is a WordPress SMTP plugin trusted by millions of users to improve their email deliverability. But the great thing is that WP Mail SMTP also offers incredibly useful extra features.
For instance, WP Mail SMTP has a From Email override feature that enables you to set a single sender address across all plugins on your site with a single click. You can install WP Mail SMTP as shown in this guide.

After WP Mail SMTP is ready on your site, go to WP Mail SMTP » Settings from the sidebar menu on your WordPress dashboard.
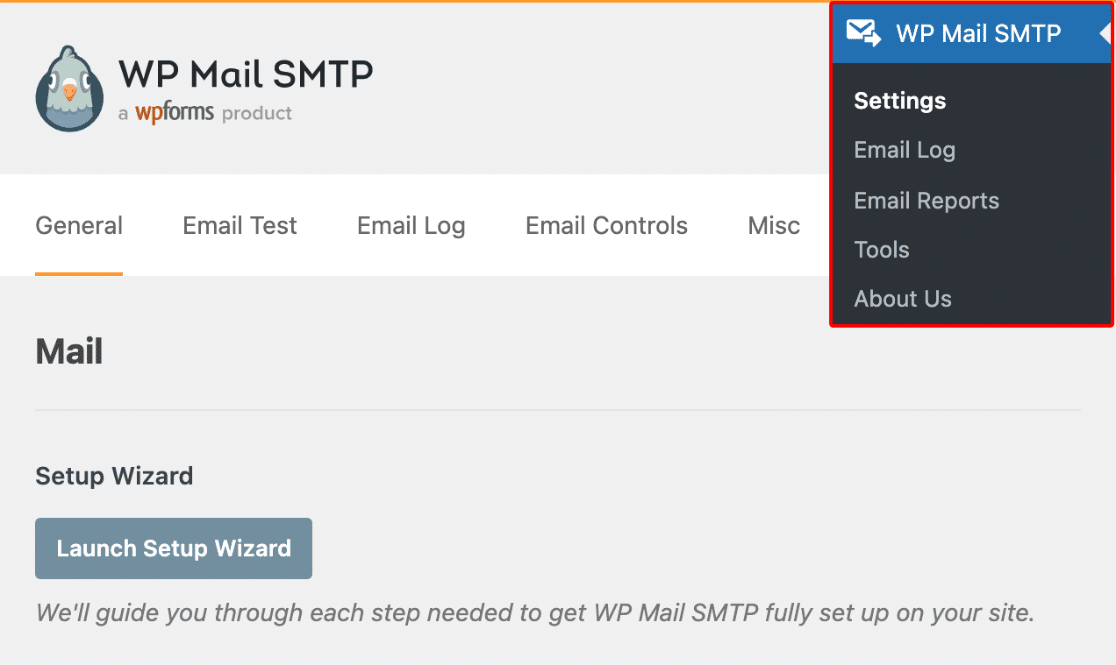
Now, scroll down to the Mail section and look for the From Email field. Enter the new sender address in the From Email field and checkmark the Force From Email option.

This From Email should match with the From Email that you used when setting up your account with a mailer service. WP Mail SMTP needs a mailer service in order to send emails.
There are many options available, and you can establish a connection with these using the same settings screen. You can see instructions for setting up different mailers with WP Mail SMTP using the doc guides below.
| Mailers available in all versions | Mailers in WP Mail SMTP Pro |
|---|---|
| SendLayer | Amazon SES |
| SMTP.com | Microsoft 365 / Outlook.com |
| Brevo (formerly Sendinblue) | Zoho Mail |
| Google Workspace / Gmail | |
| Mailgun | |
| Postmark | |
| SendGrid | |
| SparkPost | |
| Other SMTP |
After you’ve updated the settings, click on Save Settings. Now, you won’t need to edit your sender address for every plugin on your site because WP Mail SMTP will override From Email settings for you.

And there you have it! You now know how to change the WordPress notification email address settings.
FAQs on How to Change the WordPress Notification Email Address
Learning how to change the WordPress notification email address across a site is a popular topic among our readers. Here are answers to some common queries about it:
How do I change the WordPress admin email without confirmation?
You can use a plugin like Change Admin Email Setting Without Outbound Email or change it directly in the database with phpMyAdmin. This skips the need for email approval.
Why is WordPress still sending emails to the old admin address?
If you changed the email but didn’t confirm it, WordPress keeps using the old one. Check Settings > General to see if it says “pending change.”
How do I update the notification email for new user signups?
Go to Settings > General and update the admin email. This is where alerts for new users will go by default.
Can I use a different email for contact form alerts in WordPress?
Yes. If you’re using WPForms, go to the form settings and change the “Send To Email” address to any address you want.
Where can I edit email settings for WordPress notifications?
Most system emails use the address found under Settings > General. For forms and plugins, check their individual notification settings.
How do I disable specific email notifications in WordPress?
You’ll need a plugin or custom code. Some membership or form plugins also let you turn off emails in their settings.
What is the difference between admin email and notification email?
The admin email handles things like new users and updates. A notification email is used by plugins like WPForms to send alerts.
Why are my WordPress email notifications not working?
Your server might not be set up to send mail. Adding an SMTP plugin like WP Mail SMTP often fixes this.
Can I change the email address used in WPForms notifications?
Yes. Open your form, go to Settings > Notifications, and change the “Send To” and “From Email” fields.
How do I send WordPress emails through SMTP instead of PHP mail?
Install WP Mail SMTP, pick your mail service, and complete the setup wizard. This routes all emails through SMTP for better delivery.
Next, Connect WordPress With Stripe
Do you want to accept Stripe payments from your WordPress site? You’ll just need a Stripe payment plugin to get started.
You may also want to mass email your WordPress users. Here’s a quick guide on emailing registered WordPress users. And here’s how to get alerts when your WordPress emails stop working.
Ready to fix your emails? Get started today with the best WordPress SMTP plugin. WP Mail SMTP Elite includes full White Glove Setup and offers a 14-day money-back guarantee.
If this article helped you out, please follow us on Facebook and Twitter for more WordPress tips and tutorials.