I run several WordPress sites, and the constant email notifications are genuinely annoying.
Between plugin updates, comment notifications, and automatic updates, my inbox gets cluttered with WordPress emails I don’t really need to see immediately. It’s not the end of the world, but it’s unnecessary noise.
If you want to disable WordPress email notifications and clean up your inbox, here’s the simplest way to do it.
Disable WordPress Email Notifications Now
What Causes Automatic Email Notifications in WordPress?
WordPress is a regularly updated, open-source Content Management System (CMS). For security purposes, many of these updates are installed automatically. By default, WordPress sends you an email notification when these updates happen.
Other than core site updates, WordPress also sends email notifications for events like password reset confirmation, new comments submitted to your site, new users created, and so on.
Plus, if you’ve enabled automatic updates for your WordPress plugins, you’re going to get an email every time each one of your plugins is updated. The same goes for your WordPress theme.
As your website grows, you’ll likely get busy working on marketing and optimization tasks. So these extra notification emails can fill up your inbox unnecessarily.
Thankfully, it’s very easy to disable email notifications if you’ve got the right plugin
How to Disable WordPress Email Notifications
I’m going to walk you through the easiest way to disable your WordPress email notifications in three easy steps:
Let’s get started!
1. Install WP Mail SMTP
WP Mail SMTP is the best and most widely used SMTP plugin for WordPress. It authenticates your email addresses and makes sure your messages reach you and your customers’ inboxes without errors.
WP Mail SMTP Pro (the paid plan) gives you additional controls over your email settings. With this plan, you also get the ability to disable WordPress notifications that you don’t want to be receiving anymore.
So, the first thing you need is to purchase the WP Mail SMTP Pro (or higher) plan. Next, visit your account dashboard, and click on the Downloads tab. Then, click on the Downloads WP Mail SMTP button.
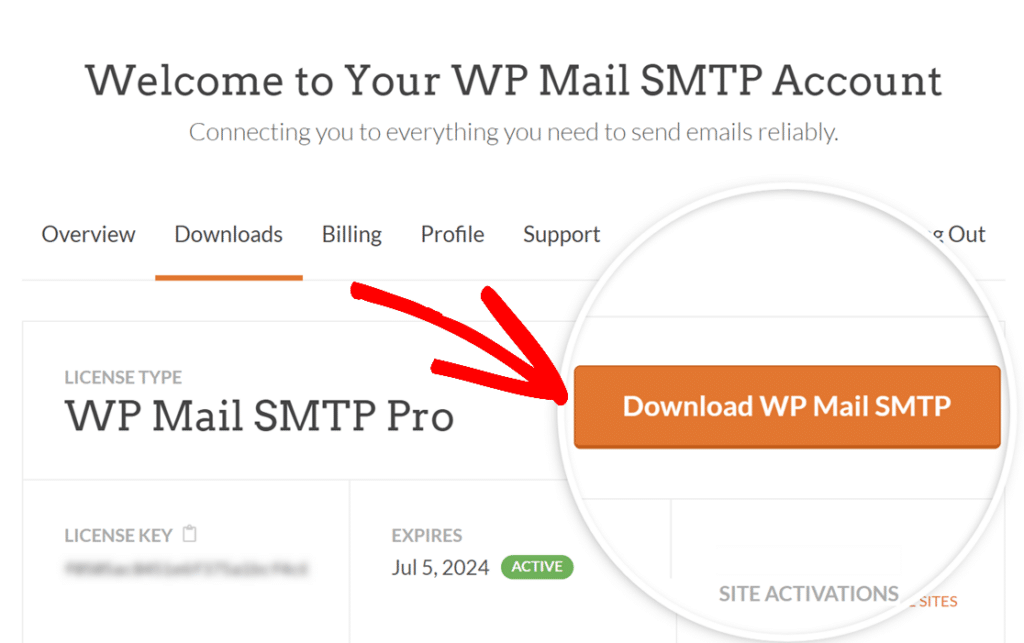
This will download the plugin as a zip file to your computer. You’ll also find your license key in the same window. Make note of this (you’ll need it later).
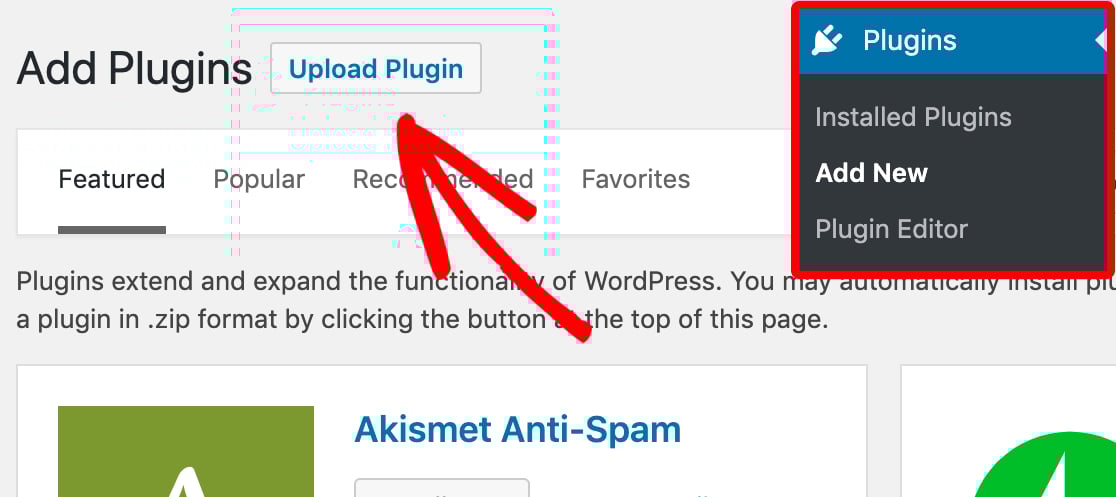
Now, open your website’s WordPress dashboard and move your mouse over Plugins to pop out a new menu. Here, click on Add New and then press the Upload Plugin button.
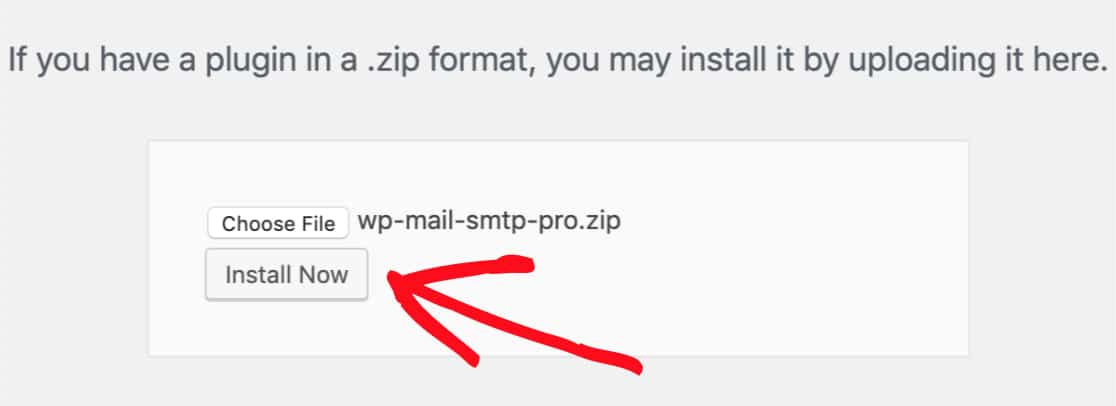
Click on Choose File and navigate to the location of your downloaded WP Mail SMTP ZIP file. Select the file and then click on Install Now.
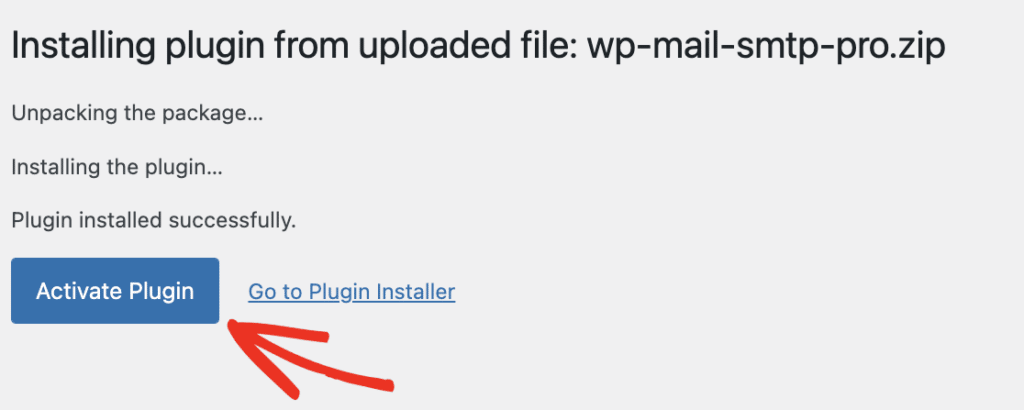
Once it’s installed, click the Activate Plugin to make it active on your WordPress site.
Activating WP Mail SMTP Pro normally launches the Setup Wizard automatically. But if it hasn’t launched for you, click on WP Mail SMTP » Settings on the left-hand bar, Then, scroll down to the Mail section. You’ll find the Launch Setup Wizard button here. Click on it.
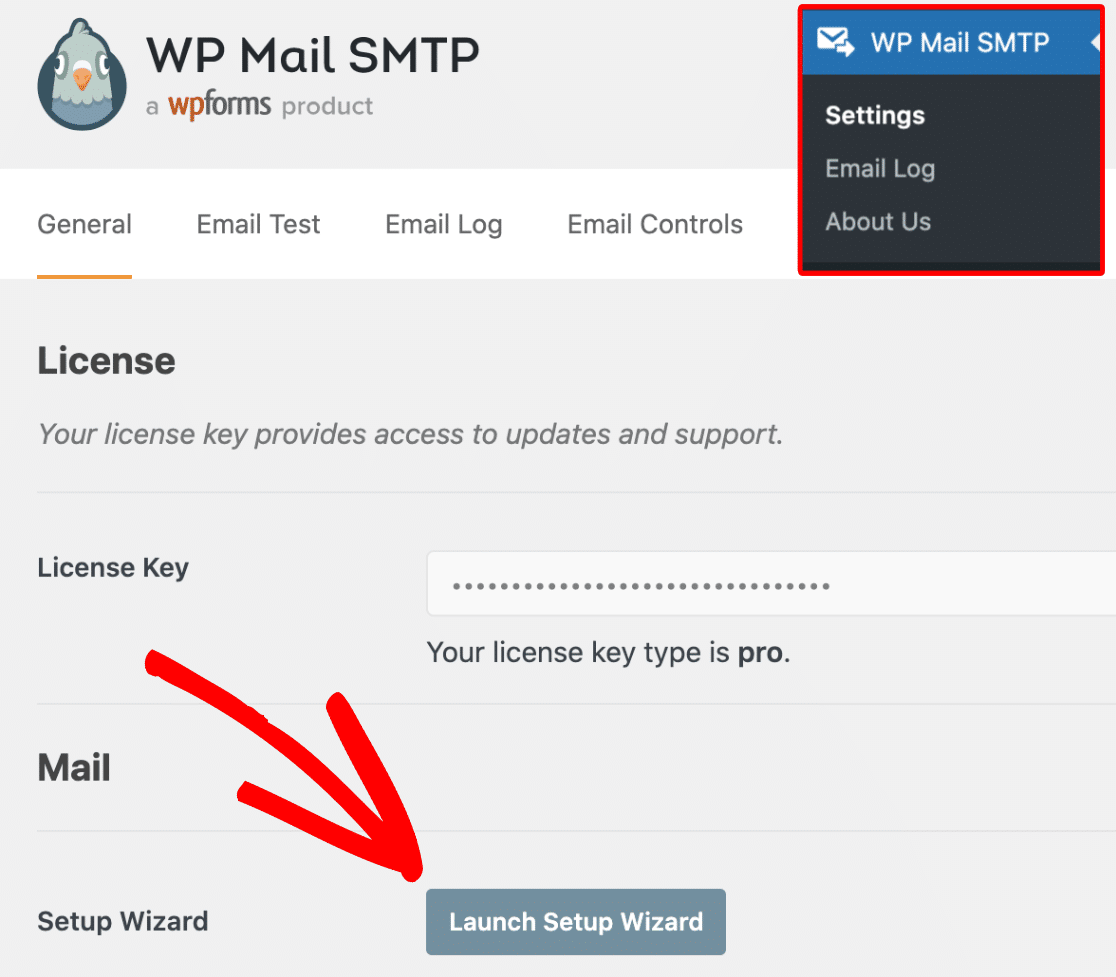
WP Mail SMTP’s setup wizard simplifies the whole configuration and setup process.
2. Configure WP Mail SMTP Settings
After launching the setup wizard, you’ll be directed to a new screen. Here, click on Let’s Get Started to start the process.
In the next step, select your preferred mailer service.
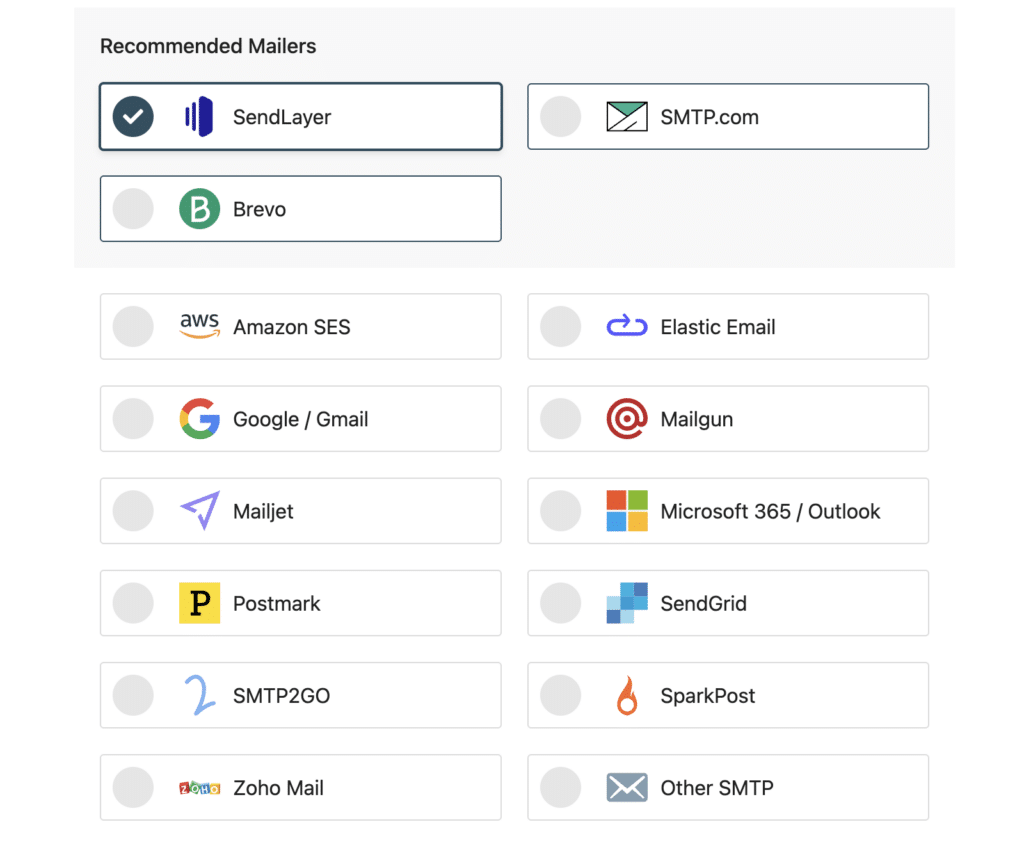
For beginners and small sites, we recommend Brevo (formerly Sendinblue). This mailer is easy to setup and it also has a free account that has a max limit of 300 emails per day. For a comparison of different third-party mailer options, see our guide on WordPress transactional email service providers.
When you’ve chosen your mailer, jump to the doc link below of your selected mailer to see its setup guide:
Come back to this post after you’ve set up the mailer in WP Mail SMTP.
After setting up the mailer, move through the final steps in the Setup Wizard by following the simple on-screen instructions.
3. Change WordPress Email Notification Settings
Once WP Mail SMTP Pro is successfully set up on your WordPress site, you should activate the Pro version using the license key you earlier copied.
To do this, click on WP Mail SMTP » Settings on the left-hand bar of your WordPress to visit the settings page. In the General tab, you’ll find the License Key field where you can enter your key to activate WP Mail SMTP Pro.
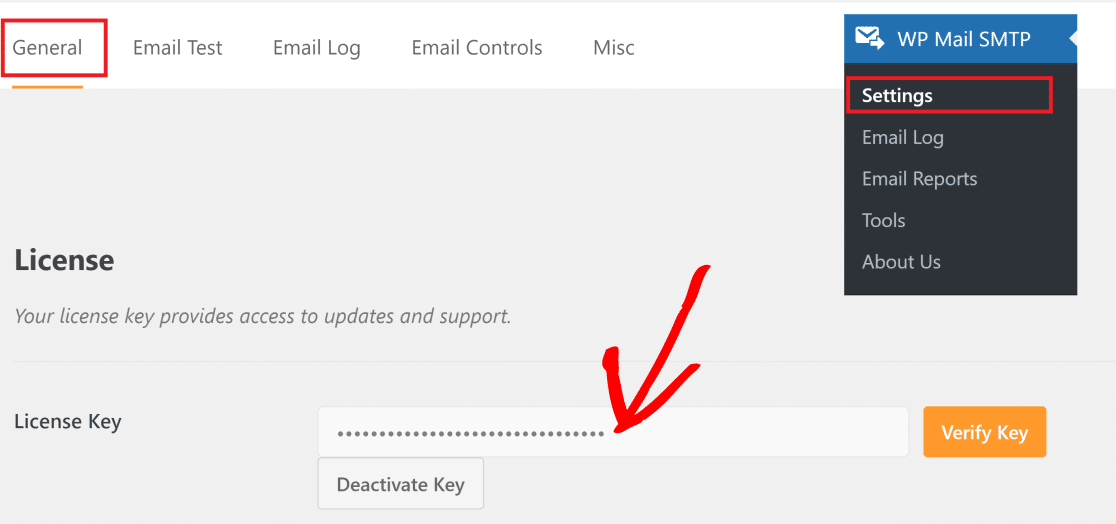
Once your Pro plan is activated, click on the Email Controls tab to access email notification settings.
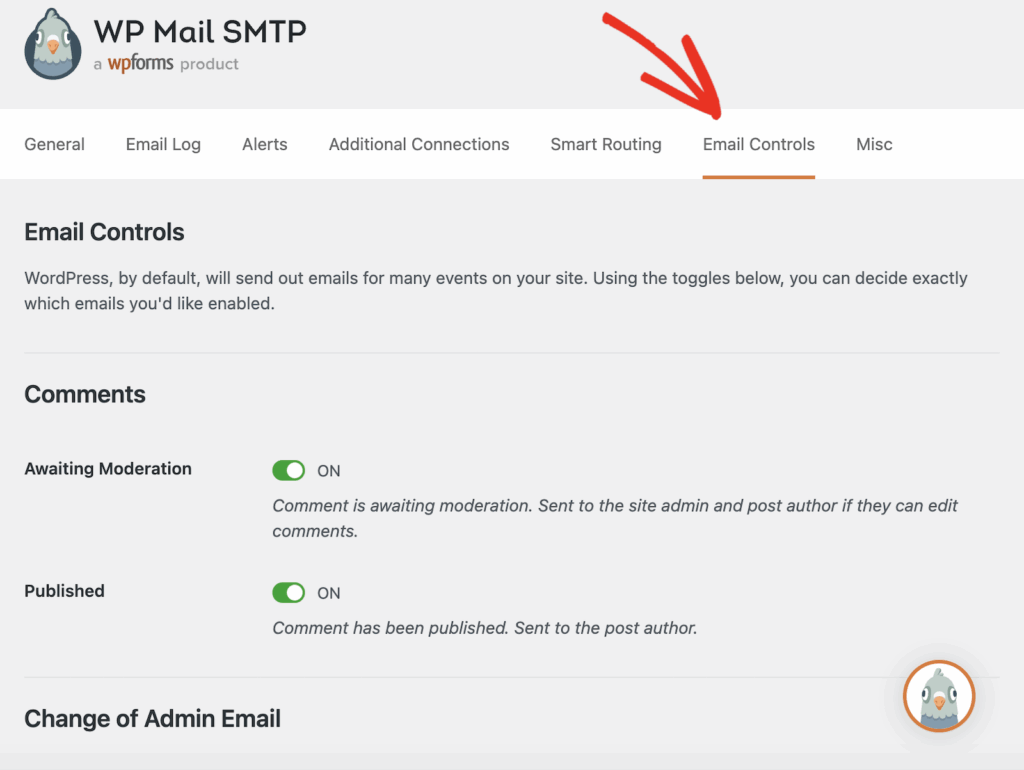
Here, you’ll find various different types of email notifications that you can configure including:
- Comments
- Change of Admin Email
- Change of User Email or Password
- Personal Data Requests
- Automatic Updates
- New User
If you have lots of plugins and premium themes that are regularly updated, then Automatic Updates is one of the most important types of emails you can control with WP Mail SMTP.
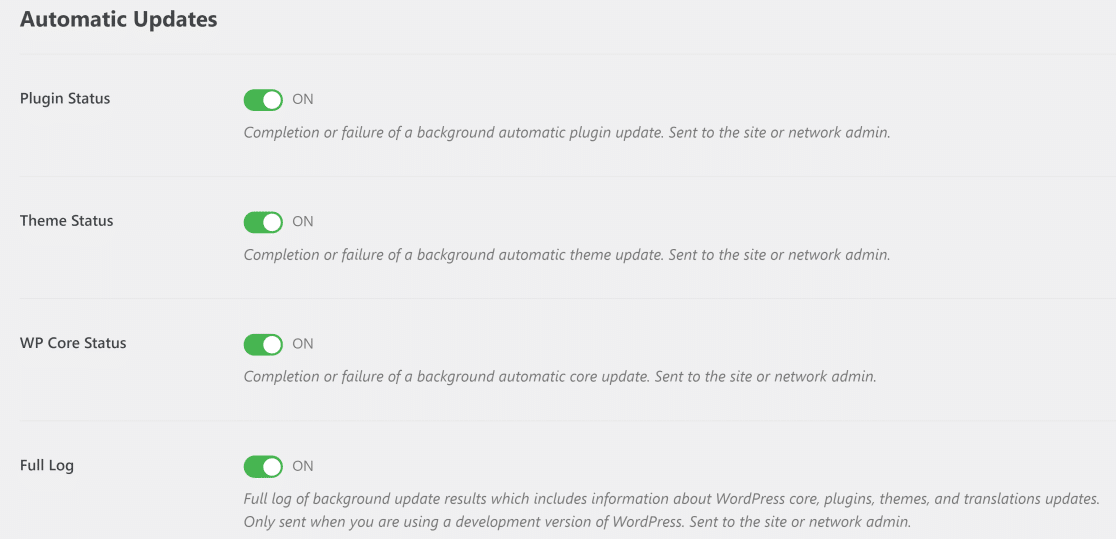
Simply use the toggle buttons to disable automatic update notifications in WordPress.
You might also find email controls for comment notifications very useful. For instance, you may only wish one of your site’s post authors to be notified when a comment is published, but don’t want any notifications when a comment is awaiting moderation.
All you have to do is disable the Awaiting Moderation email, and leave Published emails on in the Comments section.

Similarly, you can disable notification emails of various types with WP Mail SMTP’s Email Controls feature. And all it takes is a single click!
At the same time, however, you might want to set up email notifications for authors when their posts are published.
And that’s it! You now know how to disable WordPress email notifications in the easiest way possible.
FAQ About Disabling WordPress Email Notifications
Here are some of the most frequently asked questions our support team is asked about disabling email notifications in WordPress:
Will disabling email notifications affect my site’s security?
No, disabling email notifications doesn’t affect your site’s actual security. The updates still happen automatically – you just won’t get an email about every single one. You can still check your updates manually in your WordPress dashboard whenever you want.
Can I disable some notifications but keep others?
Yes, with WP Mail SMTP Pro you can turn off plugin update emails but keep comment notifications, or disable automatic update emails but keep new user registration alerts. It’s completely customizable.
What happens if I miss an important update?
WordPress handles most updates automatically, so you don’t need to do anything. For major updates that require your attention, you’ll still see them when you log into your WordPress dashboard. Plus, you can always re-enable notifications for critical updates if needed.
Can I disable notifications without using a plugin?
You can disable some notifications by adding code to your theme’s functions.php file, but it’s more complicated and you risk breaking something if you make a mistake. Using a plugin like WP Mail SMTP is much easier and safer.
Will this affect emails sent to my website visitors?
No, this only controls the notification emails sent to you as the site administrator. Emails sent to your visitors (like contact form submissions, order confirmations, etc.) work exactly the same way.
Next, Change Sender Email in WordPress
If you’d like to change your sender details for outgoing emails from WordPress, check out our tutorial on how to change the sender name and email in WordPress.
You might also want to see our list of the best WordPress SEO plugins to improve your site’s overall organic search performance. And here’s how to send emails to WordPress users without writing any code.
Disable WordPress Email Notifications Now
Ready to fix your emails? Get started today with the best WordPress SMTP plugin. If you don’t have the time to fix your emails, you can get full White Glove Setup assistance as an extra purchase, and there’s a 14-day money-back guarantee for all paid plans.
If this article helped you out, please follow us on Facebook and Twitter for more WordPress tips and tutorials.

