Do you want to change the sender email address and name in WordPress?
In WordPress, your default sender name is “WordPress,” and the From email address is “[email protected],” but this isn’t ideal for several reasons.
In this guide, I’ll walk you through the easiest way to update the WordPress email and sender details so your emails look exactly the way you want them to. Let’s dive into it!
Change WordPress Sender Email Now! 🙂
Why You Should Change the Default Sender Name and From Email in WordPress
You should change the default sender name and email in WordPress to fix email deliverability issues, correctly receive email notifications, and ensure the authenticity of your emails.
By default, WordPress uses “WordPress” as your sender name and “[email protected]” as your domain name. These sender details don’t reflect your real information and point to an email address that may not even exist.
This means that you won’t be able to receive email notifications about your WordPress site. These usually include important information like new user signups, critical website errors, and more.
Besides, your outgoing emails to users will end up as spam and never reach your customers’ inboxes. And even if some emails reach their inboxes, your users will only see an unbranded email address that they can’t even reply to.
All these things prevent you from monitoring your website status, building brand recognition, and earning the trust of your customers.
How To Change the Sender Name and From Email in WordPress
The good thing is, it’s very simple to change WordPress email sender details and use an authenticated email address. Let’s see how to do that in the steps below.
1. Install the WP Mail SMTP Plugin
WP Mail SMTP is the best SMTP plugin for WordPress. Using this plugin, you can quickly change your WordPress sender information without adding any complicated code.
What’s more, this plugin is trusted by millions of users to solve issues like wp_mail function not working for their WordPress sites.
To get WP Mail SMTP, open your WP Mail SMTP account area, click on the Downloads tab, and then press the Download WP Mail SMTP button.
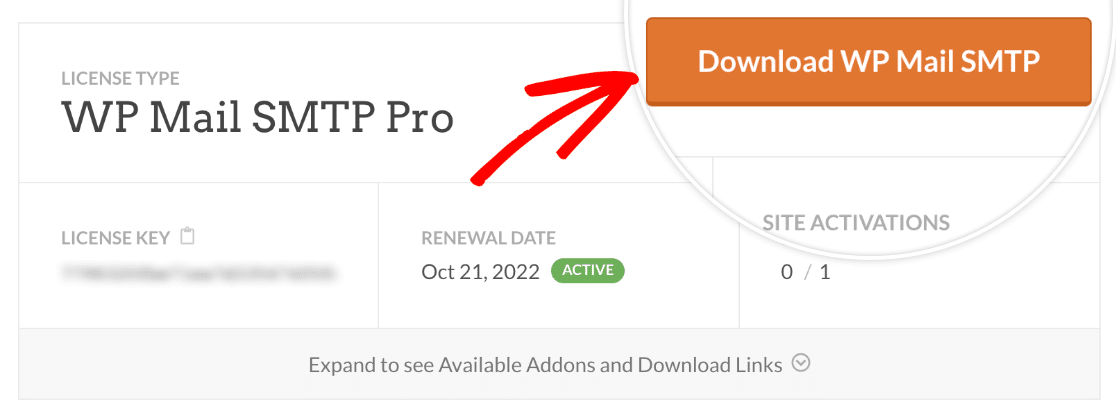
Once downloaded, open your WordPress dashboard and move your cursor over Plugins. When the menu box expands, click on Add New. Next, click Upload Plugin.
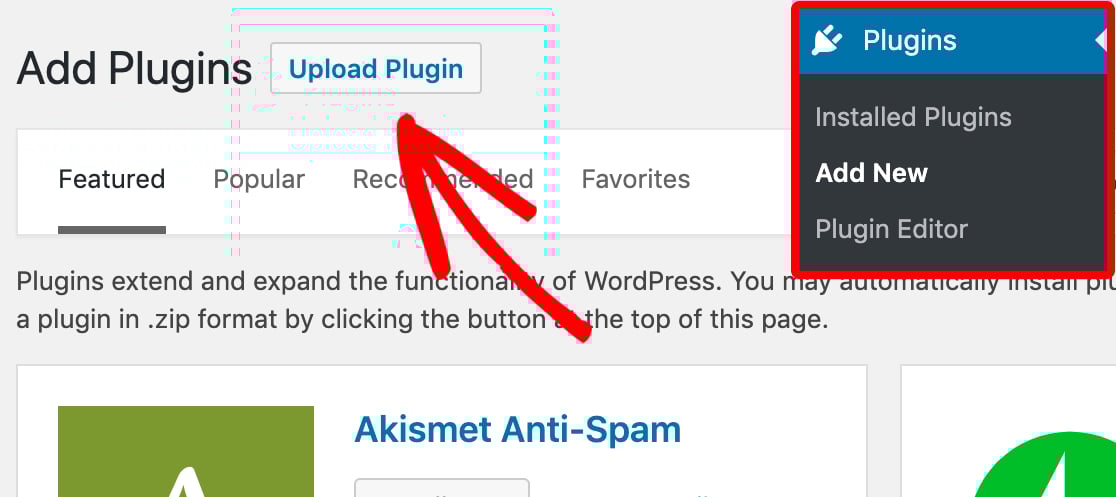
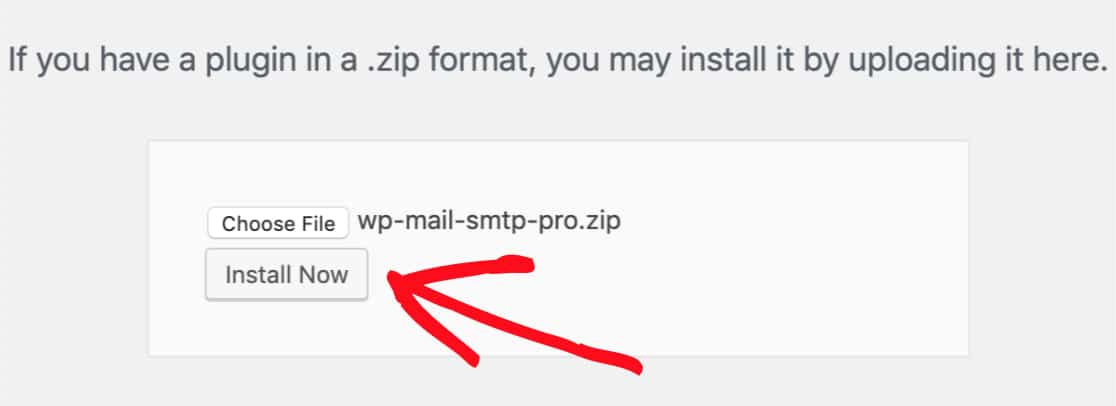
Then, press Choose File to select the downloaded WP Mail SMTP zip file. Once selected, click Install Now.
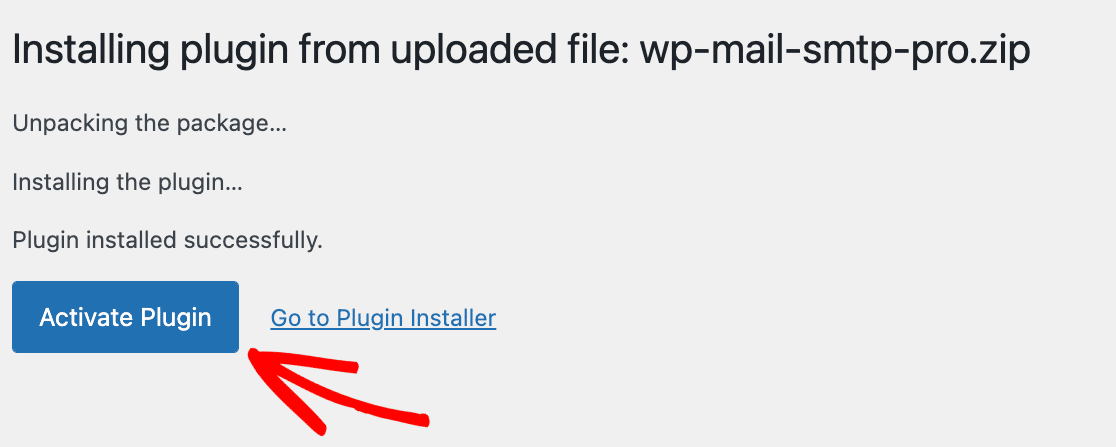
After the plugin has finished installing, click on Activate Plugin under it. As soon as WP Mail SMTP activates, it will automatically launch the Setup Wizard.
You can also manually launch the Setup Wizard by navigating to WP Mail SMTP Settings and scrolling down to find the Launch Setup Wizard button under the Mail section.
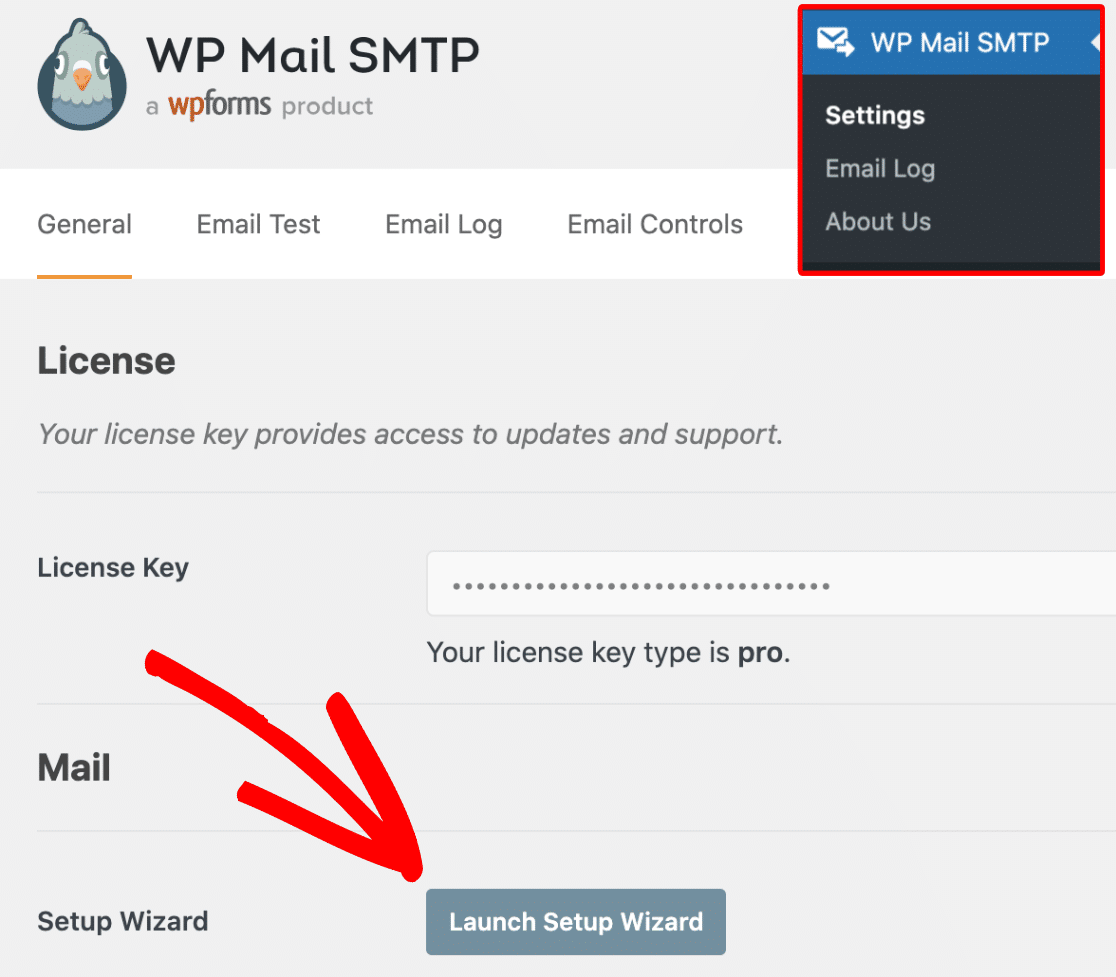
The Setup Wizard will allow you to connect your domain to an email service provider and change your From Email and From Name.
2. Choose and Configure Mailing Service
The first step after launching the Setup Wizard is to choose a mailing service. By default, WordPress uses PHP mail, which is very unreliable for sending emails.
Choosing a dedicated SMTP mailing service will help authenticate your emails. This ensures that your outgoing emails aren’t flagged as spam and reach your customers’ inboxes every time.
To choose your mailing service, launch the Setup Wizard as explained in the steps above and click on Let’s Get Started.

On the next screen, select the mailer you want to use. We recommend a transactional mailer like SendLayer, SMTP.com, or Brevo (formerly Sendinblue).
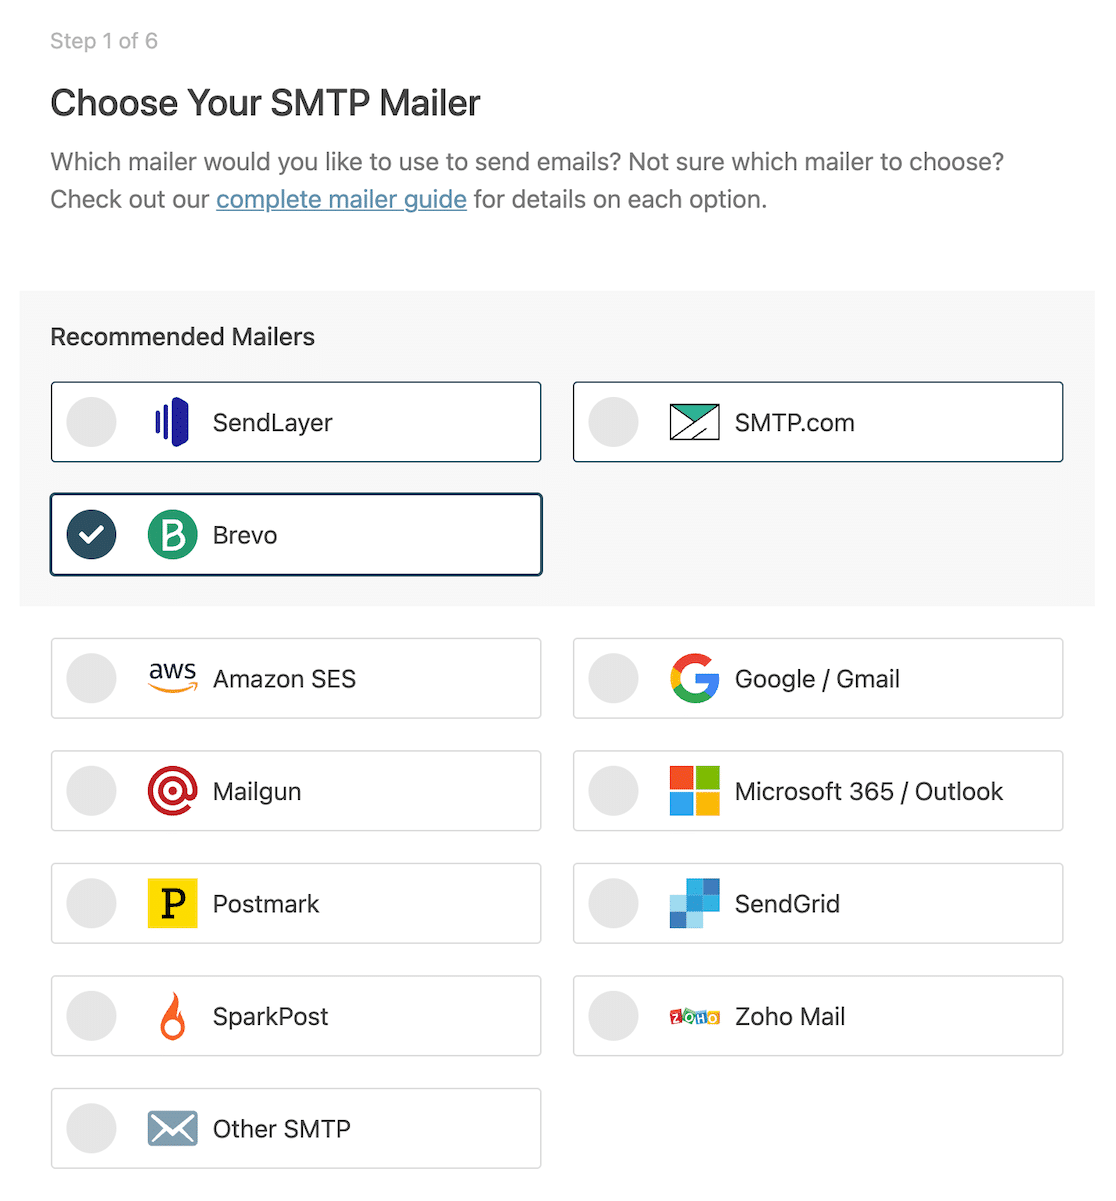
For this tutorial, we’ll use Brevo as our mailing service. Brevo is an excellent choice for smaller websites because it’s easy to set up and allows 300 emails a day for free.
You can learn about the key features of different mailers in this post on transactional email service providers for WordPress.
Click on Brevo to move to the next step. Now, click on the Get Started with Brevo button to begin the signup process.
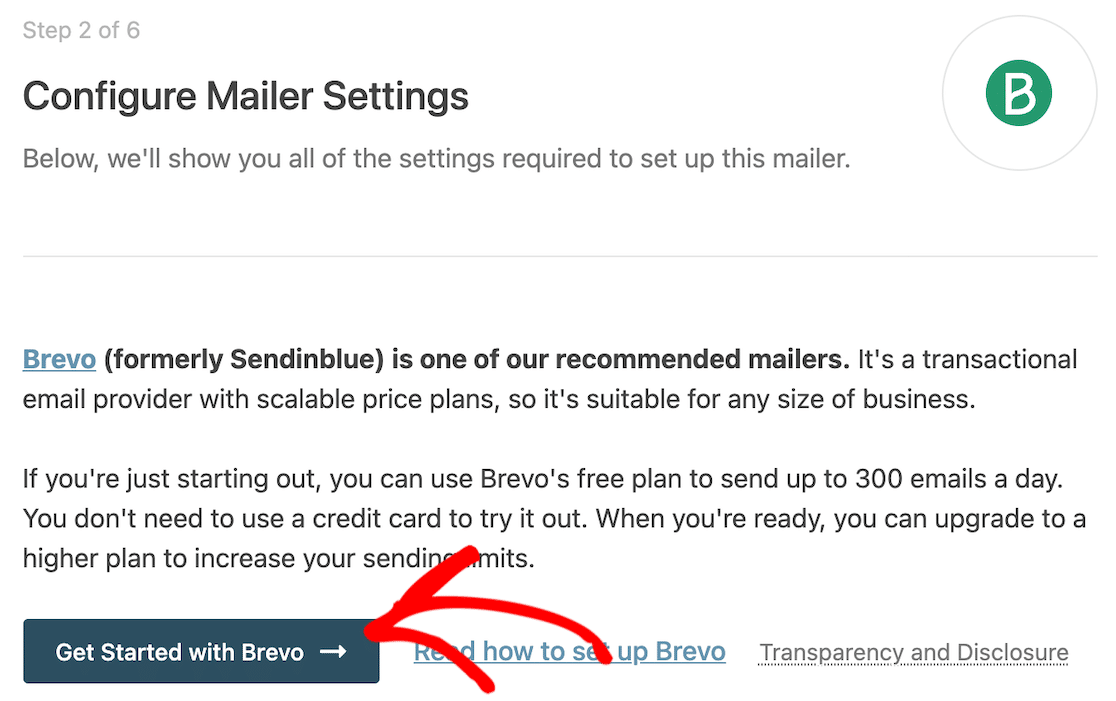
The above button will take you to Brevo’s signup page. Follow the on-screen instructions and fill out the form details (such as your name, email address, company name, address, etc.).
Note: Make sure to create your Brevo account with a domain-specific email address that you own. For example, we would use [email protected]. Select your plan to complete the signup process for Brevo.
Now you’ll need to authenticate your domain in order to effectively use Brevo and guarantee email deliverability. See this guide to learn how to authorize your domain with Brevo. When finished, return to this post for the next steps.
We strongly recommend authorizing your domain. Doing so will prevent your emails from going to the spam folder and improve email deliverability.
Add Your Mailer API Key
After your domain is authenticated, you’ll need to enter an API key for Brevo. To get the API key, open your Brevo account and click on your name on the top right to open the menu. Then click on SMTP & API in the menu that opens.
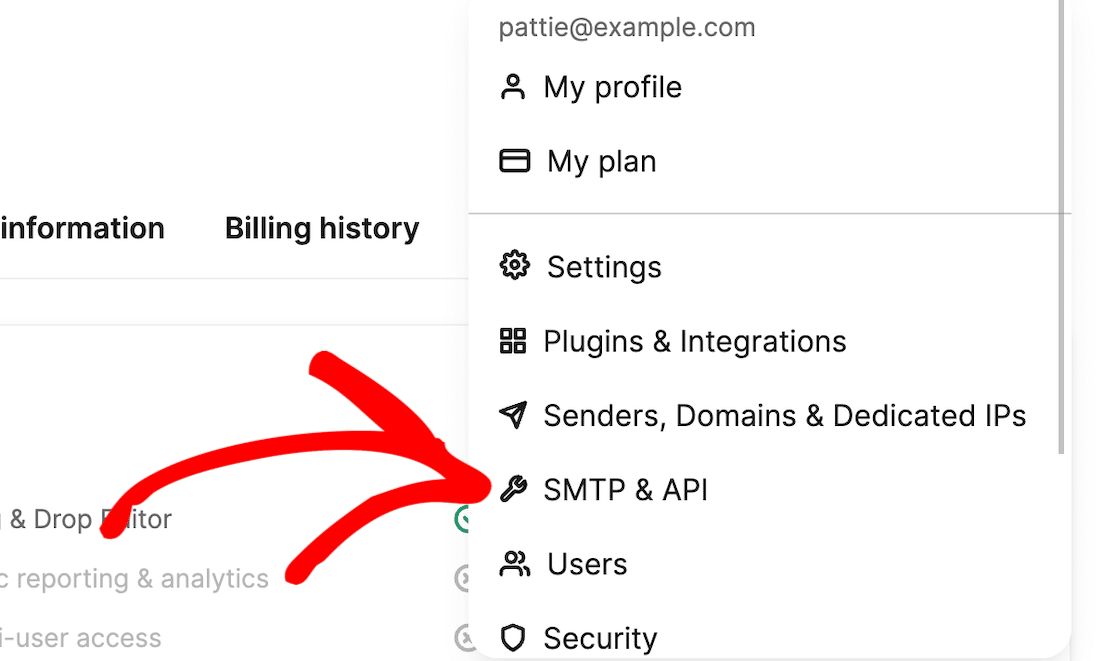
This will open a page where you can click on the API Keys tab. Then click on the Generate a new API key button as shown below.

Next, Brevo will ask you to name your API key. You can choose any name, but it’s helpful to use a name that relates to your domain somehow. Click on Generate after entering a name for your key.
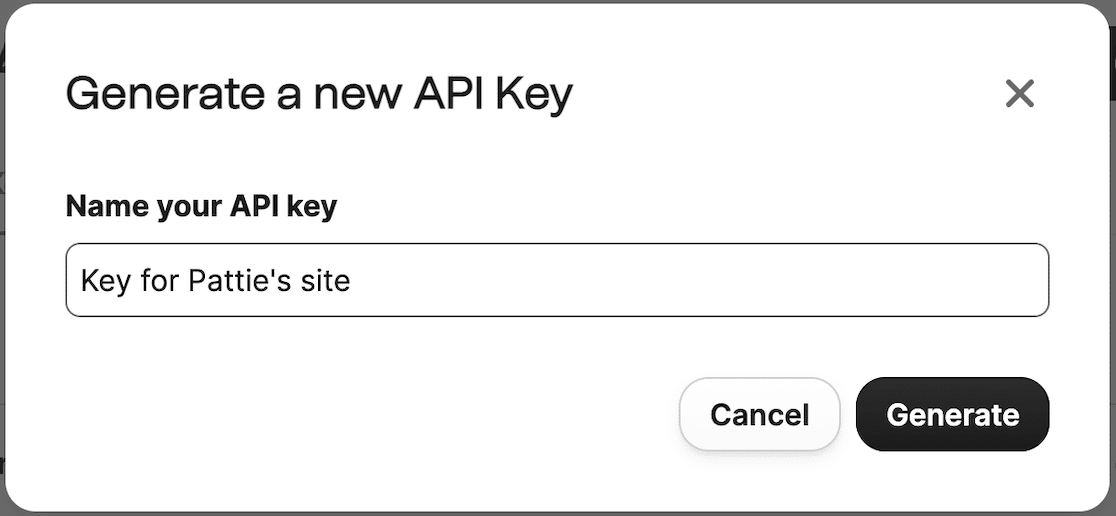
Now, a new window will open, which will have your API key. Copy this key and keep it somewhere safe (like a password manager) because you can only view this in Brevo once.
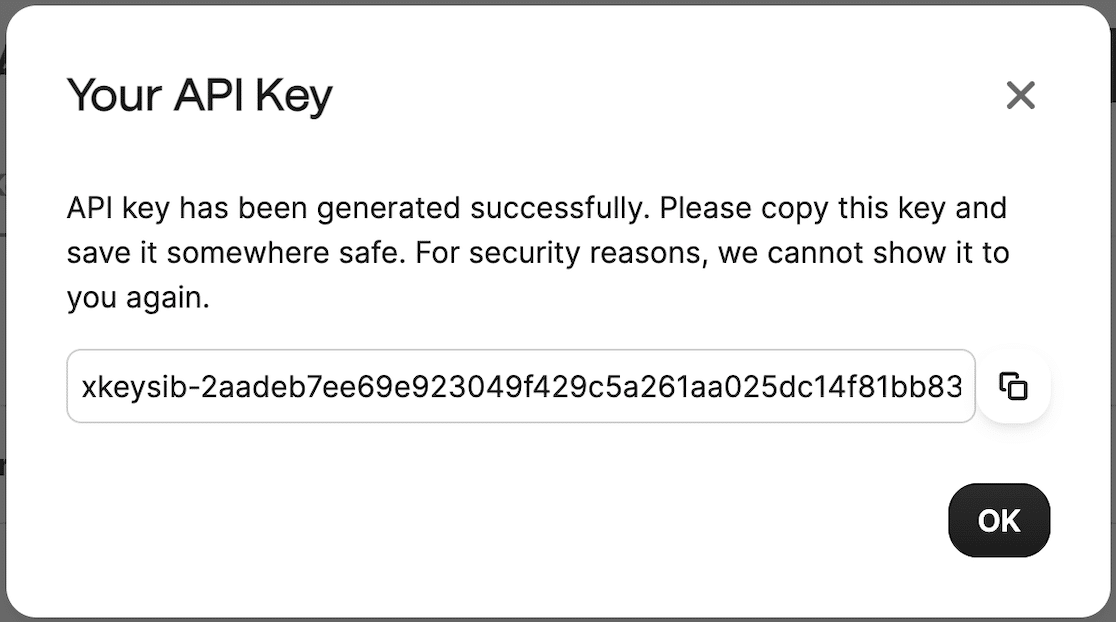
Once copied, return to the window where WP Mail SMTP Setup Wizard is open and paste the API key in the following field:

3. Set Up the Sending Domain (Optional)
The sending domain setting is optional, but it can be helpful to set it up. This setting checks for any errors on your domain end, such as misconfigured settings or missing SPF records.
To enable this feature, enter the domain name that you just authenticated in Brevo in the field provided.

This feature can help you quickly diagnose and fix any email issues you might face, so it’s always a good idea to set it up.
4. Change From Name and From Email Settings
You’re finally ready to change your From Name and From Email for WordPress. Scroll down in the Setup Wizard to find the From Name setting. Here, you can change your From Name setting to anything you’d like.
The name you choose here will appear in outgoing emails that your WordPress site sends to customers. You can also select the Force From Name setting to apply the same name for all outgoing emails across your WordPress site.
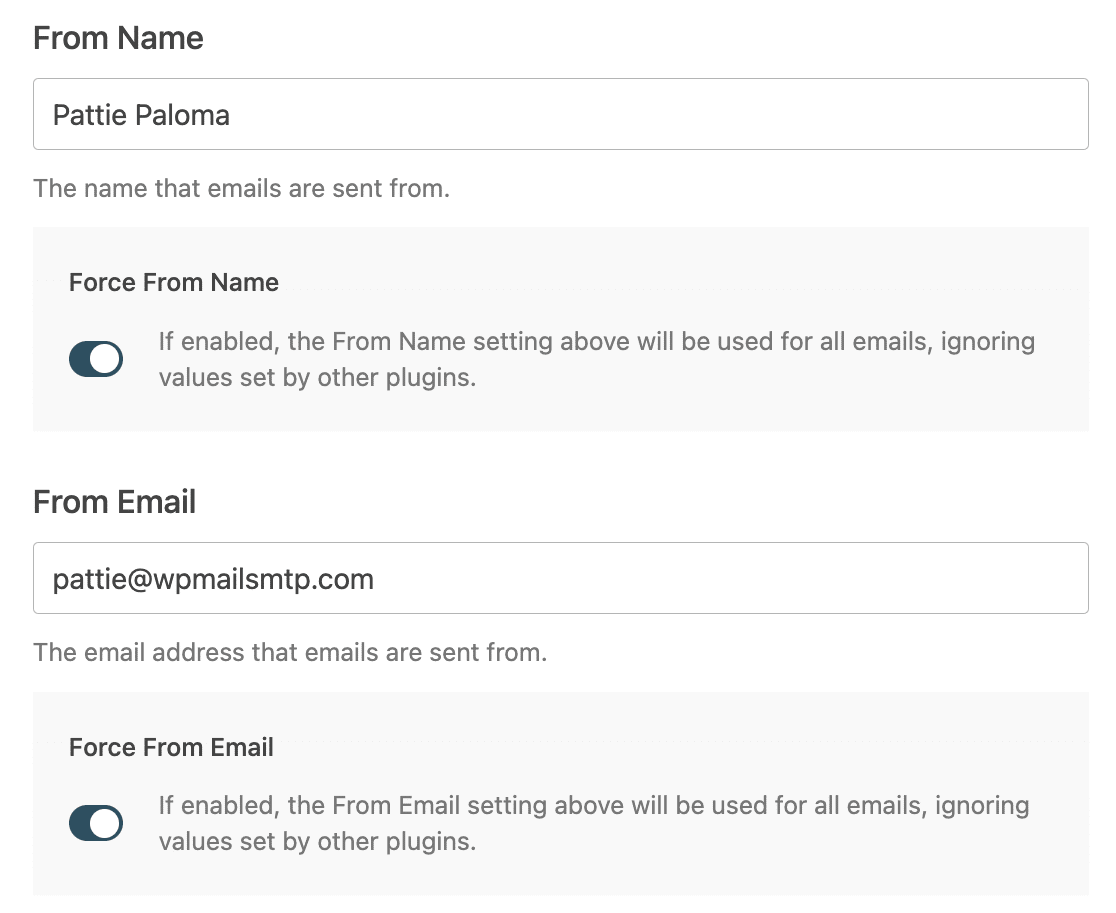
Next, scroll down to find the From Email setting. All of your website’s emails will be sent from the email address that you enter in this setting.
You should use a domain-specific email address at the domain that you earlier authenticated with Brevo. As before, you can select the Force From Email setting to use the same From Email across your WordPress site.
5. Use Gmail Aliases As Default Sender Addresses (Alternative Method)
With WP Mail SMTP, you can also use Gmail aliases as your default email addresses. This can be very handy if you’d like different plugins to use unique aliases to send email notifications.

For detailed instructions on how to achieve this, see our guide on how to send WordPress emails from a Gmail alias. And that’s it! You’ve now successfully changed your WordPress email sender information with WP Mail SMTP.
Change WordPress Sender Email Now! 🙂
FAQs on How to Change the Sender Name and From Email in WordPress
Learning how to change the from name and from email in WordPress is a popular topic of interest among our readers. Here are answers to some common queries about it:
How do I change the default email sender in WordPress?
You can change the sender name and email in WordPress by installing a plugin like WP Mail SMTP. Once it’s active, go to WP Mail SMTP » Settings and fill in your preferred From Name and From Email.
What is the default WordPress sender email address?
By default, WordPress uses something like [email protected] as the sender email. It doesn’t always look professional and can cause emails to end up in spam. That’s why I always update this to match the site’s real email address.
Can I use a custom email name instead of WordPress?
Yes, you can. You just need to update the From Name setting in WP Mail SMTP or a similar plugin. I usually set this to match the brand or website name. It helps build trust when someone receives an email.
Why are my WordPress emails going to spam?
This usually happens when the email sender address doesn’t match your domain or the emails aren’t properly authenticated.
I’ve found that using an SMTP plugin and setting up DNS records like SPF and DKIM can really help stop this from happening.
Do I need SMTP to change the email sender?
Technically, you can change the name and address without SMTP. But from my experience, using SMTP gives you better delivery and makes sure your emails don’t get blocked or land in spam. It’s the safest route if email is important to your site.
Next, Enable Email Tracking in WordPress
Do you want to track when an email is opened and a link within your emails is clicked by customers to track the performance of your WordPress notifications?
With WP Mail SMTP, you can easily track WordPress emails and know if your customers are performing your desired actions with your emails.
Ready to fix your emails? Get started today with the best WordPress SMTP plugin. If you don’t have the time to fix your emails, you can get full White Glove Setup assistance as an extra purchase, and there’s a 14-day money-back guarantee for all paid plans.
If this article helped you out, please follow us on Facebook and Twitter for more WordPress tips and tutorials.

