AI Zusammenfassung
Sendet dein Divi-Formular keine E-Mails von deiner Website? Wenn du keine Nachrichten von deinem Kontaktformular erhältst, verpasst du vielleicht wichtige Nachrichten von Besuchern oder Kunden.
Die Wahrheit ist, dass die in Divi eingebauten Kontaktformulare E-Mails nicht so versenden, wie es die meisten Mailserver erwarten. Deshalb werden sie oft blockiert oder gehen verloren.
Aber keine Sorge, das lässt sich ganz einfach beheben. In diesem Leitfaden führe ich dich durch die genauen Schritte, die ich verwendet habe, um Probleme mit Formularen zu beheben, die du im Divi Builder erstellst.
Bring deine Devi-Formular-E-Mails jetzt in Ordnung 🙂 .
Warum funktioniert mein Divi-Kontaktformular nicht?
Dein Divi-Theme-Kontaktformular funktioniert wahrscheinlich nicht, weil die E-Mails an Spam verschickt werden. Das ist ein häufiges Problem bei allen Kontaktformular-Plugins.
Standardmäßig verwendet WordPress die wp_mail() Funktion, die PHP verwendet, um E-Mails von deiner Website aus zu versenden. Das bedeutet, dass dein Webhosting-Server die E-Mail versendet.
Das ist nicht ideal, denn die E-Mails sind nicht authentifiziert, was dazu führen kann, dass deine Nachrichten im Junk-Mail-Ordner landen. Ab Anfang 2024 benötigen Gmail und Yahoo authentifizierte Domains, um Nachrichten zuverlässig zuzustellen!
Eine weitere mögliche Ursache könnte sein, dass das Divi-Kontaktformular nicht richtig konfiguriert ist. Lass uns einen Blick auf die Einstellungen werfen, damit wir das Problem beheben und dein Formular zum Laufen bringen können.
Wie man Divi-Formulare ohne E-Mail-Versand repariert
- Schritt 1: Überprüfe die Divi-Kontaktformular-Einstellungen
- Schritt 2: Installiere das WP Mail SMTP Plugin
- Schritt 3: Wähle einen zuverlässigen Versanddienstleister
- Schritt 4: Aktiviere die E-Mail-Protokollierung (optional)
- Schritt 5: Sende eine Test-E-Mail von WP Mail SMTP
- Schritt 6: Fehlgeschlagene Divi-E-Mails erneut senden
Schritt 1: Überprüfe die Divi-Kontaktformular-Einstellungen
Das Divi-Kontaktformularmodul ist sehr einfach, aber es gibt trotzdem ein paar Optionen, die wir überprüfen müssen. Öffne zunächst die Seite, auf der sich das Kontaktformular befindet, und klicke auf Mit Divi bearbeiten.

Klicke irgendwo auf das Kontaktformular und dann auf das Zahnradsymbol, um die E-Mail-Einstellungen des Divi-Kontaktformulars zu öffnen.

Scrolle auf der Registerkarte "Inhalt" nach unten zur Option " E-Mail" und erweitere sie. Hier gibst du die E-Mail-Adresse ein, an die du deine Benachrichtigungen über das Kontaktformular senden möchtest.

Als Nächstes scrollst du zu den Einstellungen für den Spamschutz und erweiterst sie. Um Divi-Kontaktformular-Spam zu verhindern, kannst du Google reCAPTCHA verwenden.
Es ist aber möglich, dass deine Spam-Empfindlichkeit etwas zu hoch ist, was dazu führen kann, dass E-Mails blockiert werden. Du kannst versuchen, den Mindestwert zu verringern, wenn dein Divi-Formular nicht funktioniert.

Wenn dein Divi-E-Mail-Formular immer noch Probleme macht, überprüfe, ob das Formular die Eingaben speichert und ob irgendein Teil des Formulars das Layout stört.
Eine fehlende E-Mail-Adresse, ein defektes Modul oder ein Plugin-Konflikt kann Divi daran hindern, Formulardaten zu senden. Versuche, ein Testformular mit nur ein paar Feldern zu erstellen, um zu prüfen, ob es funktioniert.
Wenn das Problem damit nicht behoben ist, müssen wir das WP Mail SMTP Plugin installieren. Damit wird die Standardmethode für den E-Mail-Versand durch einen professionellen E-Mail-Anbieter ersetzt.
Schritt 2: Installiere das WP Mail SMTP Plugin
Divi verfügt nicht über integrierte SMTP-Einstellungen. Die beste Möglichkeit, die Zustellbarkeit zu verbessern, ist die Verwendung eines Plugins wie WP Mail SMTP, dem besten SMTP-Plugin (Simple Mail Transfer Protocol) für WordPress.
Es verbessert die Zustellbarkeit von E-Mails, indem es deine Website mit einem externen E-Mail-Dienst verbindet, und ist eine bewährte Lösung für das Problem, dass das Elegant Themes Divi-Kontaktformular nicht funktioniert.
Darüber hinaus kannst du mit WP Mail SMTP auch:
- Protokolliere die von deiner WordPress-Website gesendeten E-Mails
- E-Mail-Öffnungen und Klicks verfolgen
- E-Mail-Anhänge speichern
- Exportiere deine Logs
- Und mehr
Um zu beginnen, gehe zu deinem WP Mail SMTP-Konto und klicke auf die Registerkarte Downloads. Klicke auf die orangefarbene Schaltfläche Download, um die neueste Version des Plugins herunterzuladen.
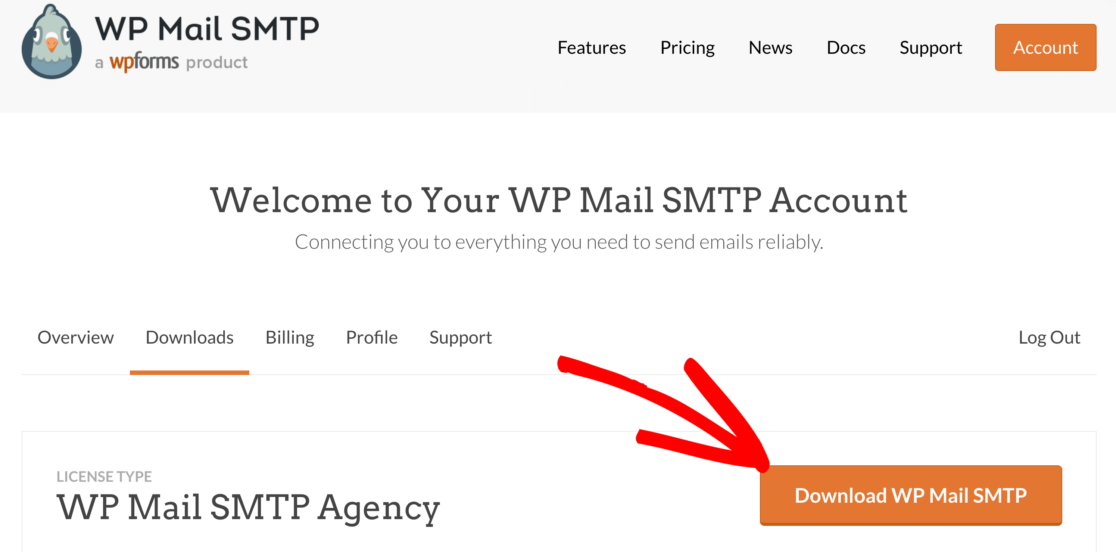
Als nächstes öffnest du das WordPress-Dashboard und lädst die Zip-Datei auf deine WordPress-Seite hoch. Wenn du bei diesem Teil Hilfe brauchst, schau dir die Schritt-für-Schritt-Anleitung zur Installation eines WordPress-Plugins an.

Stelle sicher, dass du das Plugin aktivierst. Sobald du das getan hast, wird der Einrichtungsassistent in deinem Browser gestartet.
Brauchst du Hilfe?
Unsere Elite-Lizenz beinhaltet White Glove Setup für SendLayer, SMTP.com oder Brevo (ehemals Sendinblue).
Schritt 3: Wähle einen zuverlässigen Versanddienstleister
In diesem Schritt wählen wir einen externen Mailer-Dienst aus, der zum Versenden von E-Mails von unserer Website aus verwendet werden soll. Damit beheben wir das Problem, dass das Divi-Formular keine E-Mails versendet. Um den Assistenten zu starten, klicke auf die Schaltfläche Let's Get Started.

Jetzt ist es an der Zeit, deinen neuen E-Mail-Anbieter aus der Liste auszuwählen. Ich empfehle SendLayer, SMTP.com und Brevo, weil sie zuverlässig sind und sich leicht einrichten lassen. Sie sind perfekt für kleine Websites und für Websites, die Transaktions-E-Mails versenden.
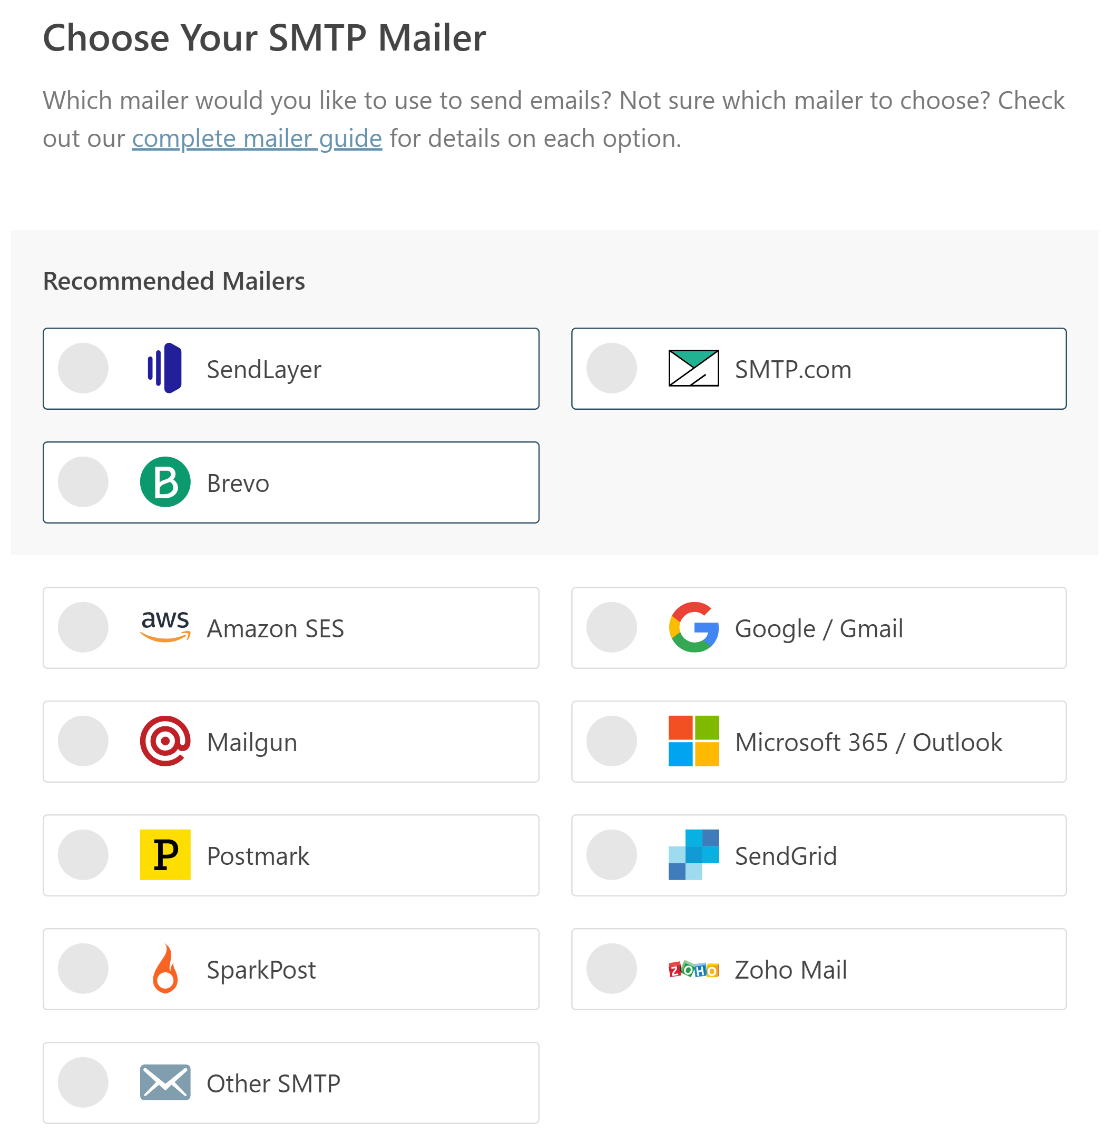
Wenn du über dein Webhosting bereits Zugang zu einem SMTP-Server hast, kannst du die Option Anderes SMTP aus der Liste verwenden, um diesen im Handumdrehen einzurichten!
Sobald du den Mailer ausgewählt hast, solltest du die Dokumentation in einem neuen Tab öffnen. In der folgenden Tabelle findest du ausführliche Anleitungen für jeden Anbieter:
| Mailer in allen Versionen verfügbar | Mailer in WP Mail SMTP Pro |
|---|---|
| SendLayer | Amazon SES |
| SMTP.de | Microsoft 365 / Outlook.com |
| Brevo | Zoho Mail |
| Google Workspace / Gmail | |
| Mailgun | |
| Poststempel | |
| SendGrid | |
| SparkPost | |
| Andere SMTP |
Wenn du mehrere Mailer einrichten möchtest, kannst du dies in den Einstellungen für zusätzliche Verbindungen tun, sobald du den Einrichtungsassistenten abgeschlossen hast. Dann kannst du eine Backup-Verbindung auswählen und Smart Routing konfigurieren.
Und wenn du schon dabei bist, solltest du eine eigene E-Mail-Domain einrichten, wenn du noch keine hast. In geschäftlichen und beruflichen Kontexten kann die Verwendung einer generischen Absender-E-Mail auf deine Empfänger/innen dubios wirken.
Mit einer E-Mail-Domain, die deine Marke repräsentiert, baust du Vertrauen auf und zeigst, dass du authentisch und professionell bist. Wenn du alles auf der Website deines E-Mail-Dienstes eingerichtet hast, kommst du zu diesem Leitfaden zurück.
Schritt 4: Aktiviere die E-Mail-Protokollierung (optional)
Im nächsten Schritt werden 2 Funktionen standardmäßig aktiviert:
- Verbesserte Zustellbarkeit von E-Mails
- E-Mail-Fehlerverfolgung
Ich empfehle dir, auch detaillierte E-Mail-Protokolle zu aktivieren. Wenn du diese Option aktivierst, kannst du alle E-Mails verfolgen, die deine Website versendet.
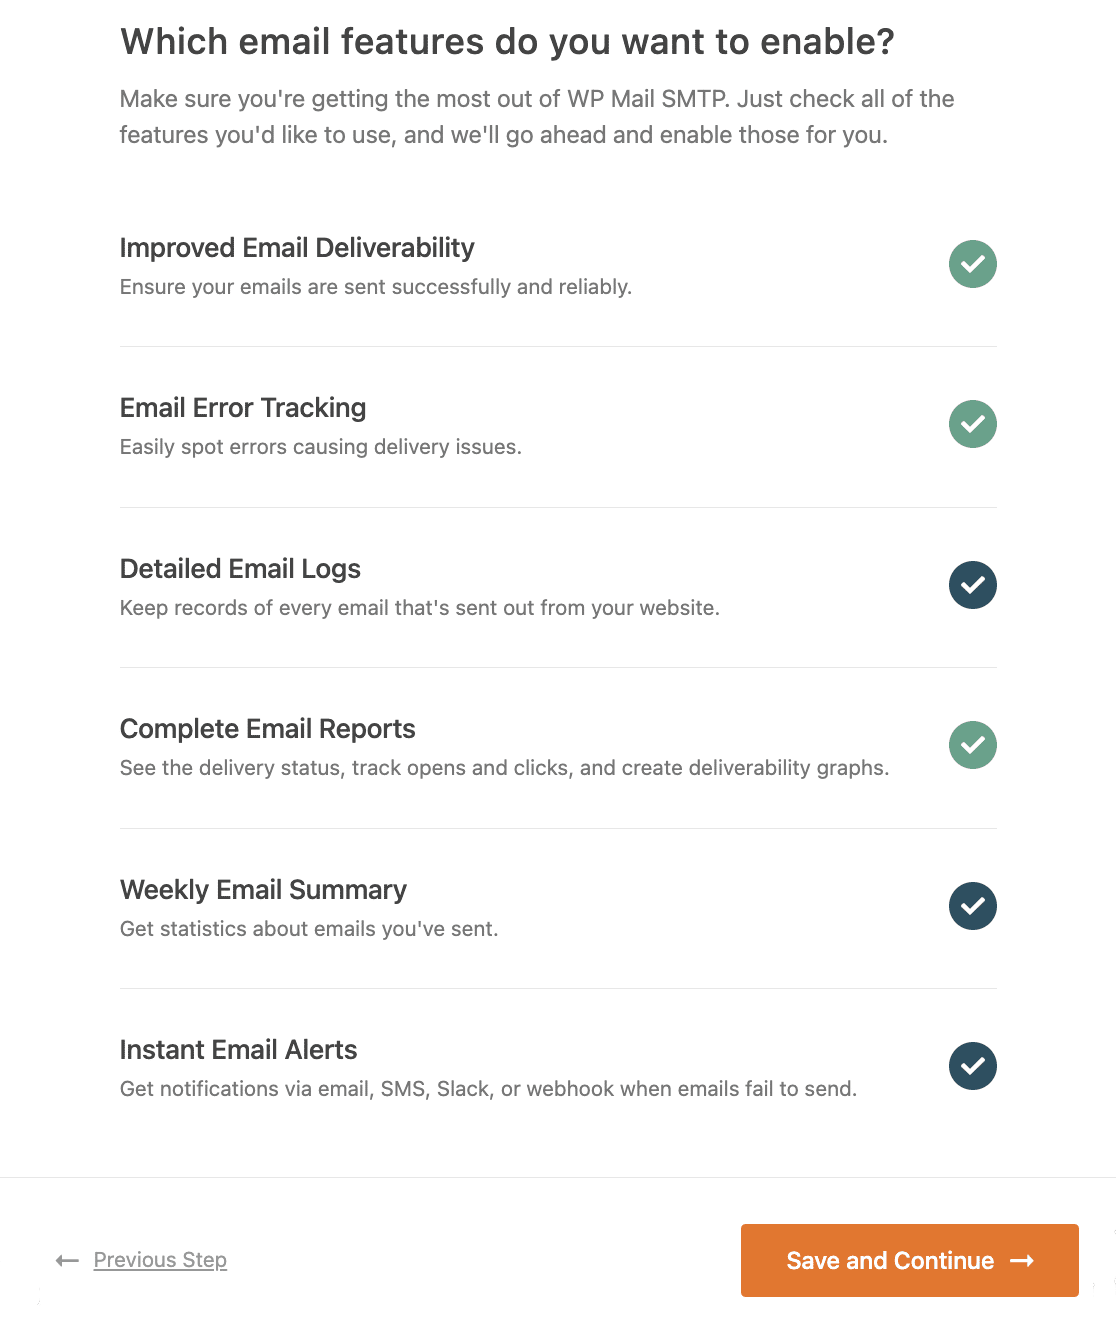
Wenn du WP Mail SMTP Pro verwendest, findest du außerdem ein hilfreiches Dashboard-Widget für das E-Mail-Protokoll und vollständige E-Mail-Berichte, um deine E-Mail-Zustellbarkeitsstatistiken einzusehen.
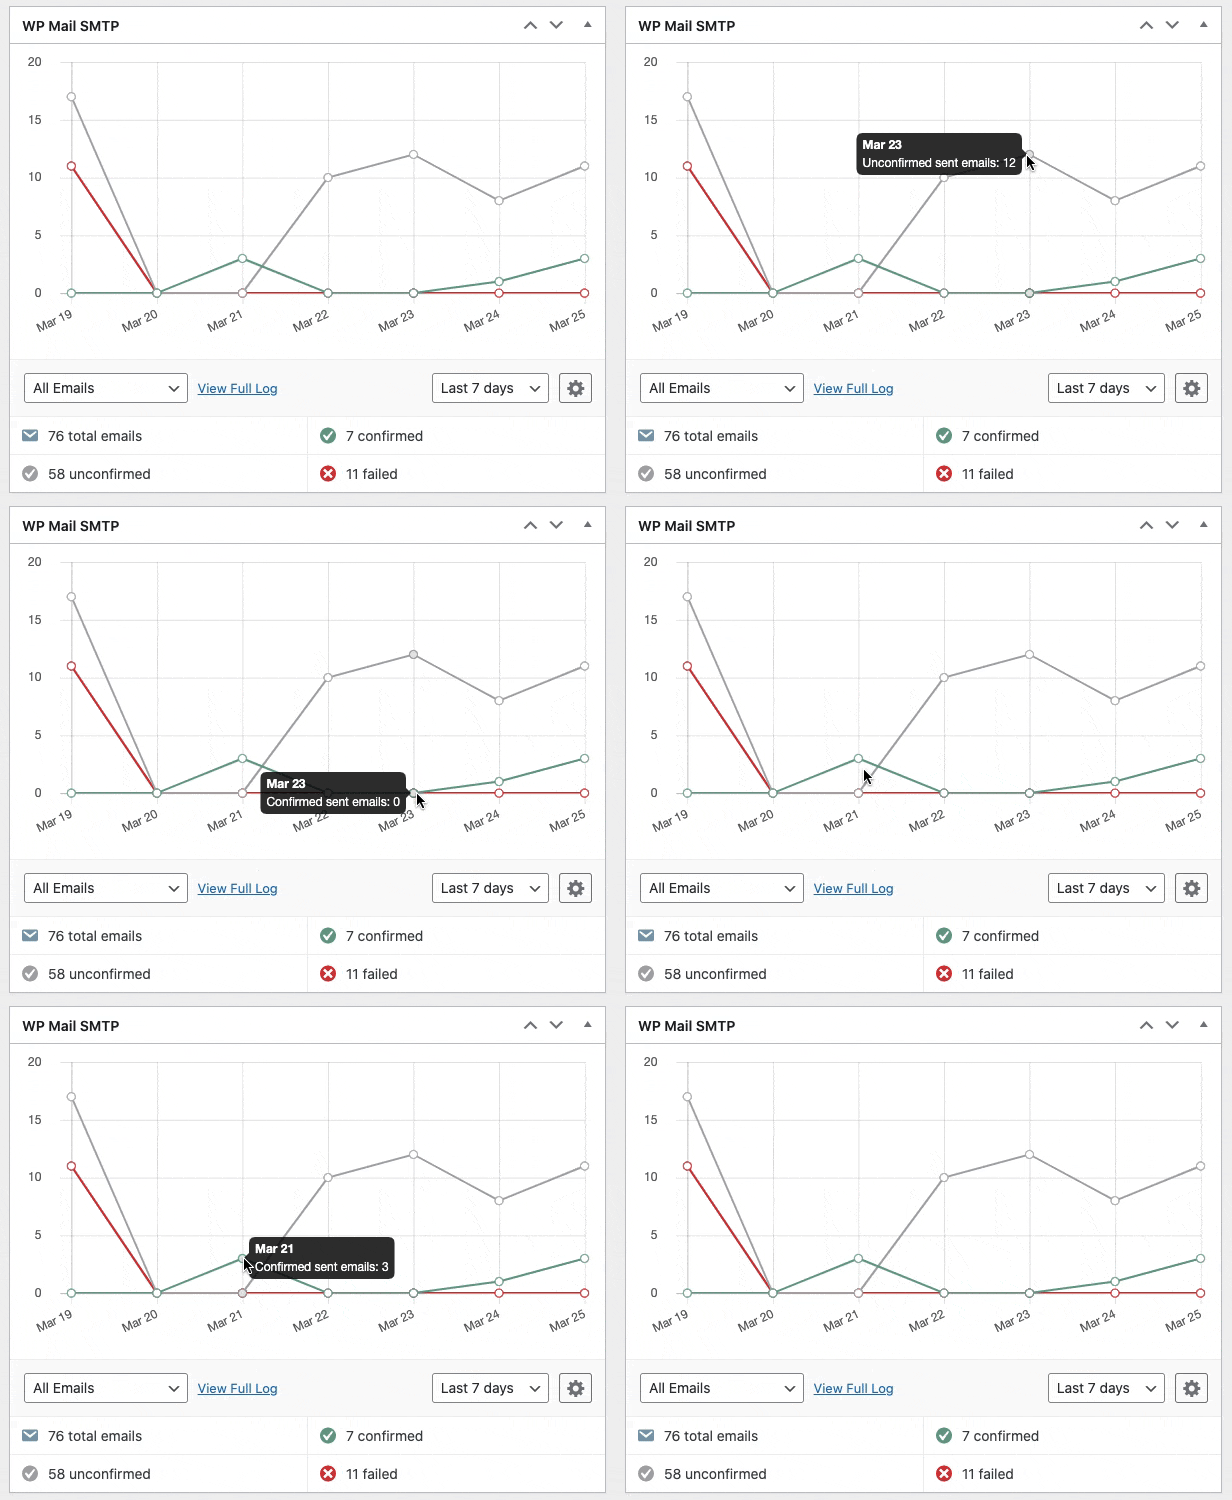
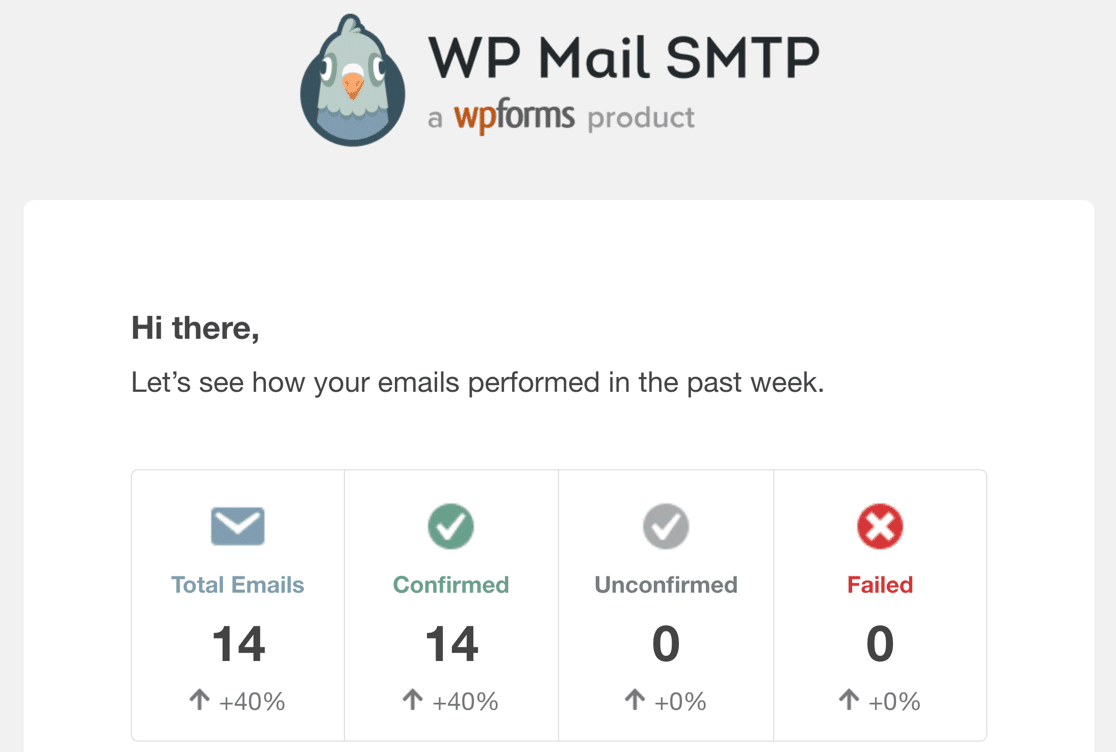
Die Einstellung " Wöchentliche E-Mail-Zusammenfassung" hält dich über die Zustellbarkeitsstatistiken auf dem Laufenden und ist eine praktische Funktion zur Überwachung von E-Mail-Fehlern.
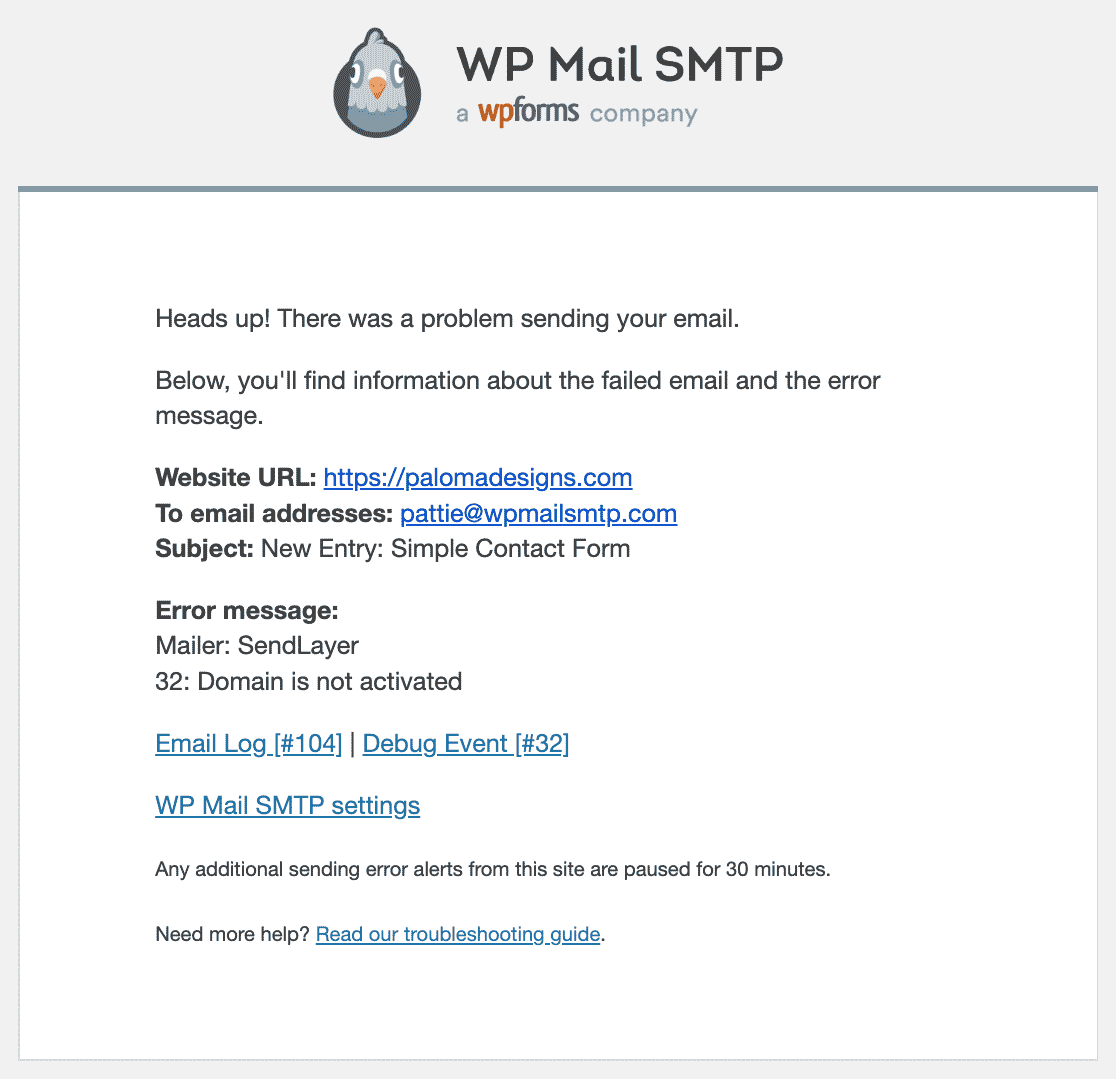
Ganz zu schweigen davon, dass die E-Mail-Sofortwarnung dich benachrichtigt, wenn deine Website keine E-Mail versendet, sobald ein Problem auftritt, sodass du dem Problem sofort auf den Grund gehen kannst.
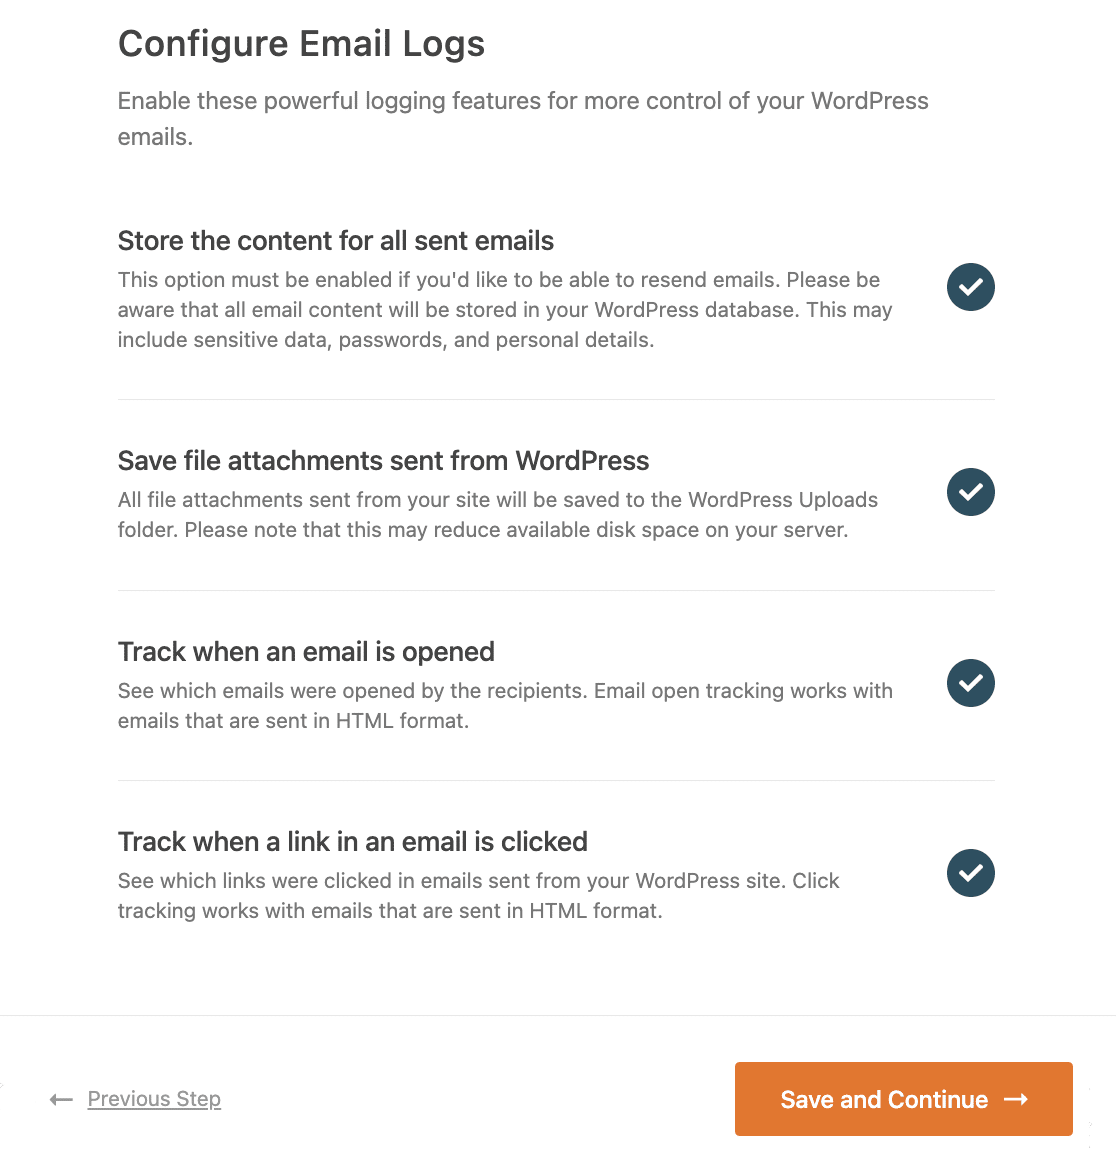
Auf dem nächsten Bildschirm siehst du weitere Einstellungen für die E-Mail-Protokollierung, die du aktivieren kannst. Mit diesen erweiterten Optionen kannst du E-Mail-Inhalte und -Anhänge speichern und das Öffnen von E-Mails und das Anklicken von Links verfolgen.
Im letzten Schritt gehst du zu deinem WP Mail SMTP-Konto, kopierst den Lizenzschlüssel und fügst ihn in das Feld ein. Dadurch werden automatische Updates für das Plugin aktiviert.

Danach schließt du den Einrichtungsassistenten ab und bekommst eine automatische Test-E-Mail, um zu bestätigen, dass alles funktioniert.
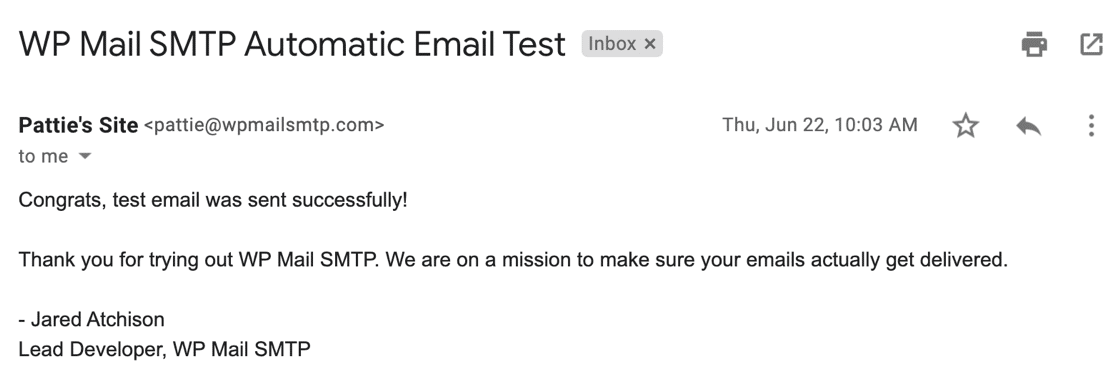
Wir sind fertig! Dein Divi-Formular sollte jetzt funktionieren. Lass uns einen Blick darauf werfen, wie du es testen kannst.
Schritt 5: Sende eine Test-E-Mail von WP Mail SMTP
Nachdem du deine automatische Test-E-Mail erhalten hast, sollte dein Plugin einsatzbereit sein und deine WordPress-Seite sollte zuverlässig E-Mails versenden.
Du kannst bei Bedarf auch jederzeit eine Test-E-Mail versenden. Dazu gehst du auf die Registerkarte E-Mail-Test auf deiner WP Mail SMTP-Einstellungsseite.
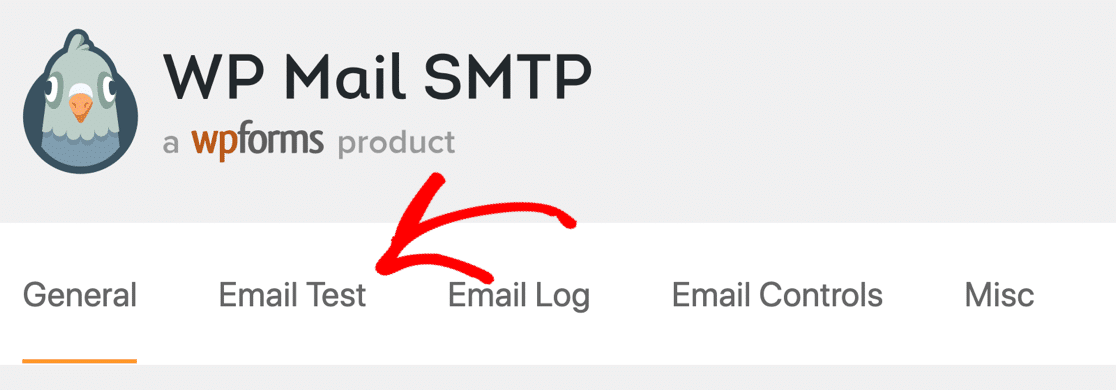
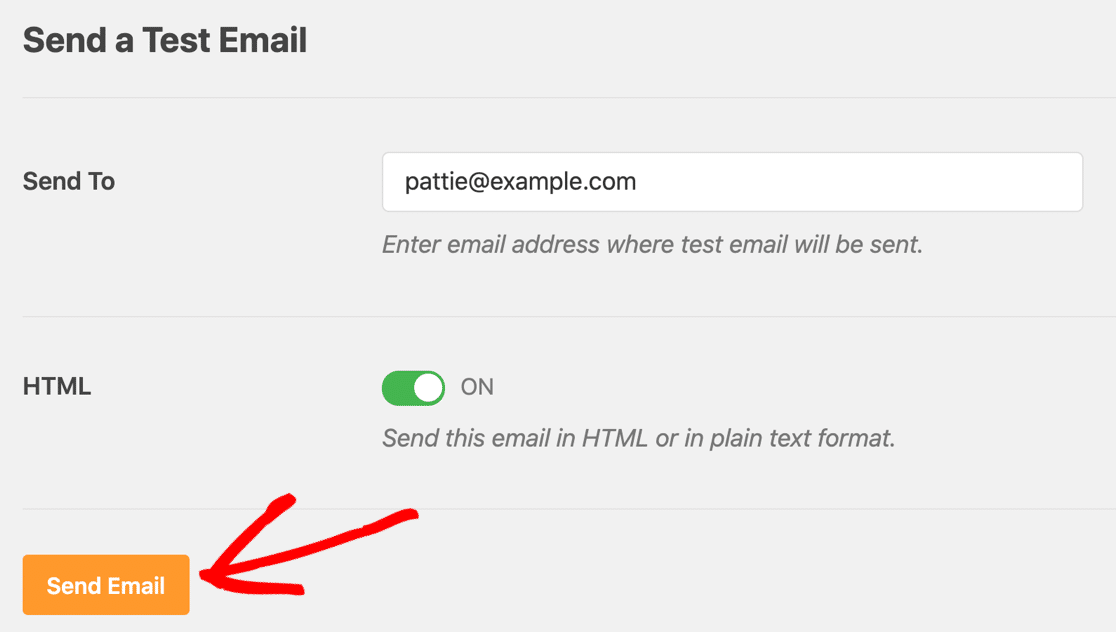
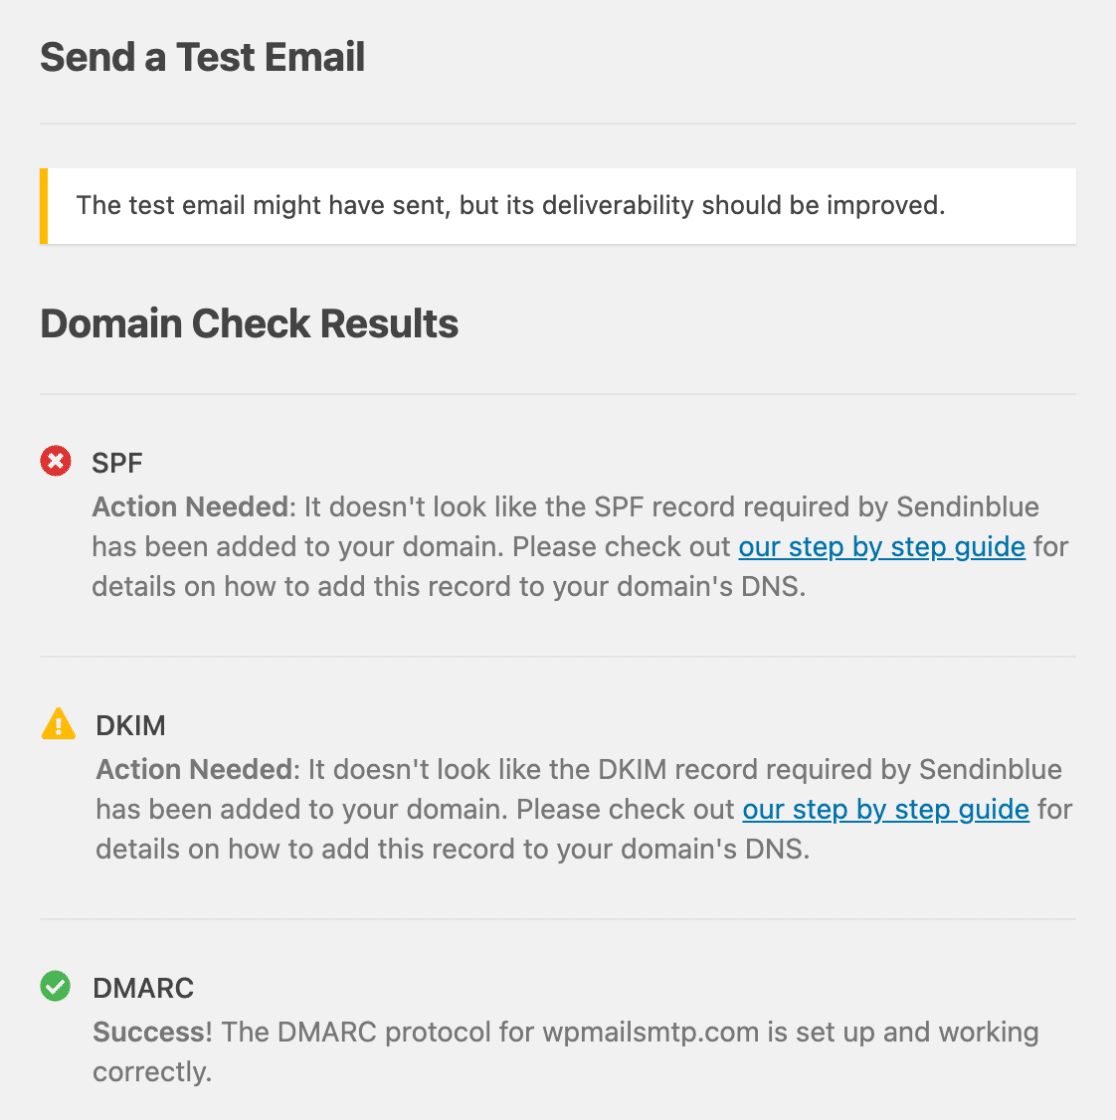
Gib jetzt eine E-Mail-Adresse in das Feld ein und sende die Test-E-Mail. Hinter den Kulissen lässt WP Mail SMTP seinen Domain Checker laufen, um deine DNS-Zone zu überprüfen.
Wenn du eine Nachricht mit einem grünen Etikett siehst, bedeutet das, dass die E-Mails von deinem Divi-Formular mit der richtigen Authentifizierung gesendet werden, also sollte alles in Ordnung sein.
Wenn es jedoch ein rotes Etikett anzeigt, bedeutet das, dass es ein Problem mit deiner Einstellung gibt. Das Plugin wird dir das Problem erklären und dir sagen, was du überprüfen musst.
Nachdem du deine Divi-E-Mails repariert hast, kann es vorkommen, dass du auf ein Problem mit deinen SMTP-Einstellungen stößt. Wenn zum Beispiel der von dir gewählte SMTP-Server ausgefallen ist, kann es sein, dass eine E-Mail nicht ankommt. Schauen wir uns an, wie du diese E-Mails erneut versenden kannst.
Schritt 6: Fehlgeschlagene Divi-E-Mails erneut senden
Du kannst fehlgeschlagene E-Mails ganz einfach über das WP Mail SMTP-E-Mail-Protokoll erneut versenden. Dazu musst du im Einrichtungsassistenten die Option " Inhalt aller gesendeten E-Mails speichern" aktiviert haben.
Wenn du das nicht getan hast, kannst du die Einstellung unter WP Mail SMTP " Einstellungen " E-Mail Log aktivieren. Um eine E-Mail erneut zu versenden, gehe in deinem WordPress-Dashboard zu WP Mail SMTP " Email Log
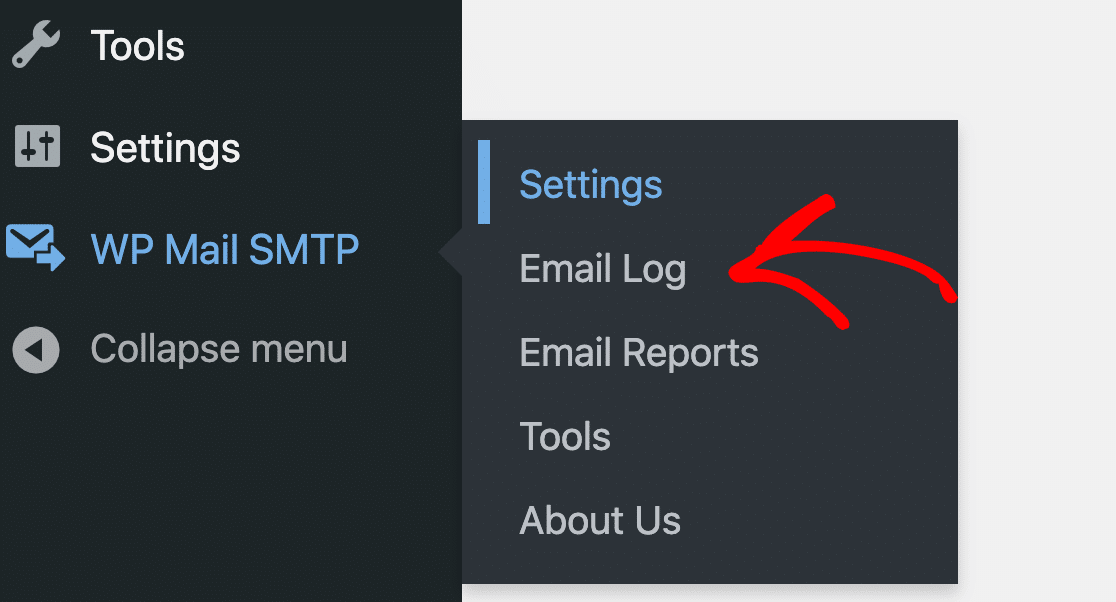
Du siehst eine Liste aller E-Mails, die von deiner Website aus gesendet wurden. E-Mails, die nicht zugestellt werden konnten, werden mit einem roten Punkt markiert. Klicke auf die Schaltfläche Protokoll anzeigen für die E-Mail, die nicht zugestellt werden konnte.

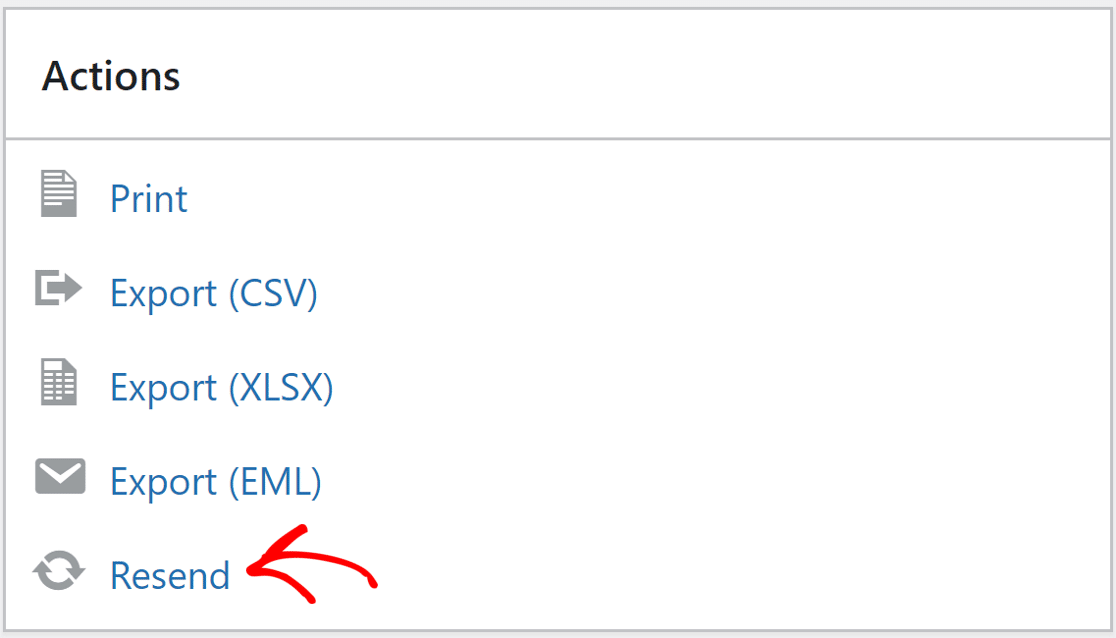
Und auf der rechten Seite findest du unter der Registerkarte Aktionen die Schaltfläche Erneut senden.
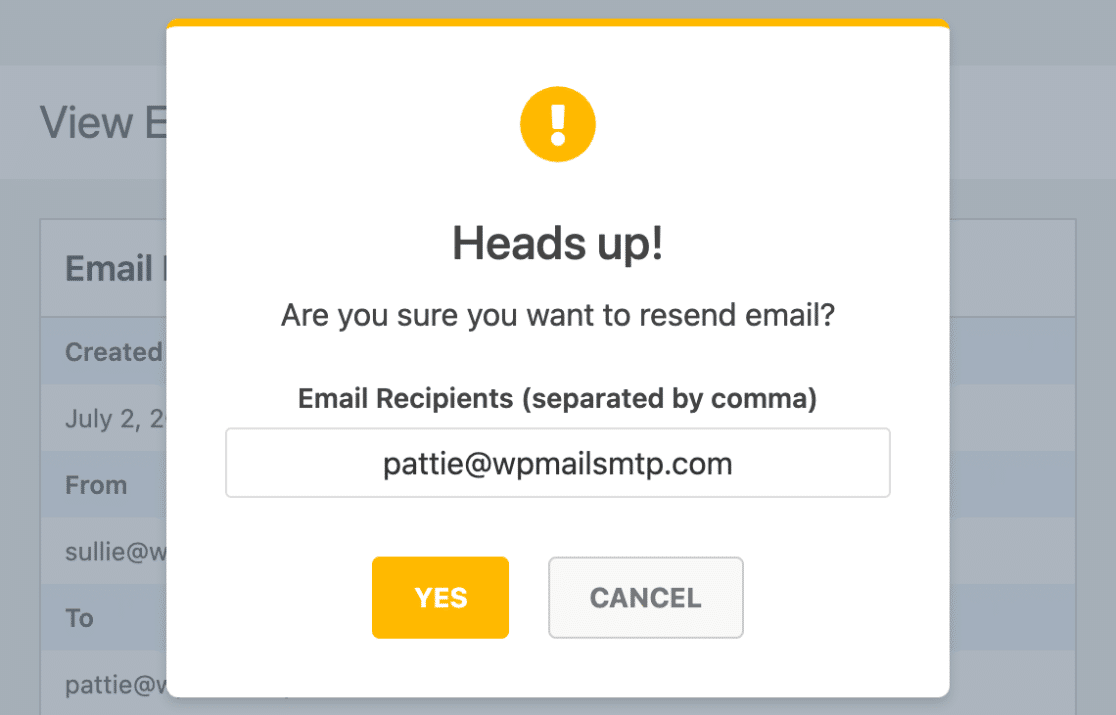
Bearbeite die E-Mail-Adresse, falls nötig, und klicke dann auf die Schaltfläche JA, um die E-Mail erneut zu senden.
Und das war's! Jetzt kannst du E-Mails, die nicht funktionieren, einfach erneut versenden, wenn dein Divi-Formular nicht funktioniert.
FAQs - Divi-Kontaktformular sendet keine E-Mail
Schau dir einige der Fragen an, die wir am häufigsten zu Divi-Kontaktformularen erhalten, die keine E-Mails senden.
Warum werden meine Divi-E-Mails immer noch nicht versendet, auch wenn ich SMTP aktiviert habe?
Wenn du SMTP aktiviert hast, deine Divi-Kontaktformular-E-Mails aber immer noch nicht versendet werden, überprüfe, ob dein SMTP-Host, Port, Benutzername und Passwort korrekt sind. Es ist auch möglich, dass du die TLS/SSL-Verschlüsselung aktivieren musst.
Was soll ich tun, wenn ich die Fehlermeldung "Nachricht konnte nicht gesendet werden" erhalte?
Es gibt ein paar Dinge, die du tun kannst, um die Fehlermeldung "Nachricht konnte nicht gesendet werden" zu beheben. Überprüfe zunächst, ob du die richtige E-Mail-Adresse verwendet hast. Überprüfe den Spamfilter. Du kannst auch versuchen, das maximale Versandlimit zu erhöhen. Schließlich kannst du auch einen anderen SMTP-Anbieter ausprobieren.
Kann ich Divi E-Mail-Fehler protokollieren, um sie später zu beheben?
Ja, du kannst Divi E-Mail-Fehler protokollieren, indem du die Divi E-Mail-Einstellungen aufrufst und den Debug-Modus aktivierst. Die Fehler werden dann unter Support " Logs protokolliert, damit du sie bei Bedarf überprüfen und beheben kannst.
Kann mein Webhoster die E-Mail-Zustellung des Divi-Formulars beeinflussen?
Es ist möglich, dass dein Host ausgehende SMTP-Ports blockiert. Du kannst einen alternativen SMTP-Anbieter wie SendLayer, SMTP.com oder Brevo (ehemals Sendinblue) ausprobieren.
Wie kann ich über Divi-Formulare übermittelte E-Mail-Adressen validieren?
Um E-Mail-Adressen zu überprüfen, aktiviere die E-Mail-Validierungseinstellungen in Divi-Formularen. Dadurch wird das Formular vor dem Absenden auf eine korrekte E-Mail-Syntax geprüft.
Prüfe als nächstes deine SPF-Einträge
E-Mail-Server verwenden häufig SPF-, DKIM- und DMARC-Einträge, um E-Mails zu authentifizieren. WP Mail SMTP überprüft deine DNS-Einstellungen und warnt dich, wenn es ein Problem feststellt.
SPF-Datensätze sind einfach TXT Datensätze, die alle ausgehenden E-Mails validieren, um Domain-Spoofing zu verhindern. Wenn du mehr als 1 SPF-Eintrag brauchst, schau dir diesen Leitfaden an, um mehrere SPF-Datensätze in einer Regel zusammenführen.
Wenn du ein Visual Form Builder-Benutzer bist, der mit E-Mail-Fehlern zu kämpfen hat, findest du Tipps zur Fehlerbehebung unter Visual Form Builder E-Mail nicht gesendet.
Bring deine Devi-Formular-E-Mails jetzt in Ordnung 🙂 .
Bist du bereit, deine E-Mails zu verbessern? Starten Sie noch heute mit dem besten WordPress SMTP-Plugin. Wenn du keine Zeit hast, deine E-Mails zu reparieren, kannst du gegen Aufpreis eine umfassende White Glove Setup-Unterstützung erhalten und es gibt eine 14-tägige Geld-zurück-Garantie für alle kostenpflichtigen Angebote.
Wenn dir dieser Artikel geholfen hat, dann folge uns bitte auf Facebook und Twitter für weitere WordPress-Tipps und -Anleitungen.

