
AI Summary
WordPress email spoofing happens when emails appear to come from your domain but lack proper authentication, causing delivery failures and security risks.
Your contact forms might be setting visitors’ email addresses as the sender, your server could be sending unauthenticated mail, or your domain simply lacks the DNS records that prove legitimate ownership.
This creates two main problems: your legitimate emails get blocked or marked as spam, and malicious actors can more easily impersonate your domain to send fraudulent messages.
In this guide, we’ll fix these spoofing issues by setting up WP Mail SMTP with proper authentication, configuring your DNS records with SPF, DKIM, and DMARC, and ensuring your contact forms handle sender addresses correctly.
How to Fix Email Spoofing Issues on WordPress
We’re going to start by understanding what email spoofing looks like in WordPress and why it happens. Then we’ll set up WP Mail SMTP with proper authentication, which is the most reliable method for eliminating spoofing issues and ensuring your emails reach their destination.
Step 1: Understand WordPress Email Spoofing
Email spoofing in WordPress occurs when your site sends emails that appear legitimate but can’t prove their authenticity to receiving mail servers.
This happens because WordPress uses PHP’s basic mail function by default, which sends messages without proper authentication protocols.
The most common spoofing scenario involves contact forms. When someone fills out your contact form, many plugins automatically set their email address as the “From” sender.
Another frequent issue is WordPress sending system emails (password resets, user registrations, order confirmations) using your domain name but without the cryptographic signatures that prove the message actually came from your server.
Mail providers like Gmail and Outlook increasingly reject these unauthenticated messages, an issue explored further in our guide on understanding email deliverability.
The root cause is always the same: your emails lack the digital signatures and DNS records that modern email security requires.
Fixing this requires moving to authenticated SMTP and setting up proper email authentication records, which we’ll cover in the following steps.

Step 2: Diagnose Your Current Email Authentication Status
Before fixing your spoofing issues, you need to understand exactly what’s failing in your current email setup. Start by checking if your domain already has email authentication records configured.
Use an SPF Record Lookup tool to see if you have an SPF record. Simply enter your domain name and click “SPF Record Lookup.” If no record is found, like in the screenshot below, that’s an issue.

Next, check for DKIM records using MXToolbox’s DKIM Lookup. You’ll need to know your DKIM selector, which varies by email provider. Common selectors include “default,” “google,” “selector1,” or your provider’s specific selector.
After that, verify your DMARC policy with MXToolbox’s DMARC Lookup. A missing DMARC record is one of the most common causes of email spoofing vulnerability.
Test Email Authentication with a Real Message
Another way to quickly check your email authentication status is to send a test email to Gmail and check the message headers (click the three dots and then on Show original).

Step 3: Set Up Email Authentication Records (DNS Level)
Email authentication happens at the DNS level, where you publish records that tell receiving mail servers how to verify emails from your domain.
These three protocols work together to prevent spoofing: SPF authorizes sending servers, DKIM adds digital signatures, and DMARC sets policies for handling authentication failures.
Configure SPF Records
SPF (Sender Policy Framework) records specify which mail servers are authorized to send email on behalf of your domain. Without an SPF record, any server can claim to send email from your domain.
Most WordPress sites need to authorize multiple sending sources: your web host for system emails, your SMTP provider for authenticated sending, and sometimes third-party services like marketing platforms.
This often leads to multiple SPF records, which breaks authentication. The key is creating a single SPF record that includes all your legitimate senders.
You’ll add this as a TXT record in your domain’s DNS, typically starting with v=spf1 and ending with ~all to reject unauthorized senders.

Set Up DKIM Authentication
DKIM (DomainKeys Identified Mail) adds a cryptographic signature to your emails that receiving servers can verify against a public key stored in your DNS.
Your SMTP provider will generate DKIM keys for you, but sometimes the resulting DNS record is too long for a single TXT entry.
When this happens, you’ll need to split the DKIM record across multiple DNS entries while maintaining the proper formatting that mail servers expect.
The DKIM record includes your provider’s public key and gets published as a TXT record at a specific subdomain, usually something like selector1._domainkey.yourdomain.com.

Implement DMARC Policy
DMARC (Domain-based Message Authentication, Reporting, and Conformance) ties SPF and DKIM together while telling receiving servers what to do when emails fail authentication.
It’s your primary defense against domain spoofing. Creating a DMARC record involves setting a policy that can quarantine suspicious emails, reject them entirely, or simply monitor without taking action.
Start with a monitoring policy (p=none) to gather data without affecting delivery, then gradually move to p=quarantine and finally p=reject as you verify legitimate emails pass authentication.

Step 4: Install and Configure WP Mail SMTP
Installing WP Mail SMTP replaces WordPress’s unreliable default mail function with authenticated SMTP sending, which is essential for preventing email spoofing.
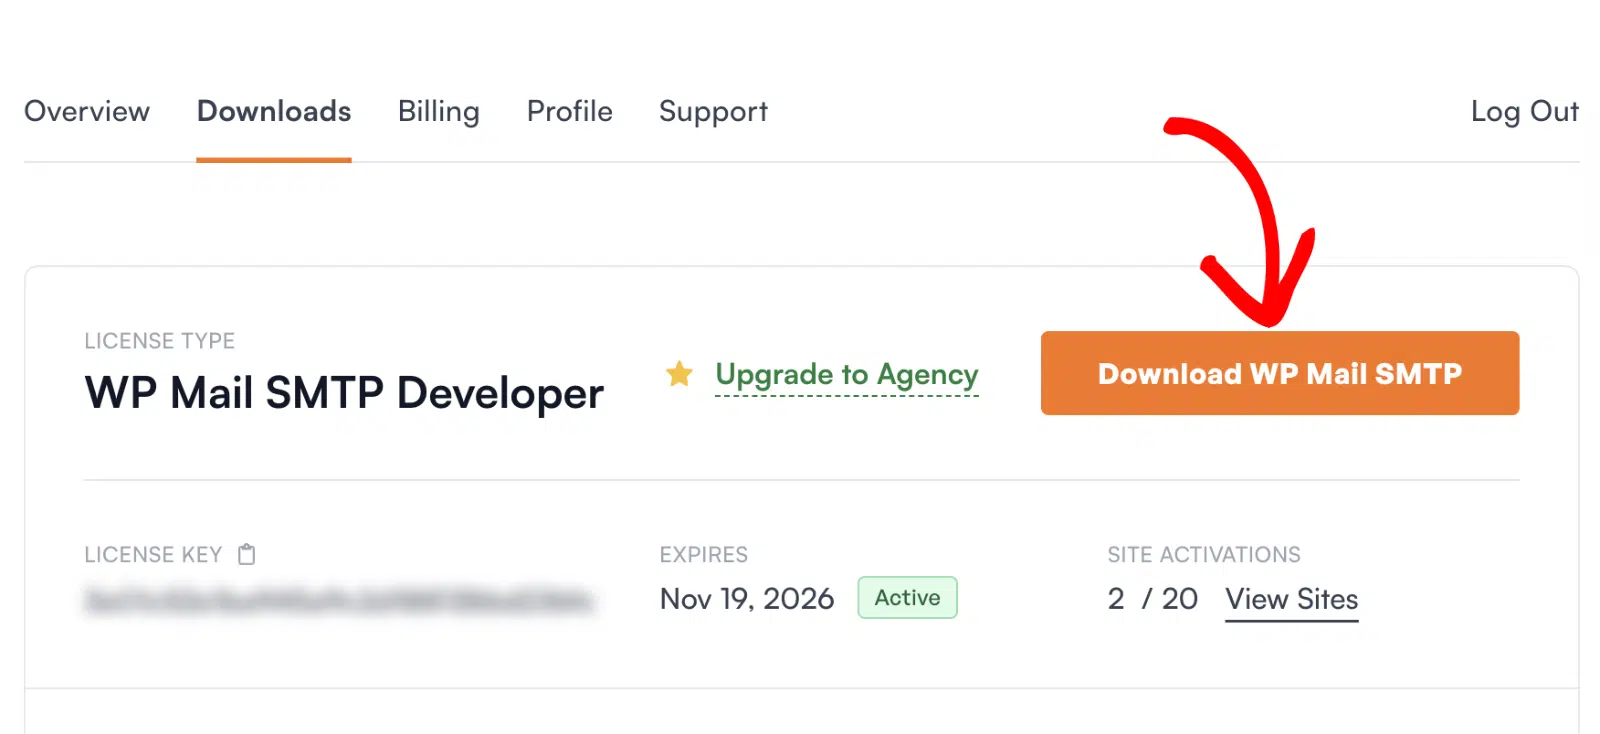
If you have WP Mail SMTP Pro, log in to your account and navigate to the Downloads tab to get the latest plugin file. The Pro version includes advanced features and email logging that help identify and resolve deliverability problems.
In your WordPress dashboard, go to Plugins » Add New » Upload Plugin, upload the zip file, and click Install Now. Once installed, activate the plugin immediately.

The Setup Wizard automatically appears after activation and is essential for fixing email spoofing issues. Don’t skip this step.
Click Let’s Get Started to begin the configuration process that will eliminate your spoofing vulnerabilities.

I usually pick a transactional provider like SendLayer, SMTP.com, or Brevo for speed and reliability, since they handle queues and rate limits better than basic webmail.

Once you’ve chosen your email provider, click on the link below to open up the documentation for it. We have a complete guide for every mailer so you can easily get your WordPress site connected:
Follow the on-screen steps to connect your account, then complete the fields the mailer asks for. Depending on your choice, you’ll paste an API key, sign in with OAuth, or approve sending from your domain.
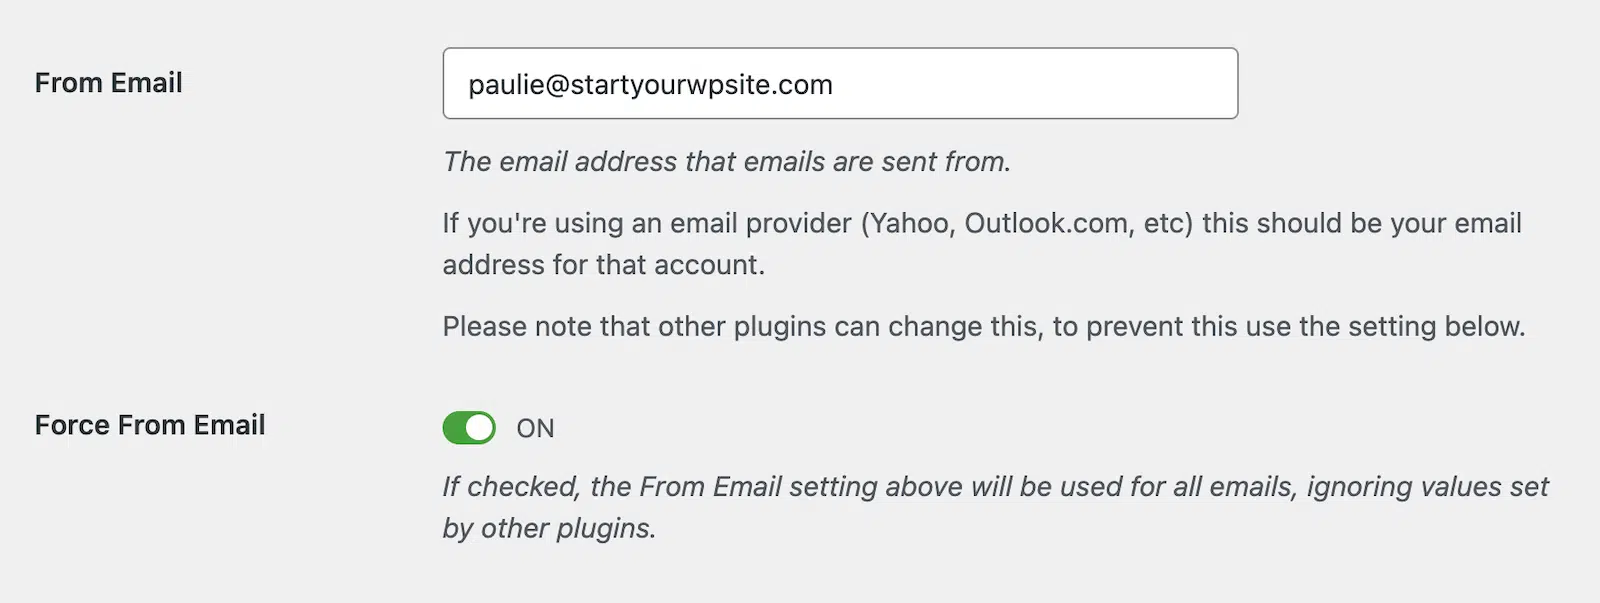
During your WP Mail SMTP setup, you’ll encounter the Force From Email setting located beneath the main From Email configuration field.

WordPress typically uses your site’s admin email address for outgoing messages, but this creates authentication problems when different plugins try to use various sender addresses.
Contact forms, user registration emails, and e-commerce notifications might each attempt to use different From addresses, leading to inconsistent authentication and potential spoofing flags.
Enabling the Force From Email option standardizes all outgoing messages to use your authenticated domain address you set in the From Email field.
Step 5: BIMI Setup (Advanced)
BIMI (Brand Indicators for Message Identification) is an advanced anti-spoofing protocol that displays your brand logo directly in recipients’ email clients when your messages pass authentication checks.
This visual verification makes it immediately obvious to recipients that emails genuinely come from your organization, providing an additional layer of protection against spoofing attempts.

For detailed implementation instructions, logo requirements, DNS record formatting, and Verified Mark Certificate setup, see our comprehensive guide on what BIMI is and how to implement it.
Step 6: Test Your Email Configuration
Once everything is configured, use WP Mail SMTP’s built-in test feature to assess your email deliverability. Go to Tools and click the Email Test tab to start.

On this screen, customize the recipient address for your test email and hit Send Email.

If everything’s set up correctly, you’ll see a green message.

If WP Mail SMTP detects any issues, it’ll show a warning.

Underneath the warning, you’ll see some information on the steps you need to take to improve it.
The common WP Mail SMTP troubleshooting guide covers solutions for typical setup problems.
FAQs on How to Fix WordPress Email Spoofing
Fixing WordPress email spoofing is a popular topic of interest among our readers. Here are answers to some common queries about it:
What is email spoofing in WordPress?
Email spoofing in WordPress occurs when emails appear to come from your domain but lack proper authentication, causing delivery failures and security risks.
This happens because WordPress uses PHP’s basic mail function by default, which sends messages without SPF, DKIM, or DMARC authentication protocols that prove the email’s legitimacy.
How do I know if my WordPress emails are being spoofed?
Check for these signs:
- contact form submissions aren’t reaching recipients
- emails consistently land in spam folders
- you receive bounce-back messages about authentication failures
- email providers show “unverified sender” warnings
- your domain appears in phishing reports you didn’t send.
Test by sending an email to Gmail and checking Show original for SPF, DKIM, and DMARC PASS/FAIL results.
How do I fix WordPress email spoofing issues?
Install WP Mail SMTP plugin, configure it with a professional SMTP provider like SendLayer, set up SPF, DKIM, and DMARC records in your DNS, enable the “Force From Email” setting to use your authenticated domain address, and test email authentication using WP Mail SMTP’s test feature.
Can WordPress contact forms cause email spoofing?
Yes, contact forms commonly cause spoofing when they use the visitor’s email address as the From sender, making it appear the visitor sent the email directly rather than your website forwarding their message.
Fix this by using WP Mail SMTP with Force From Email enabled and setting visitor emails in the Reply-To field instead.
Which SMTP providers prevent WordPress email spoofing?
Professional SMTP providers like SendGrid, Mailgun, Amazon SES, Postmark, and SMTP.com prevent spoofing by providing proper authentication, DKIM signing, and deliverability infrastructure.
Avoid using basic webmail providers like personal Gmail accounts, as they lack the authentication features needed for WordPress sending.
Can shared hosting cause WordPress email spoofing issues?
Yes, shared hosting often causes spoofing because multiple websites share the same server IP address, making SPF authentication difficult, and most shared hosts don’t configure DKIM or provide proper email authentication.
Fix this by using WP Mail SMTP with a dedicated email service provider instead of relying on your hosting provider’s mail servers.
Next, Learn How to Fix Email Delays in WordPress
Are your WordPress emails showing up 20 minutes late? Or worse, arriving hours after someone submitted a form or completed checkout? Check out this guide to learn what’s actually causing the delays on your site and how to fix them so your emails send instantly.
Ready to fix your emails? Get started today with the best WordPress SMTP plugin. If you don’t have the time to fix your emails, you can get full White Glove Setup assistance as an extra purchase, and there’s a 14-day money-back guarantee for all paid plans.
If this article helped you out, please follow us on Facebook and Twitter for more WordPress tips and tutorials.