AI Summary
If you’ve ever had a contact form message vanish into thin air or a customer say they never got their password reset email, you’re not alone. I’ve dealt with this myself, and it’s one of the most frustrating experiences ever.
WordPress doesn’t always do a great job sending emails out reliably. And when something goes wrong, you usually have to dig through logs or missed notifications to figure out what happened.
That’s exactly why I turned on push notifications in WP Mail SMTP. Now, I don’t have to check my email logs every day or wait for someone to complain. I get notified instantly if an email fails. Here’s how:
How To Get Push Notifications for Failed WordPress Emails
Push notifications work with what you already have: your browser or smartphone. Follow the steps below to enable email failure alerts through WP Mail SMTP to receive popup notifications instantly:
Step 1: Upgrade to WP Mail SMTP Pro
If you’re already using the Lite version, that’s a good start. However, in order to get push notifications for failed emails, you’ll need to upgrade to the Pro version.
I made the switch to Pro after running into a bunch of email issues that were flying under the radar. Once I set it up, I could finally stop guessing whether messages were sent or not.
What I really like about the Pro version is that it does more than just fix email sending. You also get access to email logging, email reports, smart routing, and of course, the push notifications we’re talking about here.
If you’ve upgraded to Pro, the alert features will already be available in your settings. So if you’re tired of finding out about broken emails way too late, this is one of those upgrades that actually makes a difference.
Upgrade to WP Mail SMTP Pro Now! 🙂
Step 2: Enable Email Failure Alerts
WP Mail SMTP email alerts let you know right away when emails fail to send from your WordPress site. These alerts can be sent through different services.
For example, if your site runs into trouble sending an email, you’ll instantly get a text alert about the failure. These alerts have helped me spot issues I would’ve otherwise missed.
To get started with alerts, log into your WordPress dashboard, then go to WP Mail SMTP » Settings. After that, click on the Alerts tab.
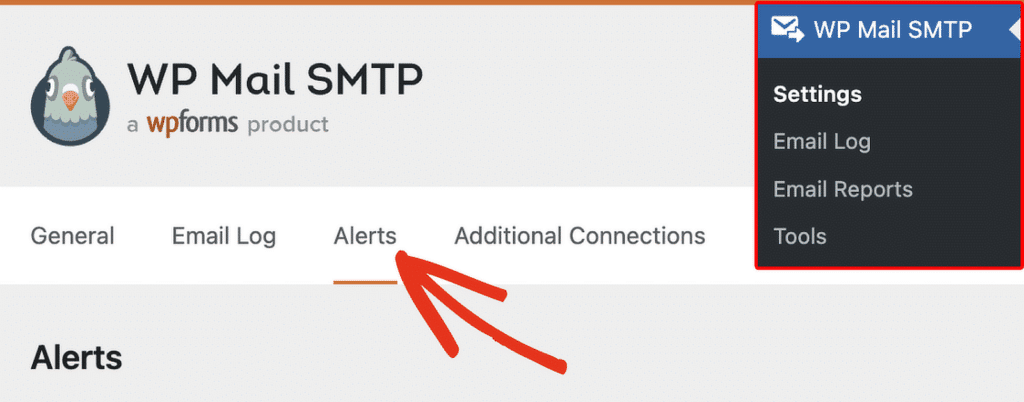
This takes you to the Alerts settings page, where you’ll see a list of options you can use to get notifications. You can choose from:
- Slack
- Discord
- Microsoft Teams
- SMS with Twilio
- Webhooks
- Push Notifications
You’ll need to connect at least one of these services before alerts will work on your site. Personally, I rely on push notifications because I want to catch problems even when I’m away from my inbox.
Step 3: Allow Notifications in Your Browser
WP Mail SMTP lets you set up an unlimited number of push notification alerts for your site. To enable it, start by toggling the Push Notifications Alerts option to the ON position.

Once you’ve moved the toggle to the ON position, click the Enable push notifications on this device button to move forward.
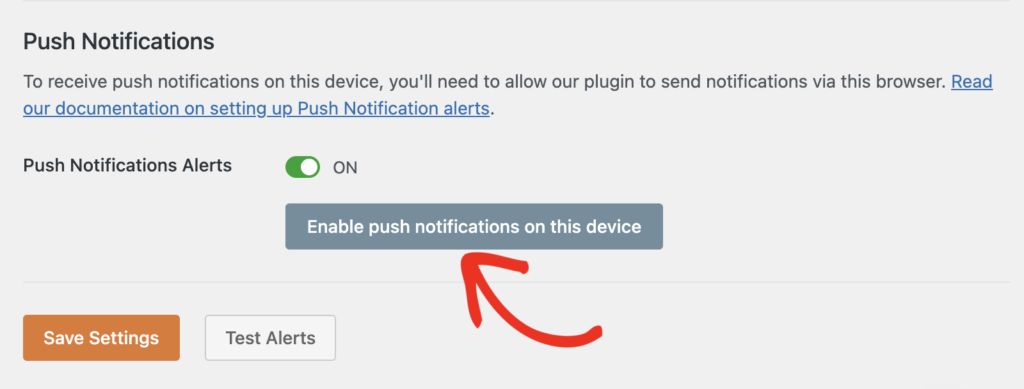
Your browser will then show a small pop-up just under the address bar. Click Allow so your browser can start receiving push alerts from your site.

After you allow it, your browser’s name will appear as the value in the Connection Name field. You can change this name to anything that helps you remember which device it’s for.
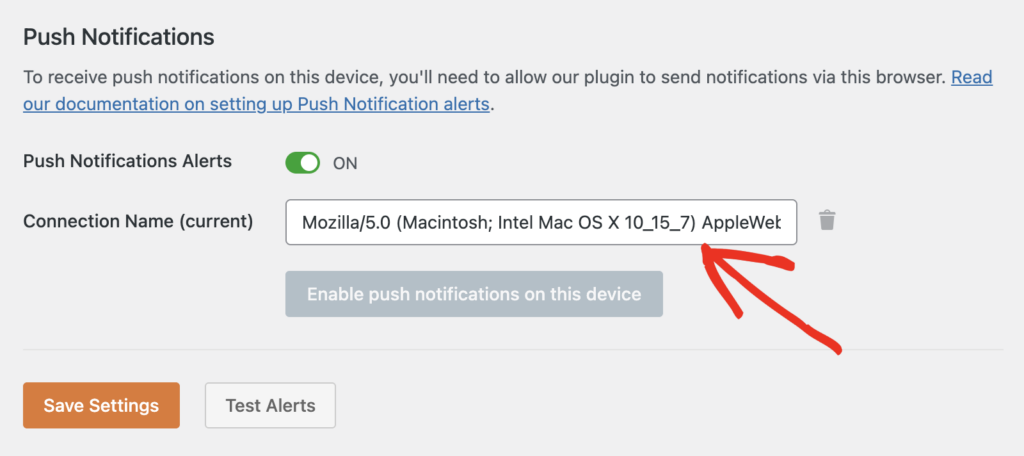
Once notifications are turned on for a device, the Enable push notifications on this device button will become inactive. But you can still add more devices.
Just open your site in another browser or device and click the Enable push notifications on this device button again. Then, make sure you allow access when your browser asks.
Step 4: Enable Notifications on iPhones
Feel free to skip this step and move on to the next if you don’t use an iPhone. However, if you are using one and want to view the Alerts screen, push notifications won’t work right away.
This is because the iOS browser doesn’t support push notifications, but there is a work around. Go to WP Mail SMTP » Settings and open the Alerts tab. Then tap the Share icon in your iPhone browser.
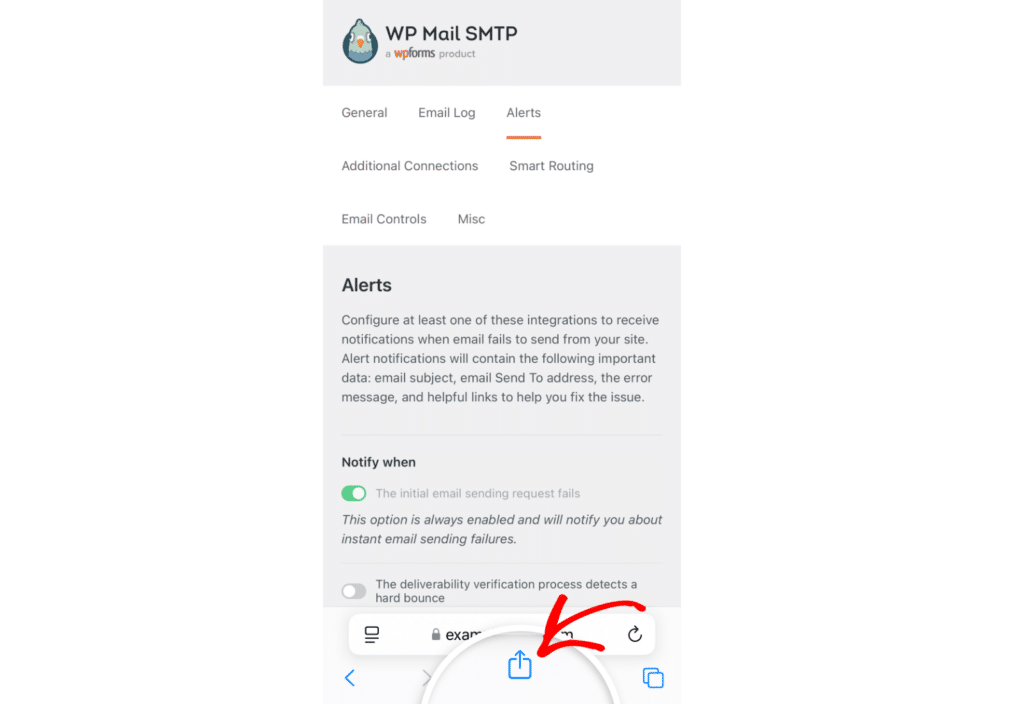
Next, scroll down and tap Add to Home Screen. This will create a shortcut on your iPhone’s home screen that links directly to the Alerts settings page. Tap the icon to open the page.
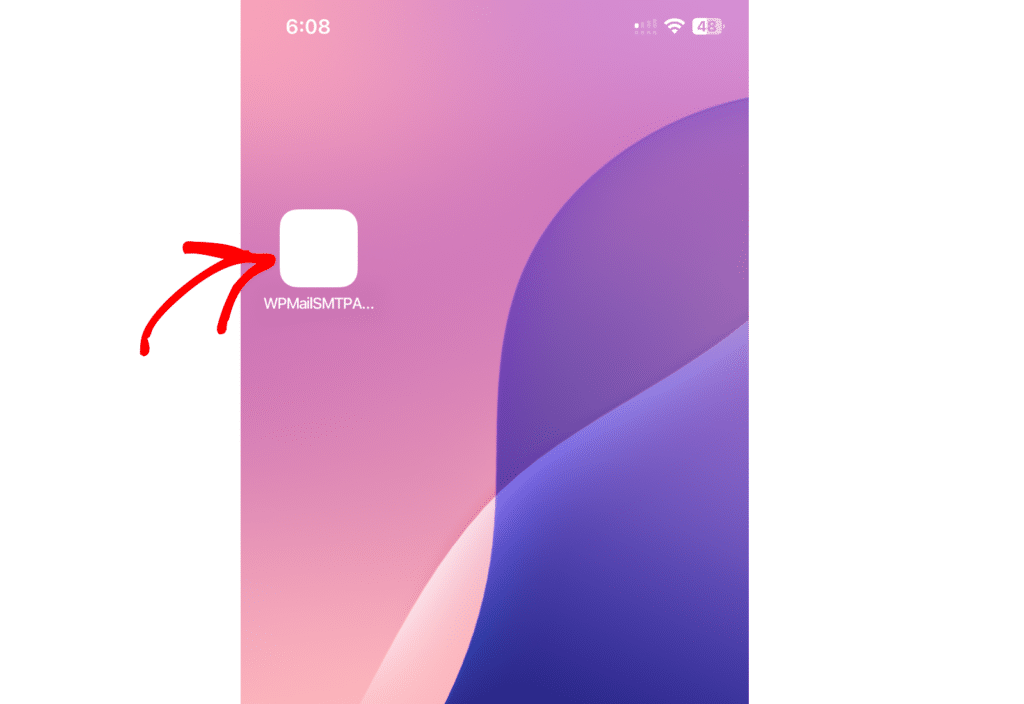
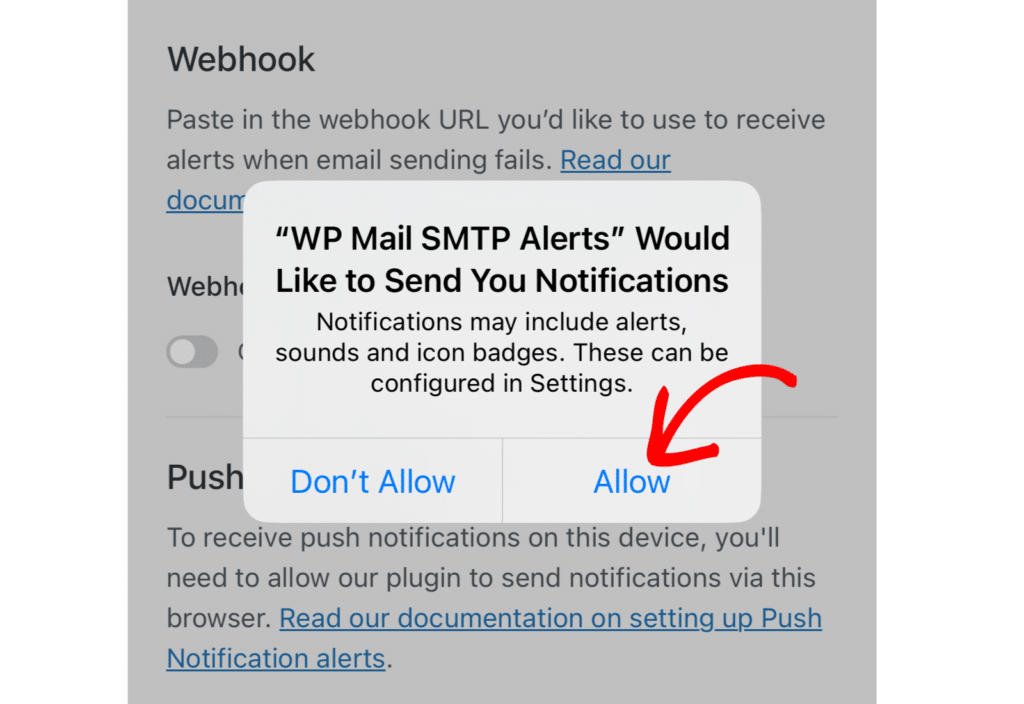
You’ll land right back on the Alerts screen. Scroll down to the Push Notifications section and tap the Enable push notifications on this device button.
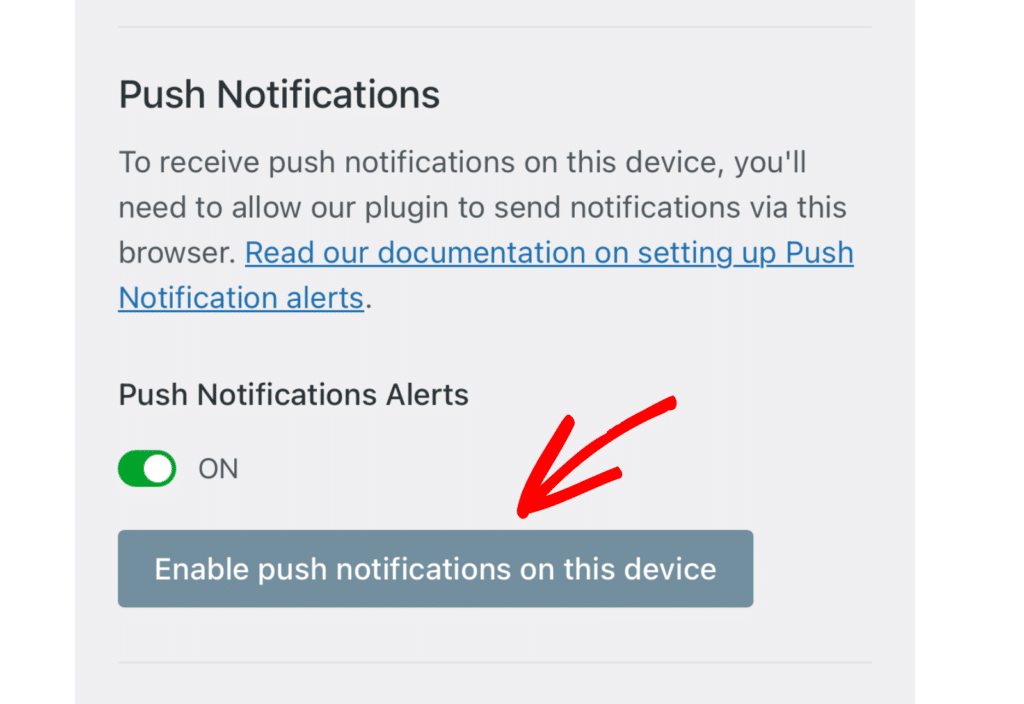
Then just tap Allow when your browser asks for permission. This will make it possible to receive alerts on your iPhone without any hassle!
Step 5: Verify Your Notifications
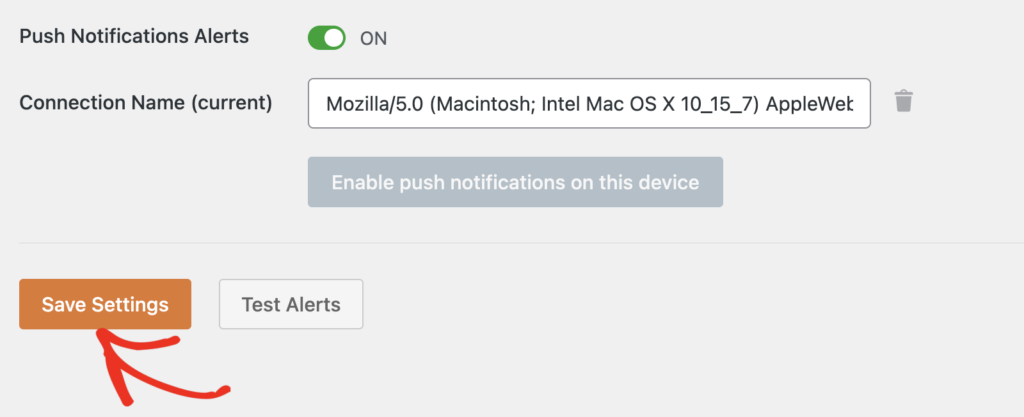
Once everything is set, don’t forget to save your settings so your push alerts stay active. Just scroll down and click the Save Settings button in the bottom-left corner of the screen.
After saving everything, it’s a good idea to run a quick test to make sure each service is working like it should. You can do that by clicking the Test Alerts button right next to the save option.
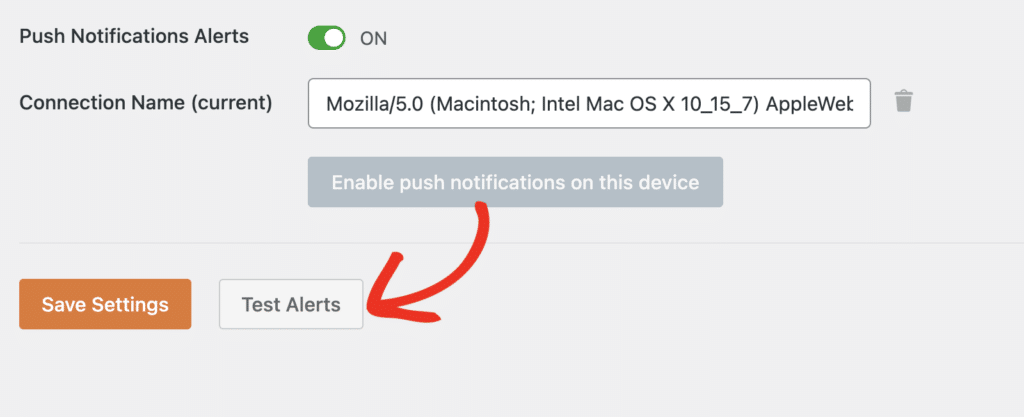
This test will ping all the alert services you set up. If everything is connected properly, you’ll see a success message pop up right away.

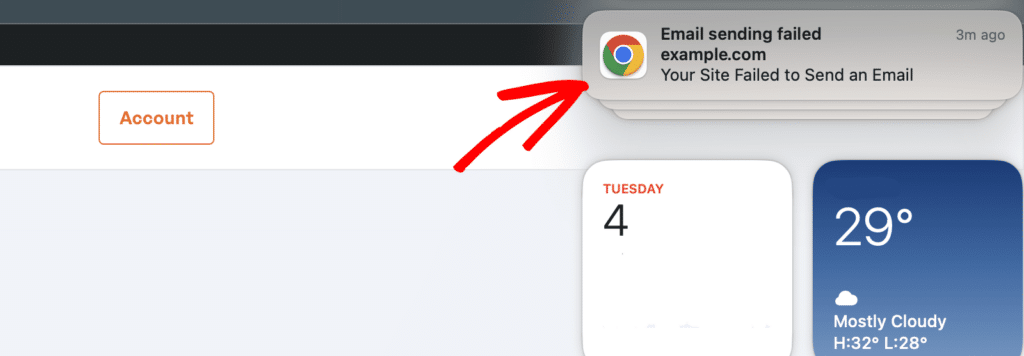
You’ll also get a push notification on your browser or phone whenever your site fails to send an email like the example below.
And that’s it! By following these steps, you can enable push notifications for failed WordPress emails, ensuring reliable communication with your users.
FAQs — How To Get Push Notifications for Failed WordPress Emails
Push notifications for failed WordPress emails are a popular topic of interest among our readers. Here are answers to some common queries about it:
How do I get notified when WordPress emails fail to send?
You can use WP Mail SMTP to set up email alerts for failed messages. I’ve found the push notifications option really helpful because it lets me know right away if something breaks, without checking my inbox or email log all the time.
Do I need the Pro version of WP Mail SMTP for push alerts?
Yes, the push notifications feature is only available with WP Mail SMTP Pro. I upgraded for this exact reason. It’s worth it just to get alerts right when an email fails.
Why are my WordPress emails not reaching users?
It usually happens when your site isn’t sending emails through a proper SMTP service. I’ve seen this a lot with new installs. WP Mail SMTP helps fix that by connecting your site to a trusted mailer and alerting you when something doesn’t send.
How do I test if push notifications are working in WP Mail SMTP?
After turning on push notifications for your device in the plugin settings, you can click the Test Alerts button. I always do this right after setup to make sure my browser is linked and working.
Can I get failed email alerts on my phone?
Yes, I’ve done it. Just open your site on your WordPress dashboard in the mobile browser, enable push notifications in WP Mail SMTP, and tap Allow when asked. That way, your phone will buzz the second something fails.
Next, How to Get an SMS Notification from WordPress Forms
Have you ever wondered how to get an SMS notification when users submit a form on your WordPress website? SMS notifications bridge the gap between online actions and real-time alerts.
This tutorial shows you how to enable SMS notifications for forms by using WPForms and connecting it to Twilio. You can also check out the steps here to get SMS notifications for failed WordPress emails with WP Mail SMTP.
Ready to fix your emails? Get started today with the best WordPress SMTP plugin. If you don’t have the time to fix your emails, you can get full White Glove Setup assistance as an extra purchase, and there’s a 14-day money-back guarantee for all paid plans.
If this article helped you out, please follow us on Facebook and Twitter for more WordPress tips and tutorials.

