Have you got a WordPress critical error, but no email has arrived with a login link?
The ‘white screen of death’ can lock you out of your site if you don’t receive the notification.
In this article, we’ll show you how to log in to your WordPress dashboard without the recovery mode email.
How Do I Fix a Critical Error on My WordPress Site?
You can fix a critical error initially by removing all of your plugins. The error message doesn’t reveal what’s causing the problem, so this is sometimes the only way to log in.
You’ll know that you have a critical error if you receive an email with the subject “Your Site is Experiencing a Technical Issue”.
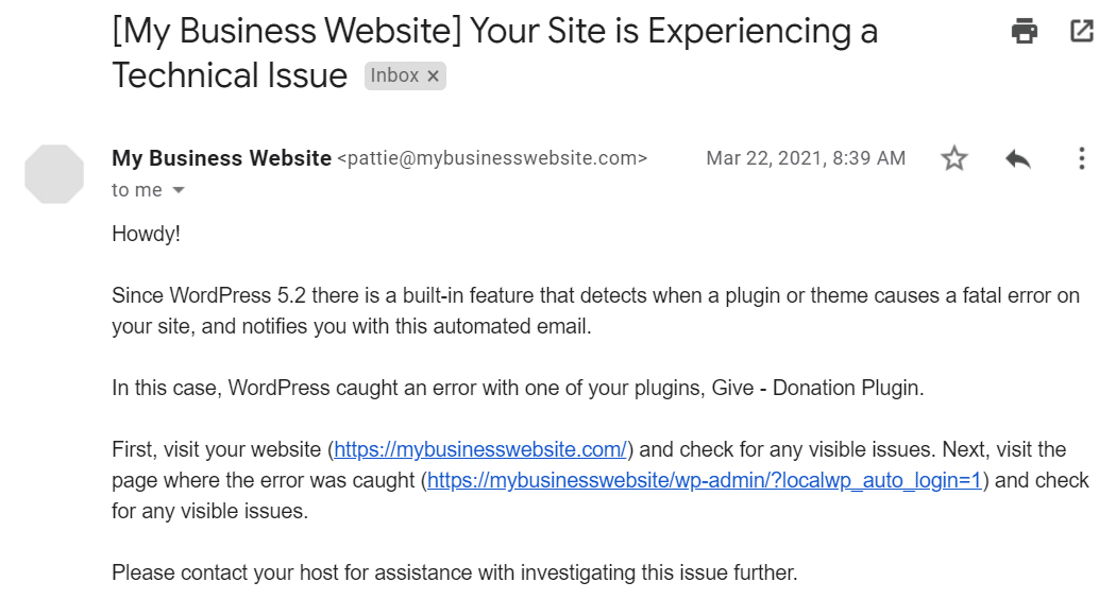
If you didn’t receive the email, we’ll show you how to get your website up and running.
WordPress Critical Error: How to Log In With No Email
In This Article
1. Manually Deactivate Plugins With cPanel or FTP
If there’s no critical error email, you’ll need to deactivate your plugins manually.
Depending on how you log into your site, there are 2 ways to do this.
Deactivating Plugins in cPanel
We’ll use Bluehost as an example for this part of the tutorial. Depending on your host, the process here might look different.
First, log in to your Bluehost account and from the sidebar, click on Advanced.
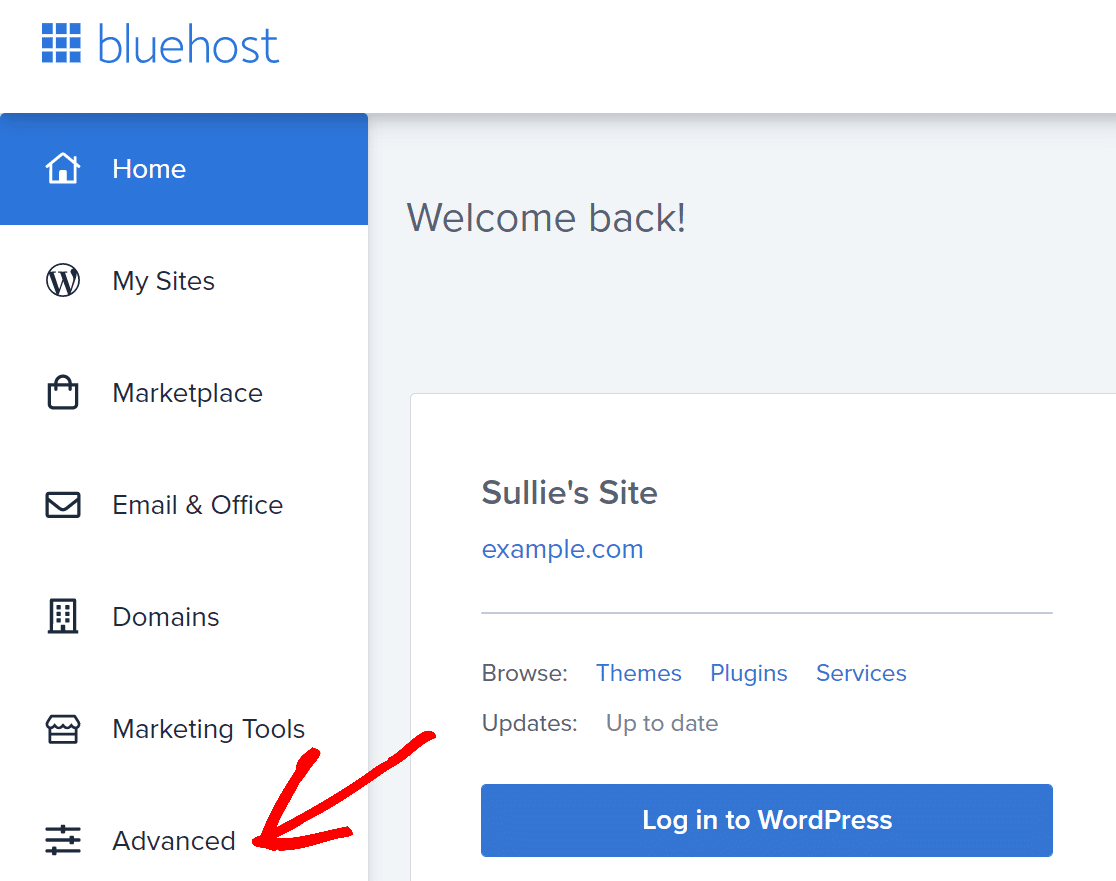
This will open cPanel.
Look for the Files section and click on the File Manager to open your WordPress files directory.

Now find public_html and click on it.

Next, search for the folder that matches the name of your site.

When you open up this folder, you’ll see all of the files WordPress needs. It’s super important not to delete or change anything else while we work through this step.
To continue, click the wp_content folder and look for the plugins folder inside it.
Right-click on the plugins folder and rename it.

Now all plugins on your website are deactivated and you’ll be able to log in to the WordPress dashboard without any issue.
Deactivating Plugins With FTP
You can easily bypass the critical error by renaming the plugins folder using FTP.
The process is essentially the same as it would be through cPanel.
Navigate to the wp_content folder and look for the plugins folder inside it. Right-click on the folder and rename it.
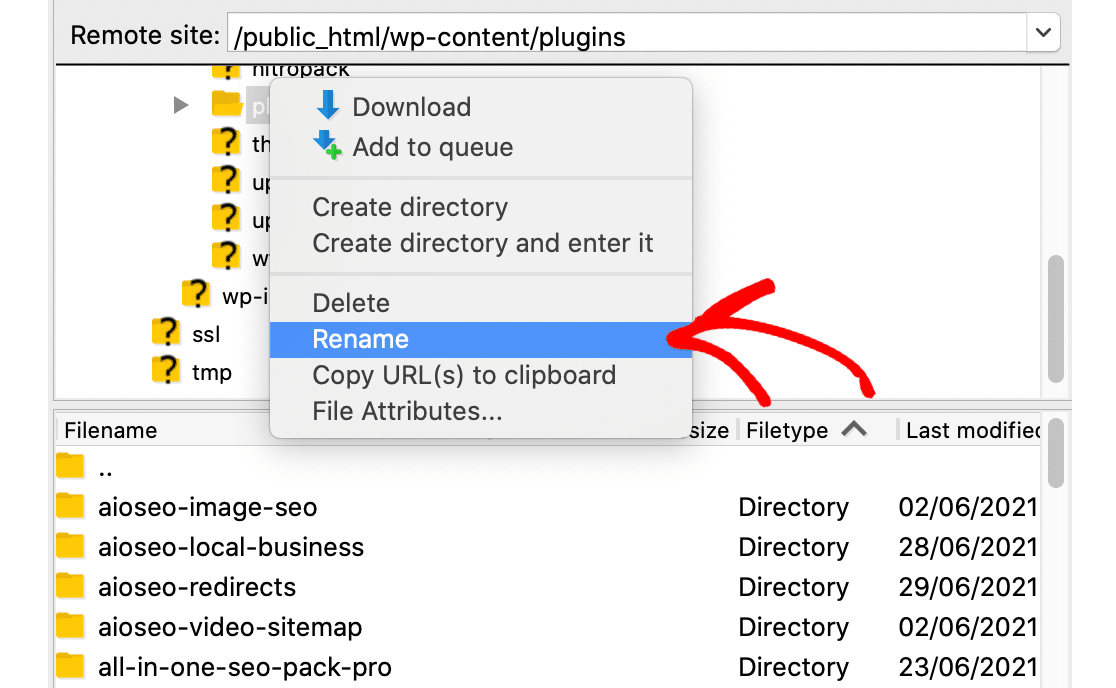
Now you can log into your dashboard.
Once into the dashboard, go to the plugins page and activate all plugins one by one. The critical error will likely have been caused by a recent plugin installation or update, so if you know which plugin is the culprit, leave that one deactivated for now.
Let’s now solve the email deliverability problem to make sure that the error email is delivered to your inbox.
2. Use WP Mail SMTP To Configure SMTP Settings
In this step, we’re going to fix the issue that stopped the critical error email from being delivered.
Email deliverability issues are super common in WordPress. Sometimes you don’t know there’s a problem until an important email goes missing.
WP Mail SMTP will take over the email sending functionality on your site to make sure you always receive critical errors in the future.
Install the WP Mail SMTP Plugin
To download the plugin, go to your WP Mail SMTP account.
Under the Downloads tab, click the orange button to download the most recent version of the plugin.
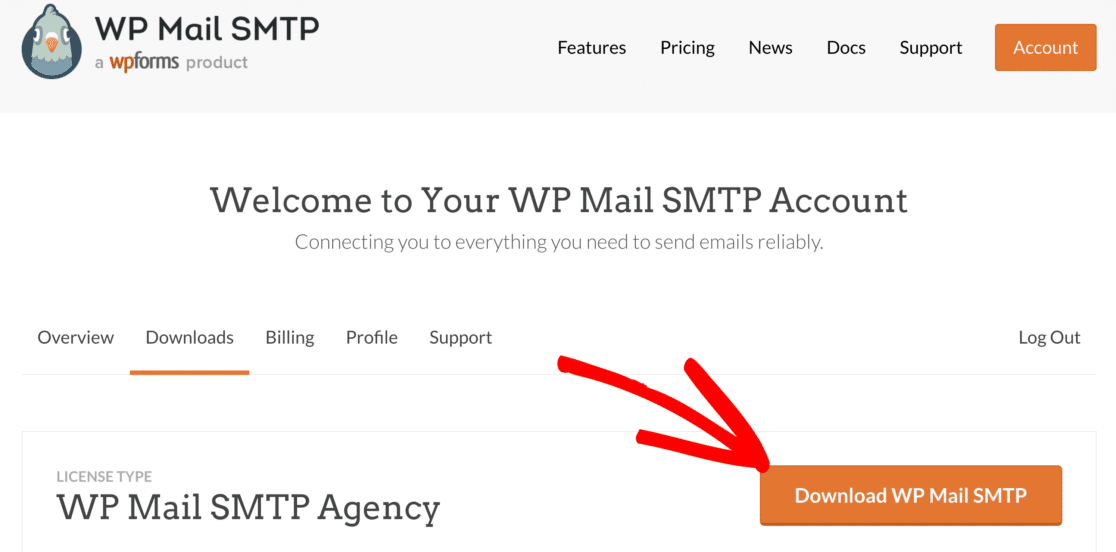
Switch to your WordPress dashboard and upload the zip file you just downloaded on the plugins page.

If you are new to WordPress or need help with this part, check out the guide to installing a WordPress plugin.
After installing the plugin, make sure to Activate it. As soon as you do that, the Setup Wizard will launch in your browser.
The wizard will guide you through the steps of configuring the plugin and connecting it to a mailer service.
Connect to a Mailer Service
In this step, we’ll connect your website to a mailer service to fix your WordPress emails.
To begin, click the Let’s Get Started button in the wizard.

Now, you’ll be asked to pick a mailer from the list that WP Mail SMTP supports. The plugin has several free and premium mailer options.
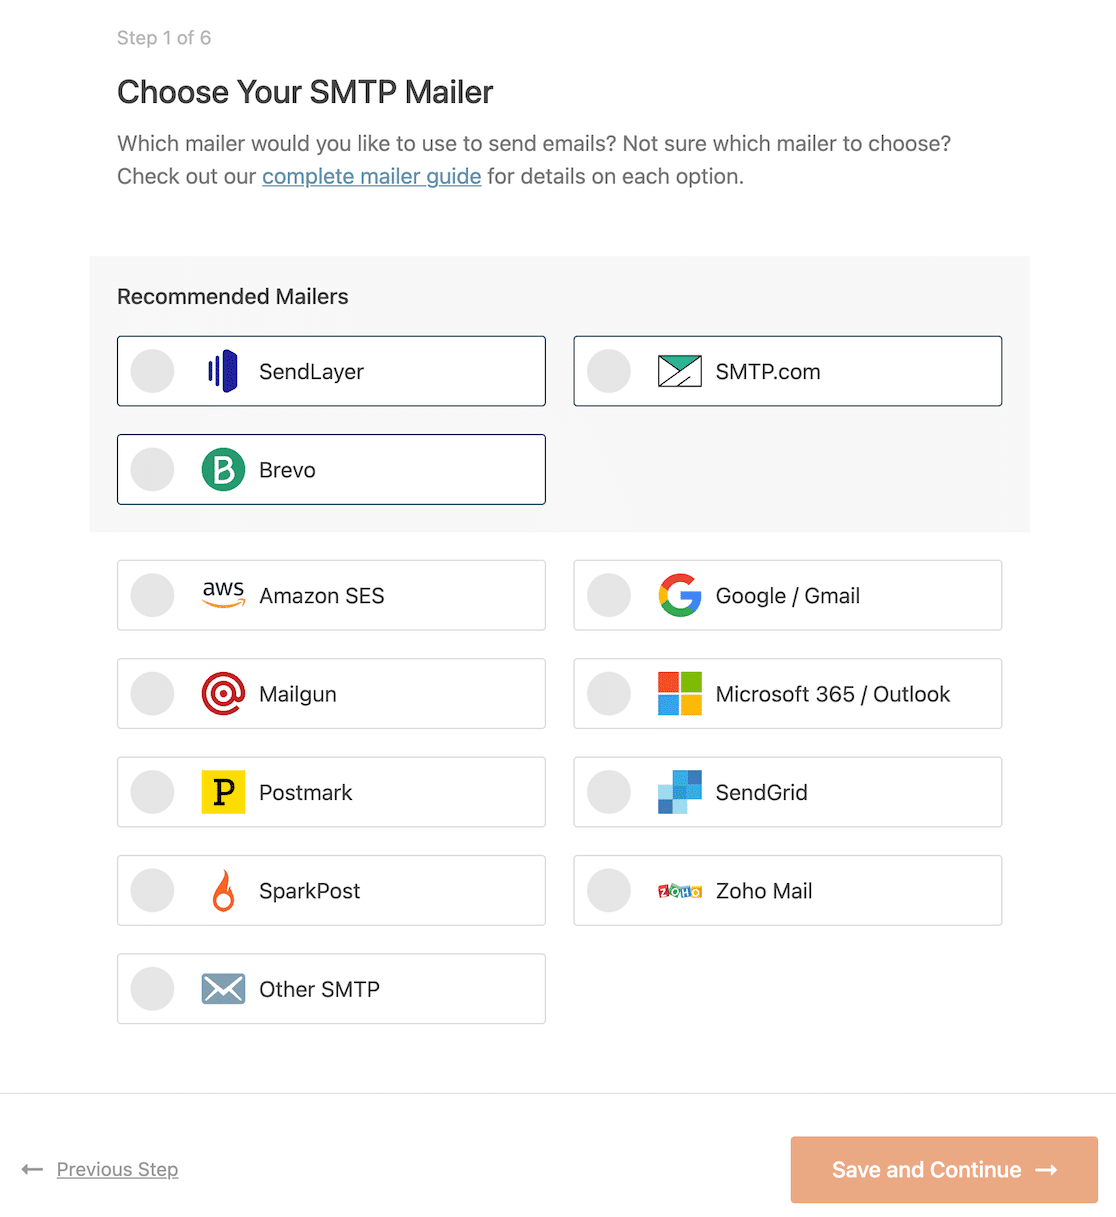
What you choose will depend on the type of website you have:
- If your website sends occasional emails, a free option like Gmail/Google Workspace will just work fine.
- If you have an eCommerce website, you might want to pick a transactional email provider. We recommend SendLayer, SMTP.com, or Brevo (formerly Sendinblue).
Click the link in the table below to open the documentation for the mailer you’ve chosen.
| Mailers available in all versions | Mailers in WP Mail SMTP Pro |
|---|---|
| SendLayer | Amazon SES |
| SMTP.com | Microsoft 365 / Outlook.com |
| Brevo | Zoho Mail |
| Google Workspace / Gmail | |
| Mailgun | |
| Postmark | |
| SendGrid | |
| SparkPost | |
| Other SMTP |
Once the connection is made, switch back to this guide to follow the next steps in the wizard.
Enable Email Logging (Optional)
In the next step of the wizard, WP Mail SMTP will have two options enabled by default.
- Improved Email Deliverability
- Email Error Tracking
The first option will help improve the deliverability of emails and the second one will check for errors in the background.
The third option is the Detailed Email Log feature. If enabled, it’ll track every email sent from your website.
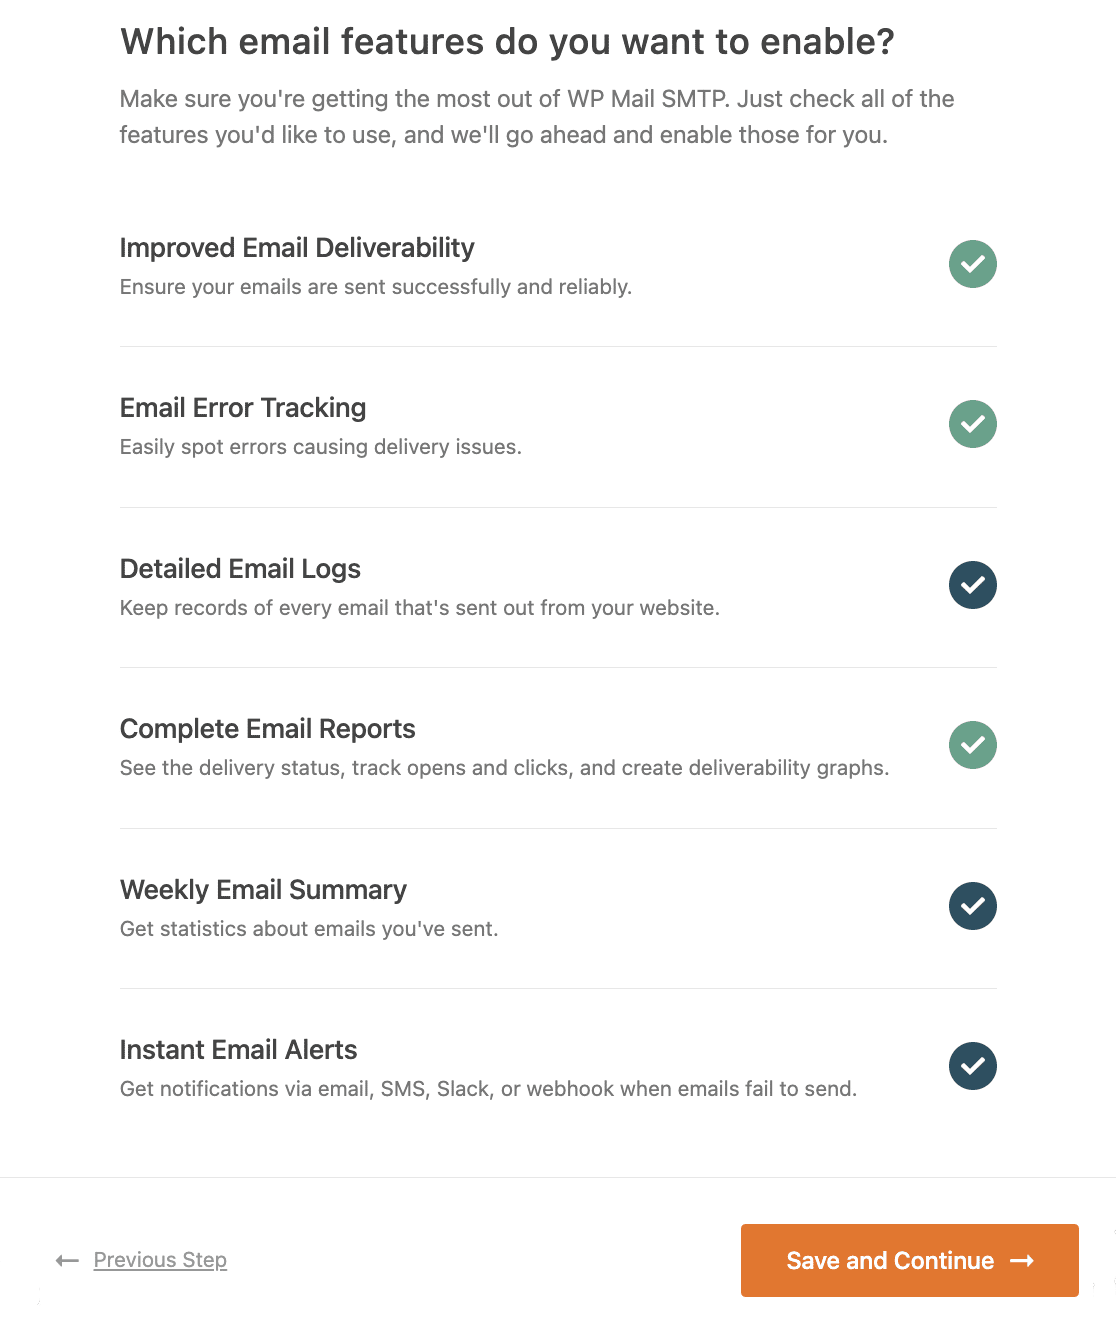
Enabling Detailed Email Logs will automatically turn on Complete Email Reports, too. This will show you a variety of details about your WordPress emails, depending on which other features you’ve enabled.
If you want to receive an overview of your recent emails logs each week, enable the Weekly Email Summary option.
Finally, if you want to receive a notification whenever your WordPress site fails to send an email, make sure to turn on Instant Email Alerts. This will let you know there’s a problem so you can quickly fix it and start sending emails again.
Configure Email Logs (Optional)
If you enable email logging, then you’ll have some additional options to consider in the next step of the Setup Wizard. These include:
- Store the content for all sent emails. This option will save the content of all your WordPress emails in your site’s database. You need to enable this feature if you want to be able to resend emails.
- Save file attachments sent from WordPress. When you turn on this setting, all email attachments sent from your site will be saved in the Uploads folder.
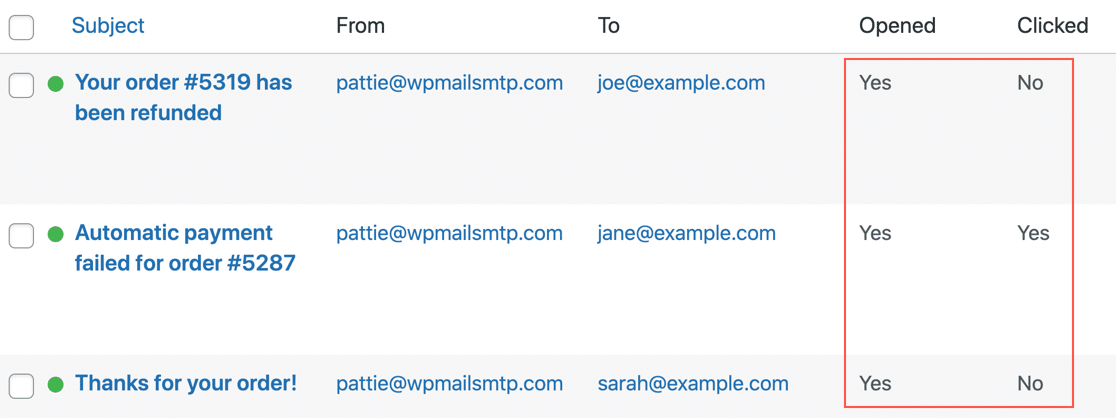
- Track when an email is opened. Use this feature to see when recipients open your emails to track engagement.
- Track when a link in an email is clicked. Enable this option to see when recipients click on the links in your emails.
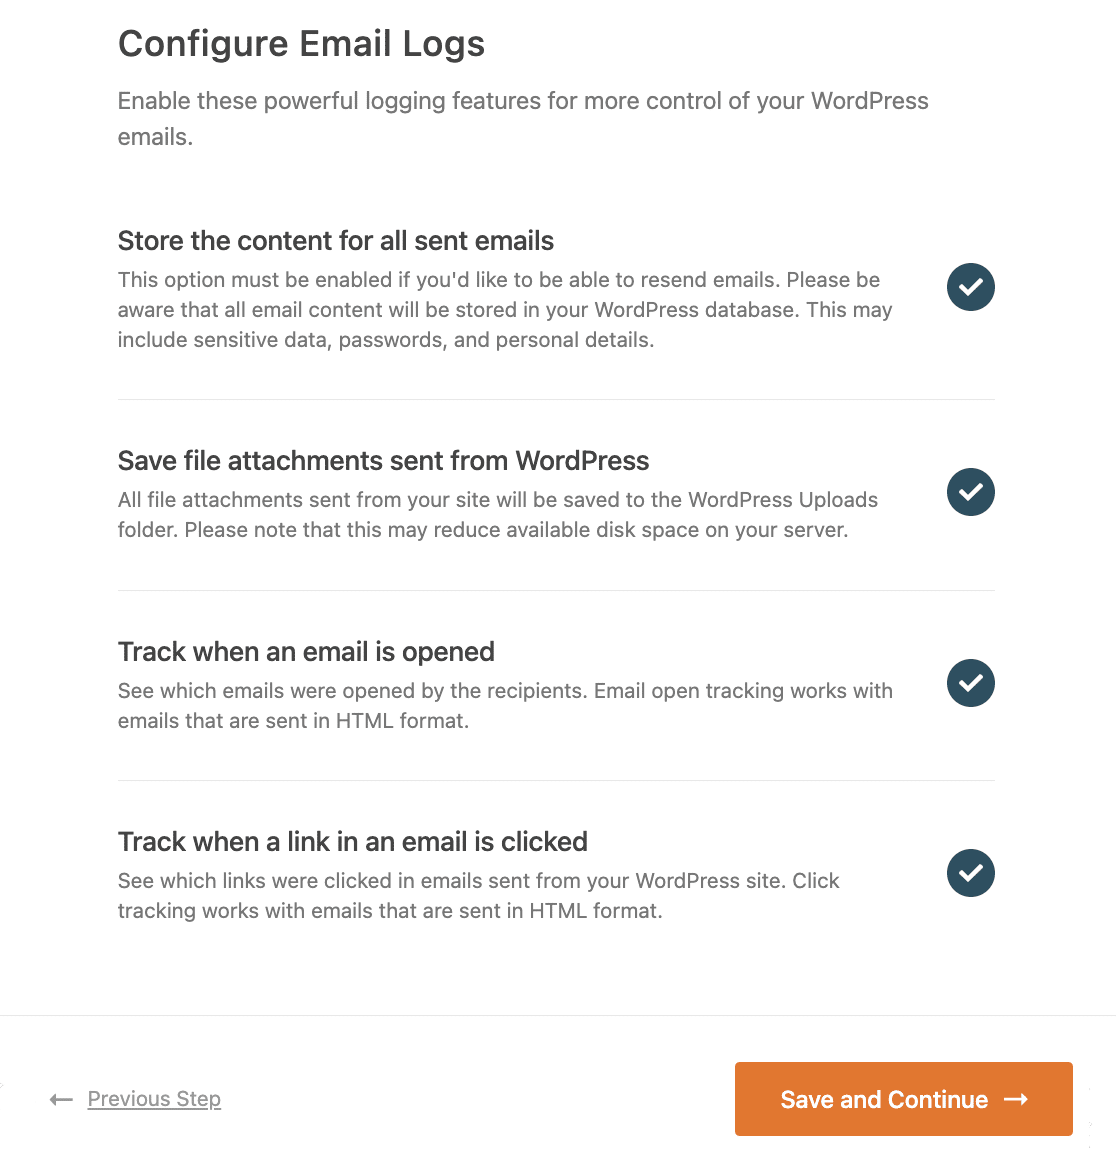
Here’s what the log looks like with open and click tracking enabled.
If you want to know more about the email logging functionality of WP Mail SMTP, we have a guide that explains how to log emails in WordPress.
For the final step in the wizard, copy the license key from your WP Mail SMTP account and paste it into the box to enable Pro features and future updates.

And that’s it. Now, whenever a critical error occurs on your website, you’ll receive an email from WordPress and you won’t need to rename your plugins folder.
Next, Check Your DNS Settings
WP Mail SMTP has a Domain Checker that scans your DNS for issues. If you want to get a head start, you can create a DMARC record for your domain. This will prevent your domain from being used to send phishing emails.
Ready to fix your emails? Get started today with the best WordPress SMTP plugin. WP Mail SMTP Elite includes full White Glove Setup and offers a 14-day money-back guarantee.
If this article helped you out, please follow us on Facebook and Twitter for more WordPress tips and tutorials.

