Your WordPress site could be losing customers because emails are failing silently. Password resets, order confirmations, and contact form notifications are all useless if they never reach the inbox.
WordPress email logging lets you see exactly what’s happening with every email your site sends. Which ones delivered, which failed, and why. No more guessing if that important customer email made it through.
This guide shows you how to set up email logs using WP Mail SMTP so you can track, troubleshoot, and resend emails when needed.
How Do I Check Email Logs in WordPress?
You can view your email logs and sent emails from your WordPress dashboard using the WP Mail SMTP plugin.
Logging WordPress emails is really simple with WP Mail SMTP because it displays the status of your outgoing emails in a log file or dashboard widget.
It’s more advanced than other email logging plugins because it can track the status all the way to the recipient’s mailbox. And it can also show you opens and clicks.
That means you can see a true picture of your email deliverability right in your WordPress dashboard.
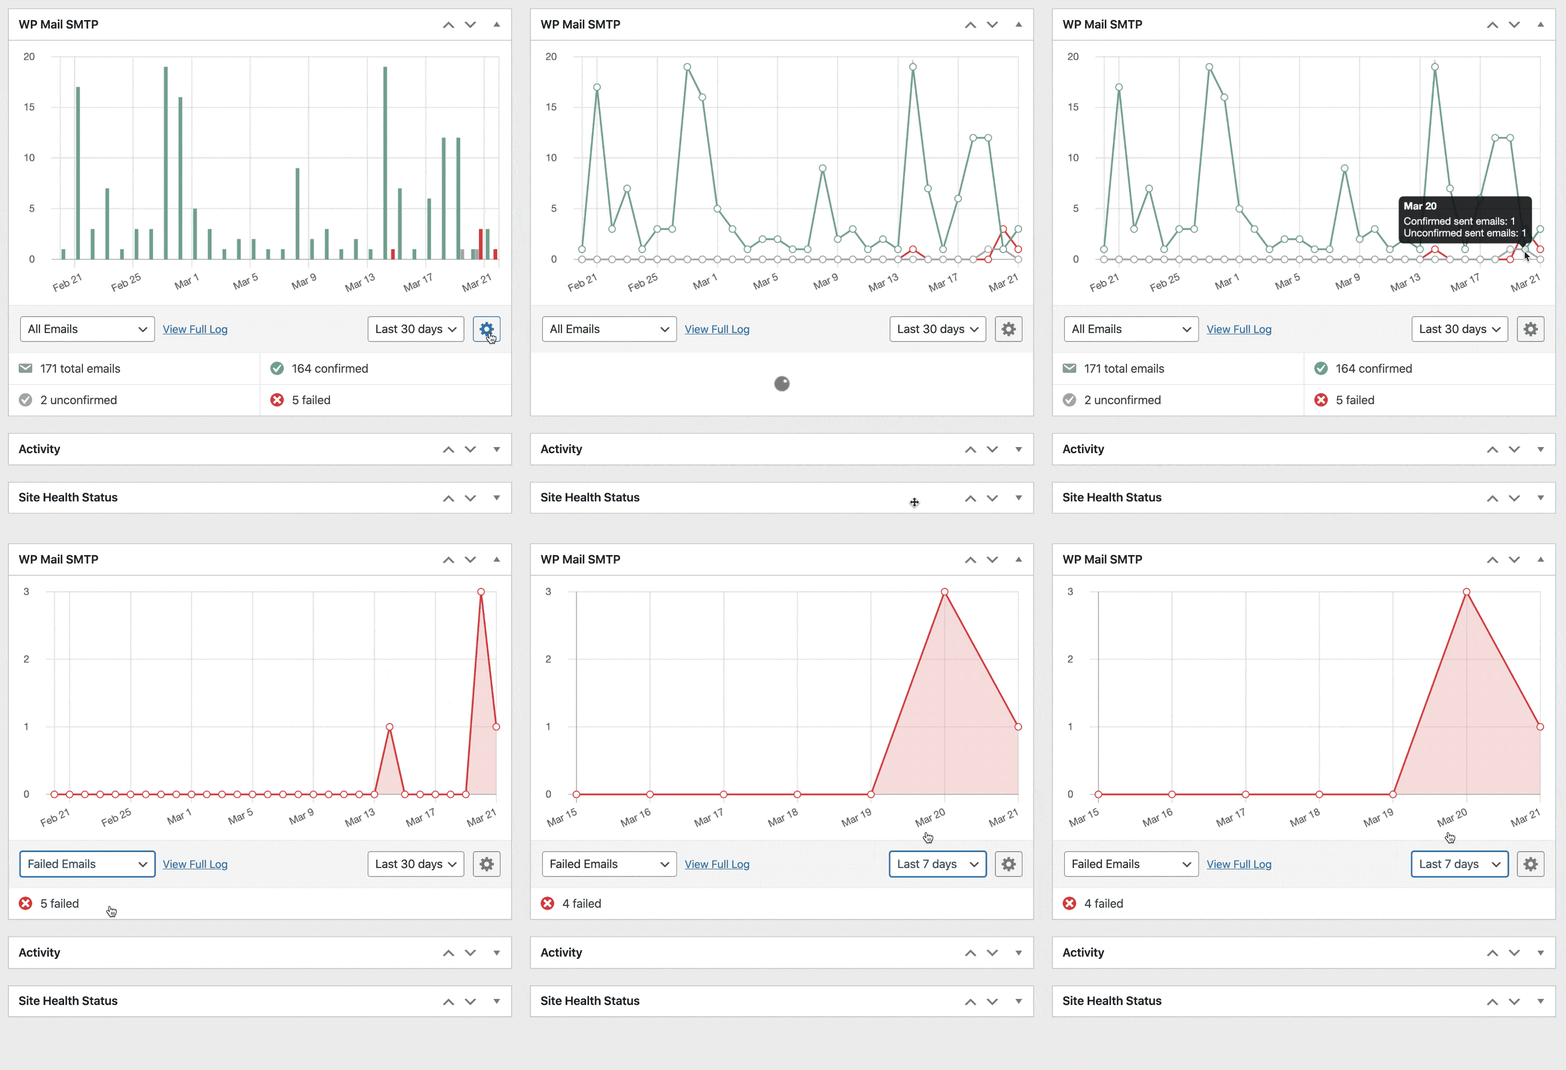
WP Mail SMTP also adds a detailed email log page to your WordPress admin area. From the email log page, you can:
- View headers: WP Mail SMTP saves all of the technical information associated with the email.
- Filter and search: Use the powerful filters to find and track your most important emails.
- Print email logs: Every email log can be printed or saved as a PDF.
- Log email contents: Save the message as well as the email headers (optional).
- Track email opens and clicks: See open and click data for every email you send from WordPress.
- Resend failed emails: Resend in bulk or individually, or forward to a different address.
- Store attachments: Save the attachment file along with the log.
- Export sent emails in CSV, XLSX, or EML format.
- View multisite email logs on separate pages easily.
Thanks to these features, logging WordPress emails is not only easy but also very powerful with WP Mail SMTP.
How to Enable WordPress Email Logging
To get full WordPress email logging on your site, you’ll need the WP Mail SMTP Pro license or higher.
Let’s see how you can set up the WP Mail SMTP log on your site.
1. Install WP Mail SMTP
We’re going to use the WP Mail SMTP plugin to log your WordPress emails. WP Mail SMTP is used by 4+ million WordPress users to improve email deliverability and tracking.
To install WP Mail SMTP, download the zip file from your WP Mail SMTP account. You’ll find it in the Downloads tab.
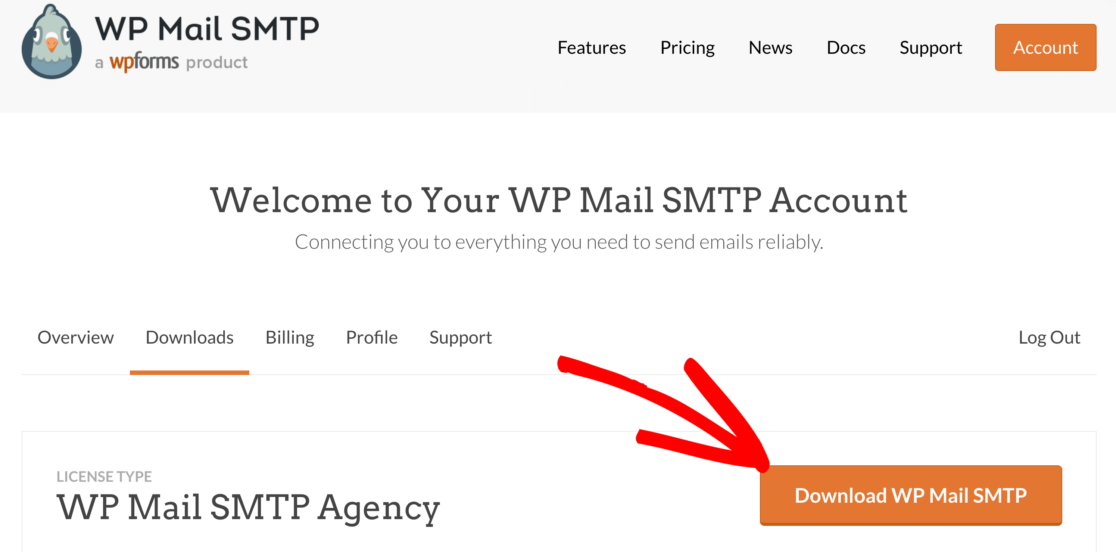
Next, open up your WordPress dashboard. Head to the Plugins page and upload the zip file to install it.
If you’re not sure how to do this, check out how to install a plugin in WordPress.

As soon as you activate the plugin, the WP Mail SMTP Setup Wizard will open.
Choose Your Email Service Provider
Now we can set up your chosen SMTP provider using the Wizard.
Click the Let’s Get Started button to begin.

On the next screen, click the mailer you want to use from the list.
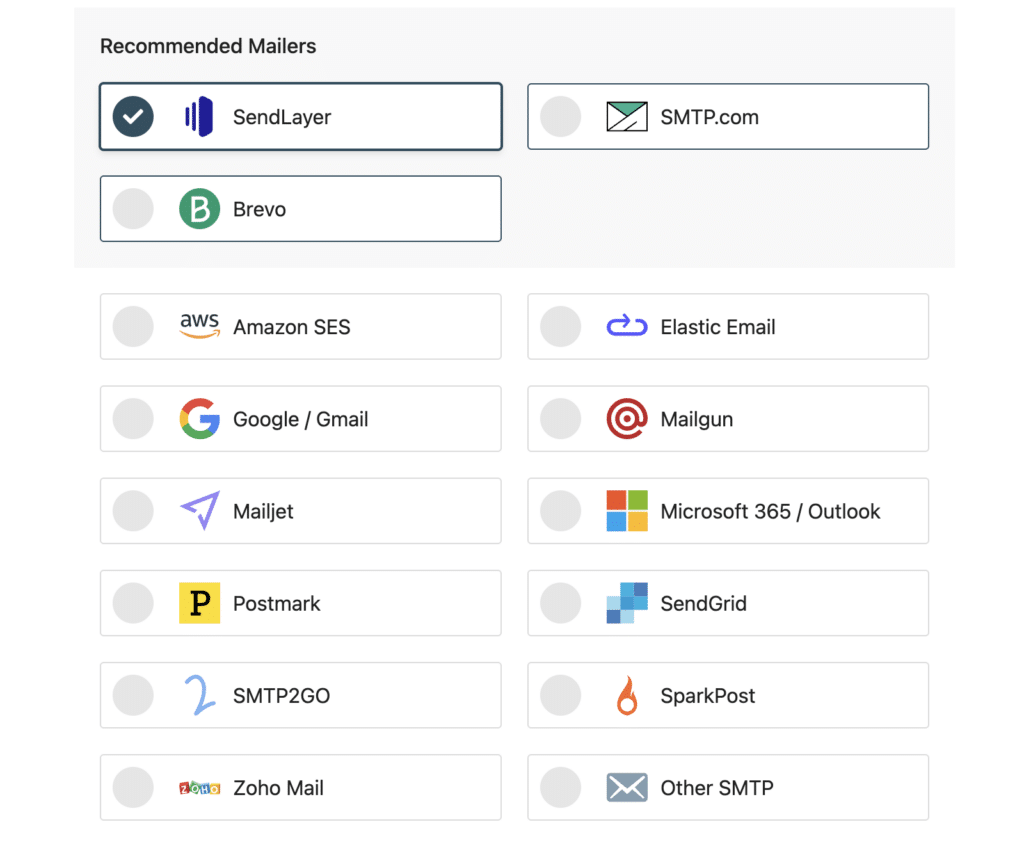
WP Mail SMTP supports a ton of popular email services, including many free options.
Logging the Email Delivery Status
Most email logging plugins will tell you if the email Sent or Failed. But they can’t give you any information about what happened after that.
Using WP Mail SMTP for logging WordPress emails provides you with a lot more insight into your delivery status. With WP Mail SMTP, you can unlock 2 additional status reports: Unconfirmed (Waiting) and Confirmed (Delivered).
Here’s what these statuses will tell you:
- Sent means that WordPress successfully generated and sent the email.
- Failed means that the email wasn’t sent. For example, you’ll see this if there’s a problem with your SMTP server or some other configuration issue.
- Unconfirmed means that the email was sent and WP Mail SMTP is waiting for the status.
- Confirmed means that the email was sent and delivered to the recipient’s mailbox.
Selected email providers support Unconfirmed and Confirmed. Here’s a chart to show each status and the mailers that support them:
| Email Service | Failed | Sent | Waiting / Unconfirmed | Delivered / Confirmed |
|---|---|---|---|---|
| SendLayer | ✓ | ✓ | ✓ | ✓ |
| SMTP.com | ✓ | ✓ | ✓ | ✓ |
| Brevo (formerly Sendinblue) | ✓ | ✓ | ✓ | ✓ |
| Amazon SES | ✓ | ✓ | ||
| Elastic Email | ✓ | ✓ | ✓ | ✓ |
| Google Workspace / Gmail | ✓ | ✓ | ||
| Mailgun | ✓ | ✓ | ✓ | ✓ |
| Mailjet | ✓ | ✓ | ✓ | ✓ |
| MailerSend | ✓ | ✓ | ||
| Microsoft 365 / Outlook.com | ✓ | ✓ | ||
| Postmark | ✓ | ✓ | ✓ | ✓ |
| SendGrid | ✓ | ✓ | ||
| SMTP2GO | ✓ | ✓ | ✓ | ✓ |
| SparkPost | ✓ | ✓ | ✓ | ✓ |
| Zoho Mail | ✓ | ✓ | ||
| Other SMTP | ✓ | ✓ |
So if you want the best possible email tracking, we recommend that you use WP Mail SMTP with a transactional mailer like SendLayer, Brevo, SMTP.com, Mailgun, Postmark, or SparkPost.
When you’ve chosen your mailer, jump to our documentation and continue the setup steps:
Come back to this guide when you’re ready.
Need a hand?
Our Elite license includes White Glove Setup.
In the final step, be sure to turn on Detailed Email Logs and Weekly Email Summary.
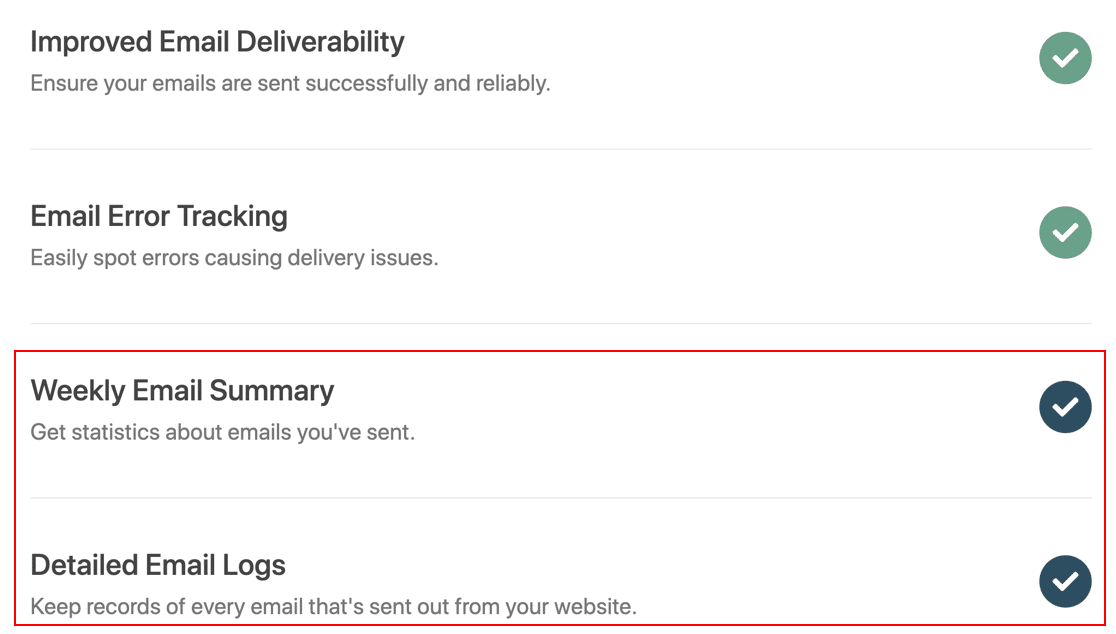
Detailed Email Logs will track your email headers and delivery status. Weekly Email Summary will send you a weekly email report.
For the best possible data, we recommend that you log the content of your sent emails as well.
2. Log All Email Content
As well as tracking the header and delivery status of each email sent from WordPress, you can save a copy of the entire content of the messages sent from your site.
This can be helpful when troubleshooting. For example, if you have an email customizer plugin for WooCommerce, you could save a copy of your order emails to make sure they’re formatted correctly.
Let’s turn on complete email logging on your WordPress site. There are 2 ways to do this. You can set this up in the Setup Wizard, or you can achieve the same results in the plugin settings.
Let’s start with the Setup Wizard.
Using the Setup Wizard to Log All Email Content
You’ll go through the Setup Wizard when you first register for WP Mail SMTP. You can always get back to the Setup Wizard, however, by clicking WP Mail SMTP » Settings in the left sidebar menu.
You’ll see the general settings on the screen with the option to launch the setup wizard.

The first thing you’ll do is select your mailer of choice. You’ll configure the mailer settings in step 2.
Step 3 is when you get to enable email features. Your 4 options are Improved Email Deliverability, Email Error Tracking, Detailed Email Logs, and Instant Email Alerts.
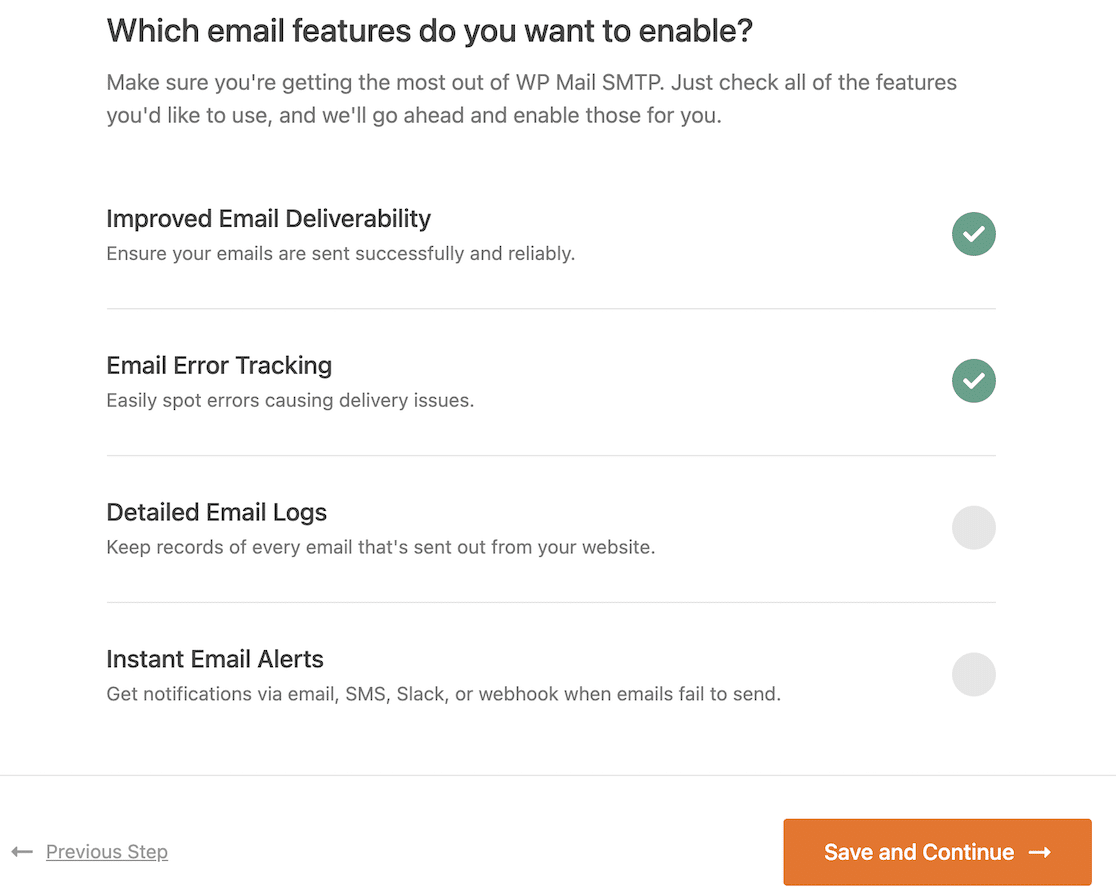
Click on Detailed Email Logs to get set up.
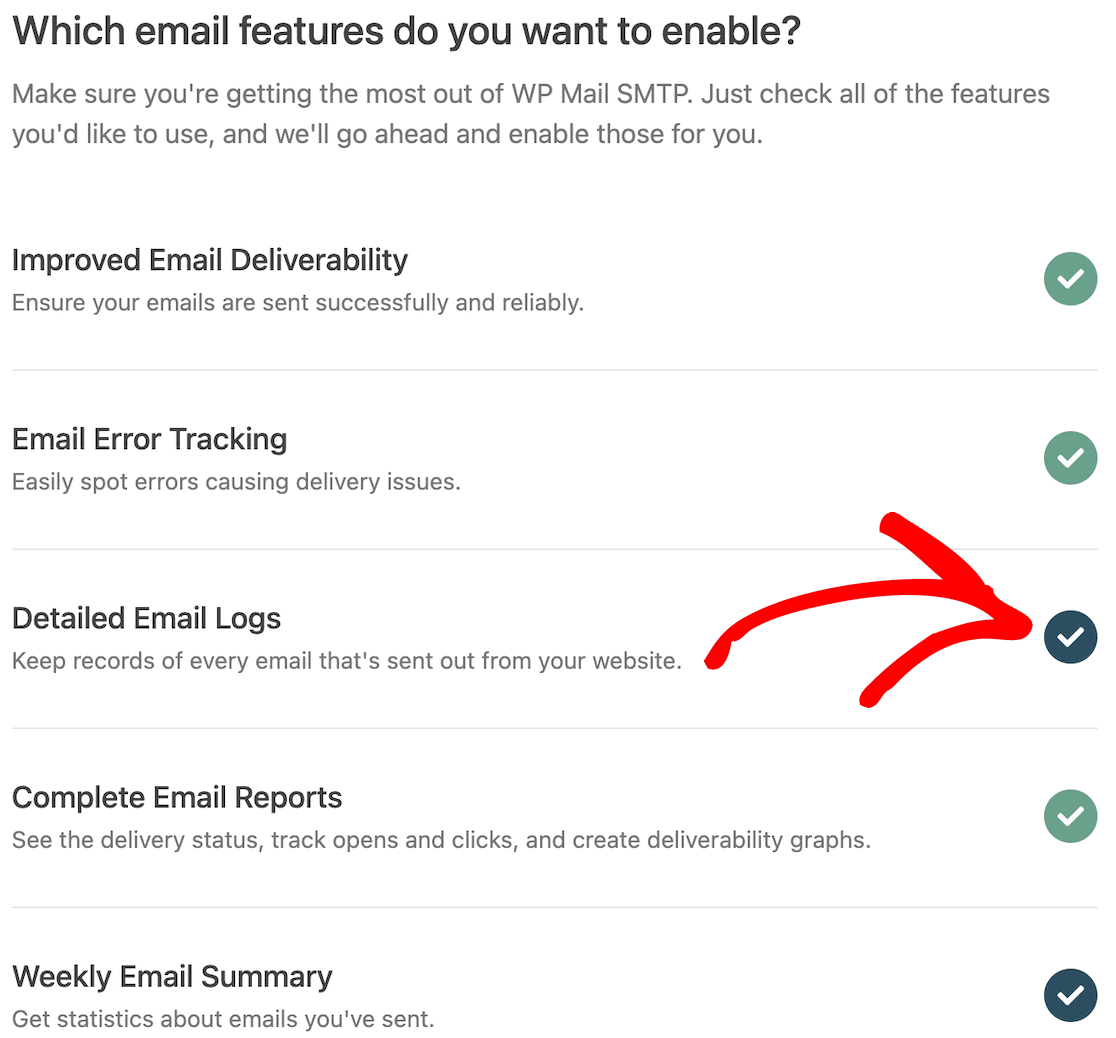
Notice that when you check Detailed Email Logs, it automatically adds options for Complete Email Reports and Weekly Email Summary.
On the next screen, you’ll configure your email logs.
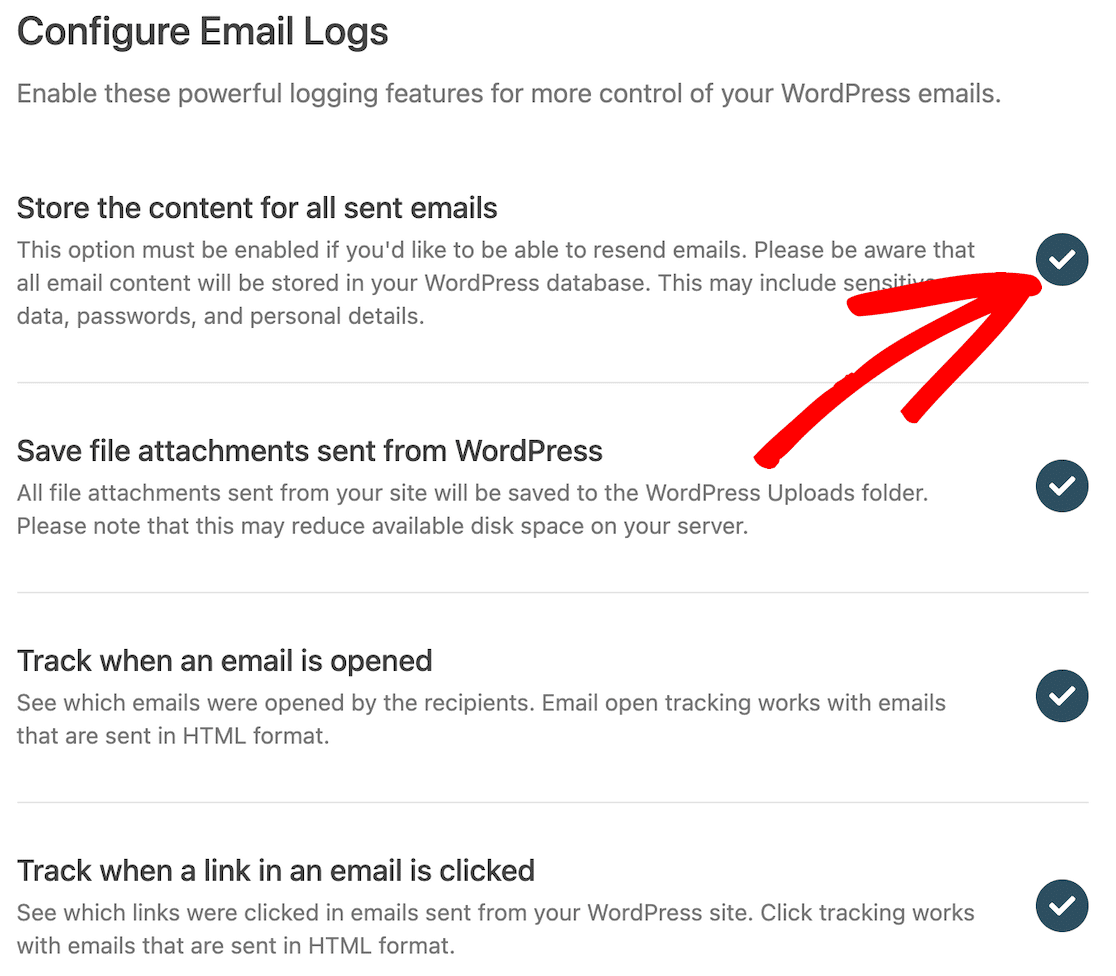
You want to check the option to store the content for all sent emails. This must be done if you want to resend any of your emails or save them in the WordPress database.
Note, however, that this means you will be storing all email content. This might include data, passwords, and personal details.
On this page, you can also opt to save attachments from your emails to your WordPress uploads folder, track when emails are opened, and track when links are clicked in your emails.
After this step, the Setup Wizard will test your connection and let you know if there are any potential issues.
While most of the setup process can be completed through the Setup Wizard, you will still need to go to WP Mail SMTP » Settings » Email Log to adjust settings for webhooks and log retention period.

Once you’ve updated those settings, you’re finished setting up email logging through the Setup Wizard.
Using the Plugin Settings to Log All Email Content
Whether you didn’t use the Setup Wizard when you started or you just want to go back and make changes, you can also use the plugin settings to set up email logging.
First, head to the Settings page in the plugin.
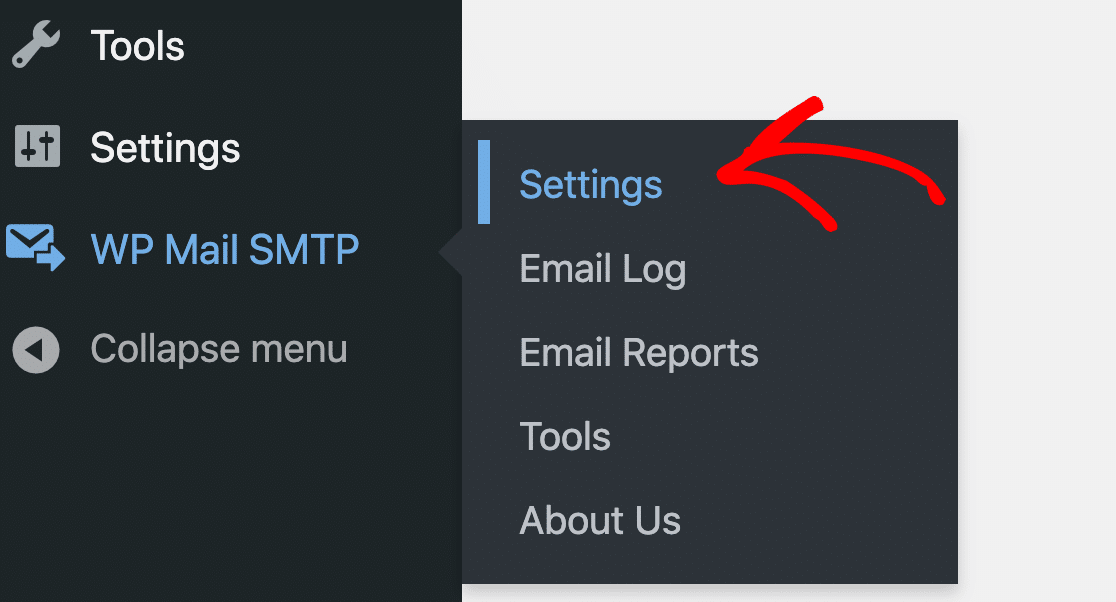
Now click the Email Log tab to open your WordPress email log settings.
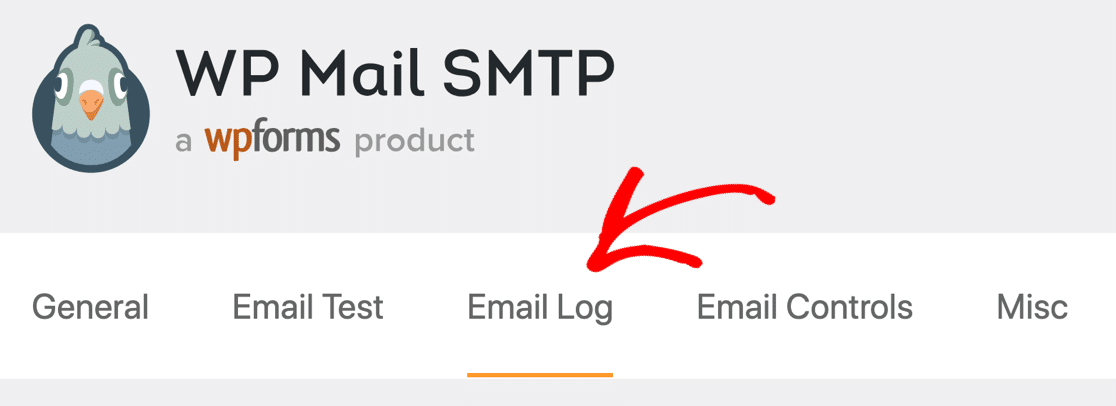
Scroll down on this page and check the box next to Log Email Content.

A reminder that this is an advanced option, so there are a couple of things to keep in mind:
- Logging the body of emails saves the content in your WordPress database. We recommend that you install a WordPress security plugin with 2-factor authentication so that your site is secure.
- Your database will grow. Over time, your WordPress database will get larger as you log the contents of all emails sent from your website.
- Set a retention period that matches your organisation’s data-retention policy (GDPR / ePrivacy compliant).
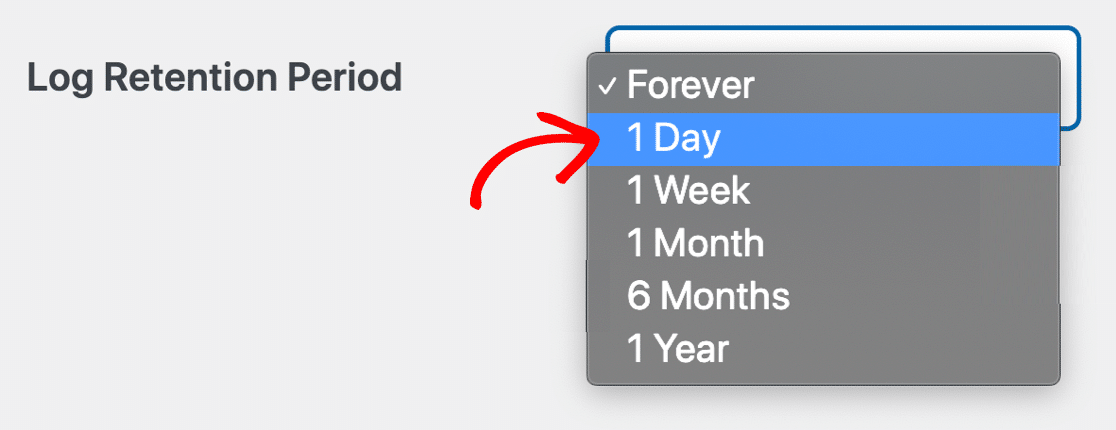
To avoid any disk space issues, you can restrict the size of your email log. If you decrease the Log Retention Period, older email logs will be deleted automatically.
Now let’s take a closer look at the log file inside your WordPress dashboard.
3. View WordPress Email Logs
Now that you’ve set up WordPress email logs, every email sent using the wp_mail() function will be logged. You don’t need to use a separate WordPress plugin for this, which is great because you can avoid any plugin conflicts that may affect your email deliverability.
If your email provider supports all of the statuses we talked about, it’s also reporting the status of every email: Sent, Failed, and (if supported) Delivered.
When we installed the plugin, the Setup Wizard generated a test email, so that’ll be in your log already. You can generate additional test emails in the Tools menu if you want to.
Now let’s take a look at the email logs. In your WordPress admin menu, open up WP Mail SMTP » Email Log.
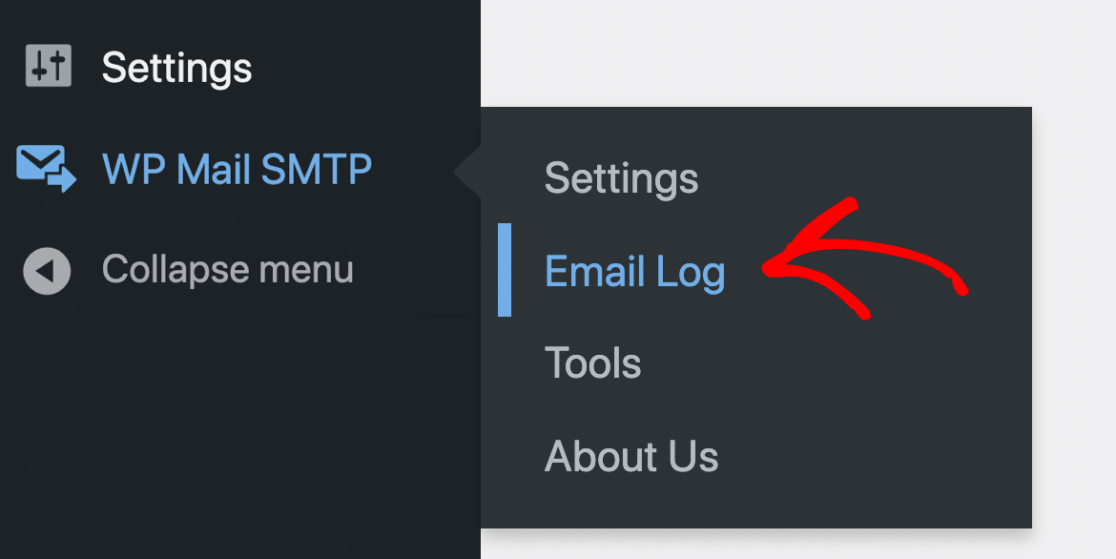
Since your installation is new, you might not have many logs to look at yet. We’ll show how it’ll look when it’s been running for a while.
Let’s start by filtering the log by date. In this example, we want to find any emails that failed on April 20.
WP Mail SMTP’s email log has a datepicker at the top so you can easily view the log files for a specific date or series of dates.
In the image below, we’ve used it to look for emails sent from our WordPress website between April 14th and April 21st.
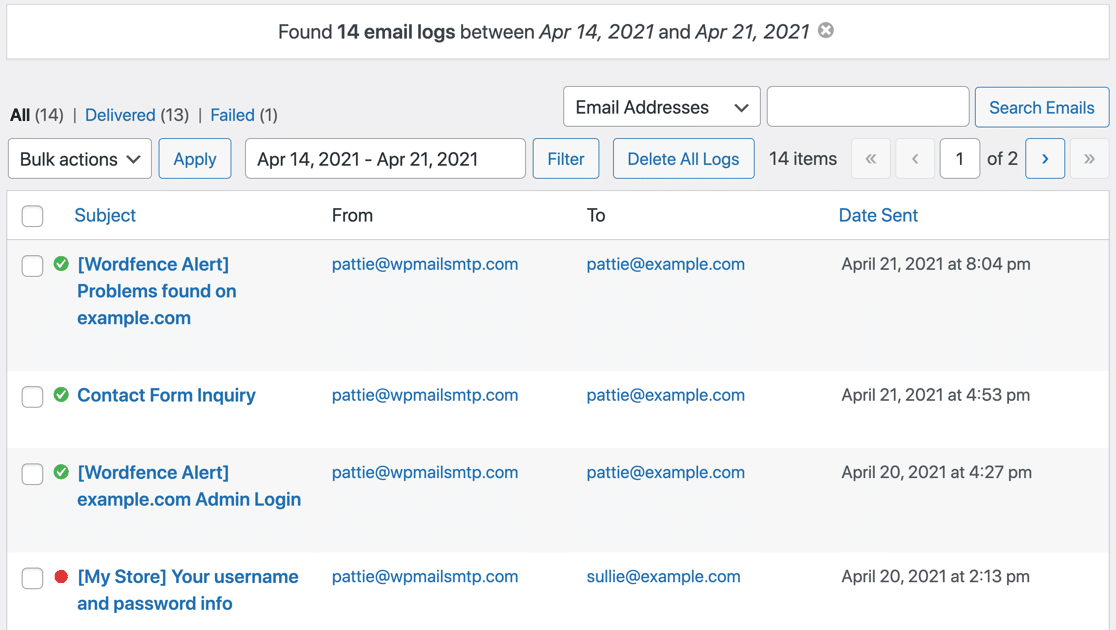
Because we’re using a transactional mailer, we can see a Delivered status with a green circle and checkmark for the first 3 emails, so we know those definitely reached the recipient’s mailbox.
One email is marked with a red dot, so we know that one Failed. If we hover over that line, we can see options to View Log or Delete.
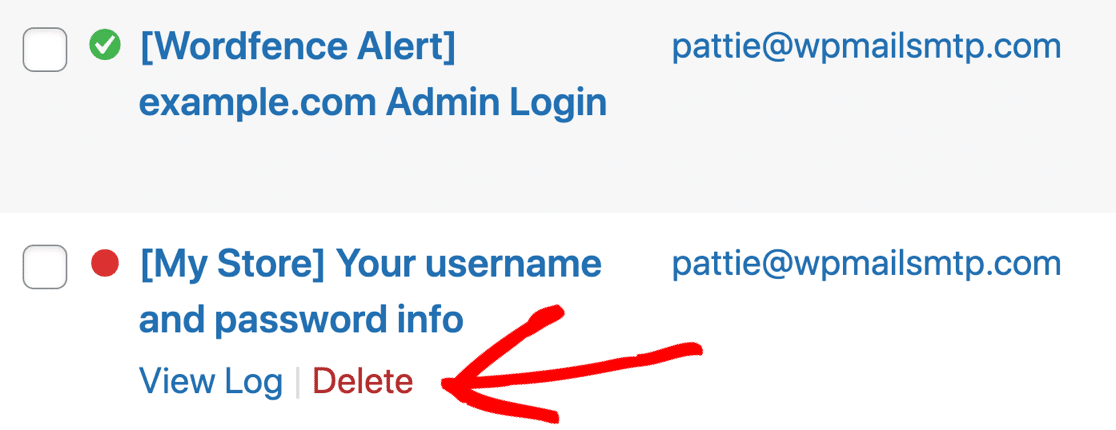
Let’s click on View Log to see more details about the logged email.
From the individual log page, we can:
- Print the email log, or save it as a PDF
- Export this log as a CSV, EML, or Excel file.
Exporting as EML will export the full email content if you’ve got that option enabled. We’ll show you how that works in the next section of this article.
The email log also tells you which plugin generated the email.
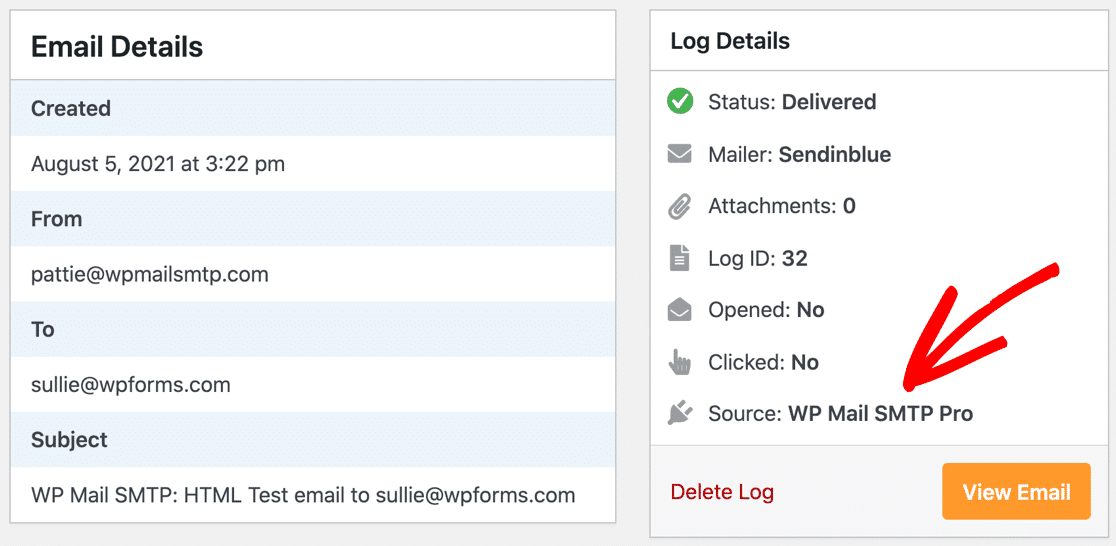
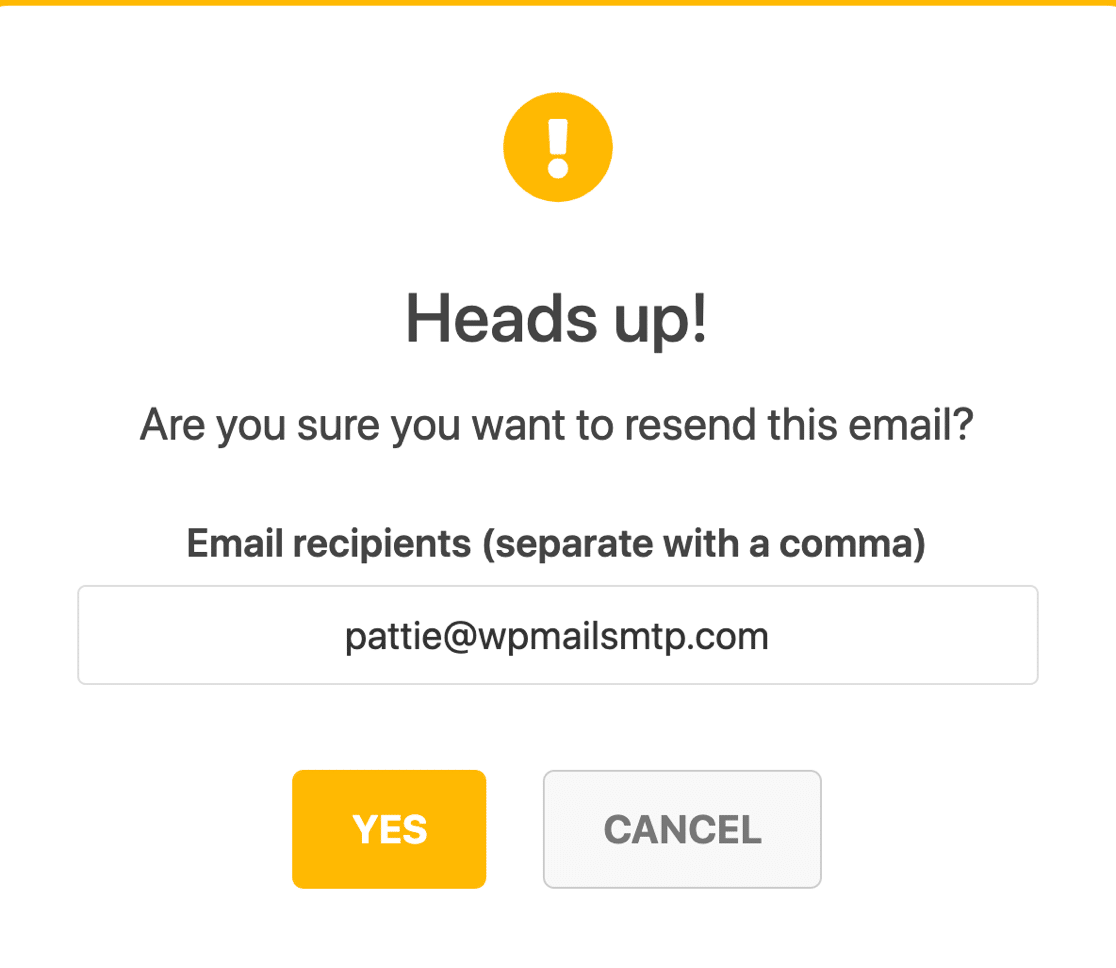
You can click Resend to resend any email and customize the To address.
This can be helpful for resending new user activations and password reset emails.
At the bottom of the log, the Technical Details dropdown will show you the full headers for more detailed troubleshooting.
We can also see the exact error that the email provider returned:

In this case, the recipient was receiving too many emails and has hit their Gmail receiving limit. So we can be sure that it wasn’t a problem with our email provider or settings.
From the individual log file page, we can print log files in Normal or Compact view. Compact view is helpful if you have a large log file and you want to save paper or reduce the size of the PDF.
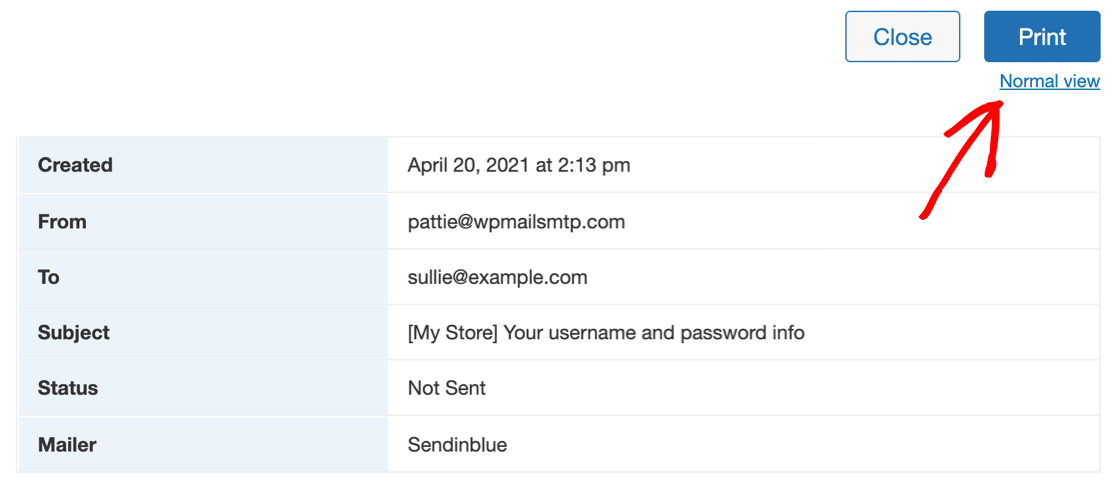
Back on the main log screen, let’s look at the other ways to manage WordPress email logs.
The search bar lets you narrow down the list of email logs. You can use multiple search criteria to keep filtering the list until you find what you need.
For example, we already filtered by date. Next, we can search in the Subject and Headers to see if we have any other username and password emails that failed during the same week.
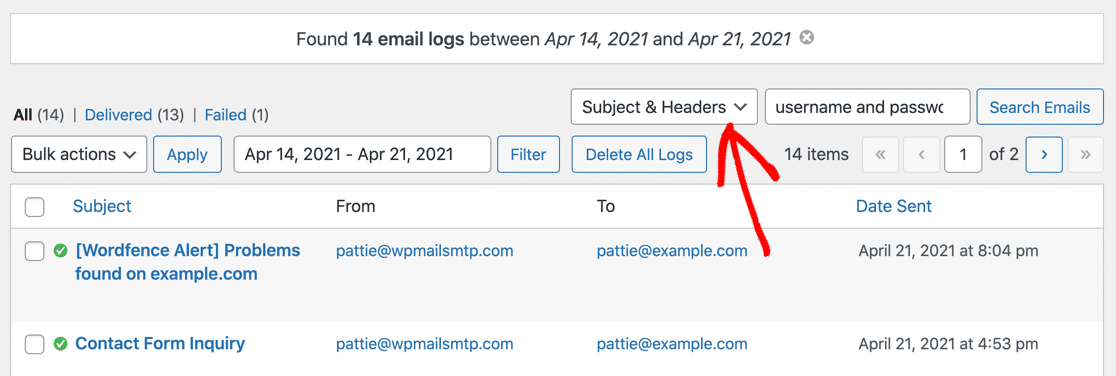
The new search is combined with the date search, and you can see both filters in the line above the log screen.

We can click the X icons to remove any part of the search if we want to broaden the results.

These filtering and searching tools make it easy to find any email and find out if it was sent and if it was also delivered (if your mailer supports the Delivered status).
Let’s move on and see how to see if your emails are being opened.
4. Track Email Opens and Clicks
Now that you know for sure that your emails are being delivered, you’ll also want to check if the recipient is actually reading and interacting with the message.
WP Mail SMTP Pro not only assists with logging WordPress emails, but it goes out and beyond to track open and click rates for every HTML email sent from your site.
WordPress email tracking is especially handy if you’re selling online courses or sending newsletters from WordPress.
First, head to the plugin’s Settings page.

And now click Email Log at the top to open your WordPress email log settings.

You’ll want to scroll down and enable these 2 settings:
- Open Email Tracking
- Click Link Tracking

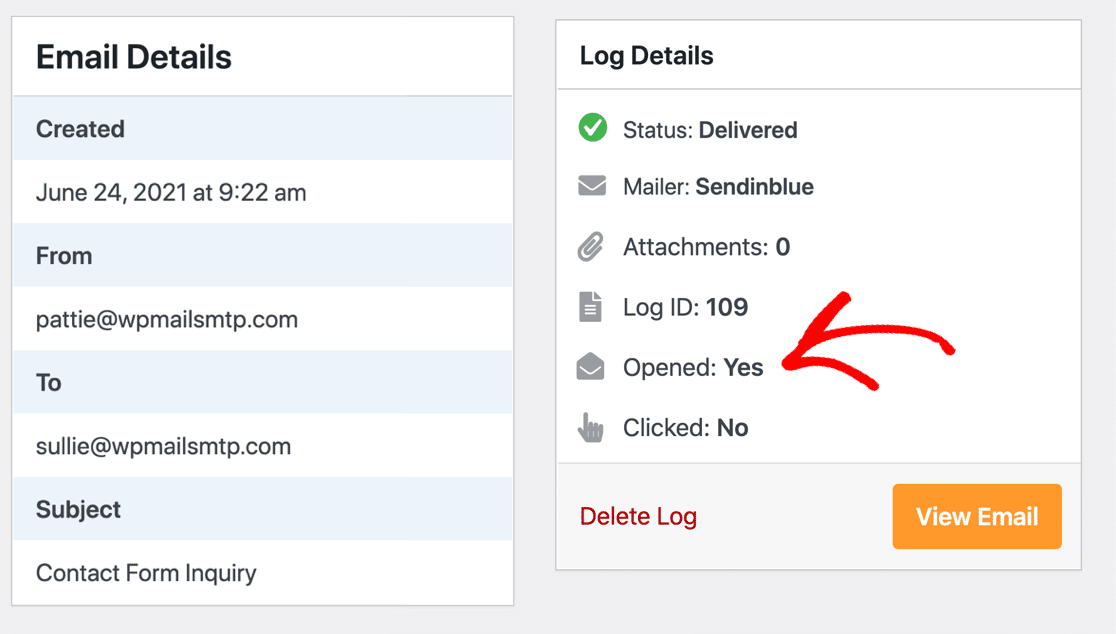
Now you’ll be able to see open and click tracking data next to each individual email log.
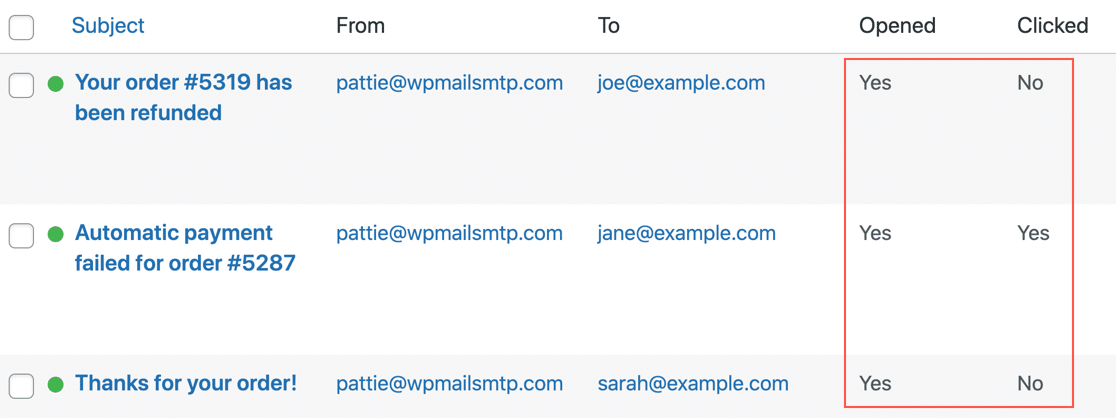
And you can also see an overview from the main email log screen.
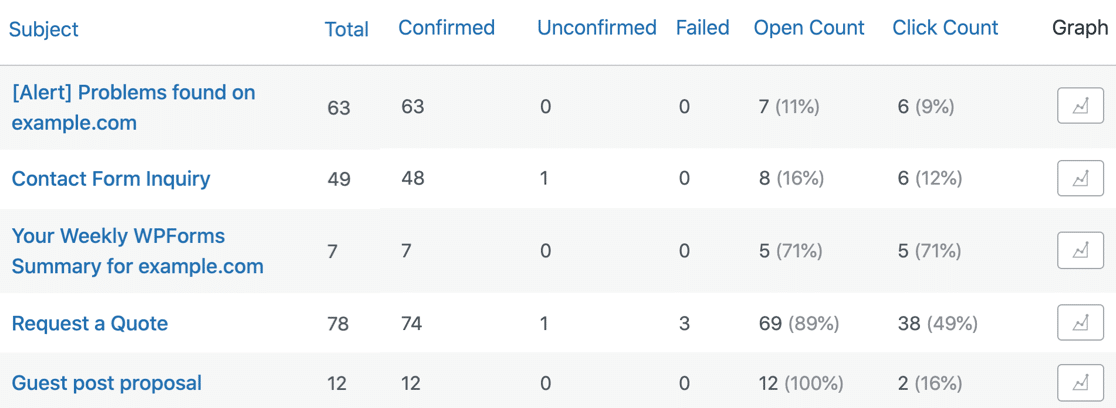
If you’re a Pro customer, you can get full open rates and click-through rates in your Email Report.
Keep in mind that open and click tracking relies on a tracking pixel. That means it works with most HTML emails sent from a live WordPress site, but might not work with SMTP on localhost until you publish your site on the internet.
Now we’ve looked at click and open tracking, let’s look at some more data we can log.
5. Log Attachments Sent From WordPress
WP Mail SMTP Pro allows you to save a copy of attachments sent out from your WordPress site.
For example, if you’re sending PDF invoices using a WooCommerce plugin, you can save each invoice for your own reference.
To do this, you’ll want to open up your WP Mail SMTP settings page again. Then click Email Log at the top to open the email log settings as we did before.
Now be sure to turn on all 3 of these options:
- Enable Log
- Log Email Content
- Save Attachments
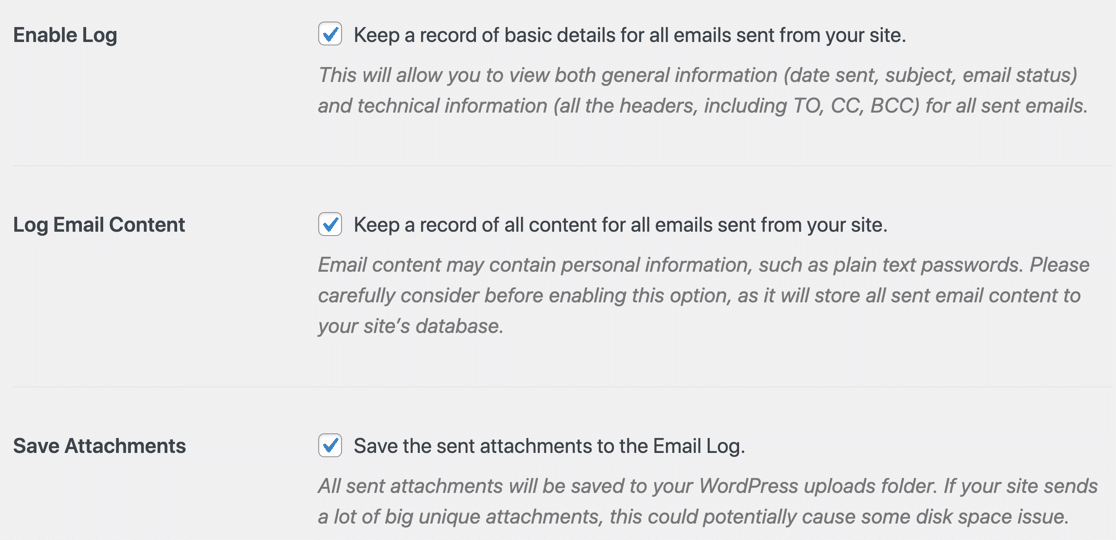
Now each email sent from your site will be saved in WordPress along with any files originally attached.
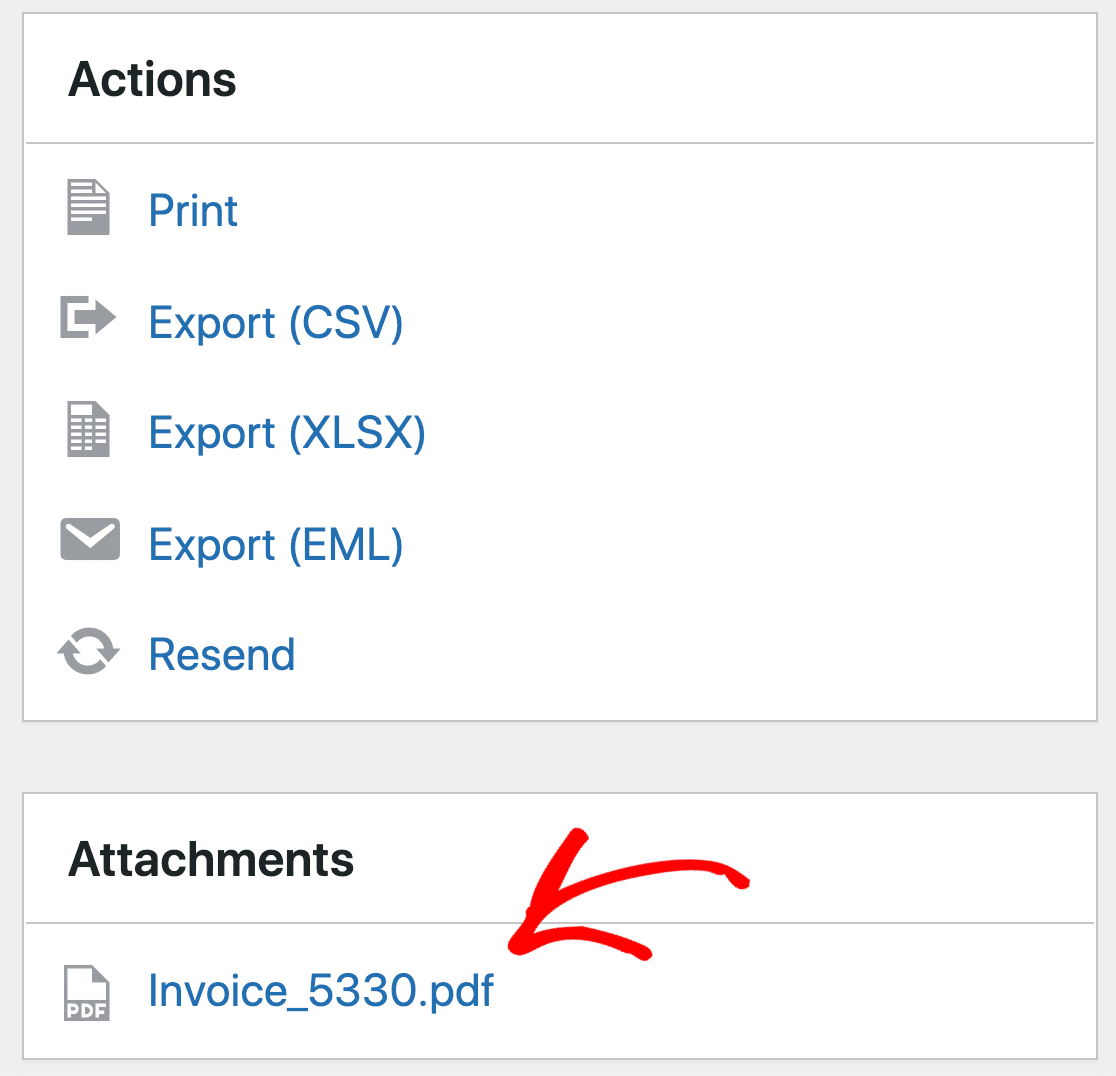
You can download the file or resend the email to forward it.
If you want, you can also export the data, which we’ll look at next.
6. Export WordPress Email Logs to CSV, EML, or XLSX
The email log export tool in WP Mail SMTP lets you export email logs and customize the fields that are included in the file.
This is an awesome way to get your email logging data out of WordPress so you can analyze it in other tools and dashboards.
For example, you could track your email deliverability alongside your WooCommerce store activity, or create your own custom reports for agency clients.
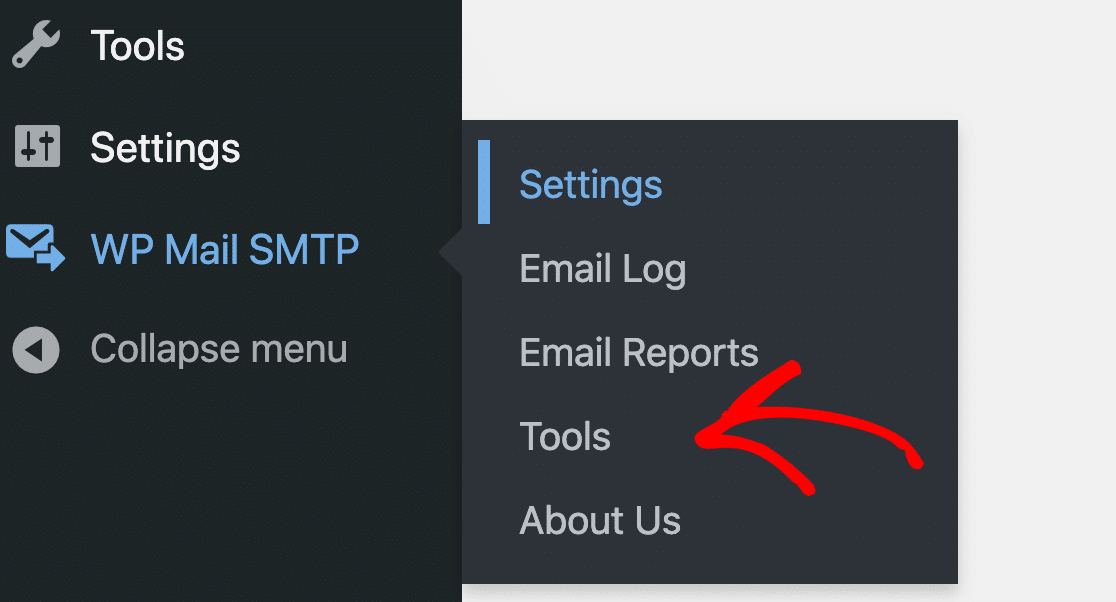
To generate an Excel or CSV export file, head to WP Mail SMTP » Tools.
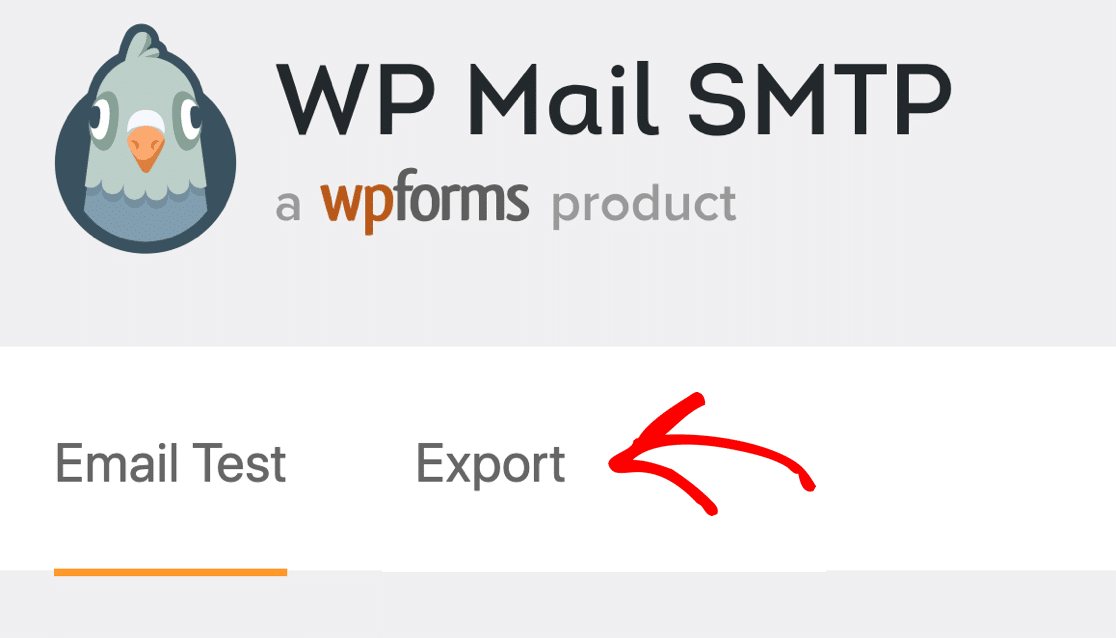
From the tabs across the top, click Export.
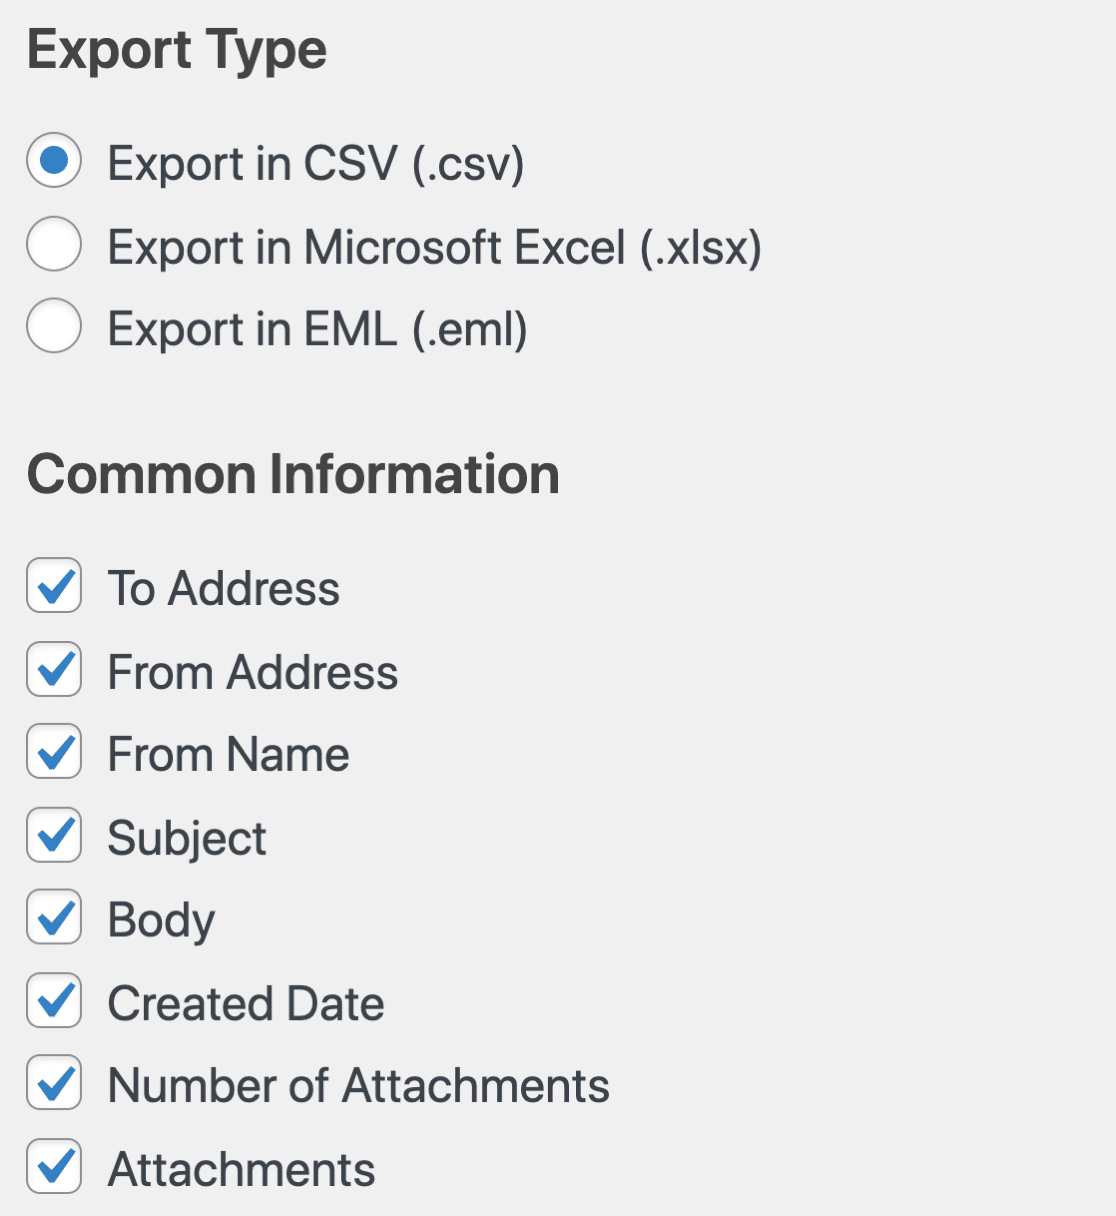
At the top, you can choose the file format and select the basic information to include.
Below that, you can pick more information and filter your search.
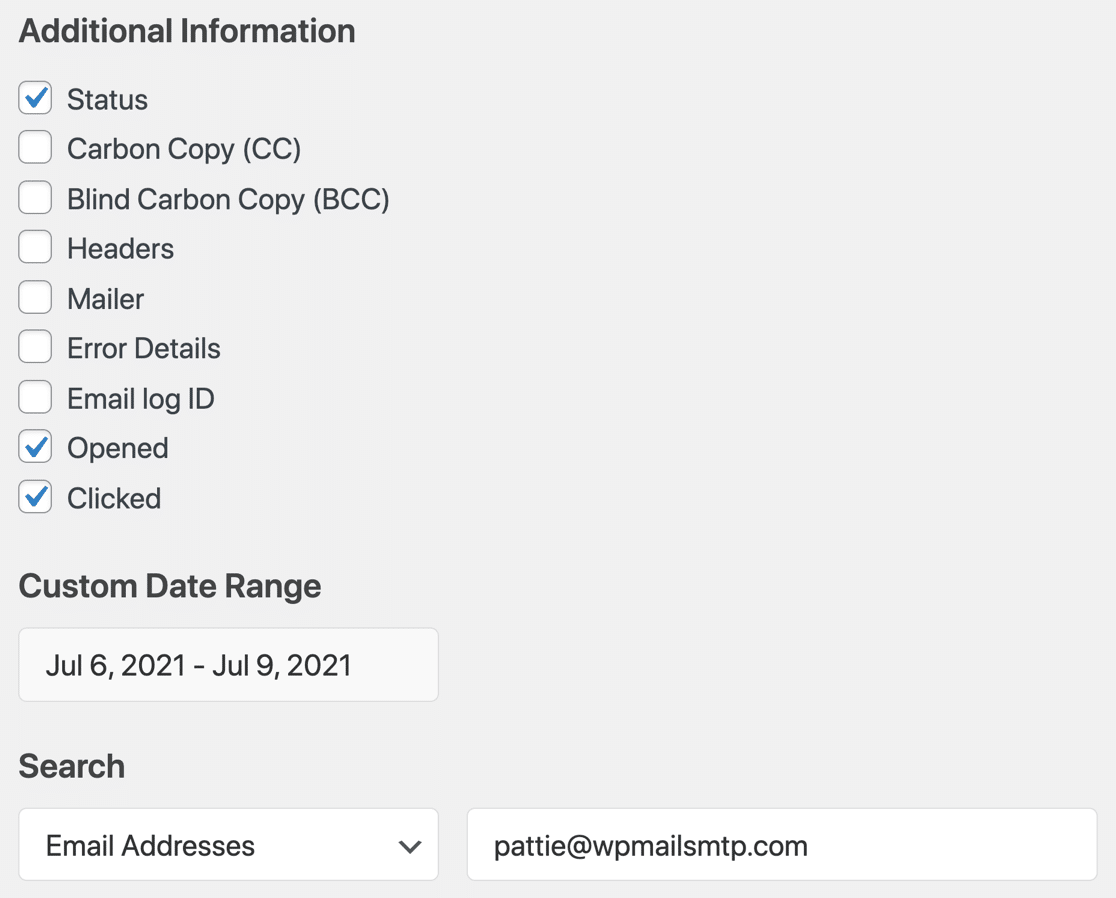
So in total, an XLSX or CSV WordPress email log export can include any combination of these fields:
| Common Information | Additional Information |
|---|---|
| To address | Status |
| From address | CC |
| From name | BCC |
| Subject | Headers |
| Body | Mailer |
| Created date | Error details |
| Number of attachments | Log ID |
| Attachments | Opened |
| Clicked |
Additionally, you can also filter the export file by:
- Exact date or date range
- Email address
- Subject or header text
- Content
Keep in mind that exporting the Body or searching the Content will only work if you’re logging the contents of the emails sent from your site.
And that’s it! Now you know how to log your WordPress emails so you can track the status and generate your own deliverability reports.
Next, Send an Email From a Gmail Alias in WordPress
Now that you’ve got WP Mail SMTP, you can send different contact form notifications from as many Gmail aliases as you like. You can use the Force From Email setting to use 1 email for everything, or pick a default alias and use the others when you need to.
No matter which Gmail alias you use, WP Mail SMTP will automatically add the right authentication.
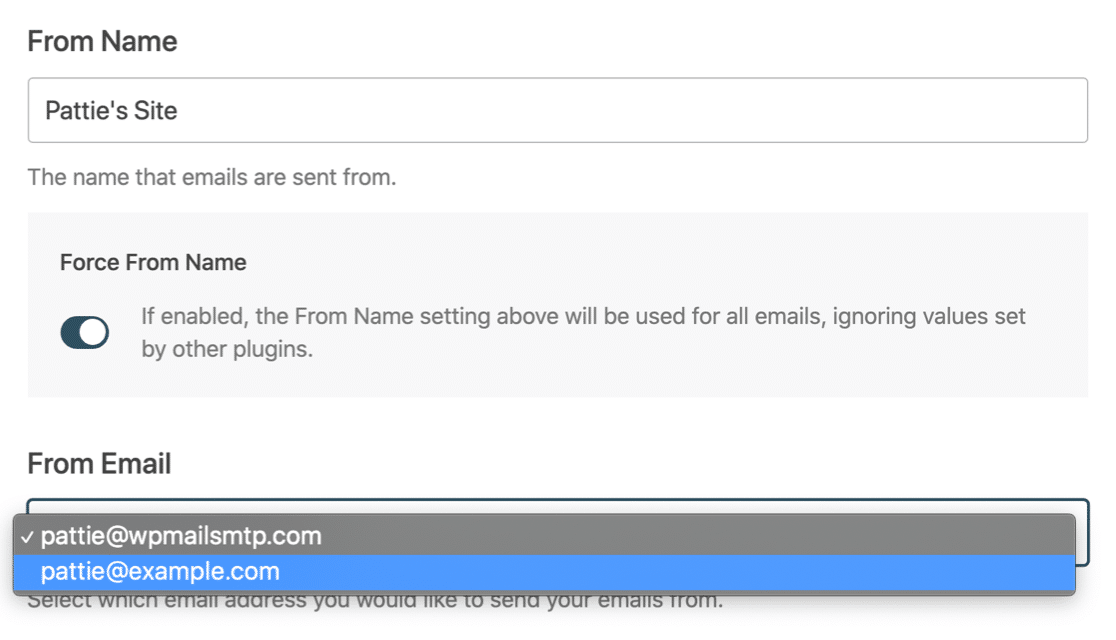
To learn more about this awesome feature, check out how to use a Gmail alias in WordPress.
Also, if you’re looking to expand your WordPress email capabilities, see our list of the best WordPress email plugins.
Ready to log your emails? Ready to fix your emails? Get started today with the best WordPress SMTP plugin. If you don’t have the time to fix your emails, you can get full White Glove Setup assistance as an extra purchase, and there’s a 14-day money-back guarantee for all paid plans.
If this article helped you out, please follow us on Facebook and Twitter for more WordPress tips and tutorials.

