AI Summary
The ‘could not connect to SMTP host’ error is a commonly encountered error in WordPress, which results in your emails failing to send.
Since this issue will likely affect website communication and functionality, it is essential to understand under what circumstances it typically occurs.
In this guide, we’ll walk you through some of the most common problems that result in the ‘could not connect to SMTP host’ error and how to fix them.
How to Fix Could Not Connect to SMTP Host in WordPress
Here are some of the most common fixes for the ‘could not connect to SMTP host’ error on your WordPress website:
- 1. Check WordPress Hosting Server Status
- 2. Review Firewall Restrictions with Web Host
- 3. Verify Your Proxy Settings in Cloudflare
- 4. Check Your SMTP Host and Port Settings
- 5. Verify if the Authentication Details are Accurate
- 6. Change the Encryption Method (TLS or SSL)
- 7. Upgrade WP Mail SMTP to its Newest Release
- 8. Use the Latest Version of WordPress
- 9. Verify Your PHP Version is 5.6 or Higher
- 10. Issues Persisting? Seek Expert Assistance!
1. Check WordPress Hosting Server Status
One of the first things to look into when encountering the ‘could not connect to SMTP host’ error is to check your WordPress hosting server status.
Sometimes, the server may shut down or have other problems, which can ultimately stop your website from sending emails.
All you have to do is visit your web hosting provider’s website and look for a page called ‘Status,’ ‘Server Status’, or ‘Service Status.’
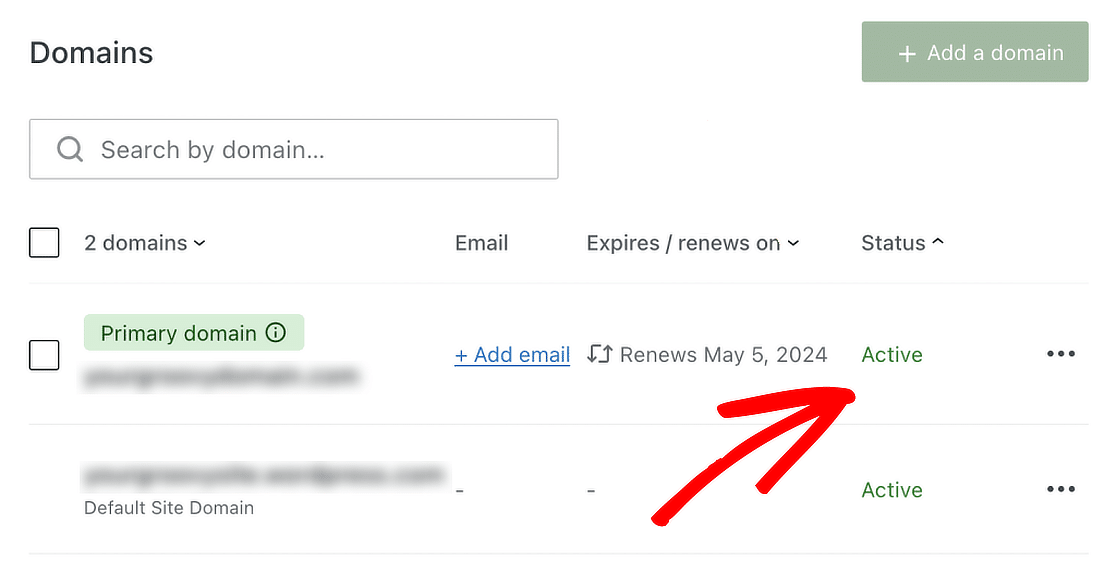
On the status page, check for any reports or notices for outages or maintenance that may affect their services.
2. Review Firewall Restrictions with Web Host
If there is no outage or other issues that may result in your web host going down, it’s time to look into your provider’s firewall restrictions. It’s not uncommon for web hosting providers to block outbound SMTP connections to force users to utilize their internal mailing servers.
Contact your web hosting and inform them about the ‘could not connect to SMTP host’ error you’ve been experiencing. If they are indeed obstructing your connection, you can politely request that they remove the firewall restrictions.
You can also go ahead and send them an error report associated with your problem. For instance, if you’re using WP Mail SMTP, the plugin automatically logs all email-sending errors. You can access the error log by going to WP Mail SMTP » Tools and then clicking the Debug Events tab.
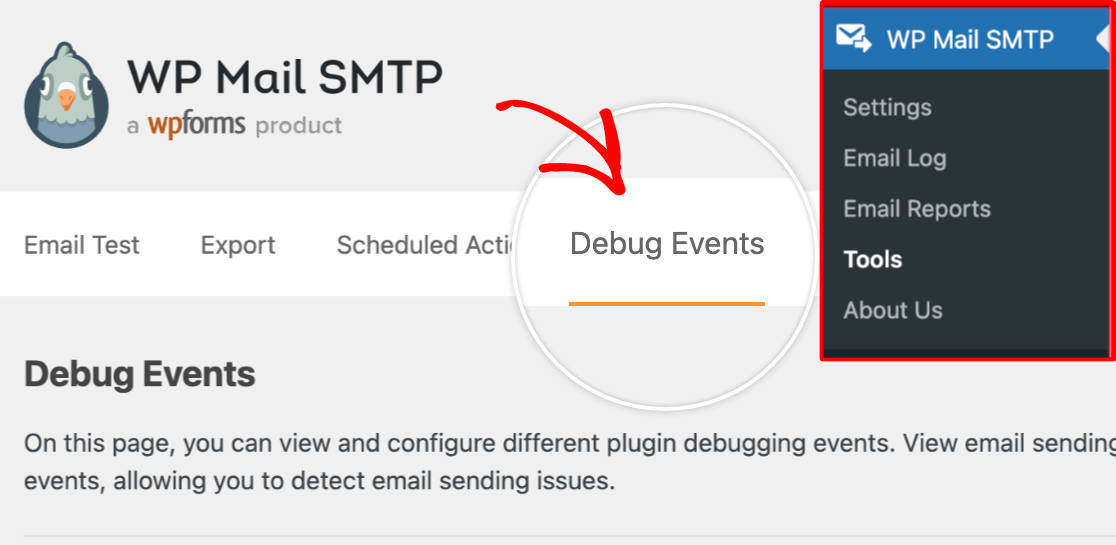
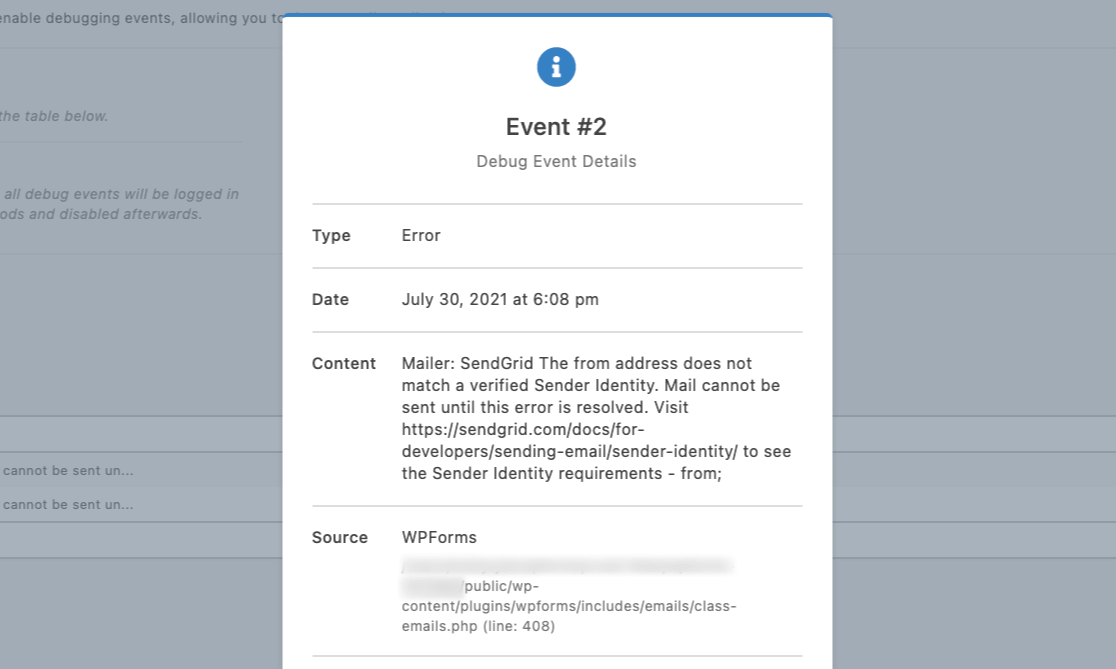
After that, scroll down and locate the error you’re getting. Click on the Event # to expand the details about the error. Then, when you call the technical help team for your web host, you can copy and paste that error to let them know the exact issue, which can ultimately result in a timely resolution.
If they can’t resolve your problem, there’s no need to worry! There are still ways to address the ‘could not connect to SMTP host’ error.
3. Verify Your Proxy Settings in Cloudflare
If you’ve switched to Cloudflare recently and are facing trouble in sending emails, chances are your proxy settings are incorrect.
During the Cloudflare Setup Wizard, Cloudflare tries to copy the DNS records from your old host and does not use the mailer settings you’ve set.
When you set up a new mailer and email account, log in to your Cloudflare account, select your domain, and click on the DNS tab.

Update the DKIM, SPF, and DMARC records based on the requirements of your email provider.
If you aren’t prompted to create a certain type of record for your email provider, you can skip this.
For more information on troubleshooting this issue, check out our guide on fixing Cloudflare not sending WordPress emails.
4. Check Your SMTP Host and Port Settings
It goes without saying that if you’re getting an error where WordPress cannot connect to the SMTP host, you need to check your SMTP settings.
If you’re using WP Mail SMTP, double-check that you’ve entered the correct values in the SMTP host and port settings.
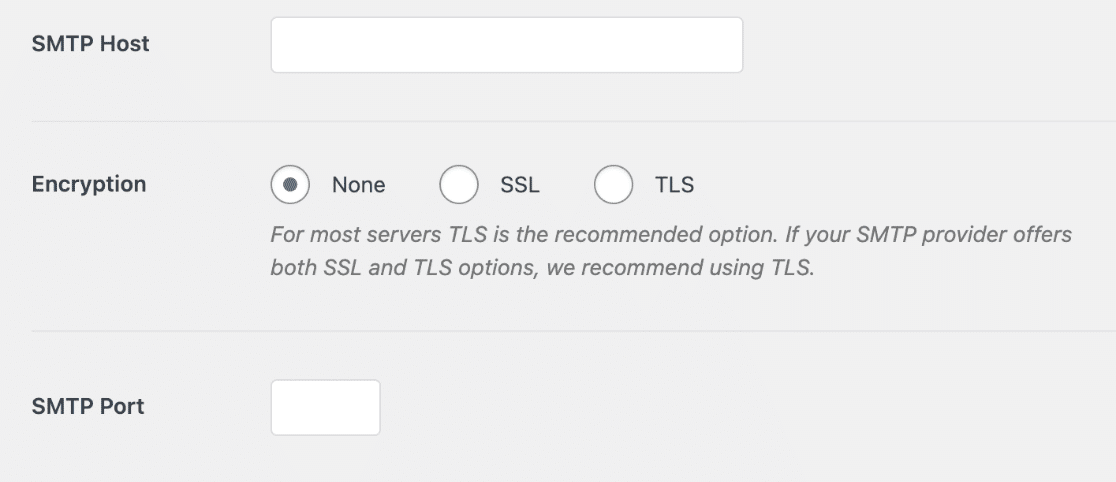
In the SMTP Host field, enter the name of your email server, i.e., the ‘domain name’ or ‘mail.domain.com.’
Meanwhile, in the SMTP Port field, enter 587, which is the default code for most custom ports, unless your mailer suggests otherwise.
5. Verify if the Authentication Details are Accurate
If you’re using the Other SMTP option in WP Mail SMTP, the mailer you select will have an authentication system to validate users.
This is crucial before allowing them to connect and send emails. So, make sure you’ve entered the right username and password.
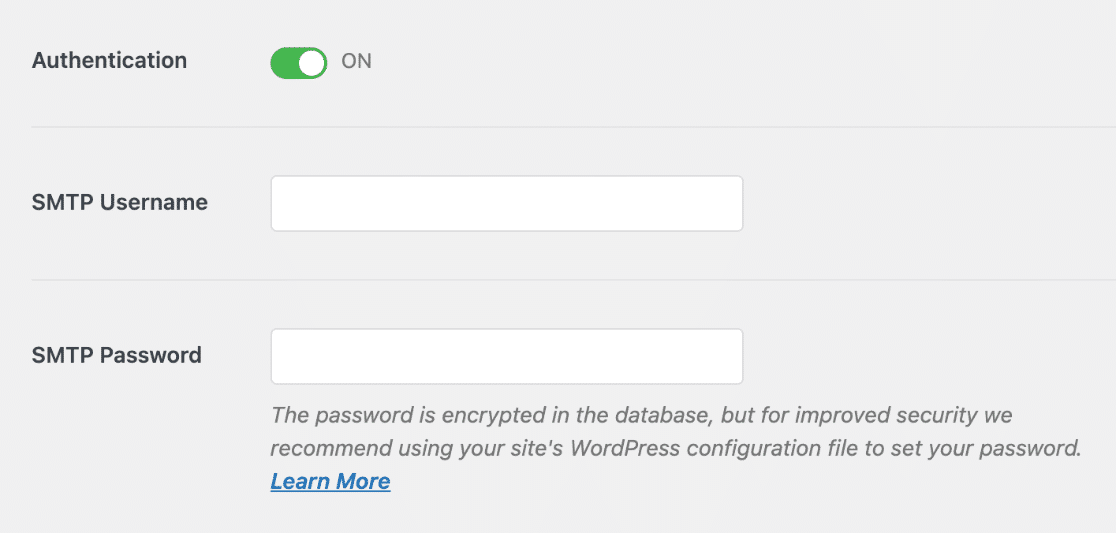
Depending on the mailer service you’ve selected, you can find these authentication details on their respective dashboards.
Your username will usually be the email address you signed up with. Meanwhile, the password is usually an API key.
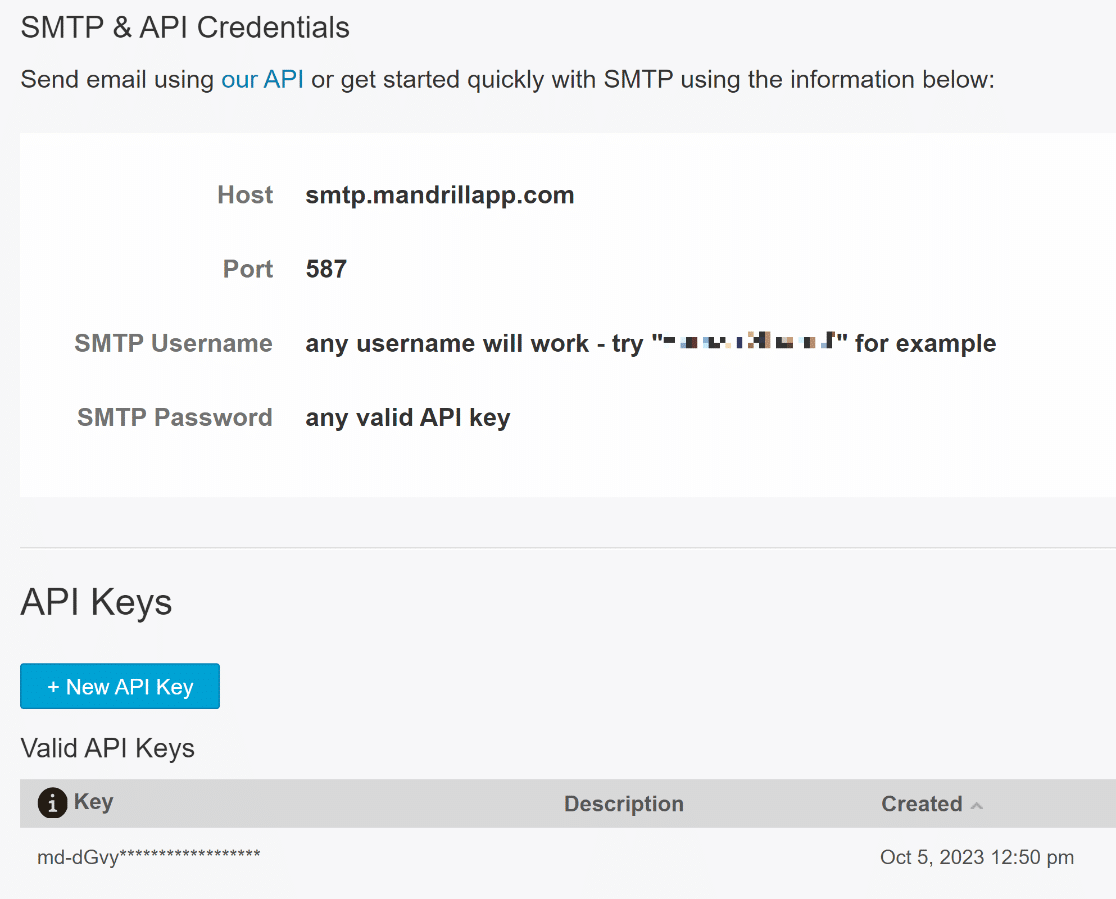
Of course, if you use any other mailer, a simple API key should get you connected and set up with the SMTP service right away.
Make sure to review the documentation in the table below for your mailer to ensure the settings are correct.
| Mailers available in all versions | Mailers in WP Mail SMTP Pro |
|---|---|
| SendLayer | Amazon SES |
| SMTP.com | Microsoft 365 / Outlook.com |
| Brevo | Zoho Mail |
| Google Workspace / Gmail | |
| Mailgun | |
| Postmark | |
| SendGrid | |
| SparkPost | |
| Other SMTP |
Ensure you’re following each step of your mailer setup guide thoroughly and carefully, and check out all values for any typos!
Need a hand?
You can purchase White Glove Setup as an additional service with any of our WP Mail SMTP licenses and have our customer support team set up WP Mail SMTP for you.
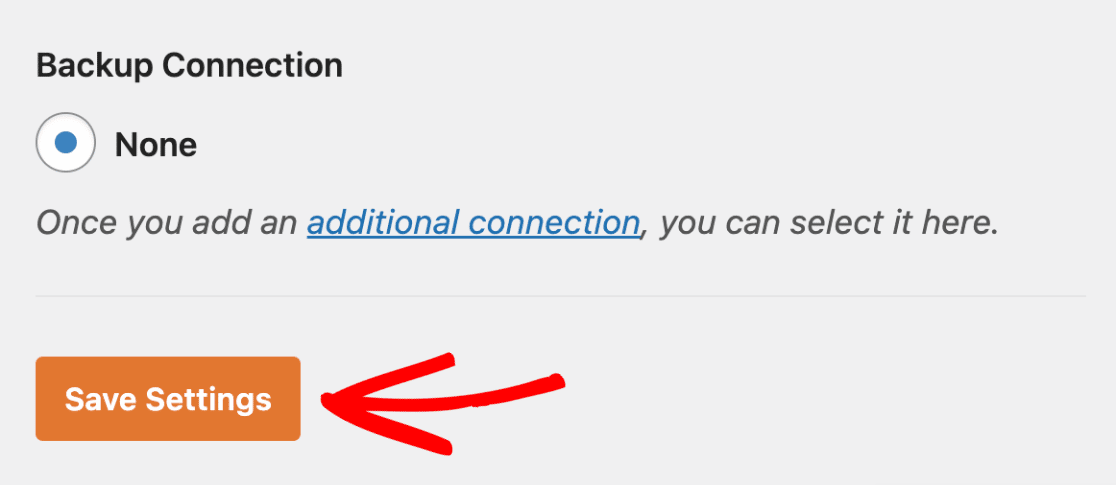
After you have completed configuring the mailer settings in WP Mail SMTP, simply click on the Save Settings button located at the bottom.
It’s also a good idea to check if the settings are working perfectly by sending a test email. To access WP Mail SMTP’s email test tool, click on the Email Test tab located on the Settings screen.
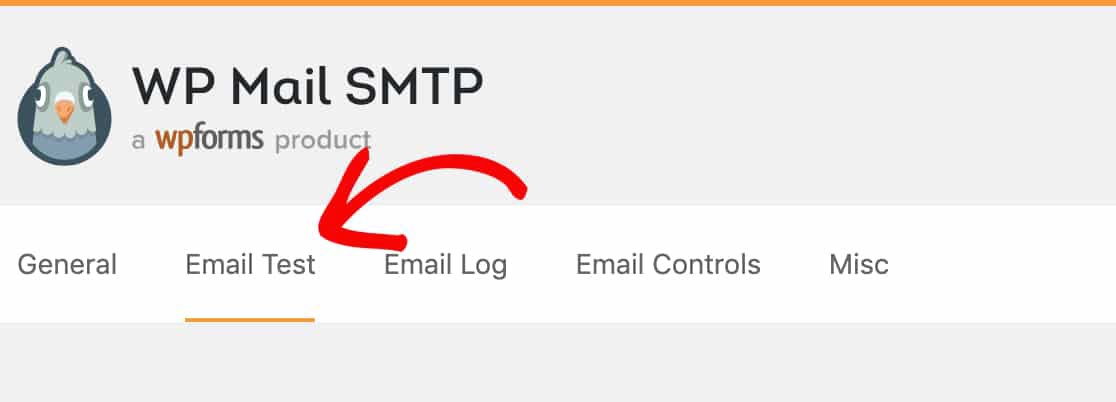
Now, please provide the email address where you would like to send the test email. Please make sure that you use an address that belongs to you to access the test email located in your inbox. Hit the Send Email button.
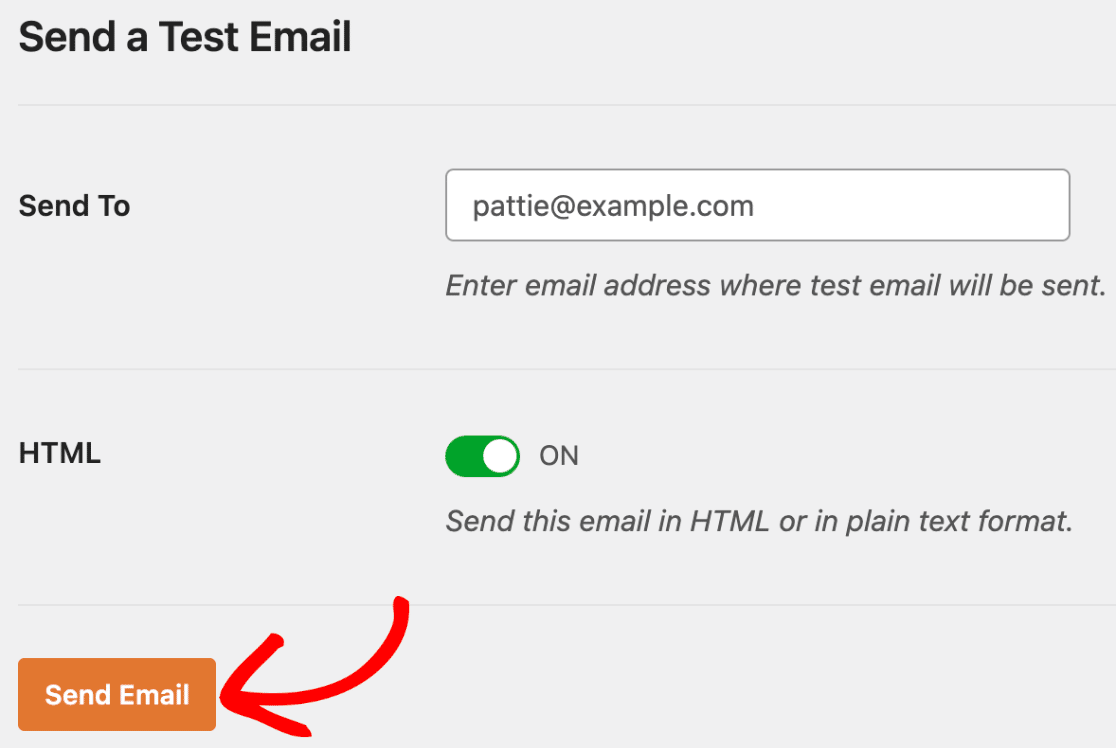
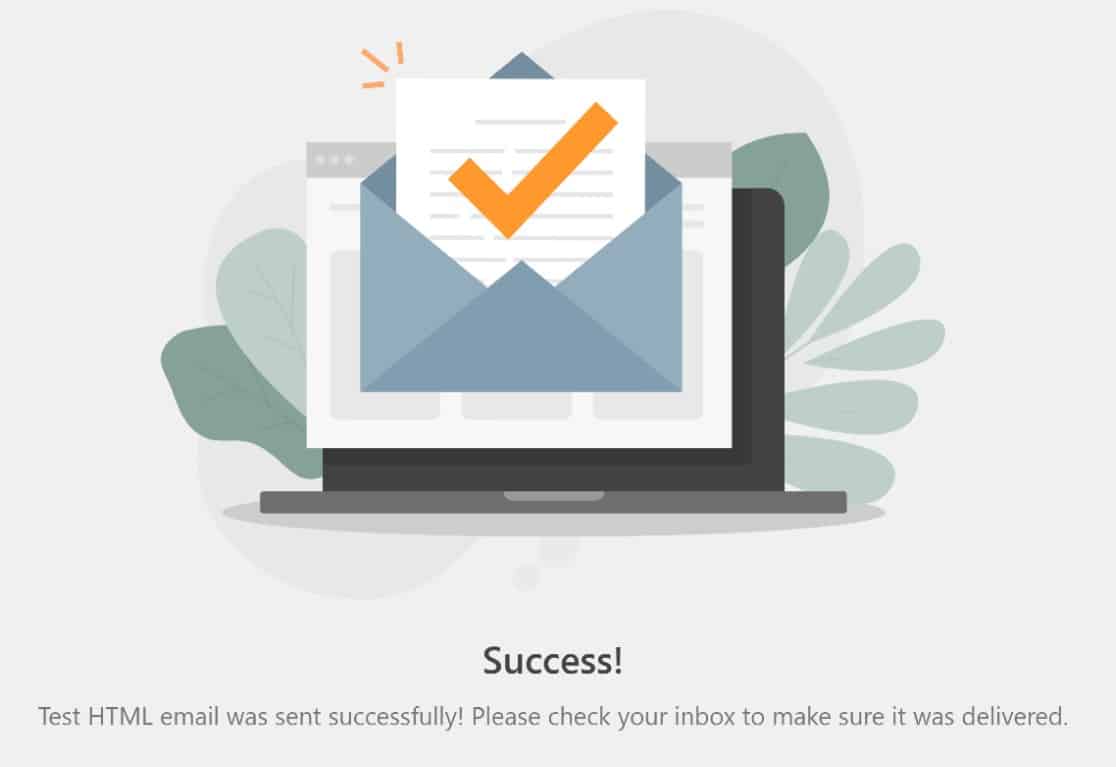
In the event that everything was correctly configured, a success message will appear on your screen that looks like this:
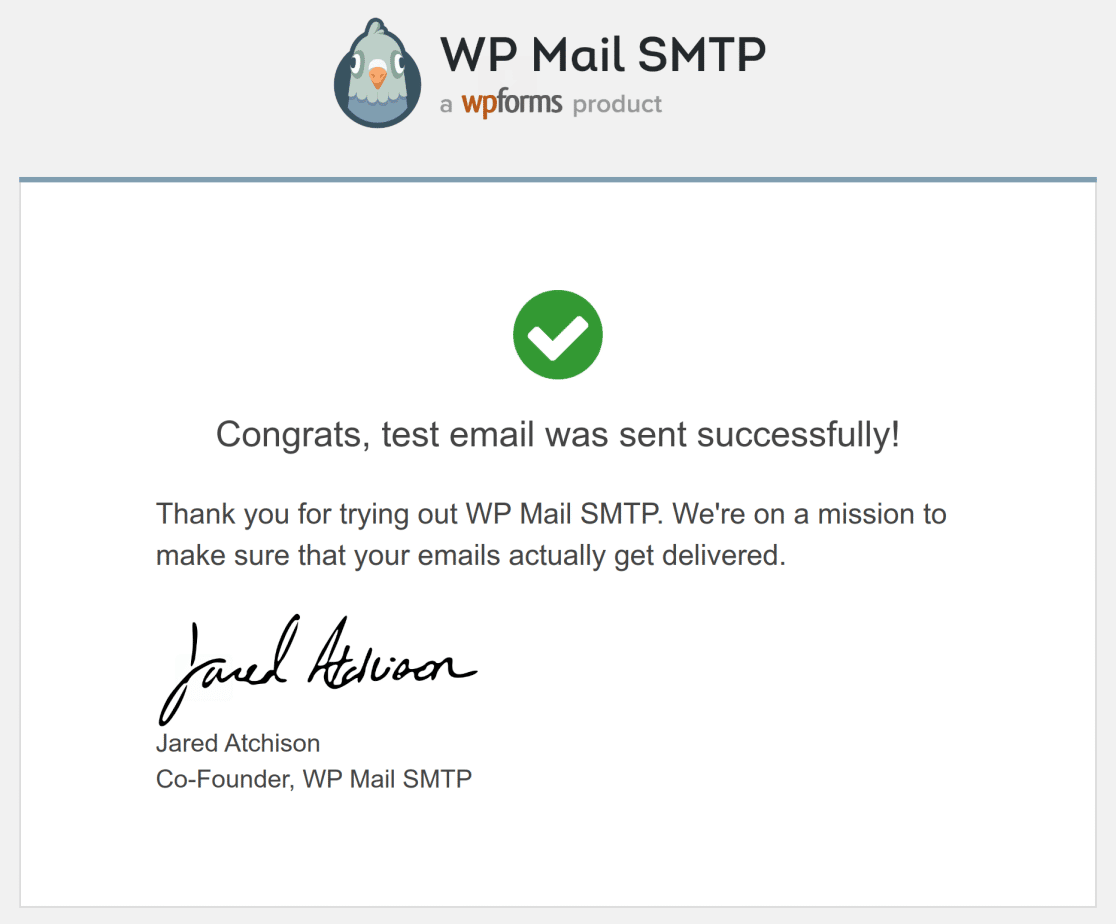
In addition to this, it is a good idea to log into your mailbox and search for the test email that is coming in. The test email will typically look like this:
6. Change the Encryption Method (TLS or SSL)
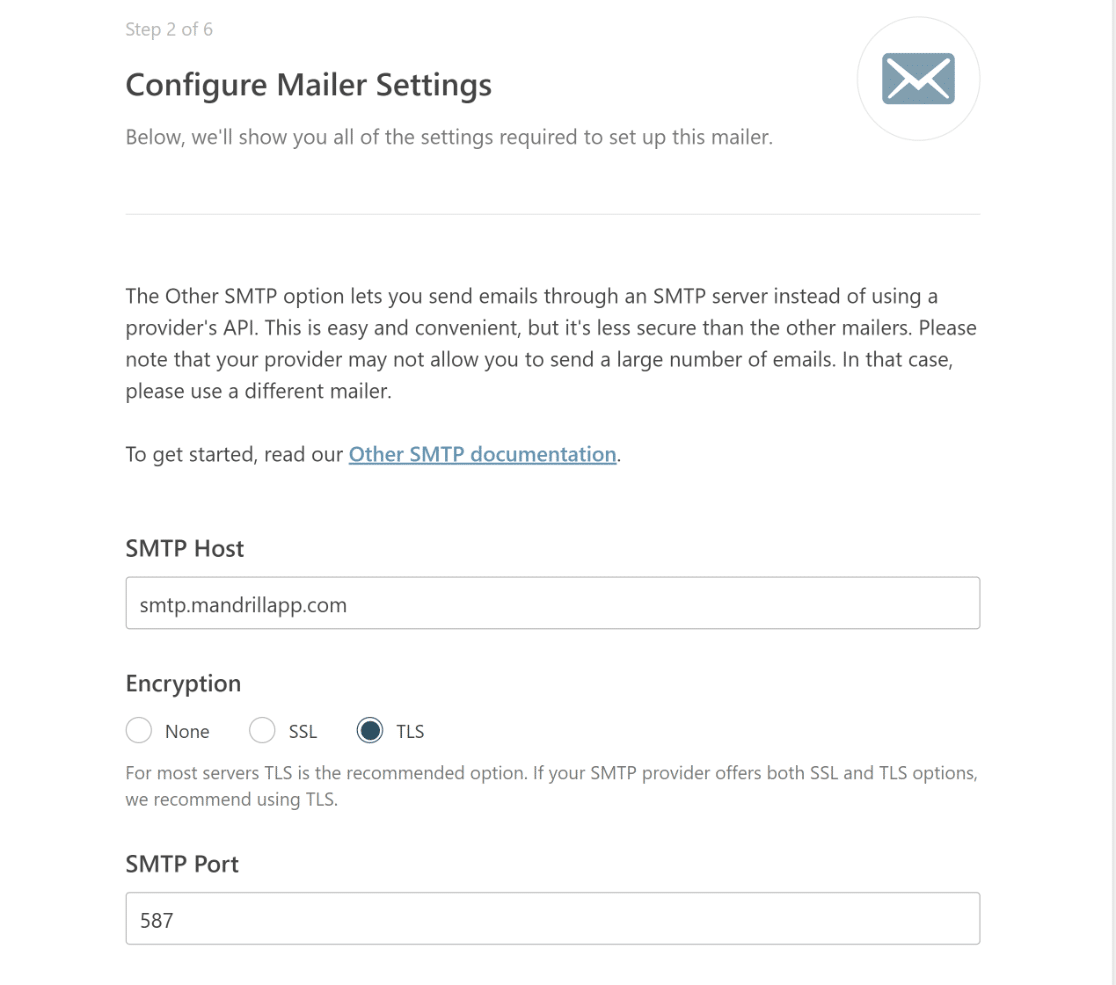
If you’re using Other SMTP to use a transactional mailer service like Mandrill, try changing the encryption method.
It is a frequent occurrence for emails and other notifications from your website to fail if the encryption method chosen is not compatible with the mailer.
To get a better idea about which encryption method you should be using with your mailer, refer to this detailed guide on SMTP settings.
7. Upgrade WP Mail SMTP to its Newest Release
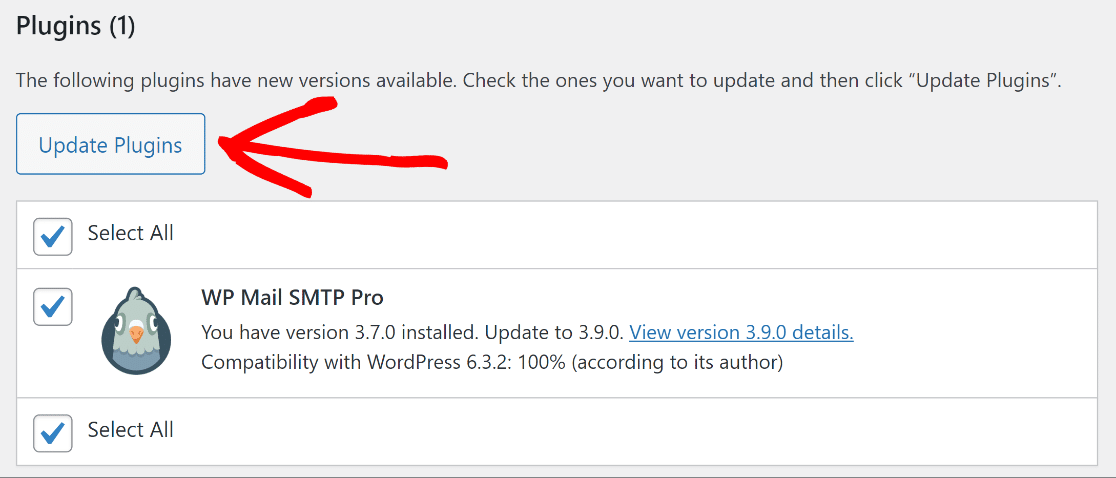
WordPress plugins like WP Mail SMTP may start to malfunction if they haven’t been updated for a while.
So, if you’re experiencing issues with emails not sending, verify that you’re running the most recent version to eliminate any problems due to outdated software.
Updates typically bring improved features and fix existing bugs. Simply navigate to Dashboard » Updates to check for any available updates.
8. Use the Latest Version of WordPress
Maintaining WP Mail SMTP is vital, but equally important is ensuring your WordPress is up-to-date.
WP Mail SMTP is designed to be compatible with the latest WordPress versions, employing the best coding practices.
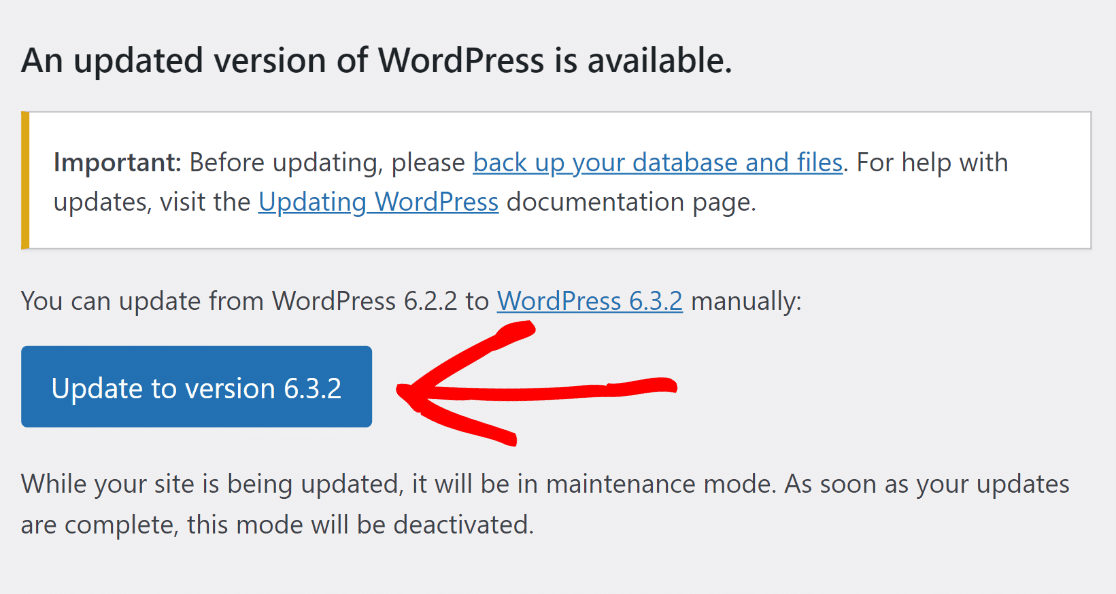
To see if there’s an update for the WordPress installation, log into your site and visit Dashboard » Updates.
Should there be a notification stating, “An updated version of WordPress is available,” consider upgrading to the newest version.
9. Verify Your PHP Version is 5.6 or Higher
At times, hosting services might be the culprits behind issues preventing test emails from being sent.
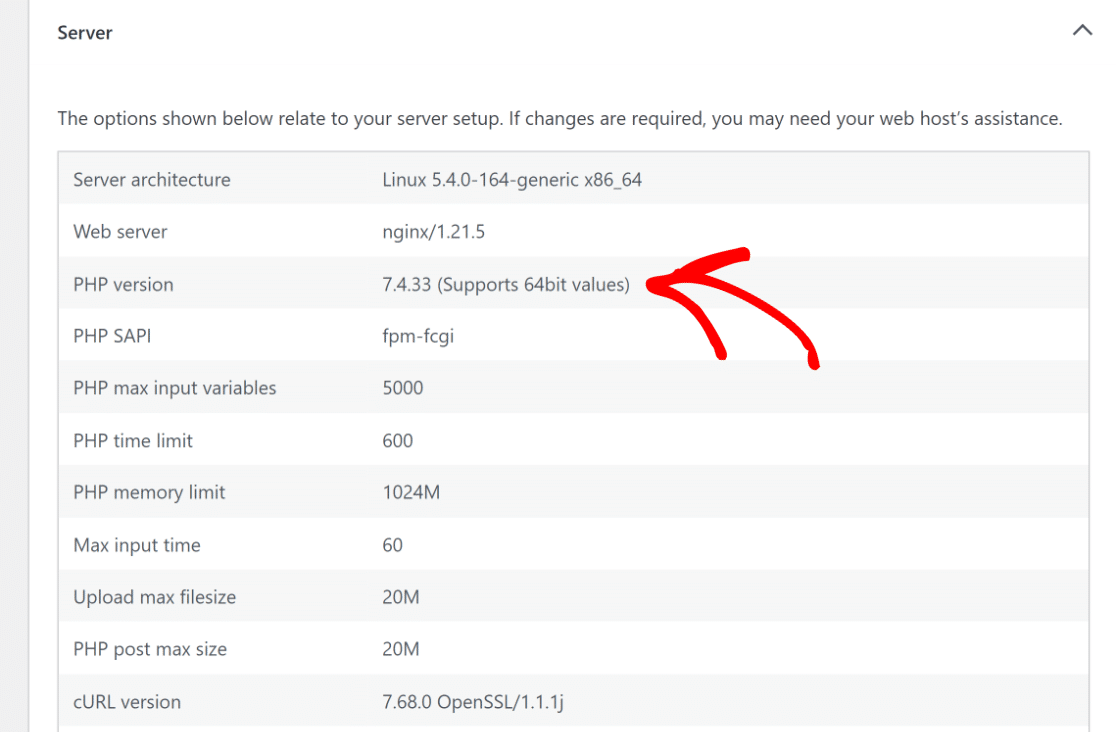
WP Mail SMTP necessitates PHP 5.6 at the minimum. For best security and performance, however, you should use PHP 7.3 or higher, as available from your hosting provider.
To check your site’s PHP version, go to Tools > Site Health > Info > Server within your WordPress dashboard.
10. Issues Persisting? Seek Expert Assistance!
If you continue encountering problems, the WP Mail SMTP Support team is ready to help you out. When contacting them:
- Include your name, email, and specific problem details.
- Providing a URL or access to your site can speed up the resolution.
- If granting access, ensure they have an ‘Administrator’ role.
- Describe the issue briefly and clearly in the message box.
- Once you’ve prepared, click Submit. The support team will respond promptly!
More Questions about Could Not Connect to SMTP Host in WordPress
Here are some common questions and their answers regarding the could not connect to SMTP host error in WordPress.
How do I fix SMTP error in WordPress?
To fix SMTP errors in WordPress, first, please make sure your hosting server is running without issues. Then, update your WP Mail SMTP plugin to the latest version, as outdated plugins can lead to errors.
Also, check that your SMTP settings are correctly configured, including the right SMTP host, port, username, and password. Ensure your WordPress and PHP versions are up to date for compatibility.
If the issue persists, deactivate other plugins to check for conflicts, especially multiple SMTP plugins. Consider using WP Mail SMTP for reliable email delivery and troubleshooting support.
What does SMTP error could not connect to SMTP host mean?
An “SMTP error could not connect to SMTP host” message means your WordPress site is unable to establish a connection with the SMTP server. This can happen due to incorrect SMTP settings, such as the wrong host, port, username, or password. Server issues, outdated WordPress or plugin versions, or conflicts with other plugins could also cause it.
Can firewall or hosting settings block SMTP connections?
Yes, that happens quite often. Some hosting providers or firewalls block certain ports for security reasons. If your SMTP isn’t working, it’s worth asking your host if they allow outbound connections on ports like 465 or 587.
What is the difference between SMTP authentication and connection errors?
A connection error means WordPress couldn’t reach the mail server at all. An authentication error means it connected but the login details (username or password) weren’t accepted.
Do I need to change my SMTP settings when moving to a new host?
Most of the time, yes. Different hosts may block ports or require different security settings. After moving, always double-check your SMTP plugin settings to match the new host’s rules.
Can wrong username or password cause SMTP errors?
Absolutely. Even a small typo in your email address or password can stop the connection. Double-check your login info, especially if you recently updated your email password.
Is it safer to use SMTP with SSL or TLS in WordPress?
Both add a layer of security, but TLS is usually the better choice if the server supports it. If TLS fails, SSL is a safe backup. Always pick one of these instead of sending mail without encryption.
Next, Learn How to Fix Could Not Instantiate Mail Function in WordPress
The ‘could not instantiate mail function’ error jeopardizes essential website interactions like user registration, password resets, and critical notifications. Check out our guide on how to fix could not instantiate mail function in WordPress.
Ready to fix your emails? Get started today with the best WordPress SMTP plugin. If you don’t have the time to fix your emails, you can get full White Glove Setup assistance as an extra purchase, and there’s a 14-day money-back guarantee for all paid plans.
If this article helped you out, please follow us on Facebook and Twitter for more WordPress tips and tutorials.

