Have you ever encountered the frustrating ‘could not instantiate mail function’ error on your WordPress site?
This error jeopardizes essential website interactions like user registration, password resets, and critical notifications.
I’ve run into this error a few times myself while helping clients set up contact forms and transactional emails.
So, don’t stress! I’ve created this guide to show how you can rectify this issue using WP Mail SMTP!
Understanding the ‘Could Not Instantiate Mail Function’ Error
The infamous ‘Could Not Instantiate Mail Function.’ error message can occasionally get in the way of your communication efforts, confusing many people.
What Does the Error Mean?
In the most straightforward terms, the ‘could not instantiate mail function’ error is WordPress’s way of saying, “I tried to send an email, but something stopped me.”
While the WordPress platform is excellent for creating websites and blogs, its default email function doesn’t always play well with certain server settings.
Common Causes For the Error
There are a few common reasons why you may get the ‘could not instantiate mail function.’ error:
- Server Restrictions: Not all hosting servers are friendly with WordPress’s default mail function. Some might have strict rules or limits on sending emails.
- PHP mail() Function Issues: WordPress uses the PHP mail() function to send emails. If there’s an issue with this function, or if it’s disabled, you’ll likely face this error.
- Incorrect Configuration: Sometimes, the website’s email setup might be misconfigured, causing emails to bounce back or not send at all.
No matter the reason for encountering this error on WordPress, there’s a very good chance that WP Mail SMTP will fix the problem.
How to Fix ‘Could Not Instantiate Mail Function’ in WordPress
The easiest way to fix all email delivery problems, including the ‘could not instantiate mail function.’ error, is to use WP Mail SMTP. Follow the steps below to get started:
1. Install and Activate WP Mail SMTP
First, you’ll need either a paid subscription to WP Mail SMTP or the free version. You can get either to fix the error, but the free version doesn’t have advanced features like weekly email summaries and email logs.
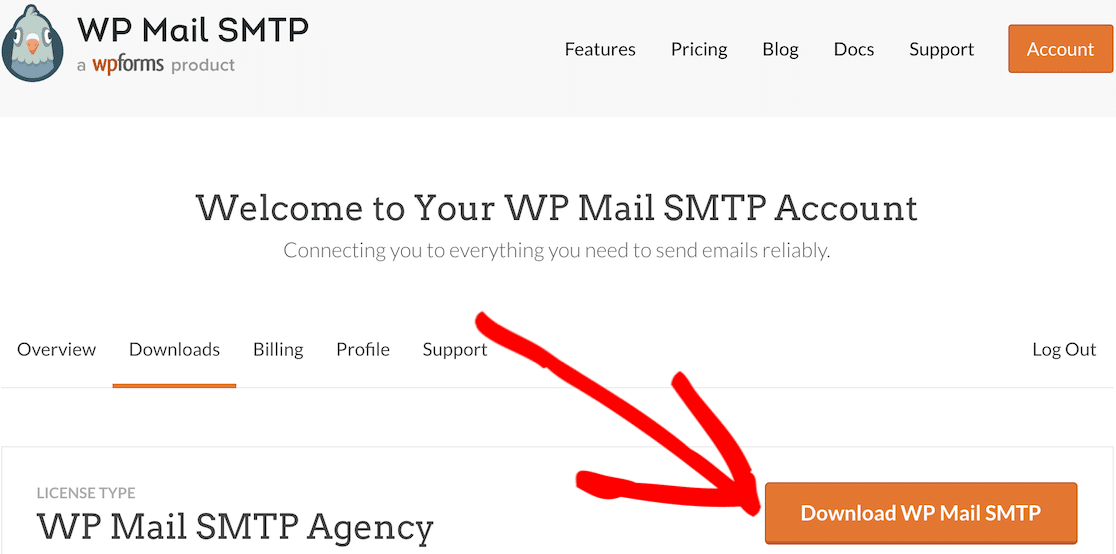
After you’ve purchased your plan, simply head over to your WP Mail SMTP dashboard and navigate to the Downloads tab. Scroll down to click on the Download WP Mail SMTP button to get the .zip file.
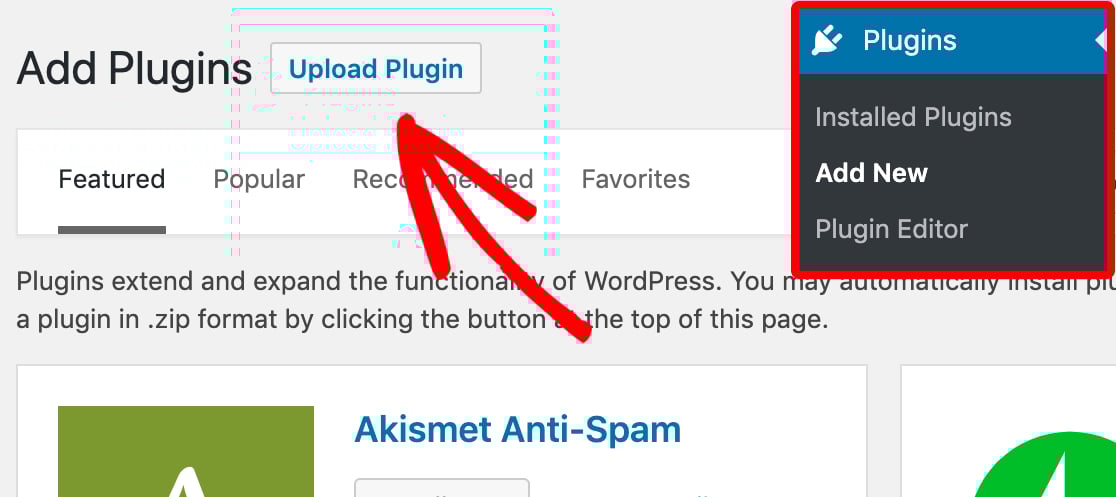
Next, open the WordPress dashboard on your website. Select Plugins from the menu bar on the left, and then select Add New.
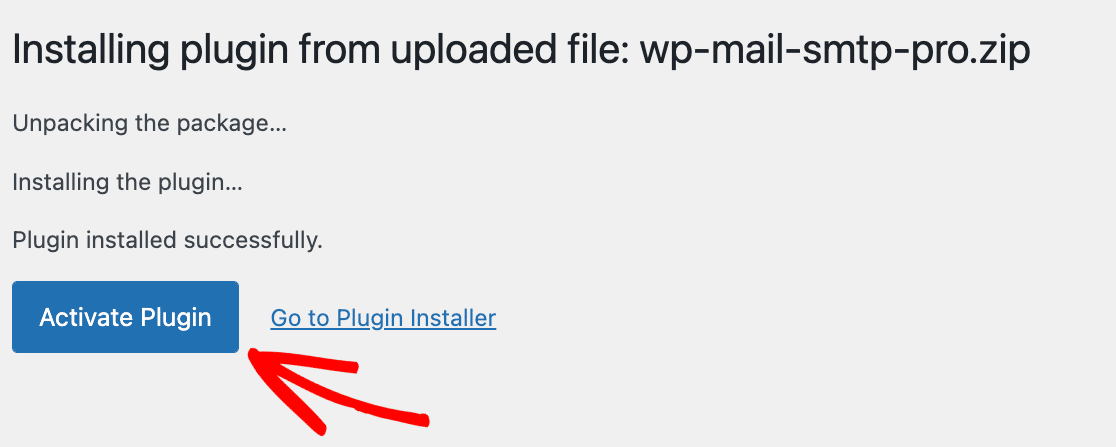
The plugin will now begin installing. Once the installation process is completed, be sure to click on the Activate Plugin button.
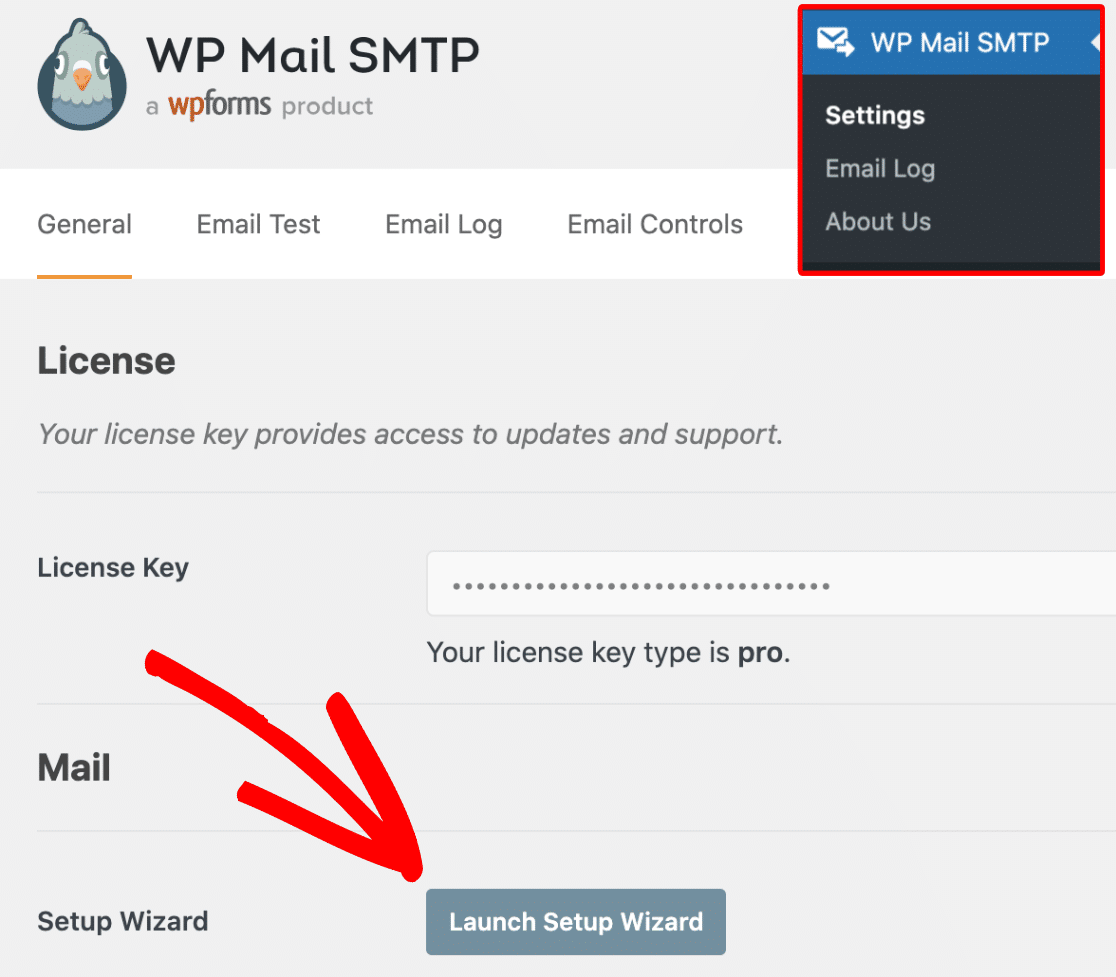
This should launch the Setup Wizard automatically. If it didn’t launch, go to WP Mail SMTP » Settings and press the Launch Setup Wizard button.
Upgrade to WP Mail SMTP Pro Now! 🙂
Let’s go ahead and connect an email provider to WordPress now.
2. Choose Your Email Service Provider
After installing WordPress Mail SMTP, you must configure it to connect your website to your mailer or 3rd party SMTP server.
If you’d rather have a professional configure WP Mail SMTP for you, our support staff provides a White Glove Setup service for an additional cost.
Or, if you want to set up the mailer yourself, simply click on the Let’s Get Started button in the WP Mail SMTP Setup Wizard.

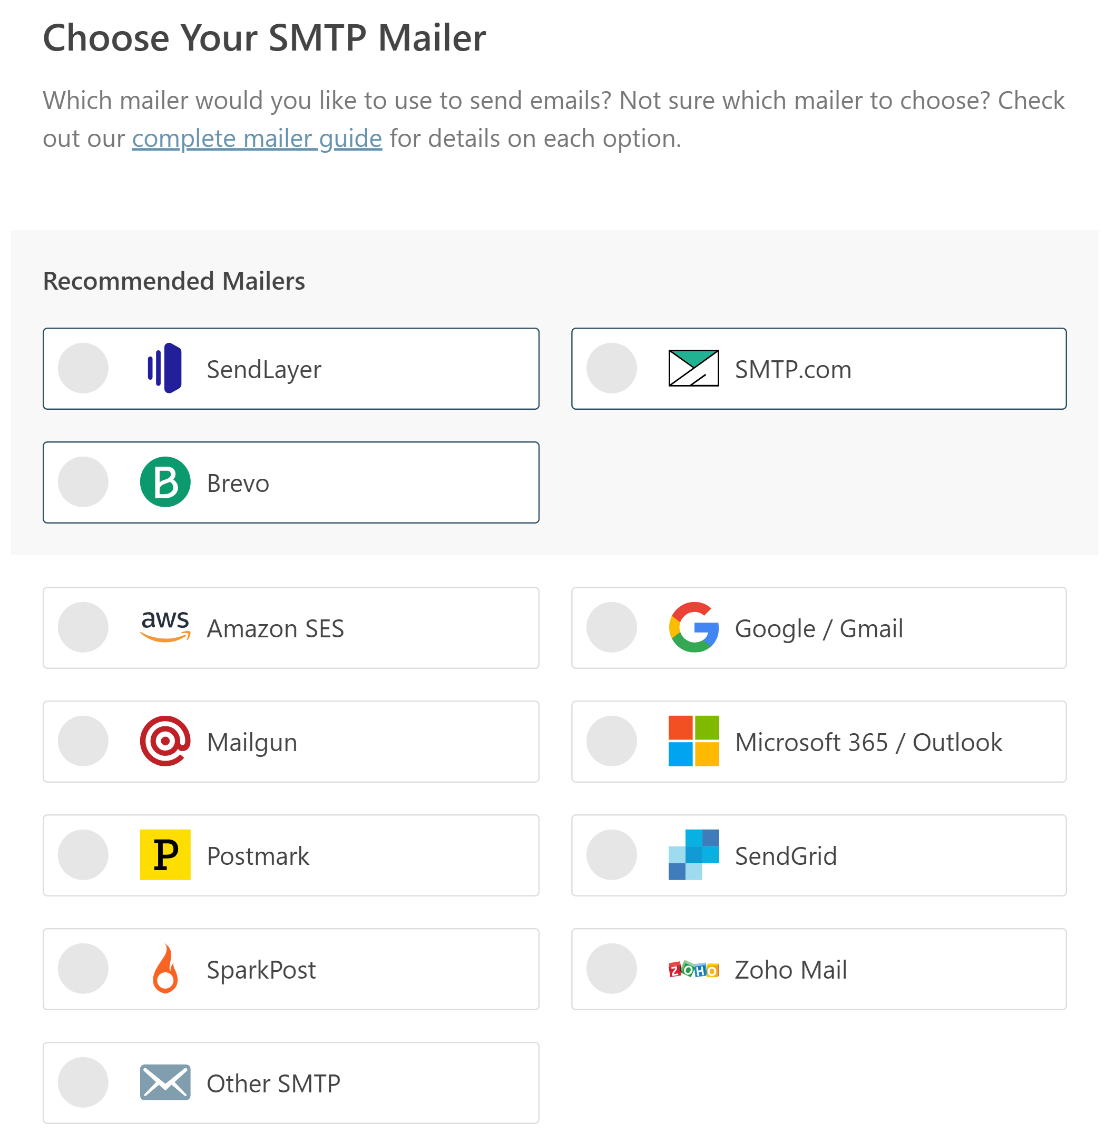
WP Mail SMTP is compatible with both paid and free email service providers. To select a mailer, click its name on the following screen.
After selecting a mail provider, you can proceed with the authentication by visiting the relevant documentation in the table below.
| Mailers available in all versions | Mailers in WP Mail SMTP Pro |
|---|---|
| SendLayer | Amazon SES |
| SMTP.com | Microsoft 365 / Outlook.com |
| Brevo | Zoho Mail |
| Google Workspace / Gmail | |
| Mailgun | |
| Postmark | |
| SendGrid | |
| SparkPost | |
| Other SMTP |
There are lots of options here, but we recommend SendLayer, SMTP.com, or Brevo (formerly Sendinblue). When it comes to delivering transactional emails, these mailers are among the most dependable options available.
Need a hand?
You can purchase White Glove Setup as an additional service with any of our WP Mail SMTP licenses and have our customer support team set up WP Mail SMTP for you.
After completing the Setup Wizard, you can configure more than one mailer under the Additional Connections settings. After that, you may set up a Backup connection and even configure Smart Routing, if required!
3: Enable Email Logging and Instant Alerts (Optional)
Once you’ve successfully set up your mailer, you can activate additional features of the WP Mail SMTP Pro plugin.
Improved Email Deliverability and Email Error Tracking are enabled by default and can’t be turned off.
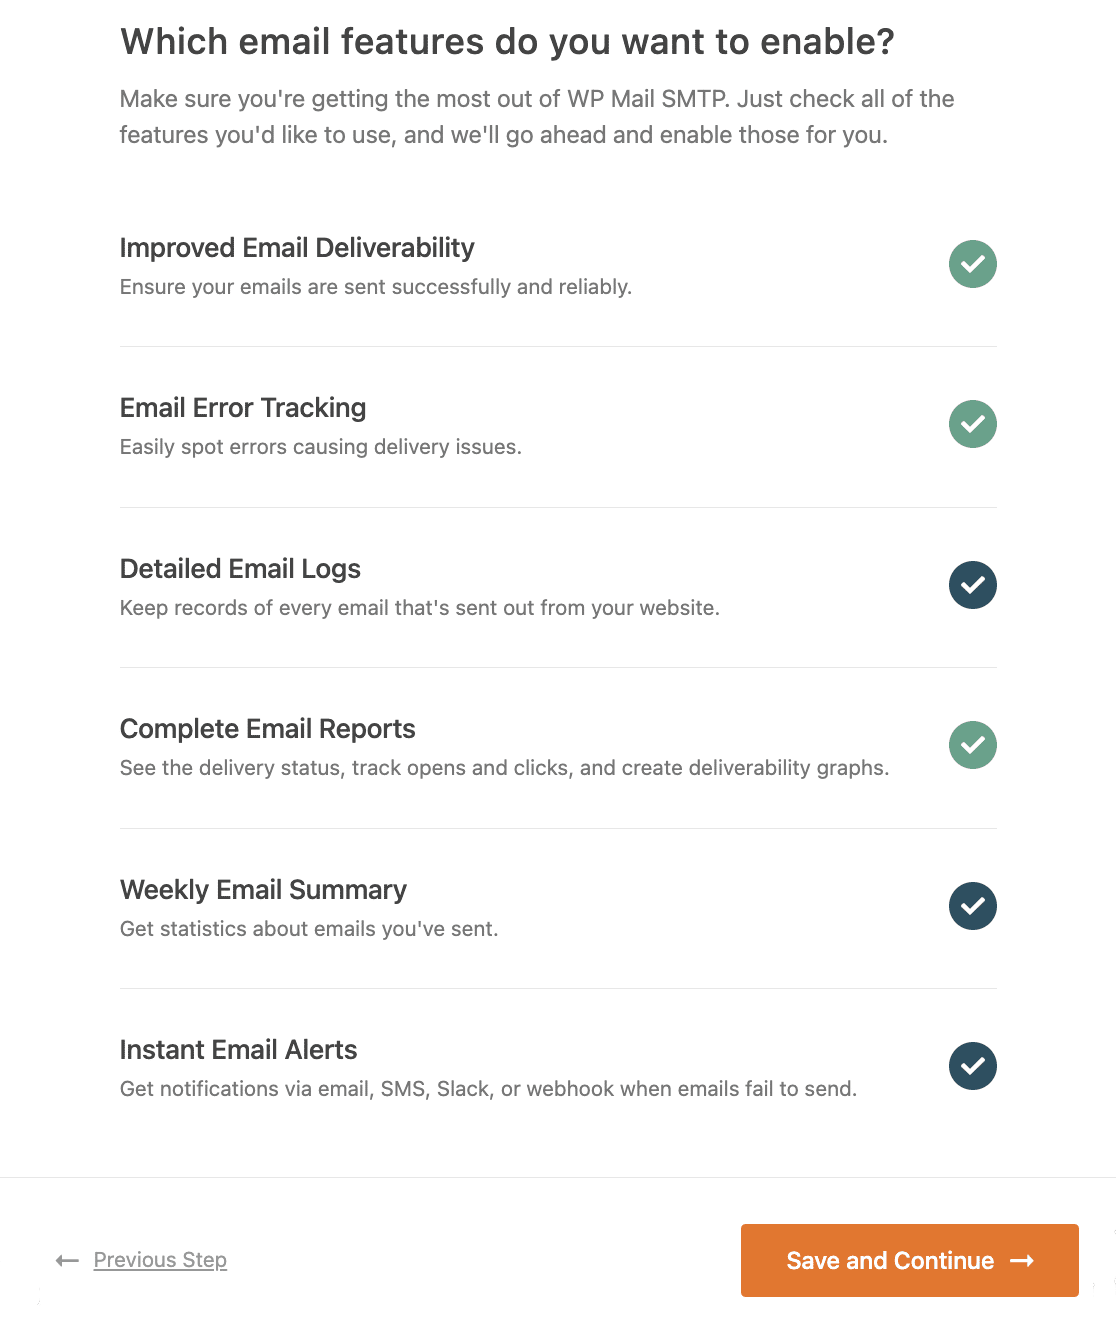
We highly recommend turning on the Detailed Email Logs, too. This will turn on Complete Email Reports.
You can also get a Weekly Email Summary of your logs and Instant Email Alerts when an email from your site fails to send.
Next, if you enable email logs, you’ll also have the chance to turn on some advanced email logging and debug features.
If you want to learn more about using these features, then check out our detailed guide on email logging for WordPress.
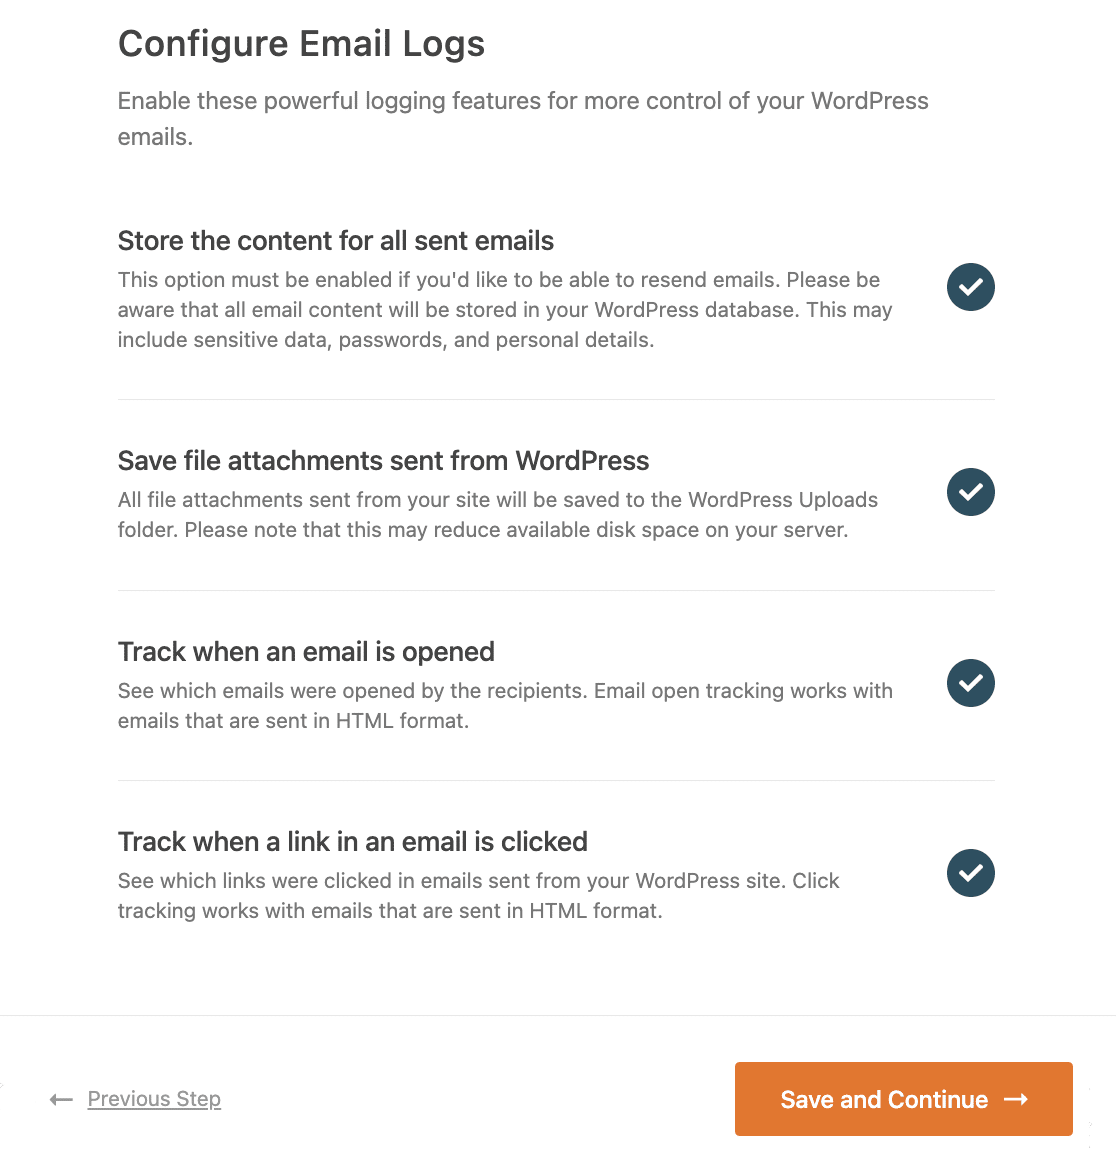
These options include:
- Store the content for all sent emails. Save email content in your site’s database.
- Save file attachments sent from WordPress. Save media in your site’s Uploads folder.
- Track when an email is opened. Track and see when recipients open your emails.
- Track when a link in an email is clicked. See when recipients click links in your emails.
Save your changes and move through to the last step of the Wizard. Go to WP Mail SMTP » Settings » Email Log if you ever want to change these email settings.
4. Perform an Email Test with WP Mail SMTP
After you have completed all of the above steps, the WP Mail SMTP Setup Wizard will send a test email to verify if everything has been configured correctly.
If there are no problems with your chosen configuration, the WP Mail SMTP setup wizard will display a success message.

At this stage, you should wait until a few emails have been generated to ensure you don’t face the ‘could not instantiate mail function’ error again.
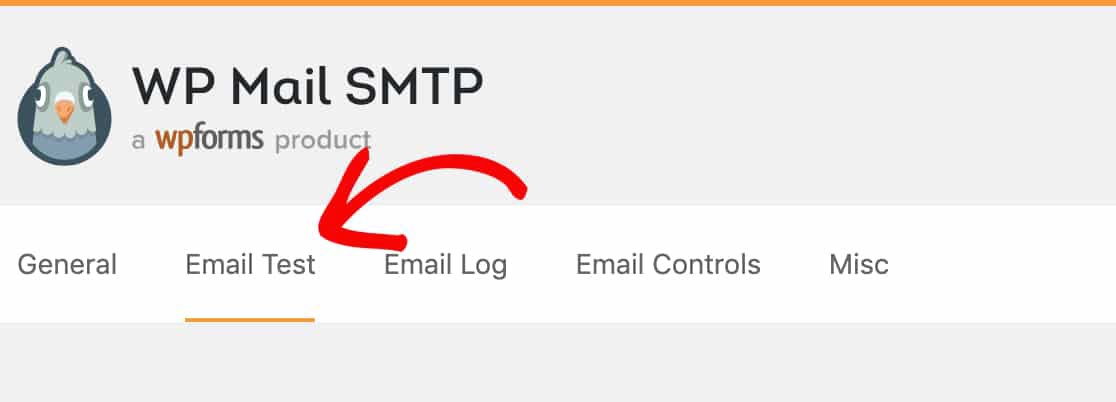
If you don’t want to wait, you can go to WP Mail SMTP » Tools » Email Test to send a few test emails from WP Mail SMTP.
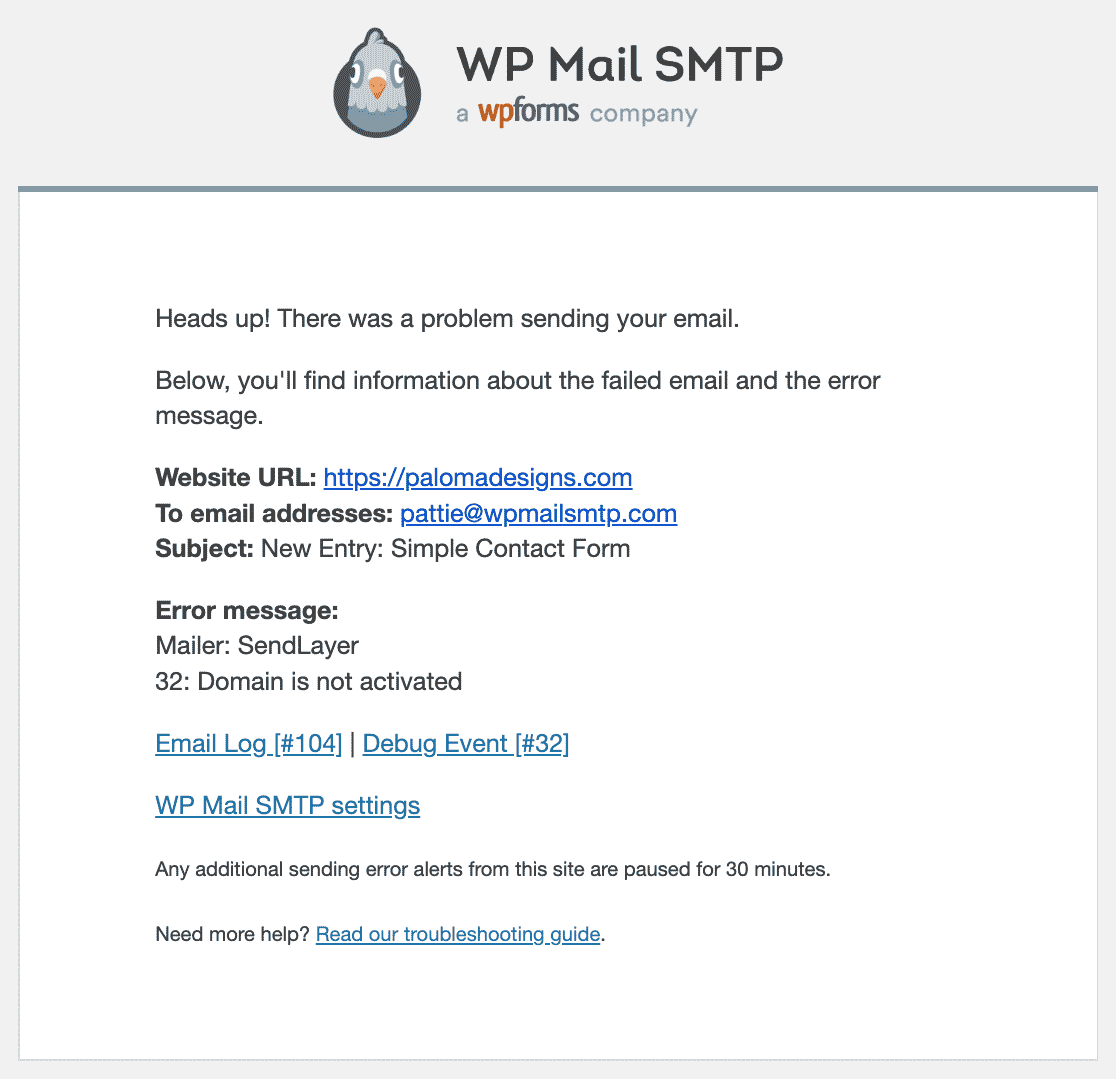
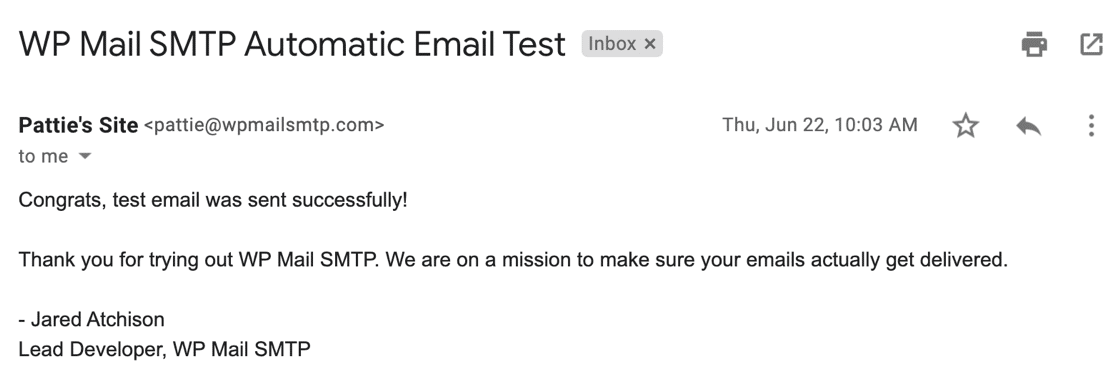
Here is a screenshot of what the test message could look like in your inbox, so you know what to expect.
5. Alternatives to Fix the ‘Could Not Instantiate Mail Function’ Error
If the ‘could not instantiate mail function’ error persists even after configuring your mailer using WP Mail SMTP, check for any of the following issues:
- Check your “From” email address: Many plugins use the admin email as the From address. This can cause email deliverability issues. If you have a ton of different plugins all sending email, WP Mail SMTP allows you to force the From Email and the From Name across your entire site that you authenticated in the Setup Wizard.
- Check if the receiver’s email address is valid: If the recipient’s email address is invalid, your mail server might refuse to transmit your message. Therefore, if the ‘could not instantiate mail function’ error occurs for only a few of your subscribers, it may be because their email address is invalid!
- Remove any special characters from the subject line: Certain mail servers will not transmit your message if the subject contains special characters such as a quote, colon, or any other special character. Please create a new newsletter with a standard subject line (such as “test”) and try again.
- Check your email sending limit: Most mailers enable you to send X emails each month. If you exceed that limit, the mail server will refuse to deliver more emails and display this error message. So, if you successfully sent 500 emails and can no longer send more, check your sending limitations.
Need help with WP Mail SMTP? Our support team can help you troubleshoot any issues, or you could check out our documentation for some common fixes.
More Questions about the ‘Could Not Instantiate Mail Function’ Error
Do you have more questions about the ‘could not instantiate mail function’ error? I’ll provide answers to some common questions below.
Could not instantiate mail function in WordPress?
This error typically arises when WordPress encounters obstacles in sending emails using its default mail system. Server restrictions or issues with the PHP mail() function are often culprits. Using reliable plugins like WP Mail SMTP can bypass these obstacles and ensure seamless email deliverability.
How do I enable mail() function?
The mail() function is part of PHP, and its activation depends on your hosting server’s configuration. To enable it: access your hosting control panel (like cPanel), locate the PHPmailer settings, and ensure the mail() function isn’t disabled.
Why is my mail function not working in PHP?
Several factors can affect the mail function in PHP, such as server restrictions on mail sending, incorrect configuration in your php.ini file, a disabled mail() function by your hosting provider, etc. For WordPress users, installing WP Mail SMTP can conveniently circumvent these hurdles.
What causes “Could not instantiate mail function” in WordPress?
This usually means your server isn’t letting WordPress send email using PHP’s built-in mail function. Most shared hosts block it for security reasons. That’s why using SMTP is a better option.
Why is my WordPress email not sending?
If you’re not receiving form or order emails, it’s often because your server blocks outgoing PHP mail. SMTP plugins fix this by using proper email services instead.
Next, Learn How to Save Contact Form Emails in the WordPress Database
Have you ever wondered how to save emails from your WordPress contact forms into your site’s database? Check out our guide on how to save emails submitted in your WordPress database for easy access.
Ready to fix your emails? Get started today with the best WordPress SMTP plugin. If you don’t have the time to fix your emails, you can get full White Glove Setup assistance as an extra purchase, and there’s a 14-day money-back guarantee for all paid plans.
If this article helped you out, please follow us on Facebook and Twitter for more WordPress tips and tutorials.

