Do you want to learn how to add SparkPost to WordPress?
Thousands of businesses use SparkPost to run email campaigns with high deliverability rates.
In this article, we’ll show you how to add SparkPost to your WordPress site step-by-step.
Why You Should Use SparkPost with WP Mail SMTP
The default mailing method in WordPress is PHPMail, which is very unreliable. Many web hosts today keep PHPMail disabled because it is usually the source of most spam emails. As a result, your emails fail to send most of the time.
To fix this issue, you need a way to change the behavior of the wp_mail() function, so that it stops relying on PHP. Instead, you want it to use the much more reliable SMTP.
This is difficult to do manually because it requires coding changes that can affect your site’s other functionalities if not handled properly. But there’s a much easier solution: WP Mail SMTP.
The WP Mail SMTP plugin for WordPress reconfigures the wp_mail() function to use SMTP for emails. Plus, it adds authentication to your sender details. This allows Internet Service Providers (ISPs) and mailer services to prove your legitimacy, so your emails always reach the inbox folder of your recipients.
What makes WP Mail SMTP so good is that it easily connects with top-rated mailer services like SparkPost. As a result, you get an easy setup process, improved deliverability, and your emails send much faster than any other plugin can.
Besides, WP Mail SMTP comes with very useful extra features like:
- Disable/enable WordPress email notifications
- Email logging of all messages sent from your site
- Weekly email statistics
- and more.
Let’s move on to the tutorial for configuring your site to use SparkPost with WP Mail SMTP.
How to Add SparkPost to Your WordPress Site
In This Article
Step 1. Create a SparkPost Account
You need to first create a SparkPost account. Visit SparkPost’s pricing page and select a plan of your choice.
SparkPost has a free plan that comes with a monthly limit of 500 emails, which is actually very good if you’re a new website. We’re going to use this free test account during this tutorial.
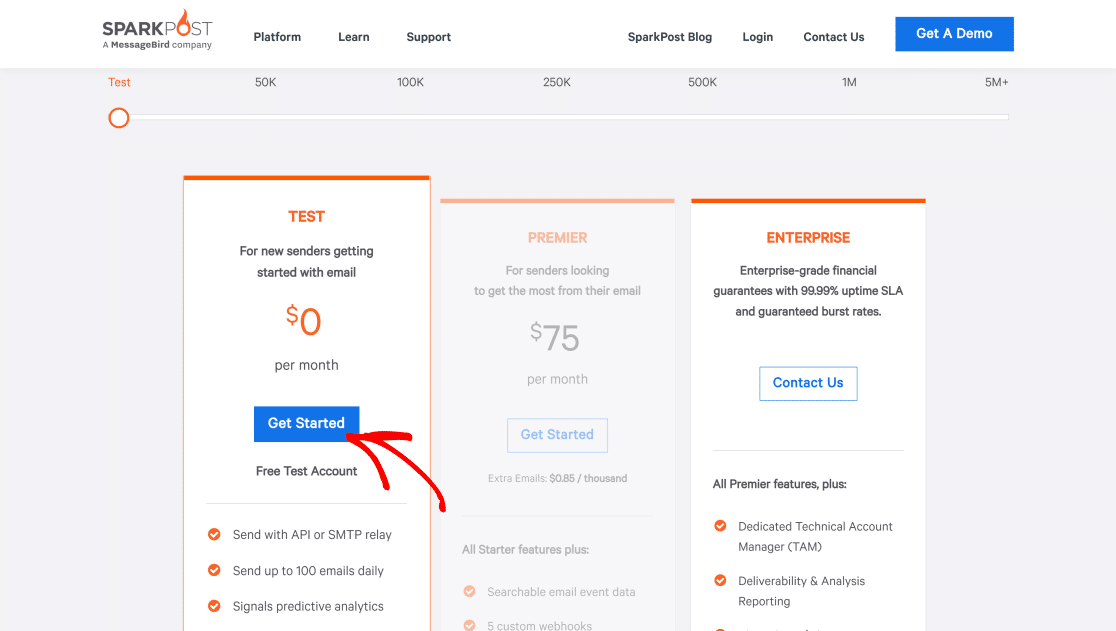
Next, fill out the account registration form which will ask you for basic information like name and company. You’ll also have to choose your SparkPost server location which can either be US or EU. It’s recommended that you use EU if you’re based outside the US. We’re going to use US since we’re that’s where we’re based.
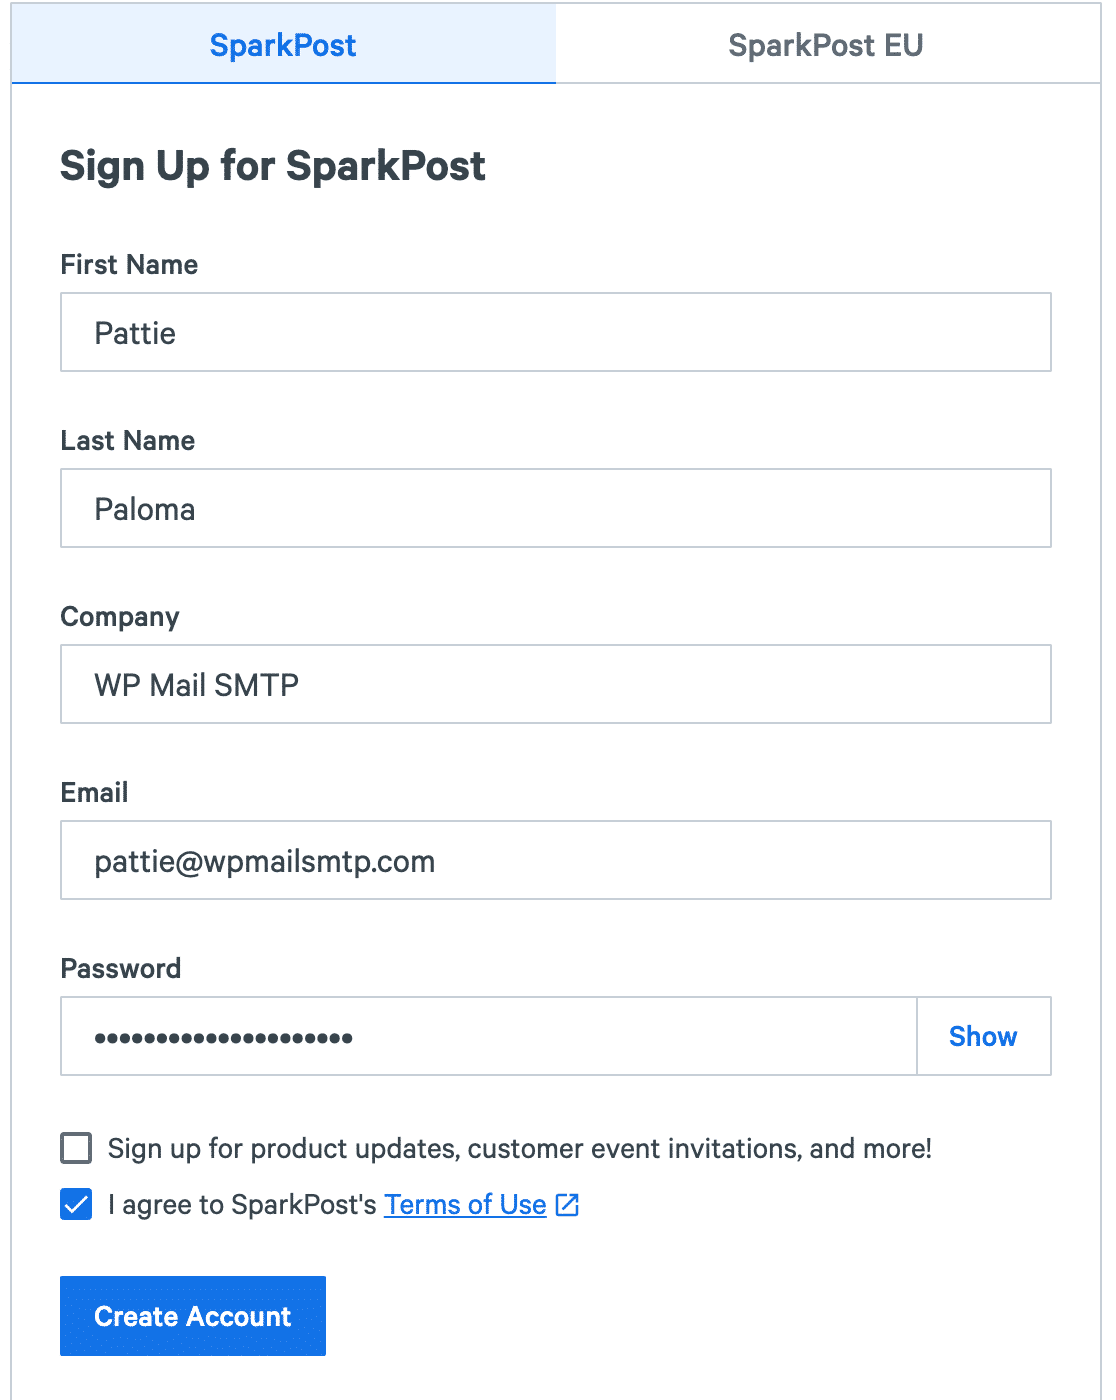
When you’ve filled out the necessary information, click on Create Account. This will take you to a new page where you’ll have to add your email domain for authentication.
Step 2. Add a Sending Domain
Now that your account is created, you can start adding your email domain to configure SparkPost settings.
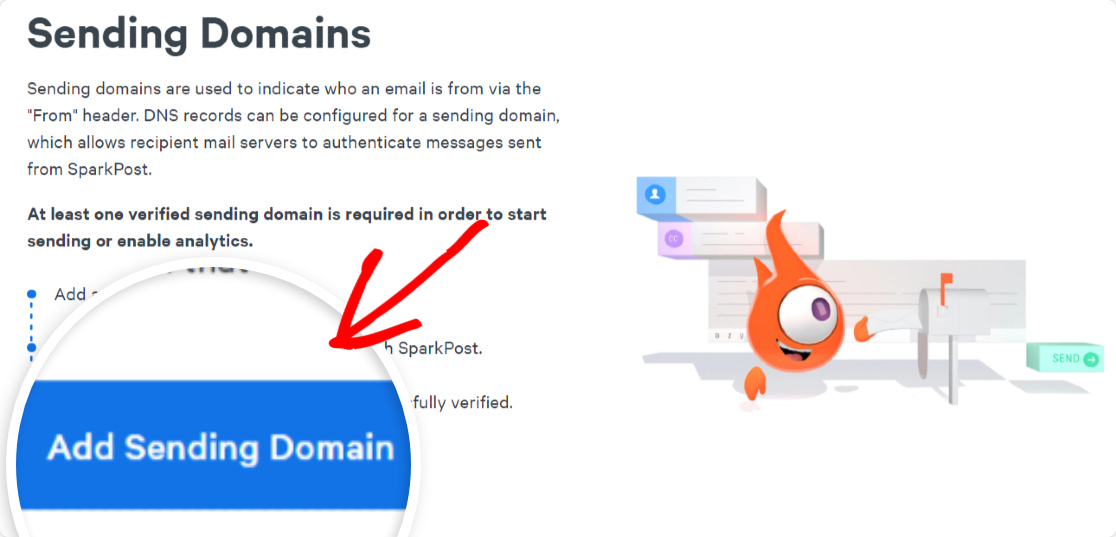
You should now be in your SparkPost dashboard where you’ll find an Add Sending Domain button. Click on it.

A new screen will open with some details about sending domains. Press the Add Sending Domain button again to go ahead.
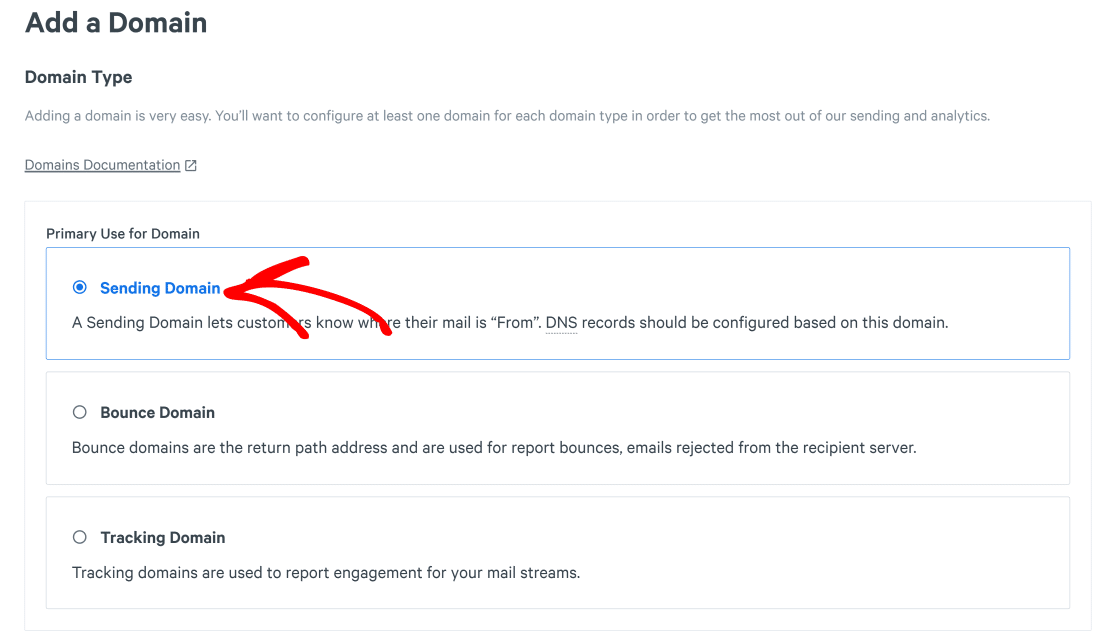
You can add different types of domains to SparkPost. Since we want a sending domain to send our emails from, select the Sending Domain option from this list.
Scroll down to find the Domain and Assignment area. Here, you’ll need to provide the domain name that you want to set as your sending domain. This can either be your root domain or a subdomain.
For best email deliverability, we recommend using a subdomain for your transactional and marketing emails. Email deliverability is closely linked with your domain reputation. So, if you dedicate a separate subdomain for your promotional emails, your root domain reputation will stay unaffected even if your subdomain reputation gets low.
You don’t need to create a new subdomain with your hosting account for this. You can simply pick any subdomain you want and enter it in the Domain and Assignment field. Then, press and Save and Continue.
Note: If you want to use your root domain, you can see our doc for adding root domain as sending domain.
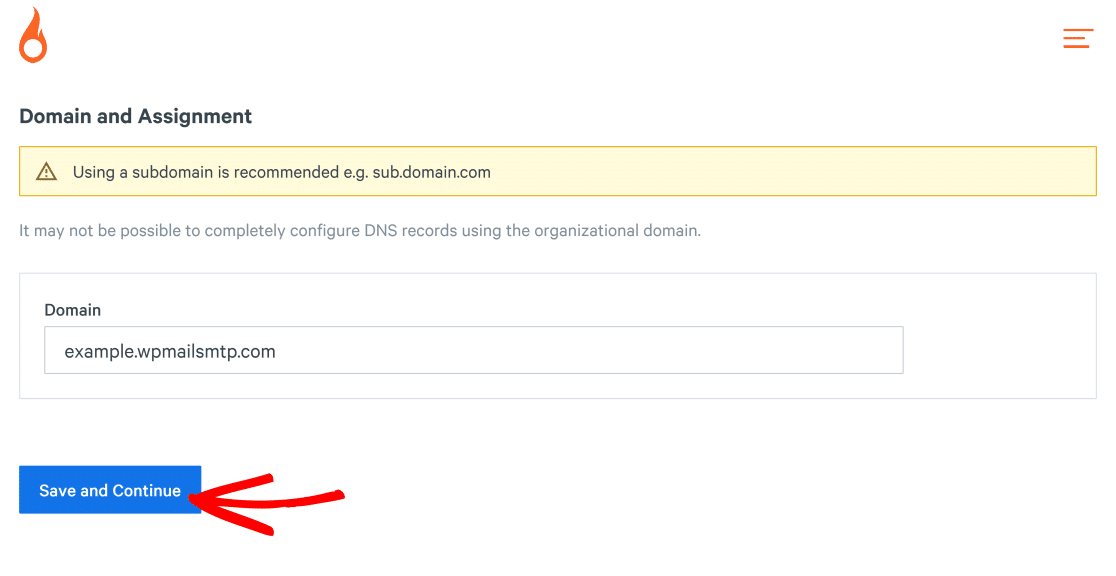
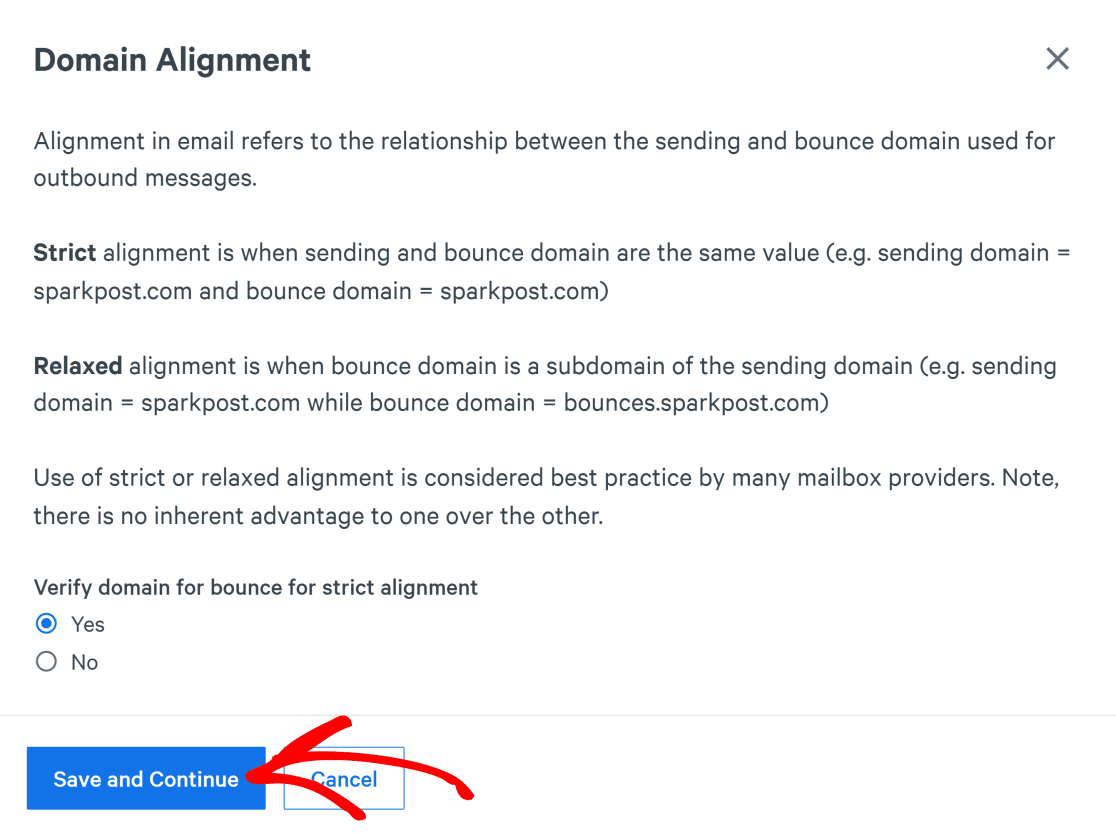
Now, you’ll see the settings for Domain Alignment. The simpler approach is to use strict alignment (which configures your sending domain and bounce domain to the same value).
Click on Yes to continue with strict alignment and then click on Save and Continue.
Now, we’re ready to add DNS records to our web host account in order to get our subdomain verified.
Step 3. Add DNS Records to Your Web Host Account
In this step, you’ll find TXT and CNAME records for SparkPost that you’ll need to add to your web host.
Simply copy these records and paste them into your root domain DNS (yes, even though these records are created for your subdomain, you only need to add these to your root domain to configure things properly).
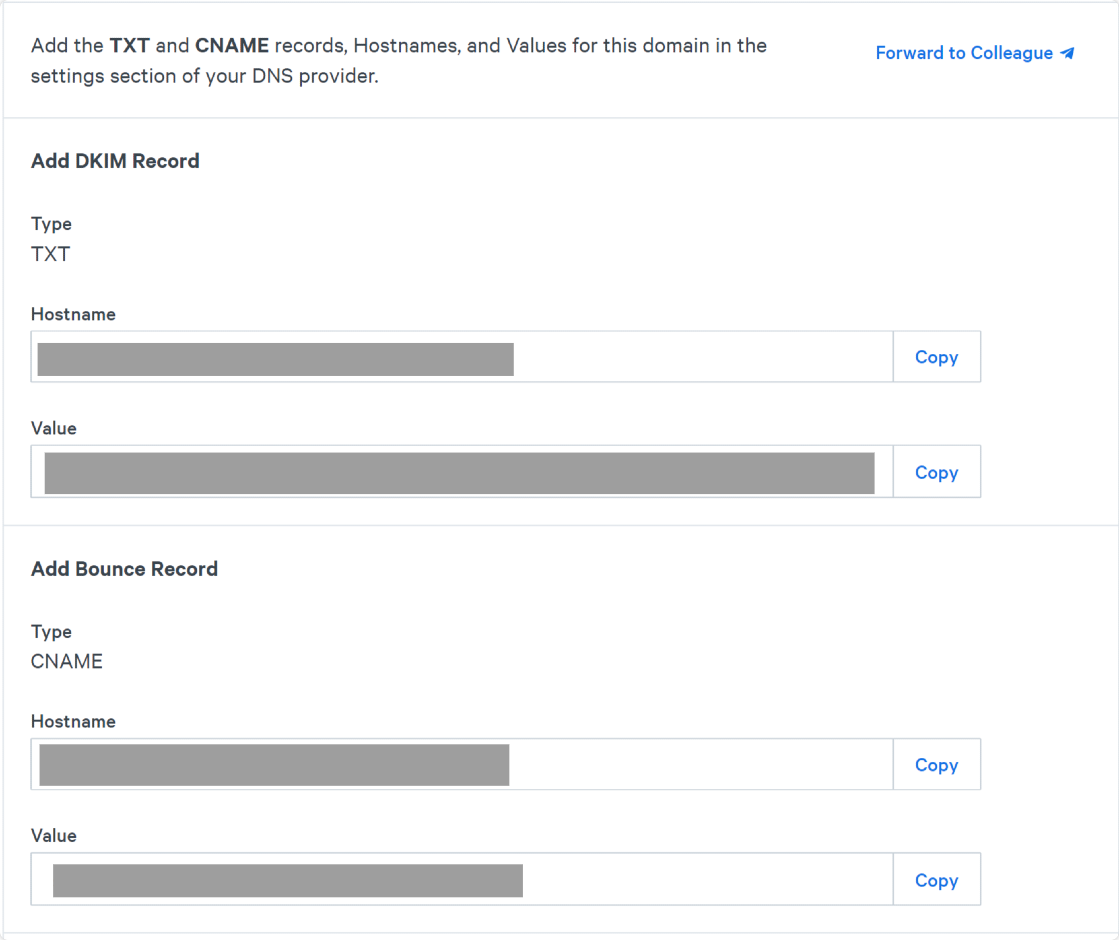
If you need help adding these DNS records to your web host account, you can contact your hosting service’s customer support.
When you’re done adding the DNS records, check the box next to the text The TXT and CNAME records have been added to the DNS provider and click on the Verify Domain button.

SparkPast will now check your domain for authentication. It can take up to 48 hours for your subdomain to get verified since your DNS records usually take a while to update.
To check if your subdomain has been verified, click on the Configuration tab on the top navigation bar. You should see your subdomain here with status markers of Sending and Bounce next to it.
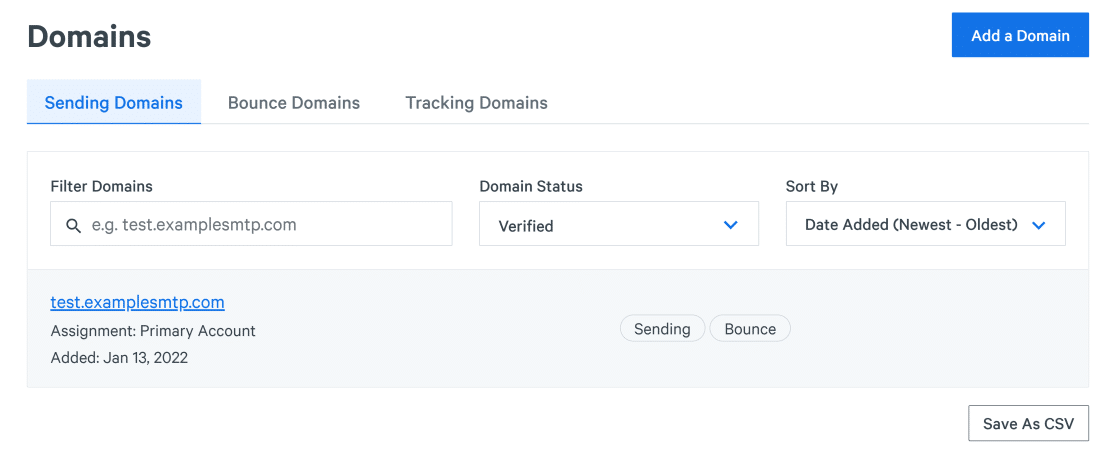
Even if your subdomain hasn’t been verified yet, you can still complete the next steps detailed below.
Step 4. Create SparkPost API Key
The SparkPost API key allows you to connect your SparkPost subdomain with WP Mail SMTP. To grab your API Key, open your SparkPost dashboard and click on the API Keys tab.

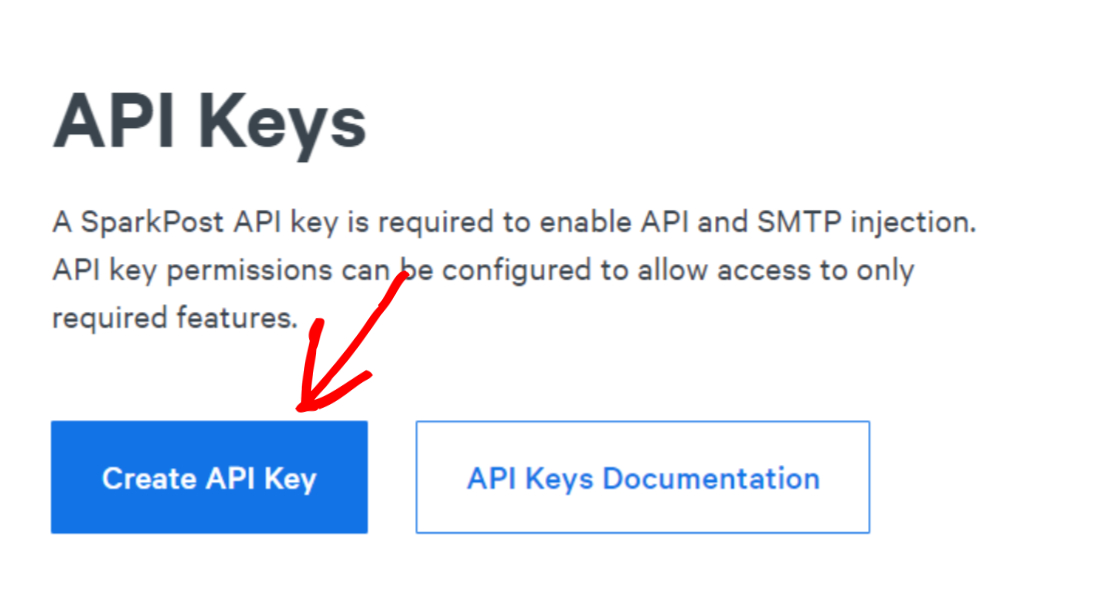
On this screen, scroll down and press the Create API Key button.
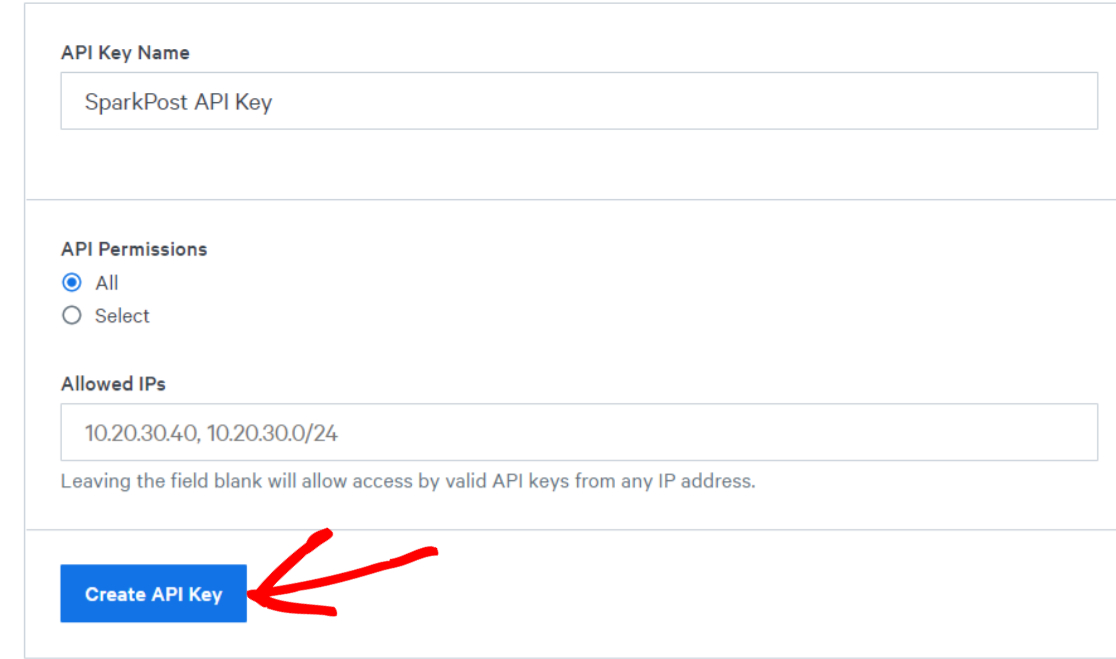
For reference, give any name to your key. We recommend leaving the API Permissions setting to “All“. Next, press the Create API Key button.
You’ll now see your SparkPost API Key. Keep this browser tab open. We’ll be copy-pasting this API key in one of the steps below to complete SparkPost setup with WP Mail SMTP.
Step 5. Install the WP Mail SMTP Plugin
Now, we’re going to install the WP Mail SMTP plugin to your WordPress site. For instructions, you can see our guide on how to install WP Mail SMTP. When you’ve installed and activated the plugin, you should see the Setup Wizard open.
If not, you can manually launch the Setup Wizard by clicking on WP Mail SMTP » Settings.

Scroll down click on Launch Setup Wizard.

This will take you to the WP Mail SMTP Setup Wizard where you can configure your WordPress site to use SparkPost and activate other useful features.
Step 6. Configure WP Mail SMTP Settings
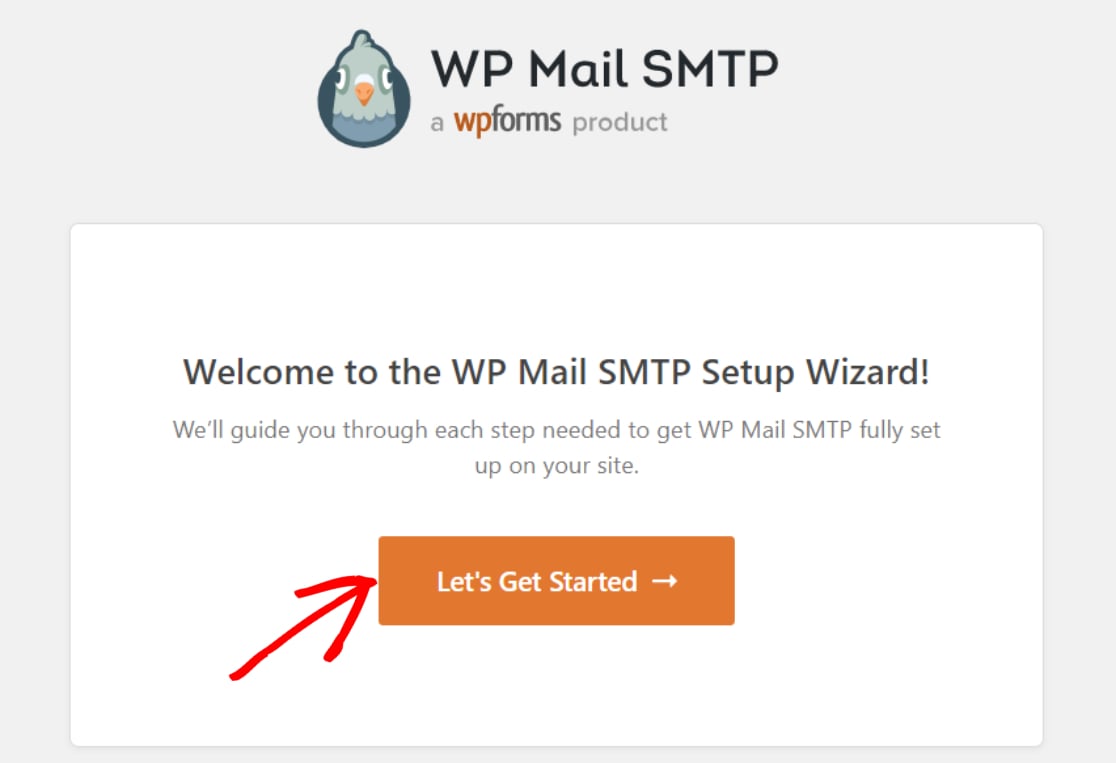
On the Setup Wizard screen, click on Let’s Get Started to begin the setup.
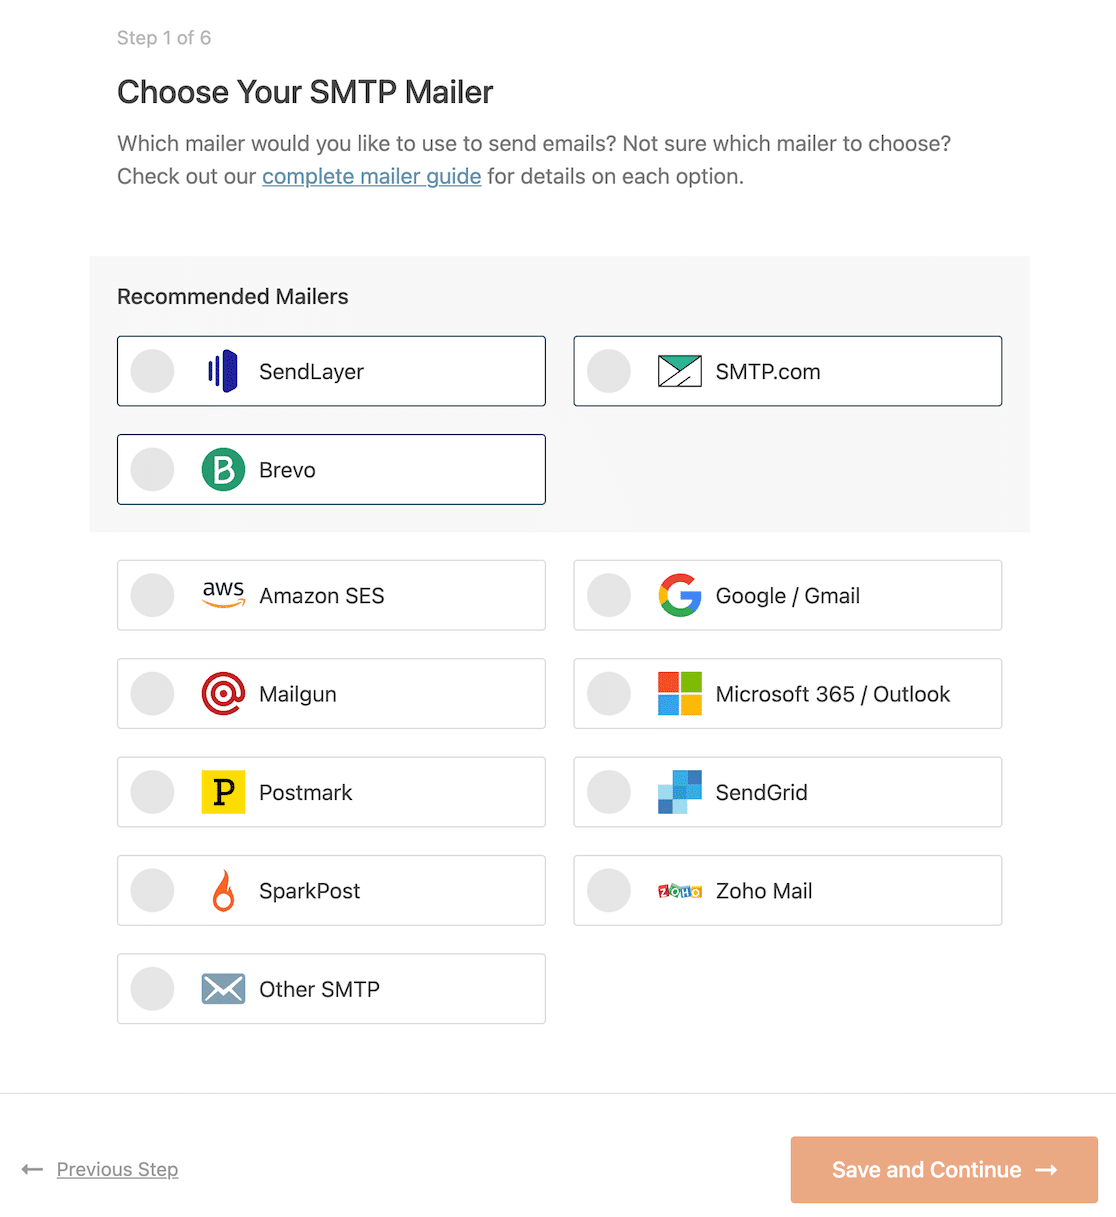
Here, you’ll find a list of all mailing services supported by WP Mail SMTP. You want to select SparkPost from this list and click on Save and Continue.
On the next screen, you’ll need to copy-paste the SparkPost API Key (that you found earlier) into the API Key field. You’ll also need to provide your mailing server Region, From Name, and From Email.
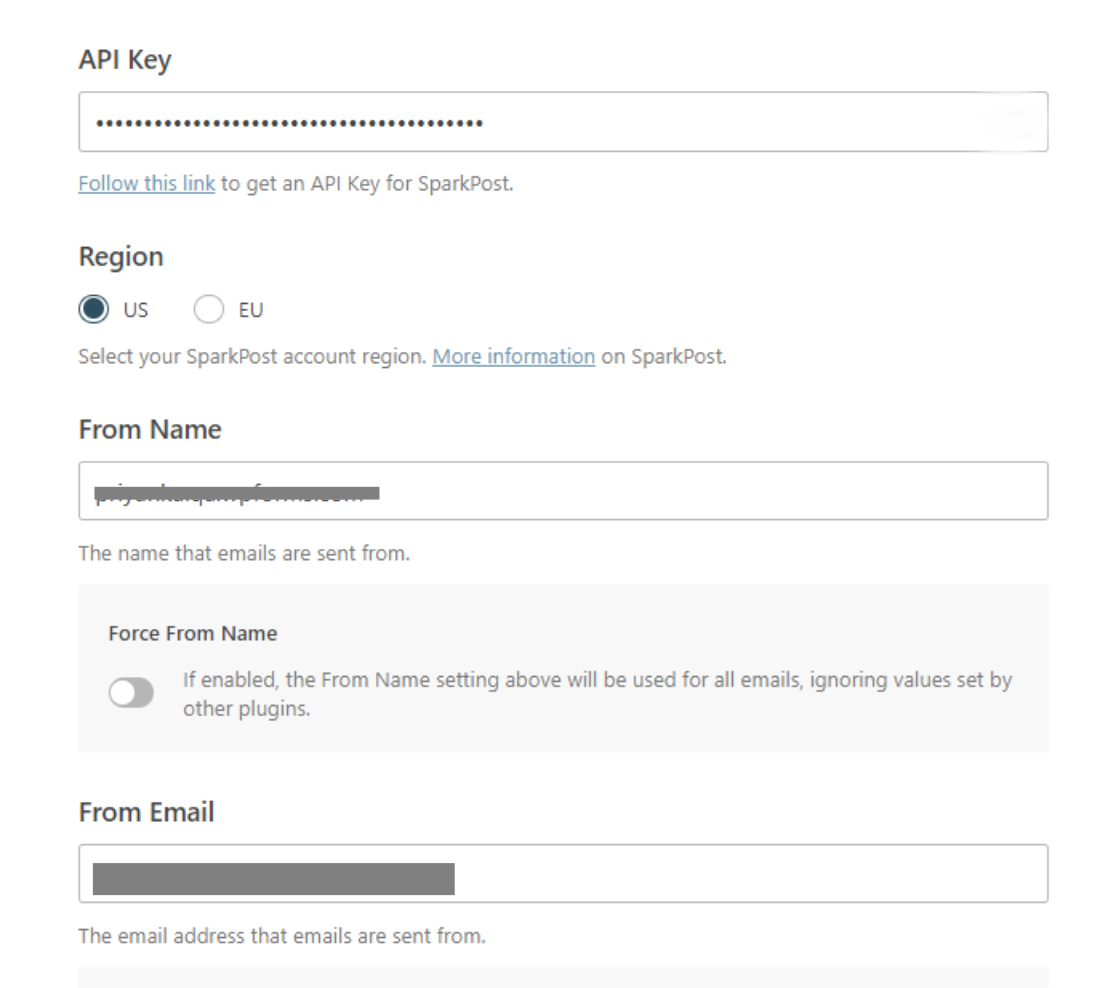
For the From Name field, pick any name that you’d want to be displayed when recipients get your message. The From Email field can have any username as long as it’s at the exact same subdomain that you verified with SparkPost in the steps above.
Note that even though WordPress will send messages from this subdomain, you won’t be able to receive messages unless you first create a mailbox at this subdomain. But you can always set your personal email address (or an email at your root domain for which you have an active mailbox) as the reply-to address on your contact forms.
Whichever option you want to use, click on Save and Continue when you’re done.
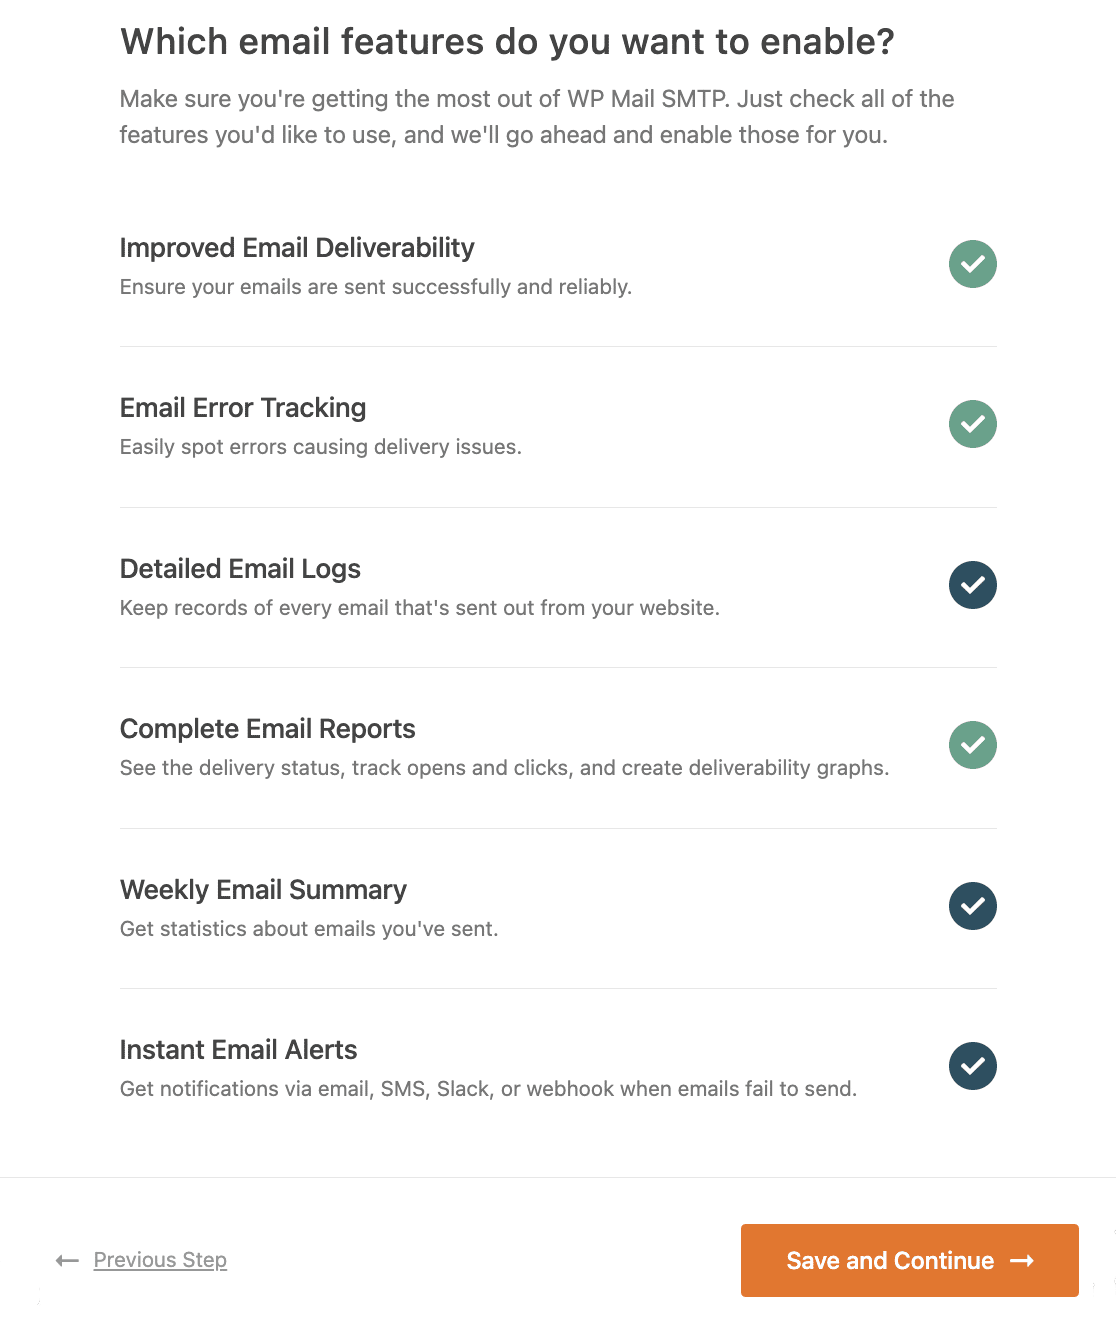
The Setup Wizard will now ask you to enable WP Mail SMTP features that you’d like to have, such as email logs or email alerts. Select the features that you want and press on Save and Continue again.
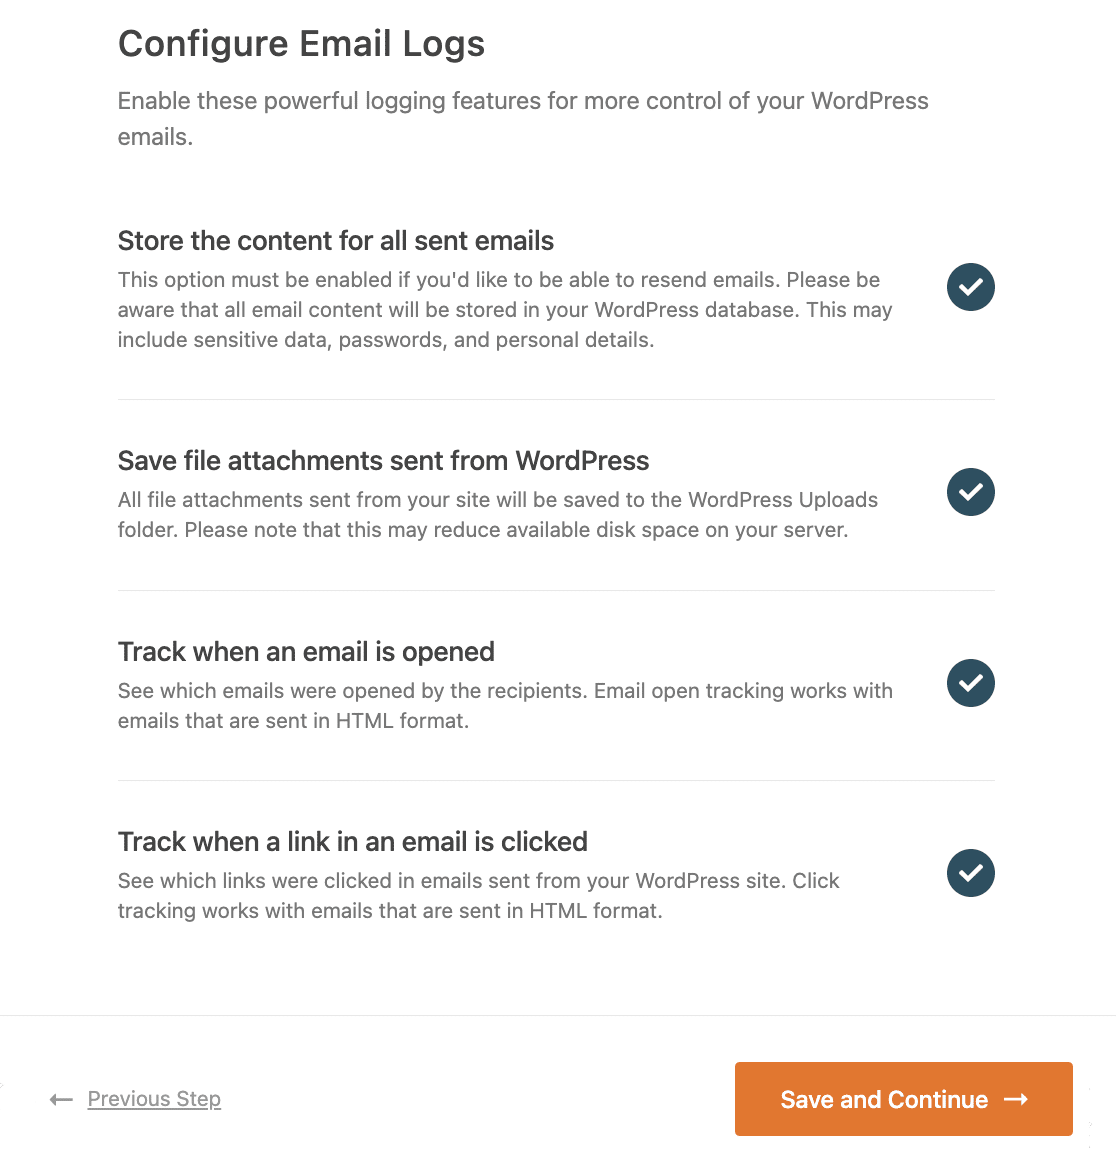
If you enabled email logging, you’ll have some additional settings to configure on the next screen.
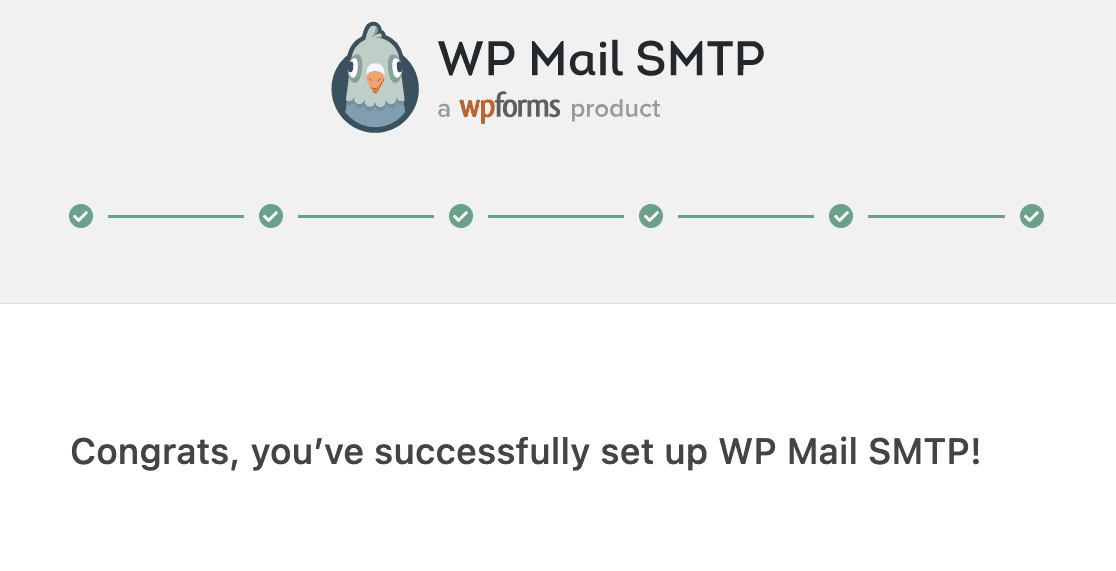
WP Mail SMTP will display a success message if everything went smoothly.
Now, we just have to test if everything is working as intended.
Step 7. Send a Test Email Message
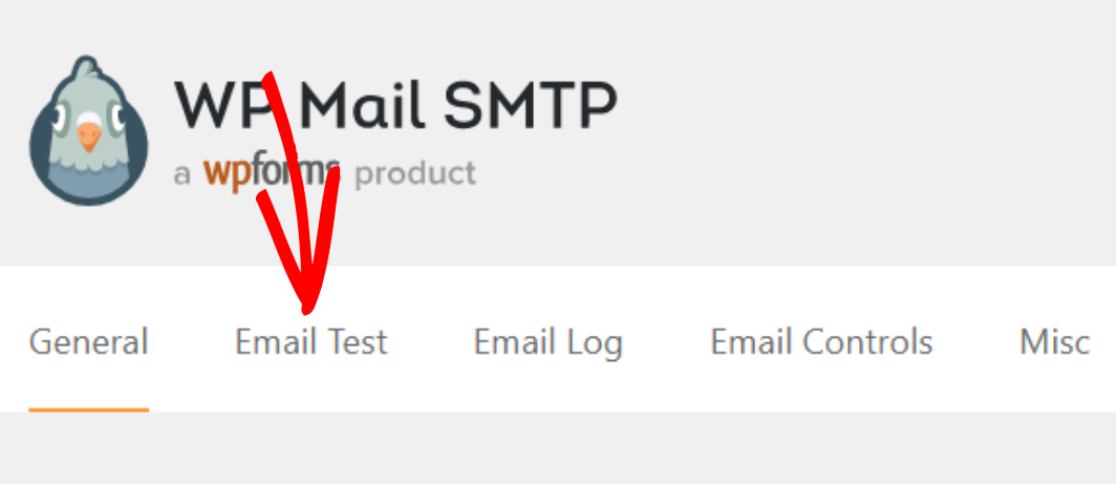
On your WordPress admin area, click on WP Mail SMTP » Tools and then move to the Email Test tab.
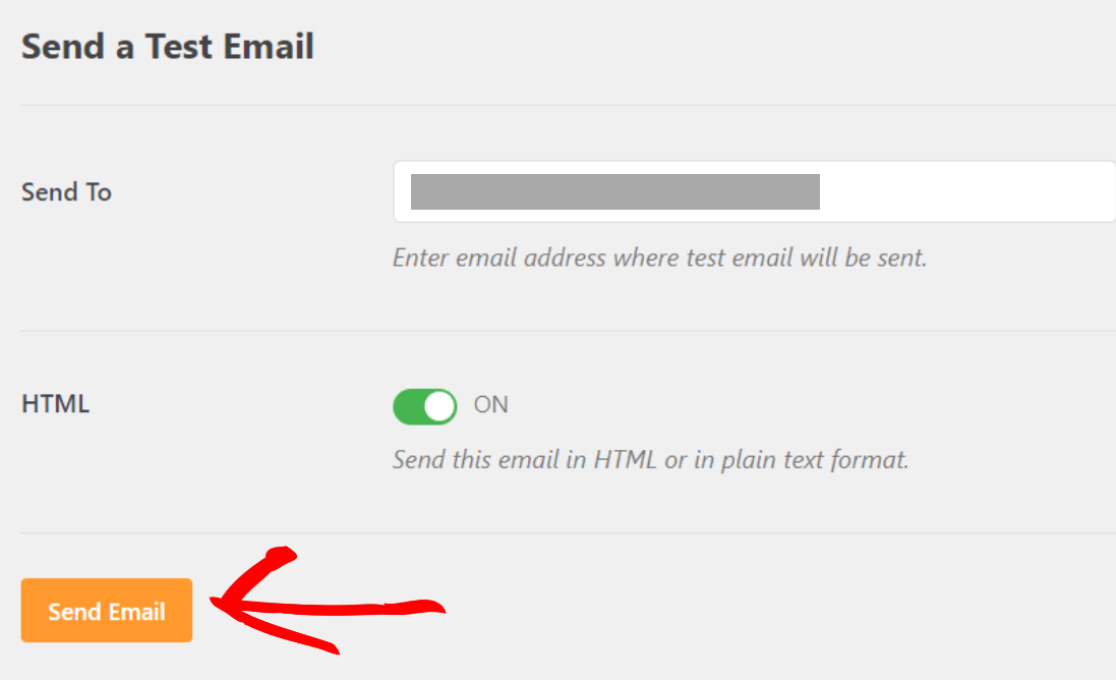
Now, enter the email address where you want to receive the test message and click on Send Email.
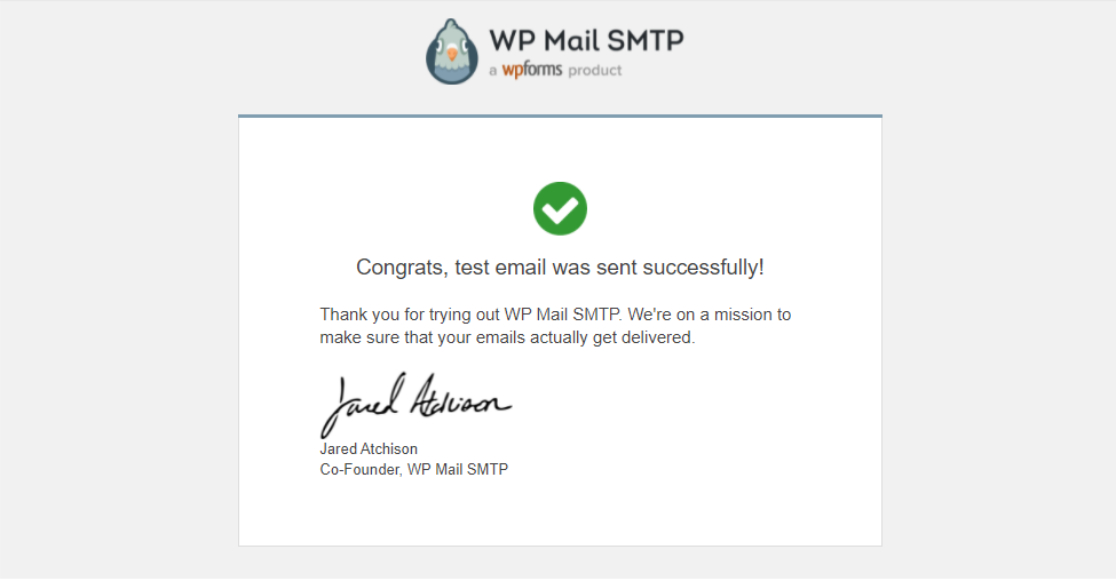
Check your email inbox for the test email message. This is what it looks like:
And that’s all! You’ve successfully added SparkPost to your WordPress site.
Next, Follow Email Deliverability Best Practices
Do you want a better understanding of what is email deliverability and you can improve it? See our guide on email deliverability to learn more about how you can maintain a good deliverability rate.
You might also want to check out this article on why wp_mail is not working if you’ve been getting email errors on your WordPress site.
Ready to fix your emails? Get started today with the best WordPress SMTP plugin. WP Mail SMTP Elite includes full White Glove Setup and offers a 14-day money-back guarantee.
If this article helped you out, please follow us on Facebook and Twitter for more WordPress tips and tutorials.

