AI Summary
Are you looking for a simple and straightforward way to create a Divi contact form for your WordPress website?
You’ll be pleased to hear that you can easily create a contact form through a WPForms integration and the Divi Contact Form Module.
In this guide, we’ll walk you through the steps for both methods so that you can choose the option that suits you the best.
How to Make a Divi Contact Form
You can create a Divi contact form with WPForms or the Divi Contact Form Module. Follow the steps below for both methods:
Create a Contact Form with Divi Builder
With the Divi Contact Form Module, you can easily create input fields like email, text, checkboxes, radio buttons, and dropdowns.
Step 1: Install the Divi Theme on WordPress
The first thing you need to do is sign up for a Divi account. Since Divi is a premium theme, you’ll have to buy a subscription, which costs $89 annually.

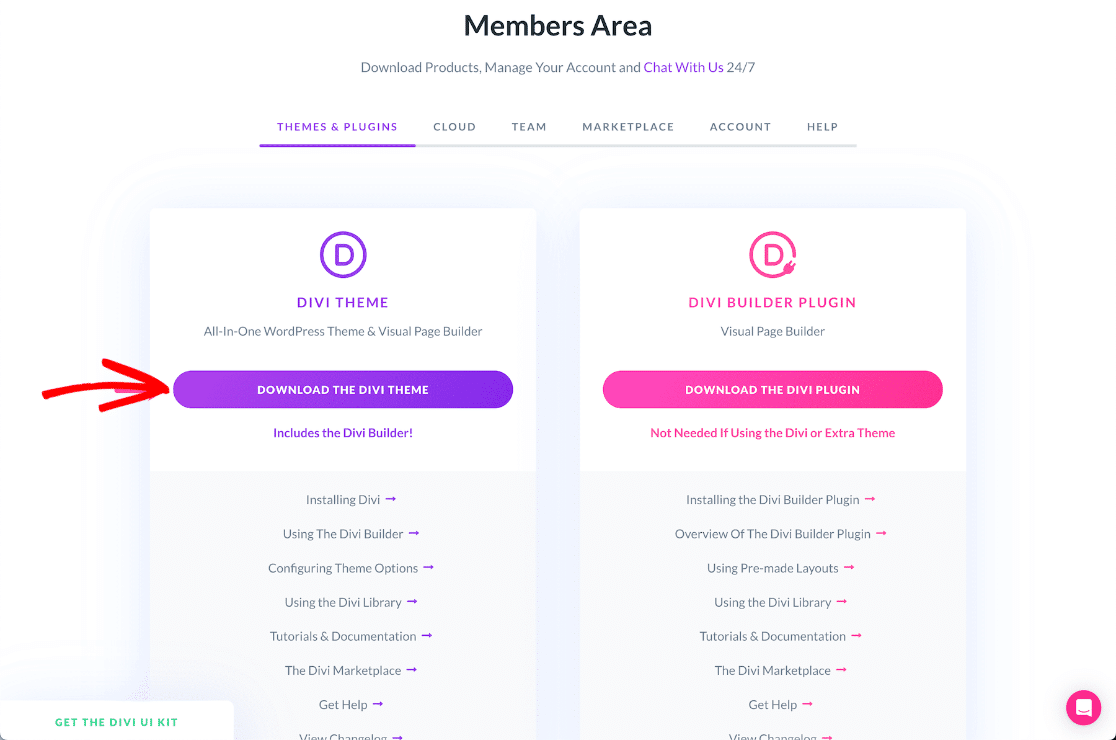
After that, navigate to the Members Area from your Elegant Themes Account and click the Download The Divi Theme button.
Once you have the Divi Theme zip file, go to your WordPress dashboard. From there, navigate to Appearance » Themes and click the Add New button.
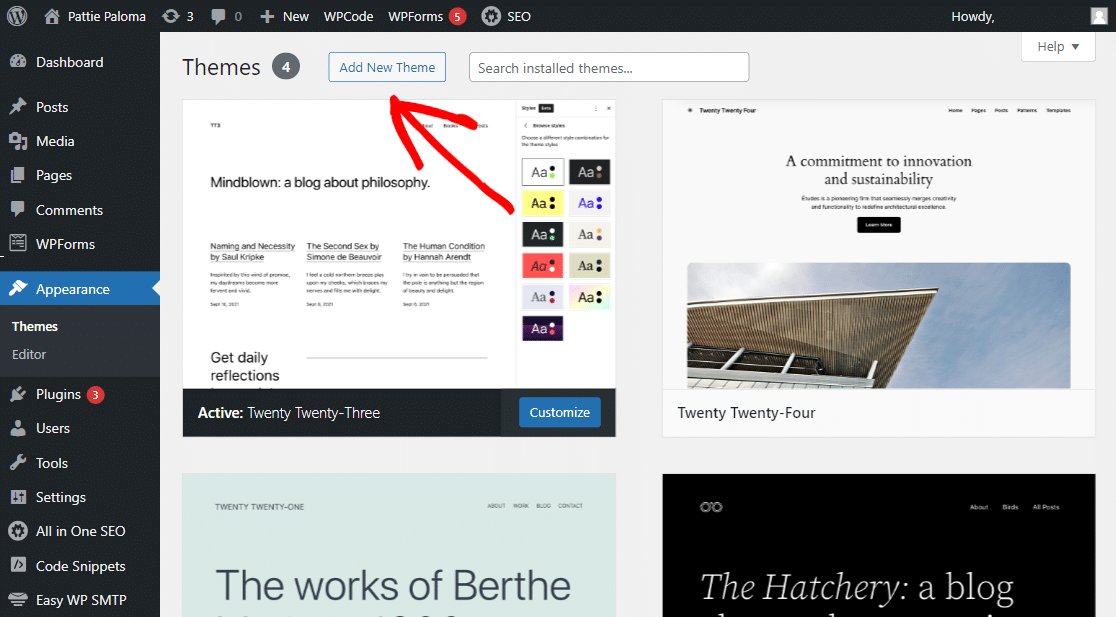
All you need to do now is click on the Add New Theme button, upload your Divi.zip file, and then click on the Install Theme button.
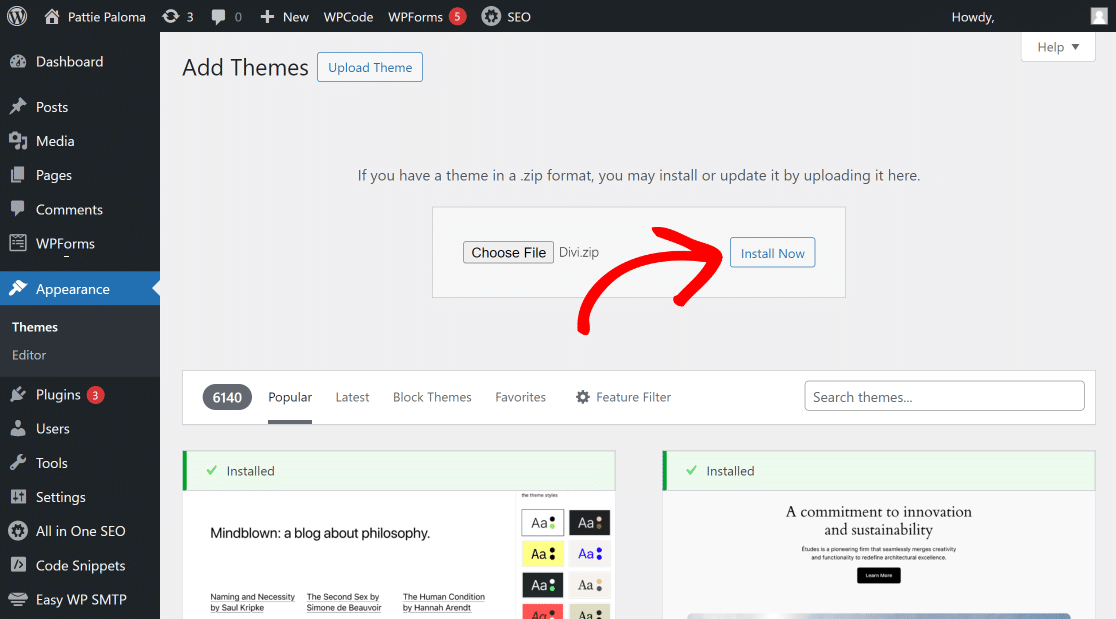
Once the Divi Theme is installed on your website, click the Activate button, and you should be good to use the Divi Builder.
Step 2: Add a Page and Load the Divi Builder
Create a new page or post, and wait for the WordPress Post Editor to open up. To load the Divi Builder, click the purple Use Divi Builder button.
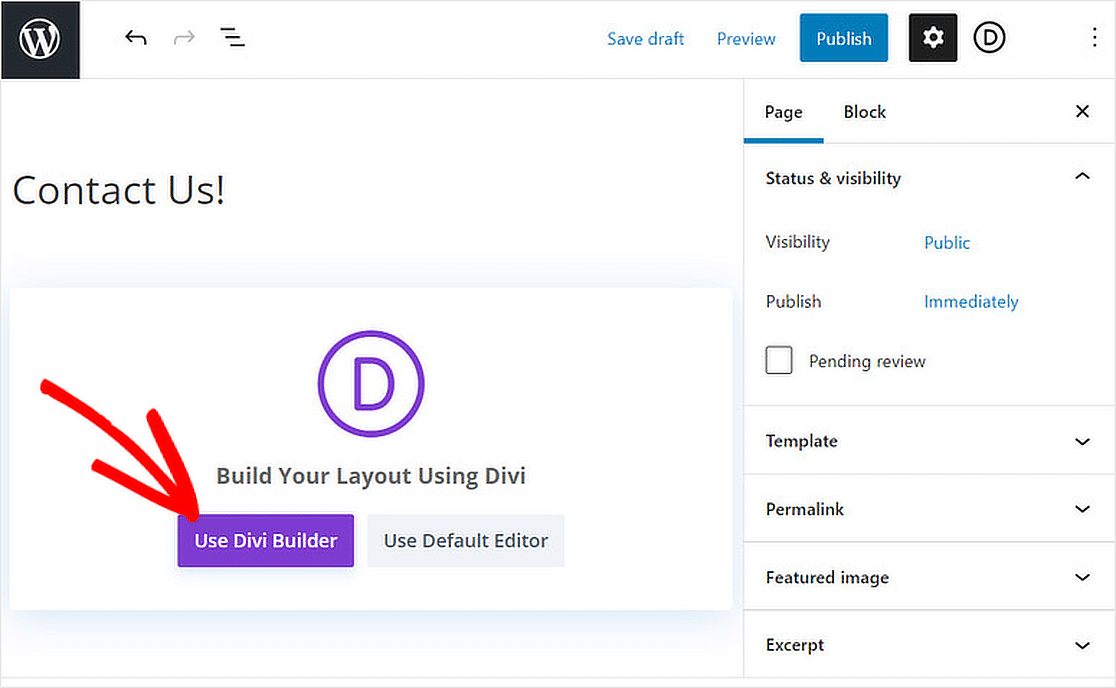
This will reload the page with the Divi builder and display three options: build a page from scratch, choose a premade layout, or clone an existing page.
Since we’re walking you through the steps of creating a contact page in Divi from scratch, click on the Start Building button.
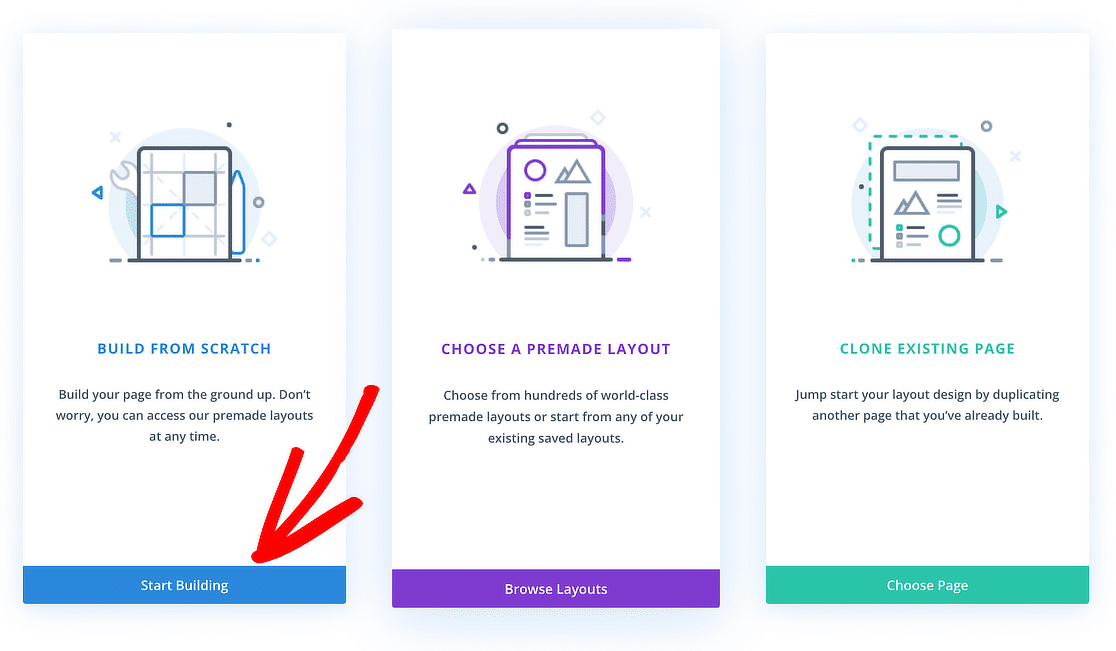
Awesome! Now, all you need to do to create your contact form is load the Divi Contact Form Module. Let’s get to it.
Step 3: Add the Divi Contact Form Module
In the Divi Builder, click on the + (Plus) button, and from the list of options, choose a New Row template that matches your needs.
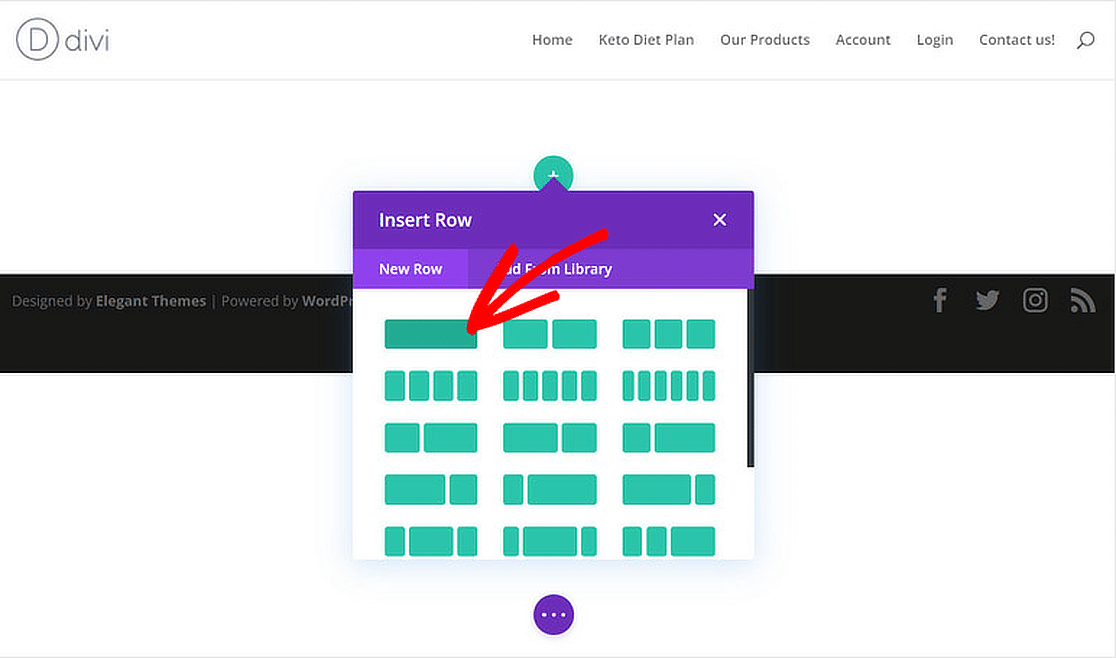
Once you add a row, a library of modules will open up. From the New Module tab, scroll down and click on the Contact Form module.
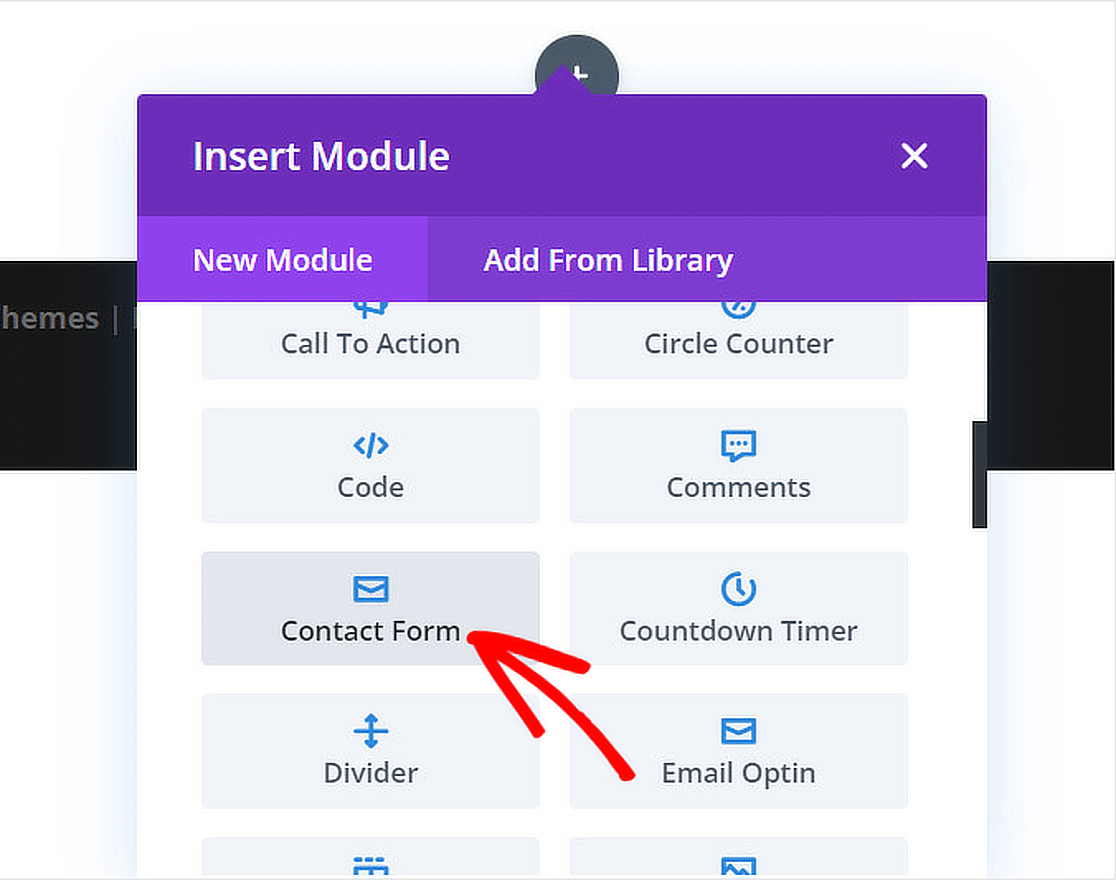
Once you add the Contact Form module, you’ll notice three form fields: Name, Email, and Message. Your contact form is now ready!
Step 4: Configure Your Divi Contact Form
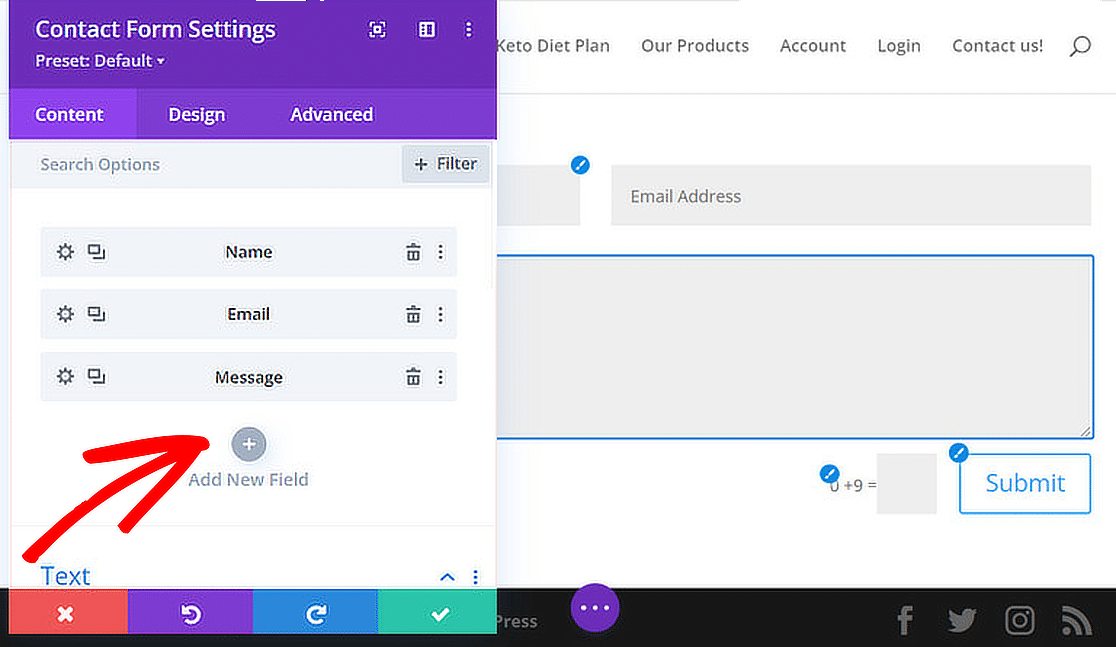
To start, click the Contact Form in the Divi Builder to open its customization options. You can click the Add New Field button to add other form fields.
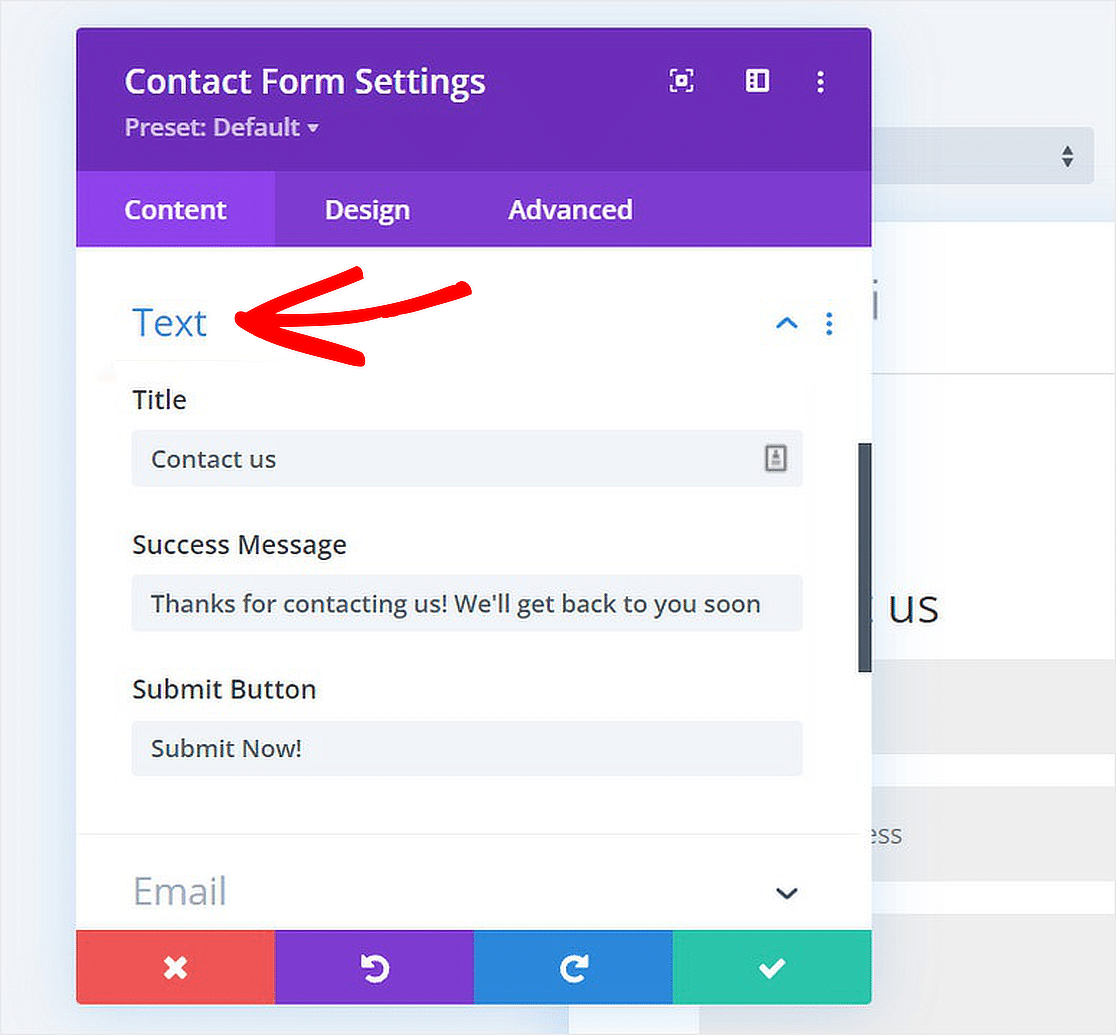
If you scroll down a bit, you’ll also find additional options under the Text menu to edit the title, the confirmation message, or change the submit button text.
You’ll also find useful tools like background settings, spam protection, redirect links, and more. Feel free to change them as required.
Create a Divi Contact Form with WPForms
WPForms is the best drag-and-drop form builder for WordPress, which you can use to create contact forms, calculation forms, order forms, and more!
Step 1: Install the WPForms Plugin
As the best form builder plugin for WordPress, WPForms successfully integrates with Divi to make the form creation process a breeze.
Even the Lite version of the plugin comes with a ton of features that can prove more useful in comparison to the Divi Contact Form Module.
However, if you upgrade to Pro, you can take advantage of additional features like advanced form fields, entry management, file uploads, and more!
Once you decide what license level suits your needs, go ahead and install the WPForms plugin. Check out this guide on installing a WordPress plugin for the steps.
Step 2: Create Your Contact Form
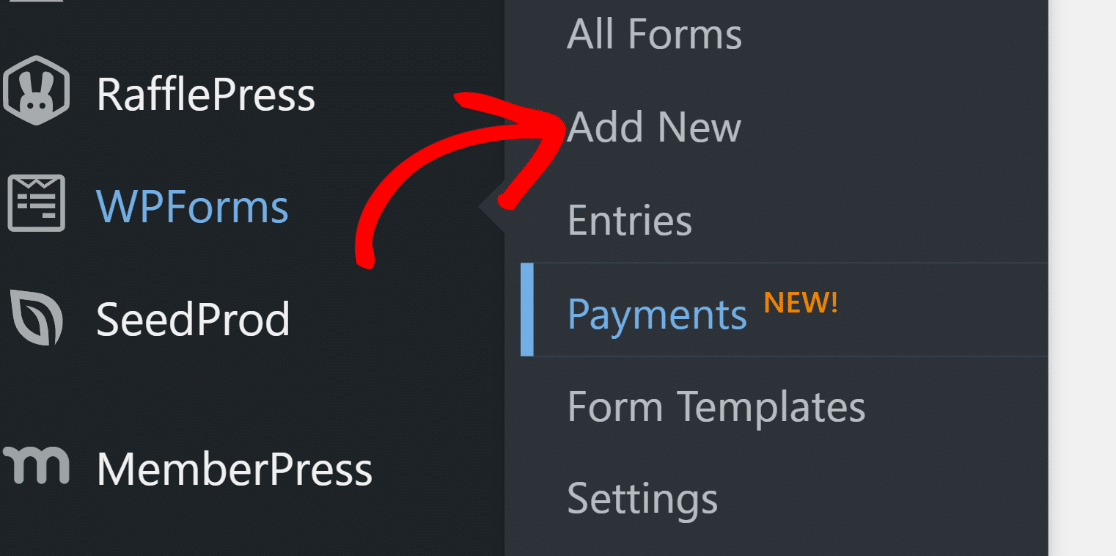
Now, to create a new form. Go to WPForms from your WordPress dashboard and click the Add New option.
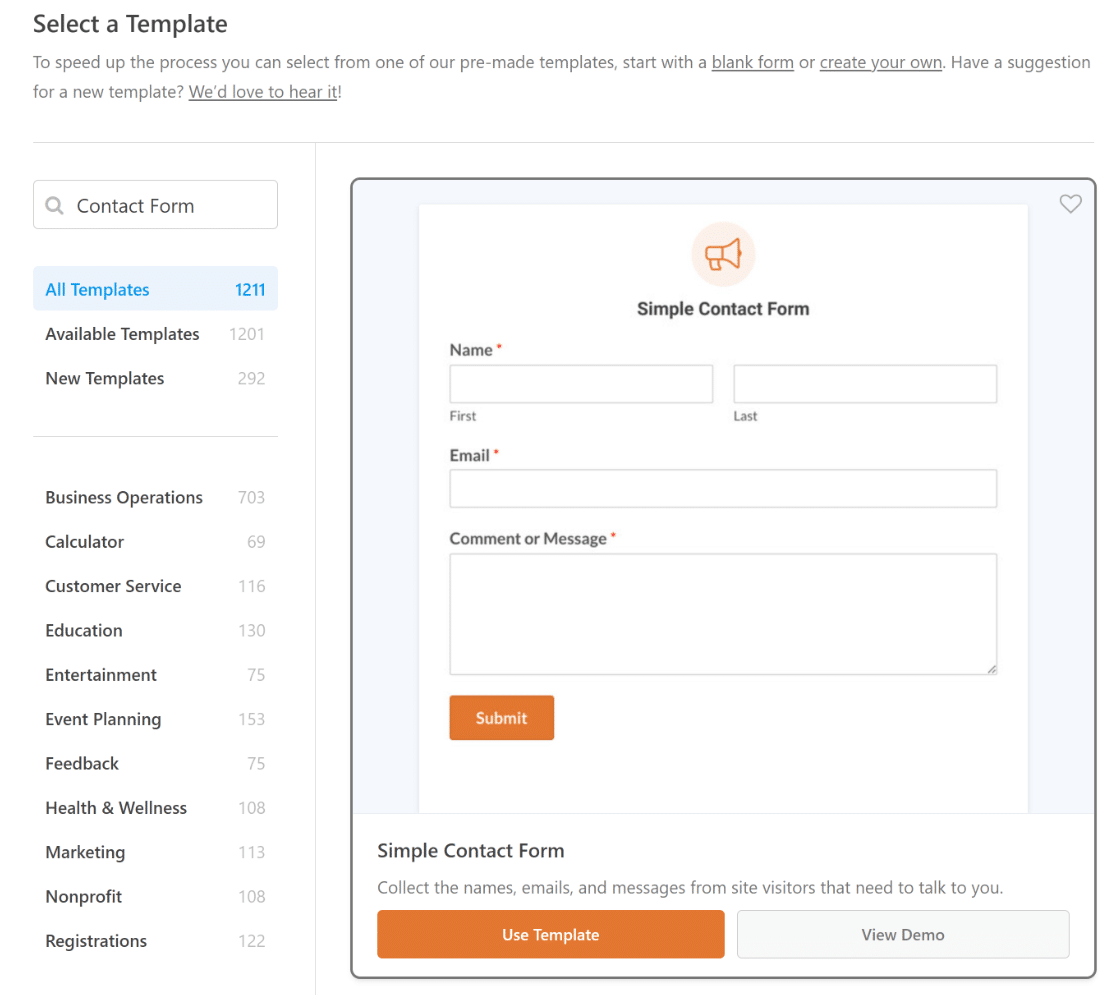
After that, give your form a name and pick a template. For this guide, we’ll choose the Simple Contact Form to speed up the form creation.
Inside the form builder, this is how your form will look. Feel free to add, change, or rearrange fields as you please.
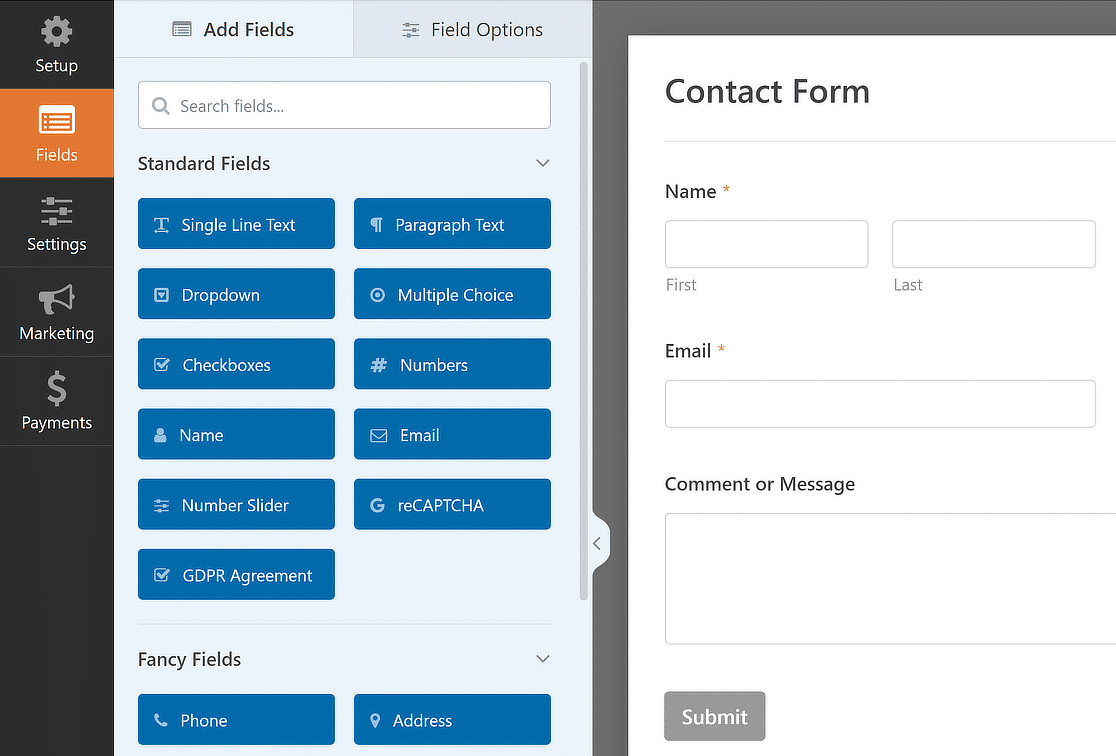
That’s about it! You’ve successfully created a contact form using WPForms. Now, let’s customize your notifications and confirmations.
Step 3: Customize Notifications & Confirmations
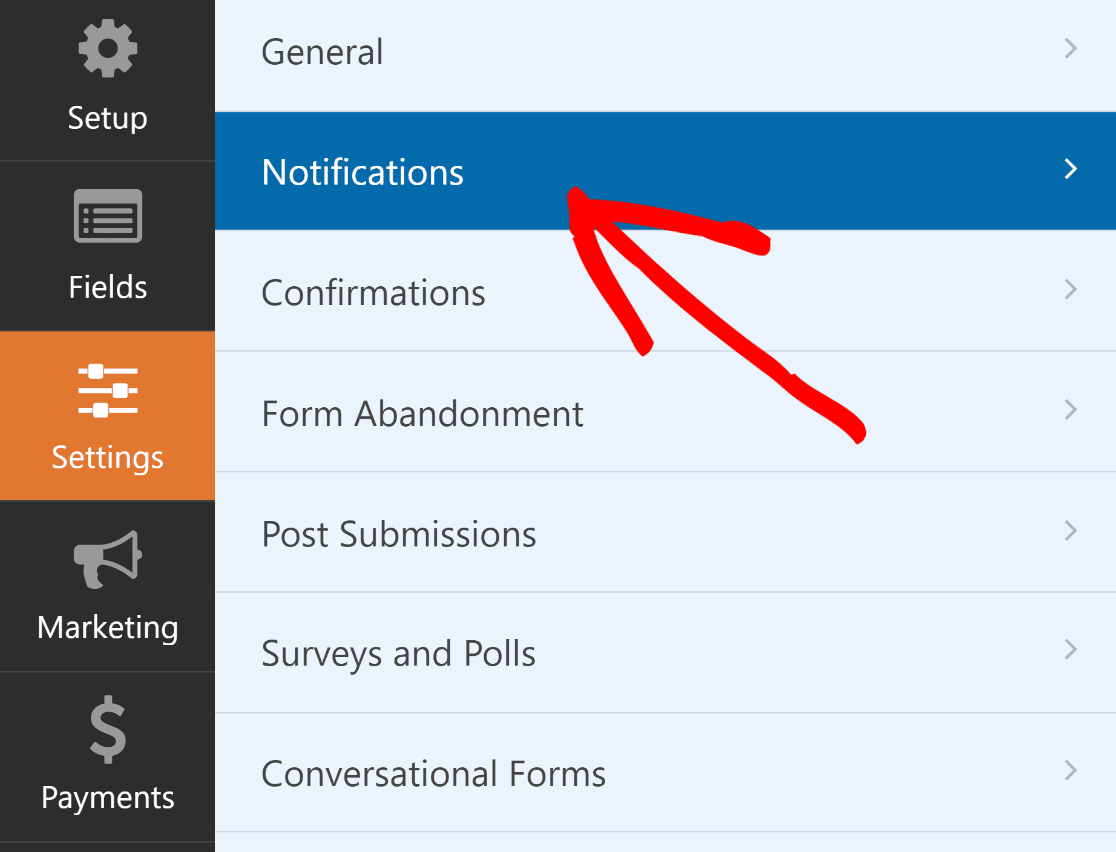
Setting up notifications ensures that you always know about new form entries. It’s in the form builder. Go to Settings and then Notifications.
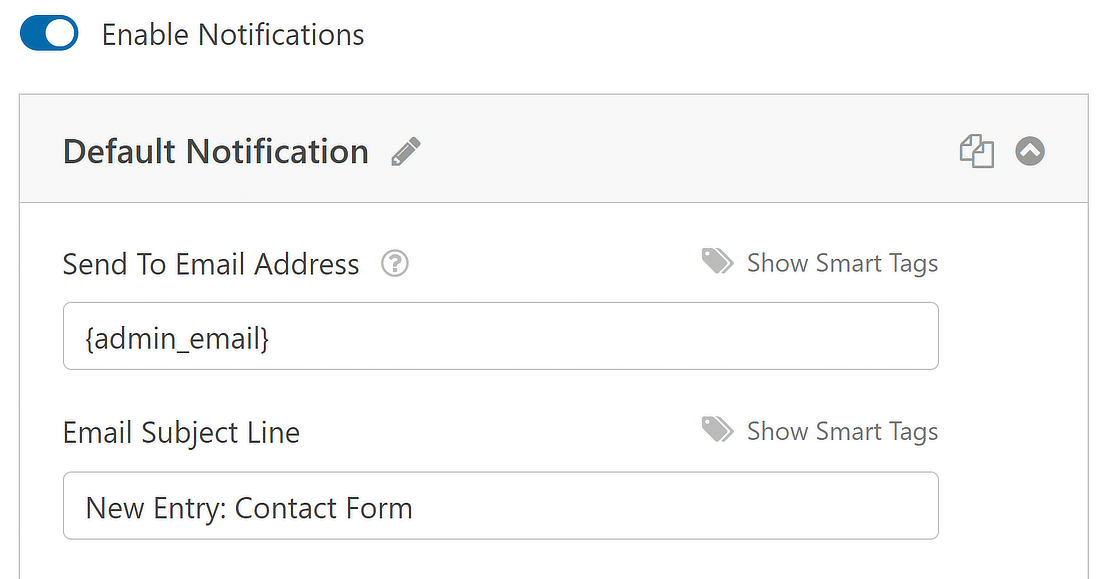
From here, you can make changes to the default notification settings, such as the subject line, or alter the emails that are sent to the recipients.
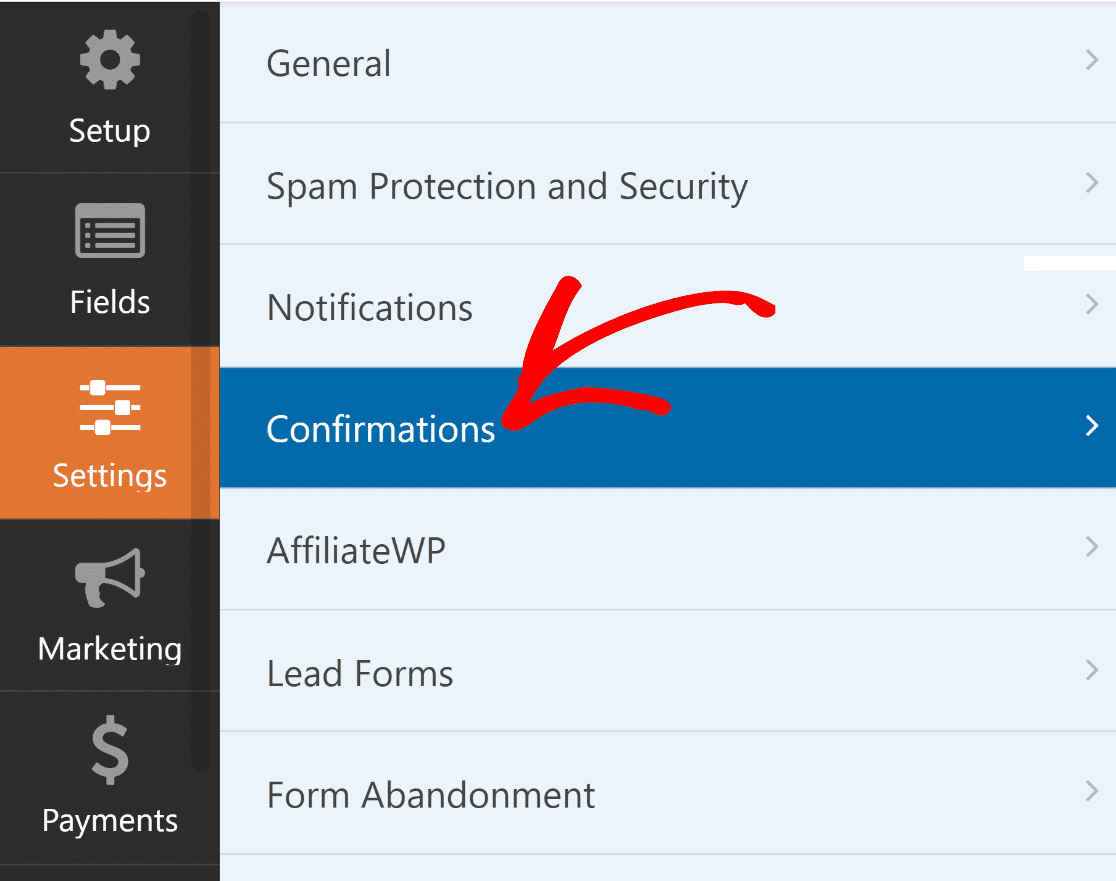
Now, in the Settings menu, choose Confirmations from the list of options to set up replies for when a form is submitted successfully.
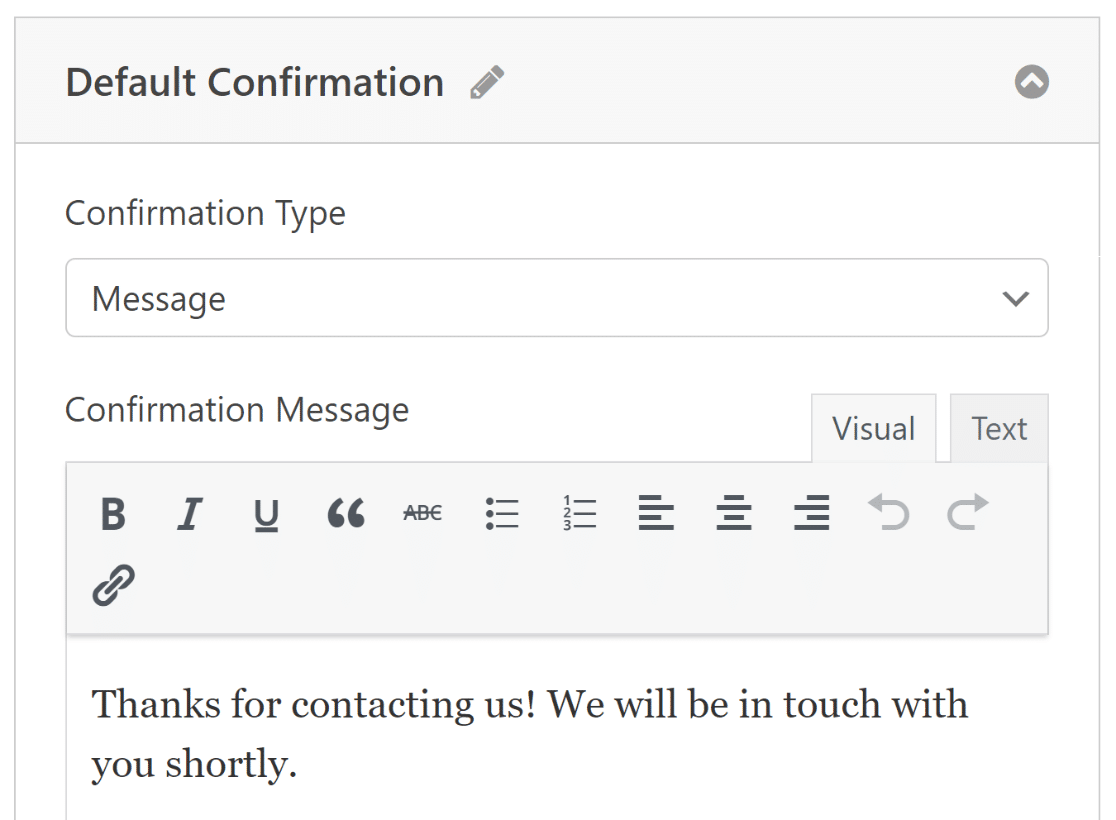
Next, choose which type of confirmation is most appropriate for your website, whether it be a message, a page display, or a redirect.
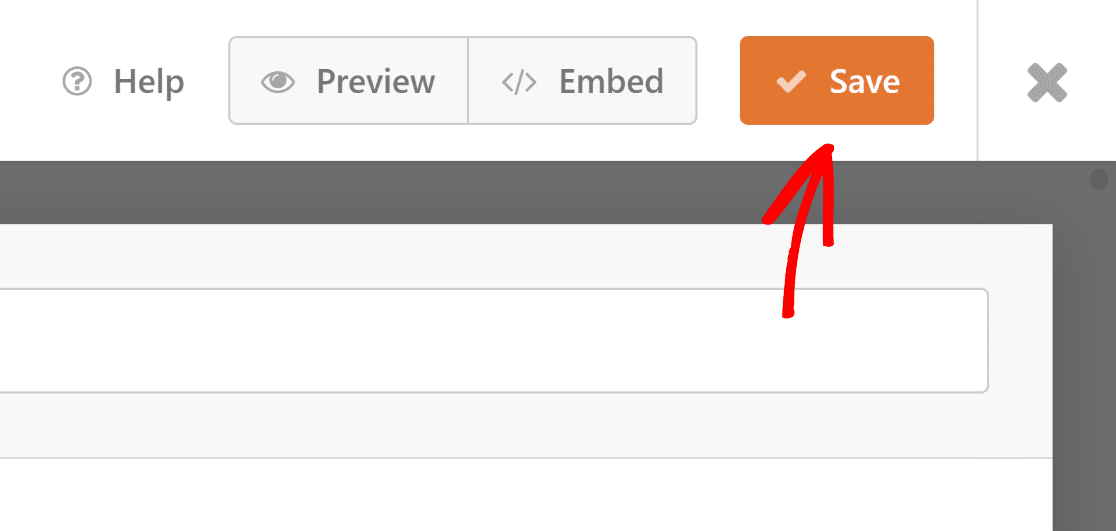
To keep your form and its settings up to date, don’t forget to save your changes. The form is now ready to be published through Divi.
Step 4: Publish Your Divi Contact Form
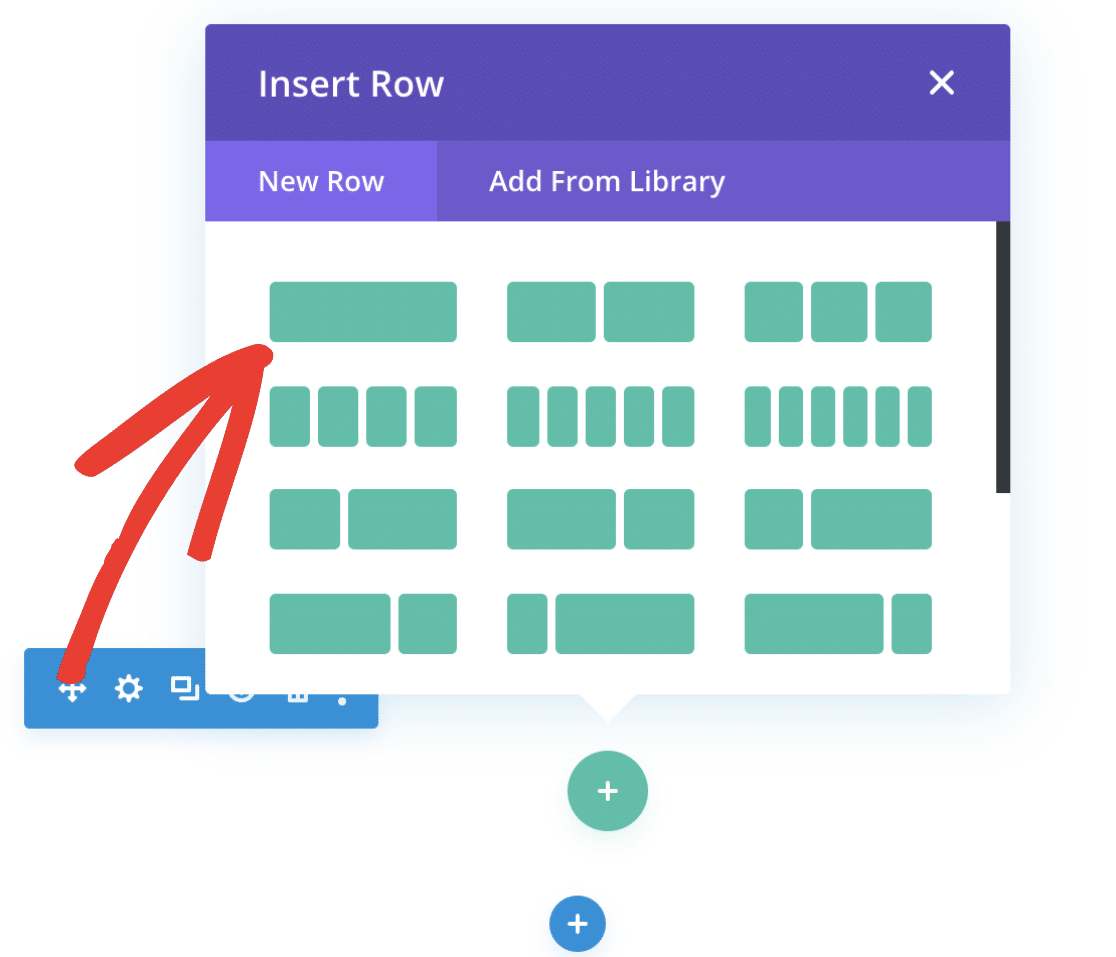
To add this contact form, go to the Divi Builder and pick a row style, as we did for the Divi contact form module.
Divi comes with an integration for WPForms, so to add the form, search for WPForms in the search box and select the module that appears.
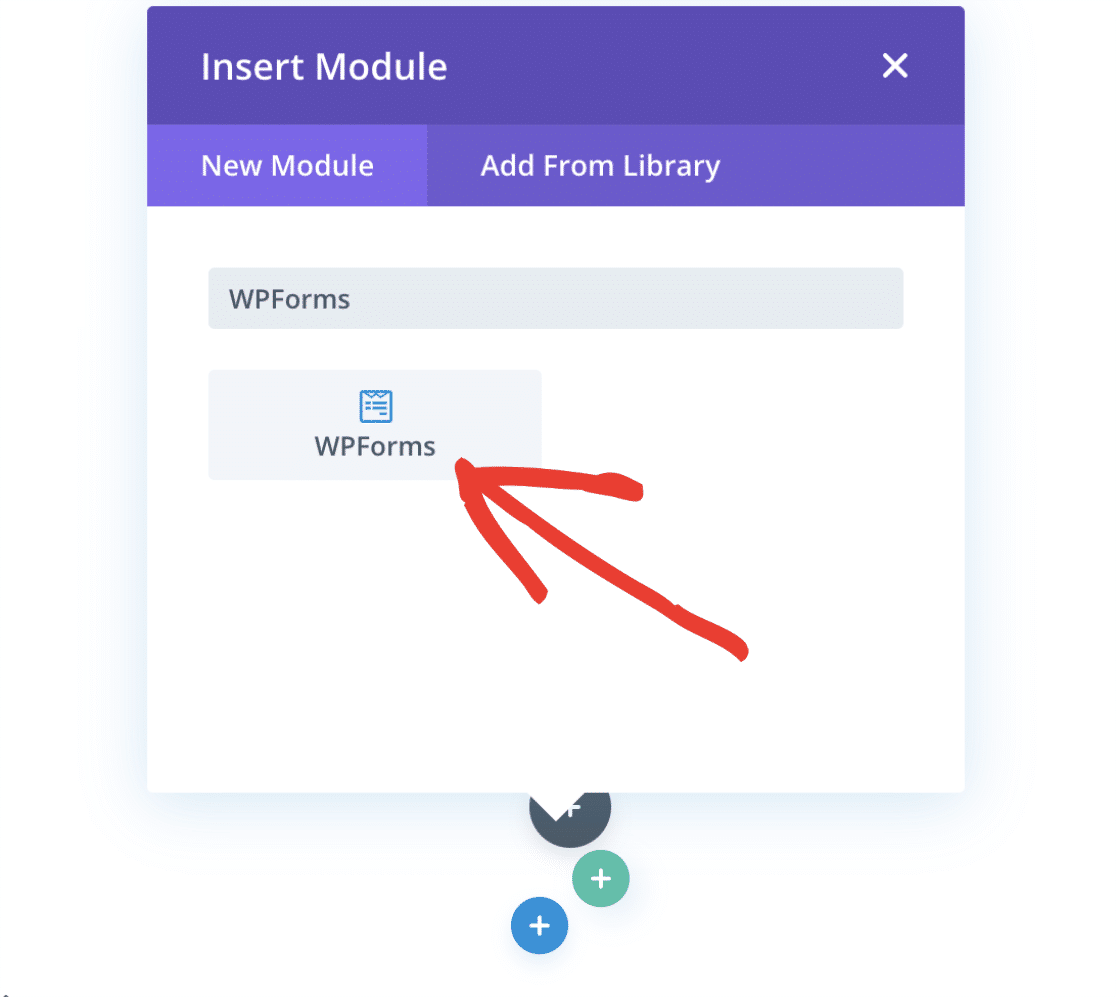
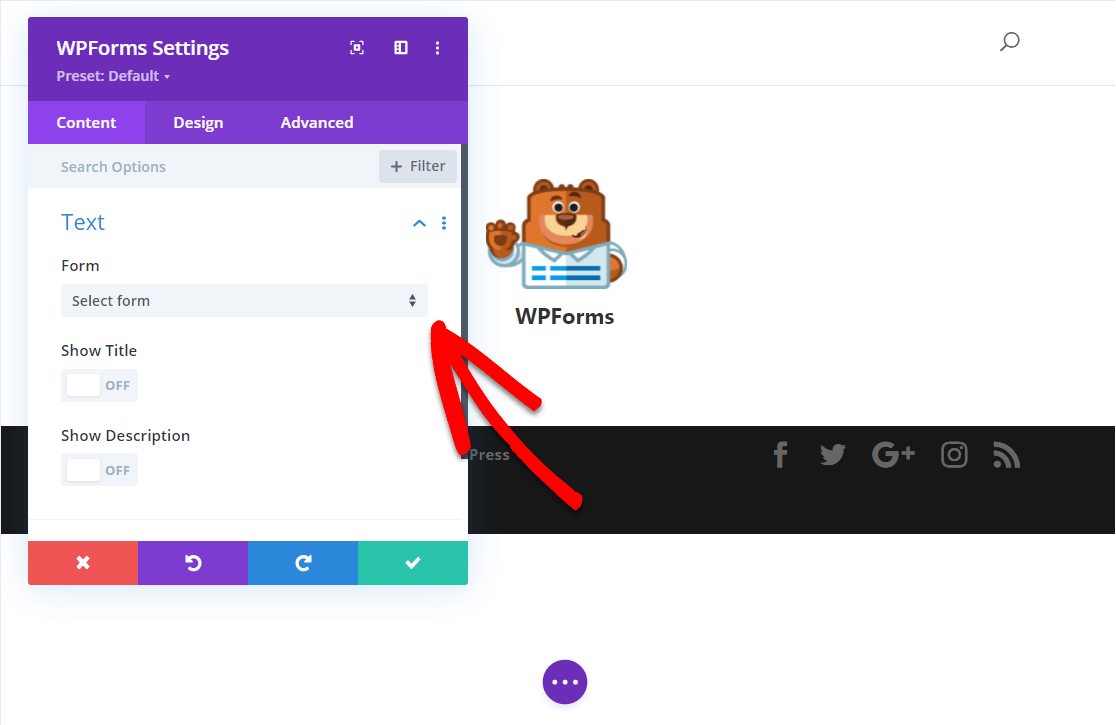
After the WPForms module has been added in Divi, additional settings will appear. For instance, here you can:
- Choose which form you want to add.
- Enable settings that show the form title.
- Enable settings that show the form description.
Once you are ready, proceed to select your form from the dropdown menu that is located under Form.
Your selected form will now automatically be added to the Divi page. Make sure to hit the green Checkmark button to save your settings.
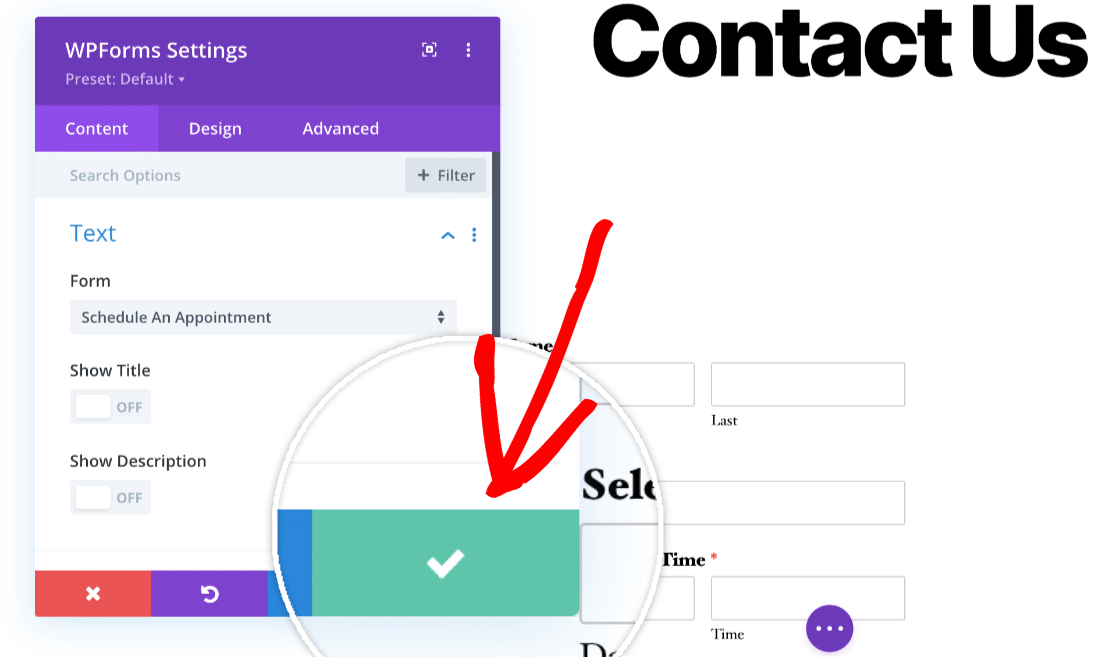
Great job! Your Divi contact form with WPForms is now ready! If you want to customize it further, check out these additional design settings.
FAQs about Creating a Divi Contact Form
Using the Divi theme and its many features, like contact forms, is a popular topic among our readers. Here are answers to some questions about it.
Does Divi have a contact form?
Yes, Divi comes with a contact form module. This tool allows you to add a contact form to your pages easily, without needing extra plugins. However, the features may be limited as compared to a dedicated form builder like WPForms.
How do I edit a Divi contact form?
To edit a Divi contact form, go to the page where the form is located in your Divi Builder. Click on the module that says “Contact Form”. Here, you can change fields, adjust styles, and customize form notification and confirmation settings directly.
Does WordPress have a built in contact form?
WordPress itself does not come with a built-in contact form feature. However, WordPress users can easily add contact forms to their websites by using plugins. Divi, when installed on WordPress, provides an integrated contact form module, eliminating the need for additional plugins.
How do I create a pop up contact form in Divi?
Creating a pop-up contact form in Divi involves using the Divi Builder and a bit of creativity. Firstly, design your contact form in a standard section. Then, use the Divi Builder’s visibility options to hide this section on the page.
Lastly, trigger the section to show as a pop-up by linking it to a button or link on your page. This method may require custom CSS or a Divi pop-up plugin for smooth operation. A simpler method, however, would be to use OptinMonster!
Next, Learn How to Create a Price Calculator in WordPress
Looking for an easy solution on how to create a price calculator for your website to start selling items online? Check out this guide for the step-by-step process of setting up a simple order form with an automated price calculator for your website.
If you are wondering how to encourage users to fill out a form requiring their email to download a file, then that’s possible too. Check out this guide on How to Require an Email Address to Download a File.
Ready to fix your emails? Get started today with the best WordPress SMTP plugin. If you don’t have the time to fix your emails, you can get full White Glove Setup assistance as an extra purchase, and there’s a 14-day money-back guarantee for all paid plans.
If this article helped you out, please follow us on Facebook and Twitter for more WordPress tips and tutorials.

