If you’re a small business owner or you operate an eCommerce store, you might be familiar with WooCommerce.
WooCommerce is a popular platform for selling on WordPress, but many find it too complex and robust for their small business. Fortunately, alternatives to WooCommerce are available and effective.
So, if you want to learn how to sell on WordPress without WooCommerce, keep reading. I’ll show you how to do it with one, streamlined plugin that you might already use for your site.
How to Sell on WordPress Without WooCommerce
In This Article
1. Install WPForms
If you don’t already have the WPForms plugin installed on your WordPress website, then get it!
WPForms is the most popular form-building plugin available for WordPress, and you may already utilize it for your website’s contact forms, newsletter signups, and more. And if you’re not using WPForms to create your forms, you should.
Then, you can easily transform these forms into powerful eCommerce tools by adding just a few extra fields.
When you install WPForms, you’ll want to get the Pro license. This way, you have access to all the advanced features for creating the order forms you need.
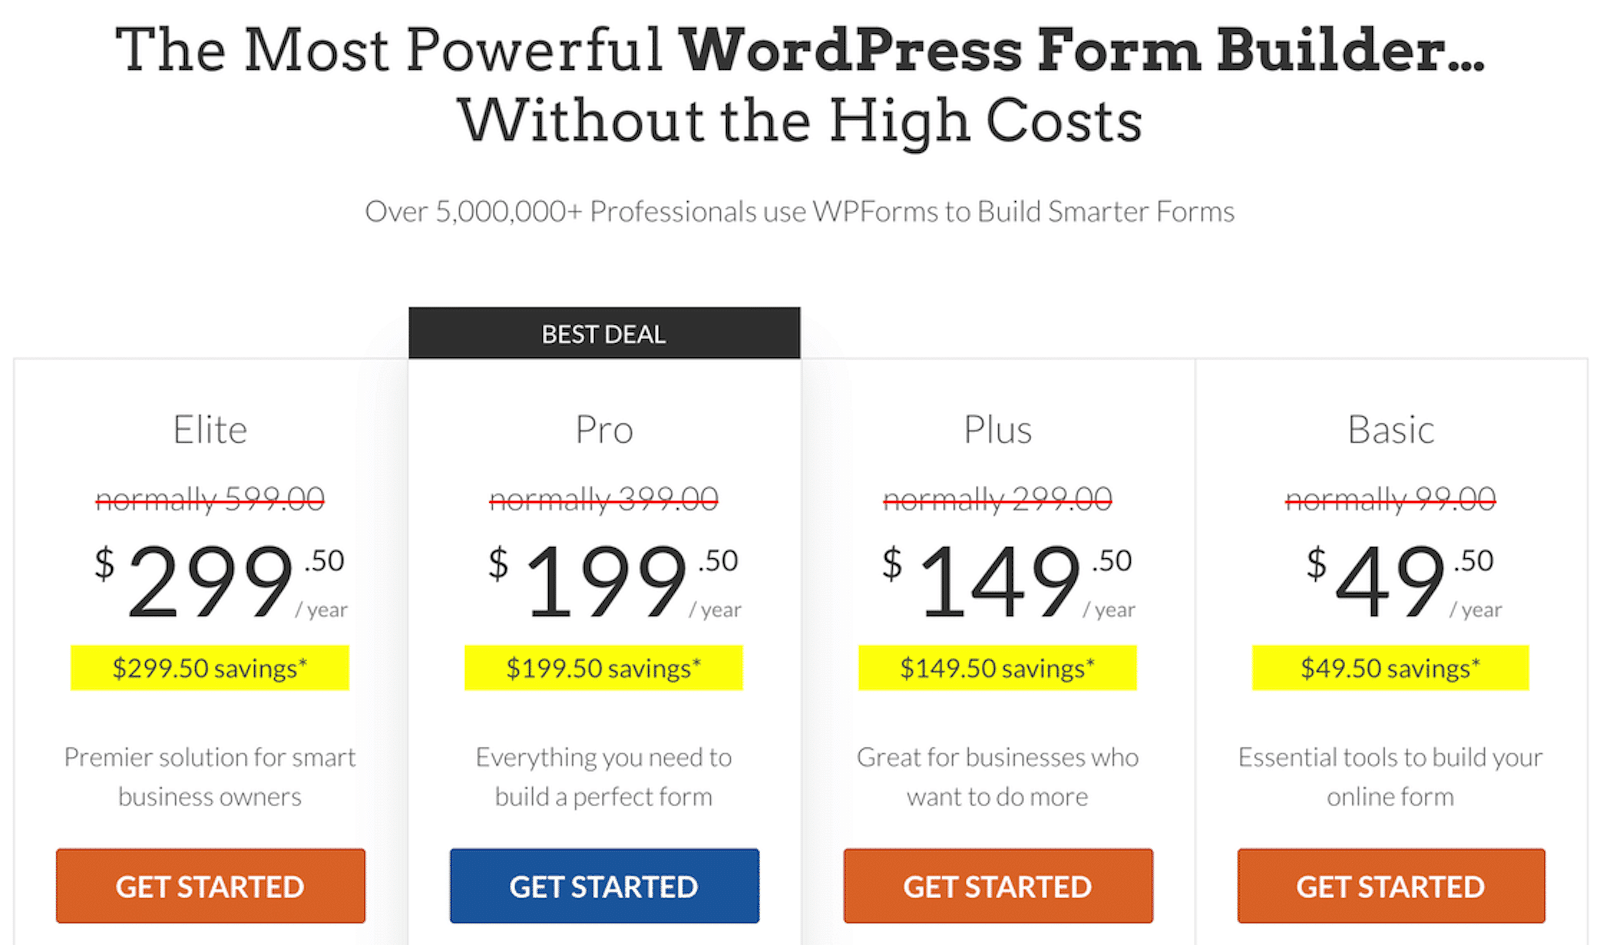
Plus, you’ll need WPForms Pro so you can utilize the various payment gateways offered and start processing transactions straight from the form. I’ll explain more in the next step.
2. Choose Your Payment Addon
Now that you’re all set with WPForms Pro, you need to install and activate your chosen payment addons.
These addons enable integration with leading payment gateways such as Stripe, PayPal Commerce, and Square, providing your forms with extensive options for secure and seamless transactions.
You can activate one payment addon to use on your forms, or you can enable multiple addons so your customers can choose their preferred method at checkout.
To install the addons, head to your WordPress admin area and click on WPForms » Addons.
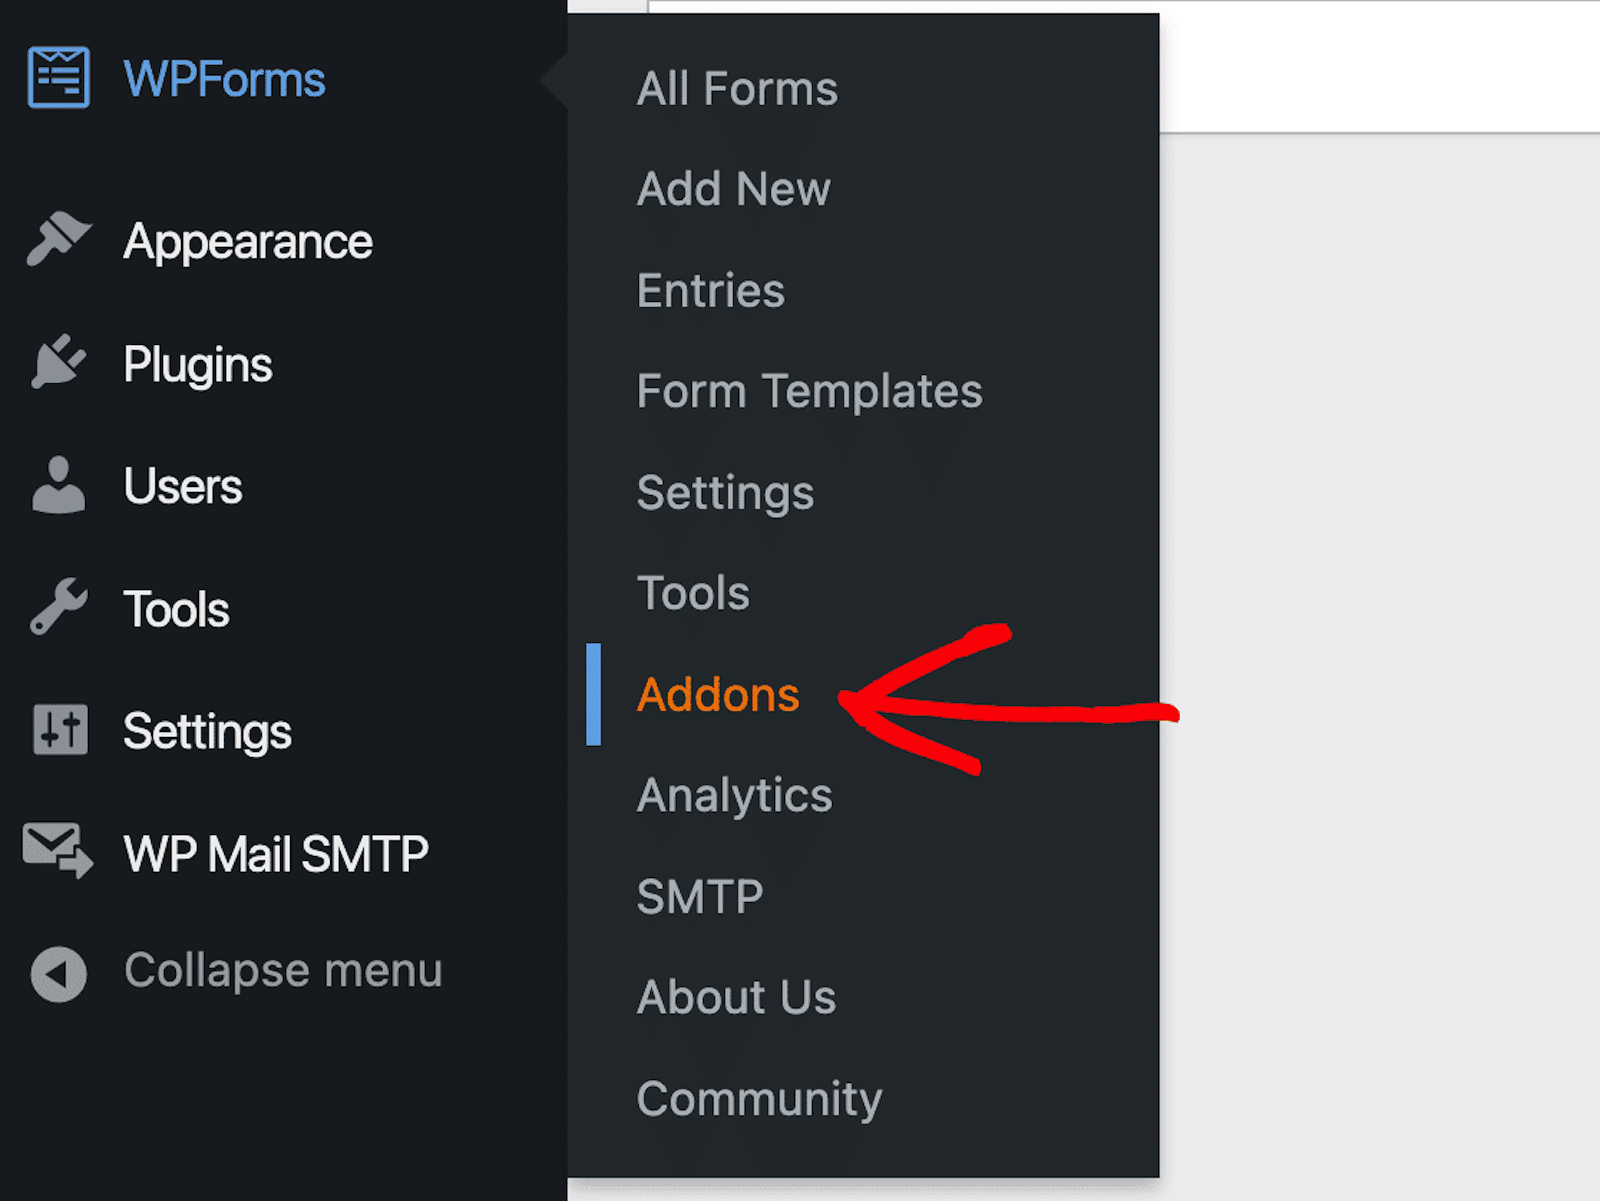
Now, on the WPForms Addon page, you can locate your desired addons. Simply browse through the available options or try out the search function for specific results.
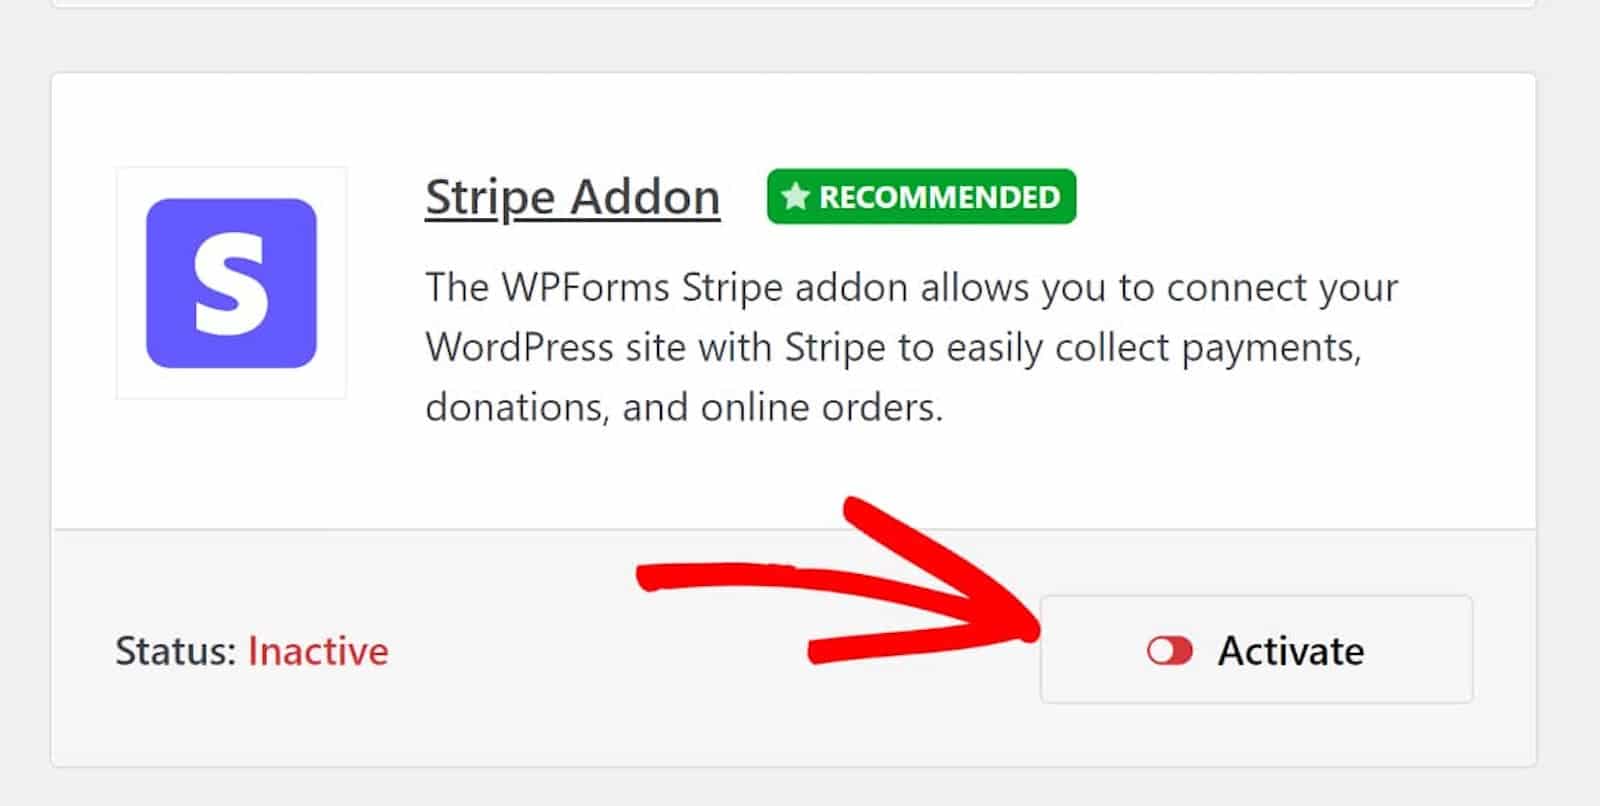
Then, to activate the addon you want, just click on the “Install Addon” button followed by “Activate.”
Now, go back to the WPForms tab located in the WordPress admin sidebar and navigate to WPForms » Settings » Payments.
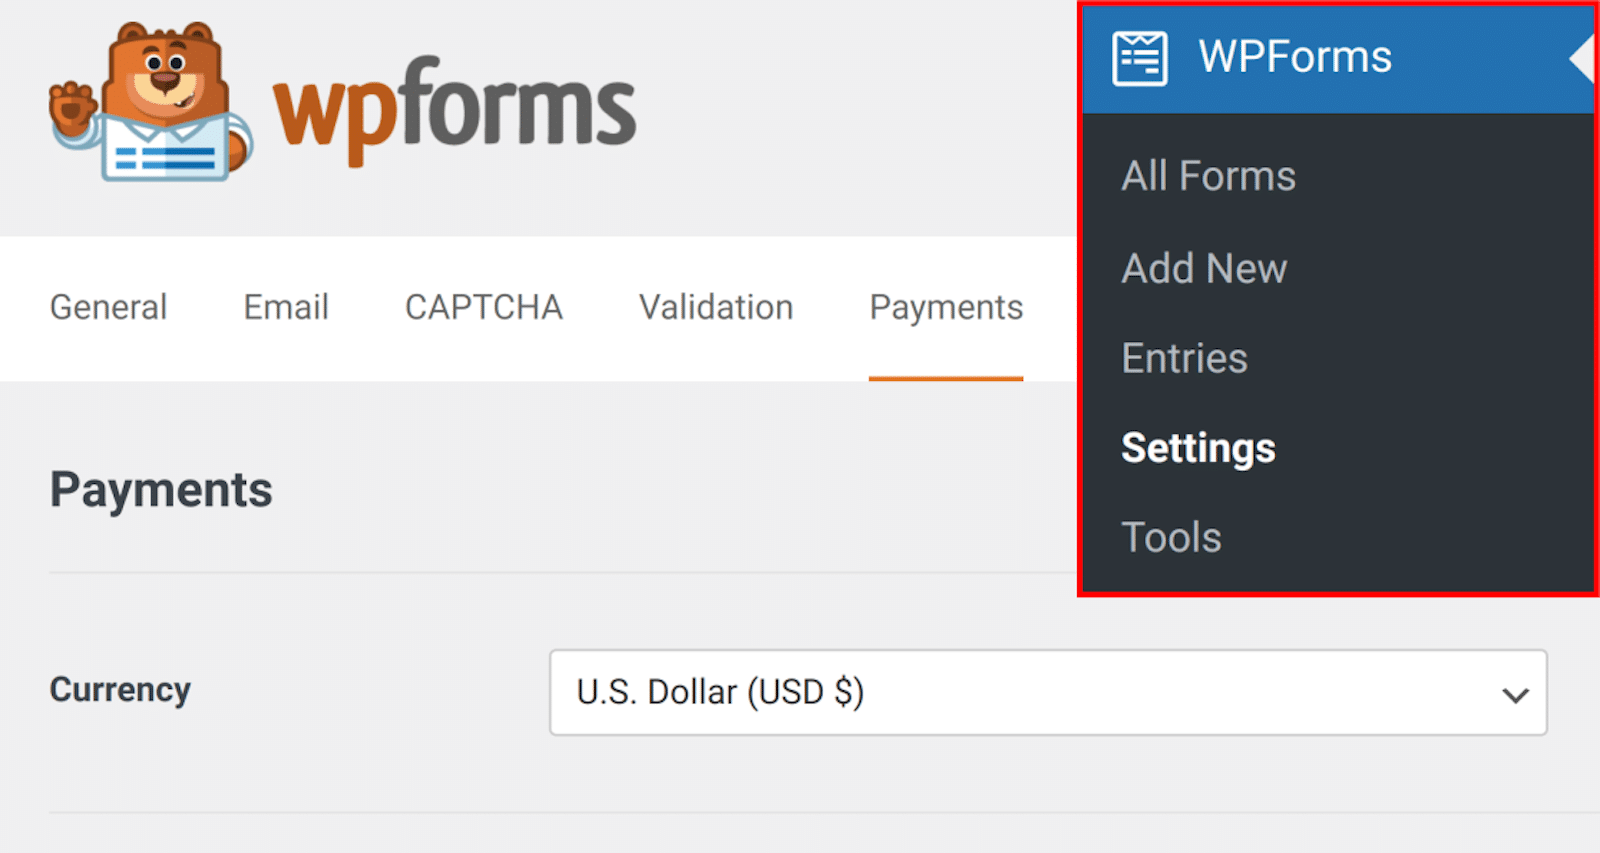
Following this step will enable you to finalize the setup and configuration for your preferred payment gateway. Then, you’ll be guided through the process of authorizing the integration between your website and the payment platform.
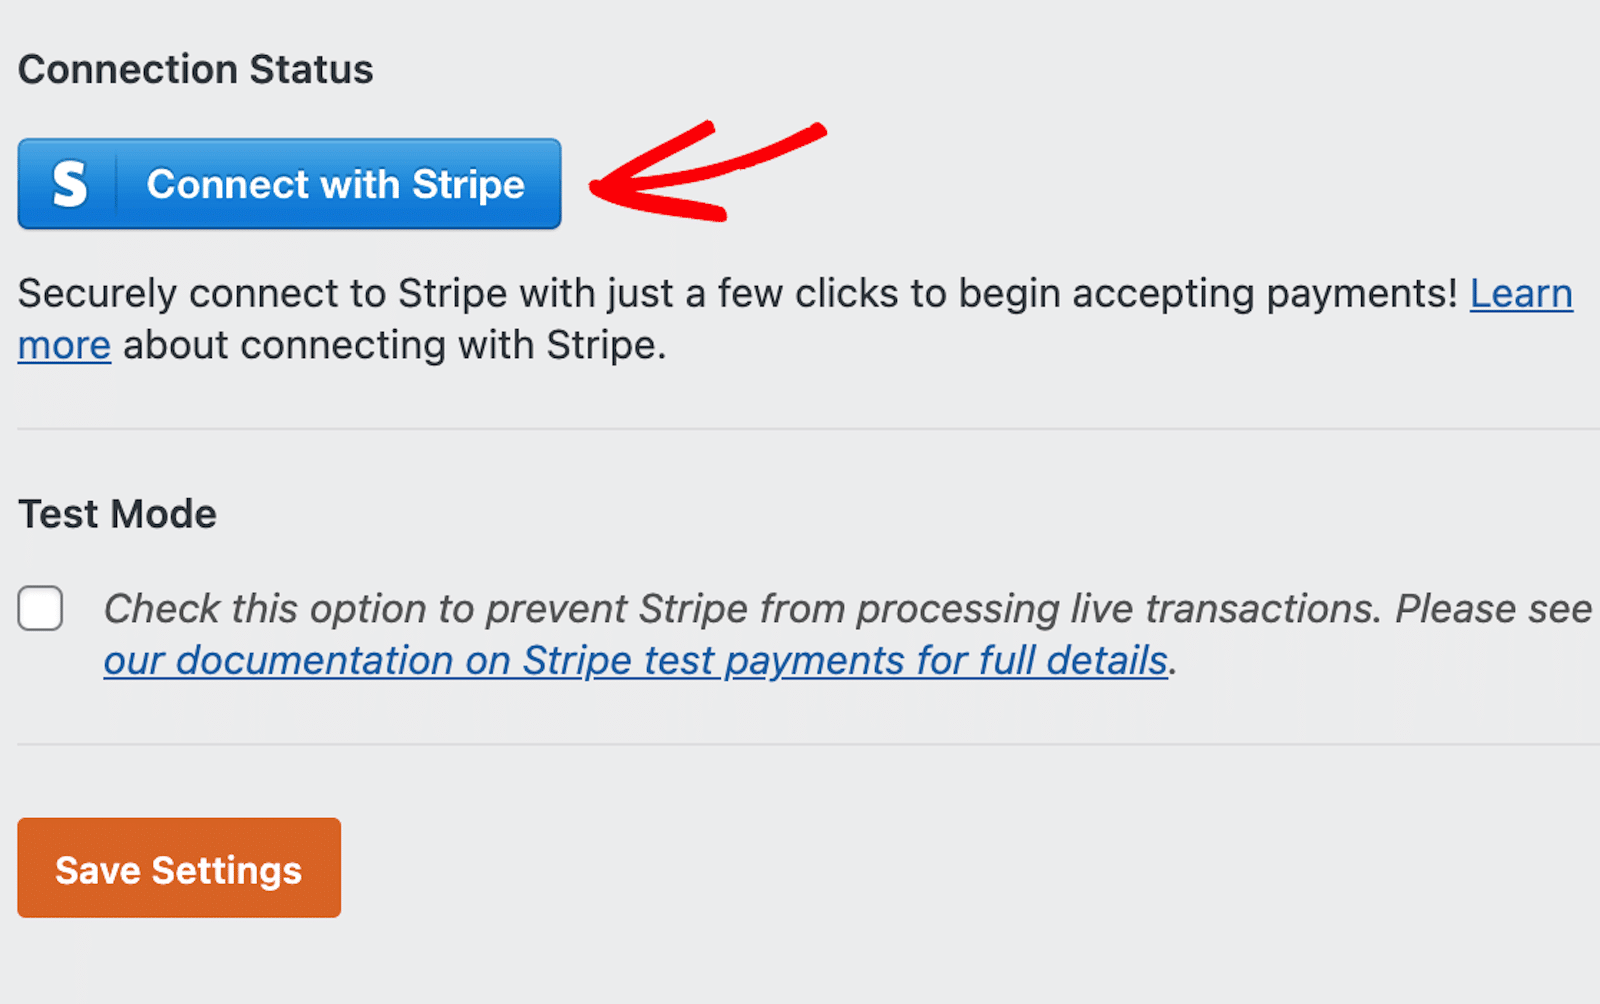
Don’t forget to save your settings when you’re finished!
3. Create an Order Form
Now that your payment addon is configured, you can move on to designing your eCommerce order form using WPForms. And, as I mentioned earlier, you might already be using a form on your website that could be easily edited into an order form.
Or, you could explore the WPForms template gallery where you’ll find thousands of form templates of all shapes and sizes to get you started. These templates already have the fields and elements that you need included.
To browse the template gallery, head back to the WPForms tab on the WordPress admin area sidebar and click on WPForms » Add New.
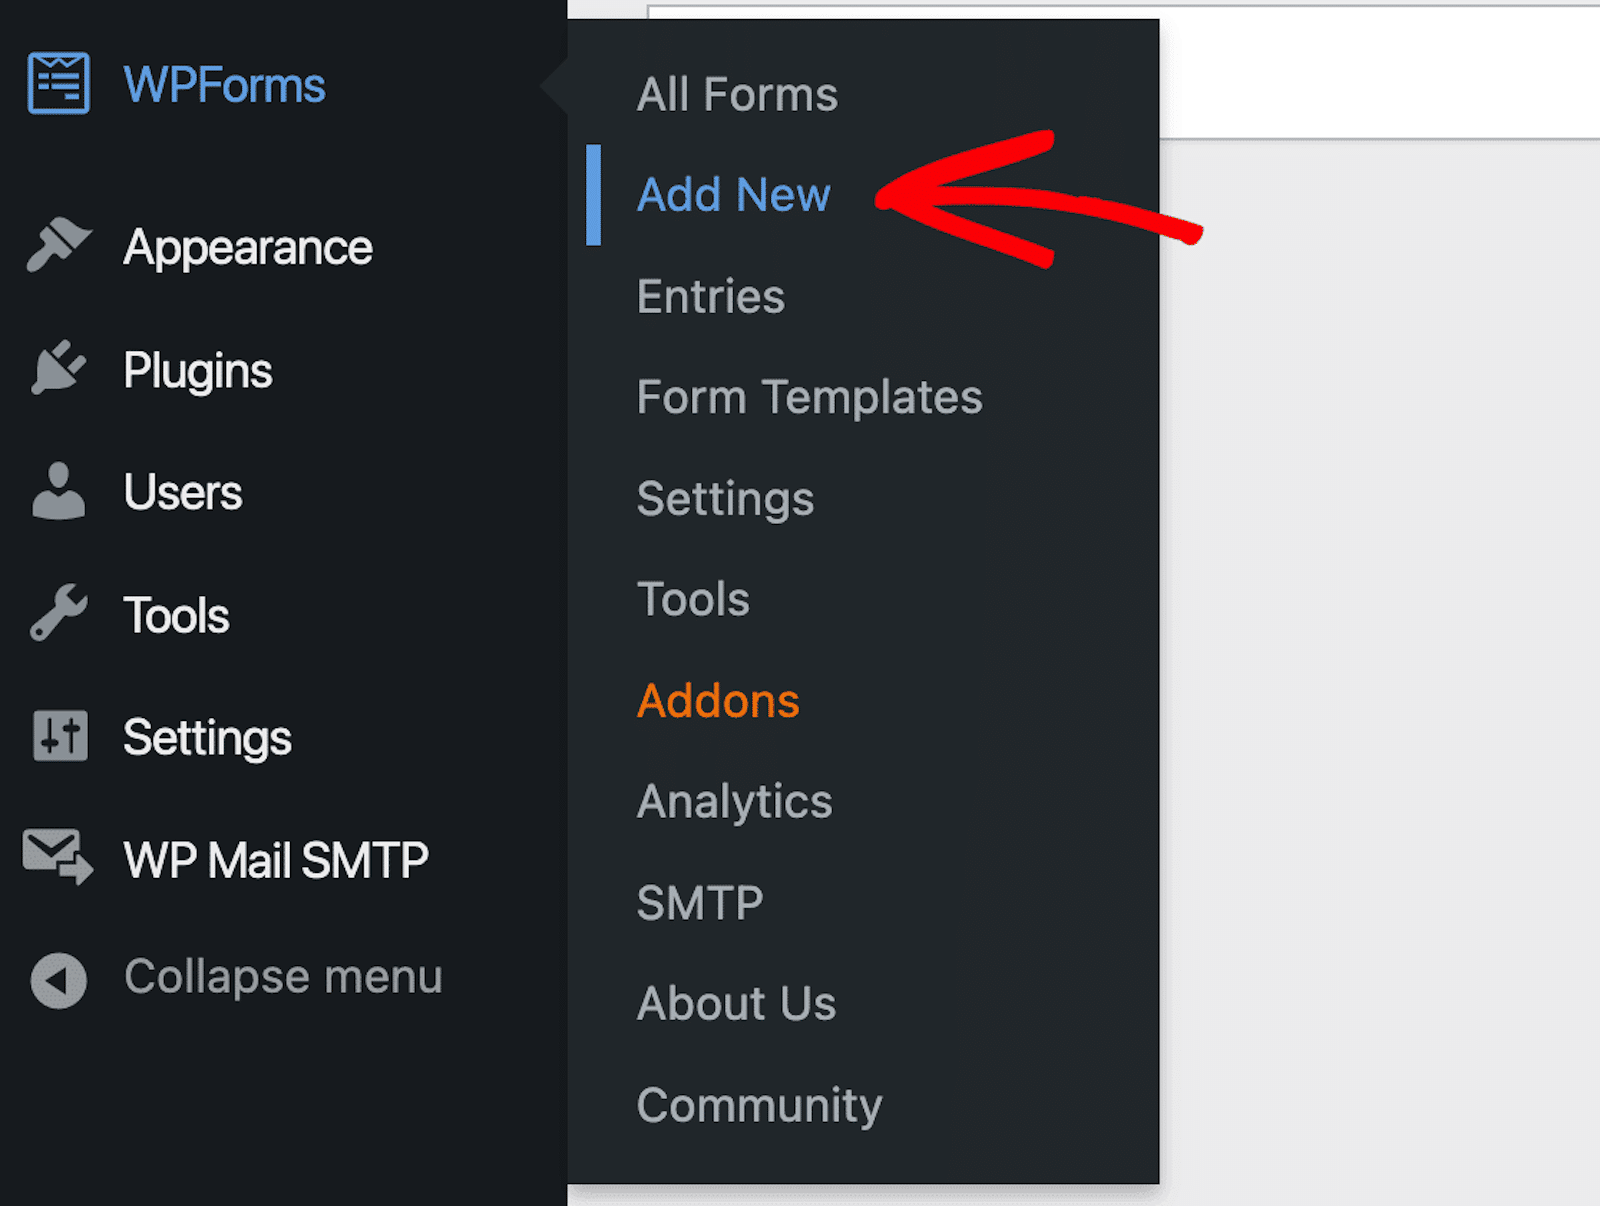
For this tutorial today, I’m customizing the WPForms Billing / Order Form Template. But feel free to choose any template you want!
When you’ve settled on your desired template, click “Use Template” to start customizing your form.
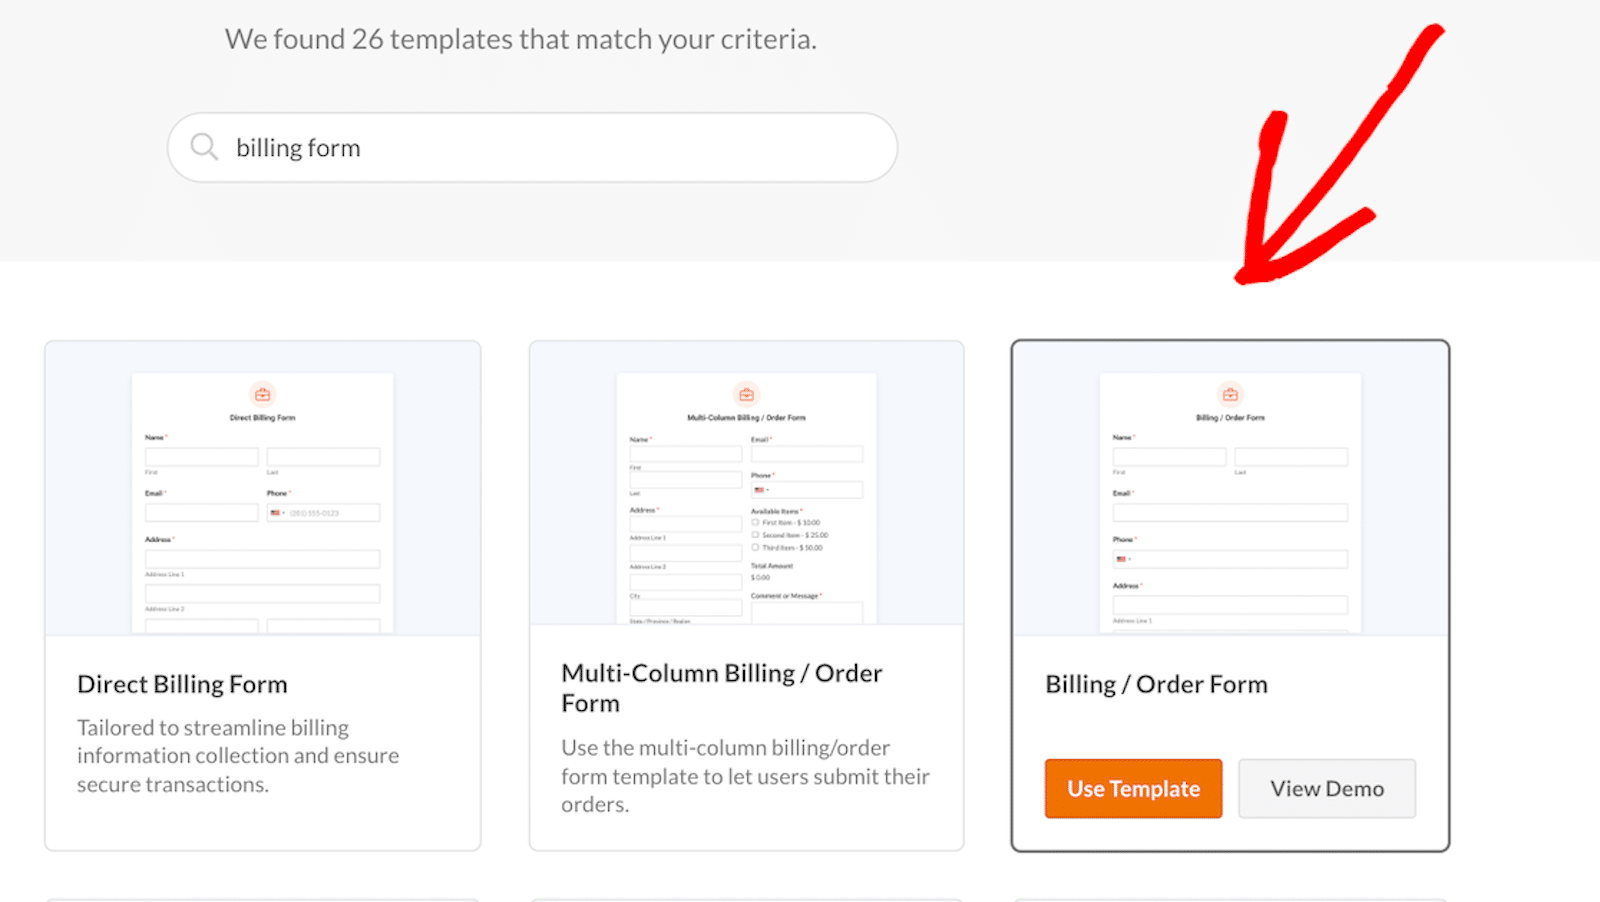
Clicking on the template will take you to the form-building screen, where you’ll probably need to edit some of the fields and features included in the form.
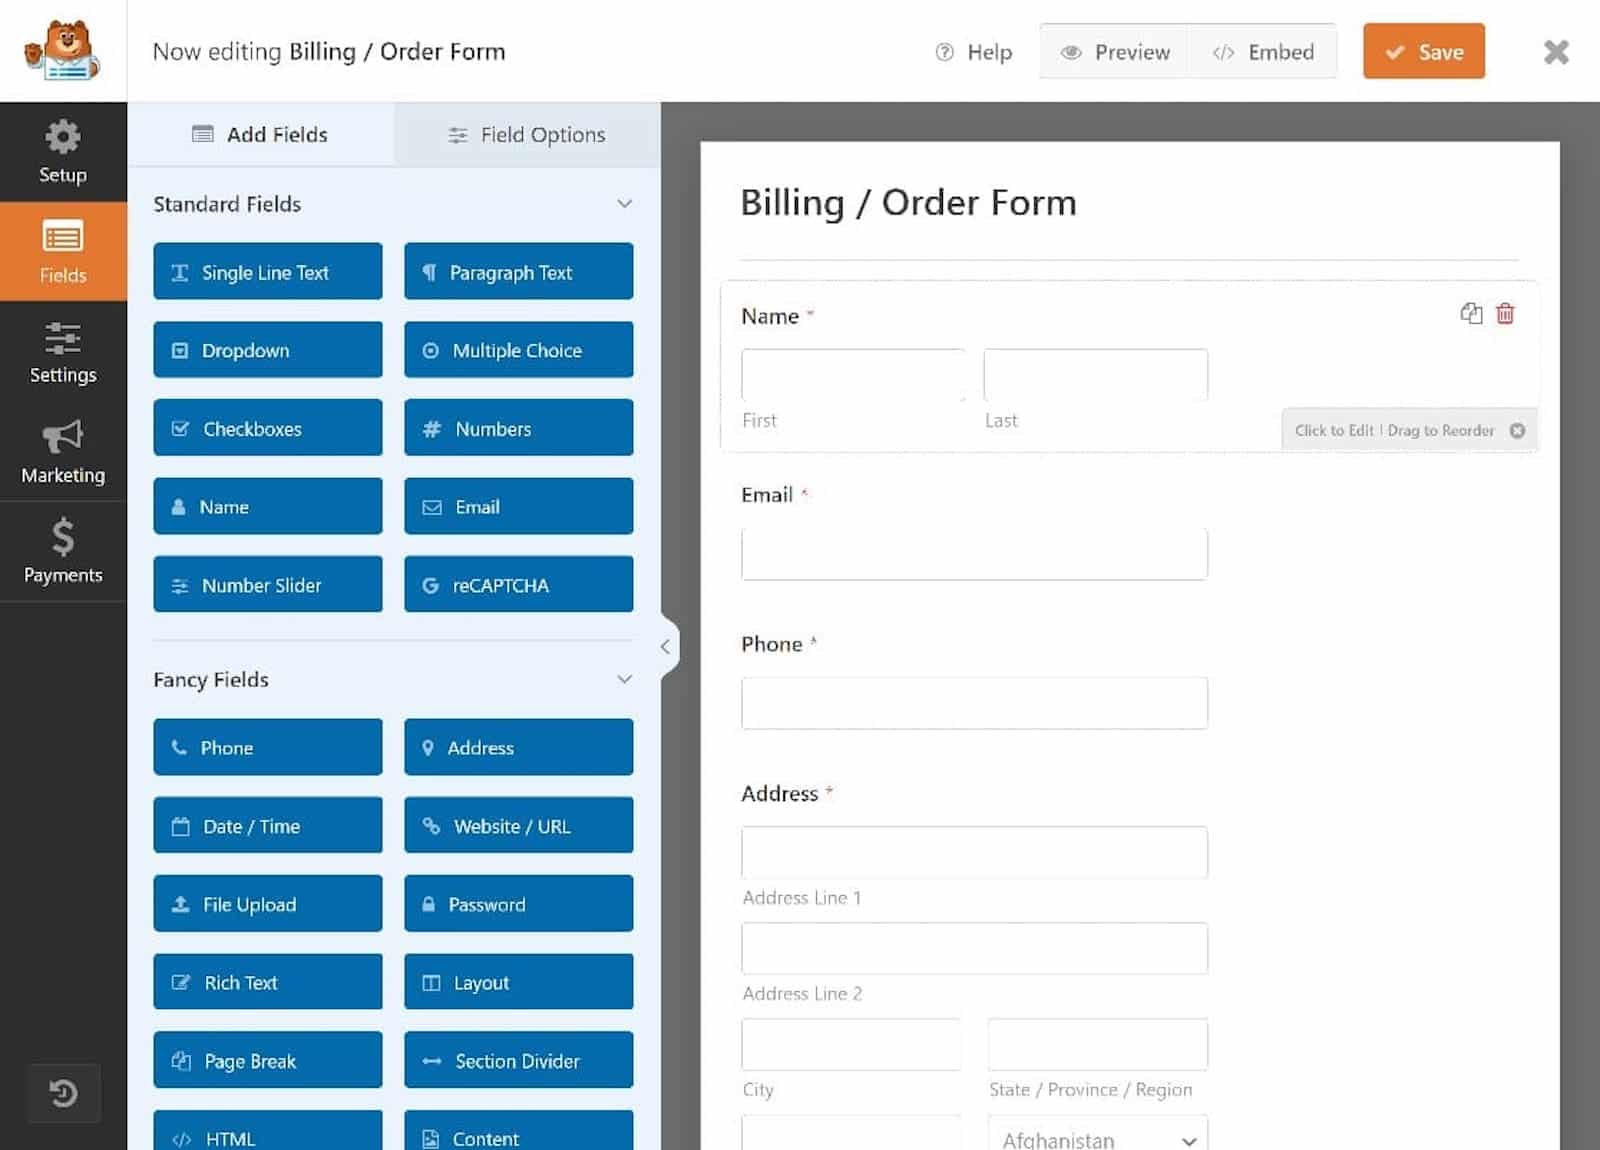
Your order form template may come with placeholder products and prices, for example. So, you’ll need to change these details.
To edit this information, select the Multiple Items field. This field might be labeled as “Available Items” on your form.

This interactive field is where customers order your products and services.
To edit, click anywhere within the field to open its options panel on the left side of the screen. Now you can access all the elements to customize the form to suit your needs.
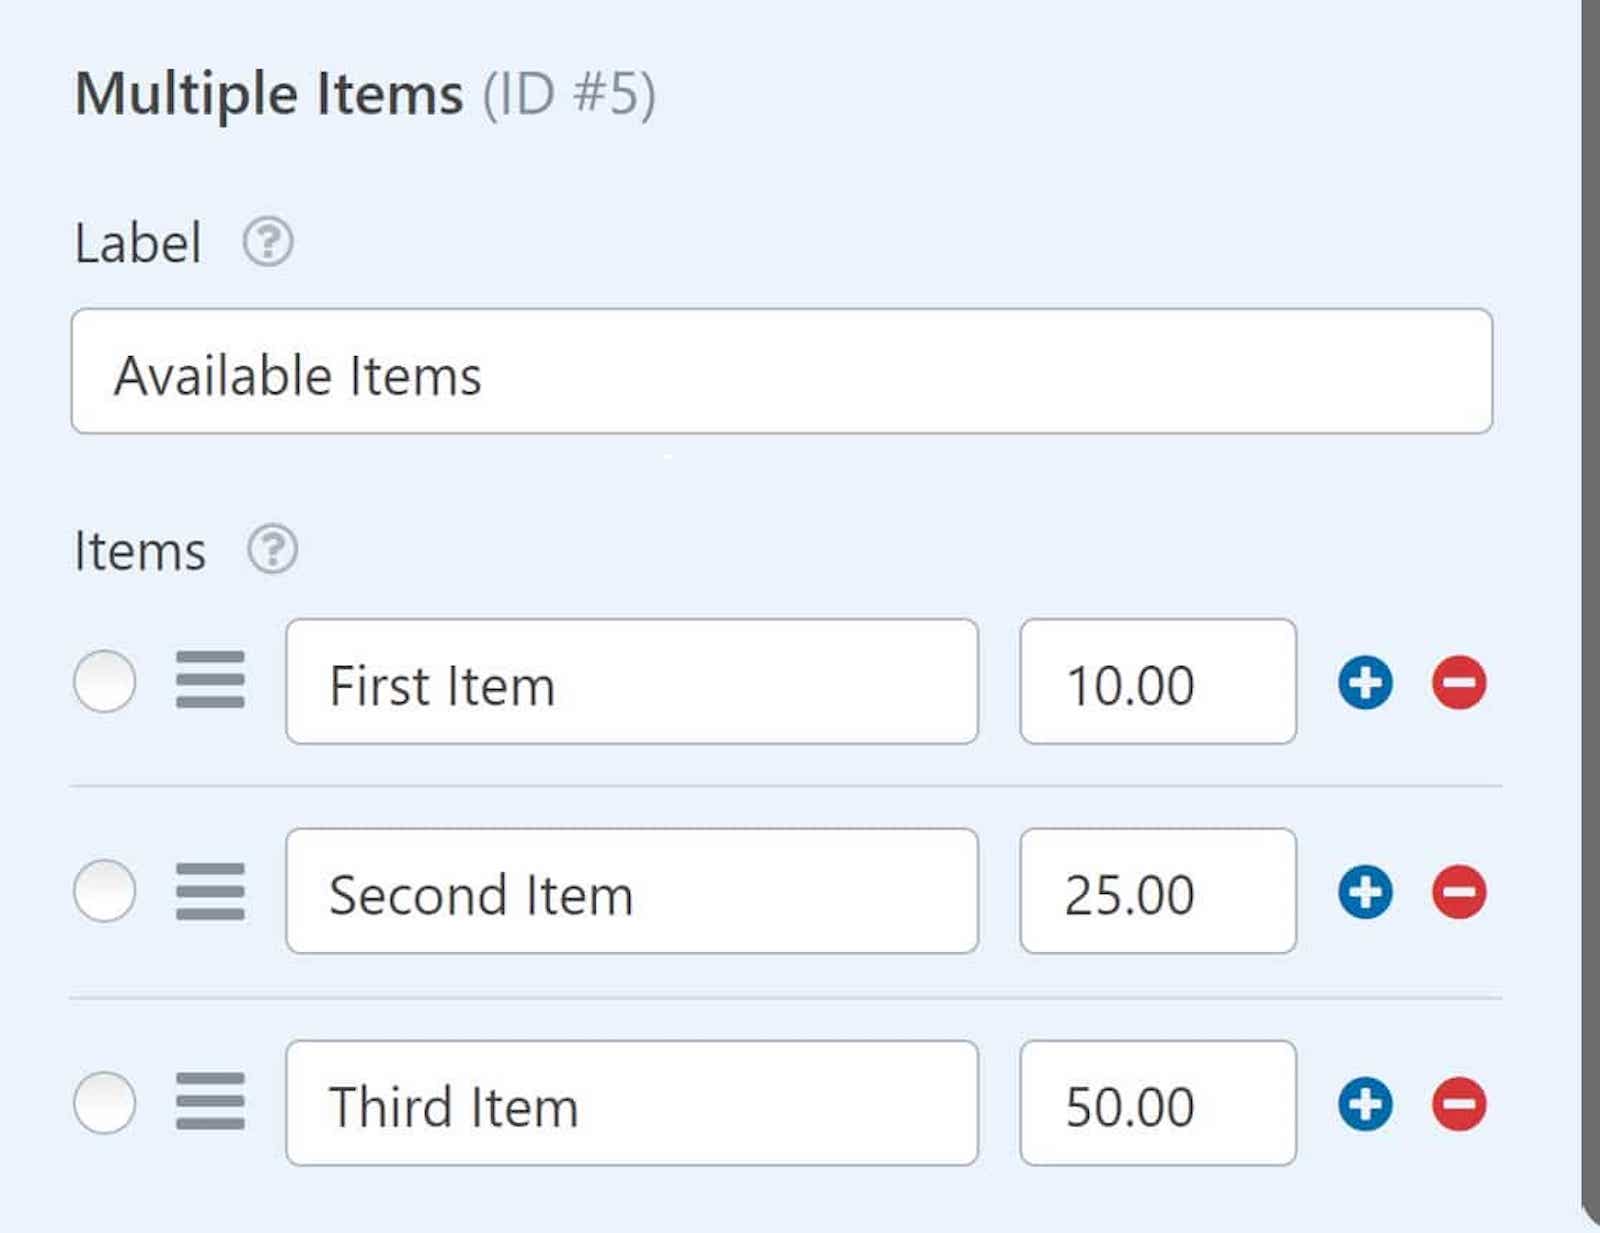
You’ll likely need to edit the labels of your items here, along with their prices. You can also include a quantity option with your items selection, so customers can order multiple things at once.
Add Payments
Once you’ve edited your items, you need to also add or customize the payment field. On the form builder, you’ll find payment fields for each of the payment addons you set up before. So, simply choose the processor you want to use on your order form.
I like using Stripe to process credit card payments since it’s the most accessible for users and comes with the lowest usage fees.
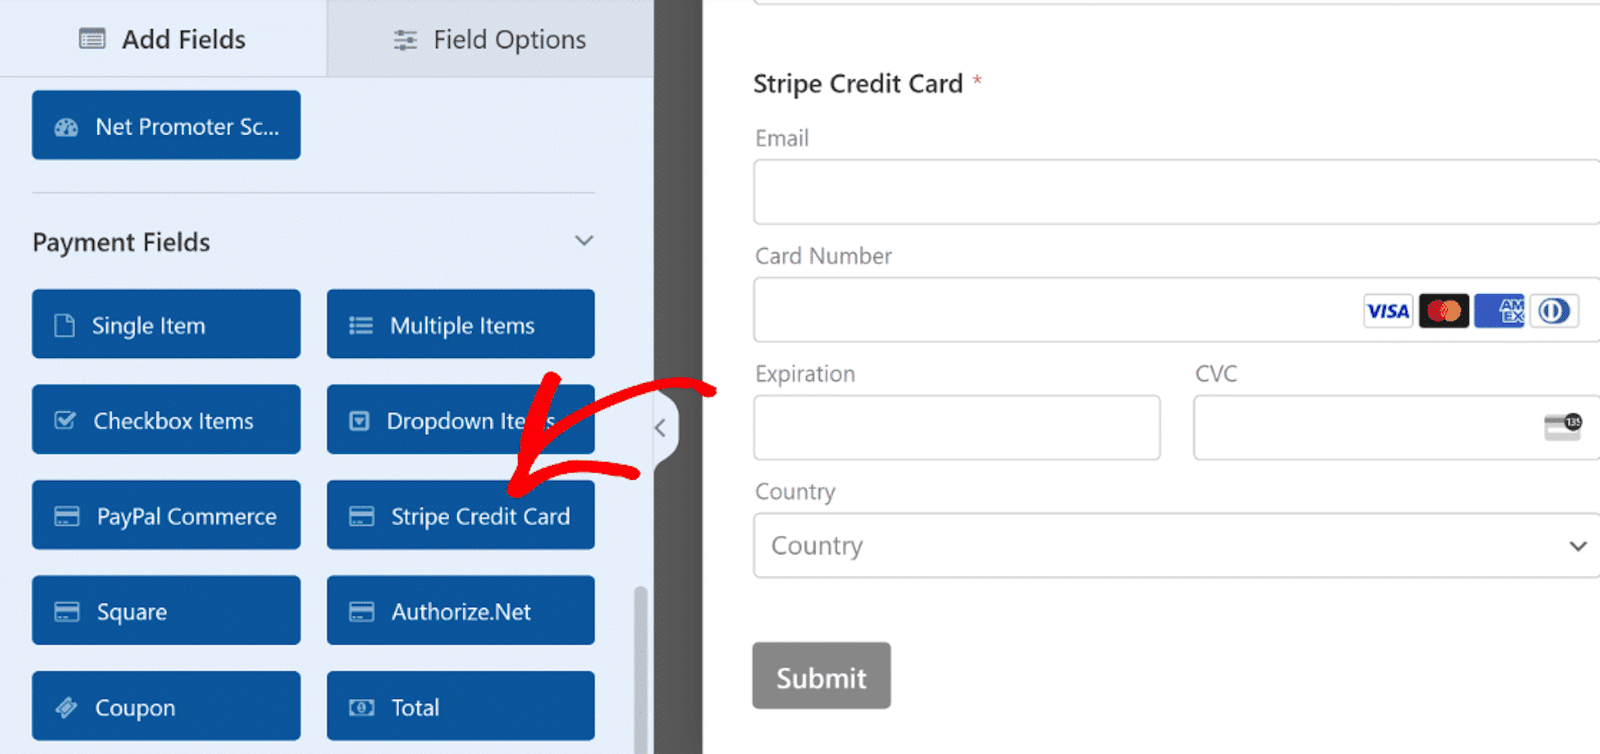
Then, to accept payments on your form, you need to enable the payment gateway. Head over to the menu on the left sidebar of the form builder.
Here, you’ll click on the payment gateway you’re using on your form to Enable its payments.
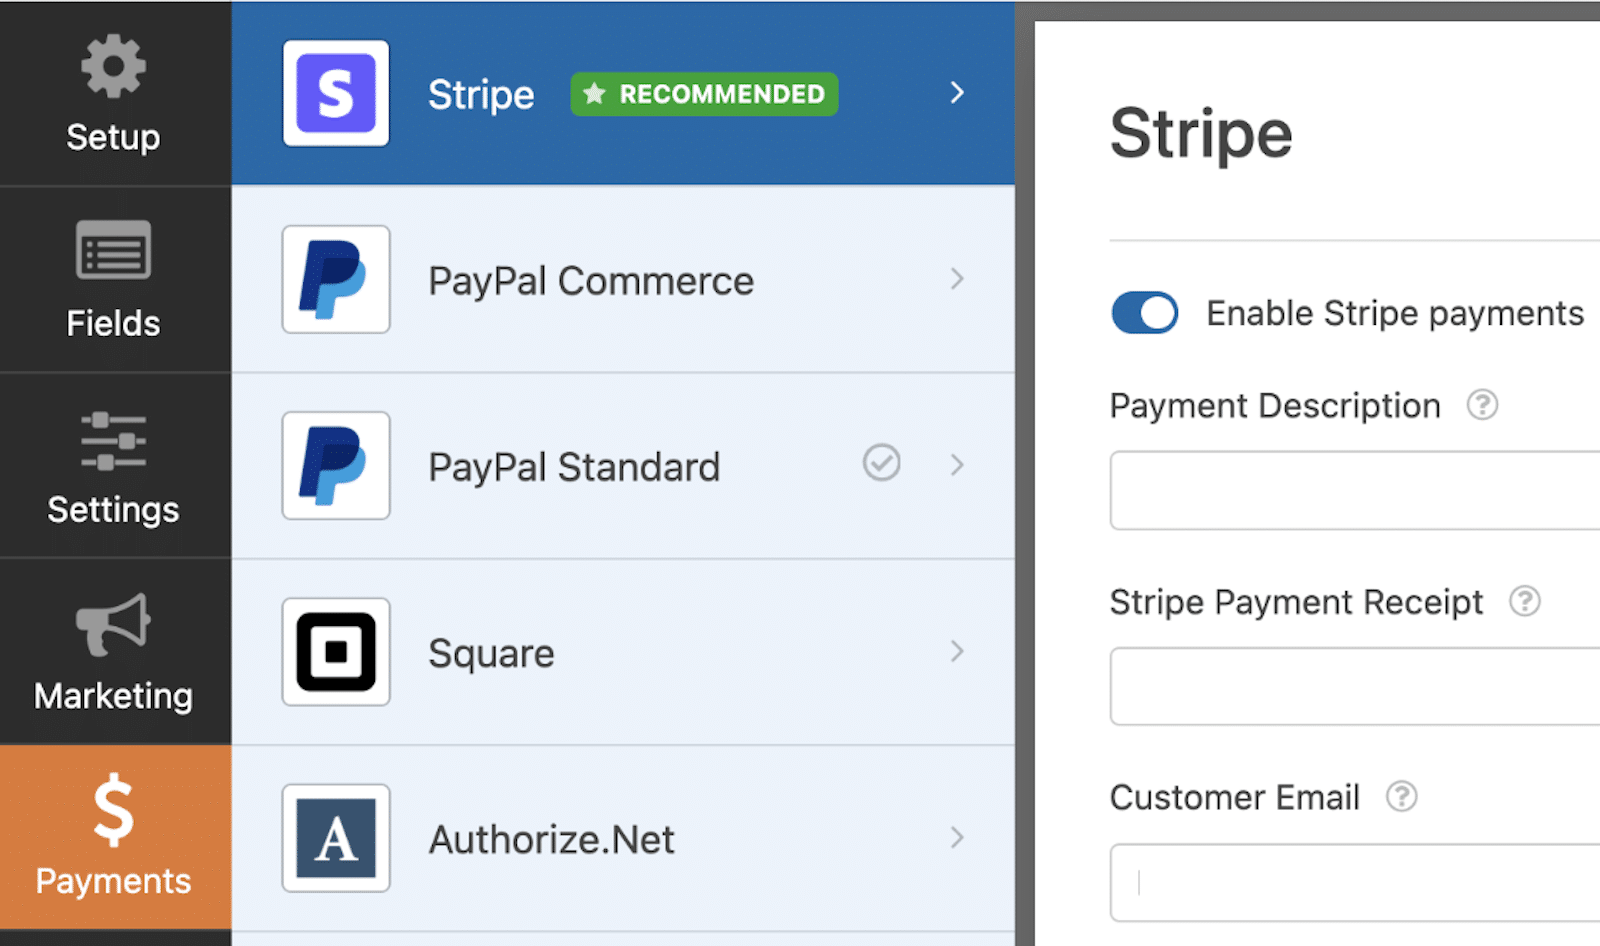
Once the option is toggled, you’re ready to process orders and accept payments, all in one form.
4. Add Extra Features
Also, while they’re not required of your order form, consider adding extra features like coupons or calculations to your order form.
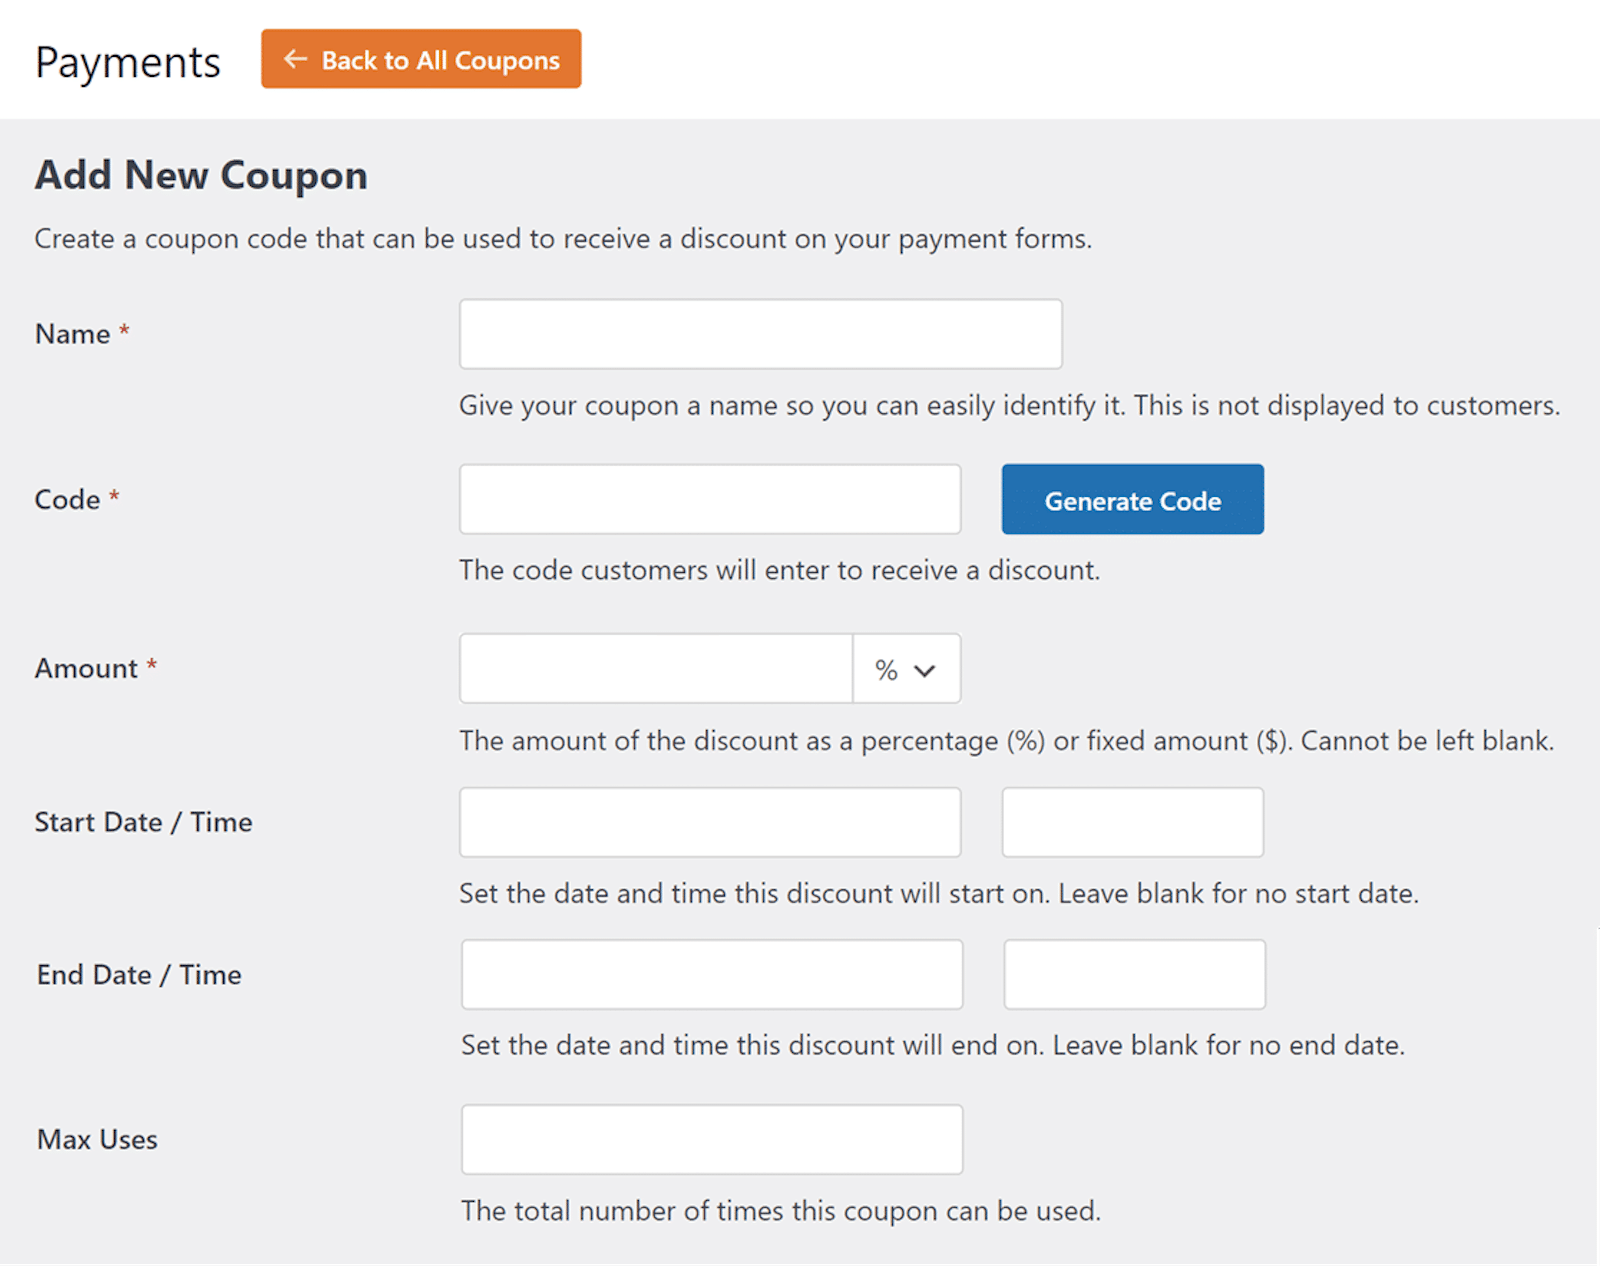
With the Coupon field, you can enable discounts to be automatically configured into the total displayed on your form.
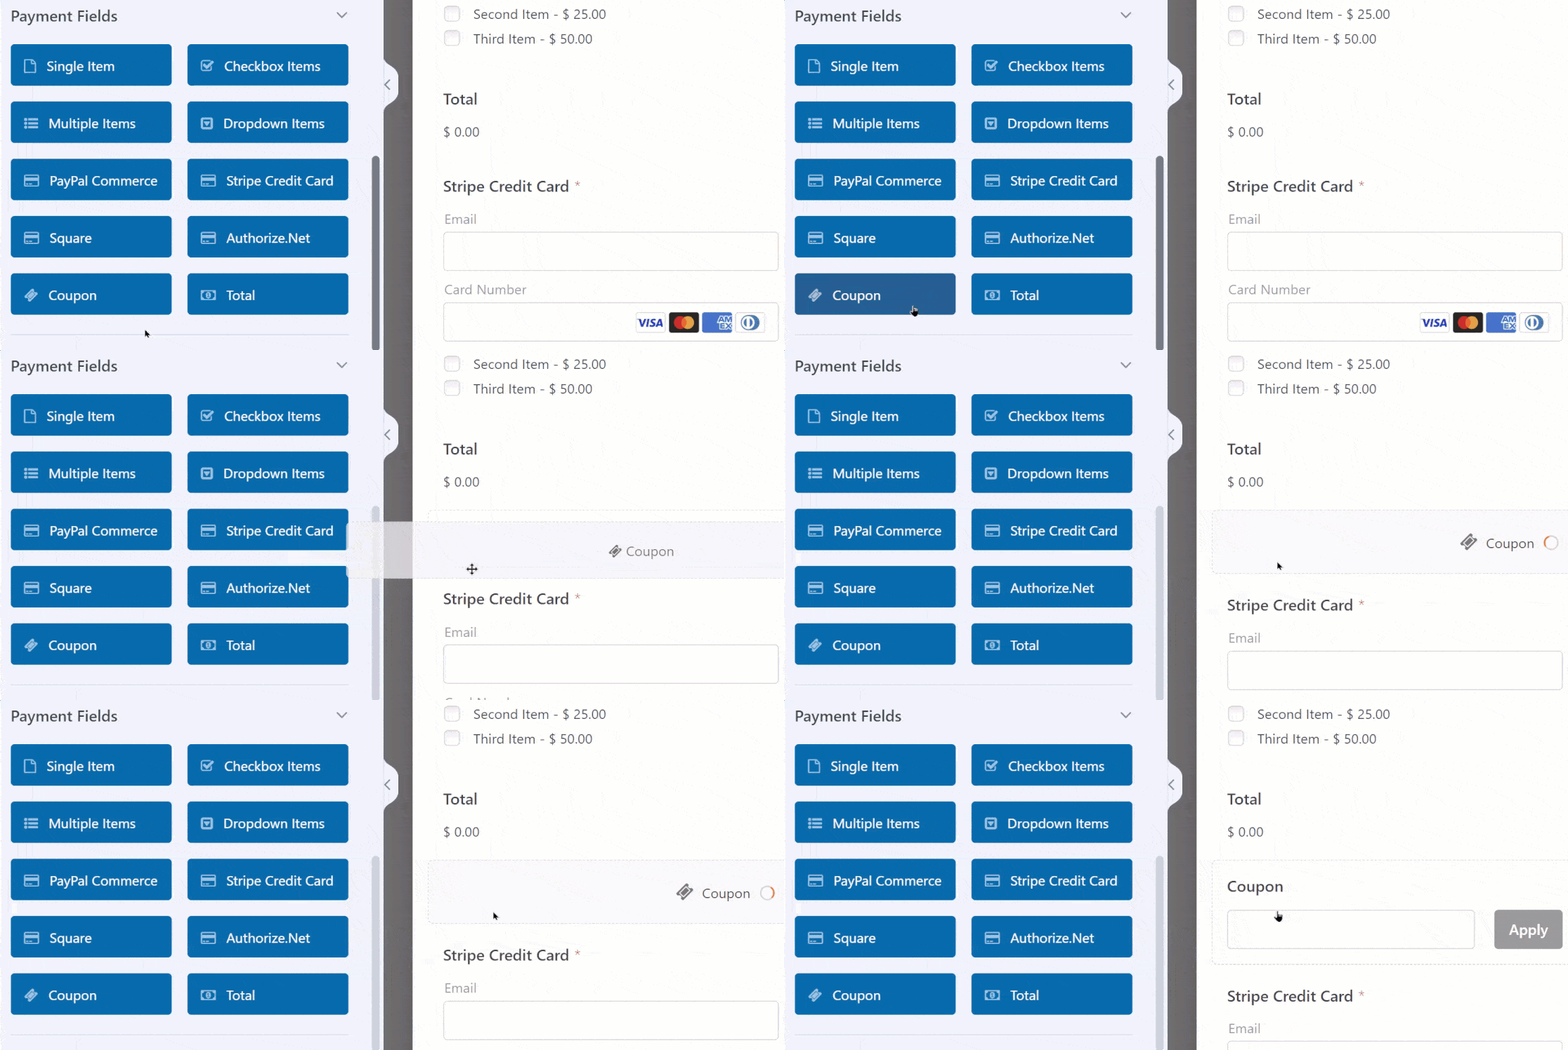
This is a great incentive for casual shoppers to become converted customers.
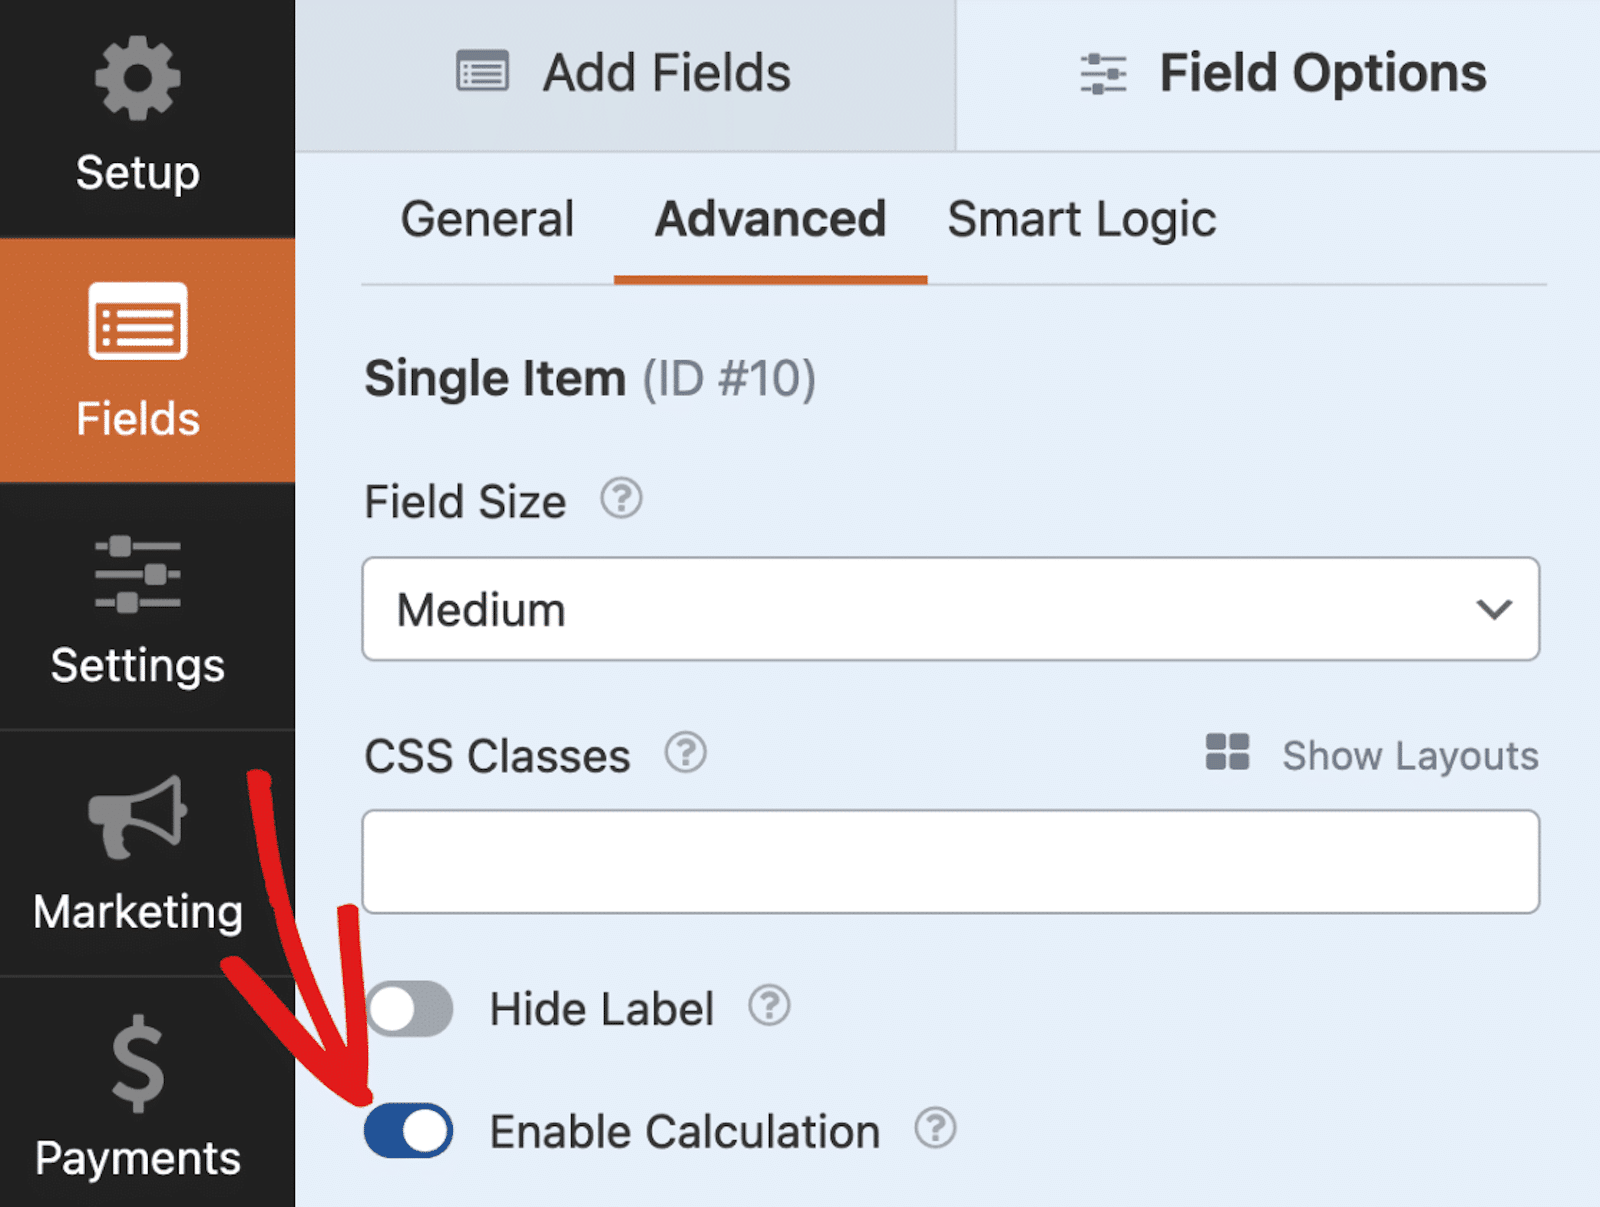
Something else you might like to include with your form is a calculation of some kind.
With calculations enabled, you can include all sorts of automatic calculations for various costs, percentages, fees, and much more.
And, as always, we offer an extensive range of form templates that already have built-in calculations with the formula and functionality ready to go.
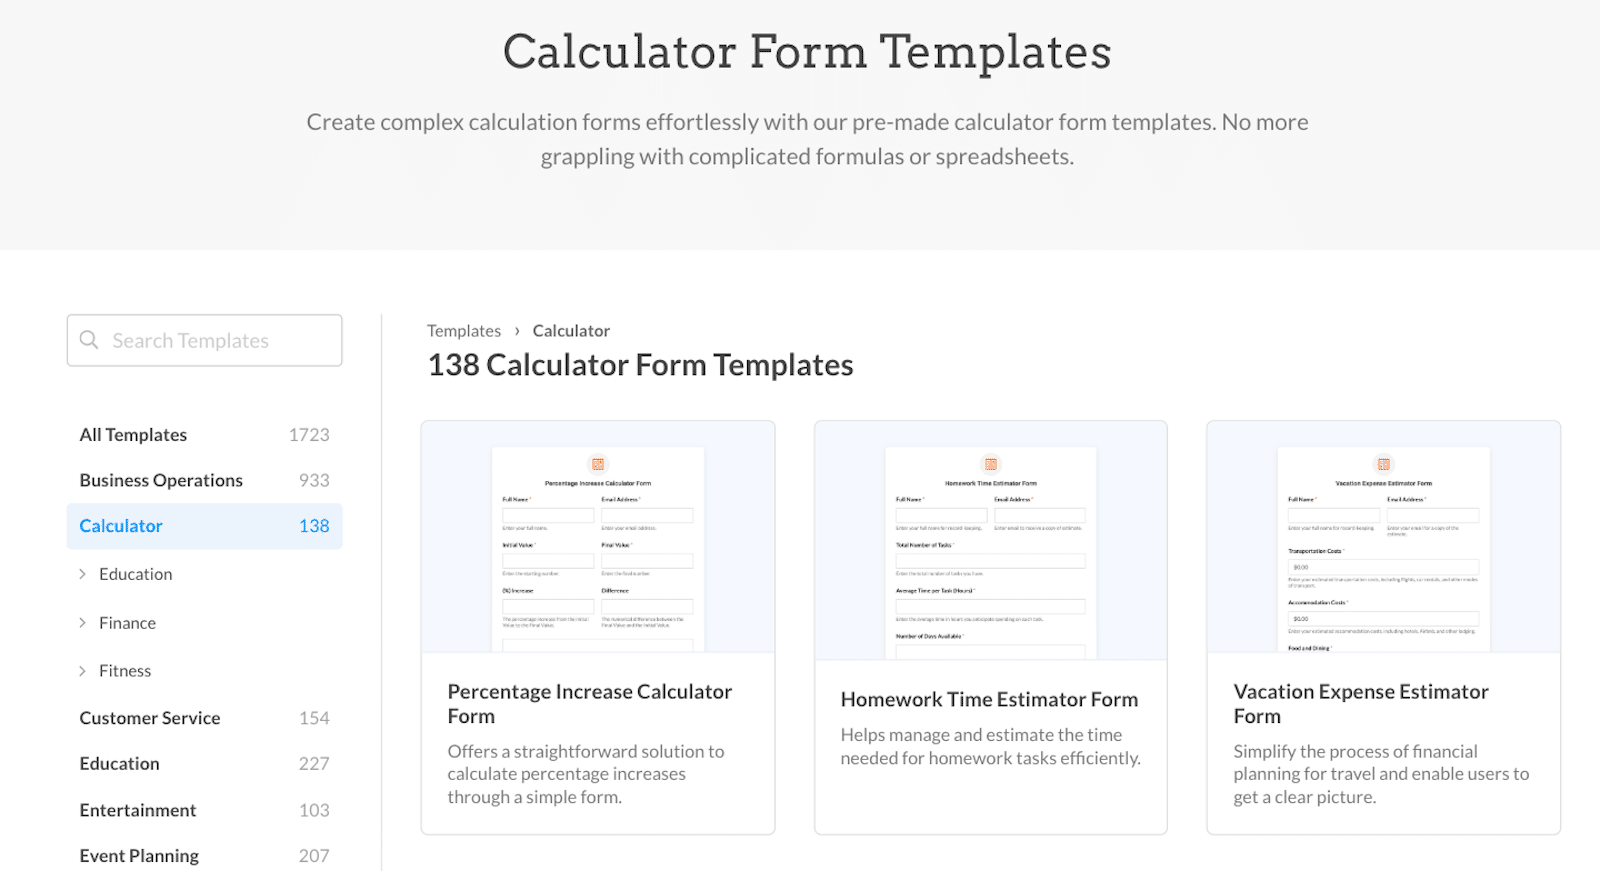
Form templates that can calculate shipping fees or sales tax are incredibly useful for order forms, as you can customize the rest of the order form like we covered earlier.
5. Track Your Orders
Finally, another factor you might consider for your eCommerce store is tracking the performance of your newly created order forms.
It’s possible to track your form analytics even though you’re not using WooCommerce. You still want to understand how your forms are converting, after all.
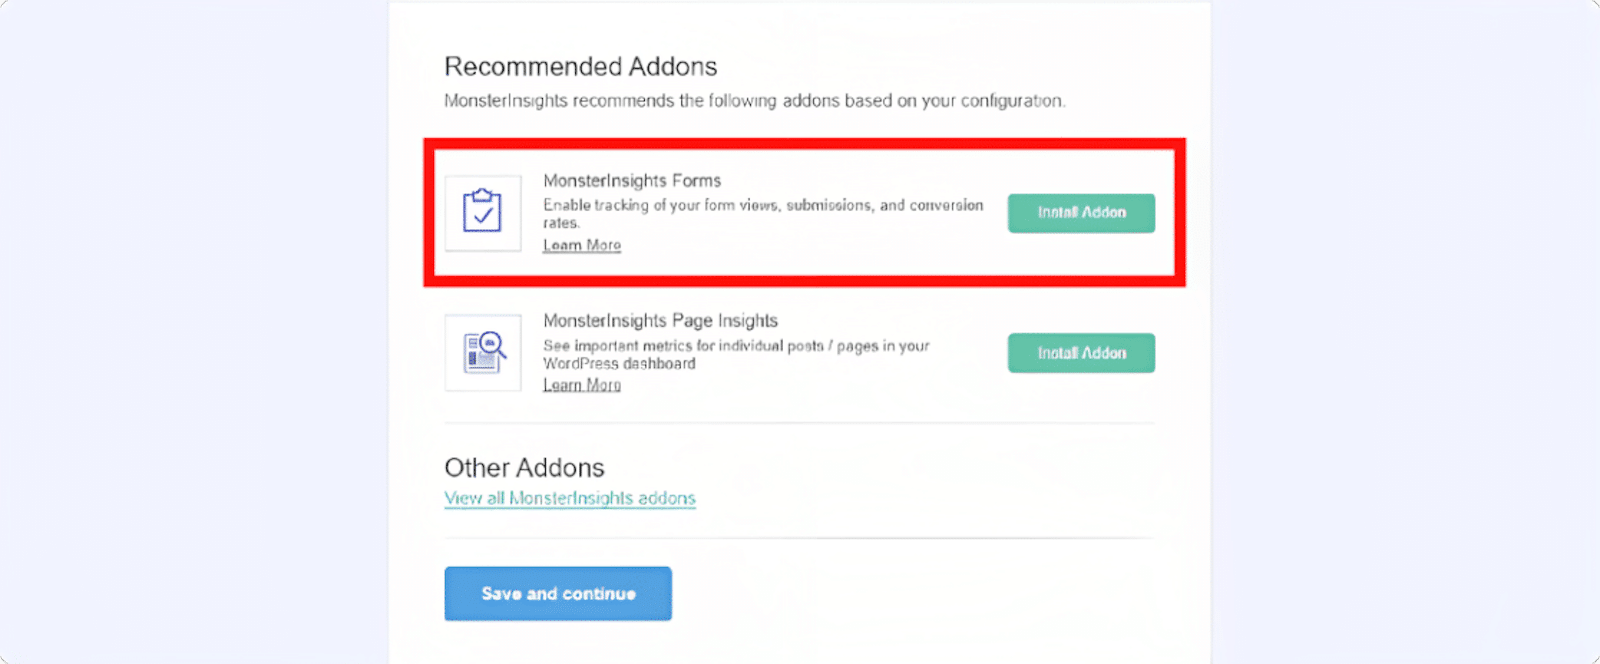
To do so, I suggest utilizing MonsterInsights. Specifically, I like the MonsterInsights Forms addon, because you can start tracking form analytics by simply installing and activating it.
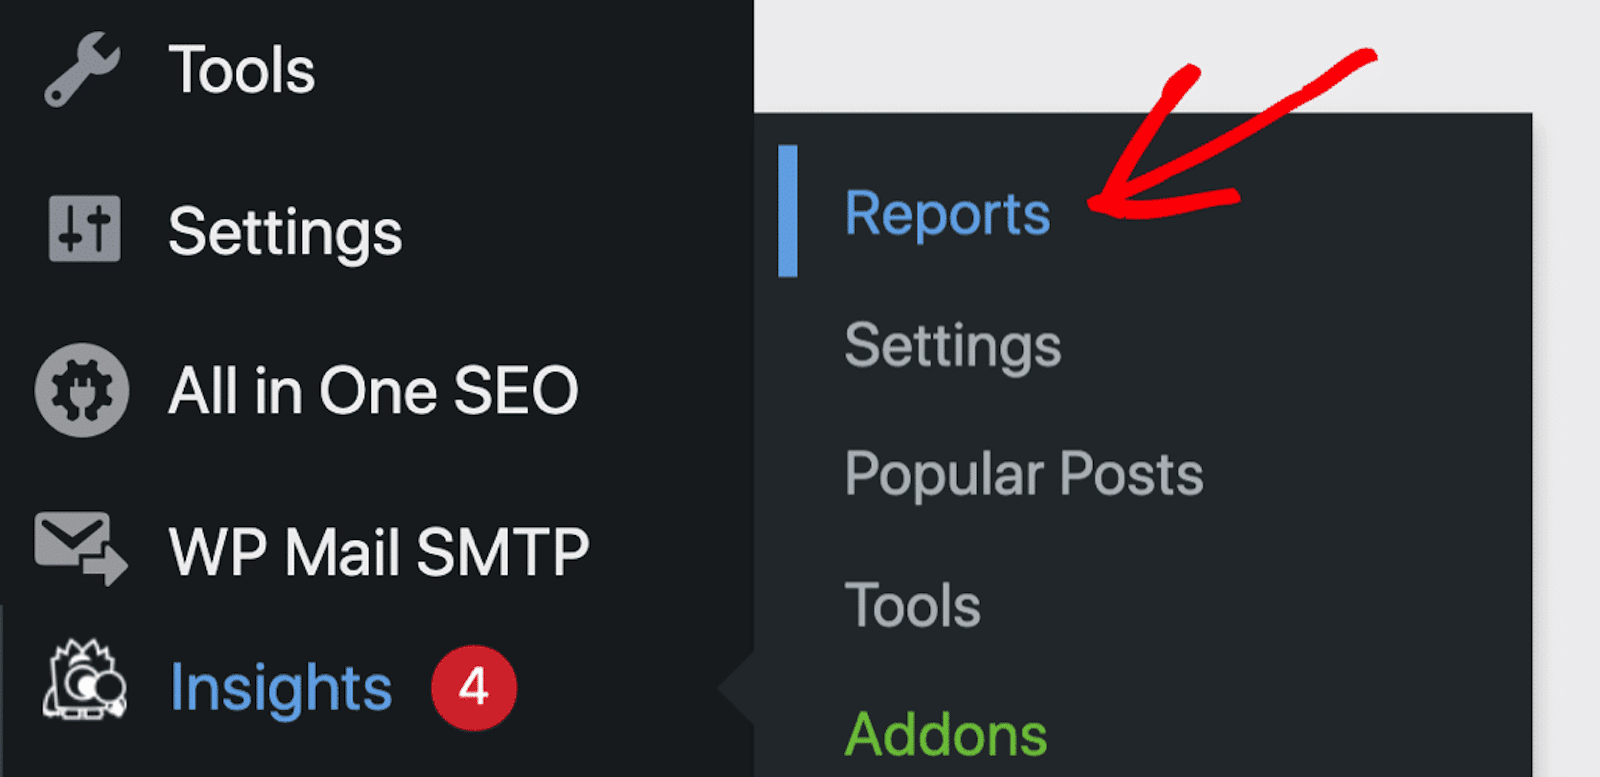
You can immediately see your forms in action by navigating to Insights » Reports in your WordPress Dashboard.
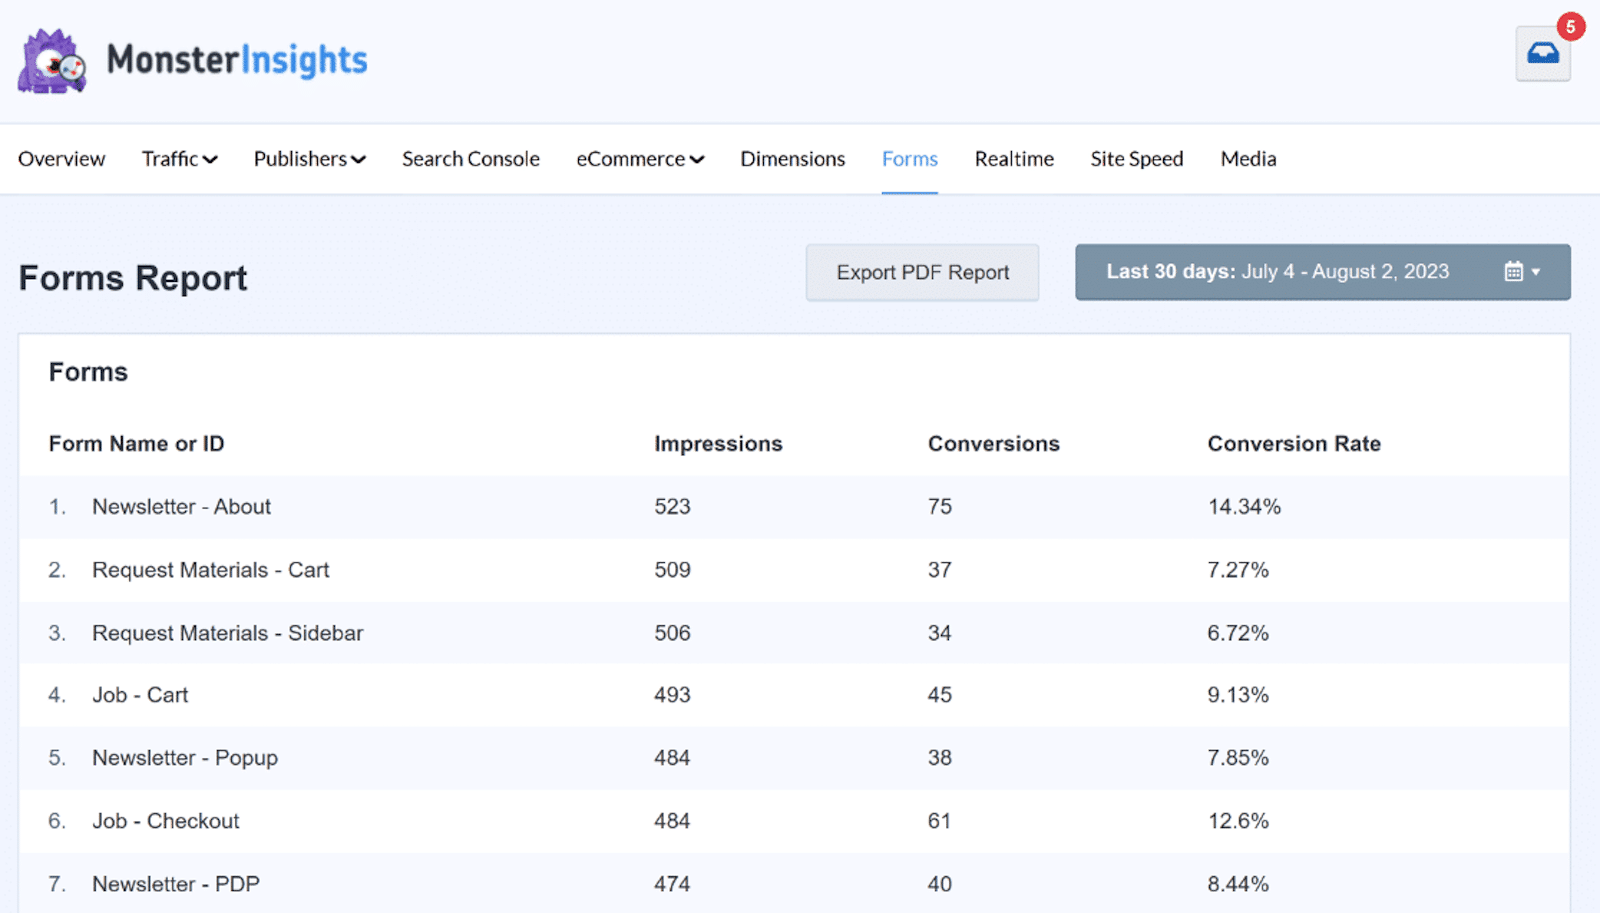
From here, click on the Forms tab to view your site’s form report.

Here, you’ll find detailed reports for all your forms, including analytical data such as the Impressions, Conversions, and Conversion Rate.
And that’s it! With WPForms, you have an ideal solution for selling on WordPress without WooCommerce.
Why Should I Use WPForms Instead of WooCommerce?
WooCommerce might not be the best choice for small businesses or eCommerce stores that are selling only a handful of products. The extensive features and functionalities of the platform add unnecessary weight to your website, potentially causing slower load times.
Plus, if your products are made-to-order without inventory requirements, opting for a full-fledged eCommerce platform like WooCommerce could be too much. In these cases, the complex system may not justify the benefits, particularly for smaller stores with fewer items.
That’s why I suggest using WPForms. WPForms offers a user-friendly and efficient solution for creating a streamlined online store tailored to the needs of smaller businesses.
Next, Build and Automate Your Site Funnels
You’re now on your way to running your small business or eCommerce store on WordPress without WooCommerce.
But did you know FunnelKit can drastically improve the sales funnels you create for your eCommerce site? It will also automate many of your tasks for you, too.
To learn how it all works and what the platform can do for you, be sure to read our FunnelKit review which covers its highlights, features, and functionality.
Ready to fix your emails? Get started today with the best WordPress SMTP plugin. If you don’t have the time to fix your emails, you can get full White Glove Setup assistance as an extra purchase, and there’s a 14-day money-back guarantee for all paid plans.
