


AI Summary
If you’re running a smaller WordPress site that doesn’t send hundreds of emails daily, Google’s SMTP server is an excellent free solution. There’s no need to set up another email service if you already have a Gmail account.
Using Google’s trusted email infrastructure instead of your host’s default mail system can help your WordPress site’s emails to reliably land in inboxes instead of the spam folder.
The best part is that connecting to Google’s SMTP server is now easier than ever. With tools like WP Mail SMTP, you can set everything up in just a few clicks without touching a single line of code or dealing with complex configurations.
Ready to make your WordPress emails more reliable? Let’s get started!
Gmail SMTP settings reference
If you’re configuring Gmail SMTP outside of WP Mail SMTP’s one-click flow, or just need a quick lookup, here are the settings Google currently uses.
| Setting | Value |
|---|---|
| SMTP server | smtp.gmail.com |
| Port (recommended) | 587 with STARTTLS |
| Port (alternative) | 465 with SSL/TLS |
| Username | Your full Gmail or Google Workspace email address |
| Authentication | OAuth 2.0 (required since May 2025) or app password for personal accounts with 2-Step Verification |
| Encryption | TLS on port 587, SSL on port 465 |
| Daily sending limit (personal Gmail) | 500 emails |
| Daily sending limit (Google Workspace) | 2,000 emails |
You won’t need to enter these values manually if you’re using WP Mail SMTP’s Google / Gmail mailer — the plugin handles the connection through the Gmail API rather than direct SMTP. The settings above are for completeness, and for anyone connecting Gmail to other clients or scripts.
Method 1: Google SMTP One-Click Setup
The fastest way to connect your site to Google’s SMTP server is through WP Mail SMTP’s one-click setup wizard. I always recommend this option since it handles most of the technical steps automatically.
To use the Google Workspace / Gmail one-click setup option, you’ll need WP Mail SMTP Pro so go ahead and purchase a license if you don’t already have one.
First, install and activate WP Mail SMTP if you haven’t already. You’ll see the setup wizard launch automatically. Click the Let’s Get Started button to begin the configuration process.
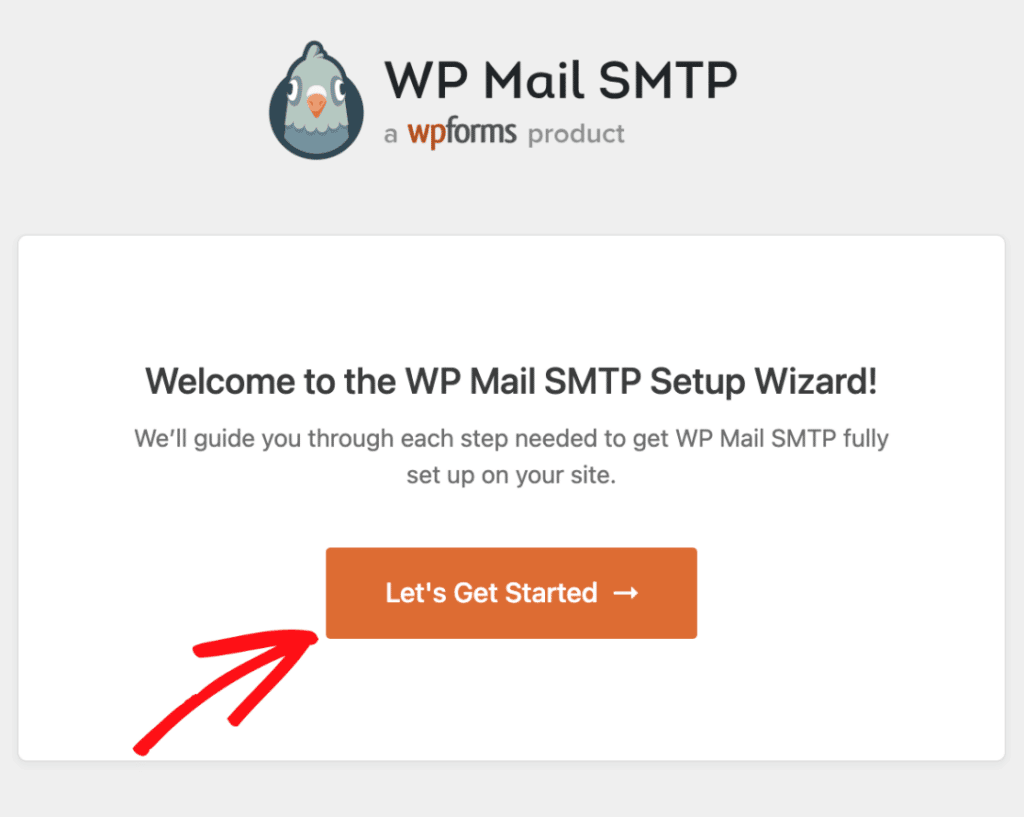
If you’ve previously installed WP Mail SMTP you can run the setup wizard from the Settings screen.
On the following screen, you’ll see various mailer options. Choose the Google / Gmail option and click the Save and Continue button.

A new window will pop up explaining the restrictions of using a Gmail account as your WordPress email provider. Click the I Understand, Continue button.

On the next screen, you’ll connect to your Google account. Turn the One-Click Setup option to Enabled and click the Sign in with Google button.

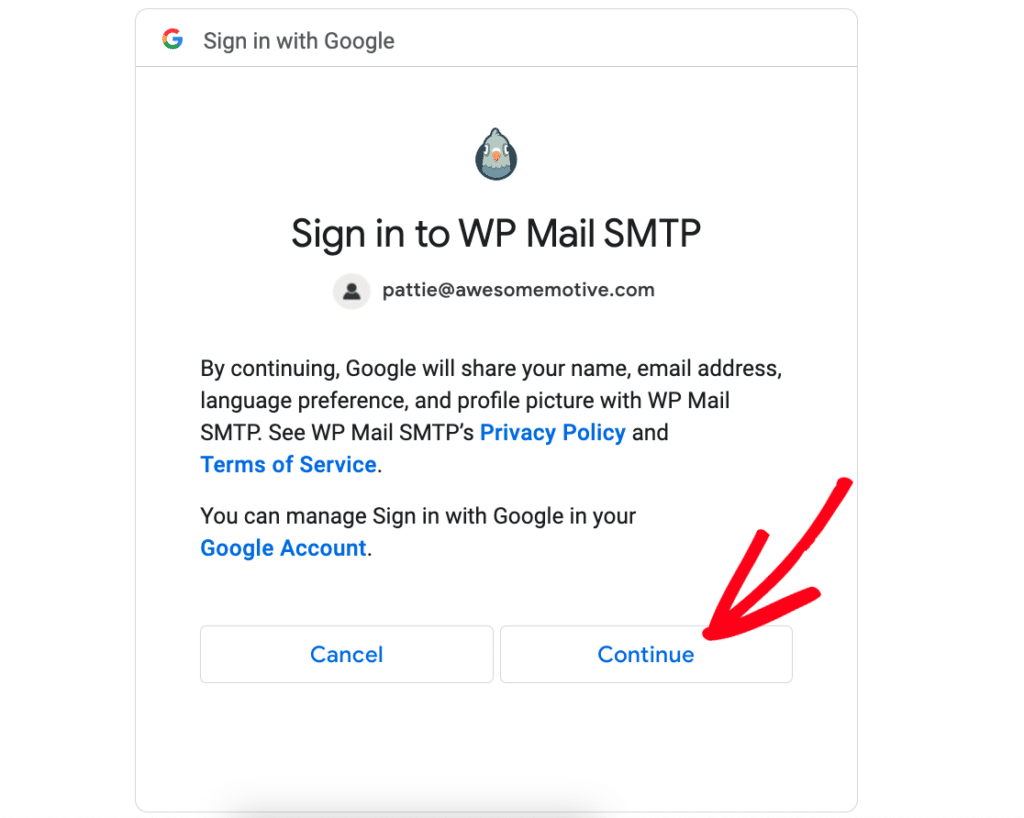
Go ahead and log into your Google account. Then click Continue to give the plugin permissions to send emails via your account.
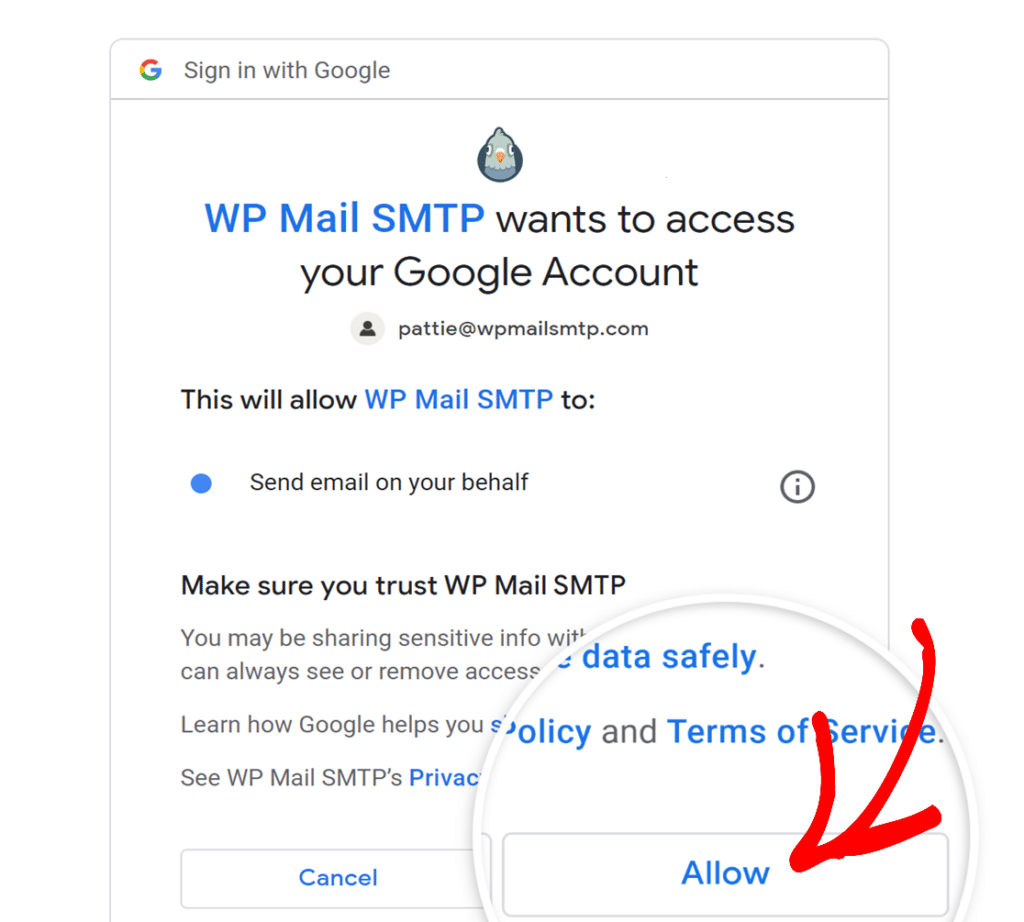
Next, Google will show you what permissions WP Mail SMTP needs. These are standard permissions for sending email through your account. Click Allow to continue.
Back in WordPress, you’ll see a success message once the connection is complete. The wizard automatically fills in all the necessary settings for you – no need to copy/paste any credentials or IDs!
If you’re sending from a custom domain (anything other than @gmail.com), you’ll also want to set up SPF, DKIM, and DMARC records on that domain. Our guide on fixing WordPress email spoofing walks through the full setup.
Method 2: Manual Configuration
While the one-click setup option is fast and easy, you can still set up Gmail in WP Mail SMTP with the Lite version of the plugin.
If you’re deciding between One-Click Setup and manual setup, here’s a quick comparison:
| Manual Setup | One-Click Setup (Pro) | |
|---|---|---|
| Ease of Use | Step-by-step guide to assist you | Instant connection with minimal steps |
| Technical Steps | Requires creating a Google app and configuring credentials | No manual configuration needed |
| Time Required | Approximately 30-60 minutes | Less than 2 minutes |
| Support | Access to extensive documentation | Priority support from our team |
| Ideal For | Users who prefer detailed setup and learning process | Users seeking the fastest and easiest setup |
Looking for the quickest way to get started? One-Click Setup simplifies the process so you can start sending emails right away.
👉 Upgrade to Pro & Enable One-Click Setup
However, if you prefer to set things up manually, watch the video below or keep reading for full step-by-step instructions.
Step 1: Create a Google Cloud Project
First, head over to Google Cloud Console. If you don’t already have a project, you’ll need to create one.
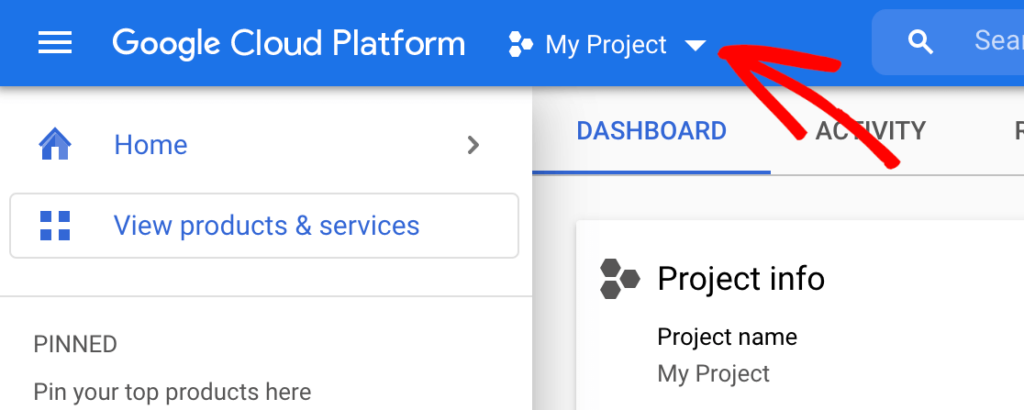
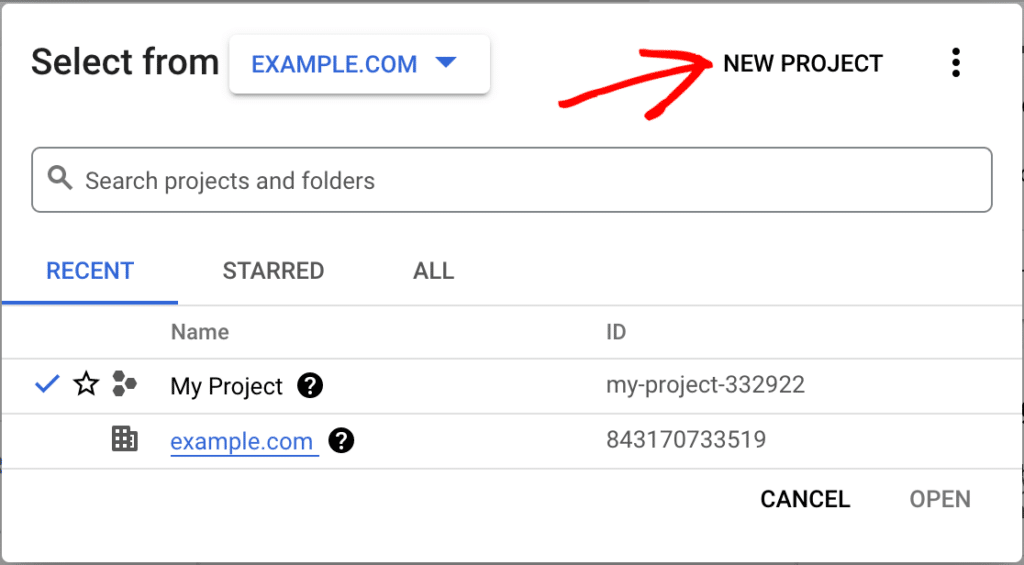
Log into your Google account, go to the Google Cloud Console and click the My Project dropdown at the top of the page.
Click the New Project link in the top right corner.
Name your project something like “WordPress Email SMTP” and choose an organization name and location from the dropdowns.
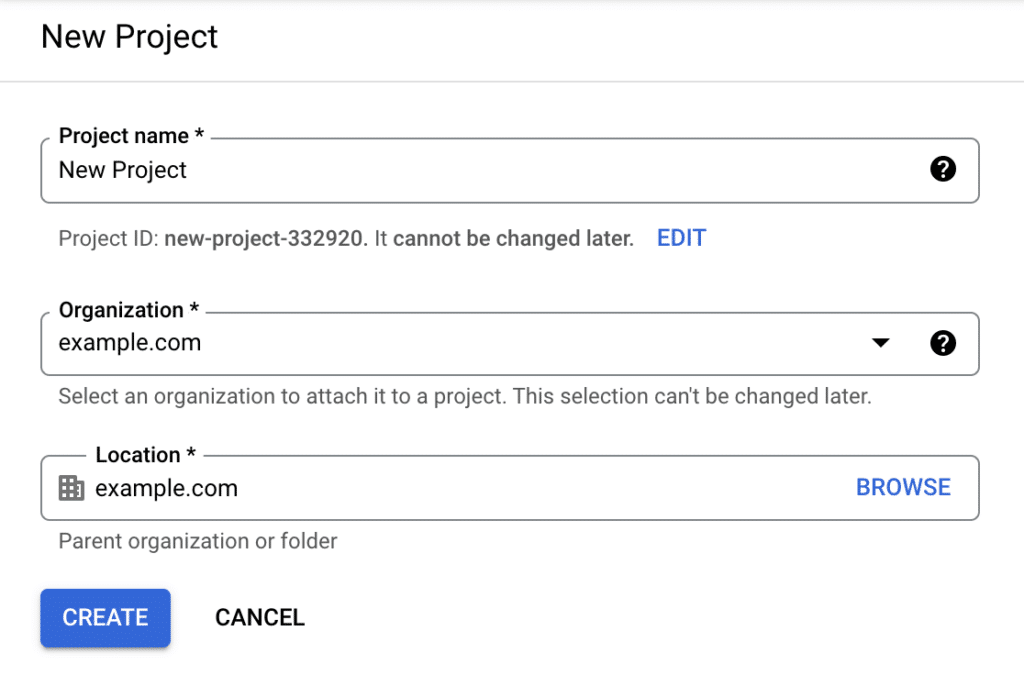
Finally, click the Create button.
Once your project is ready, make sure it’s selected in the project dropdown. You’ll need this project for the next steps.
Step 2: Activate Google API
Before creating your credentials, you need to enable the Google API for your project.
In your Google Cloud Console sidebar, go to APIs & Services » Library.
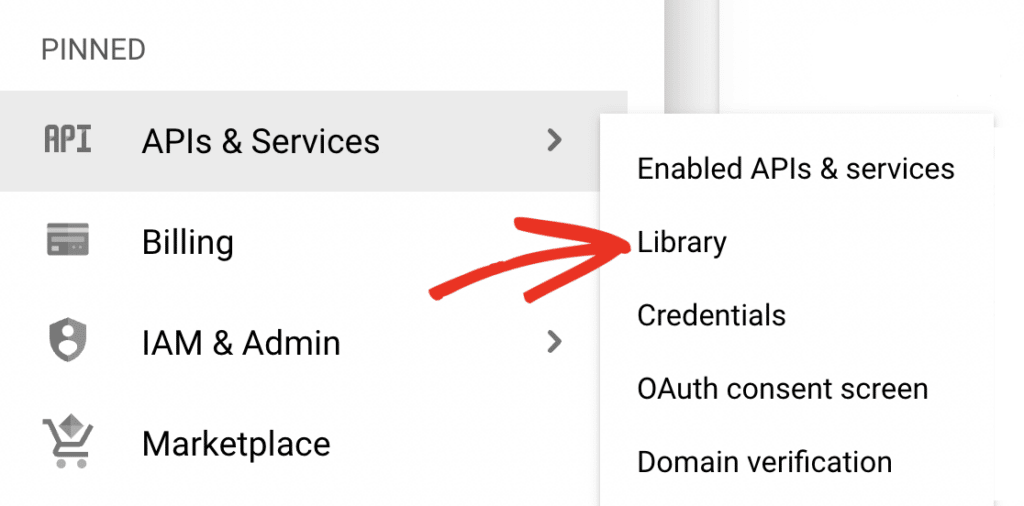
Then look under Category and click on Google Workspace, or enter “Gmail API” in the search bar.
Click on the Gmail API result and click on the blue ENABLE button.
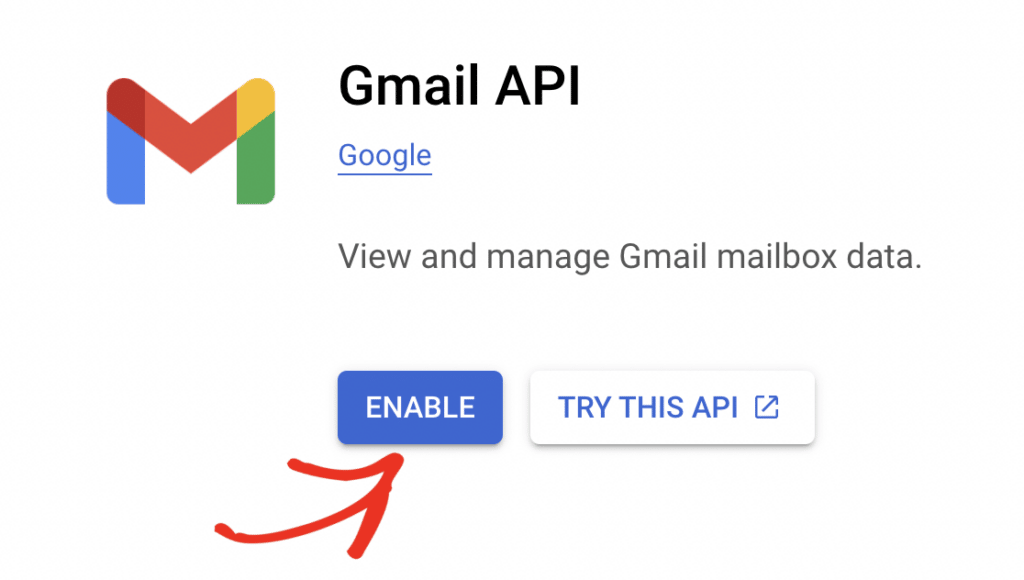
Step 3: Create Credentials
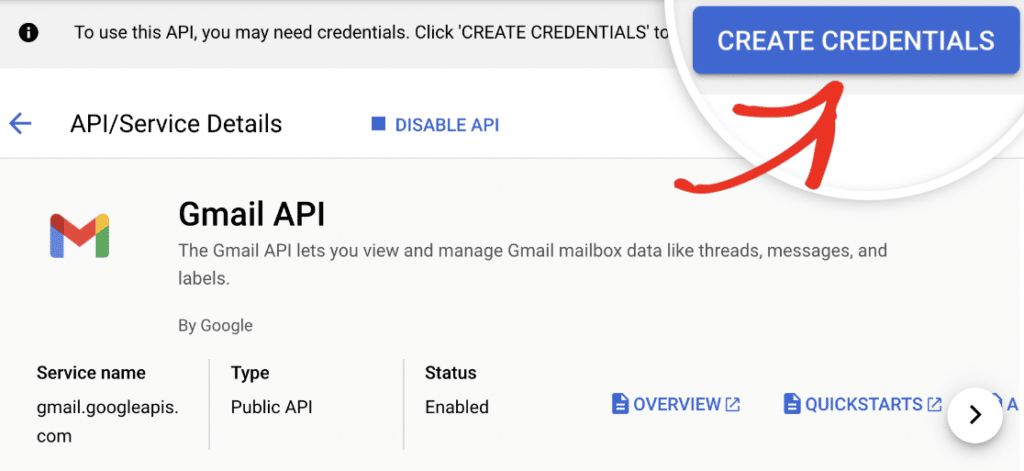
Click the blue Create Credentials button to get started.
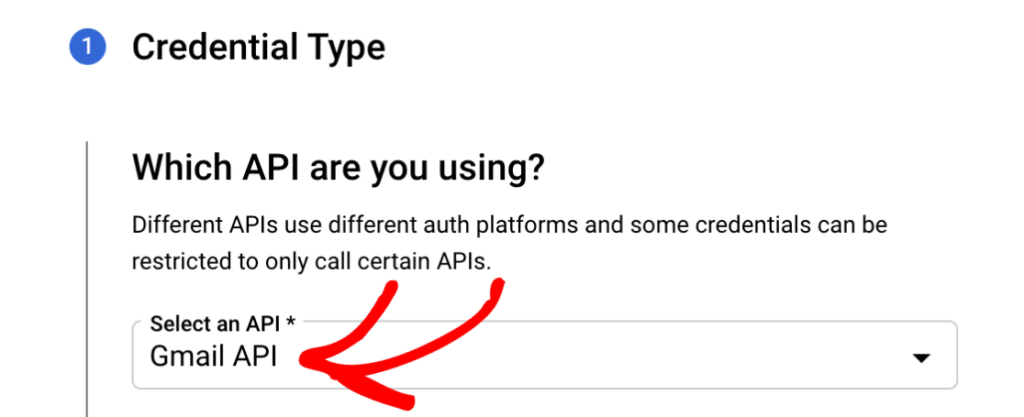
Choose Gmail API as the Credential Type.
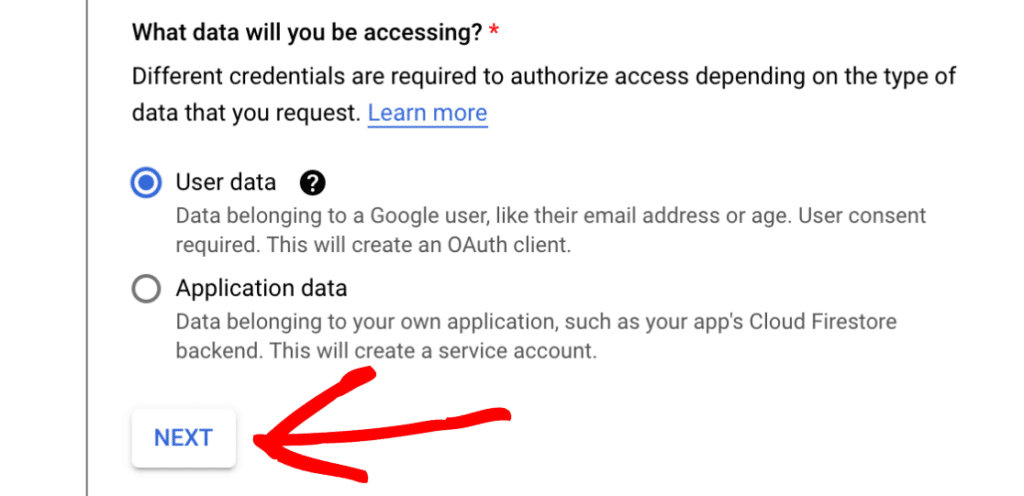
Next, under What data will you be accessing?, select the User data option. Then click the NEXT button to proceed.
Step 4: Configuring the OAuth Consent Screen
In the next step you’ll need to fill out some basic information about your app:
- App name: Enter an app name of your choice (e.g., My WordPress Site Email).
- User support email: Select your email address from the choices provided.
- App logo: If you’d like, you can upload a logo for your app. This is optional.
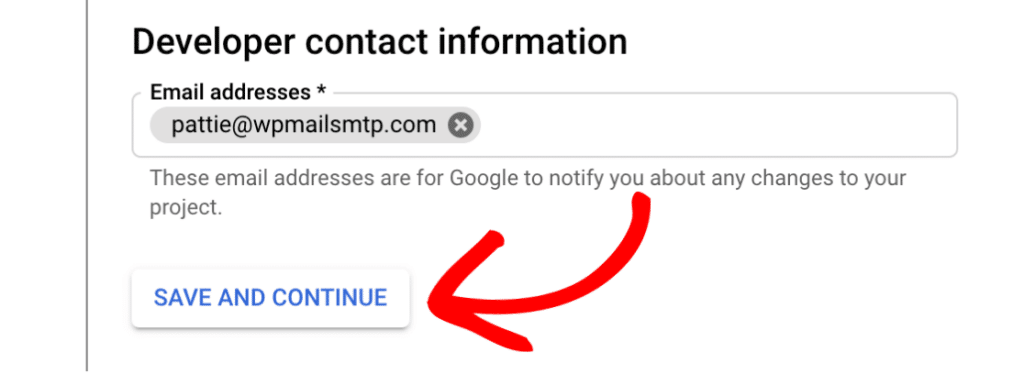
Finally, add your email address in the Email addresses field. Then click on the SAVE AND CONTINUE button.
Scroll down to the end of the Scopes section and click on the SAVE AND CONTINUE button to proceed.
Step 5: Setting Up Your OAuth Client ID
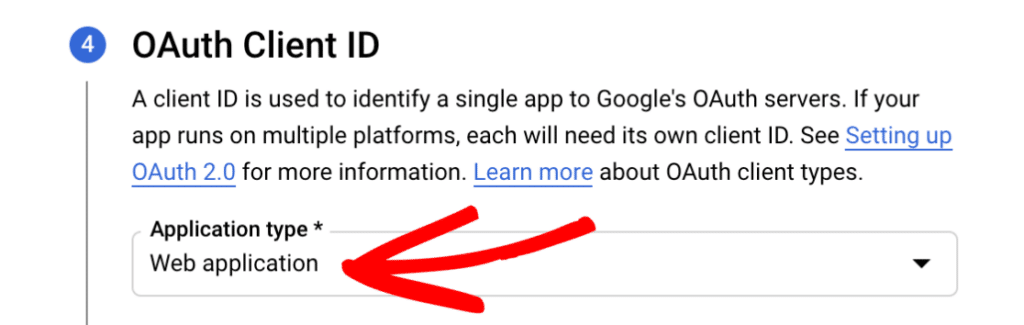
Next you’ll need to set up your client ID that will identify your app to Google’s OAuth servers.
First, select Web application from the Application type dropdown.
Change the name of your client if you wish, or leave it as the pre-populated default. Then, scroll down to the Authorized redirect URIs section.
Click the Add URI button and input the following:
https://connect.wpmailsmtp.com/google
Finally, click the Create button to finish setting up your client ID and click the Done button to complete this step.
Step 6: Publish Your App
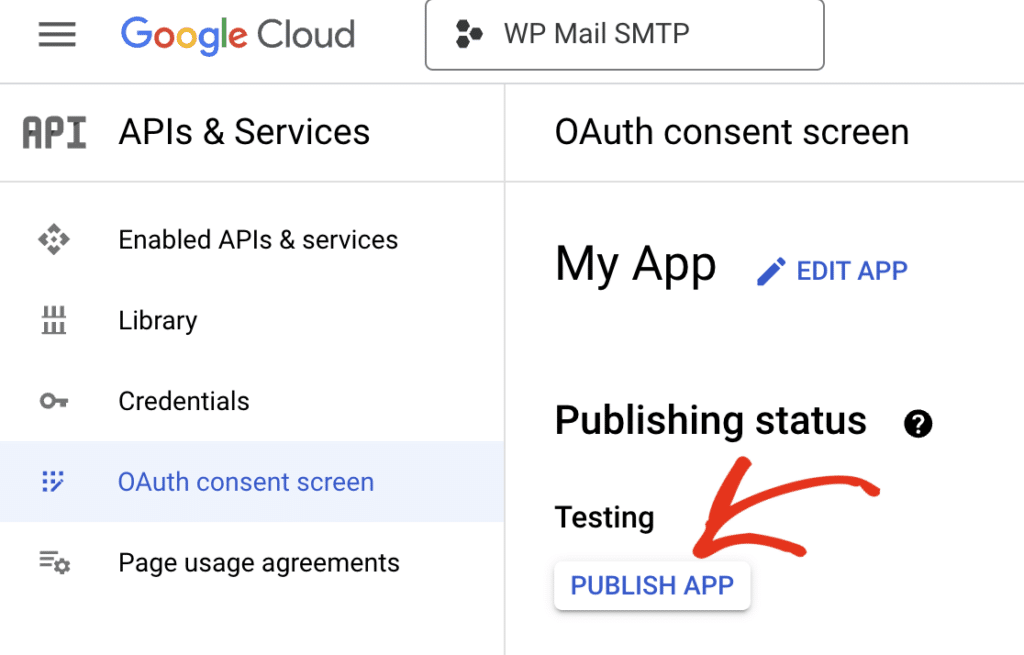
By default your new app is set to private, which means it won’t work properly. To fix this, go to APIs & Services » OAuth consent screen in your Google Cloud Console sidebar.
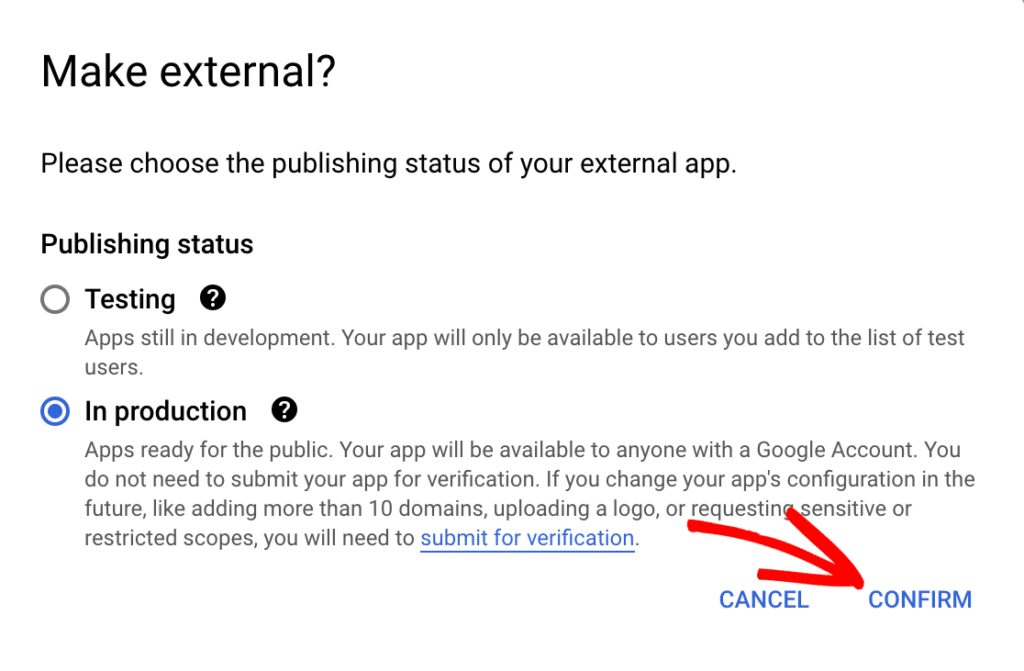
Select the Audience tab and then click the Publish App button if you’re using a personal Gmail account and Confirm to Push to production.
If you’re using a Google Workspace account, you’ll need to click a Make External button and then select In Production and Confirm.
Step 7: Configure WP Mail SMTP Settings
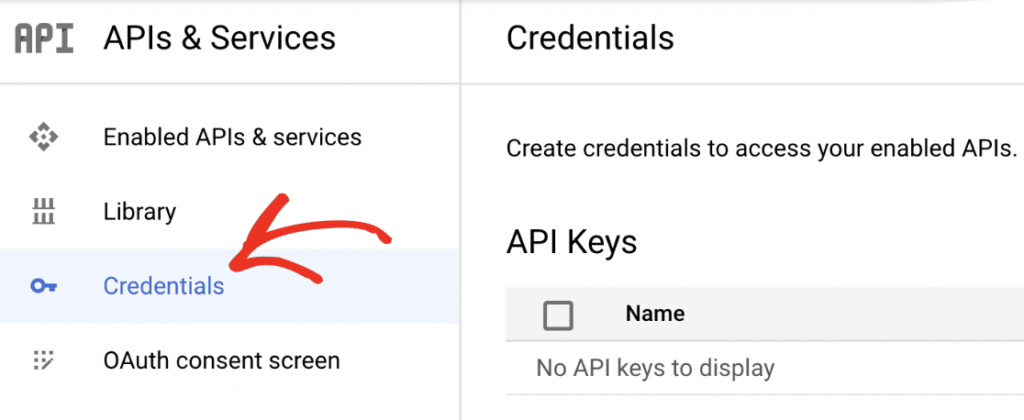
Now you’ve created your Google app, you need to copy the credentials to paste into the WP Mail SMTP settings. You’ll find these under APIs & Services » Credentials.
Click the pencil icon next to your newly created app to view the Client ID and Client secret.
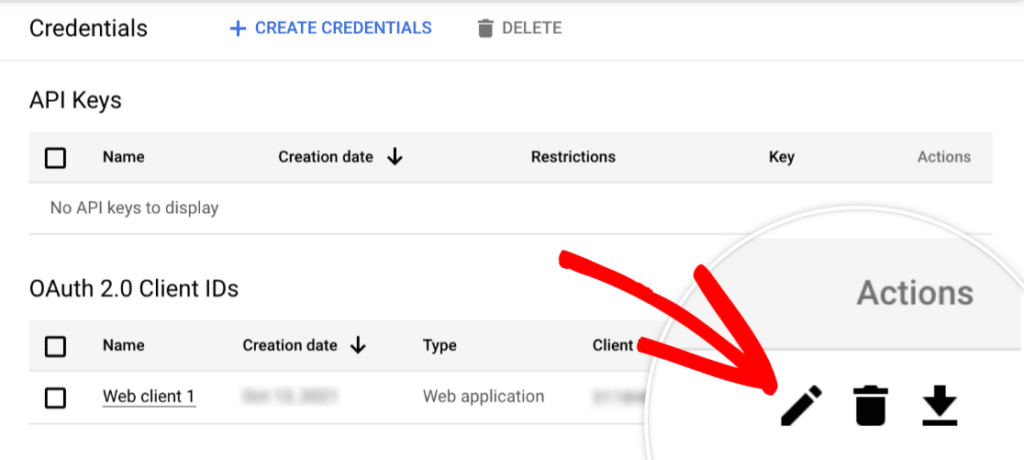
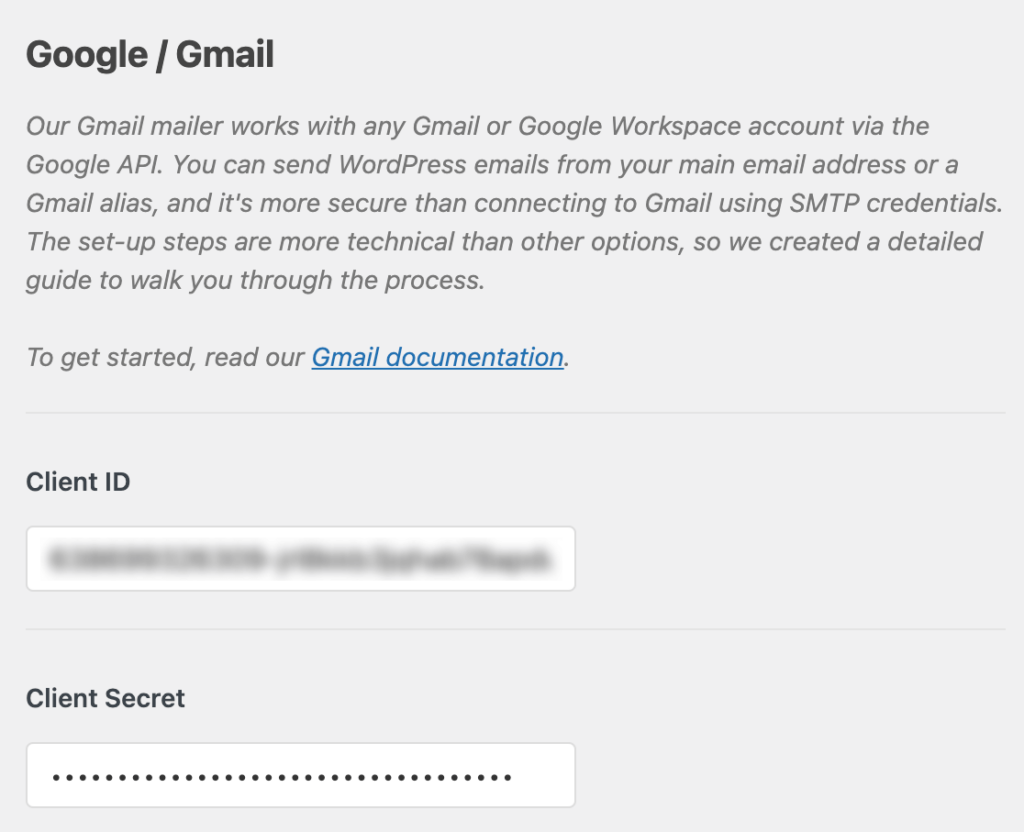
Copy these values and paste them into the corresponding fields in the WP Mail SMTP settings, then scroll down and click the Save Settings button.
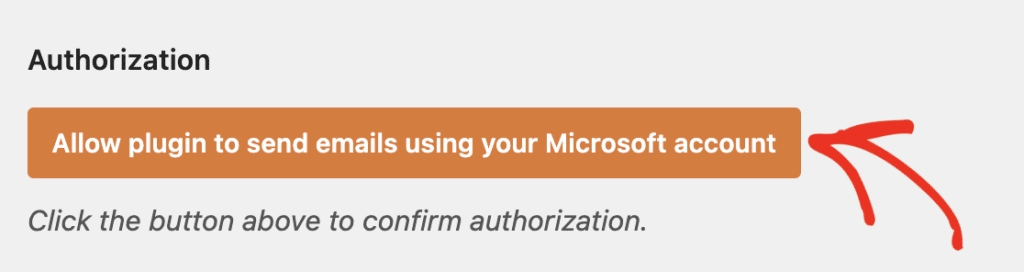
After you’ve saved your client ID and client secret, the settings page will refresh. Scroll down to the bottom of the page and click the Allow plugin to send emails using your Google account button.
When you click this button, you’ll see a popup Google login screen. Go ahead and log in with your Google account and click the Allow button to enable WP Mail SMTP to send emails using your Gmail account.
If you’re using a free Gmail account, you may see a warning message that Google hasn’t verified the app.
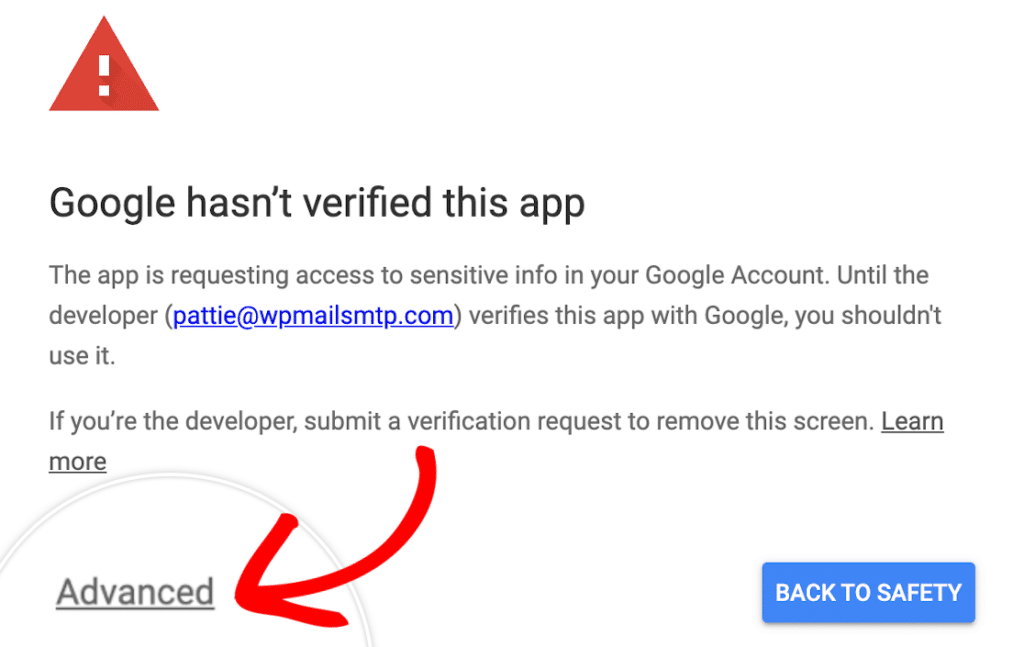
As you created the app for your own personal use, you don’t need to get it verified by Google. Just click the Advanced link and then Go to wpmailsmtp.com (unsafe) before clicking the Allow button.
You should see a success message that you’ve successfully connected your site to your Google account.
Once you’ve set up your site to send emails with Google SMTP server, you can use WP Mail SMTP’s test mail feature to make sure you’re receiving the emails sent from your site.
Send Your WordPress Emails With Google SMTP Now
FAQs About Sending Emails With Google SMTP Server
What is Google SMTP server?
Google SMTP server is like a reliable postal service for your WordPress emails. Instead of using your web host’s basic email system (which often ends up in spam), your site connects to Google’s trusted email infrastructure. This means better delivery rates and fewer headaches with missing emails.
What is the SMTP server address for Gmail?
The Gmail SMTP server address is smtp.gmail.com. Use port 587 with STARTTLS encryption as the default, or port 465 with SSL/TLS as a fallback. Your username is your full Gmail or Google Workspace email address. Authentication requires either OAuth 2.0 or, for personal accounts with 2-Step Verification, a 16-character app password.
Should I use port 587 or 465 for Gmail SMTP?
Use port 587 with STARTTLS as your default. It’s the modern standard for SMTP submission and works reliably across most clients and hosts. Port 465 with implicit SSL is a valid fallback if your host blocks 587 or your software specifically requires SSL. Both ports are encrypted and both require authentication.
What is the difference between Gmail SMTP and the Gmail API?
SMTP is the open standard protocol used to send email between mail servers, including Gmail’s server at smtp.gmail.com. The Gmail API is Google’s REST endpoint for interacting with Gmail accounts, which includes sending. Both can deliver mail from a Gmail account. WP Mail SMTP’s Google / Gmail mailer uses the Gmail API under the hood, which is why the setup involves creating a Google Cloud project rather than entering SMTP credentials directly.
Can I still use my Gmail password for SMTP?
No. Google deprecated “less secure apps” support in May 2025, so plain account passwords no longer work for SMTP authentication. You have two options: OAuth 2.0, which is what the WP Mail SMTP Google / Gmail mailer uses, or an app password, which is a 16-character token you generate in your Google account security settings (only available if you have 2-Step Verification enabled, and only for personal Gmail accounts, not Workspace).
Why choose Google SMTP over default PHP mail?
PHP mail (the default WordPress mailer) lacks the authentication that modern email systems expect. Google SMTP adds that missing layer of trust, which means your notification emails, password resets, and contact form submissions are much more likely to reach their destination.
Do I need a Gmail account to use this?
Yes, you’ll need a Gmail or Google Workspace account to use Google SMTP (a free Gmail account is fine). But here’s something people often miss: you don’t have to send from a Gmail address. You can use any email address as your “From” address once you’ve set up proper authentication plugin. Follow our guide to sending emails from a Gmail alias to get instructions for how to do this.
What happens if I hit Gmail’s sending limits?
Regular Gmail accounts can send up to 500 emails per day, while Google Workspace accounts allow 2,000. If you hit these limits, emails will bounce until the next day. For larger sending needs, I usually suggest either upgrading to Google Workspace or considering a dedicated email service provider like SendLayer.
Next, Set Up Google Postmaster tools
Now that you’ve got Google SMTP handling your emails reliably, you might want to take a closer look at your email delivery. Google Postmaster Tools monitors the number of bounced emails and spam complaints you get each day, helping you to spot problems before they become a serious issue.
Ready to fix your emails? Get started today with the best WordPress SMTP plugin. If you don’t have the time to fix your emails, you can get full White Glove Setup assistance as an extra purchase, and there’s a 14-day money-back guarantee for all paid plans.
If this article helped you out, please follow us on Facebook and Twitter for more WordPress tips and tutorials.
