Are you looking to fix the Limit Attempts by BestWebSoft not sending email issue?
Email alerts from a security plugin are super important and you don’t want to miss those.
In this guide, we’ll show you how to check your Limit Attempts by BestWebSoft email alert settings. We’ll also show you how to install WP Mail SMTP to improve email deliverability.
How Does Limit Attempts by BestWebSoft Work?
Limit Attempts by BestWebSoft is a WordPress security plugin that protects your website from spam and brute-force attacks. It limits the number of failed login attempts per user and blocks the IP for a certain period of time, based on your settings.
This prevents automated scripts from running on your website. The plugin also sends an email notification when it detects and blocks an IP address.
These emails are important for any site to keep an eye on the security of the website.
Now that we understand how the plugin works, let’s see how we can solve the email notification issue by following the steps below.
How To Fix Limit Attempts by BestWebSoft Not Sending Email
In This Article
1. Check Notification Settings in Limit Attempts by BestWebSoft
The email notification in the plugin is turned off by default. You’ll want to check the settings and enable it.
First, go to Limit Attempts » Settings.
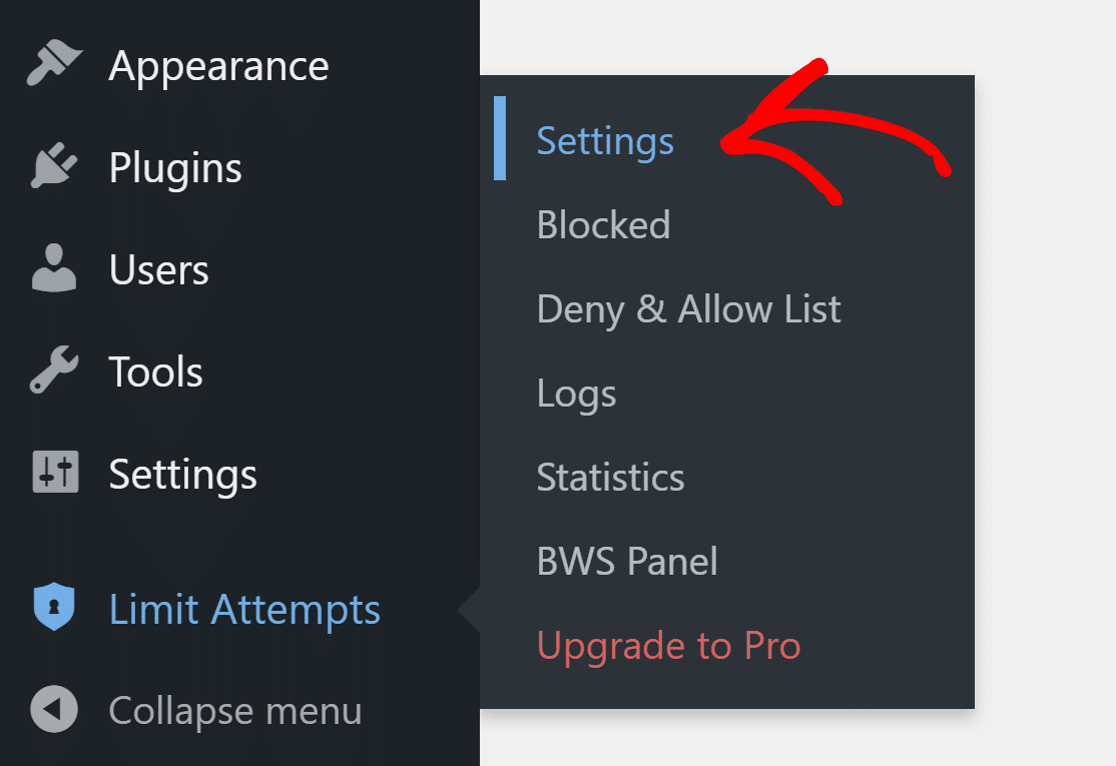
Then click on Notifications in the sidebar. Here, make sure the Email Notifications option is enabled.

Once you have selected the checkmark, the other notifications settings will appear.
There, you can choose to send the notification to a user on the website or type in a custom email address by selecting Custom Email.

The plugin also lets you customize the template of the email you’ll receive as notifications. Scroll down and edit the template to create your own using the variables given or use the default one.
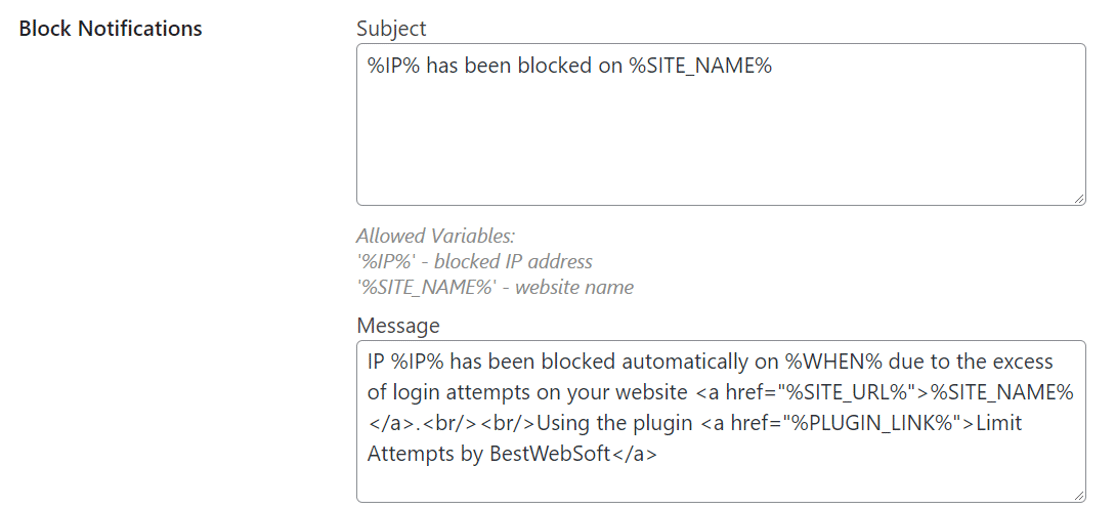
Once you have made the changes, click on Save Changes to update the settings.
Let’s now check the number set for failed attempts before the plugin carries out its function.
2. Check Failed Attempts Settings
Limit Attempts by BestWebSoft blocks the IP address or email of a user after a certain number of failed attempts to log in. This keeps those who try to repeatedly guess usernames and passwords from accessing the site.
In the Limit Attempts Settings, go to the Settings tab and check the number in the box for Block IP Address After.

The recommended value is 5. If the value is set to a higher number, it will take more attempts for Limit Attempts to block the IP and send an email notification.
Now that we have everything set up in the Limit Attempts, let’s install the WP Mail SMTP plugin to ensure all emails are delivered to the right inbox.
3. Install the WP Mail SMTP Plugin
WP Mail SMTP is the best WordPress SMTP plugin. It makes it easy to fix the Limit Attempts by BestWebSoft not sending email issue.
It reconfigures the wp_mail() function to send email using an external email service. This adds authentication to the emails and prevents them from landing in the spam folder.
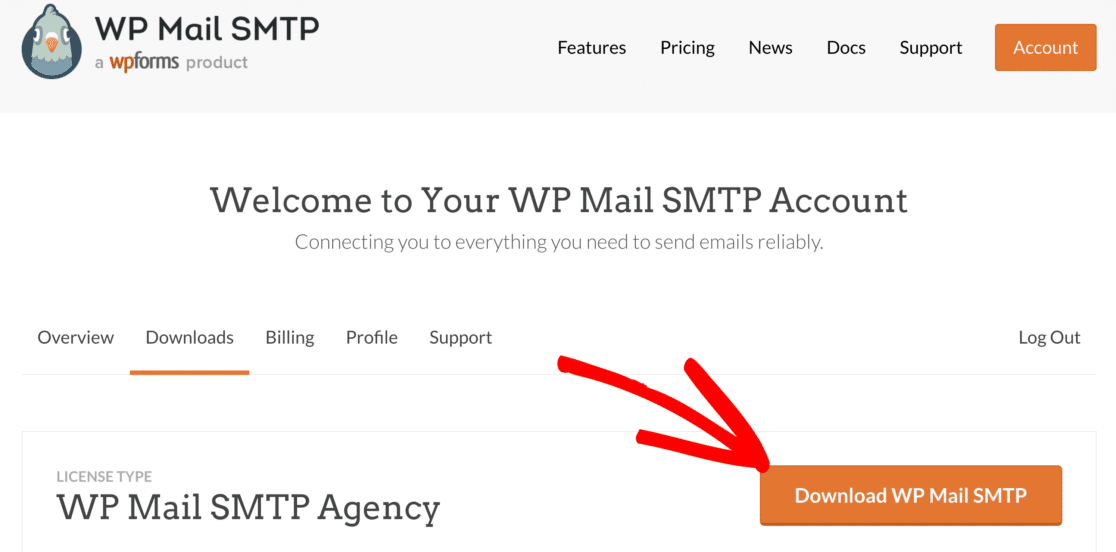
To download the plugin, head over to your WP Mail SMTP account, and under the Downloads tab, click on the orange button.
Next, switch to the backend of your WordPress website and upload the zip file on the Plugins page. If you need help with this, you can refer to this guide on how to install a WordPress plugin.

After you install the plugin, make sure you also activate it. This will start the Setup Wizard which makes it easy to configure the plugin.
If you are not ready yet and want to start the wizard at a later time, you can click the Launch Setup Wizard button in the plugin settings.
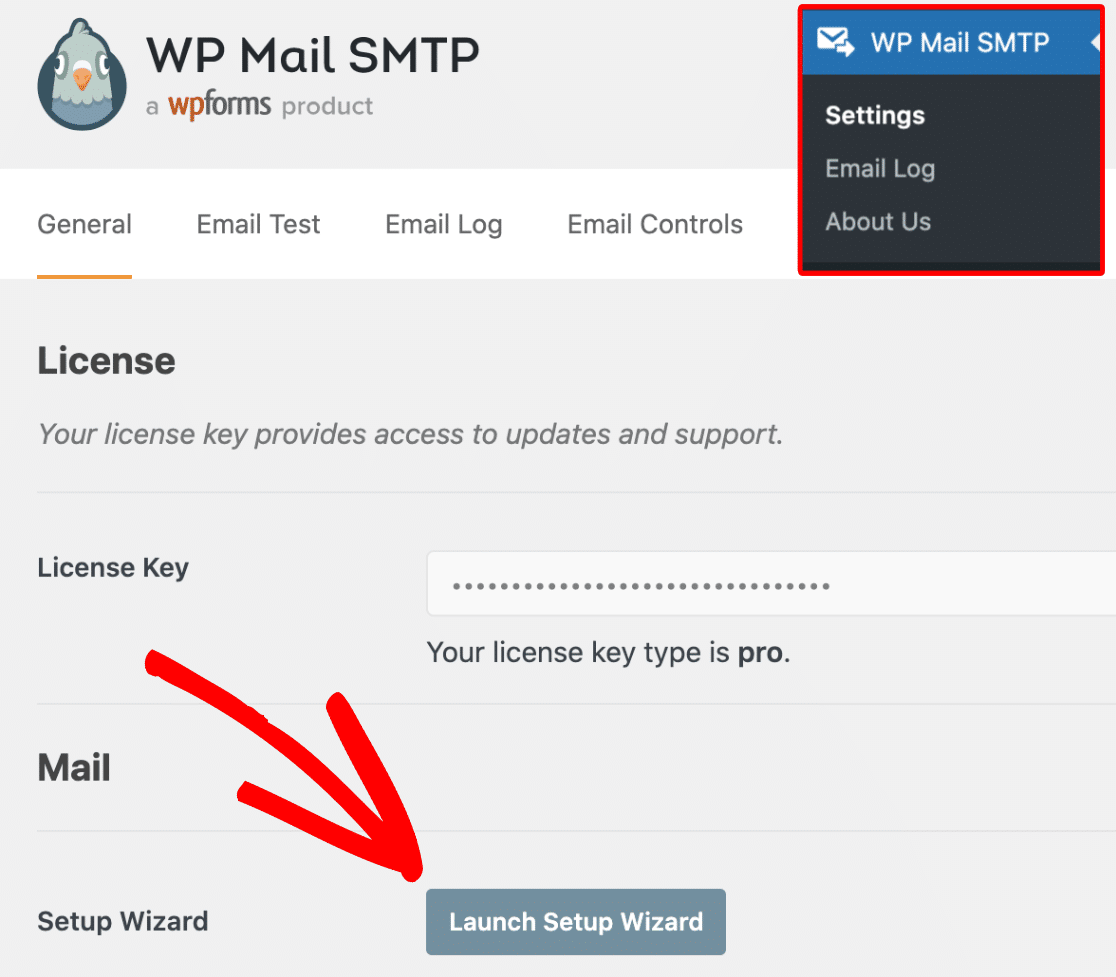
Do note that this will erase any existing mailer settings you might have in the plugin.
4. Setup a Mailer Service
In this step, we’ll choose an email service that’ll add authentication to your emails.
Click on the Let’s Get Started button to begin the process.

WP Mail SMTP offers plenty of options for the email service provider.
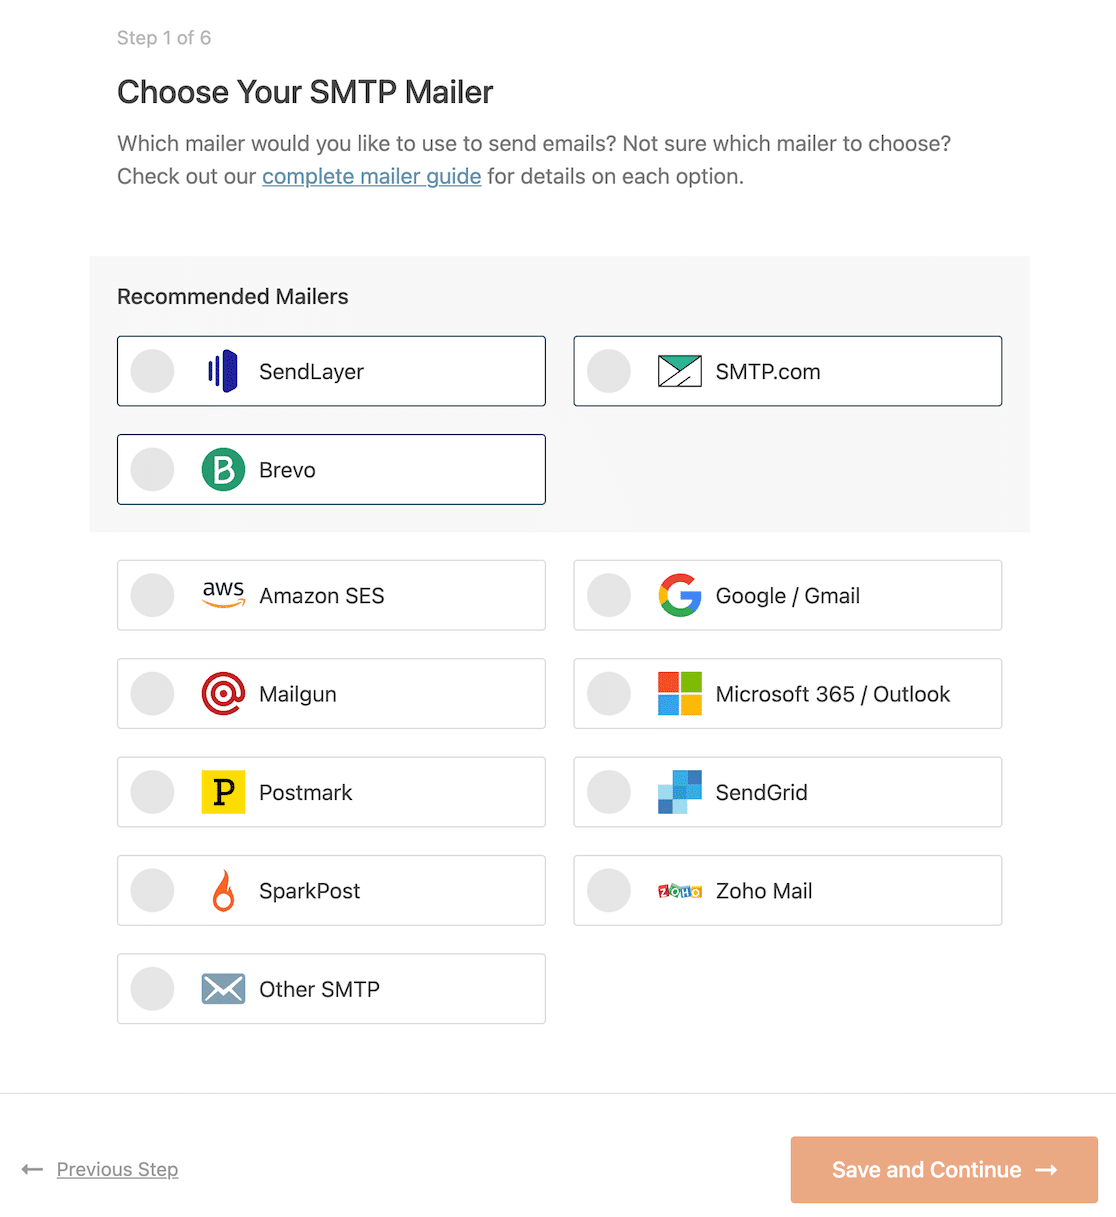
- Are you on a tight budget and have a website that sends occasional emails? You can choose Brevo (formerly Sendinblue), which lets you send up to 300 emails per day for free.
- If you don’t mind spending a little and have a website that sends lots of transactional emails, it is better to go with an option like SendLayer or SMTP.com.
- Already have access to an SMTP service? You can use the Other SMTP option. Just make sure to use the correct SMTP port to avoid connection issues or timeouts.
When you’ve chosen your mailer, open up our documentation to complete the setup steps on the provider’s side.
- SendLayer
- SMTP.com
- Brevo
- Amazon SES
- Google Workspace / Gmail
- Mailgun
- Microsoft 365 / Outlook.com
- Postmark
- SendGrid
- SparkPost
- Zoho Mail
- Other SMTP
If you want to set up multiple mailers, you can do so in the Additional Connections settings once you’ve finished the Setup Wizard. Then you can select a Backup Connection and configure Smart Routing.
Switch back to this guide once you establish a connection between the mailer and your website.
5. Turn On Email Logging (Optional)
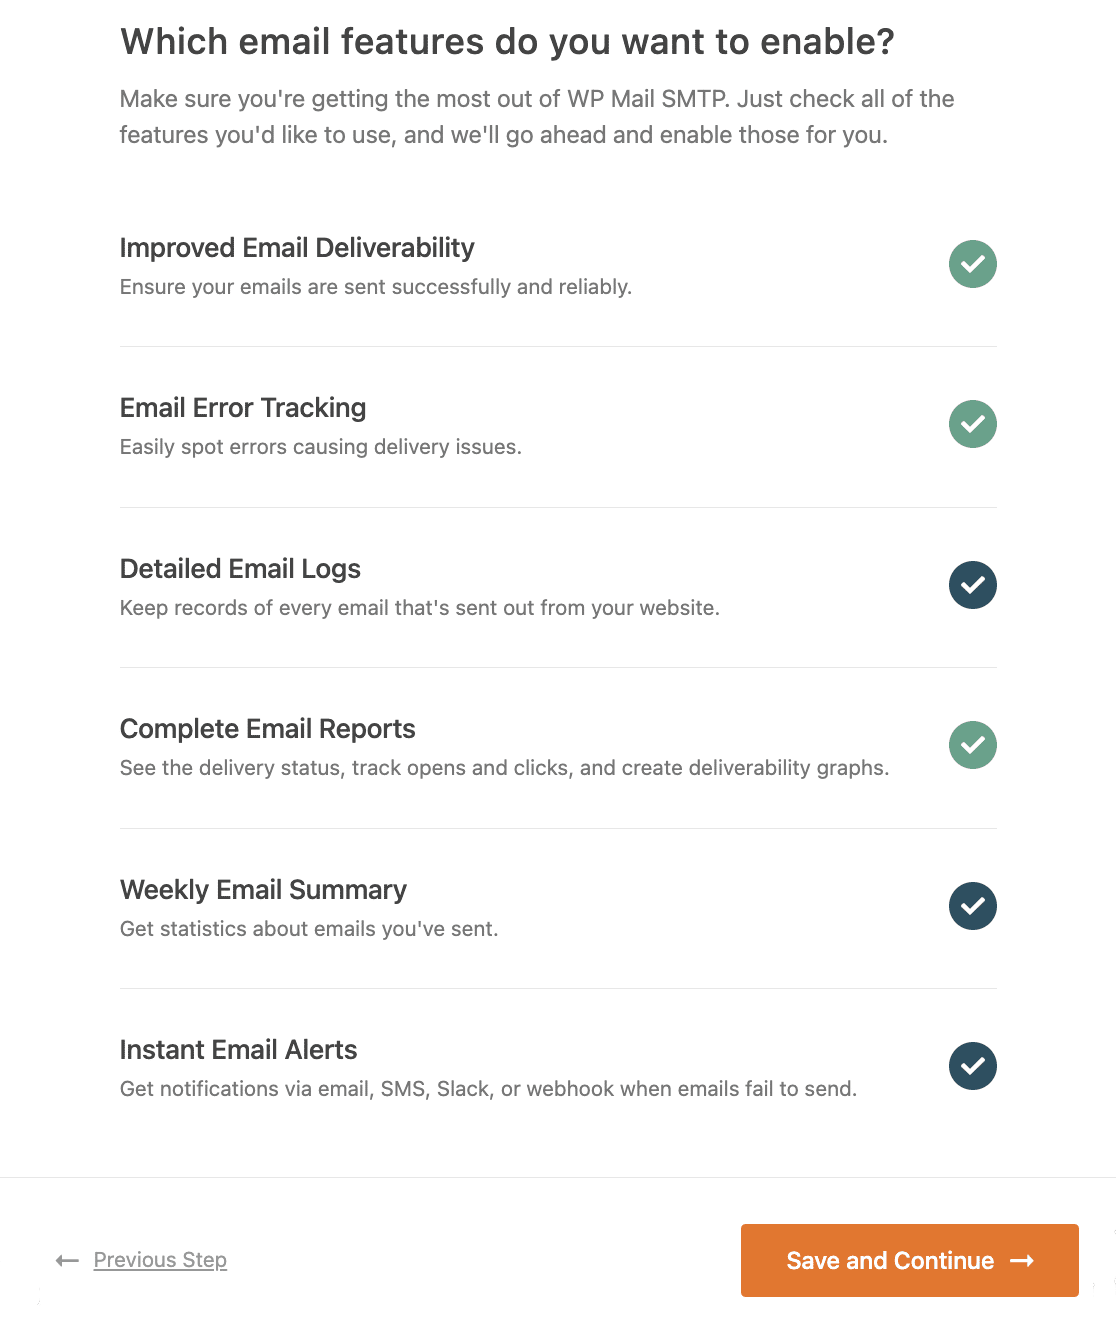
For the next step, WP Mail SMTP will ask you which features you want to enable. By default, 2 options will be enabled.
- Improved Email Deliverability improves delivery to the right inbox.
- Email Error Tracking lets you know about problems that your emails might face.
It is recommended to you keep them enabled to solve the Limit Attempts by BestWebSoft not sending email issue.
The third option is Detailed Email Logs which, when enabled, will keep a track of all emails that are being sent from your website.
This is helpful in spotting errors with your emails. It also lets you track email opens and link clicks, save attachments, and more. You might want to check out this guide that explains how to use the email log feature in WP Mail SMTP.
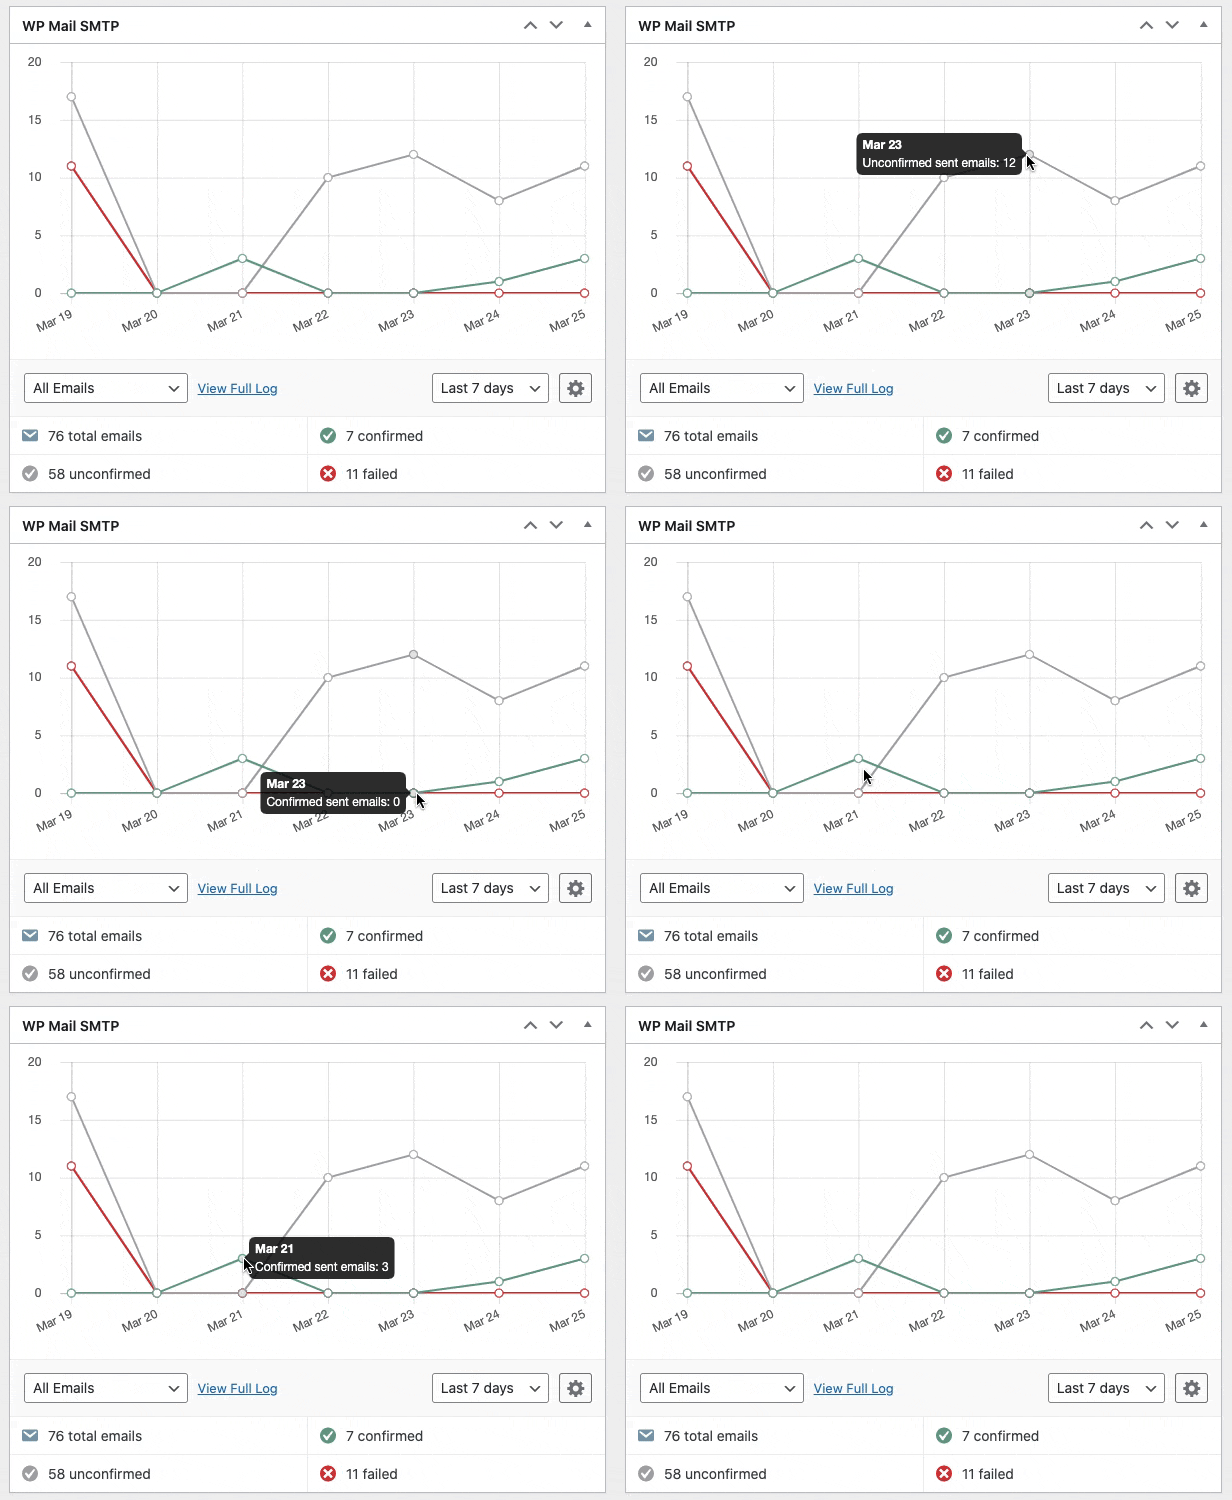
WP Mail SMTP also has a helpful dashboard widget that shows your email logs in the form of a chart. This makes it easy to interpret that data in less time.
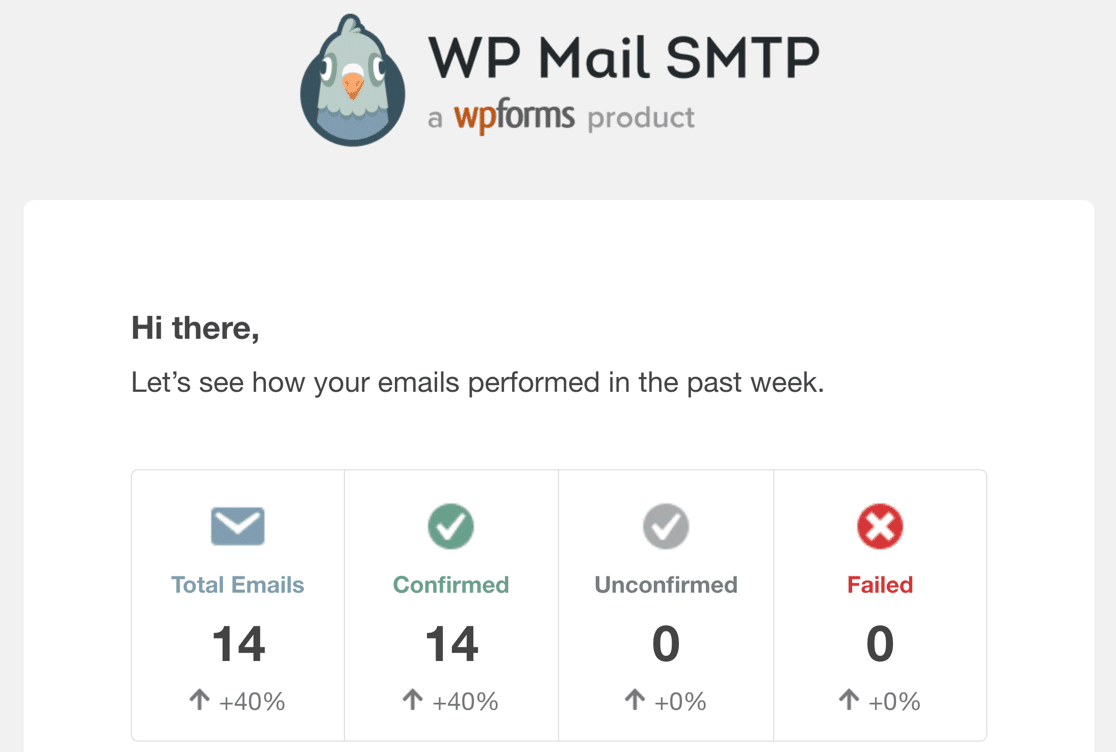
When Detailed Email Logs are enabled, Complete Email Reports will also be turned on. You have the choice of whether or not you want to receive the Weekly Email Summary, which shows your recent email delivery stats.
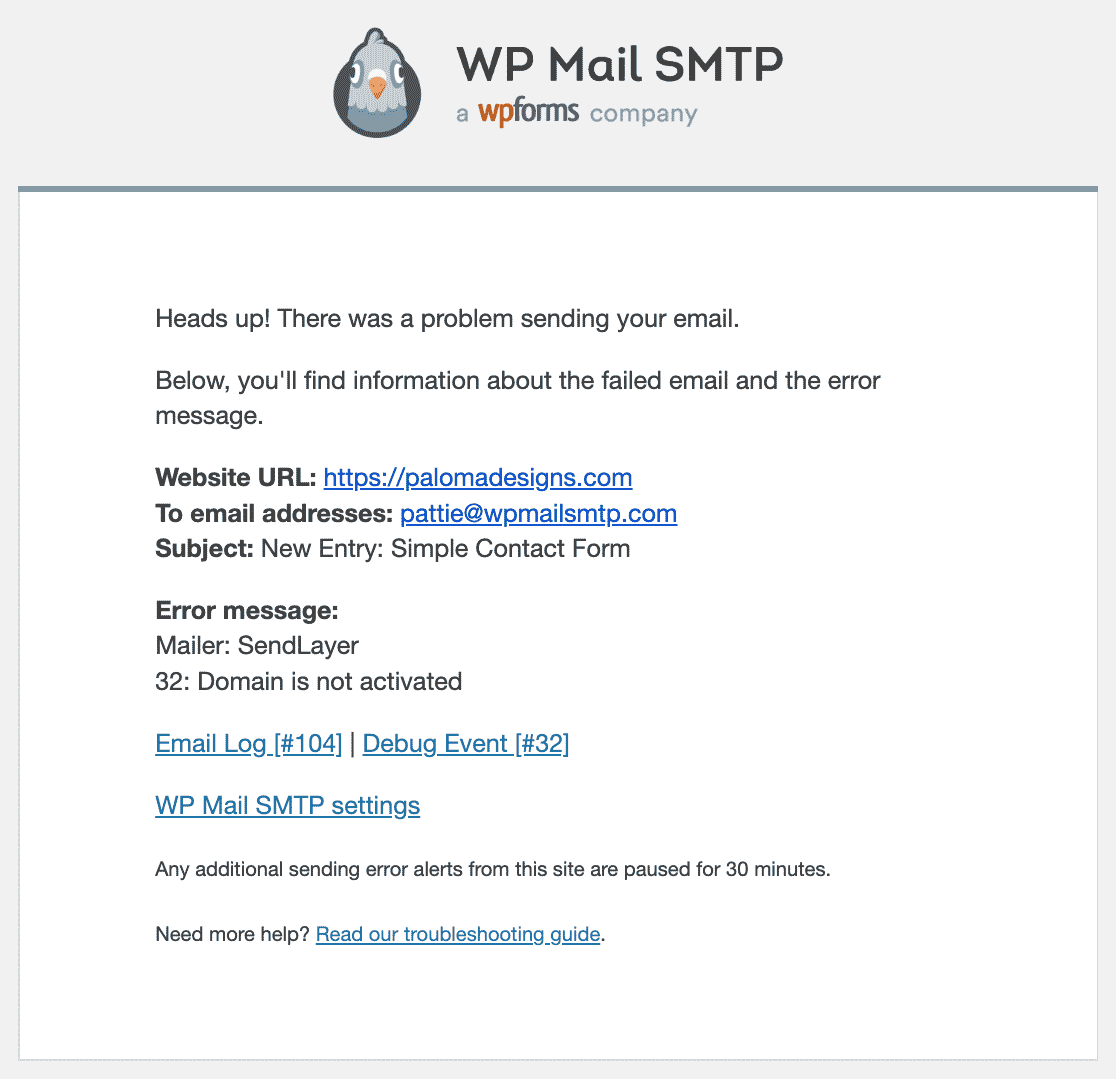
The Instant Email Alerts feature will let you know right away if your site fails to send an email. This lets you quickly diagnose the issue and fix it so your emails start sending again.
On the next screen, you’ll have the chance to enable some advanced email logging features.
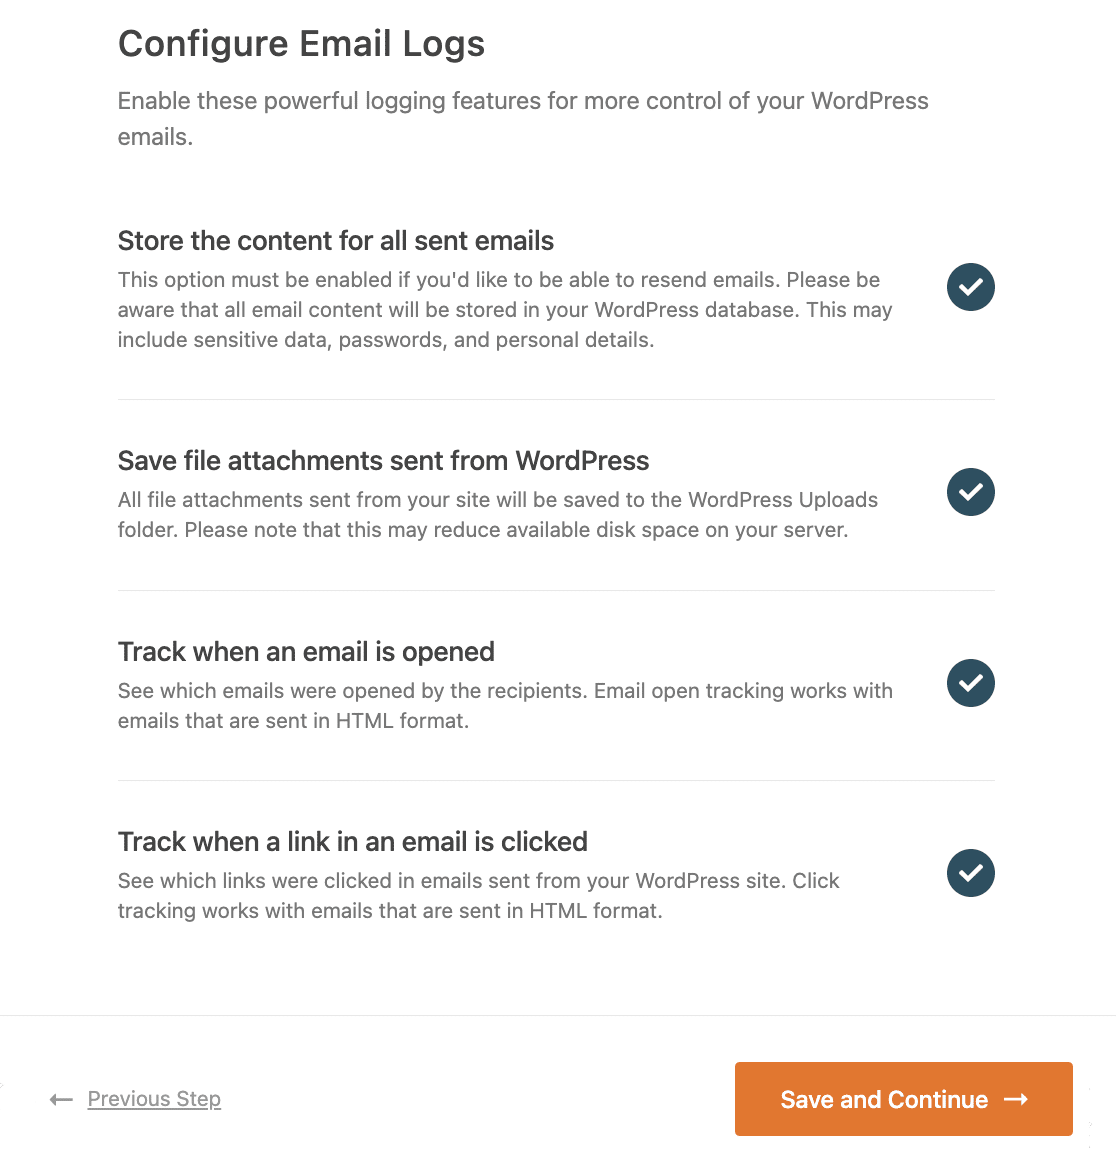
Saving the content of your WordPress emails will let you resend them if you need to. Saving file attachments can be useful if you need to print invoices or packing lists, and track opens and link clicks helps you measure engagement.
For the last step, you’ll need to grab the license key from the WP Mail SMTP account and paste it into the box. This will enable future automatic updates to the plugin.

That’s it! You’ve done everything to solve the Limit Attempts by BestWebSoft not sending email issue.
Next, Fix Contact Form by BestWebSoft Not Sending Email
BestWebSoft has a suite of WordPress plugins and themes. It has quite a lot of plugins covering different categories and the contact form plugin is one of them.
If you’re using it to build forms and facing issues with email deliverability, you might want to check out how to fix the BestWebSoft contact form email notifications.
Ready to fix your emails? Get started today with the best WordPress SMTP plugin. WP Mail SMTP Elite includes full White Glove Setup and offers a 14-day money-back guarantee.
If this article helped you out, please follow us on Facebook and Twitter for more WordPress tips and tutorials.

