Do you want to set up WordPress push notifications on your website?
With web push notifications, you can send messages to users even after they have left your site. This increases targeted traffic and could boost your conversions.
In this article, we’ll show you how to set up a free push notification plugin so you can try it for yourself.
In This Article
What Are Web Push Notifications?
Web push notifications are messages sent to visitors (who have opted to receive them) after they have left your website. To opt in, you’ll usually see a prompt like this:

Push notifications work and look exactly like the notifications you receive on your phone. They work on both desktop and mobile devices and can be sent automatically or manually.
The best thing about push notifications is their performance, particularly compared to email:
- Web push notifications are known to have a great open rate. Saleduck, an online deal community got a 400% higher open rate with push notifications.
- Another PushEngage customer saw 4x higher click-through rates than email.
- The delivery rate for push is around 90%, and there is no risk of your message ending up in the spam folder!
Want to see if you get the same results? Let’s try out PushEngage on your site.
How to Add Web Push Notifications to Your WordPress Site
PushEngage is a free WordPress push notification plugin that’s compatible with most popular browsers, including:
- Chrome
- Firefox
- Safari
- Microsoft Edge
We’re going to use PushEngage because it can be used on many platforms, including WordPress and Shopify.
If you have a WooCommerce website, you can send push notifications for cart abandonment, sales, and low stock alerts. If you regularly write blogs, you can set PushEngage to create automatic push notifications whenever you publish something new.
- The free version lets you sign up 500 subscribers and send up to 300 notifications per month.
- Paid plans start at $14/month for up to 100,000 subscribers and unlimited notifications. You also get support for WooCommerce and other advanced features.
1. Install the PushEngage Plugin
First, we’ll install the PushEngage plugin. You’ll find it in the WordPress plugin repository.
If you are not sure how to find it, check out our step-by-step guide on how to install a WordPress plugin.
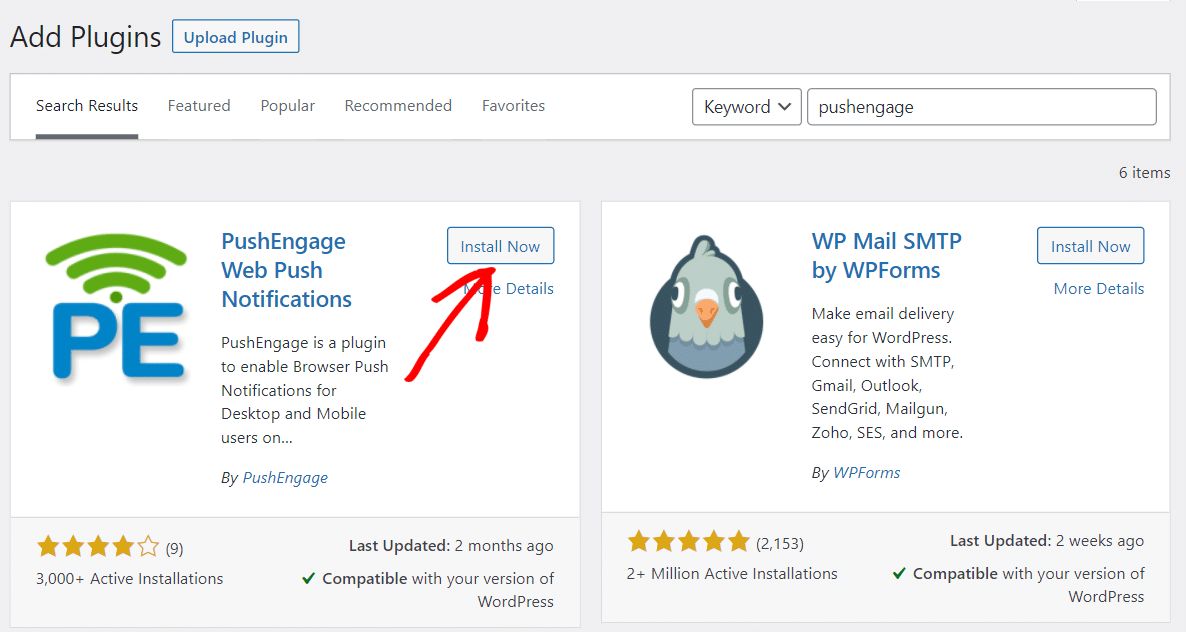
Once you’ve got the plugin installed, you can proceed to create a free account on PushEngage and link it to the plugin.
2. Create a Free Account on PushEngage
In this step, we’ll create your account and connect it to WordPress.
Head over to the PushEngage website and click on Get Started for Free Now!
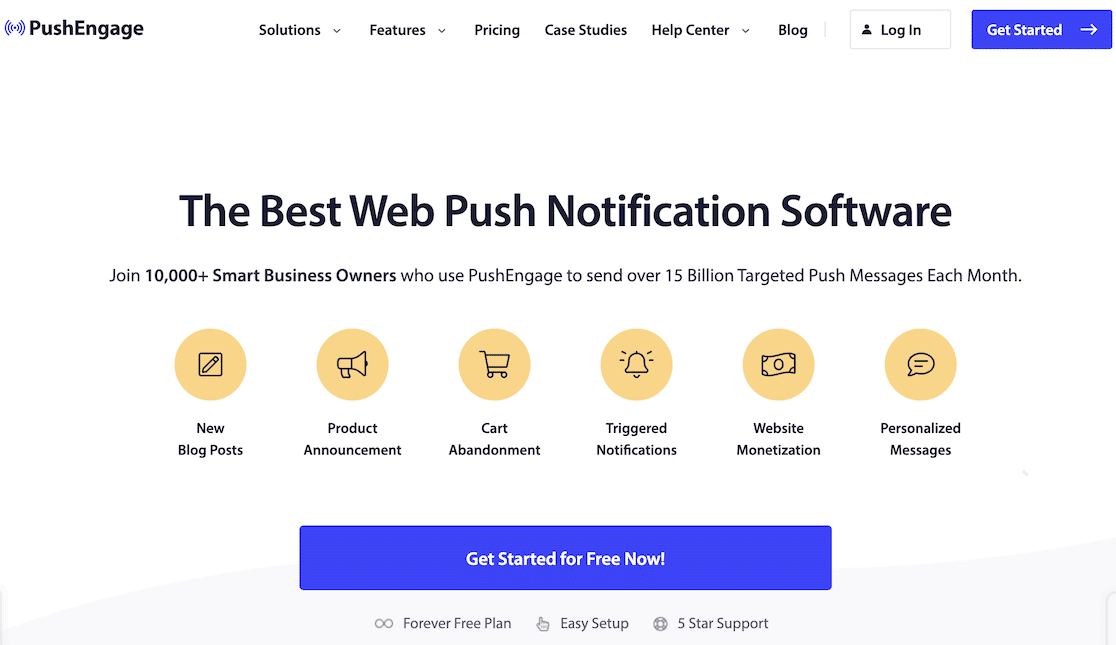
Fill in your account details and complete signup here. If you choose to set up using your Google account, PushEngage will prompt you to enter your website details.
Once you are on the dashboard, you will see a setup wizard that makes it easy to configure the plugin. Click on View Tasks to start the process.

First, we’ll upload your site logo. This will appear as the default image in the push notification message.
Click on the Change button and upload an image in either PNG or JPG file format.
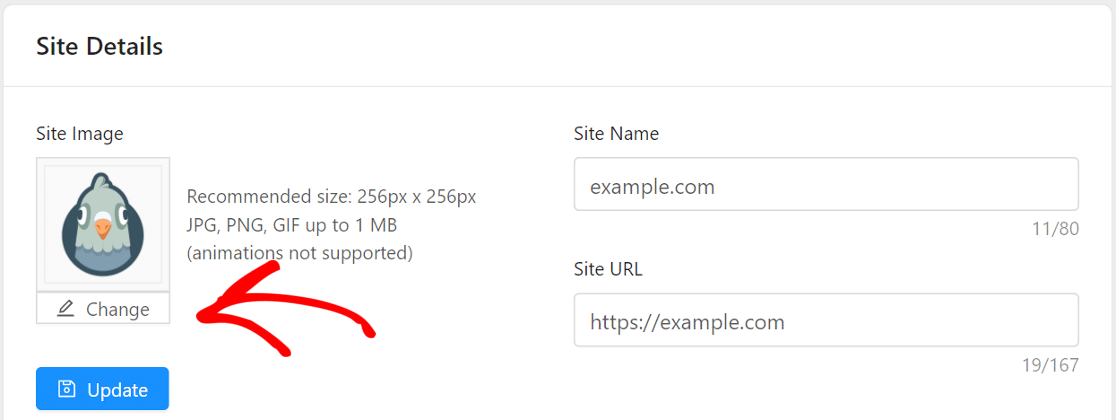
When you complete this step, PushEngage will ask you to confirm your time zone. Since that’s done automatically, let’s move on to the 3rd step in the onboarding wizard.
3. Connect Your WordPress Website
In this step, we’ll connect your site to your new PushEngage account.
We already installed the plugin, so this is simple. We just need to copy the API code from PushEngage and paste it onto our website.
On the PushEngage site, scroll down and click on the Get API Key button and then click on Generate a new API key.
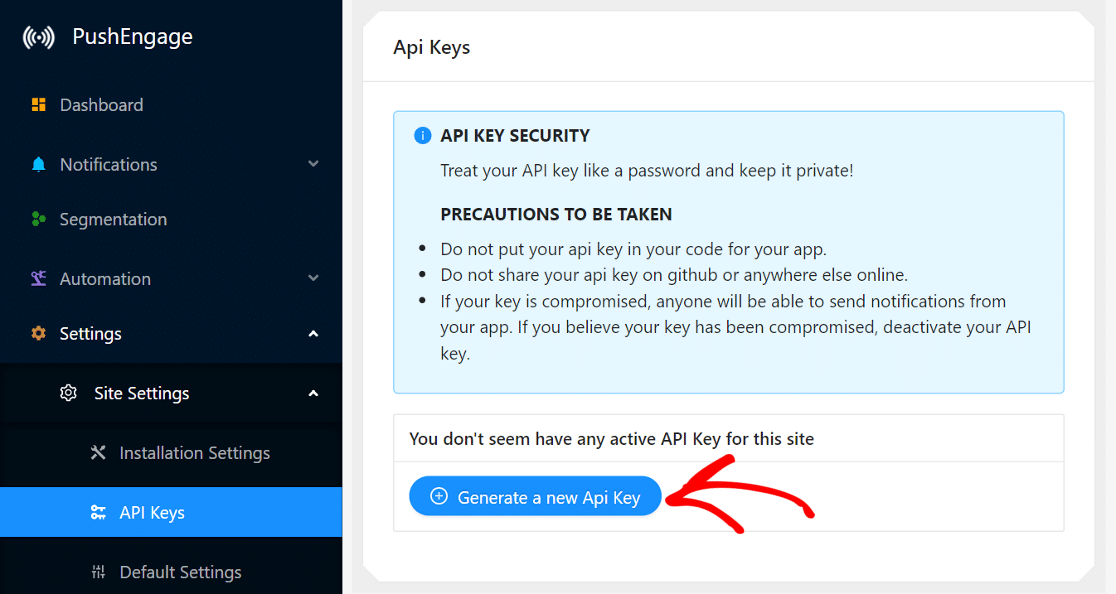
Switch back to your WordPress dashboard now. Copy and paste the API key where prompted and click on Submit.
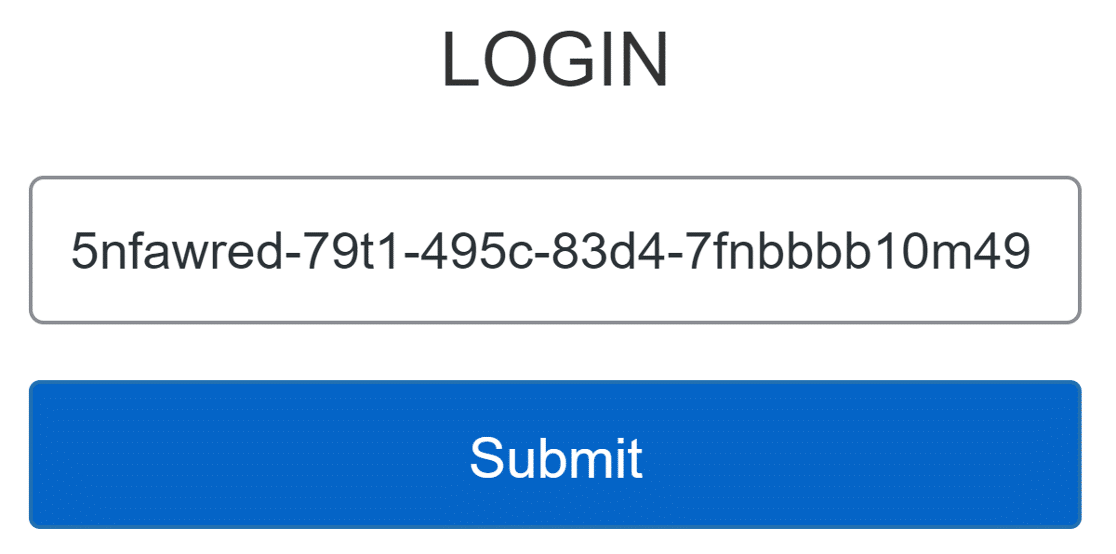
The website will now connect to PushEngage.
You can now change some basic settings from the WordPress dashboard. In particular, you might want to pay attention to these 2 settings:

- Automatically send a push notification to your subscribers every time you publish a new post: This setting will push a notification to your subscribers as soon as a new post goes live. If you want more control, turn this off here. You can then send manual notifications by checking a box in the post editor, or by writing your own notification on the PushEngage website.
- Allow all types of posts to automatically trigger a notification: If this is enabled, be sure to check the custom post types on your site so that you don’t accidentally send notifications for post types that are private. If in doubt, you could turn this off.
From this point, some of the settings we’ll show you can be applied in WordPress or on the PushEngage site. We’ll show you the PushEngage site since it’s a little more detailed.
4. Set Welcome Notification
The 4th task is to set up a welcome notification for your subscribers. This notification will be shown after someone has subscribed to notifications from your website.
In the welcome message, you need to set a title and a message. You can set the URL to any page you like. We used the homepage URL, but you could also use a specific category or sale page.
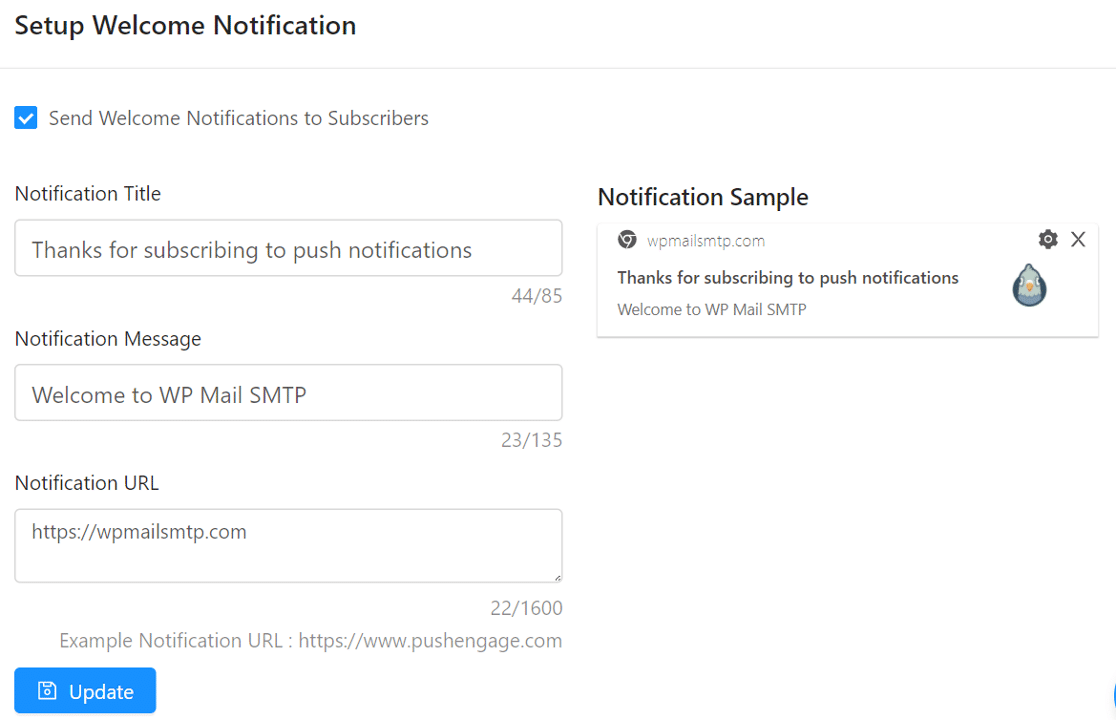
Make sure to check the Send Welcome Notifications to Subscribers box and click on the Update button to save your changes.
Next, we’ll set up the dialog box that invites users to opt in.
5. Set Up Subscription Dialog Box
The fifth task is to set up a subscription dialogue box or the notification prompt that visitors will see when they visit your website.
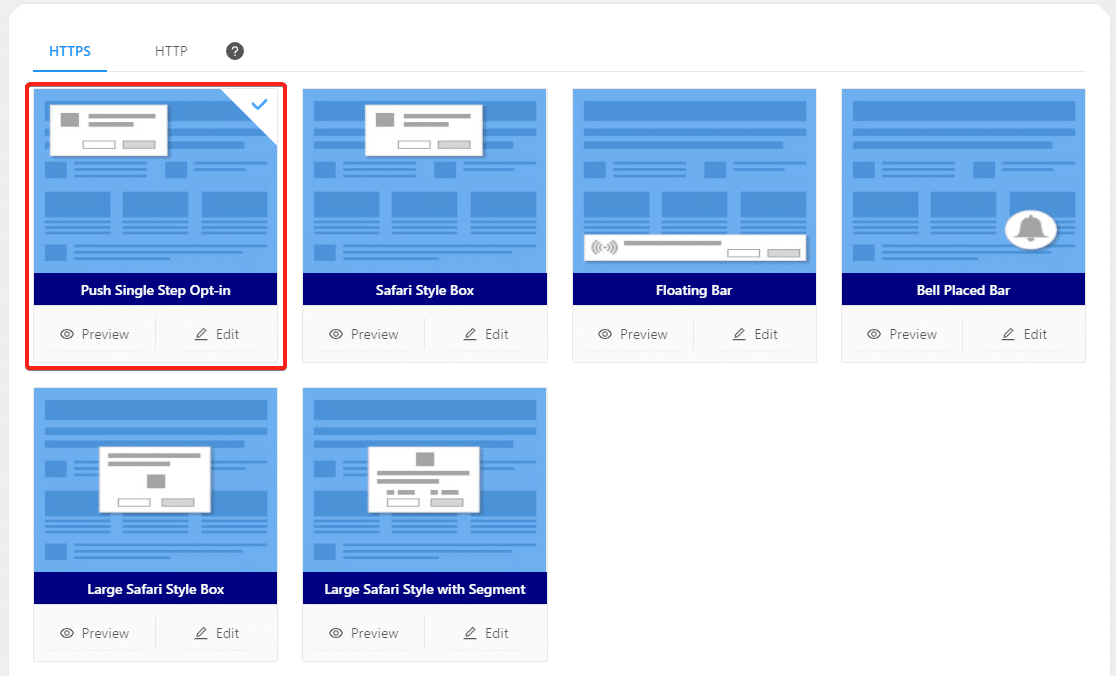
You can find it from the task list or under Settings » Subscription Settings » Subscription Dialogbox. You can Preview to see how each one looks or click on Edit to change its style.
PushEngage recommends the Push Single Step Opt-in for best performance.
At this point, you’ll need to upload some files if you’re not using WordPress. This will allow you to send notifications from your domain instead of the PushEngage subdomain.
Since we have the WordPress plugin installed, let’s skip this and start sending.
7. Start Sending Push Notifications
Now it’s time to send your first notification. If you want to test this step, visit your homepage and subscribe so that you have a test subscriber to begin with.
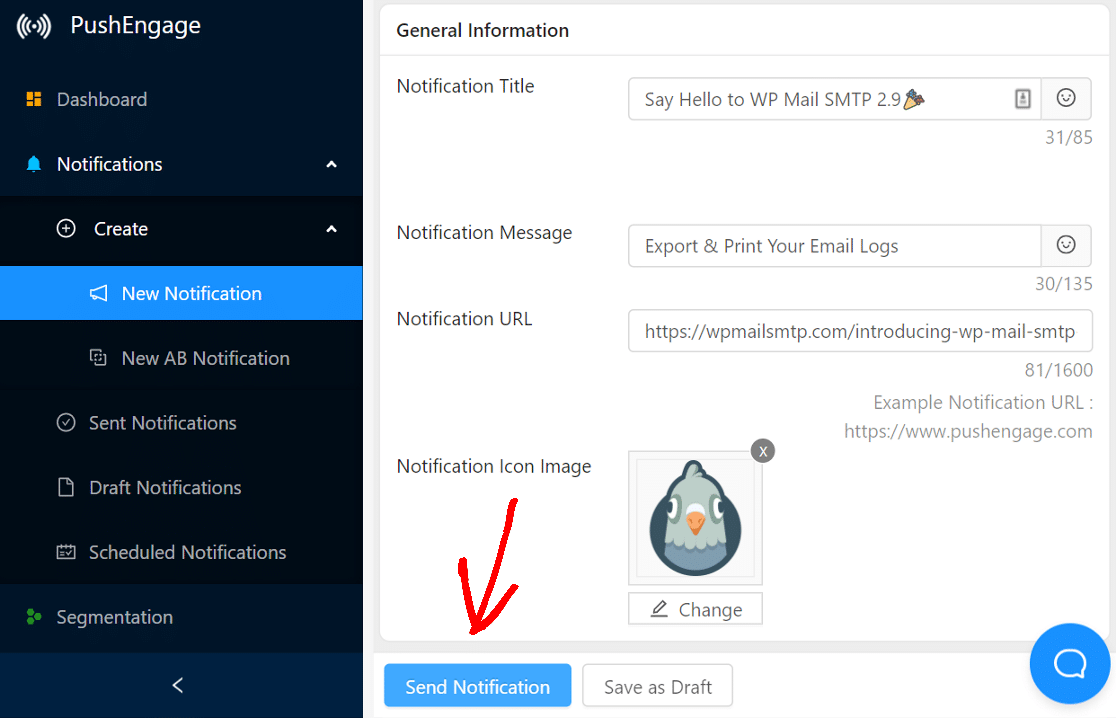
To send a new notification, Click on Notifications from the sidebar and click on Create » New Notification.
Here, you need to type in:
- The title and message for the notification
- The URL of the specific page you want to target
- A custom image for the notification message (if you want to override the default one).
Pro Tip: We recommend that you use Multi-Action Notification as well. This allows you to add a ‘Read More’ button that could help to get more clicks.
Once that’s done, you can choose to send your notification now or schedule it at a later time. If you are on a paid plan, you can also schedule it to send according to the user’s time zone.
Review everything before clicking the Send Notification button… and that’s it! Keep an eye on your PushEngage analytics to see how your notifications perform.
Next, Notify Authors When Their Posts Are Published
It’s a lot easier to keep track of the posting schedule of a multi-author blog if you have automatic email notifications set up for authors when their posts are published.
And if you’re fed up with spam on your site, we recommend checking out these alternatives to Google reCAPTCHA
Ready to fix your emails? Get started today with the best WordPress SMTP plugin. If you don’t have the time to fix your emails, you can get full White Glove Setup assistance as an extra purchase, and there’s a 14-day money-back guarantee for all paid plans.If this article helped you out, please follow us on Facebook and Twitter for more WordPress tips and tutorials.

