
AI Summary
Before I started writing about WordPress, I spent years as a freelance web designer. I’ve been building WordPress websites for over 10 years now, and one thing I quickly learned not to rely on was the built-in email functionality.
At first I assumed that WordPress just handled emails properly out of the box but when clients complained they weren’t getting their form submissions and other important website emails, I realized I needed a better solution.
Not every business wants to pay expensive email services though. Every dollar counts, especially when you’re just starting out.
If you’re in the same boat, connecting WordPress to a free SMTP server could solve these problems without adding another monthly expense.
In this guide, I’ll walk you through everything you need to know about using free SMTP email servers with WordPress. I’ll share the options that have worked best for my clients and me, along with step-by-step instructions to get you set up quickly.
- Why WordPress Emails Fail and How SMTP Fixes It
- What to Consider When Choosing An SMTP Email Service
- What You Need to Set Up a Free SMTP Server for WordPress Emails
- Setting Up the WP Mail SMTP Plugin
- Sending WordPress Emails With Free Gmail SMTP
- Setting Up Free Brevo Email with WP Mail SMTP
- Setting Up SendLayer with WP Mail SMTP
- Set Up Any Free SMTP Service with WP Mail SMTP
- Frequently Asked Questions
Why WordPress Emails Fail and How SMTP Fixes It
By default, WordPress uses the PHP mail() function to send emails. This might sound technical, but here’s what it means for you: unreliable email delivery and a higher chance your messages will get flagged as spam.
Many hosting providers restrict or don’t properly configure PHP mail, which means your emails might never leave your server in the first place.
Emails sent through PHP mail also lack proper authentication, so email providers can’t confirm your messages are legitimate. This is increasingly problematic as spam filters have become stricter with unauthenticated emails, quickly flagging and blocking messages that don’t follow modern email security practices.
To make matters worse, the default system provides no delivery confirmation or tracking capabilities, leaving you in the dark about whether your emails actually reached their destination.
This is where SMTP (Simple Mail Transfer Protocol) comes to the rescue. SMTP is the industry standard for sending emails across the internet, and it offers several crucial advantages:
- Improved deliverability: Proper authentication makes your emails more likely to reach the inbox
- Enhanced reliability: Less chance of emails getting lost in cyberspace
- Better sending reputation: Your domain gains credibility with email providers
- Tracking capabilities: Many SMTP services provide delivery analytics
- Higher sending limits: Most SMTP services allow more emails than your hosting provider

The best part? You can implement SMTP on your WordPress site for free using the options I’ll cover in this guide.
What to Consider When Choosing An SMTP Email Service
When selecting an SMTP email service for your WordPress site, you should think carefully about your needs both now and in the future.
While it’s tempting to stick with the email service you’re already using like Gmail or Outlook, this isn’t always the best choice for your website.
Firstly, as these email services are designed primarily for you to write and send emails from an app or web-based interface, it can be quite tricky to set them up to work with your WordPress site.
For example with Gmail, you’ll need to navigate a lengthy series of technical steps that Google requires for security reasons. First, you must enable 2-Step Verification on your Google account, then set up a project in Google Cloud Platform, create OAuth credentials, grant permission to your SMTP plugin to access your account, and troubleshoot errors. If you think that sounds complex and time consuming, trust me – it is!
WP Mail SMTP does offer an easy one-click connection option for Gmail and Outlook email accounts but you’ll need to upgrade to the paid version of the plugin to access this.
Another issue you’ll likely experience as your website grows is that there’s no easy way to increase limits without upgrading to more expensive business accounts, and even then, these services aren’t primarily designed for high-volume website emails.
Additionally, when your website shares the same email service as your personal or business communications, deliverability issues from your website can potentially impact your important personal emails.
So this isn’t to say you can’t use the Gmail SMTP server to send your WordPress emails (and I’ve included full directions for this below as I know it’s a popular choice). But it’s definitely worth looking at some other options.
Benefits of Dedicated Transactional Email Services
In my experience, specialized transactional email services like SendLayer, Brevo, or others offer significant advantages for website owners. Many of these services offer generous free SMTP plans that are great when you’re just starting out.
I’ve found the setup process with these services to be remarkably straightforward. Most integrate directly with WP Mail SMTP, requiring just an API key or standard SMTP credentials.
Dedicated transactional email services also offer significantly higher deliverability rates. They maintain dedicated IP pools with good sender reputations and provide detailed analytics showing exactly what happens to your emails. They may also offer better handling of attachments, improved queue management during traffic spikes, and generally a more reliable email sending experience.
For very small personal sites, sticking with your existing email service might be adequate. However, based on my experience managing multiple WordPress sites, I strongly recommend considering a dedicated transactional email service from the beginning.
The free tiers offered by most dedicated services provide enough capacity to get started, making them accessible even for new websites. As your email needs grow, transitioning to paid plans is seamless and can be pretty affordable. For example, SendLayer paid plans start at $5 a month.
I’ve put together information about all the free SMTP services supported by WP Mail SMTP in the table below to help you make your decision.
| Service | Free Limit | Features | Limitations | Paid Plan Starts At |
|---|---|---|---|---|
| SendLayer | 200 emails (trial only) | Simple setup, good deliverability, detailed analytics, developer friendly | Not a forever free plan, just a trial. But more affordable monthly plans than other options | $5/month for 1,000 emails |
| Brevo (Sendinblue) | 300 emails per day | Marketing features, SMS capabilities | Email footer branding on free plan | From $9/month for 5,000 emails |
| Elastic Email | 100 emails per day | Email designer, email verification, and analytics | API plan does not include dashboard tools | From $19/month for 50,000 emails |
| Gmail | 500 emails per day (2,000 with Google Workspace) |
Reliable service, familiar interface | Complex setup if you’re using a free SMTP plugin | $7/month with Google Workspace |
| Mailgun | 100 emails per day | Developer-focused, powerful API, good deliverability | Email logs kept only for 1 day | From $15/month for 10,000 emails |
| Mailjet | 200 emails per day | Includes email editor and form builder | Mailjet logo in free plan emails | From $15/month for 10,000 emails |
| Postmark | 100 emails per month | Detailed analytics, message streams | Free plan is very limited, designed for testing only | $15/month for 10,000 emails |
| Twilio SendGrid | 100 emails per day (for 60 days) | Detailed analytics, developer-friendly | Free trial is limited to 60 days | $19.95/month for 50,000 emails |
| SMTP2GO | 1,000 emails per month | Easy setup, responsive support | Emails sent over daily/monthly limit are blocked, not queued | $15/month for 10,000 emails |
| SparkPost | 500 emails per month (developer account) | Enterprise-grade analytics | Developer-focused, steeper learning curve | $20/month for 50,000 emails |
What You Need to Set Up a Free SMTP Server for WordPress Emails
Once you’ve chosen a free SMTP email service and signed up for an account, you can use it to start sending emails from your WordPress site in minutes. Here’s what you need:
- A WordPress website: You need administrative access to install plugins
- An SMTP plugin: I recommend WP Mail SMTP, which has a free version that works with many SMTP email services.
- An account with an SMTP email provider: Choose any from the table above or another service that gives you SMTP email credentials.
- Your domain DNS access: For authentication (improves deliverability). You can usually access this in your web hosting or domain name administration panel.
Once you’ve got everything you need, the setup process should take only a few minutes for most SMTP email providers. I’ve included detailed steps for a few of the most popular services below but the basic setup is essentially the same for every email service:
- Choose and sign up for a free SMTP email service
- Install an SMTP plugin on your WordPress site
- Configure the plugin with your SMTP service credentials
- Send a test email to verify everything works
- Optionally, set up domain authentication for better deliverability
Even if you’re not technically inclined, don’t worry – WP Mail SMTP makes this process fast and easy.
Setting Up the WP Mail SMTP Plugin
Before we take a look into free email services, you’ll need to install an SMTP plugin on your WordPress site.
WP Mail SMTP connects easily with all the popular email services and makes the setup process straightforward, even for people who aren’t particularly tech-savvy.
If you go with the Pro version, you get one-click configuration for Gmail and Outlook, which honestly makes life much easier if you want to use these email providers.
The paid version plugin also includes helpful logging features that have saved me countless hours of troubleshooting when things go wrong. But for now, you can go ahead and install the free version.
Here’s how to get started with WP Mail SMTP:
- Install the plugin: Go to your WordPress dashboard > Plugins > Add New and search for “WP Mail SMTP”
- Activate the plugin: Click the “Activate” button after installation
- Run the setup wizard: Follow the prompts to choose your SMTP provider
- Configure your provider: Enter the credentials for your chosen SMTP service
- Send a test email: Verify that everything is working properly
The free version of WP Mail SMTP works with most major email providers, many of which offer a free plan, including:
For most small business owners, the free version of WP Mail SMTP will be sufficient to start with. As your business grows, the Pro version offers features that may justify the investment.
As for the email providers, their free plans do have limitations, which vary depending on the service you choose. You can use the table above as a guide to help you choose a free SMTP email provider that fits your needs.
While the WP Mail SMTP setup wizard will walk you through the steps of connecting to your email service of choice, I’ve included full manual instructions below so you can configure the plugin at any time after installation.
Sending WordPress Emails With Free Gmail SMTP
I’ll start by explaining how to connect your Gmail account to WordPress using the WP Mail SMTP plugin. As explained previously, you may want to consider signing up for a free email account specifically for your website rather than using your existing Gmail account. But I know Gmail is still one of the most popular email options, so I’ve included the full steps to get connected here.
Begin with either creating a new Gmail account dedicated to your website’s emails or using an existing one. Gmail allows you to send up to 500 emails a day but If you’re running a business, consider using a Google Workspace account, which increases your sending limit to 2000 emails a day
Setup with Free WP Mail SMTP Version
Start by going to WP Mail SMTP » Settings and clicking the General tab.
Now, enter the email address that your WordPress site’s emails will be sent from. This can be the Gmail address you set up when creating your account or an alias you created to send from a custom domain.

I also recommend setting the Force From Email toggle to On. This will set your Gmail address as your From email for all emails your site sends, overriding anything set by other plugins.
Next, enter the From Name you want your emails to appear to come from. This is set to your website name by default, but you can enter any name you wish.

Again, I recommend turning the Force From Name option on.
Next, scroll down and select Google / Gmail as your mailer.

Google no longer supports entering your Gmail username and password as your SMTP credentials so if you’re using the free WP Mail SMTP plugin you’ll need to set up an app password first. This can be a bit complex, so I recommend following our detailed documentation at Gmail / Google Workspace Setup Guide for step-by-step instructions with screenshots and a video to walk you through the process. This method works but requires several technical steps.
WP Mail SMTP Pro offers a one-click setup option that dramatically simplifies the process. If you want to stick with using Gmail for your WordPress emails, it’s really worth the upgrade as you can save yourself all the manual setup and hassle.
If you’re deciding between One-Click Setup and manual setup, here’s a quick comparison:
| Manual Setup | One-Click Setup (Pro) | |
|---|---|---|
| Ease of Use | Step-by-step guide to assist you | Instant connection with minimal steps |
| Technical Steps | Requires creating a Google app and configuring credentials | No manual configuration needed |
| Time Required | Approximately 30-60 minutes | Less than 2 minutes |
| Support | Access to extensive documentation | Priority support from our team |
| Ideal For | Users who prefer detailed setup and learning process | Users seeking the fastest and easiest setup |
One-Click Gmail Setup With WP Mail SMTP Pro
Looking for the quickest way to get started? One-Click Setup simplifies the process so you can start sending emails right away.
👉 Upgrade to Pro & Enable One-Click Setup
To take advantage of this quick and easy setup option, all you need to do is activate One-Click Setup by clicking the toggle to ON.
Next, click the Save button at the bottom of the screen to save your settings.

After saving your settings, you’ll see a Sign in with Google button that you’ll need to click to authorize WP Mail SMTP to send emails via your Google account.

After logging in, click the Allow button to grant access.

And that’s it! You should see a confirmation message that you’ve successfully connected your Google account and you’re all set.

Setting Up Free Brevo Email with WP Mail SMTP
If you’ve decided Gmail isn’t the best option for sending your WordPress emails, you may want to consider one of the other SMTP providers listed abobe.
Brevo (formerly Sendinblue) is one of WP Mail SMTP’s recommended email providers and it offers a generous free tier allowing up to 300 daily emails—perfect for new websites or blogs. When your site grows and you need to send more emails, Brevo offers various paid tiers with enhanced capabilities and higher sending volumes.
Sign Up for a Brevo Account and Generate Your API Key in Brevo
To get started, you’ll need to have a Brevo (Sendinblue) account. You can create a new Brevo account for free without a credit card.

After signing up, you’ll need to verify your email address by clicking the button in the email Brevo sends you. Then, you can enter your contact information and continue on to verify your domain. There are detailed step-by-step instuctions to walk you through this in our Brevo setup guide.
After authorizing your domain and verifying your DNS records, you can continue to configure WP Mail SMTP.
You’ll need an API key to use Brevo with WP Mail SMTP. You can generate this in your Brevo dashboard under the SMTP & API area from the settings menu. Follow the steps to generate a new API key and copy it. You’ll need this API key to paste into your WP Mail SMTP settings.

Enter Your Basic Email Settings
Open WP Mail SMTP’s settings page by going to WP Mail SMTP » Settings » General in your WordPress dashboard.
First set the from From Email, which is the email address that all of your site’s emails will be sent from. This email address must contain the same domain you authorized in Brevo.
For example, if you authorized example.com, the From Email address must contain example.com (e.g. [email protected]).

Next, enter the From Name you want emails from your site to be sent from.

Select Brevo as Your Email Provider
In the “Mailer” section, look for and select “Brevo” from the list of available mailers. The plugin offers direct integration with Brevo, making configuration straightforward.

Scroll down and enter the API key you previously generated in your Brevo account into the API Key field.

Next, enter the Sending Domain, which will allow WP Mail SMTP to check for any domain-side errors in your Brevo setup. This domain check will run each time you send a test email.
The sending domain for your site should be the same domain that you’ve already authorized in Brevo.
Finally, click the Save Settings button to save your Brevo connection. You should now be able to send email from your WordPress site with a free Brevo Email account.
Setting Up SendLayer with WP Mail SMTP
Sendlayer doesn’t have a free plan but I’ve included it here as it’s significantly cheaper than other transactional email services at only $5 a month, and you can try it out and get the first 200 emails you send for free.
If you need to send more emails than the free plans with other providers offer but you don’t want to sign up for an expensive email service, it’s a great option. Here’s a step-by-step guide to connect SendLayer with WordPress using the WP Mail SMTP plugin:
Create a SendLayer Account
First, go to the SendLayer website and sign up for a new account. SendLayer offers a free trial which is perfect when you’re just getting started. To get started on the free plan, scroll down to the bottom of the pricing table and click the link to sign up for a free trial.

You can follow this guide for step-by-step instructions for creating a SendLayer account.
Configure WP Mail SMTP Settings
Open WP Mail SMTP’s settings page by going to WP Mail SMTP » Settings » General in your WordPress dashboard.
First set the from From Email, which is the email address that all of your site’s emails will be sent from. This email address must contain the same domain you authorized in SendLayer.
For example, if you authorized example.com, the From Email address must contain example.com (e.g. [email protected]).
Next, enter the From Name you want emails from your site to be sent from.
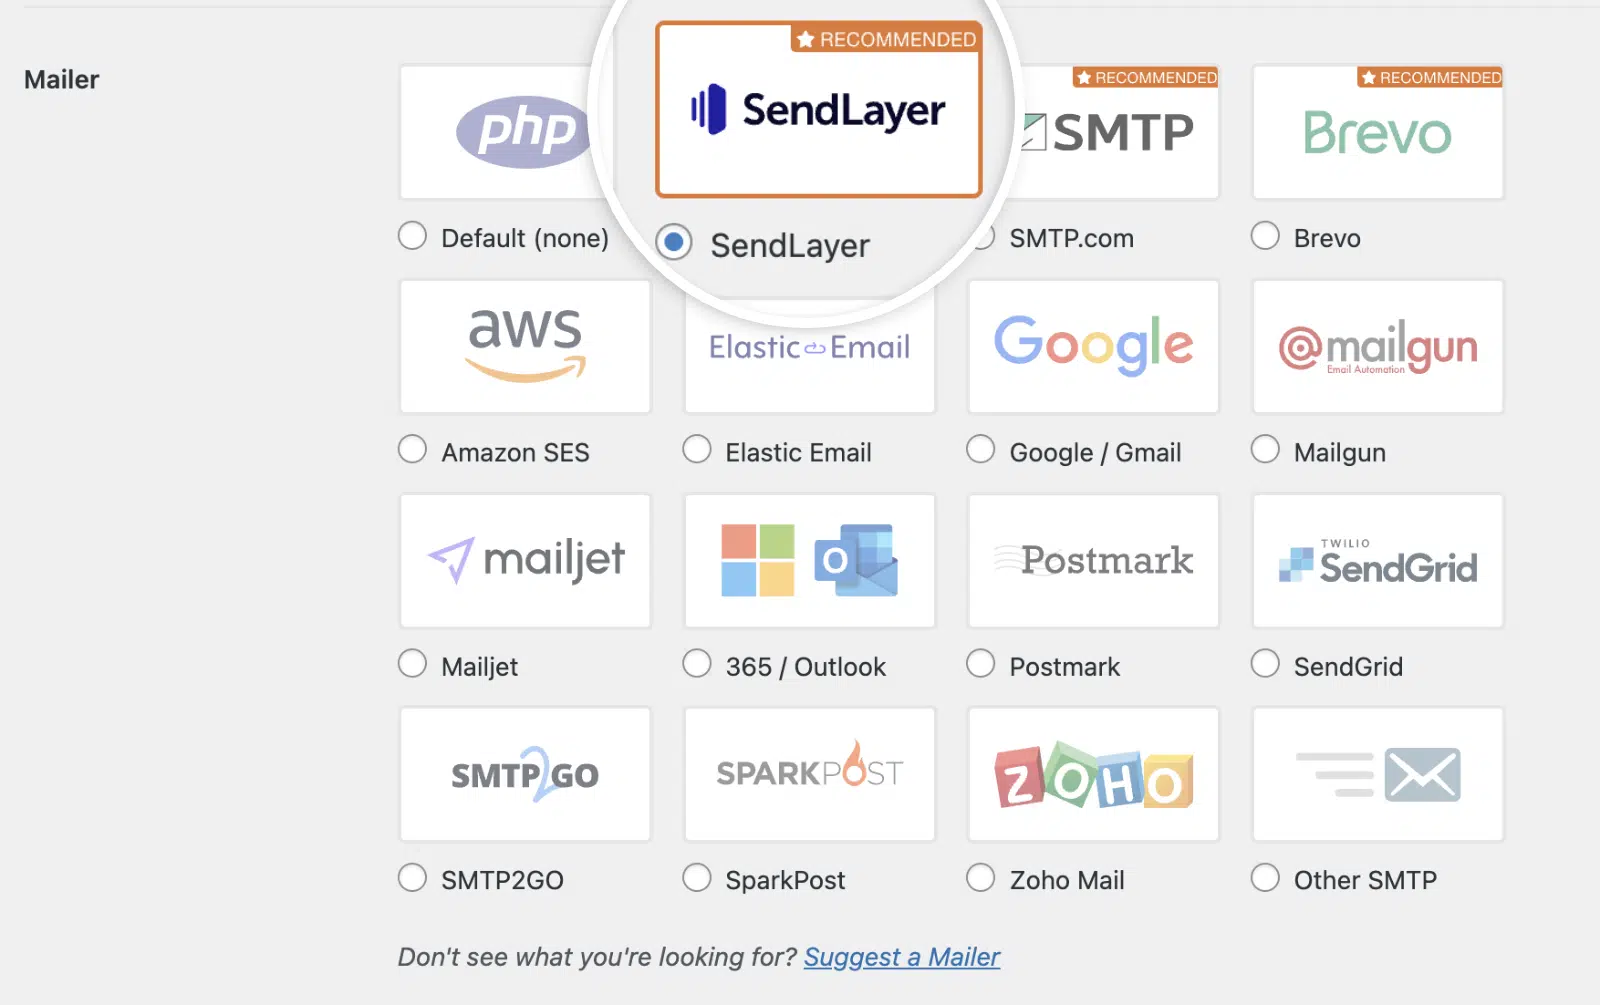
Setting Up SendLayer as Your Mailer
In the Mailer section of the WP Mail SMTP settings page, select SendLayer as your mailer option.
Next, you’ll need to create an API key. You can easily do this by clicking the Get API Key link next to the API field in your WP Mail SMTP settings

This will take you to your SendLayer dashboard, where you can click a button to Create New API Key.

Now copy the API key and return to your WordPress dashboard.

Enter the API key you copied from your SendLayer dashboard into the API Key field.

Click Save Settings to store your configuration, and that’s it! Your WordPress emails will now be sent securely via SendLayer.
Set Up Any Free SMTP Service with WP Mail SMTP
Want to choose another free email service? The steps are similar regardless of the SMTP service you choose – sign up for an account, find your SMTP credentials or API key, and fill out the credentials in the WP Mail SMTP setup screen to start sending email via your chosen provider. You can see detailed instructions for all supported email services in the WP Mail SMTP Documentation.
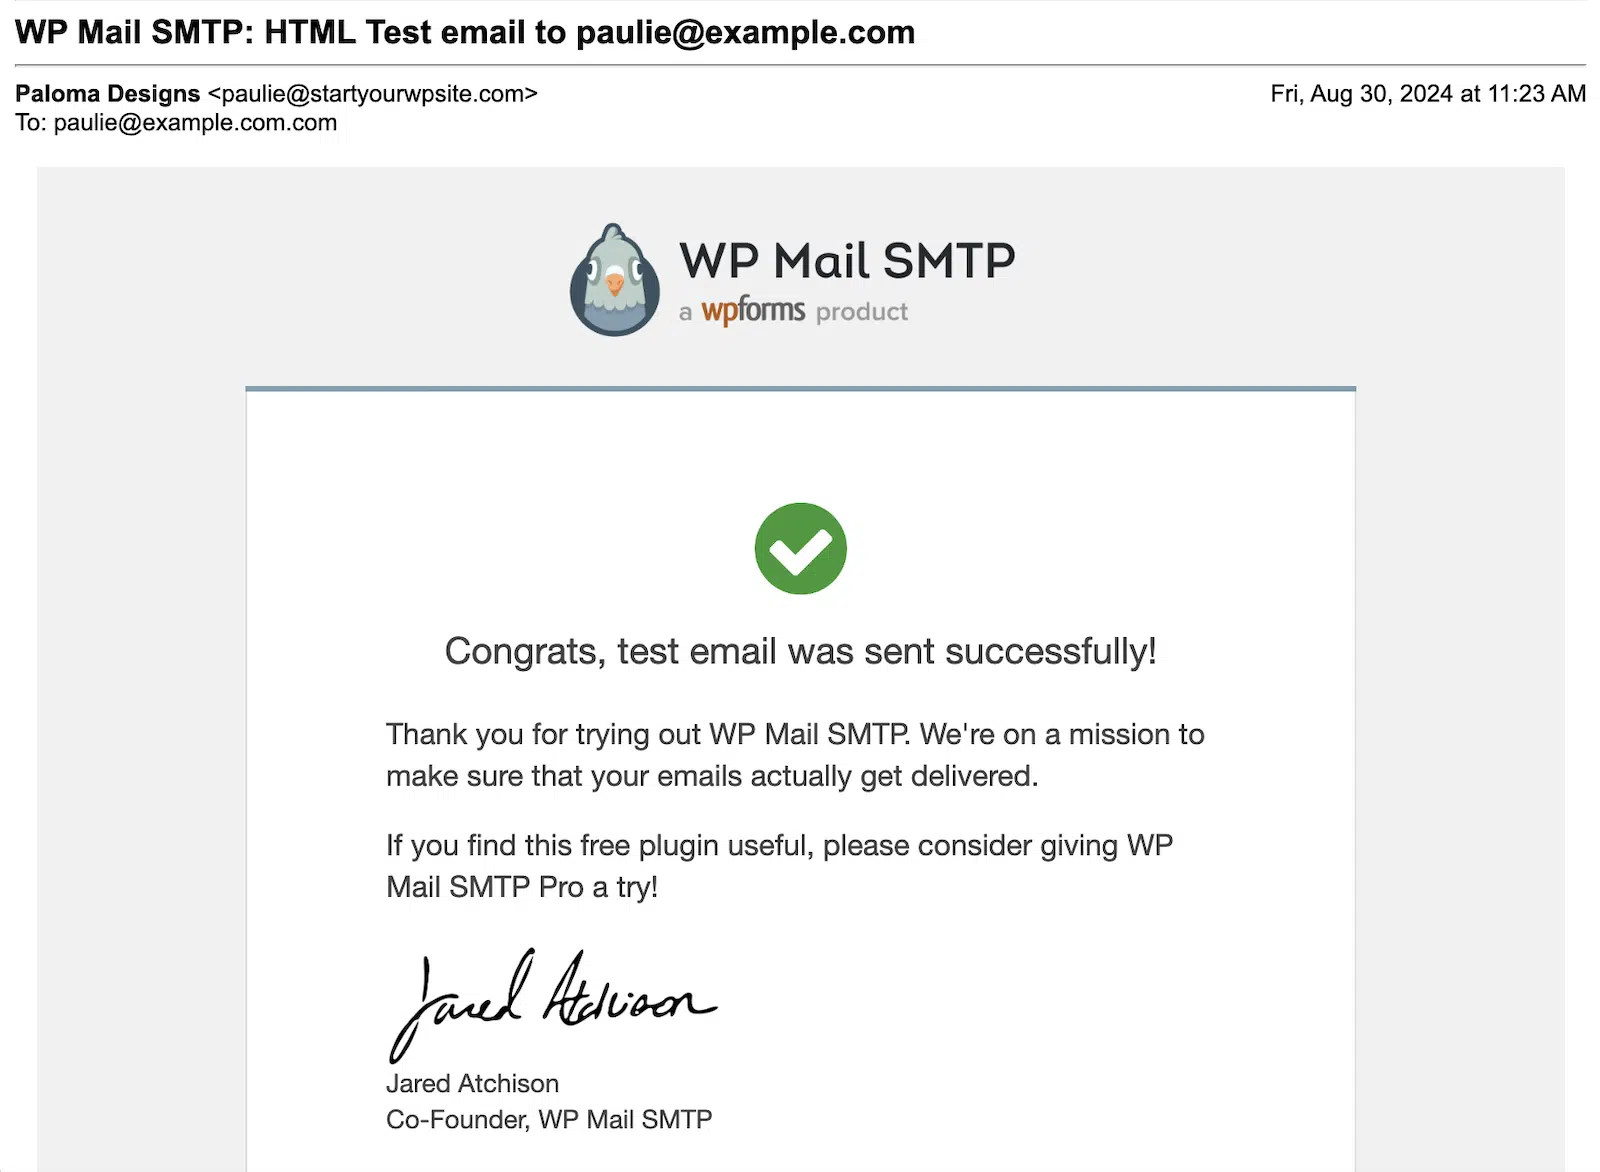
To ensure everything is working correctly once you’ve configured your email, go to WP Mail SMTP » Tools » Email Test. Enter an email address where you want to receive a test email and click Send Email.

Check the specified inbox to verify that the test email was delivered successfully.
Frequently Asked Questions
We get lots of questions about using a free SMTP server for WordPress emails. Here are some of the most common:
What is SMTP and why do I need it for WordPress?
SMTP (Simple Mail Transfer Protocol) is the standard protocol for sending emails across the internet. WordPress uses PHP mail() by default, which is often blocked or restricted by hosts and has poor deliverability. SMTP provides authentication, improving the chances your emails will reach inboxes rather than spam folders.
Are free SMTP servers reliable for business use?
Yes, free SMTP servers from reputable providers like Gmail, Brevo, or SendGrid are reliable for small to medium WordPress sites. They offer sufficient daily sending limits for most businesses and good deliverability rates. As your email volume grows, you may need to upgrade to paid plans.
Do I need technical skills to set up SMTP on WordPress?
Basic technical comfort helps, but modern SMTP plugins like WP Mail SMTP make the process straightforward with step-by-step instructions. The Pro version even offers one-click setup for Gmail and Outlook, plus a White Glove Setup service if you need assistance.
What’s the difference between SMTP and API sending methods?
SMTP is the traditional protocol for sending emails, while API methods use direct integration with a provider’s systems. API methods are generally more modern and can offer better performance, while SMTP is more universally compatible. Many WordPress SMTP plugins now support both methods.
Can I use my hosting company’s SMTP server?
Some hosting companies provide SMTP servers, but they often have restrictions and poor deliverability. Third-party SMTP services typically offer better reliability, deliverability, and features.
Remember, the most important step is simply implementing SMTP rather than relying on WordPress’s default PHP mail function. Any of these options will significantly improve your email deliverability.
Whichever option you choose, you’ll soon be sending WordPress emails that reliably reach their destination – no more lost password resets, missed order confirmations, or form submissions disappearing.
Ready to fix your emails? Get started today with the best WordPress SMTP plugin. If you don’t have the time to fix your emails, you can get full White Glove Setup assistance as an extra purchase, and there’s a 14-day money-back guarantee for all paid plans.
If this article helped you out, please follow us on Facebook and Twitter for more WordPress tips and tutorials.