AI Summary
Looking for a way to set up hCaptcha on your WordPress forms?
hCaptcha is a great Google reCAPTCHA alternative — and it’s completely free.
In this tutorial, we’ll walk you through how to set up hCaptcha on your forms (easily).
Fix Your Contact Form Emails Now
What Is hCaptcha?
hCaptcha is a popular free CAPTCHA service. It’s an anti-spam tool that protects websites from hackers and spammers. And it’s the best Google reCAPTCHA alternative.
The hCaptcha privacy policy is compatible with recent regulations such as GDPR and CCPA. So if you’re concerned about your site’s privacy, hCaptcha might be the right anti-spam tool for your forms.
How To Set Up hCaptcha on WordPress Forms
Setting up hCaptcha on WordPress forms is super easy. Here’s a table of contents for the tutorial:
In This Article
So let’s get started!
Step 1: Install and Activate WPForms
The first thing you’ll need to do is download and activate the WPForms plugin.
For this tutorial, you can use WPForms Lite or WPForms Pro.
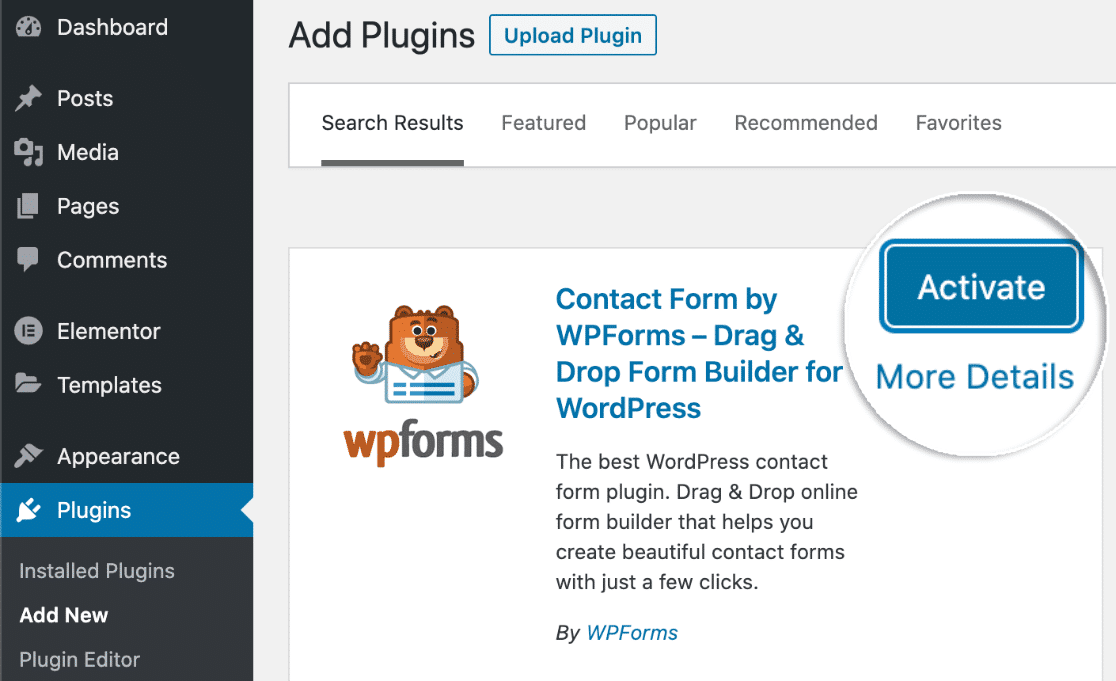
If you’re new to WordPress, here’s a step-by-step guide on how to install a WordPress plugin to help you get started.
Next, you’ll need to select the hCaptcha option from WPForms’ settings.
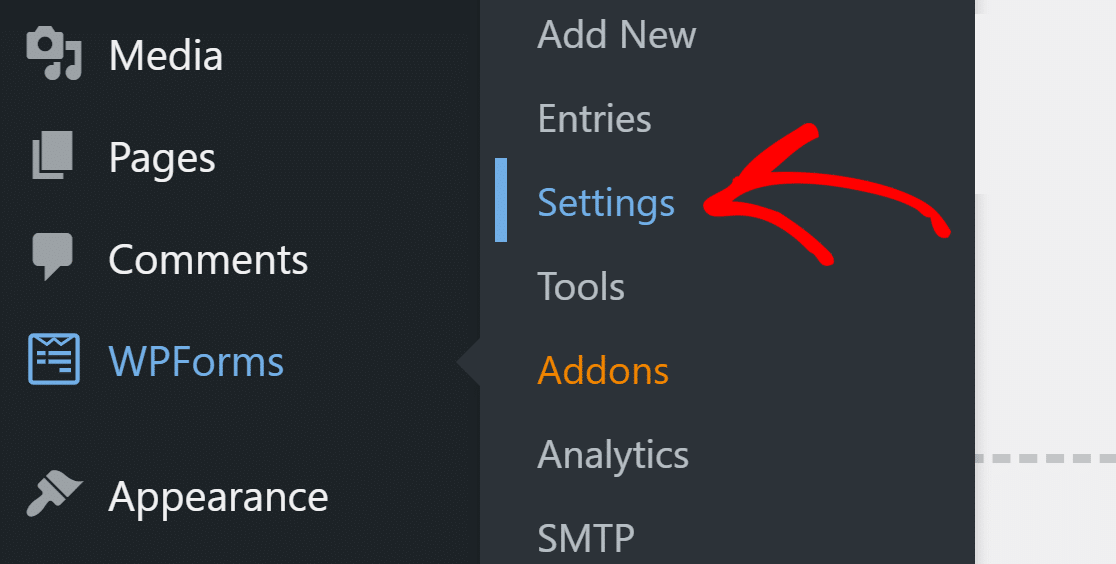
To do that, head over to your WordPress dashboard and click WPForms » Settings.
This will open your WPForms settings page. You can see multiple tab options at the top of the settings page. Click on the CAPTCHA tab from the tabs across the top.

You’ll see two 3 popular CAPTCHA services: Cloudflare Turnstile, hCaptcha, and reCAPTCHA.
Select the hCaptcha option.
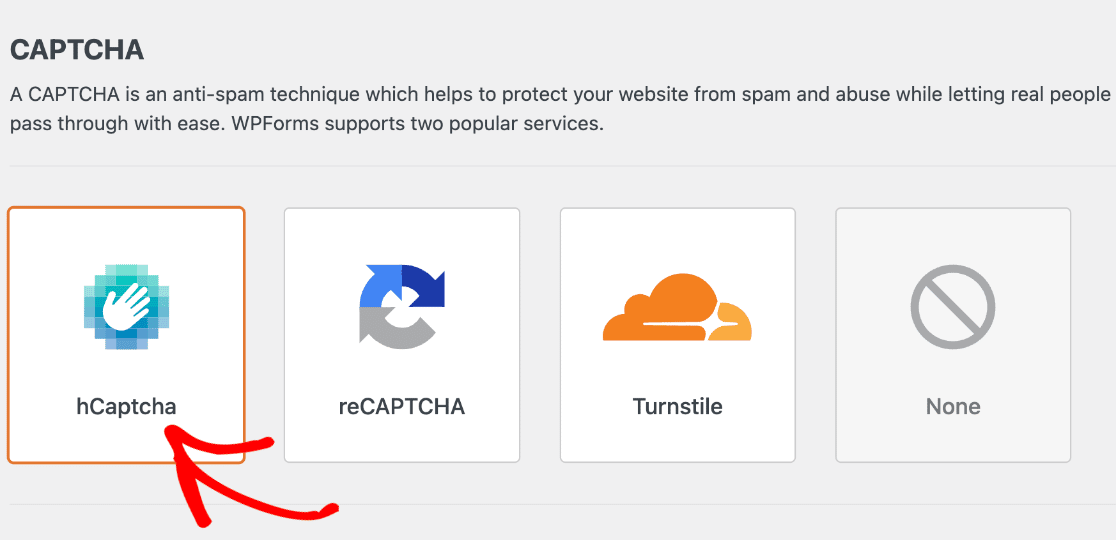
As soon as you select the hCaptcha option, you’ll see settings to add hCaptcha Site and Secret Key. We’ll generate these now.
Step 2: Set Up hCaptcha Sitekey
To get hCaptcha keys, open the official hCaptcha site in a new tab and remember to keep open WPForms in another tab.
Log in to your hCaptcha account and add a new site.
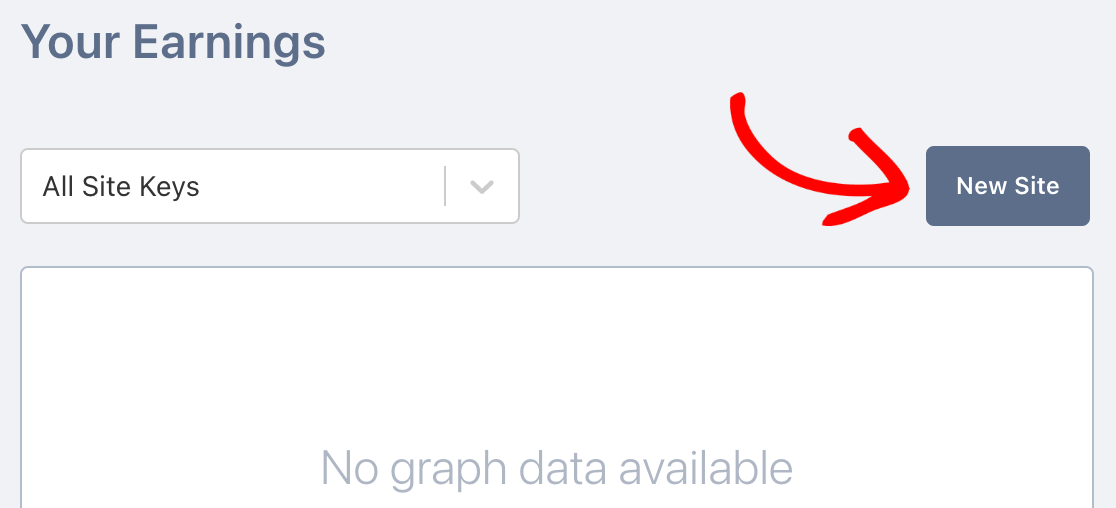
This will open a page where you need to add your site details.
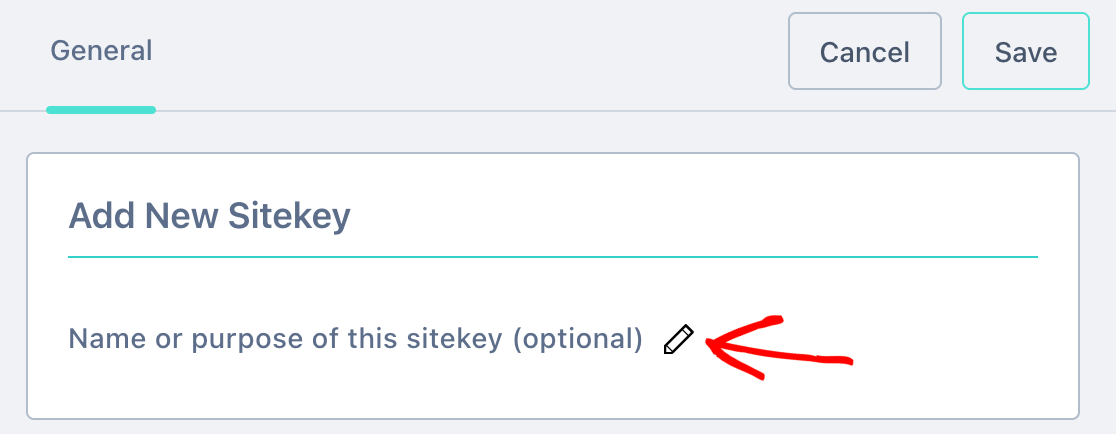
The first section you’ll see here is the Add New Sitekey section. Here you can add a name to this specific Sitekey, but it’s only for your reference, so don’t worry too much about what you call it.
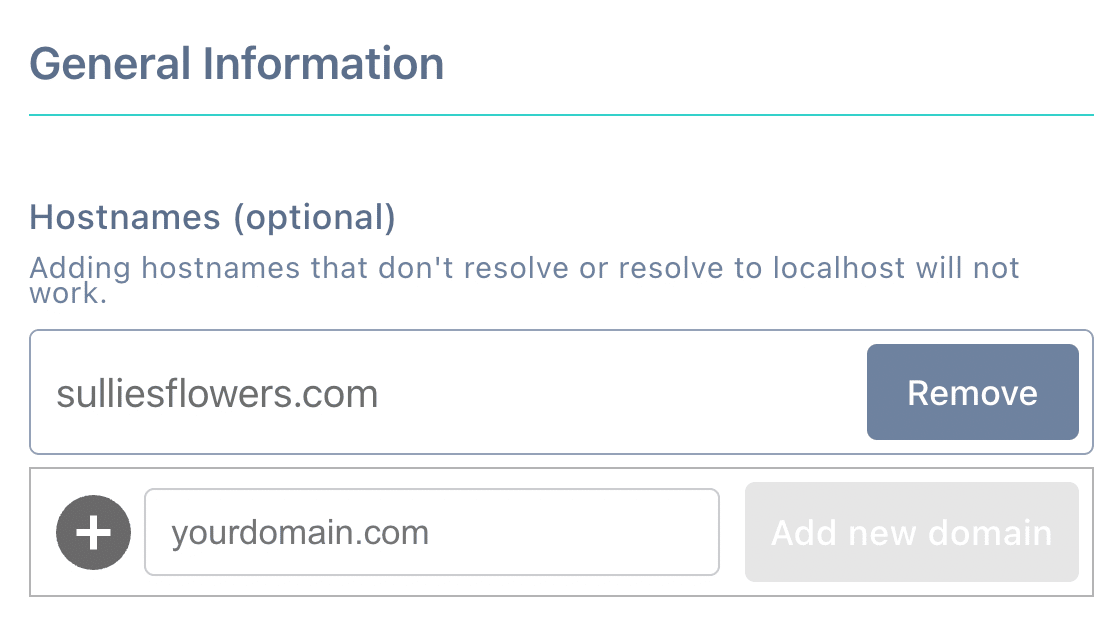
Now in the second section, you’ll need to define all of the websites you want to use this key on. Click the plus button if you need to add more.
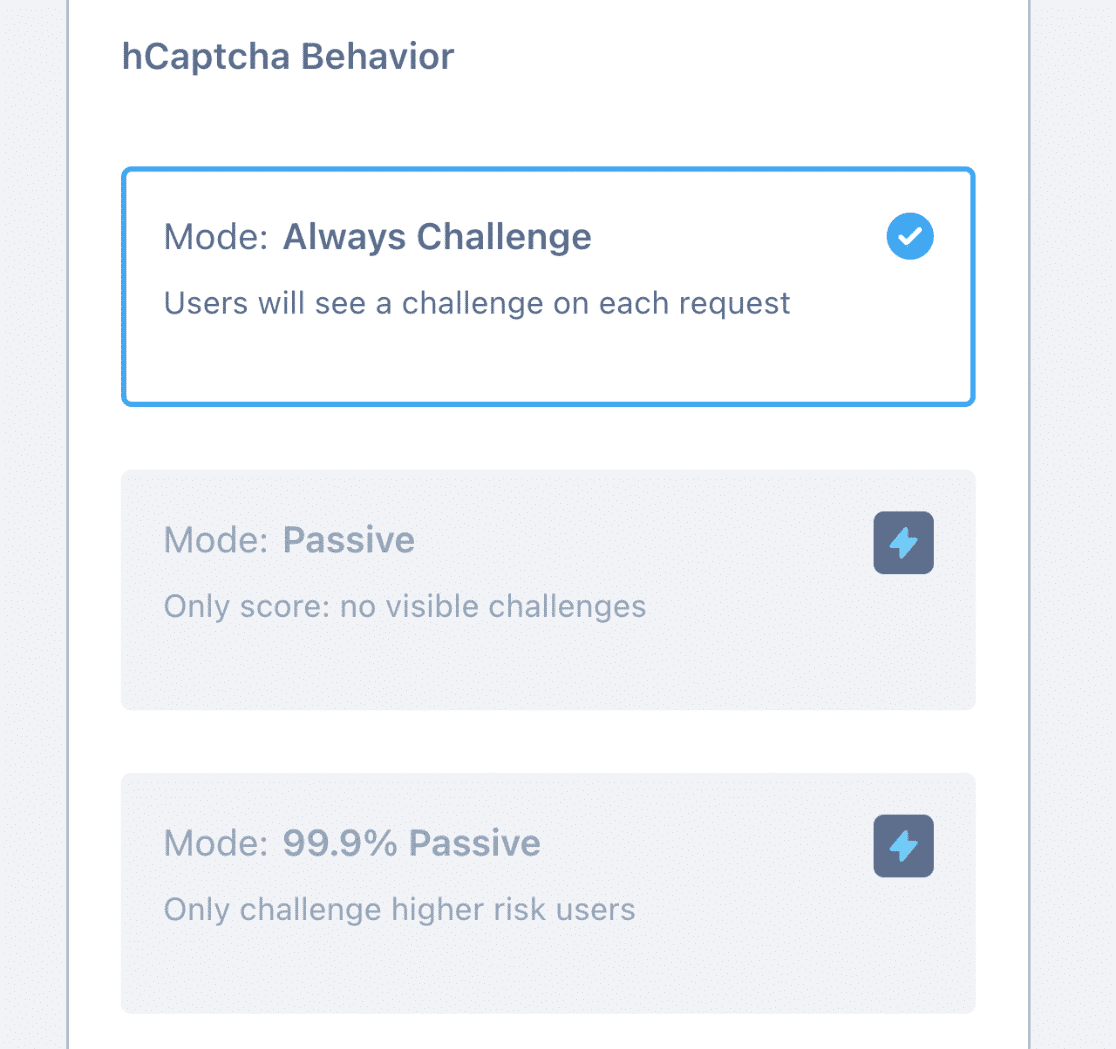
If you’re using a free hCaptcha account, you’ll have to use the Always Challenge mode, so let’s skip this step.
Next, you’ll want to decide how difficult your CAPTCHAs should be. hCaptcha calls this the Passing Threshold.
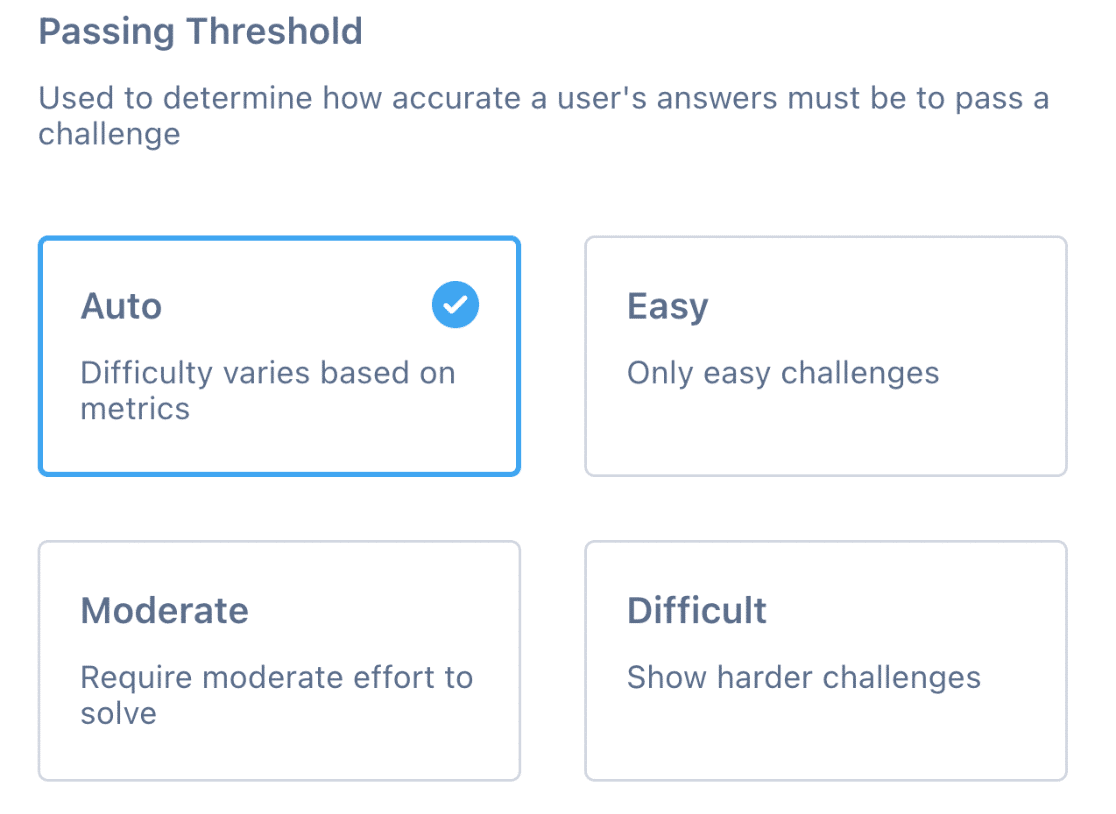
For most WordPress forms, Auto will work just fine. If you want to control this setting, here’s a general guide to what each threshold means:
- Easy displays the standard “easy” challenges to validate users.
- Moderate shows a slightly more difficult challenge.
- Difficult shows a challenge that is hard to solve. While this is the most secure, it could also be frustrating, so you may want to consider what the form is for and who will be using it.
And that’s it! Your hCaptcha key is set up. Now let’s switch back to WordPress and add it to your forms.
Step 3: Add Sitekey to WPForms
Adding your sitekey to WPForms will complete the connection between your WordPress site and hCaptcha.
Staying on the hCaptcha site for a moment, click on the Settings button to start.
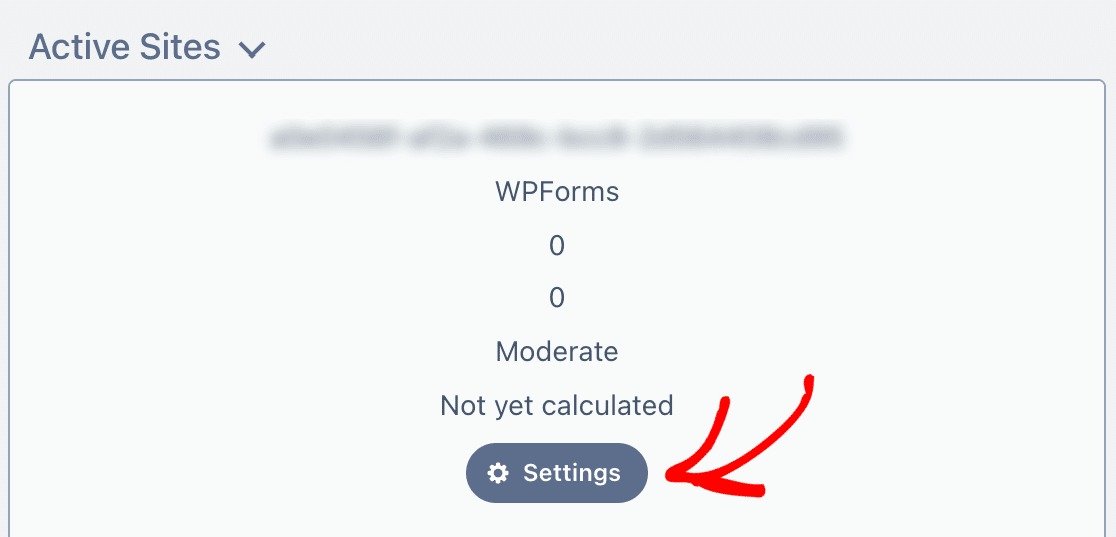
Copy the sitekey and paste it in to the Site Key field in WPForms.
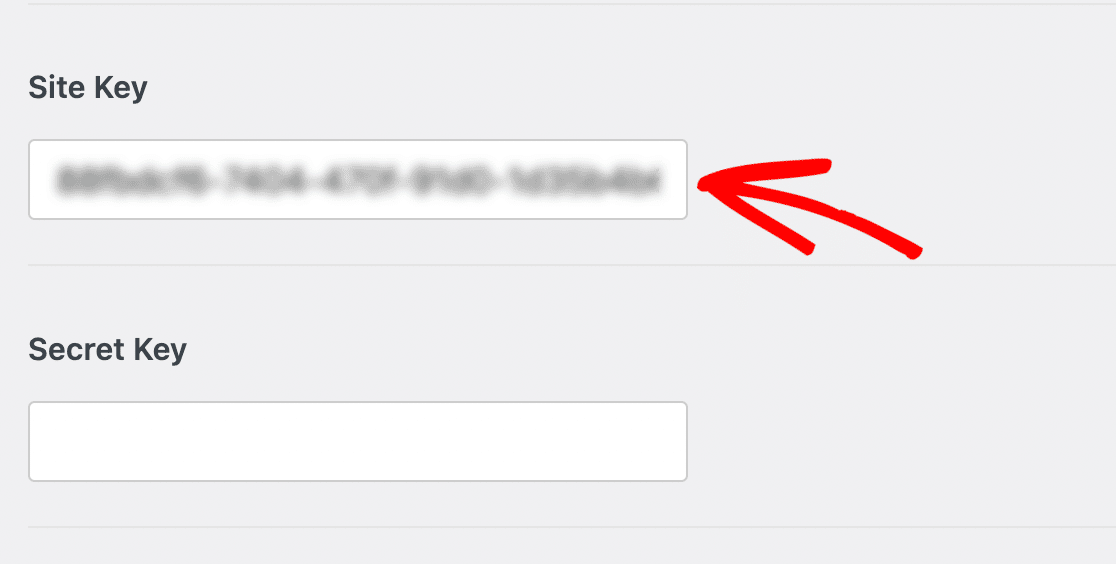
Next, we need to add the Secret Key.
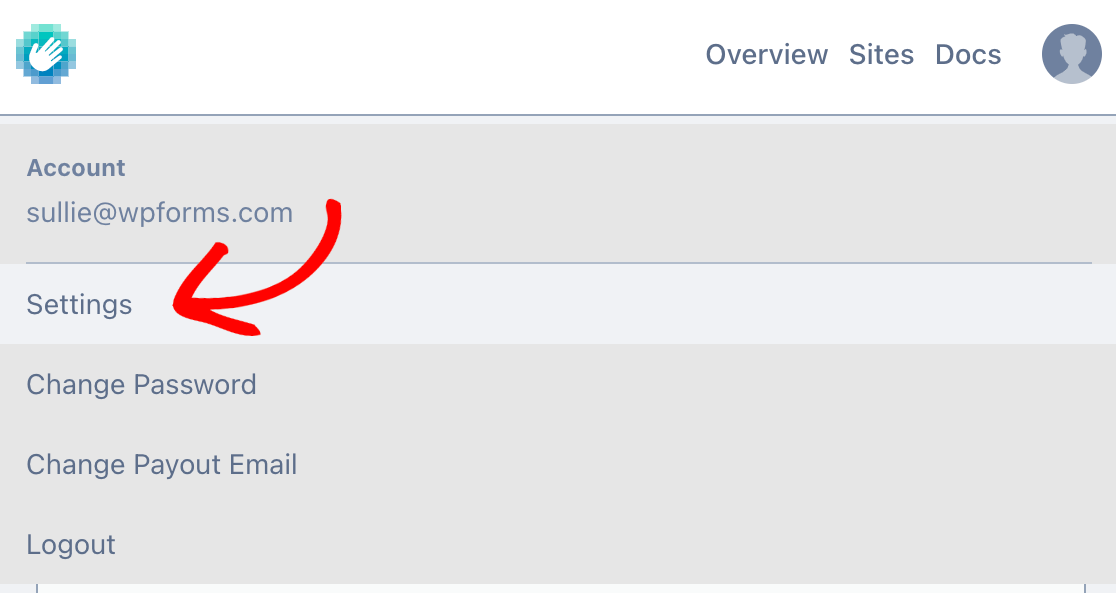
To copy your secret key, click on your profile picture at the top-right of the hCaptcha website.
Then click Settings.
Copy your secret key here.
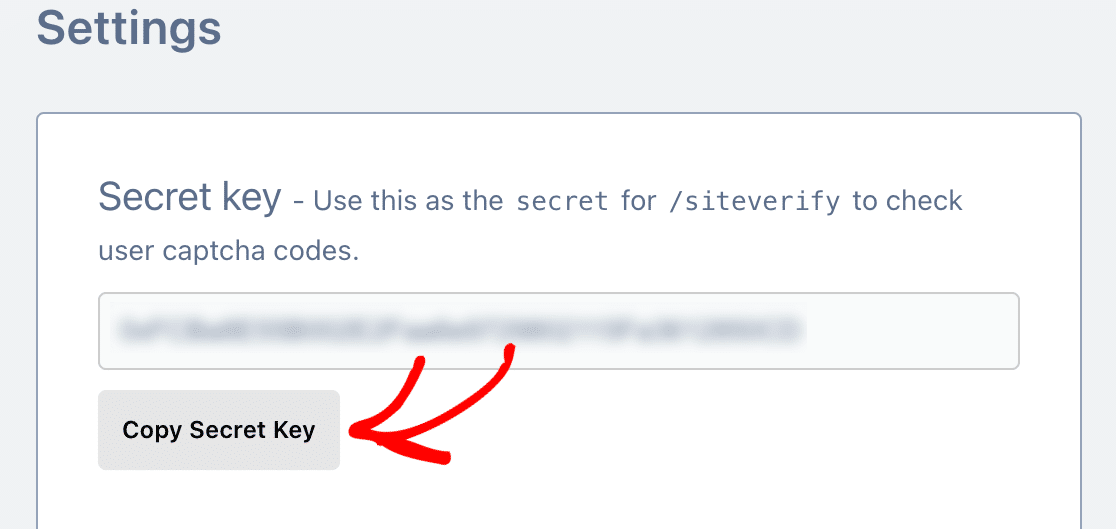
Once you’ve pasted your Secret Key into your WPForms settings, the connection will be complete.
If you’d like to customize your hCaptcha settings further, you can change the Fail Message before saving.
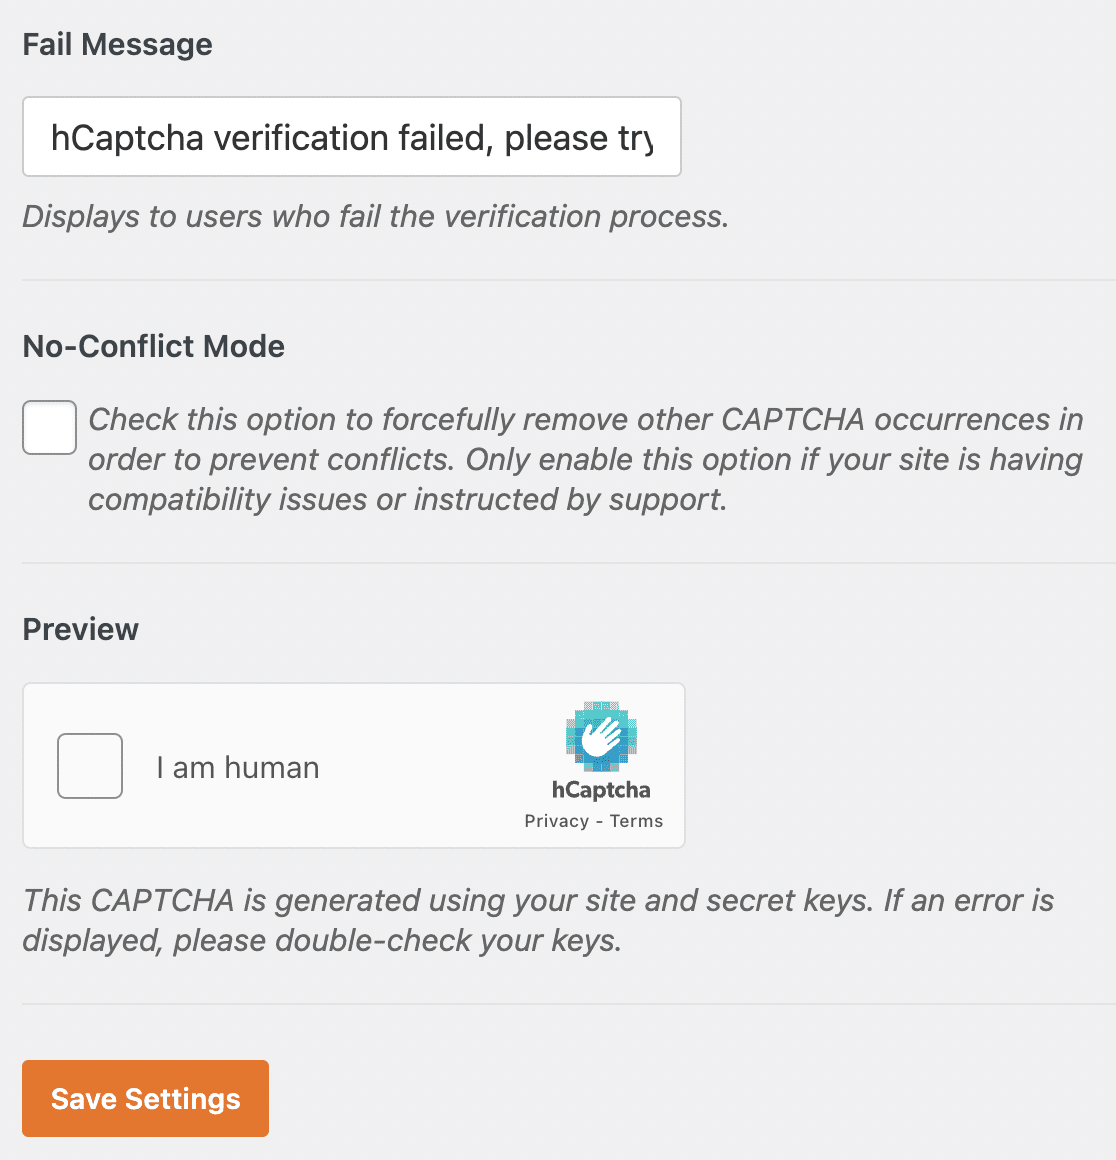
And that’s it! Now we can quickly add hCaptcha to your forms in WordPress.
Step 4: Create a New Form
Now that you’ve configured all hCaptcha settings, it’s time to enable it in your online contact forms.
For that, we need to open a form you’ve created.
If you haven’t made your form yet, create a new form using the WPForms plugin.
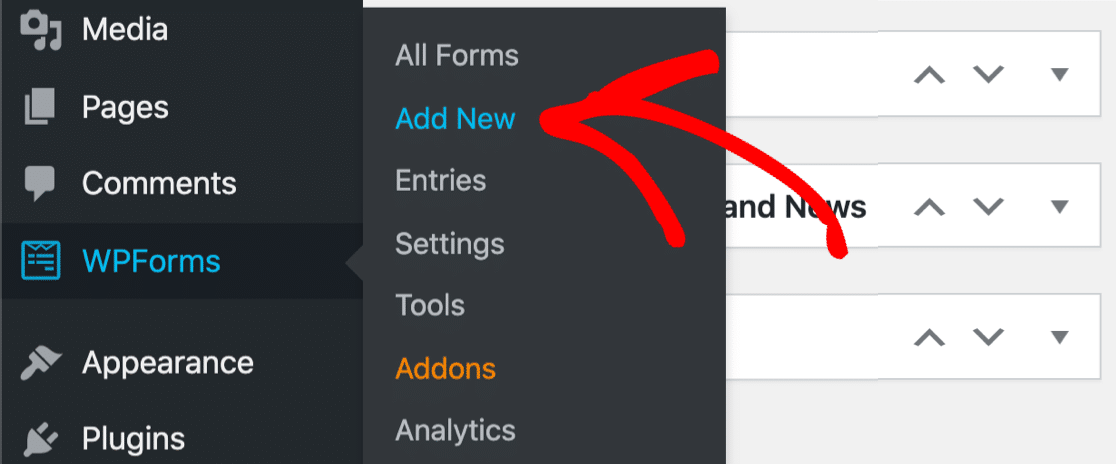
WPForms comes with a huge form template library that consists of several pre-built form templates such as:
- Online donation form template
- Surveys and polls form template
- Order form template
- Job application form template
- and many more.
The major benefit of using a pre-built template is that you don’t have to build your form from scratch.
We’ll choose the Simple Contact Form template.
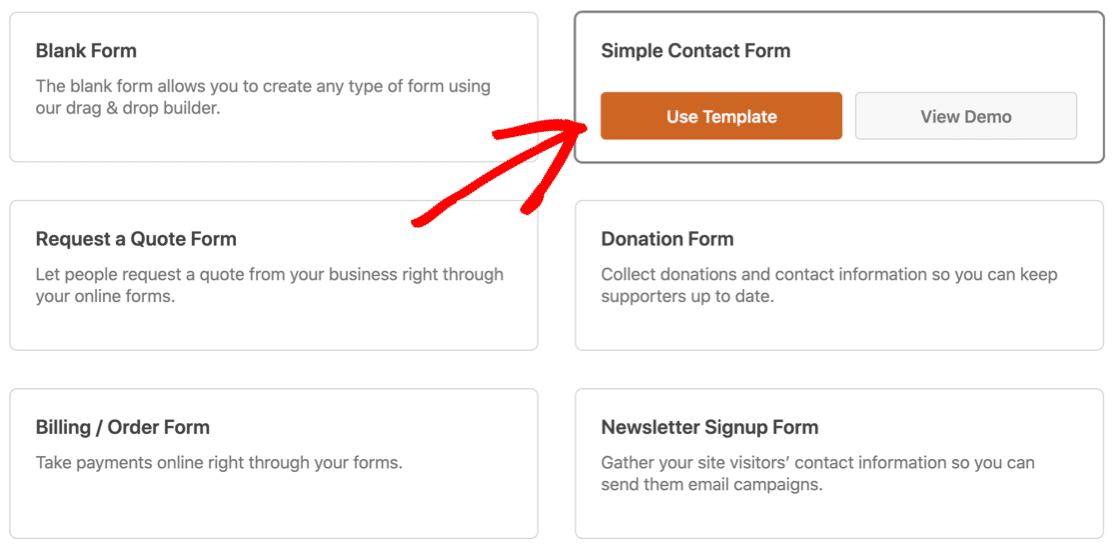
Once you select the temple, WPForms form builder setup will open. You can see form on the right and a drag and drop builder on the left.
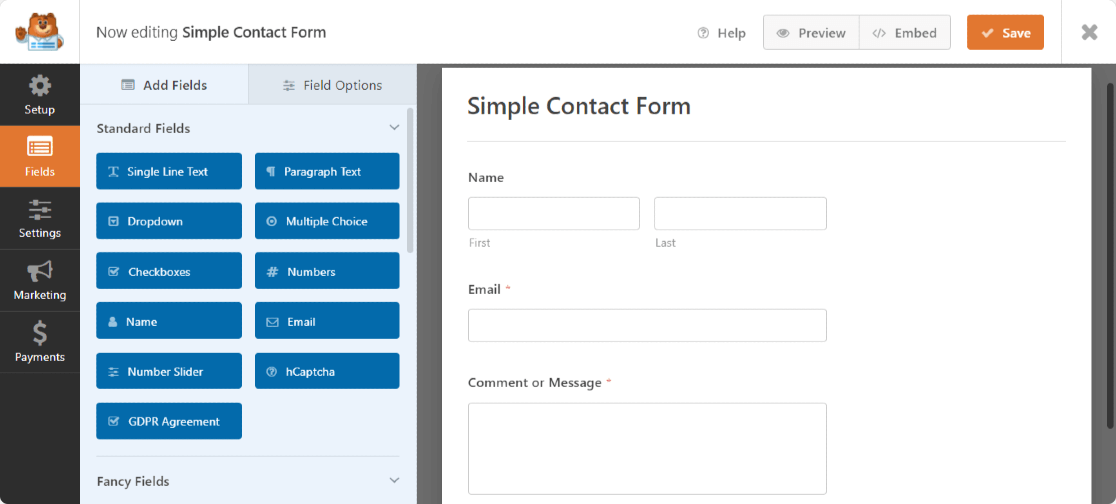
You can add additional fields to your online form by dragging and dropping them from left to right.
Step 5: Add hCaptcha Field on WordPress Form
Our online form is ready; it’s time to secure it with hCaptcha.
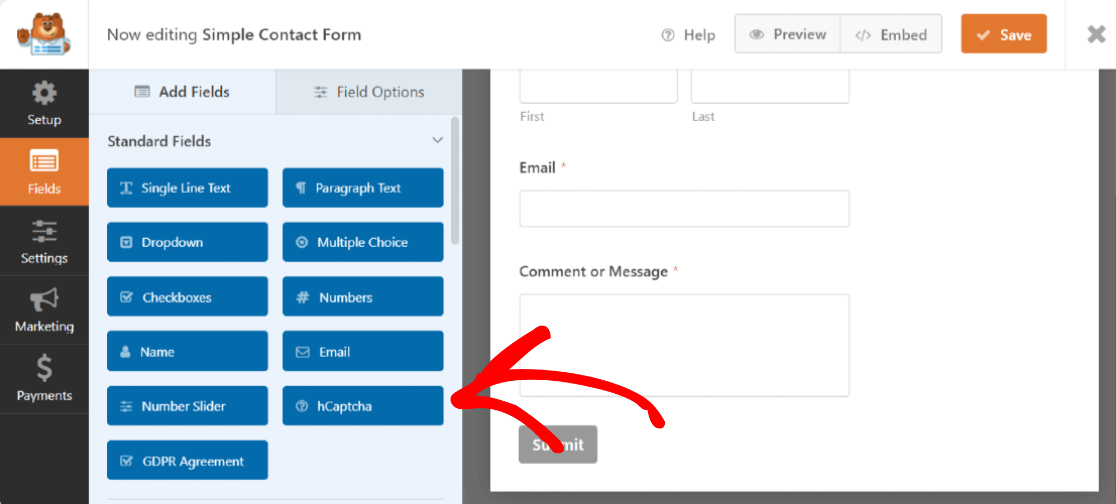
To add the hCaptcha field to your form, on the left side of the form builder, under the Standard Fields section, click on the hCaptcha field.
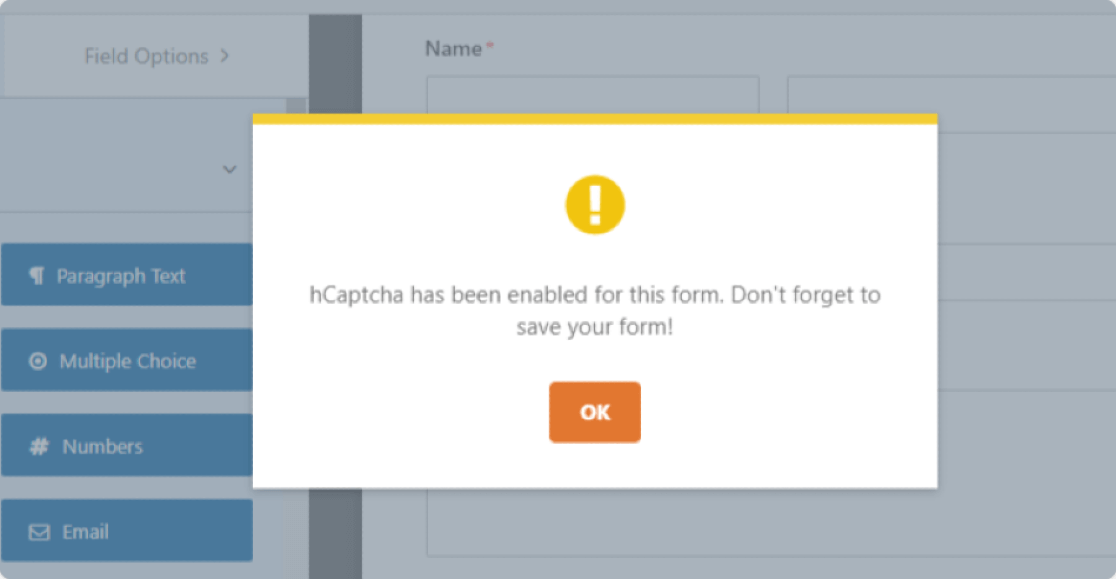
As soon as you click the hCaptcha field, a popup will be displayed to confirm that you’ve turned on hCaptcha for this form. Click OK.
The hCaptcha logo on the top-right of your form will confirm hCaptcha service is activated on your form.
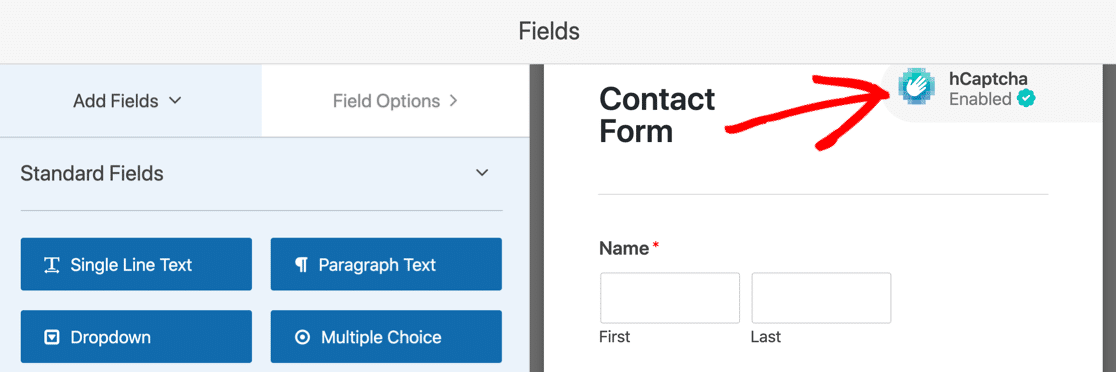
This logo is only to remind you that the hCaptcha is active on your form and not displayed on your published form.
Click on the Save button and add WPForms to a page in WordPress.
Step 6: Test Your New hCaptcha Field
Now you need to make sure that hCaptcha works properly with your contact form or not.
To test hCaptcha, open the contact form on your site’s front-end, fill in your form entries and check the hCaptcha box. Depending on the difficulty level you chose, you may see a challenge pop up.
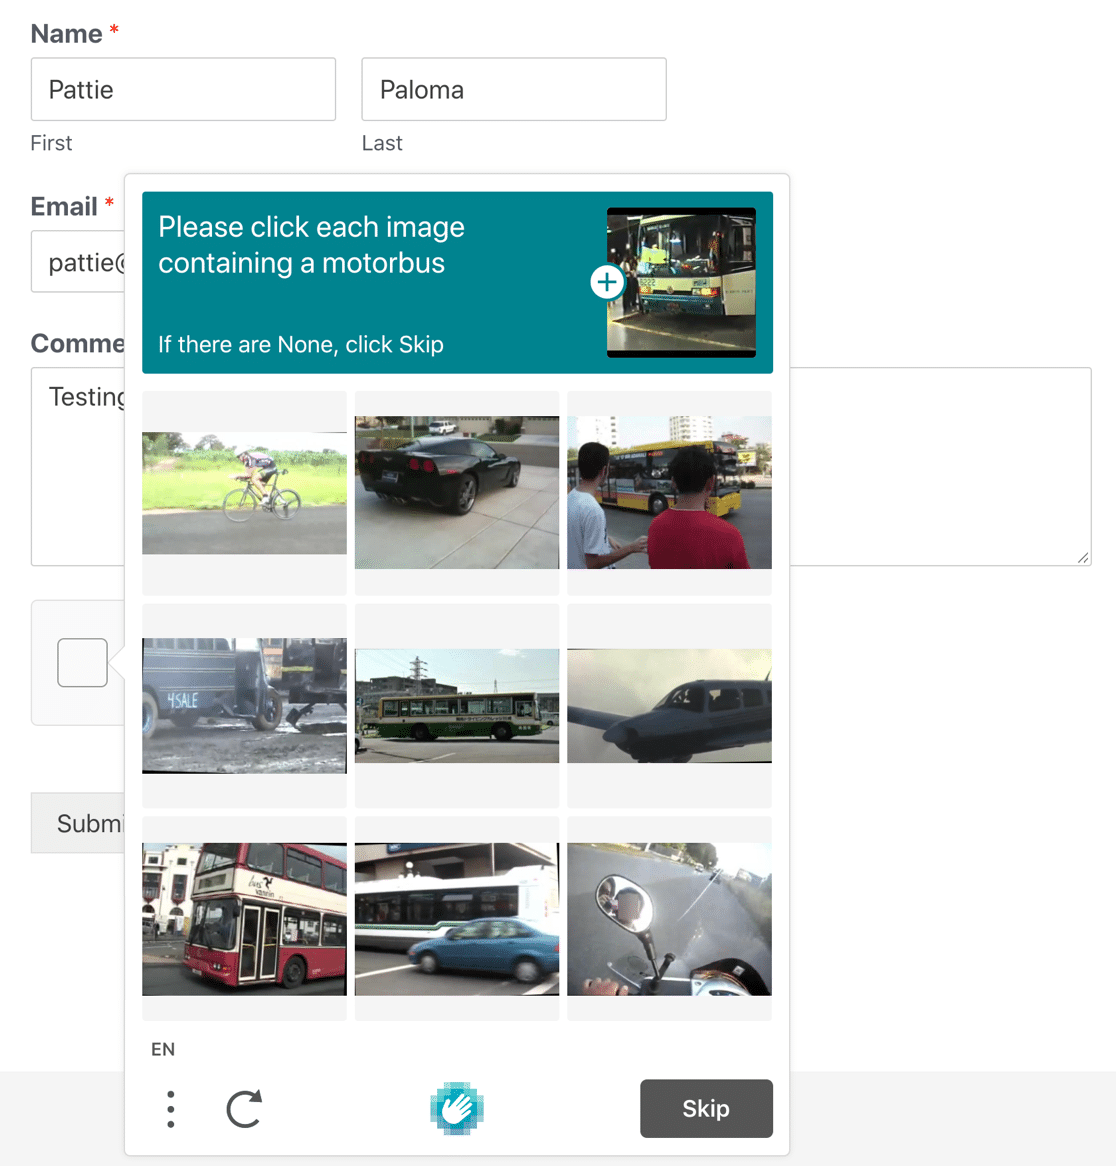
And that’s it! Now you know how to use hCaptcha on WordPress forms.
Note: Remember to test your contact form in another browser or incognito window where you haven’t logged in as an admin on your site.
Fix Your Contact Form Emails Now
Next, Add a GDPR Agreement to Online Forms
And there you’ve it! This is how simple it’s to set up hCaptcha on WordPress forms. We hope this article helps you create more protected and secure online forms for your WordPress websites.
After adding hCaptcha, you might need to add a GDPR agreement to your forms. Check out our step-by-step tutorial on how to add a GDPR agreement to your WordPress forms.
We also have a guide that’ll help you out if WPForms is not sending email.
Ready to fix your emails? Get started today with the best WordPress SMTP plugin. If you don’t have the time to fix your emails, you can get full White Glove Setup assistance as an extra purchase, and there’s a 14-day money-back guarantee for all paid plans.If this article helped you out, please follow us on Facebook and Twitter for more WordPress tips and tutorials.

