Looking for an easy way to create a lead magnet page in WordPress to capture new leads and grow your email list? You’re at the right place!
WPForms makes it incredibly easy to create opt-in forms, which you can add to any page to offer a lead magnet like a free eBook in exchange for email addresses.
Create Your Lead Magnet Page Now
So, without further ado, let’s dive into the steps to create a lead magnet landing page in WordPress with the help of WPForms.
In This Article
How to Create a Lead Magnet Page in WordPress
Creating a lead magnet page in WordPress with good conversion rates doesn’t have to be difficult. Follow the steps below to get started:
1. Create Your Lead Magnet
The first thing you need to do is create your lead magnet. There are many types of lead magnets you could use. For instance, PDF eBooks, whitepapers, case studies, cheat sheets, quizzes, or any other digital resource.
Here are some lead magnet ideas you can use for inspiration regarding what to offer your audience that may encourage them to provide their email address.
For this tutorial, we will use a free eBook to explain all the steps needed to create a lead generation and magnet page in WordPress.
2. Upload Your Lead Magnet
Once you’ve decided what lead magnet you’re going to offer to your visitors, it’s time to upload it to your WordPress website.
This is very simple to do. From your WordPress dashboard, simply go to Media » Add New Media File. Then, click on the Select Files button.
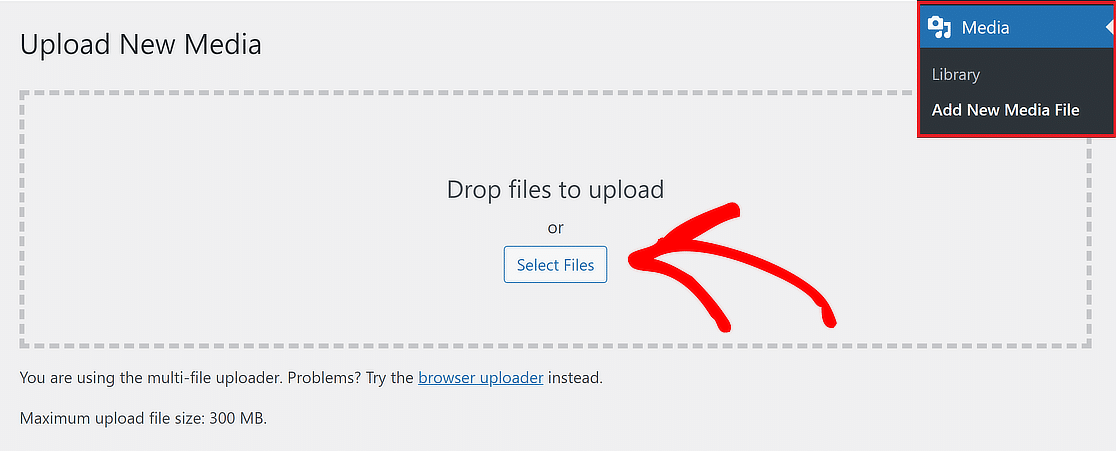
Wait a few seconds for the file to upload successfully. Once done, click on Copy URL to clipboard at the bottom right corner of the page.

This will copy the file URL automatically. Simply paste this in a safe location, as you’re going to need the URL later on.
3. Create a New Post in WordPress
From your WordPress dashboard, simply go to All Posts. Then, click on the Add New Post button on the top-left corner of the page.
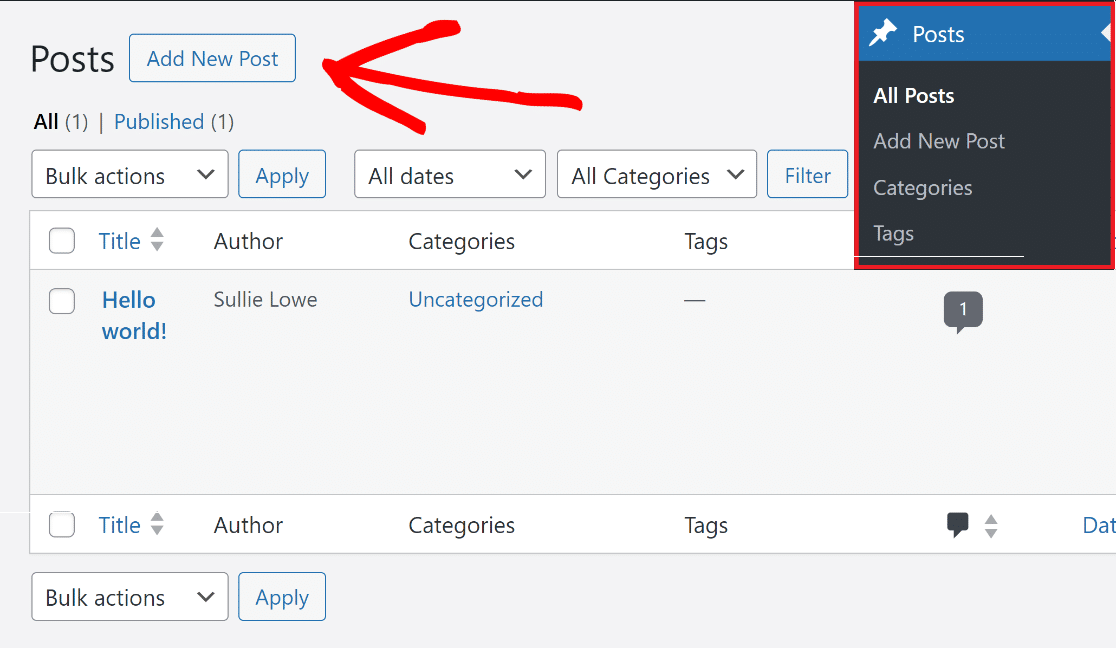
This will open up a new post in the block editor of WordPress. Give it a name and then use the File block to attach the lead magnet.
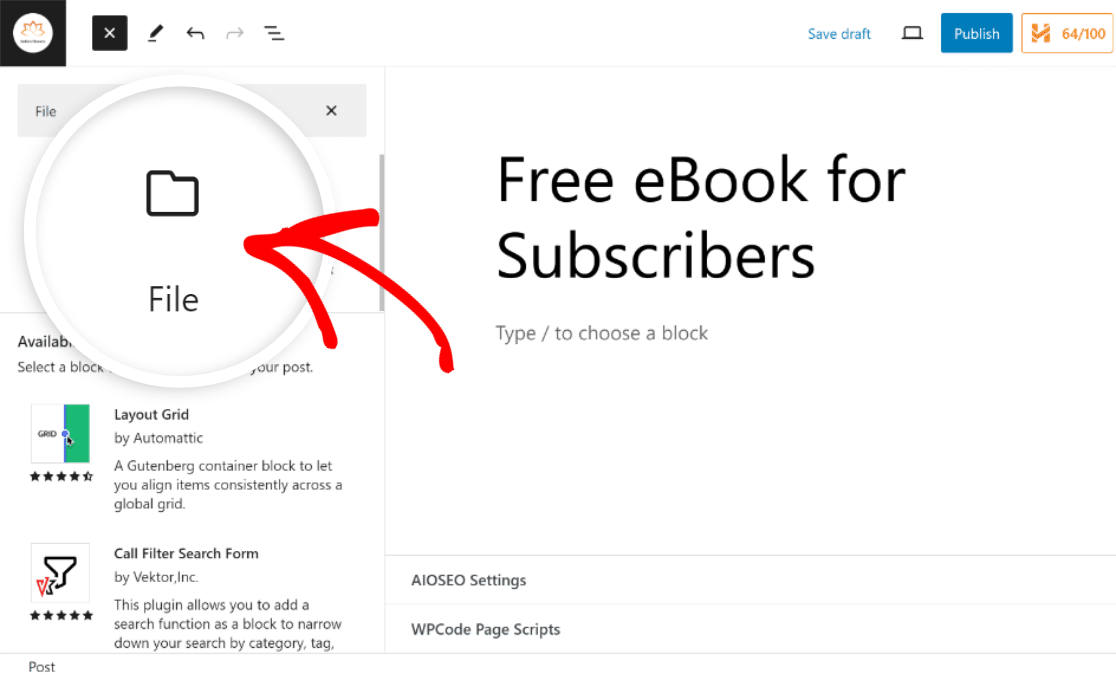
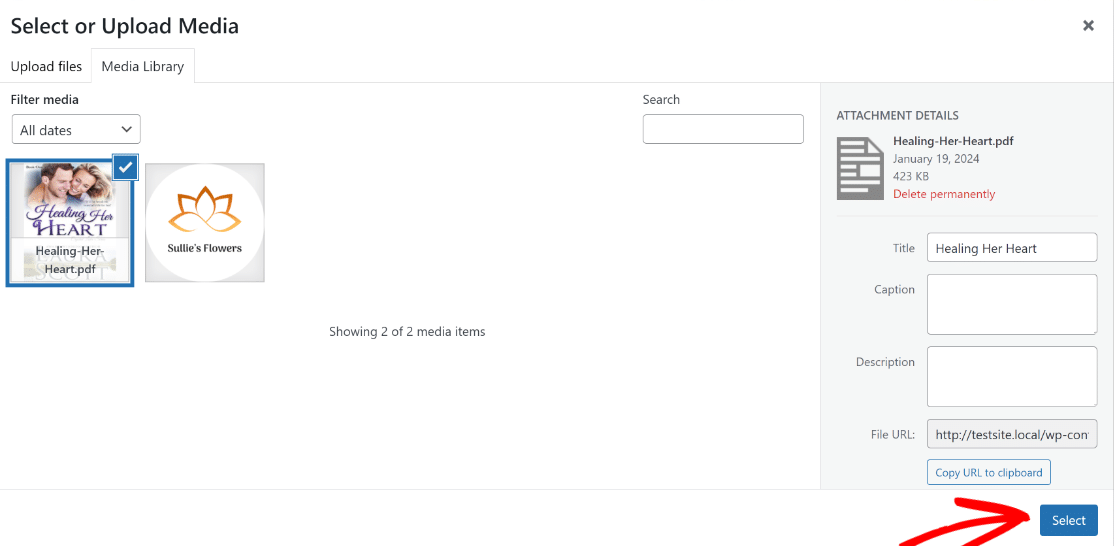
With the File block inserted, click the Media Library button, choose your lead magnet file, and hit Select to attach it to your post.
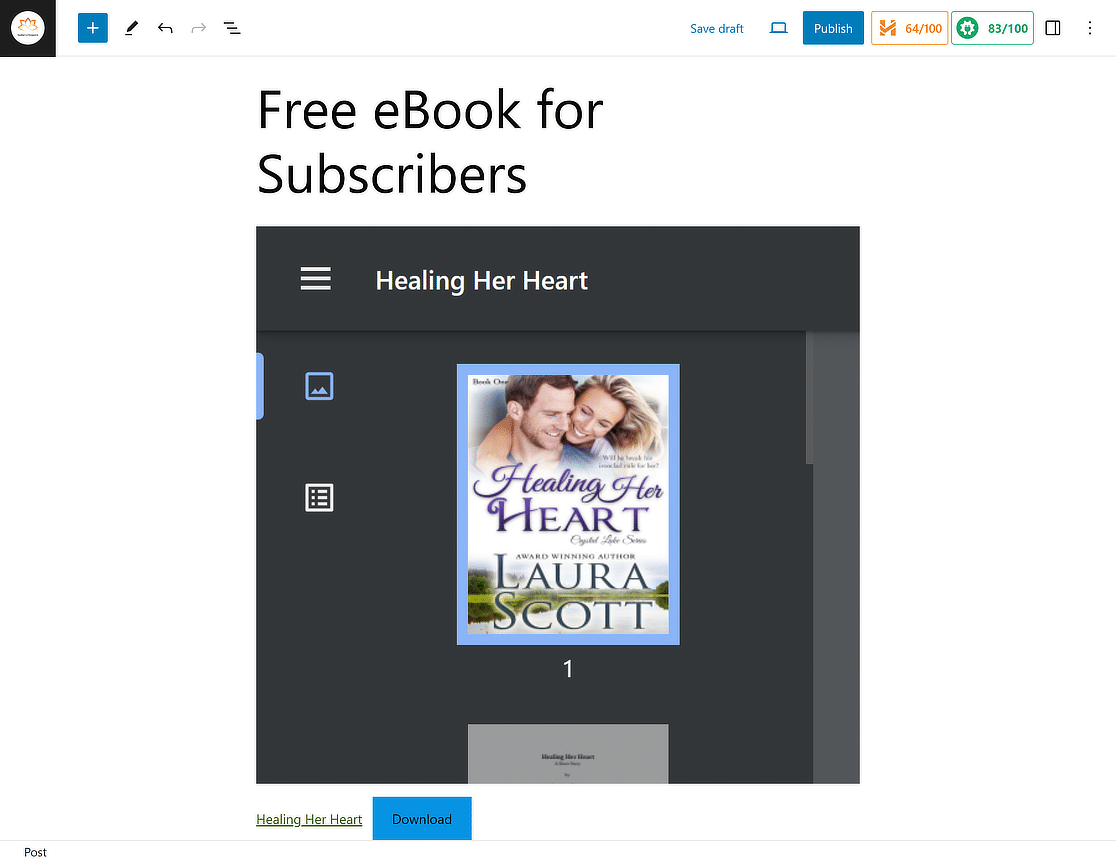
If you’re using a free eBook like in our example, you should see a preview of the PDF, along with a Download call to action (CTA) right beneath it.
Since you’re giving away this digital resource in return for an email address, it’s important that search engines can’t find it. We’ll show you how to do this next. It’s called “no indexing.”
4. Hide Your Lead Magnet from Google
To prevent a page from being indexed by search engines like Google, you can use a WordPress plugin like All in One SEO (AIOSEO).
If you would like additional information, please refer to these detailed instructions on how to install a plugin for WordPress.
Once you’ve installed AIOSEO on your WordPress site, return to the post where you’ve attached the lead magnet file.
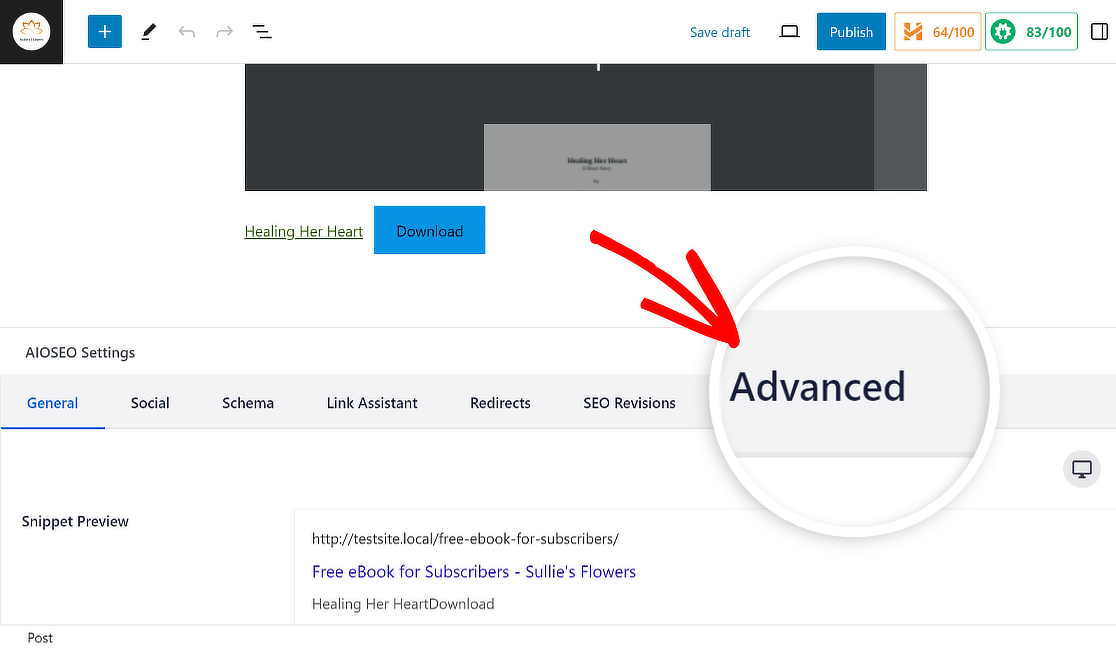
Here, you should see a new menu for AIOSEO Settings upon scrolling down a bit. Click on the Advanced tab.
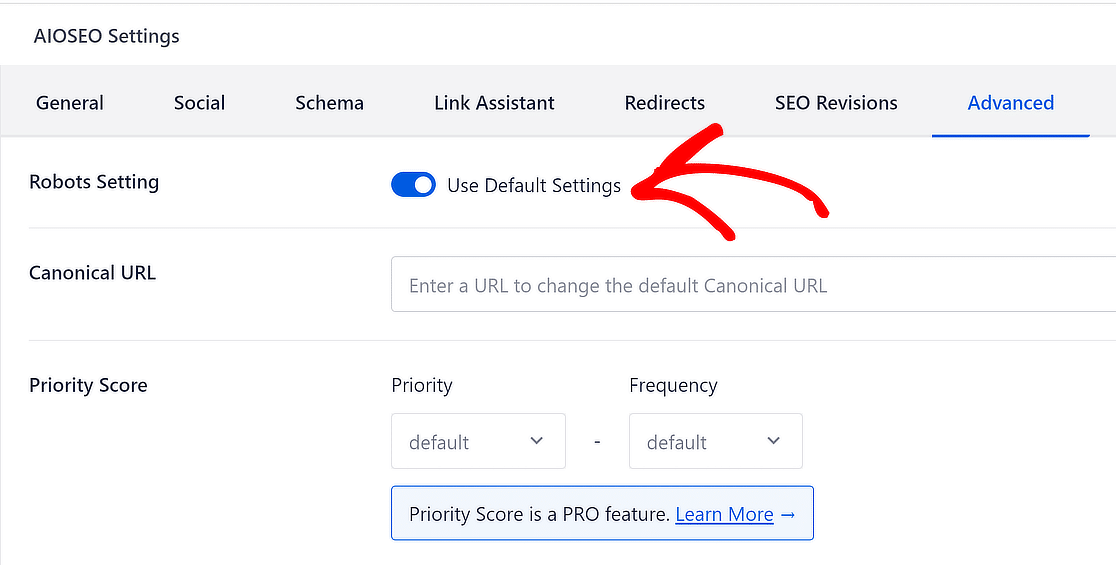
Now you’ll see an option called Robots Setting and a switch that says Use Default Settings. Move the toggle to the OFF position.
After you do that, more choices will show up under Robots meta. If you don’t want the page to show up in Google’s search results, check the No Index box.
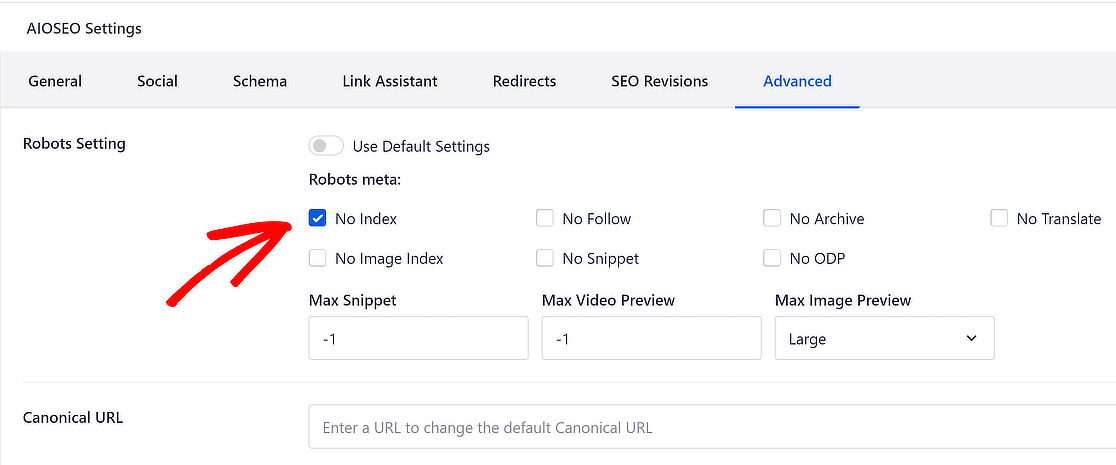
AIOSEO will include a line of code that excludes this page from being indexed. You can save or Publish your page.

Great job so far! Now, all we need to do is create an opt-in form to take your users to the lead magnet page.
5. Use WPForms to Create an Opt-In Form
Creating an opt-in form with WPForms is super easy. Follow the steps in this guide to install and activate the plugin.
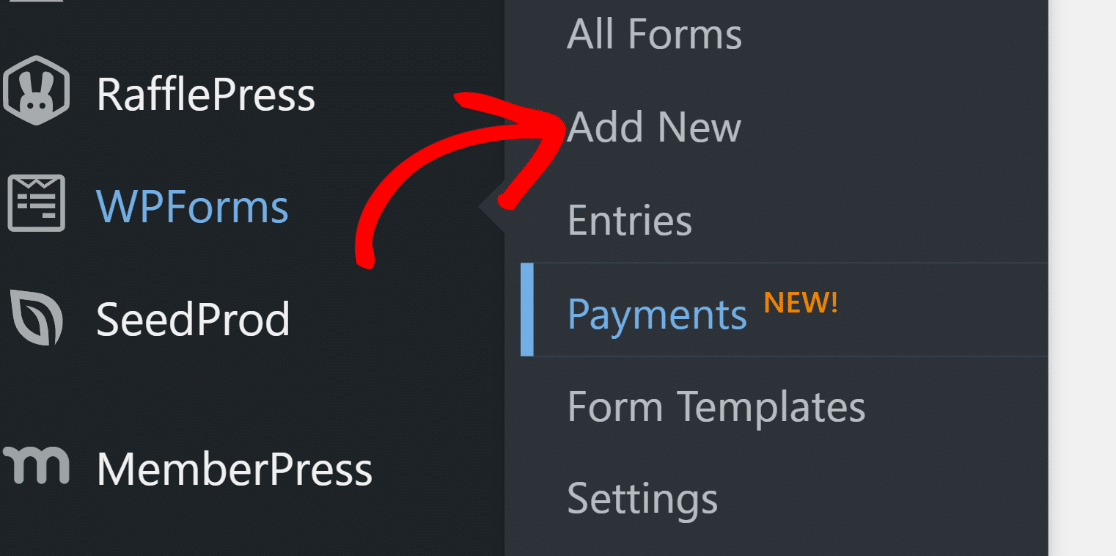
You’re all set to create the opt-in form now. To do this, go to WPForms » Add New from your WordPress dashboard.
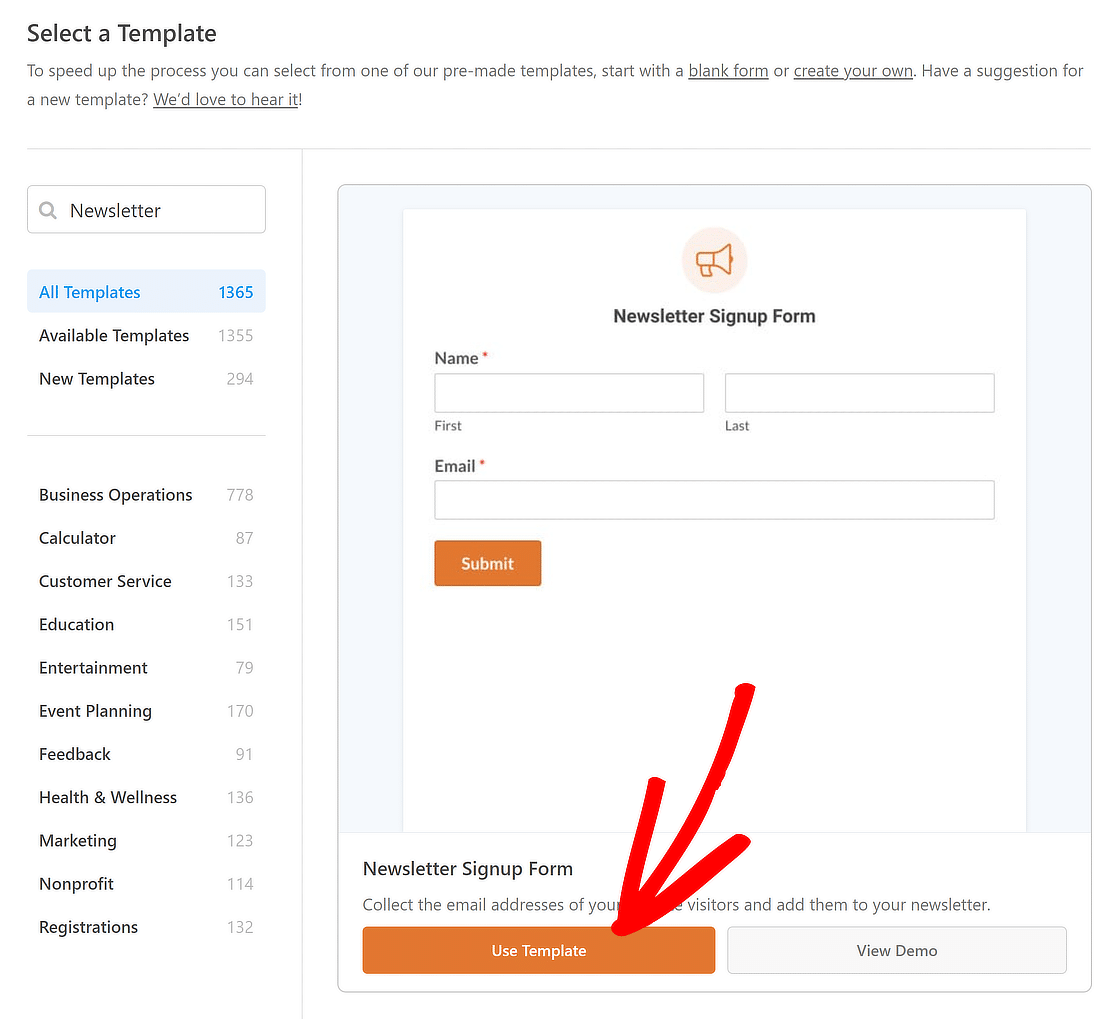
After that, give your form a name and pick a template. For this guide, we’ll choose the basic Newsletter Signup Form to speed up the form creation.
Once the template has loaded, you’ll see that most of the work is done for you. You’ll find the following fields are already in the form: Name & Email.
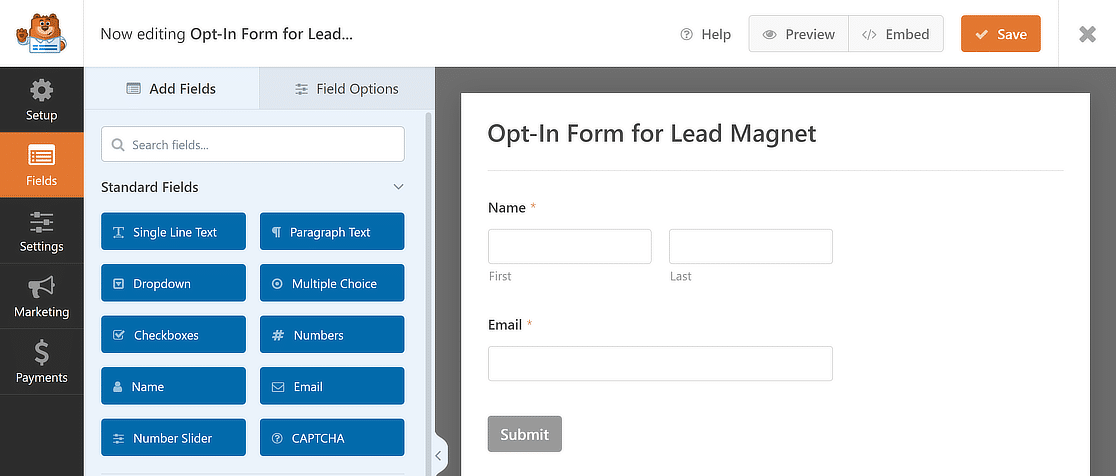
You can use the simple drag-and-drop builder in WPForms to change, move, or add fields to the form as you like.
For now, though, let’s leave it alone since we’re making a lead magnet form and need to keep things short to reduce form abandonment.
6. Set Up Lead Magnet Access
When people fill out your form, they will expect to be able to access your lead magnet immediately. There are a few different ways you can give people access to your lead magnet with WPForms:
Reveal Lead Magnet Link in Confirmation Message
You can give people access to your lead magnet resource by putting a link to it in the confirmation message that they get when they fill out your form.
To set this up, simply navigate to the Settings section and select Confirmations from the menu on the left side of the WPForms interface.
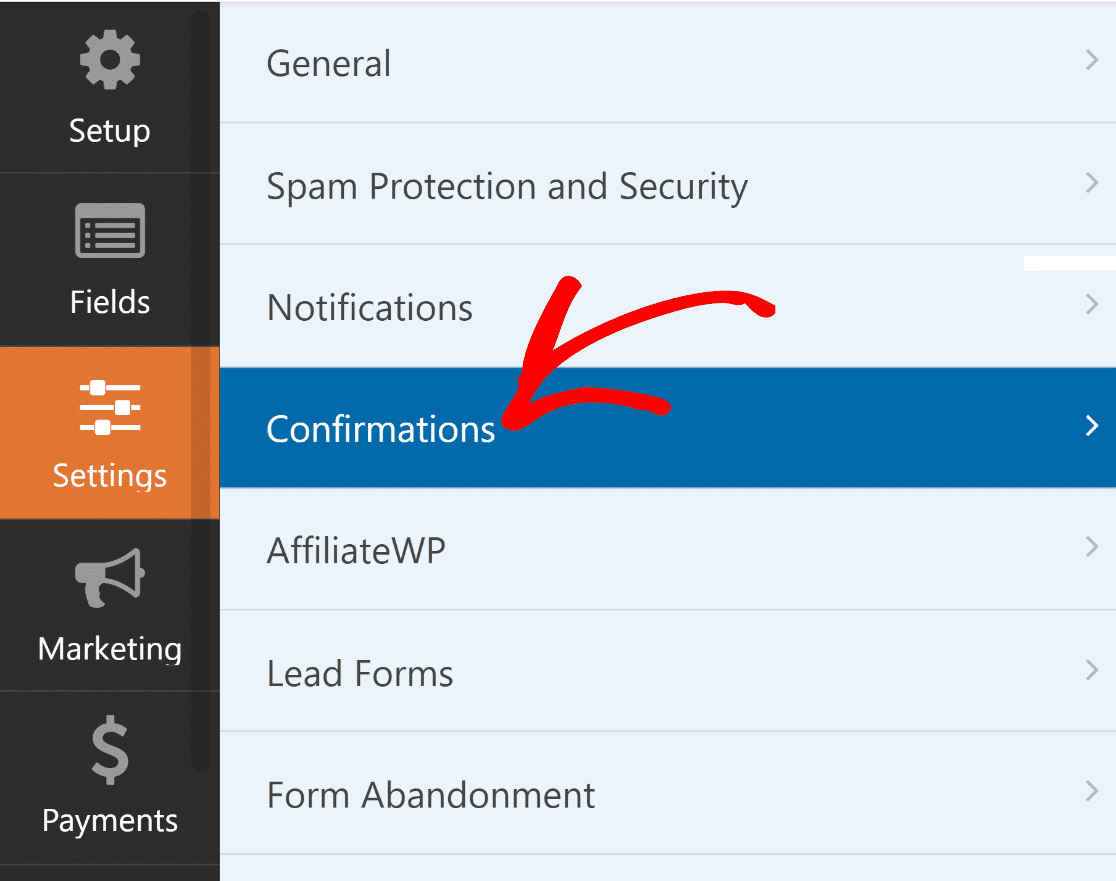
From here, it’s incredibly simple to personalize the confirmation message and include a link to your lead magnet.
Remember to copy the URL of your lead magnet file earlier. This is the link you’ll need to include in the message.
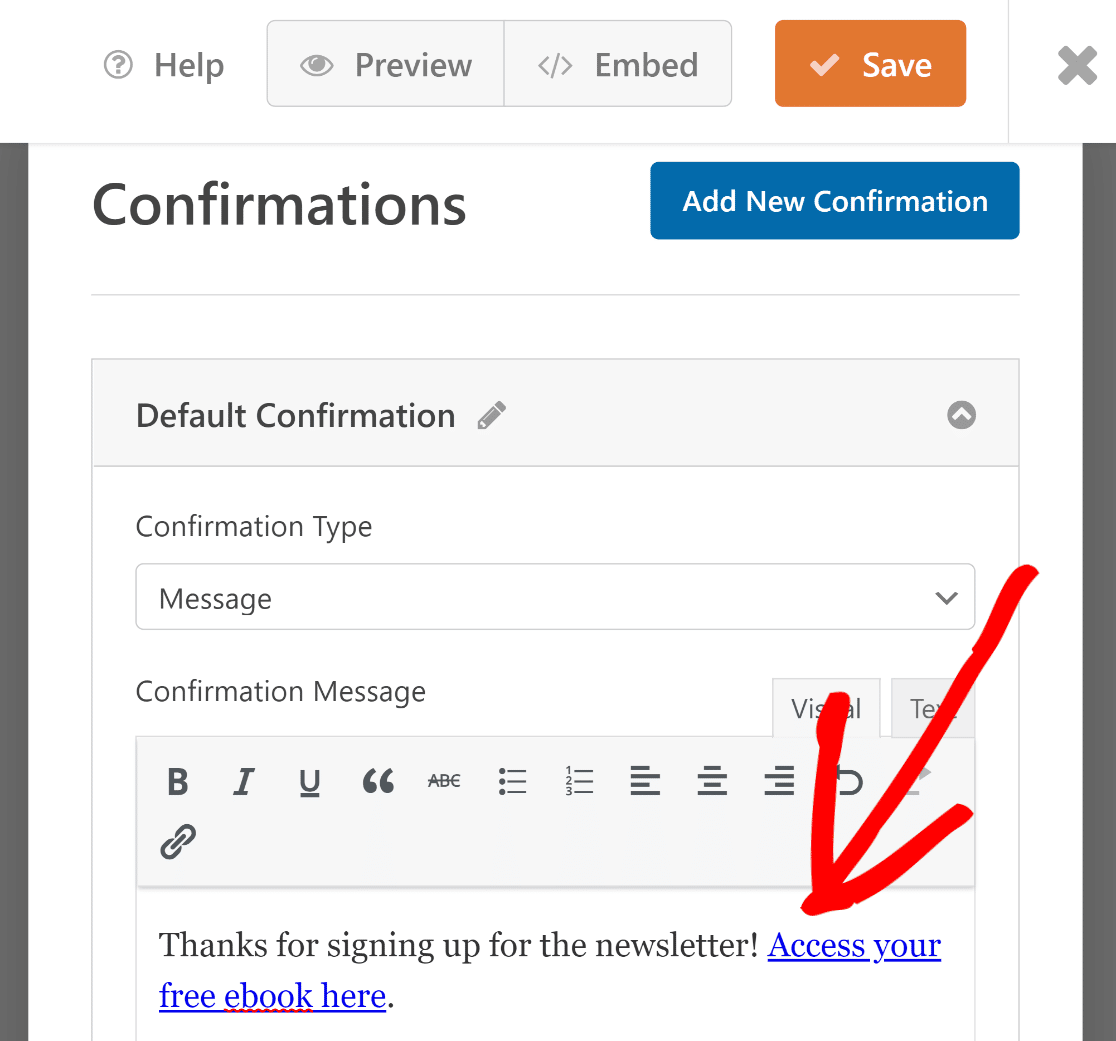
This message will show up right away after the form is submitted, and the link will make it easy for users to access your lead magnet.
Redirect to the Lead Magnet URL
WPForms also allows you to configure an instant redirection that happens when the user clicks the Submit button.
To do this, go to Confirmation Type and choose Go to URL (Redirect). Next, paste the link to your lead magnet page in the Confirmation Redirect URL field.
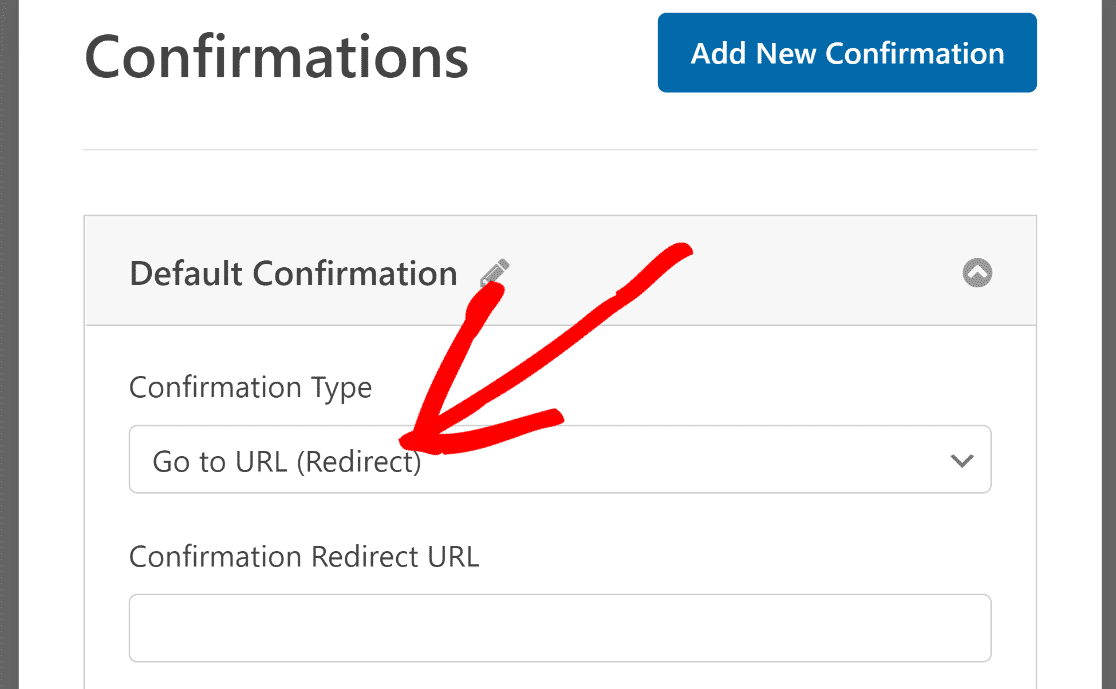
Through this method, you will be able to immediately direct your visitors to the lead magnet page upon the submission of the form.
Send Lead Magnet Link via Email
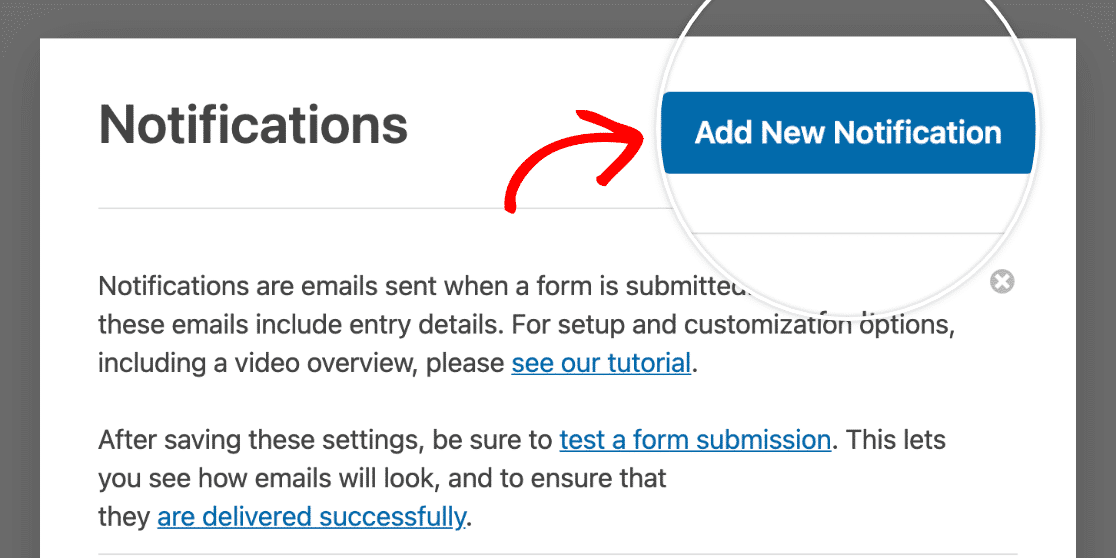
You can also send the lead magnet link to your users via email. This is among the best lead magnet practices. To do this, click on Settings » Notifications.
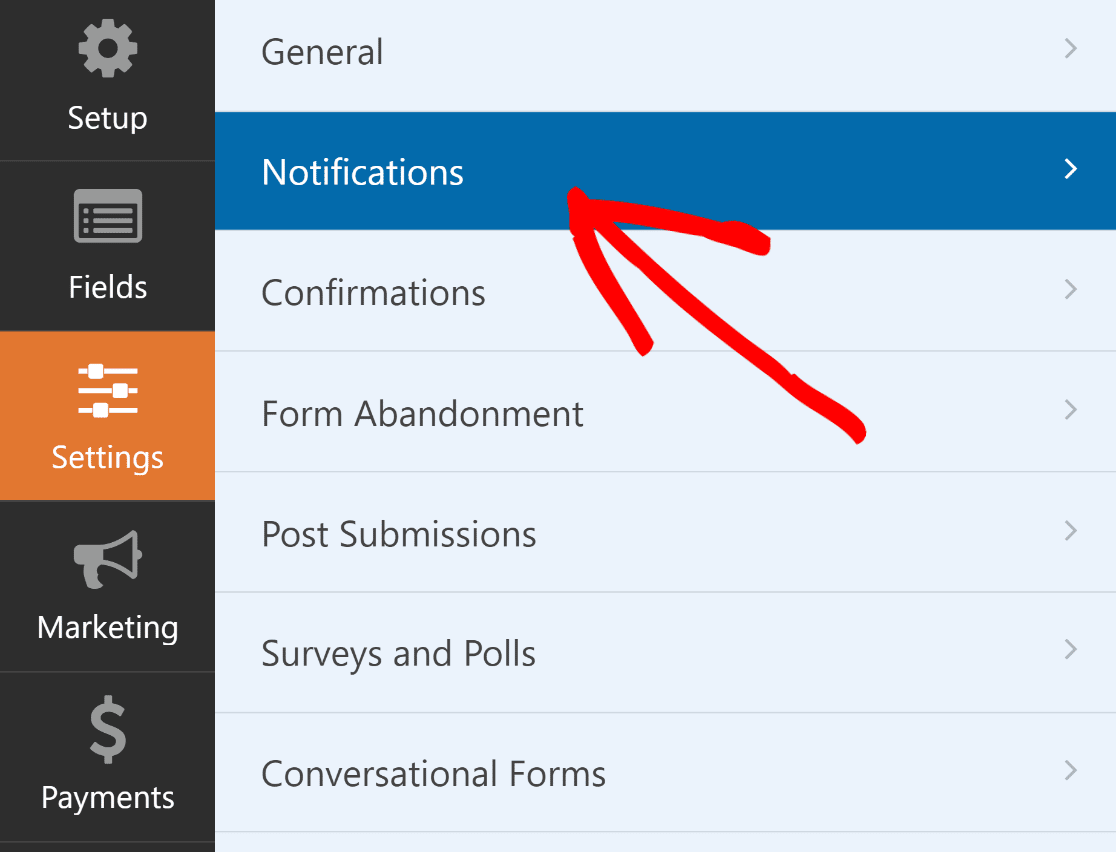
To proceed, click on the button labeled Add New Notification located in the upper right corner of the screen.
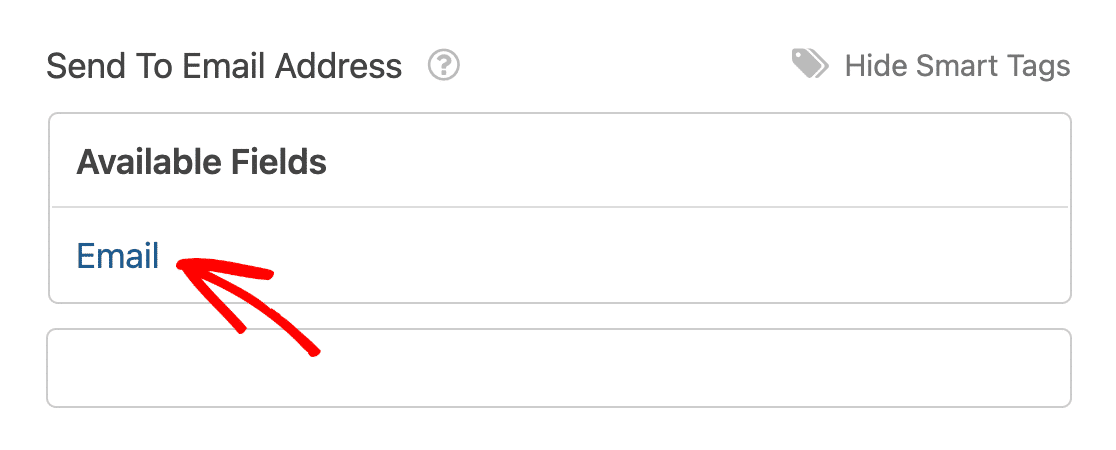
Pick Email from the list of Smart Tags in the Send to Email Address field. This will fetch the email address of the user filling out the form automatically.
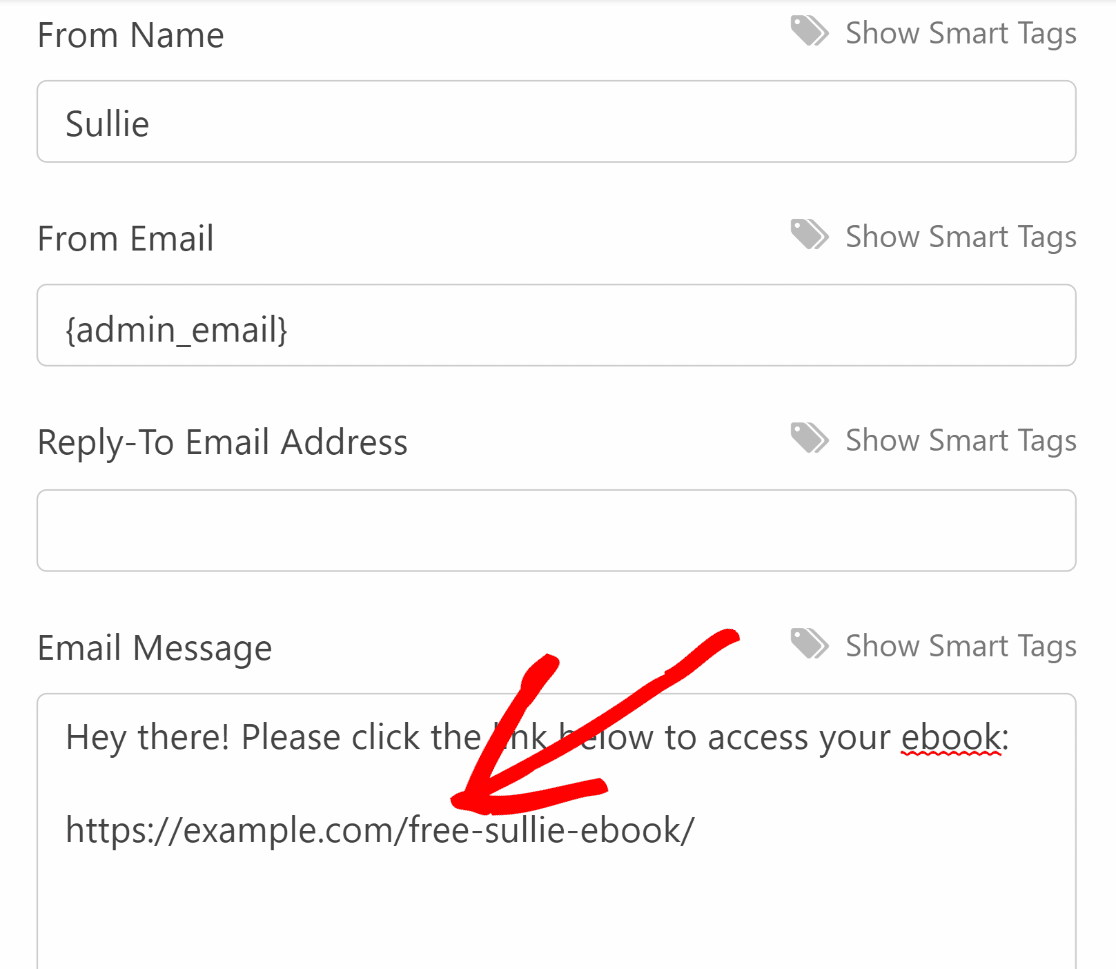
Scroll down until you reach the Email Message field, and then enter the URL to your lead magnet here.
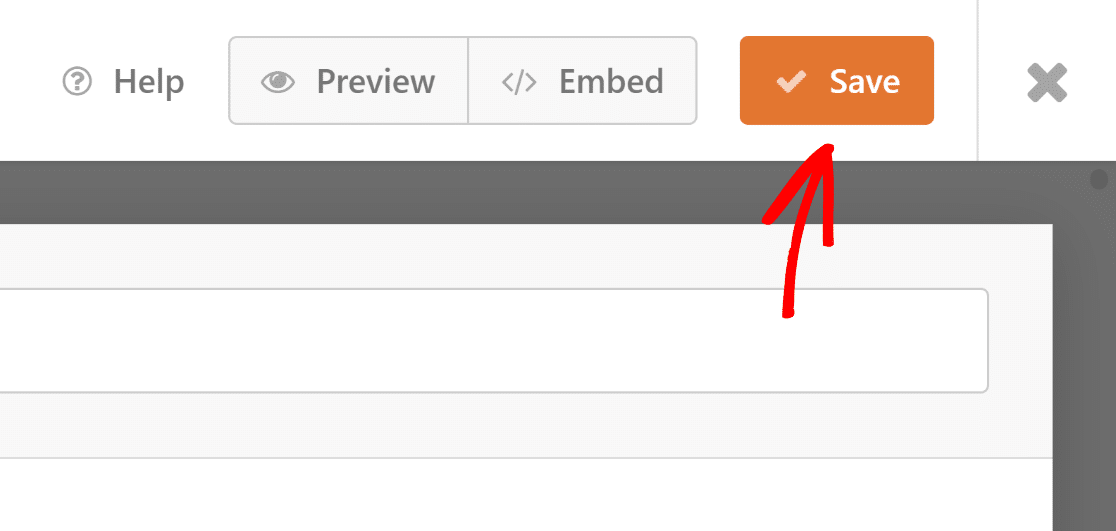
To save your changes up to this point, press the orange Save button in the upper-right corner of the screen.
7. Publish Your Lead Magnet Optin Form
Now, you can publish the form on your website and start getting leads! At the top of the form builder, click the Embed button.

You’ll be presented with two options now. For this example, we’ll embed the form on a new page. Go ahead and click on Create New Page.
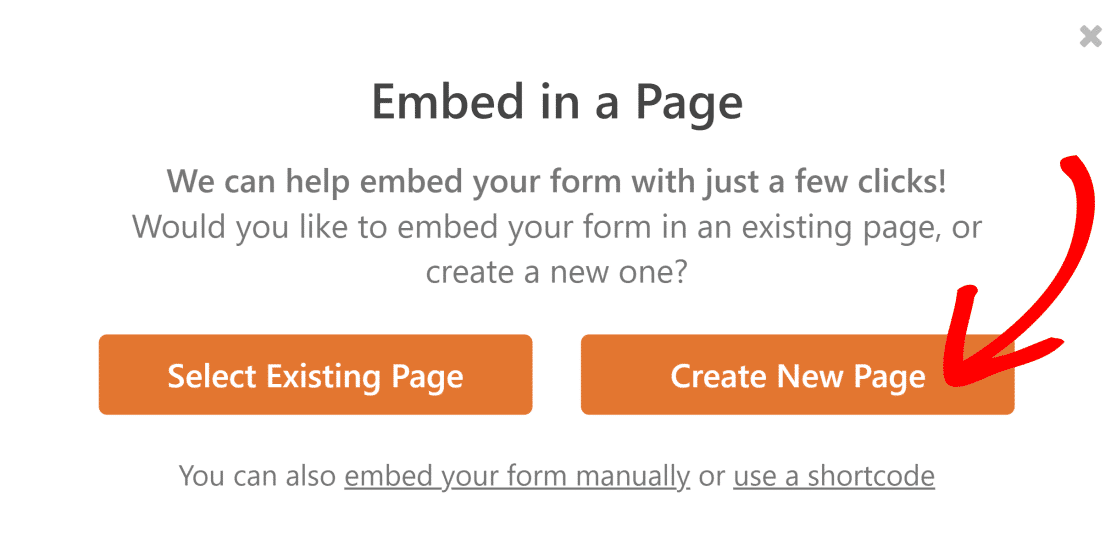
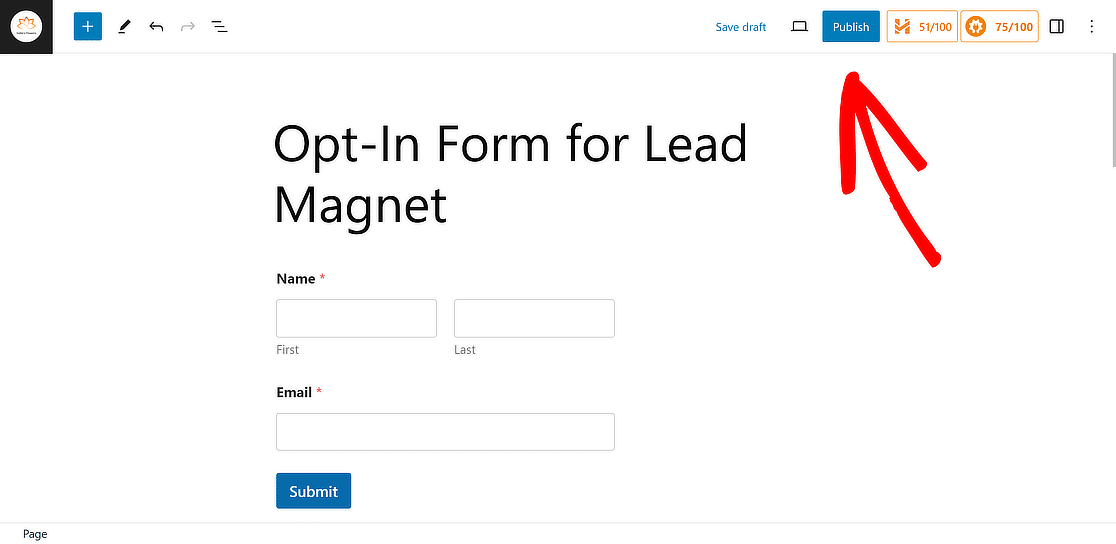
Name your page and then press Let’s Go. This will redirect you to the WordPress block editor page. Simply hit the Publish button.
Very cool! Now, let’s check to see if the confirmation message is working right. You can test this by filling out a test entry.
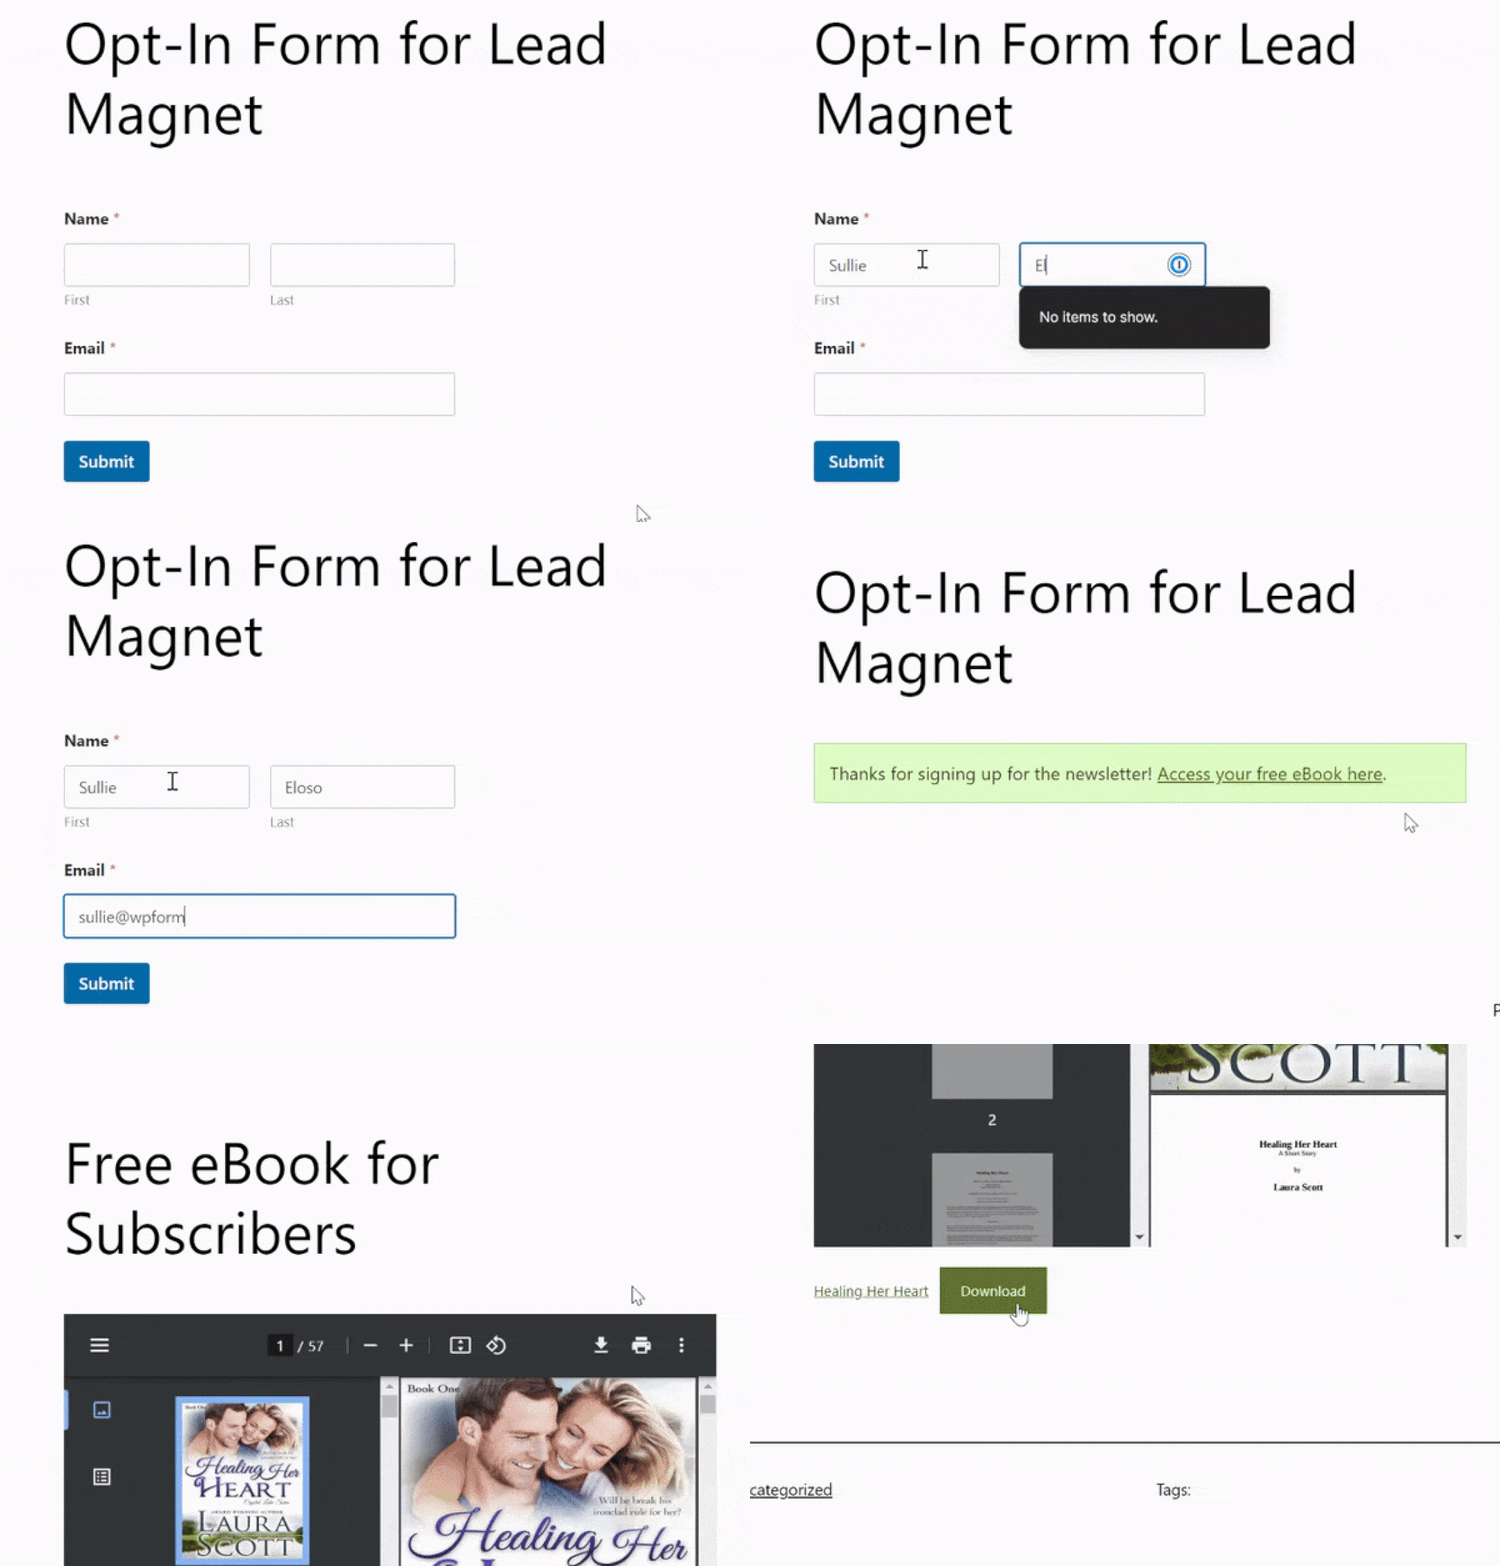
As you can see above, the confirmation message with our lead magnet link shows up as planned. This indicates everything is good to go!
More Questions About Creating a Lead Magnet Page in WordPress
Lead magnet pages are a popular topic of interest among our readers. Here are answers to some commonly asked questions about them.
How can I create a lead magnet?
To create a high-quality lead magnet, identify your audience’s key interests or problems. Develop a resource like an eBook, webinar, or checklist that addresses these issues.
Ensure it’s valuable enough for people to exchange their contact information for it. Design it attractively and make sure it’s directly relevant to your product or service.
Why create a lead magnet?
A great lead magnet is essential for attracting potential customers. It helps in collecting contact information, enabling you to build a mailing list for email marketing.
This list is crucial for nurturing leads, providing valuable content, and guiding them through the sales funnel towards making a purchase.
What is a lead magnet example?
An example of a good lead magnet is a freebie eBook or email course offering expert tips in a specific field.
For instance, a digital marketing agency might offer an eBook or course titled “10 Proven Strategies to Increase Your Website Traffic.”
This provides immediate value to the target audience while showcasing the agency’s expertise.
How to make a lead magnet for free?
To create a lead magnet for free, use tools like Canva for design and Google Docs for content creation.
Select a topic relevant to your expertise to create an effective lead magnet. Compile useful information into a guide, checklist, or report.
Make sure it’s neatly formatted, easy to read, and provides real value. Share it on your website or social media with a simple sign-up or pop-up form.
Next, Learn How to Create a Price Calculator For Your Website
Offering a way for your website visitors to make calculations directly on the form is a great way to engage with them and generate leads. Check out this guide to learn how to create a calculator form in WordPress.
If you are wondering how to encourage users to fill out a form requiring their email to download a file, then that’s possible too. Check out this guide on How to Require an Email Address to Download a File.
Ready to fix your emails? Get started today with the best WordPress SMTP plugin. If you don’t have the time to fix your emails, you can get full White Glove Setup assistance as an extra purchase, and there’s a 14-day money-back guarantee for all paid plans.
If this article helped you out, please follow us on Facebook and Twitter for more WordPress tips and tutorials.


