AI Summary
Looking for a way to make website visitors contacting you with a multi step form a more positive experience?
By splitting your form into different sections, you can fight form fatigue and increase user engagement and lead generation on your website.
In this guide, we’ll walk you through the basics of setting up a multi-step form in WordPress with WPForms via 2 different methods.
How to Create a Multi-Step Form in WordPress
Creating a multi-step form in WordPress using WPForms is incredibly easy. Simply follow the steps below:
In This Article
Step 1: Install a Multi-Step Form Builder Plugin
If you’re looking for a form builder plugin that allows you to create multi-step forms, calculators, and other types of forms, look no further than WPForms. It offers numerous features that make creating a customized form incredibly easy.
For this tutorial, we recommend signing up for WPForms Pro, since it has many features like Page Breaks, the Lead Forms Addon, conditional logic, and customizable templates that make it very easy to create a multi-step form.
Once you have acquired the WPForms Pro license, all you have to do is activate and install the plugin on your website. For step-by-step instructions on how to do this, check out this guide on installing a WordPress plugin.
Step 2: Create Your Form and Add Relevant Fields
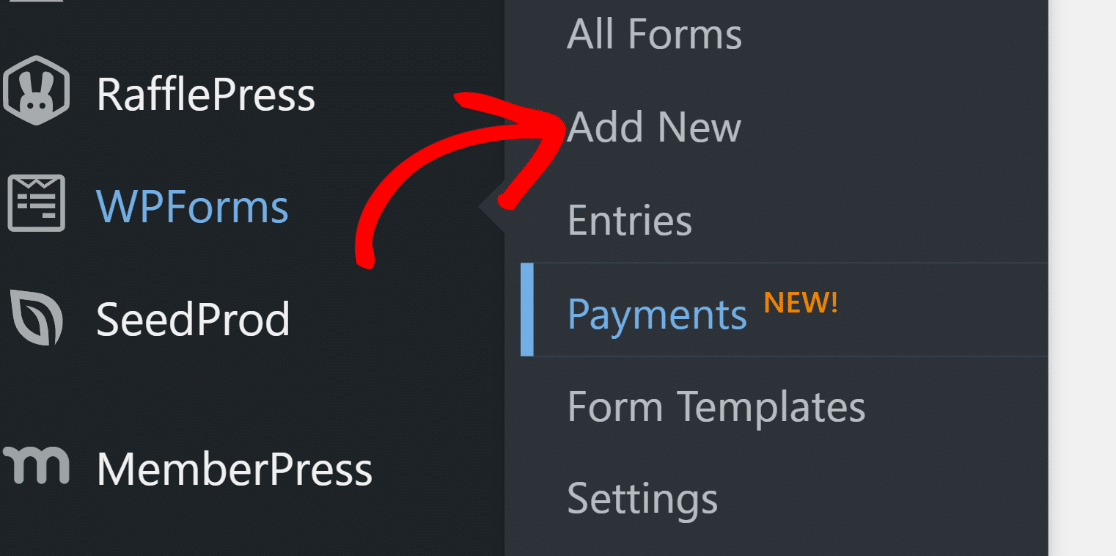
Now, let’s create your multi-step form in WordPress. From your dashboard, simply navigate to WPForms and click on the Add New button.
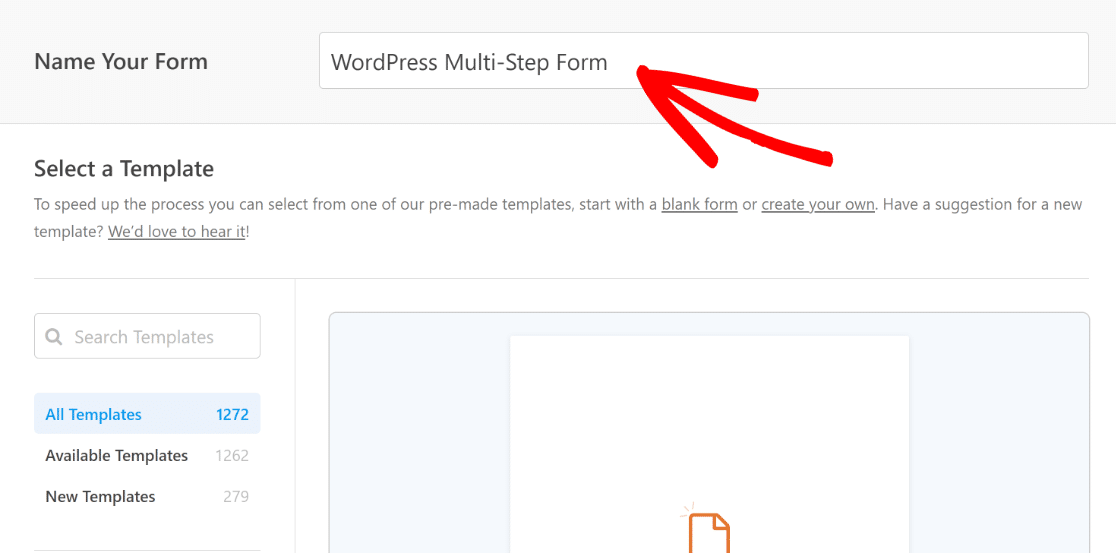
On the next page, name your form. For the purpose of this tutorial, we’ll call ours the “WordPress Multi-Step Form”.
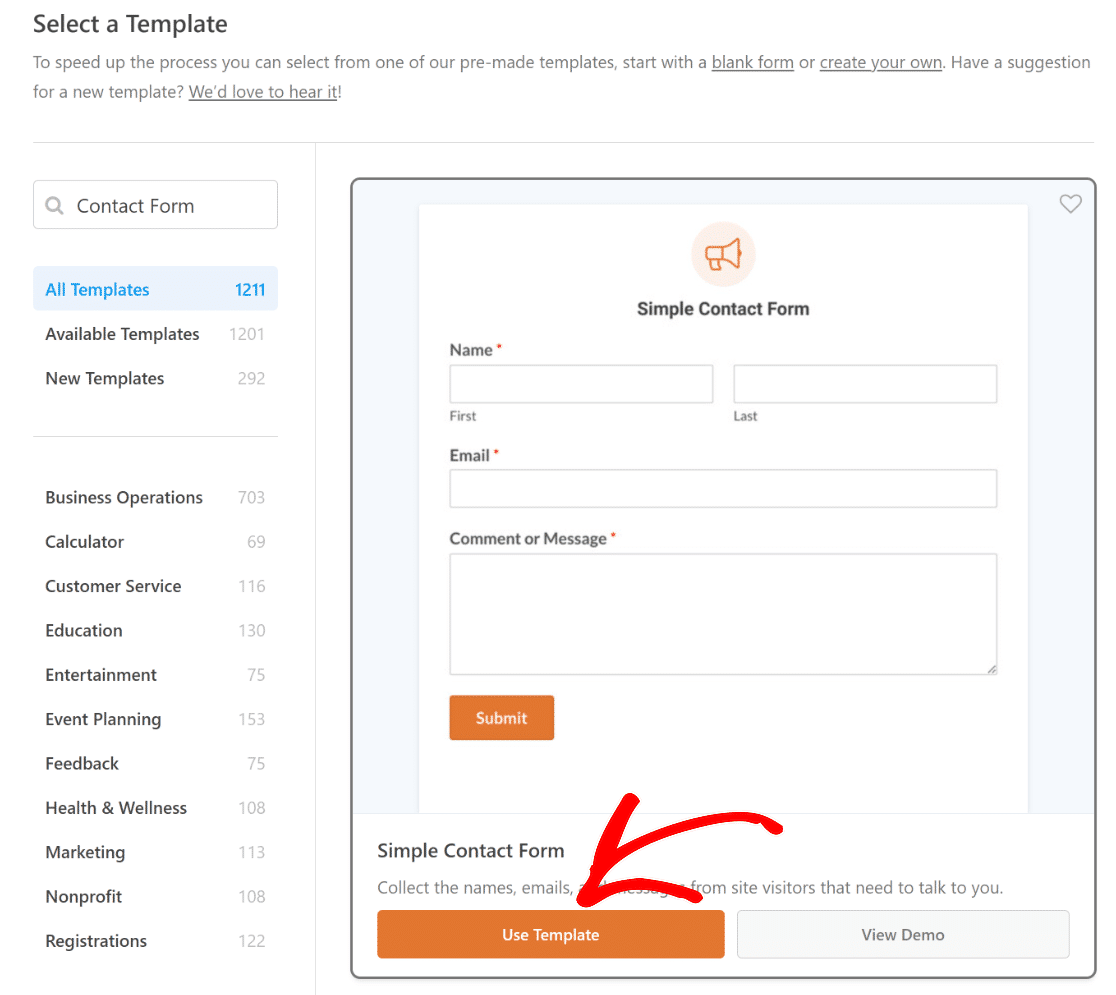
After that, you can choose to start building your form from scratch by clicking the Create Blank Form button, or you can add fields to an existing template.
To save time and proceed with adding relevant fields to our form, we will select the Simple Contact Form and then click the Use Template button.
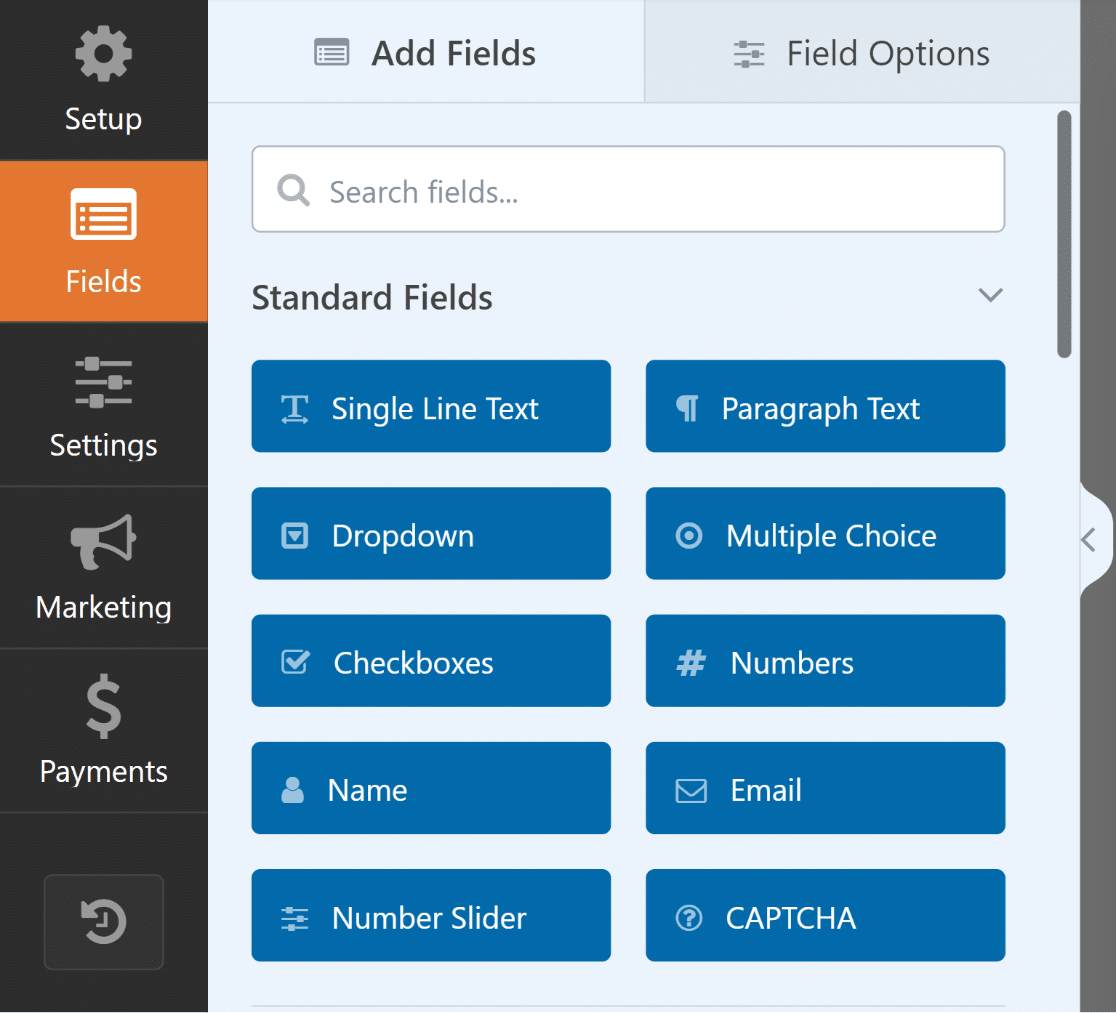
After clicking on the Use Template button, you will be redirected to the Form Builder. On the left side, you can see all the available Fields.
Meanwhile, on the right side of the screen, you can see an editable preview of your form, where you can drag and drop other fields to your liking.
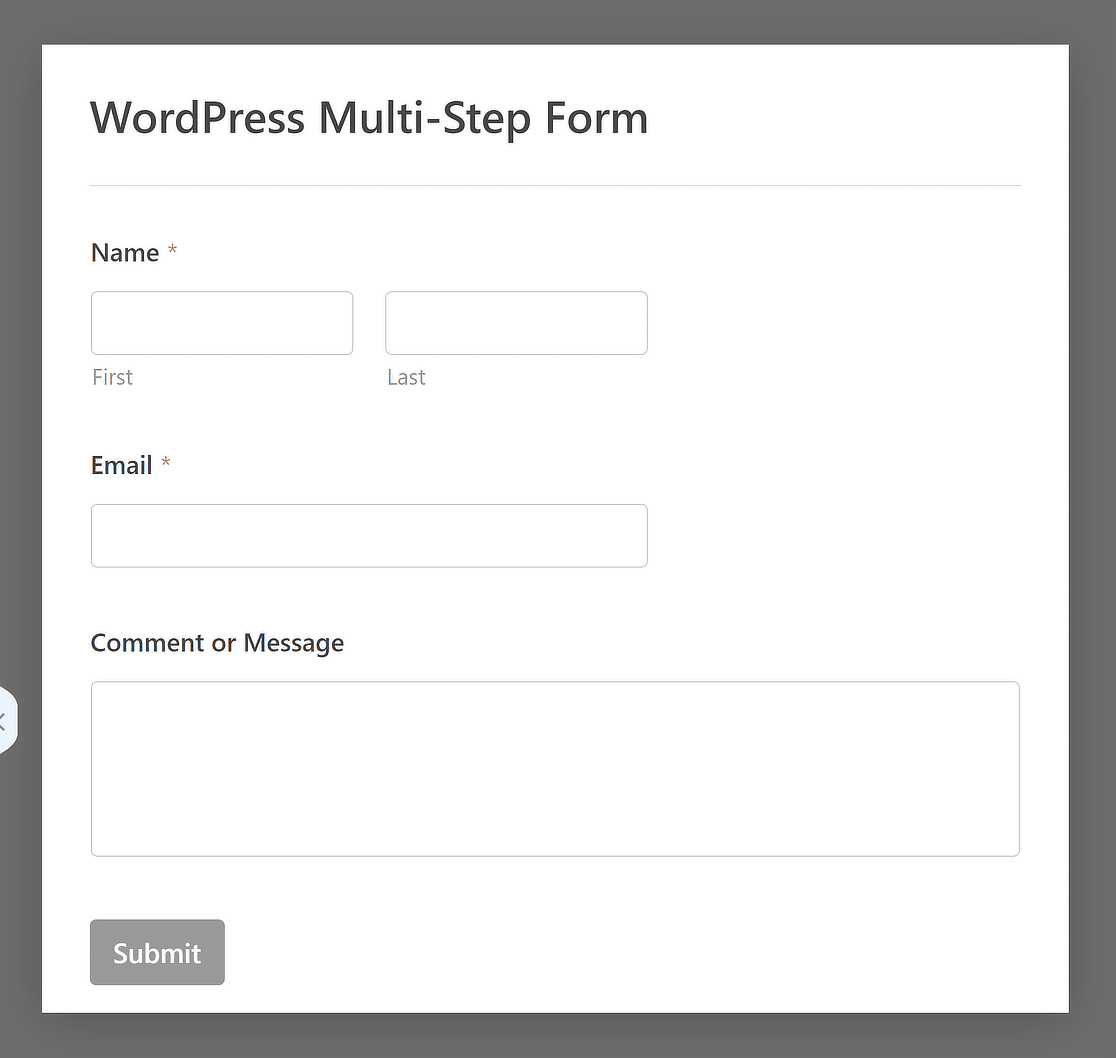
With the SimpleContact Form Template, you’ll already have the Name, Email, and Comment or Message form fields.
Click on any of the form fields to make changes or add new fields to customize your form. For instance, we added fields for users to provide info regarding:
- Company Name – Using the Single Line Text field.
- Job Title – Again, using the Single Line Text field.
- Website – Using the Website / URL field from the Fancy Fields section.
- Industry – Using a Checkbox field and adding Choices such as Information Technology, Manufacturing, Retail, and Healthcare.
- Country/Region – Using a Dropdown field and adding Choices such as United States, Canada, Australia, United Kingdom and New Zealand.
- How did you hear about us? – Once again, using the Dropdown field and adding Choices like Google, Facebook, LinkedIn, etc.
We added these fields to enhance the form template further and make it relevant to our use case. Now, let’s take a look at how to split your form into multiple parts.
Step 3: Split Your Form into Multiple Parts
You’ll be pleased to know that splitting your form into multiple parts is very easy with WPForms, and you don’t just have one method to do it!
Depending on your requirements, you can either use the Page Break field to split your form or use the Lead Forms Addon. We’ll show you the steps for both!
Method 1: Add the Page Break Field to Split the Form
To begin with breaking your form into multiple parts, drag-and-drop the Page Break field, from the left-hand panel to the right-hand panel.
Remember that you need to insert the Page Break field in the precise location where you want the form to be split.
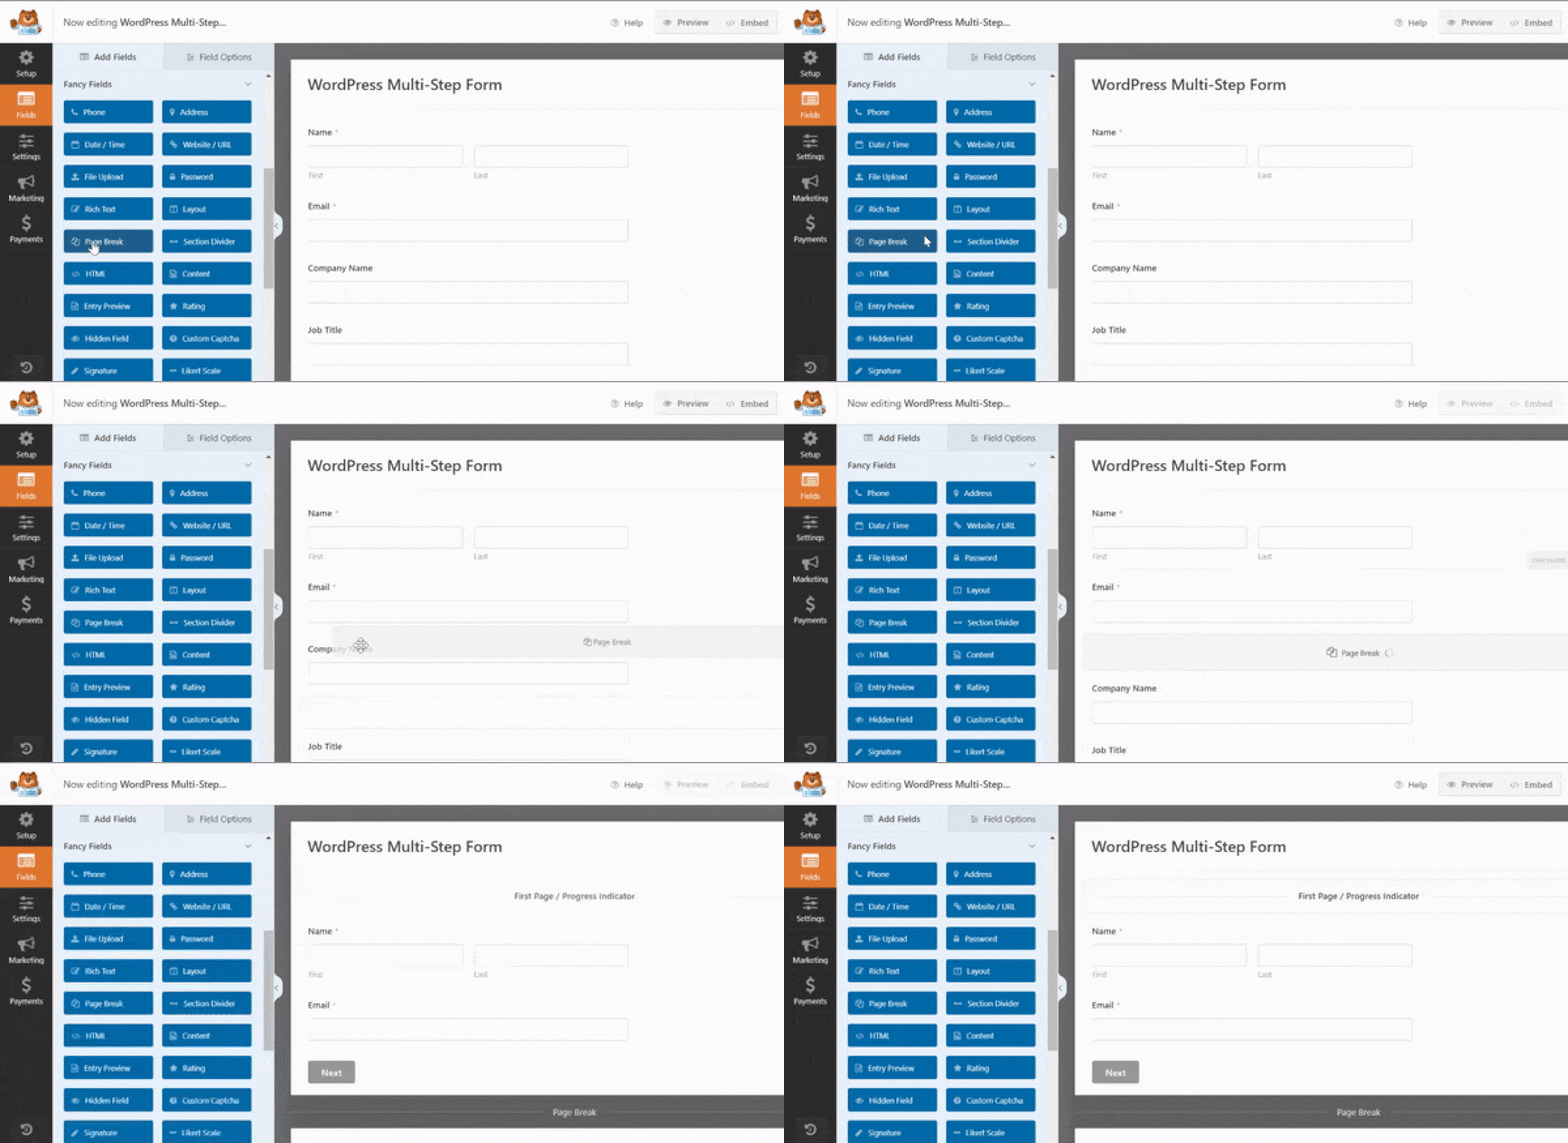
If you want to split the form again, repeat the same steps. WPForms will allow you to create as many form pages as you need.
You can create 2-step forms or go as high as you want, but remember to keep things simple because you don’t want to overwhelm your users.
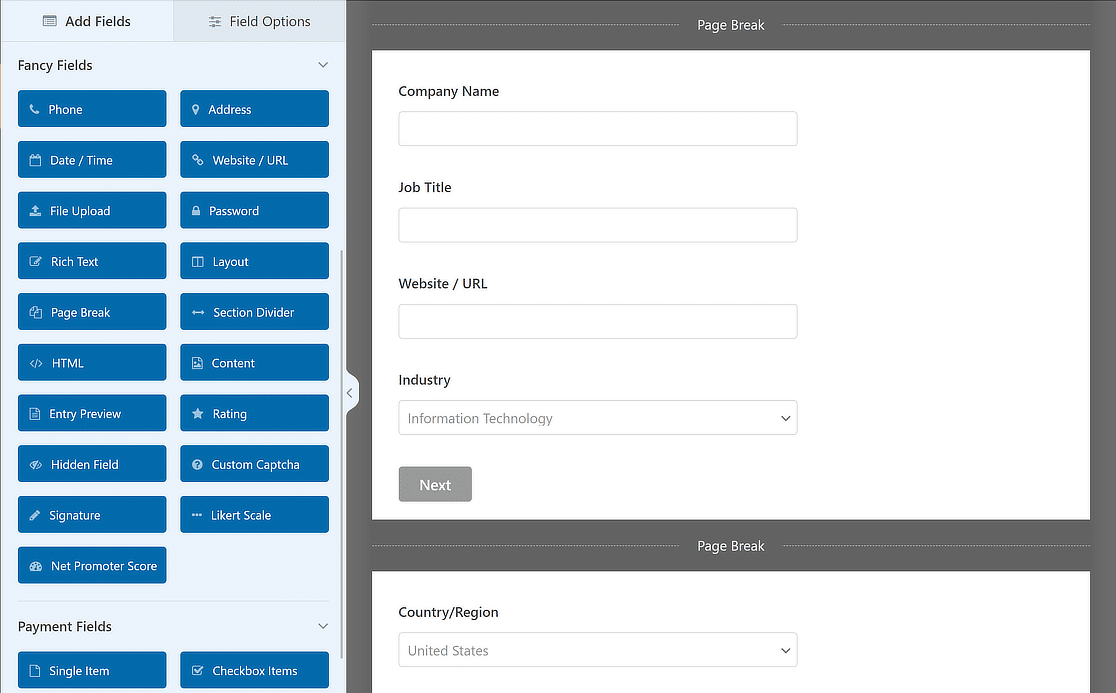
Once you’re done, you can customize the multi-page progress bar to increase the user-friendliness of the form.
Customize the Multi-Page Form Progress Bar
By using a progress bar, you can let users know about the different sections in your form, so that they know how much they have left to fill out before clicking Submit.
WPForms makes things super easy for you by introducing three different breadcrumb-style indicator bars for multi-step forms:
- Progress Bar: This option allows the user to see the form’s progress as they fill it out to keep them informed.
- Circles: This option allows your multi-step form to display one circle and the page title on each page.
- Connector: This option displays the page titles and a connecting bar for each section of your multi-step form.
Click on the First Page break section to customize the first page of your multi-step form’s progress bar and page title. From this location, you can:
- Select the desired Progress Indicator type.
- Modify the Page Indicator Color to your liking.
- Customize the Page Title to help users understand what section of the form they are on (if you selected Circles or Connectors).
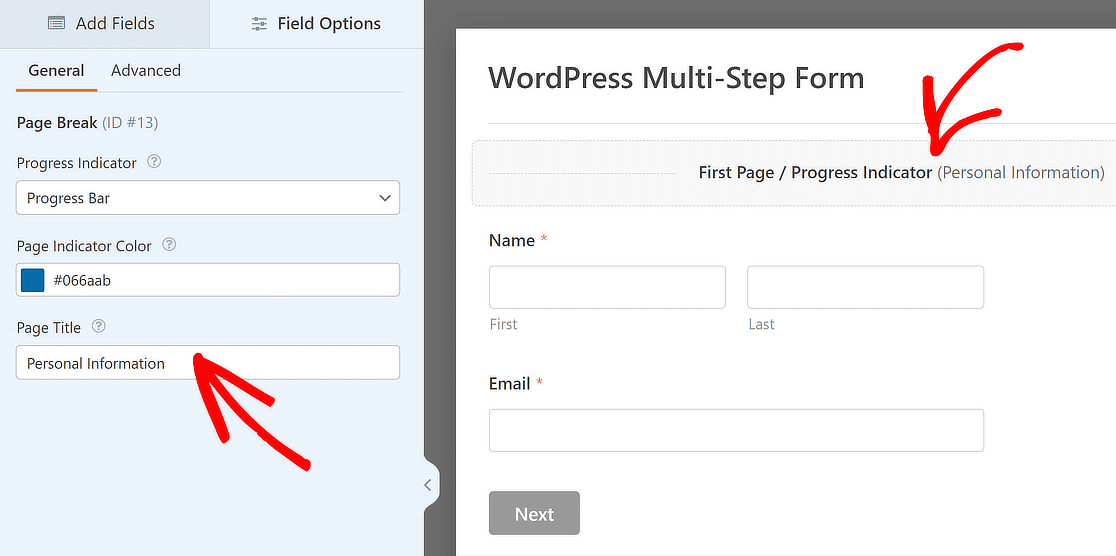
Customize the Next Page Title and Button Text
You’ve changed the Page Title for the first section of the form, but what about the other sections of your form?
Like the first page, you can change the Page Title for the next section by clicking on the relevant Page Break field, and even customize its Next Label.
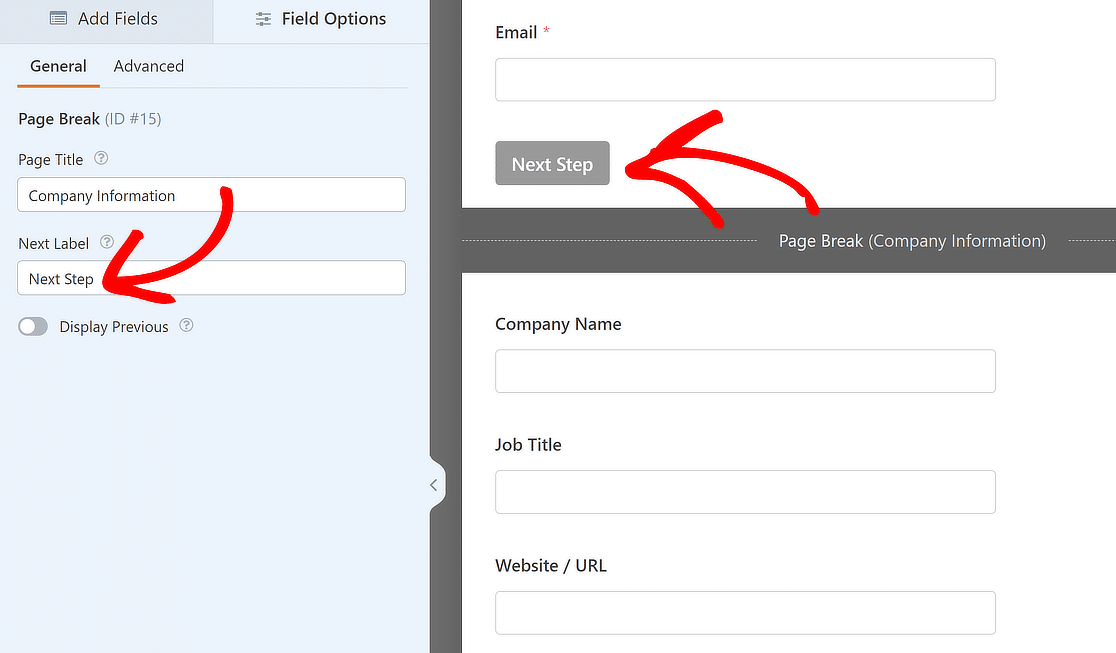
Also, you can turn on the Display Previous option to show a Previous page button to site visitors and even customize the Previous Label to your liking.
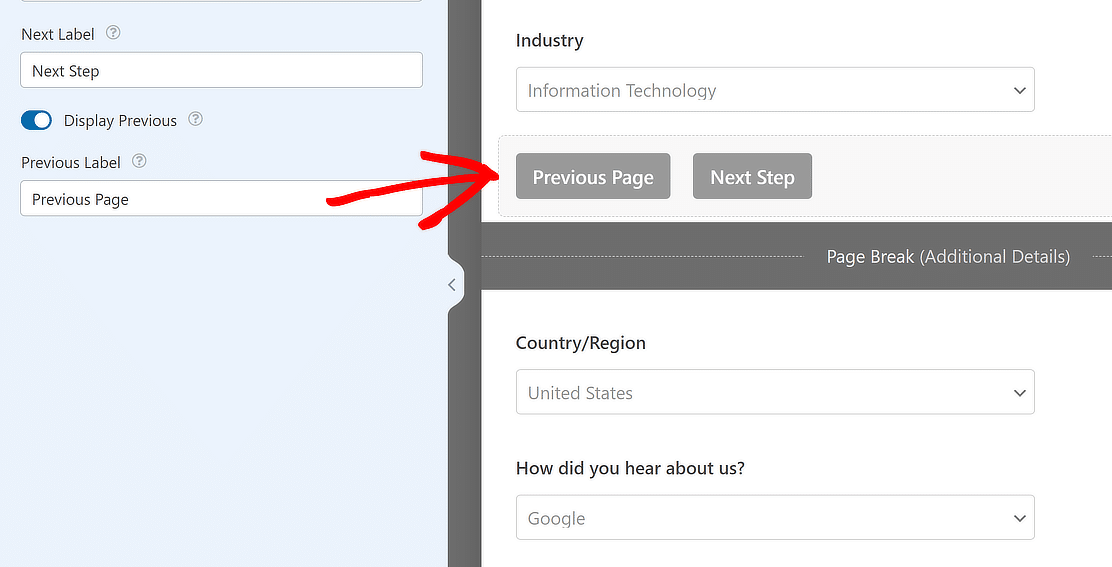
In this manner, if necessary, customers can go back to your form’s previous page, which further boosts the user-friendliness of your form.
Method 2: Use the Lead Forms Addon to Split the Form
The Page Break field works just fine to split the form into numerous sections, but if you’re looking for an alternative, you can use the Lead Forms Addon.
Plus, generating leads is great for managing your small business on WordPress, which is also totally possible with WPForms.
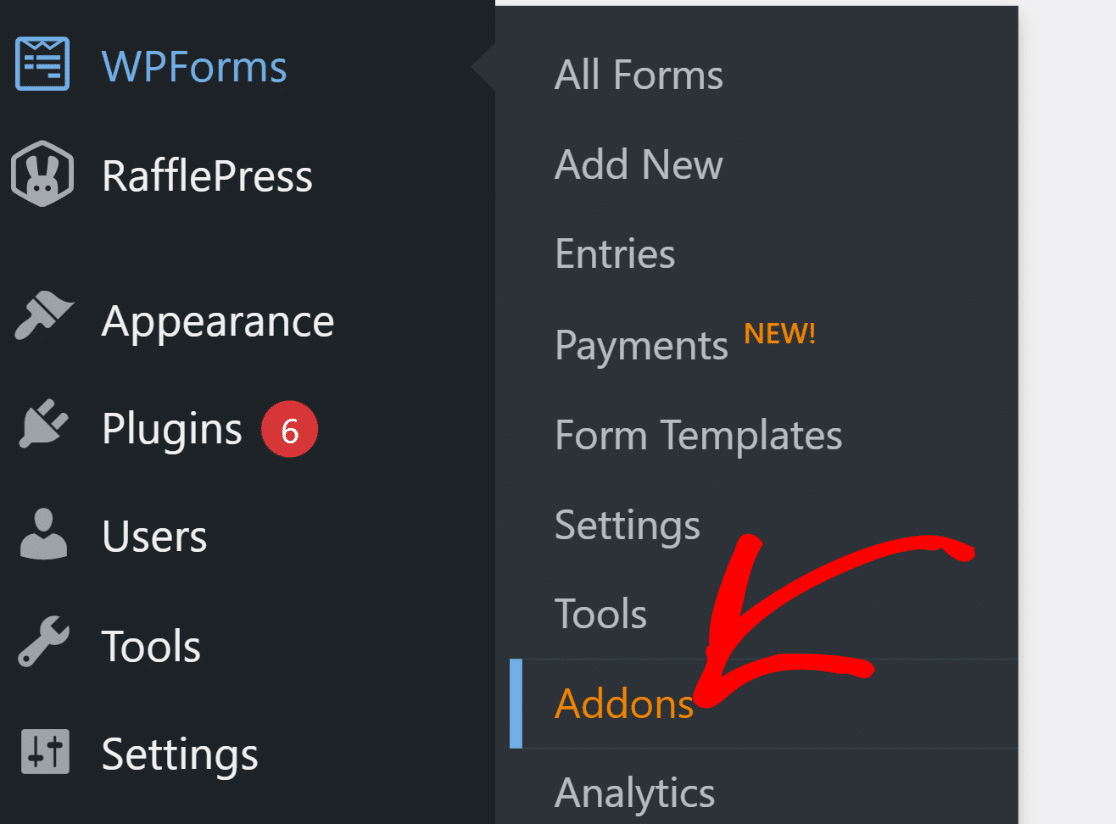
Installing the Lead Forms Addon is very simple. From your WordPress dashboard, go to WPForms, then click on Addons.
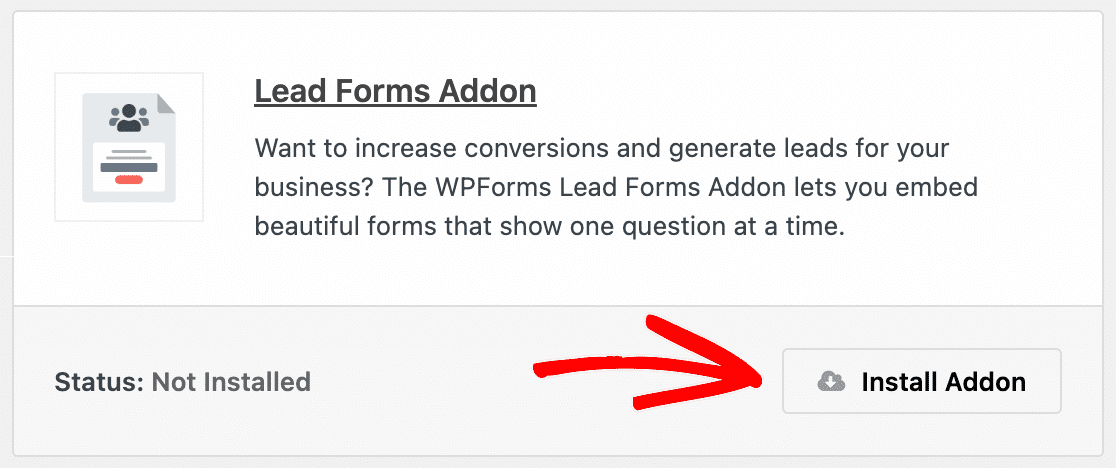
After that, look for “Lead Forms” in the Search Addons section. Then, click on Install Addon, followed by the Activate button.
Enable Lead Form Mode in the Form Builder
Once the Lead Forms Addon is installed and activated, return to the form builder where you’re creating your form.
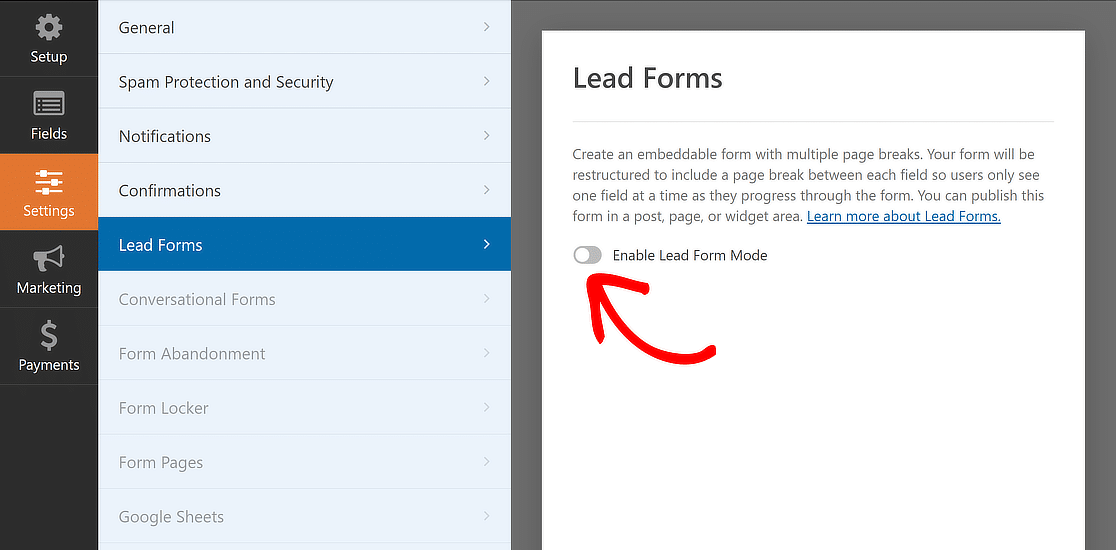
From there, click on the Settings tab, and then select the Lead Forms option. Now, all you have to do is toggle ON the Enable Lead Form Mode option.
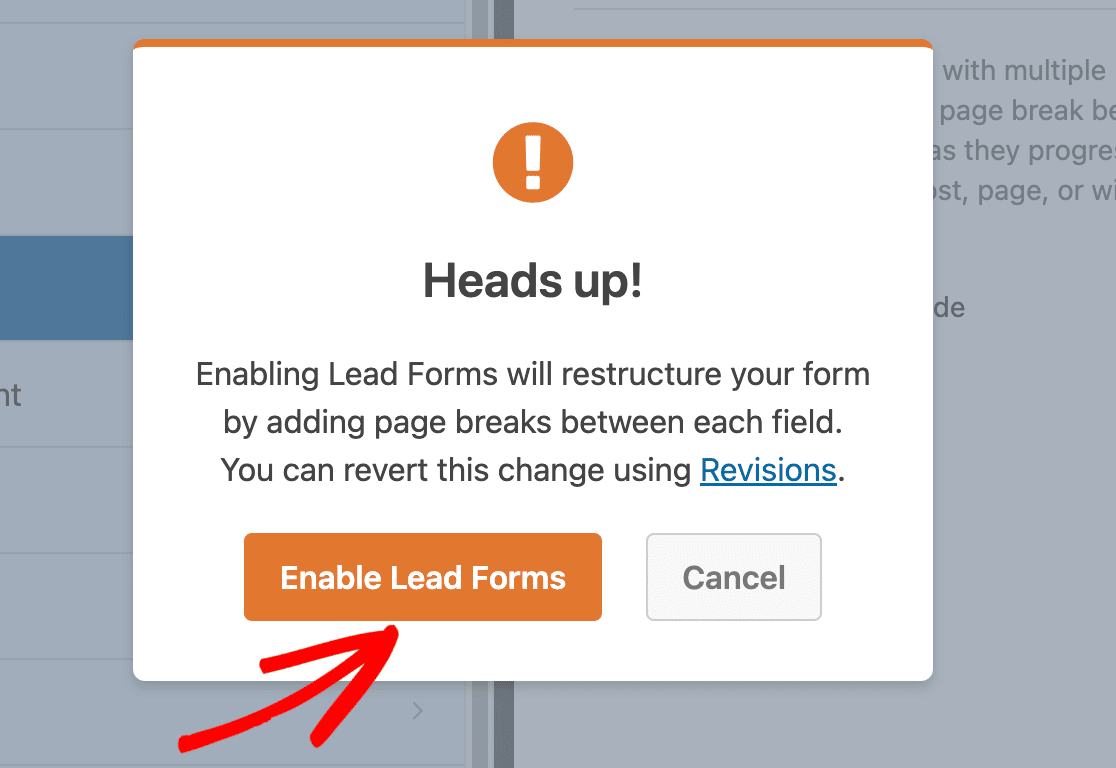
This will cause a popup to appear informing that the Lead Forms Addon will restructure your form. Click the Enable Lead Forms button.
Your fields will now be automatically transformed into a Lead Form. Unless you have a large number of fields, this normally takes a few seconds.
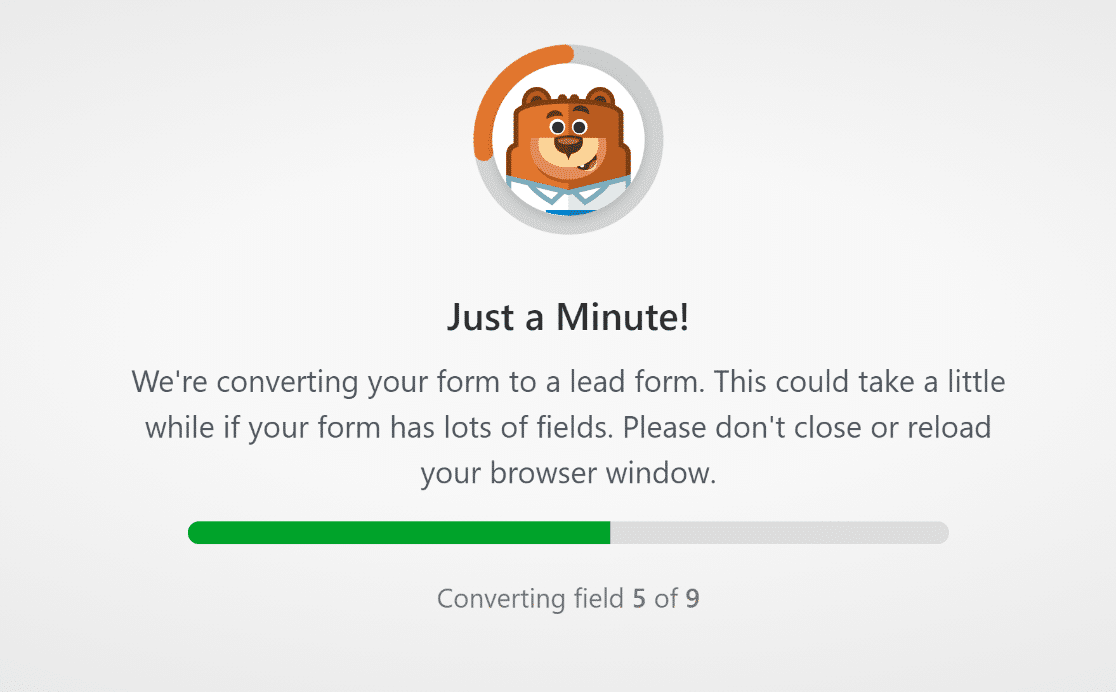
Your form will now automatically be divided into numerous sections. Feel free to add, modify, and arrange fields to your liking.
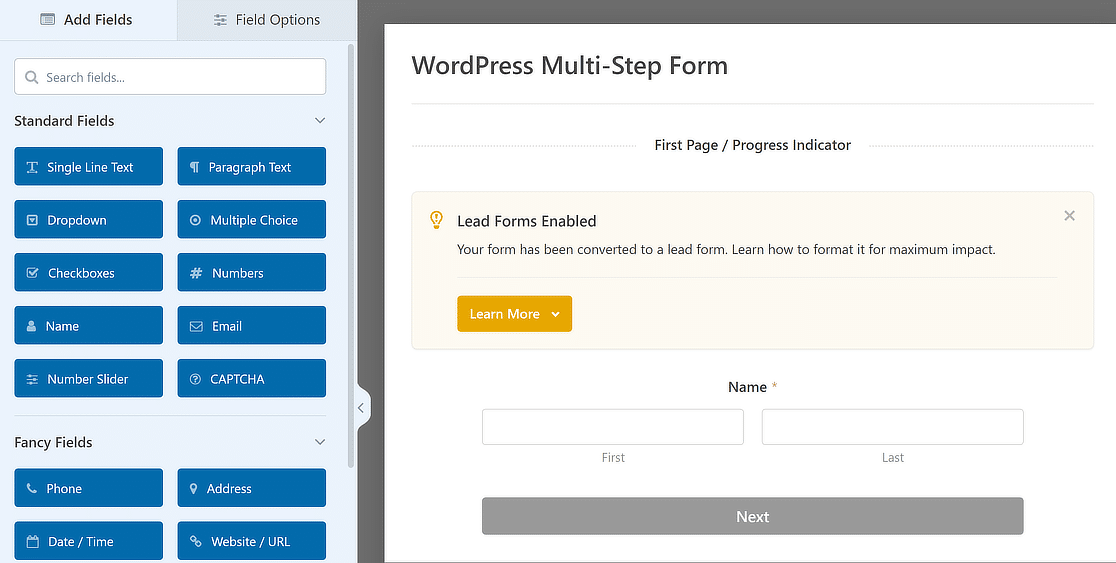
Customize the Lead Form Style Settings
One of the best things about the Lead Forms Addon is that it enables you to customize the appearance of your form on the front end.
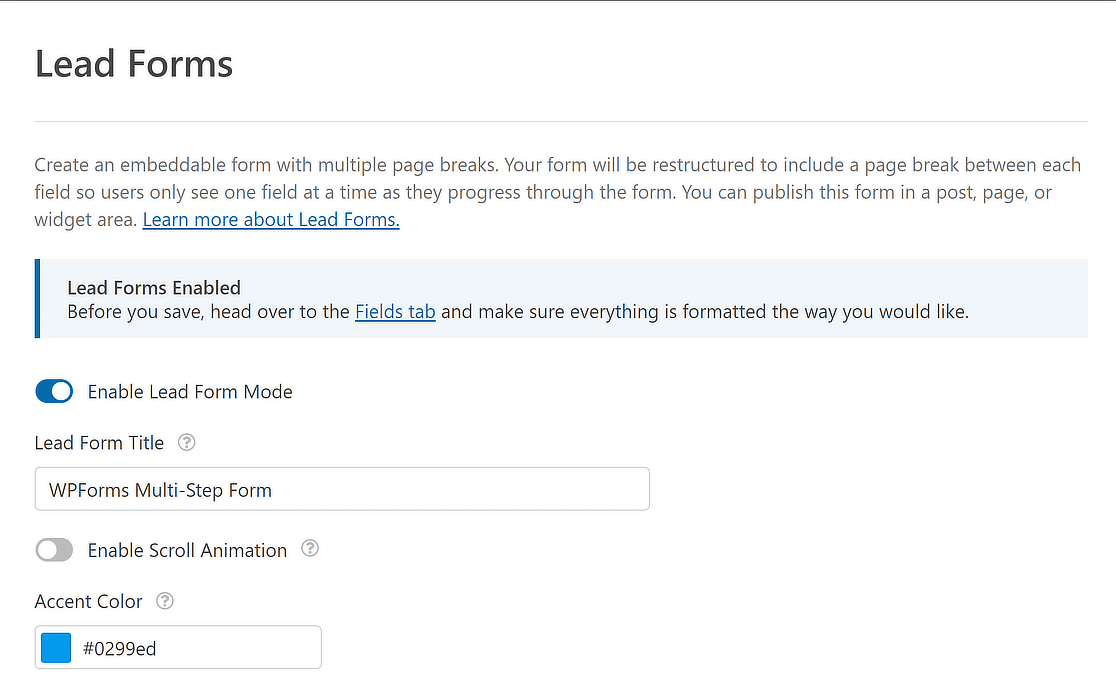
The Lead Forms settings page has all of the customization options. We’ll go over the available customization choices below.
- Lead Form Title: You may give your Lead Form a title by entering it in the Lead Form Title field. When users fill out your form, the title will appear on the front end.
- Accent Color: This option lets you change the color of your buttons, progress bar, and icons via an interactive color picker tool.
- Scroll Animation: With this option enabled, WPForms will navigate the user to the top of the page, upon clicking on the Next button in the form.
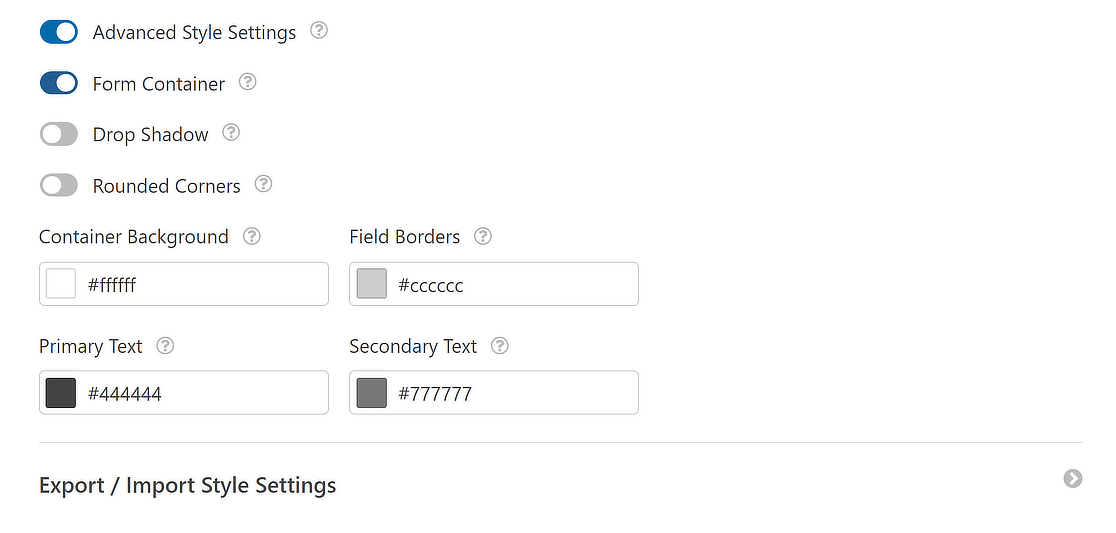
Your Lead Form can be further customized with the help of additional settings. You’ll need to turn on the Advanced Style Settings to access these options.
There is also a Form Container option, which you can enable to enclose the Lead Form in a container, making it stand out from the rest of the page’s elements.
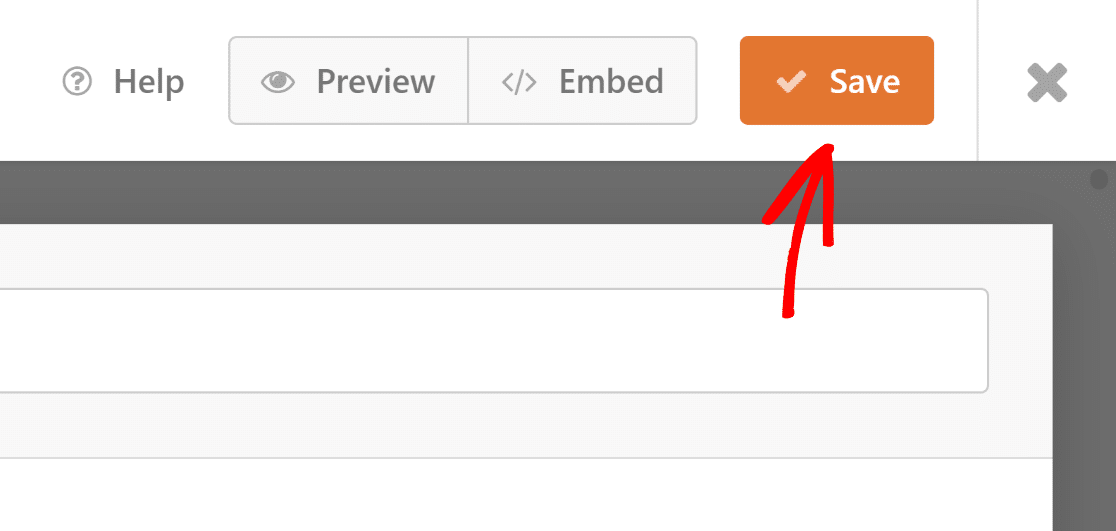
Once you’ve customized your multi-step form to include all your desired features, don’t forget to press the Save button.
You can also use a multi-step form to capture new leads and grow your email list. Check out this guide on how to create a lead magnet page with WPForms!
Step 4: Customize Notifications & Confirmations
Configuring notifications guarantees that you are always kept up to speed on new form entries. In the form builder, go to Settings, then Notifications.
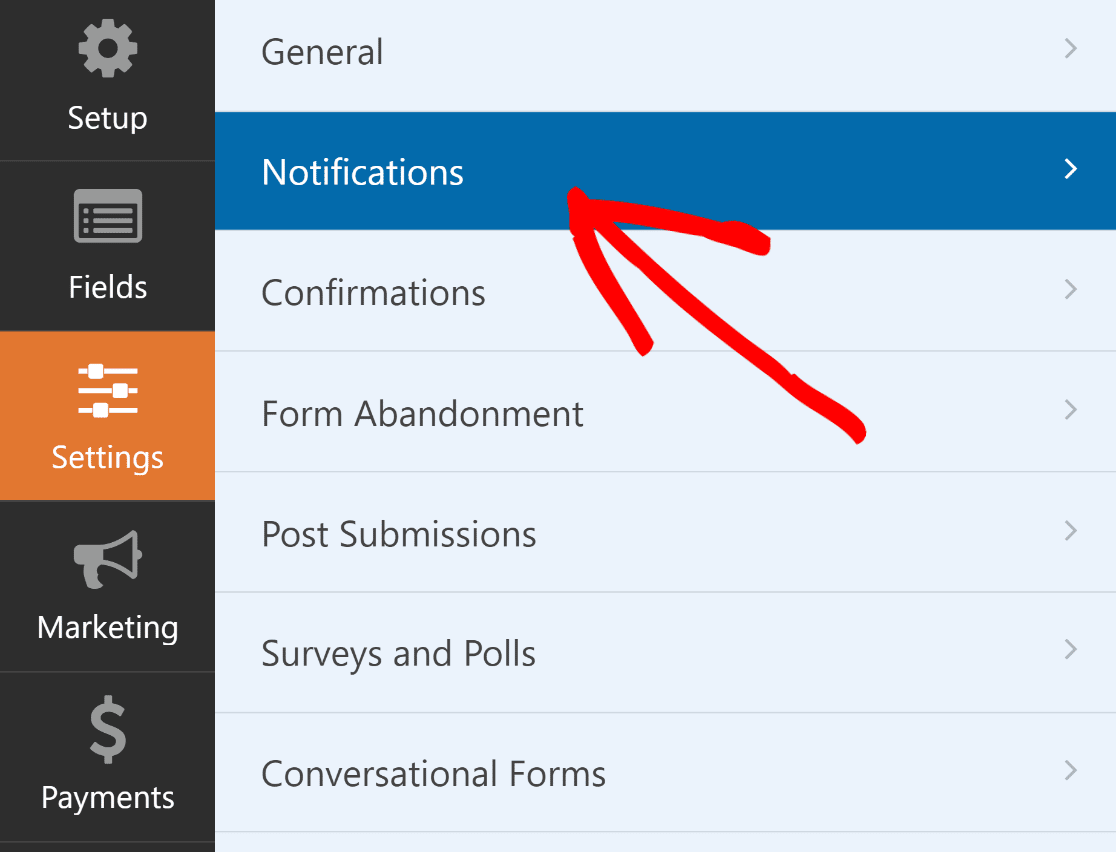
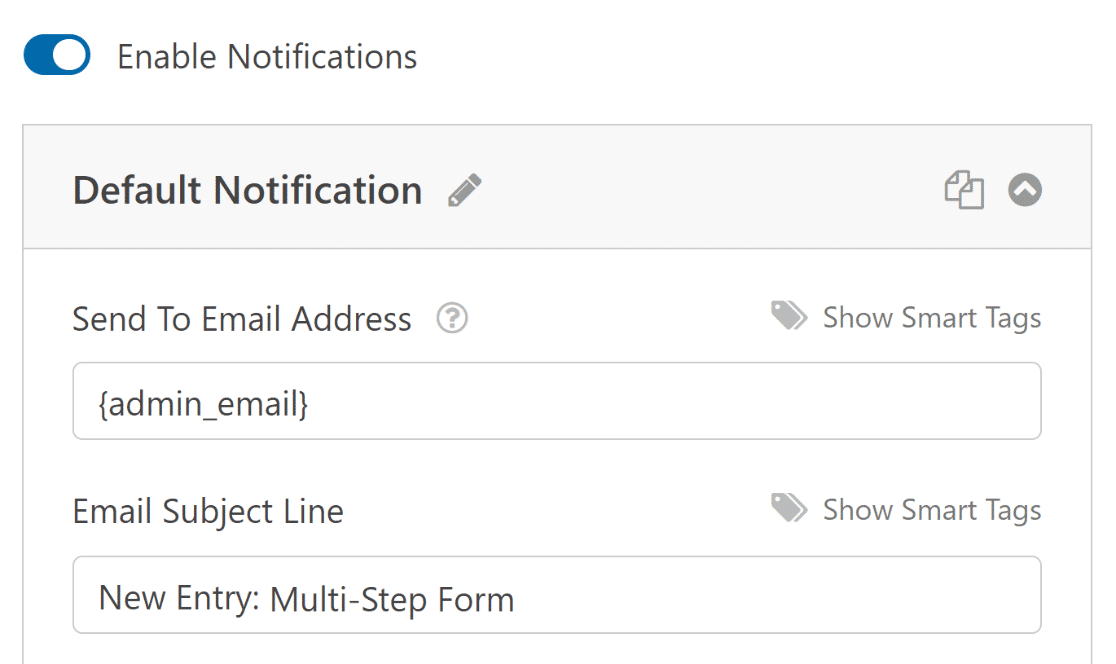
You can edit the default notification settings, such as the subject line, or change recipient emails as needed from here.
Once done, simply navigate to Confirmations in the Settings menu to set up responses for successful form submissions.
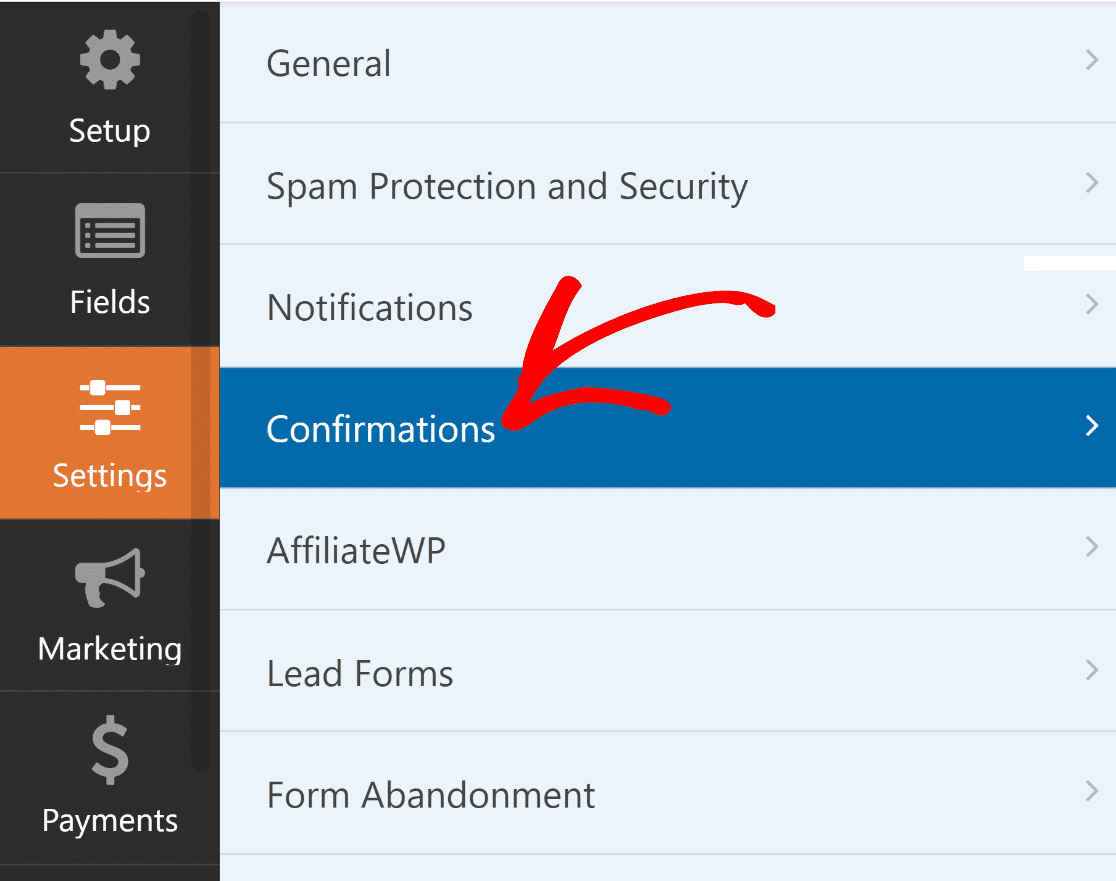
Now, select the Confirmation Type (message, page display, or redirect) that works best for your website and configure its options.
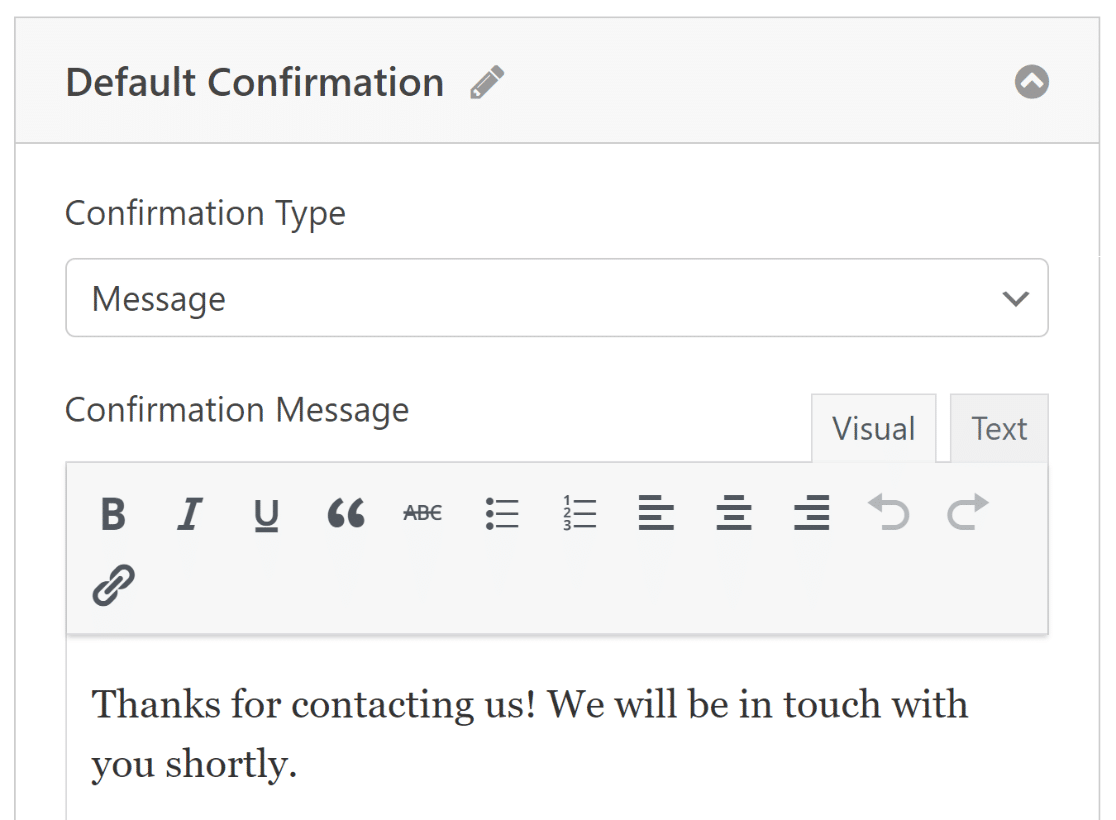
Please remember to save your form again to avoid losing any changes and make sure your settings are updated.
Step 5: Publish Your Multi-Step WordPress Form
Great job! You’ve successfully created a multi-step form in WordPress. It’s now time to take it live and see those form submissions come rolling in!
The process is incredibly simple and you don’t even have to leave the form builder. Simply click on the Embed button in the top right corner.
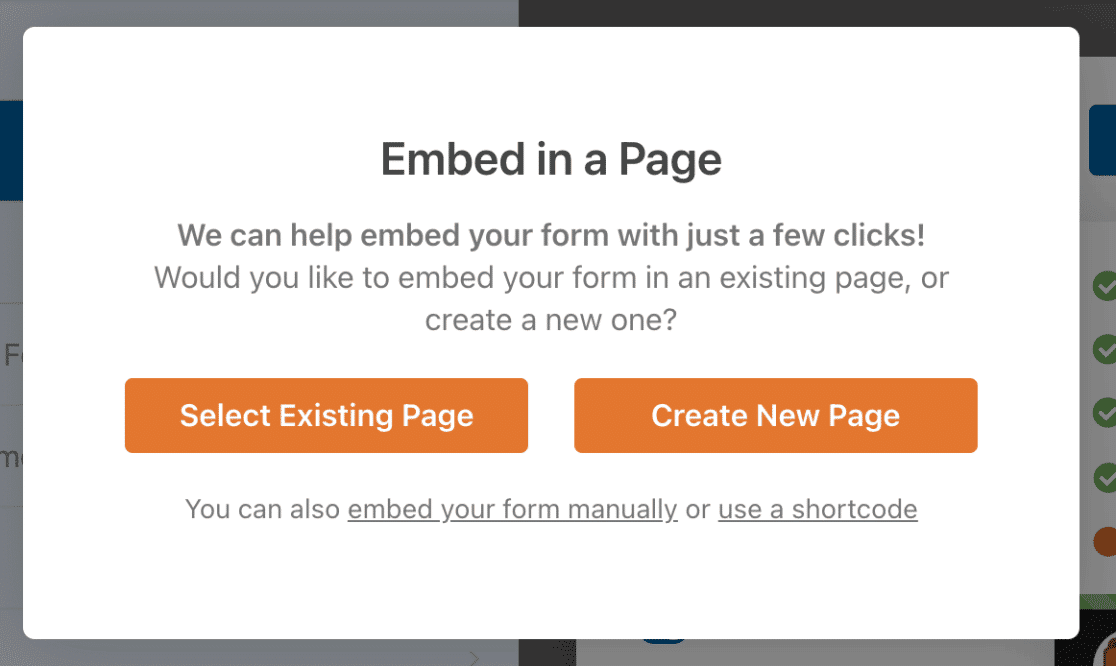
You can choose to publish the form on an existing page or create a new page, after which you’ll be redirected to the WordPress block editor.
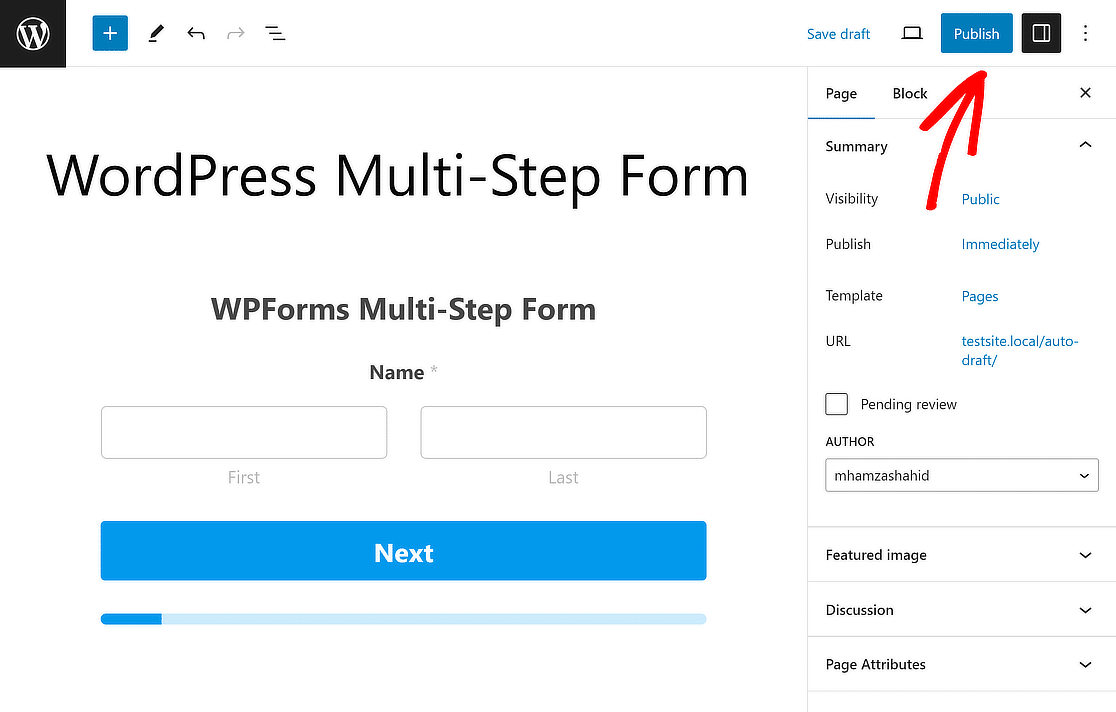
The form will already be embedded. All you have to do now is click on the Publish button, and your multi-step WordPress form will be live!
If you’re using a page builder like Divi, you can also check out this guide for steps on how to make a Divi contact form.
More Questions about Multi-Step Forms
WordPress multi-step forms are a popular topic of interest among our readers. Here are answers to some questions about them.
What is a multi step form?
A Multi Step Form divides a form into multiple steps or pages, enhancing user experience by breaking down longer forms into manageable sections. This is ideal for complex forms like applications, surveys, or registrations. WPForms simplifies creating Multi Step Forms with its Page Break field, enabling easy navigation for users.
Will a Multi Step Form Slow Down My Website?
No, a Multi Step Form won’t slow down your website. WPForms, particularly with its Lead Forms Addon, optimizes these forms for speed and performance, ensuring they load quickly without affecting your website’s overall speed.
When Should I Use a Multi Step Form?
Use a Multi Step Form when you have lengthy or detailed forms. They’re perfect for registrations, surveys, or applications where you need to collect a lot of information but want to avoid overwhelming the user on the landing page. WPForms allows for an efficient Multi Step Form creation, enhancing user engagement.
Which Types of Forms Convert Better in the Multi-Step Layout?
Forms that require detailed information, such as job applications, complex surveys, and lengthy registrations, convert better with a Multi-Step layout. This format, easily created using WPForms, helps in keeping users engaged and reduces the feeling of being overwhelmed by a long-form, boosting conversion rates.
Next, Learn How to Make a Calculator Form in WordPress
Do you want to learn how to make a calculator form in WordPress to increase user engagement on your wesbite? You’re in luck! Creating a custom calculator form is quick and easy, thanks to WPForms and its Calculations Addon.
If you are wondering how to encourage users to fill out a form requiring their email to download a file, then that’s possible too. Check out this guide on How to Require an Email Address to Download a File.
Ready to fix your emails? Get started today with the best WordPress SMTP plugin. If you don’t have the time to fix your emails, you can get full White Glove Setup assistance as an extra purchase, and there’s a 14-day money-back guarantee for all paid plans.
If this article helped you out, please follow us on Facebook and Twitter for more WordPress tips and tutorials.

