


AI Summary
If you want to send WordPress emails with Amazon SES, you’ll need more than just an AWS account. You also need your site to prove it’s allowed to send.
Amazon SES starts every new account in a restricted sandbox environment. And WordPress’s default mail function can’t connect to SES directly, so those emails quietly fail.
In this guide, you’ll learn how to connect Amazon SES to WordPress using WP Mail SMTP.
You’ll also create AWS access keys, leave the sandbox, verify your domain, and send a test email. Let’s get started.
Fix WordPress Email Issues Now
What Is Amazon SES?
Amazon SES (Simple Email Service) is a pay-as-you-go email service from Amazon Web Services. It’s built to send high volumes of transactional email at a low cost.
Transactional emails are the messages your site sends automatically. That includes password resets, order receipts, and contact form notifications.
Here’s why people choose Amazon SES for WordPress:
- Low cost. You pay about $0.10 per 1,000 emails you send.
- Free to start. AWS includes a free tier of 3,000 emails a month for your first year.
- Strong deliverability. SES runs on Amazon’s trusted infrastructure, which helps your emails reach the inbox.
- Scales with you. It handles a handful of emails or millions.
There’s one honest catch. Amazon SES is harder to set up than most mailers.
You’ll work inside the AWS console, create security keys, and wait for Amazon to approve your account. If you want a faster setup, a simpler mailer like SendLayer or SMTP.com takes minutes.
But WordPress can’t connect to Amazon SES on its own. That’s where WP Mail SMTP comes in.
WP Mail SMTP reroutes your site’s email through SES instead of the unreliable PHP mail function. It acts as the bridge between WordPress and Amazon SES.
How to Set Up Amazon SES in WordPress
You set up Amazon SES in WordPress in 6 steps. Here’s the full path from start to finish:
Before you start, make sure you have these ready:
- An AWS account (a credit card is required to sign up).
- An SSL certificate on your WordPress site, so it loads over HTTPS.
- A domain-based email address, like [email protected].
Now let’s walk through each step.
Step 1: Install WP Mail SMTP
If you want to use Amazon SES in WordPress, you need WP Mail SMTP. It’s the best SMTP plugin for WordPress, making the whole process super easy.
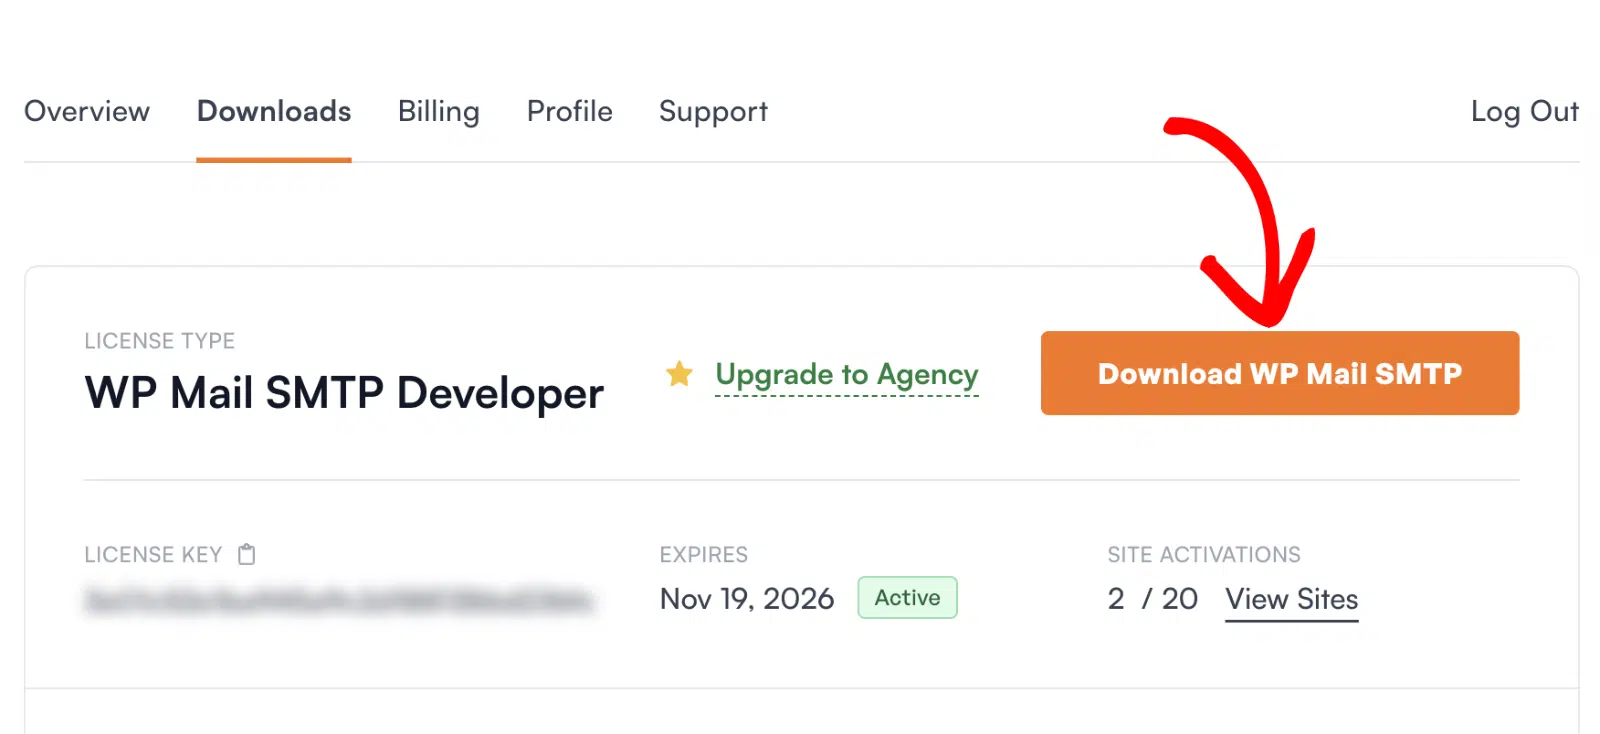
The Amazon SES mailer is available with the Pro version of WP Mail SMTP. To download the Pro version, head to your WP Mail SMTP account.
After that, click on the Downloads tab and download the latest version to your desktop.
Next, open up your WordPress dashboard and upload the zip file to install the plugin.
If you need help with this part, jump over to this guide to installing a WordPress plugin.
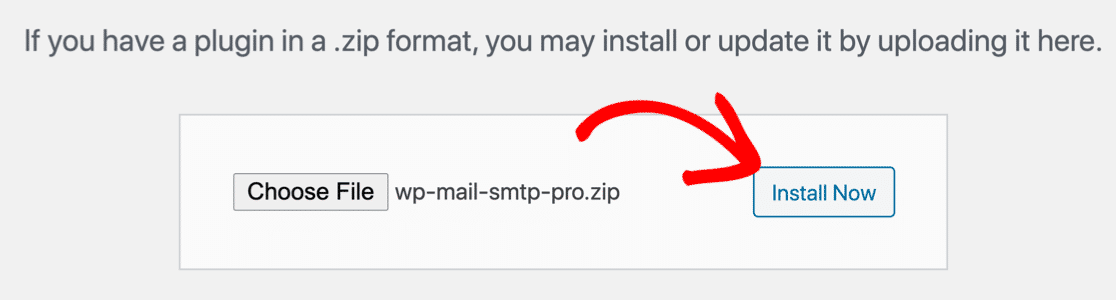
Once the plugin has been uploaded, hit Activate. This will start the WP Mail SMTP Setup Wizard in your browser.
You can leave this browser tab open and proceed to the next step.
Step 2: Create an AWS IAM User and Access Keys
Next, create an IAM user in AWS to get your access keys. These keys let WP Mail SMTP connect to Amazon SES securely.
IAM stands for Identity and Access Management. Instead of using your main AWS login, you create a limited user just for sending email.
Start by logging in to your AWS Management Console. You’ll land on the main dashboard.

Create your IAM user
In the search bar at the top, type IAM. Then select IAM from the results to open the service.

In the left menu, click Users. Then click the Create user button.

Give your user a clear name. A format like yourdomain_wpmailsmtp helps you track it later. Then click Next.

Attach the AmazonSESFullAccess policy
On the permissions screen, select Attach policies directly. That way, you give the user SES access without a group.

In the search box, type AmazonSESFullAccess. Check the box next to it in the results.

Click Next to continue to the review screen.

Review the details. If everything looks right, click Create user.

Generate your access key ID and secret access key
Now open the new user to create its keys. From the Users list, click the username you just made.

Open the Security credentials tab. Then scroll to the Access keys section and click Create access key.

Amazon asks how you’ll use the key. Select Other, then click Next.

Add a short description tag if you want one. Then click Create access key.

You’ll now see your Access key ID and Secret access key. Keep this page open for the next steps.

Step 3: Move Amazon SES Out of Sandbox Mode
Every new Amazon SES account starts in sandbox mode. Sandbox mode limits your account until Amazon approves it for production.
In sandbox mode, you can only send email to addresses you’ve verified. You’re also capped at 200 emails a day and 1 email per second.
To send email to real users, you need production access. You request it by asking Amazon to raise your sending quota.
Open the Service Quotas dashboard in the AWS console.
First, pick your region. Click the region dropdown in the top right, then choose the region closest to your users.

Find the Amazon SES quota
In the left menu, click AWS services. Then search for Amazon Simple Email Service (Amazon SES) and select it.

Next, open the Amazon SES service to see its quotas.

Once here, find the Sending quota row in the list. Select the checkbox next to it.

Request a sending quota increase
To increase your sending quota, click the Request increase at account level button.

Then, enter the daily sending quota you need in the Increase quota value field. Ask for a realistic number based on your site.

Finally, click the Request button to submit.

Step 4: Connect Amazon SES to WP Mail SMTP
Now connect Amazon SES to your site with the access keys from Step 2. Go back to your WordPress dashboard for this step.
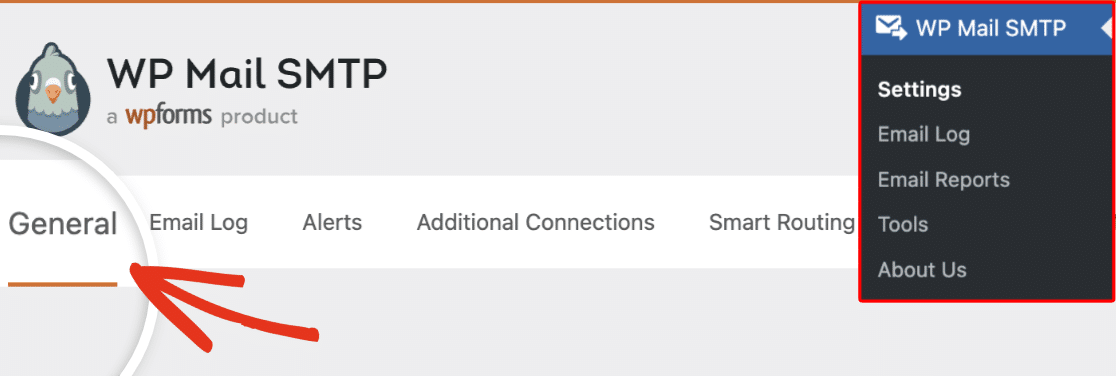
Navigate to WP Mail SMTP » Settings and open the General tab.
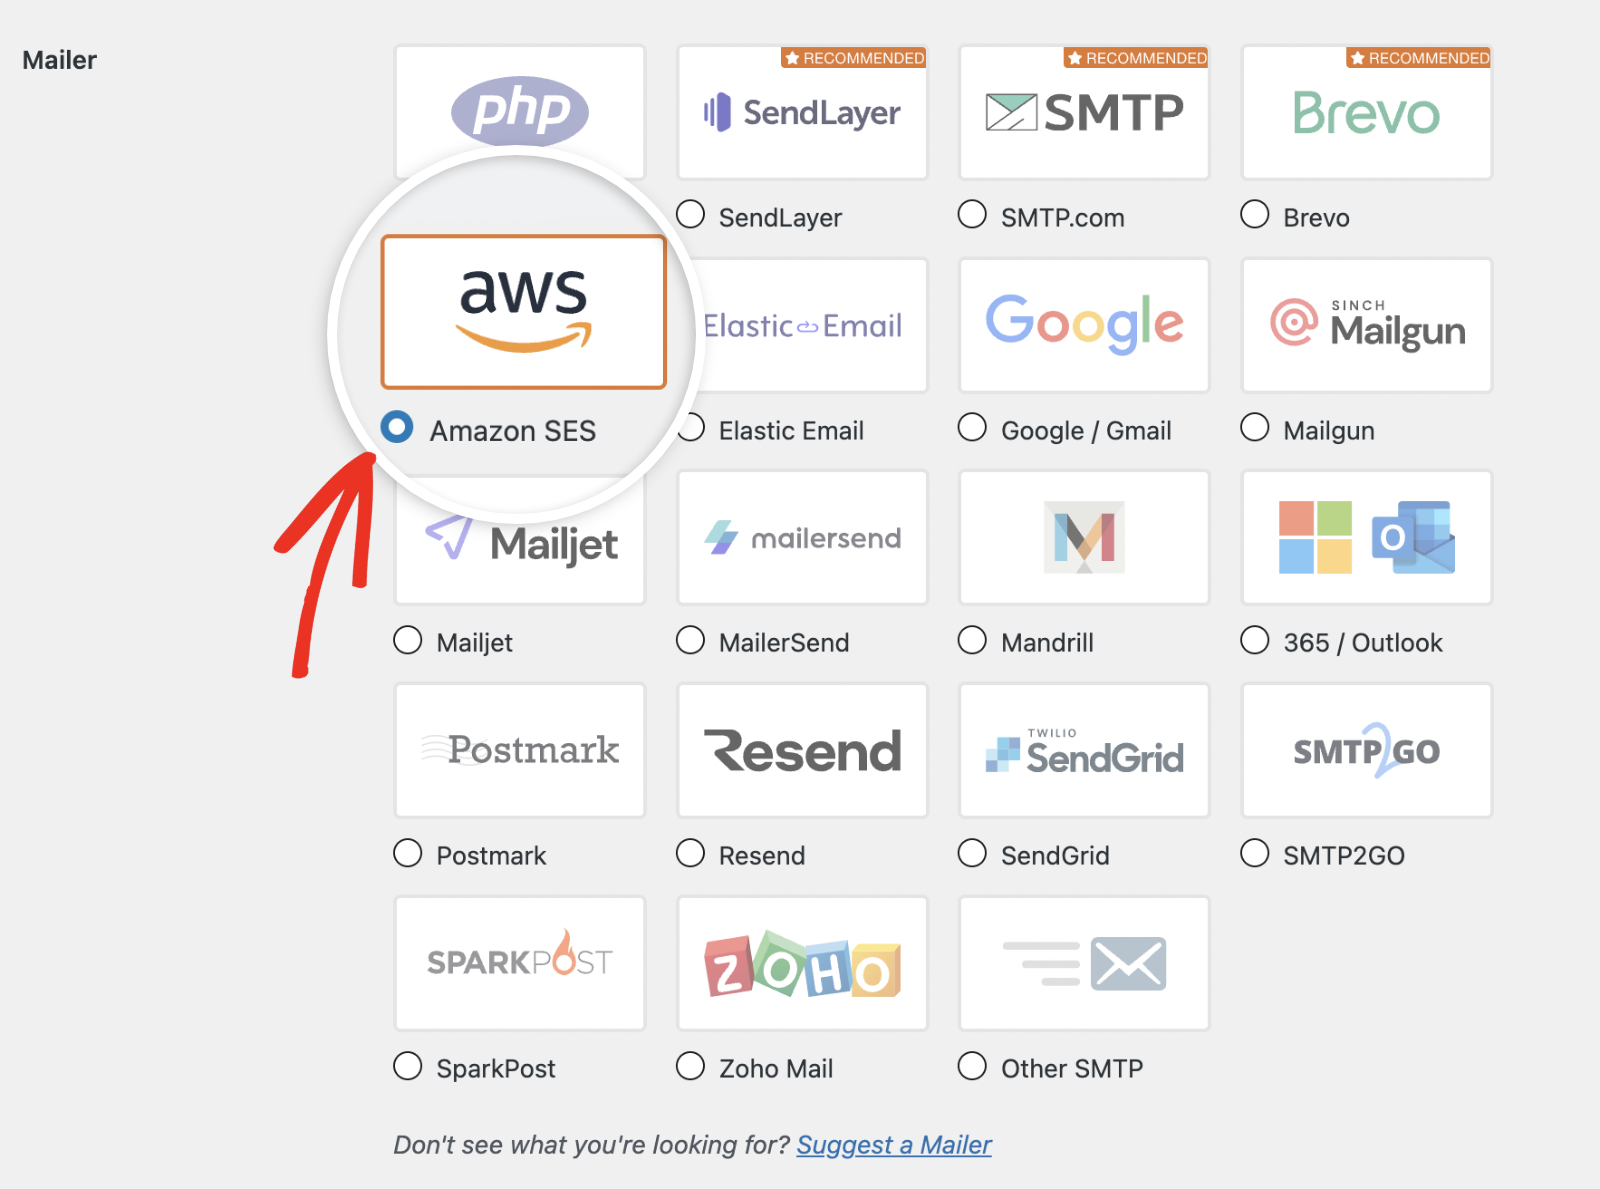
After that, scroll down to the Mailer section and select Amazon SES from the list of mailers.
Add your access key, secret key, and region
A new Amazon SES section appears below the mailer list. Paste your keys into the matching fields:
- Access Key ID into the Access Key ID field.
- Secret Access Key into the Secret Access Key field.
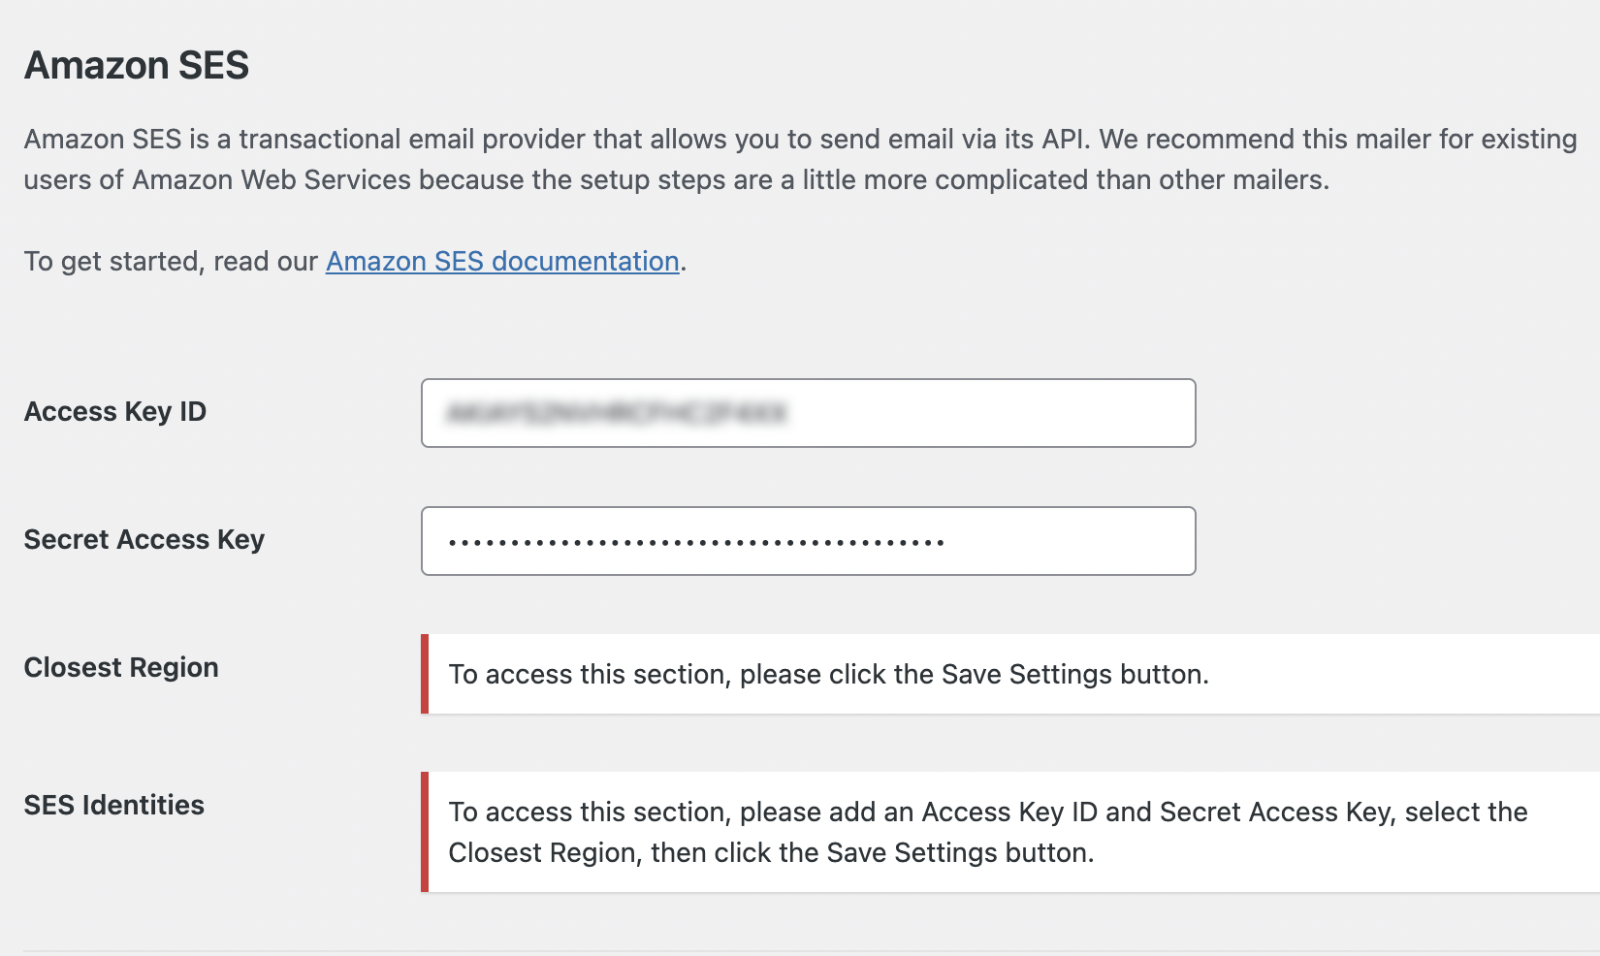
Once done, scroll down and click Save Settings to save your changes.
After saving your changes, additional fields will appear to set the Closest Region dropdown. Choose the same region you selected in Amazon SES.

Click Save Settings to store your details.
Step 5: Verify Your Domain or Email in Amazon SES
Before you can send, verify your sending identity in Amazon SES. An identity is the domain or email address your messages come from.
WP Mail SMTP lets you do this right inside the plugin. After you save your settings, an SES Identities section appears.
Click the Add New button to start.

You’ll see two options: verify a domain or verify a single email address. Verifying your domain is the better choice for most sites.
Verify a sending domain
Select Verify Domain, then enter your domain in the box. Click the Verify button.
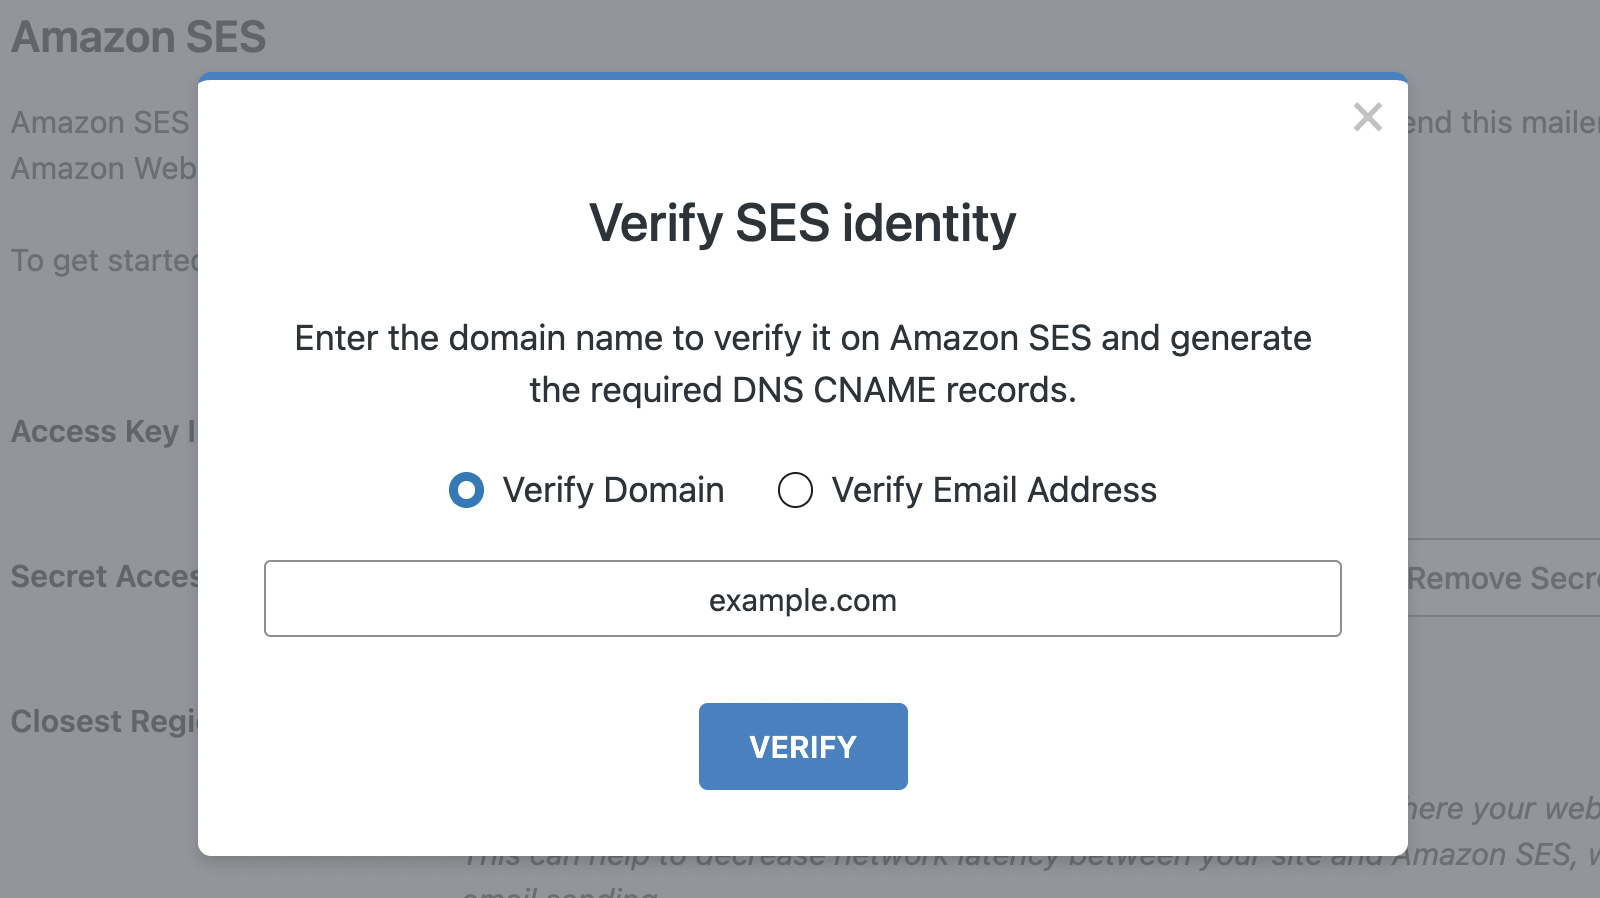
Amazon then gives you a set of CNAME records. You’ll need to add these records to your domain’s DNS settings. They also strengthen your email authentication, which protects your domain from spoofing.
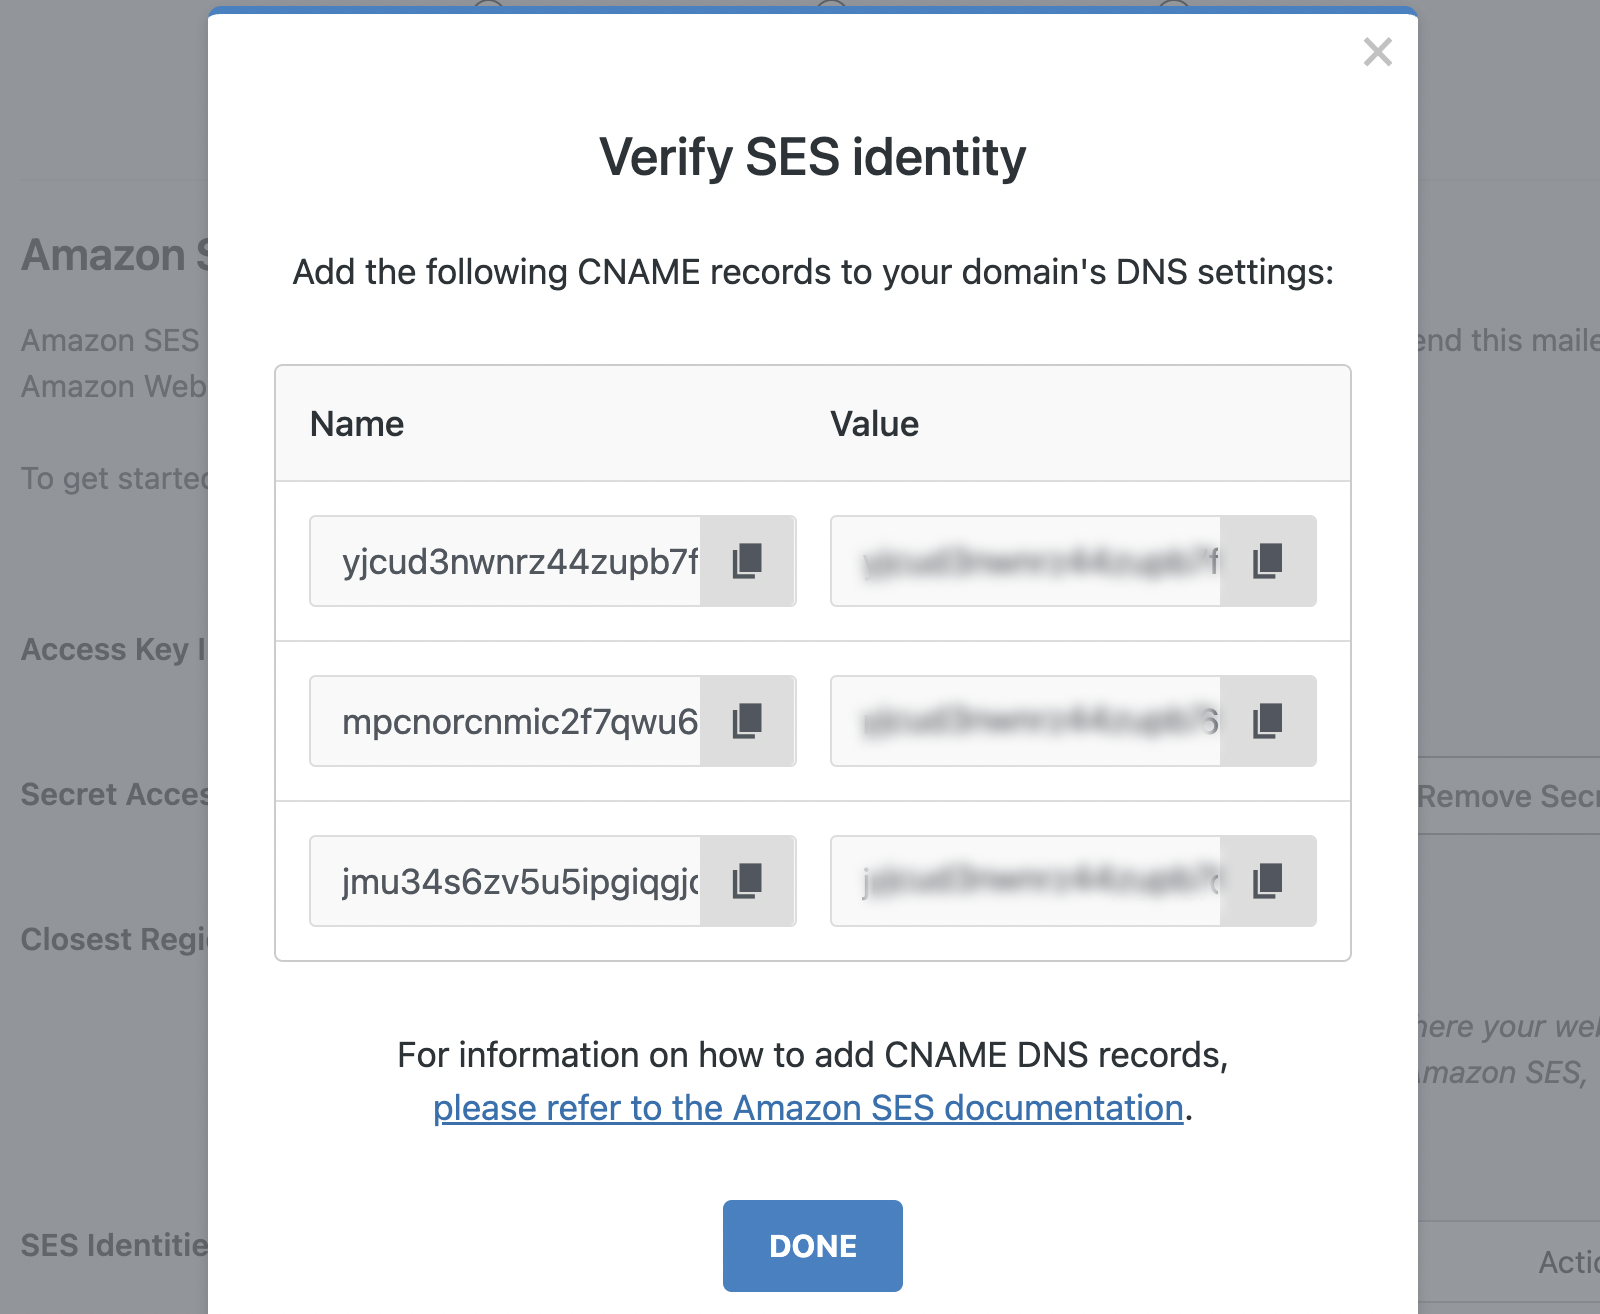
If you need help locating or adding your DNS records, be sure to contact your domain host. Alternatively, check out our guide on adding DNS records for WP Mail SMTP for a detailed walkthrough.
Verify a single email address
You can also verify just one email address. Select Verify Email Address, enter your email, and click Verify.
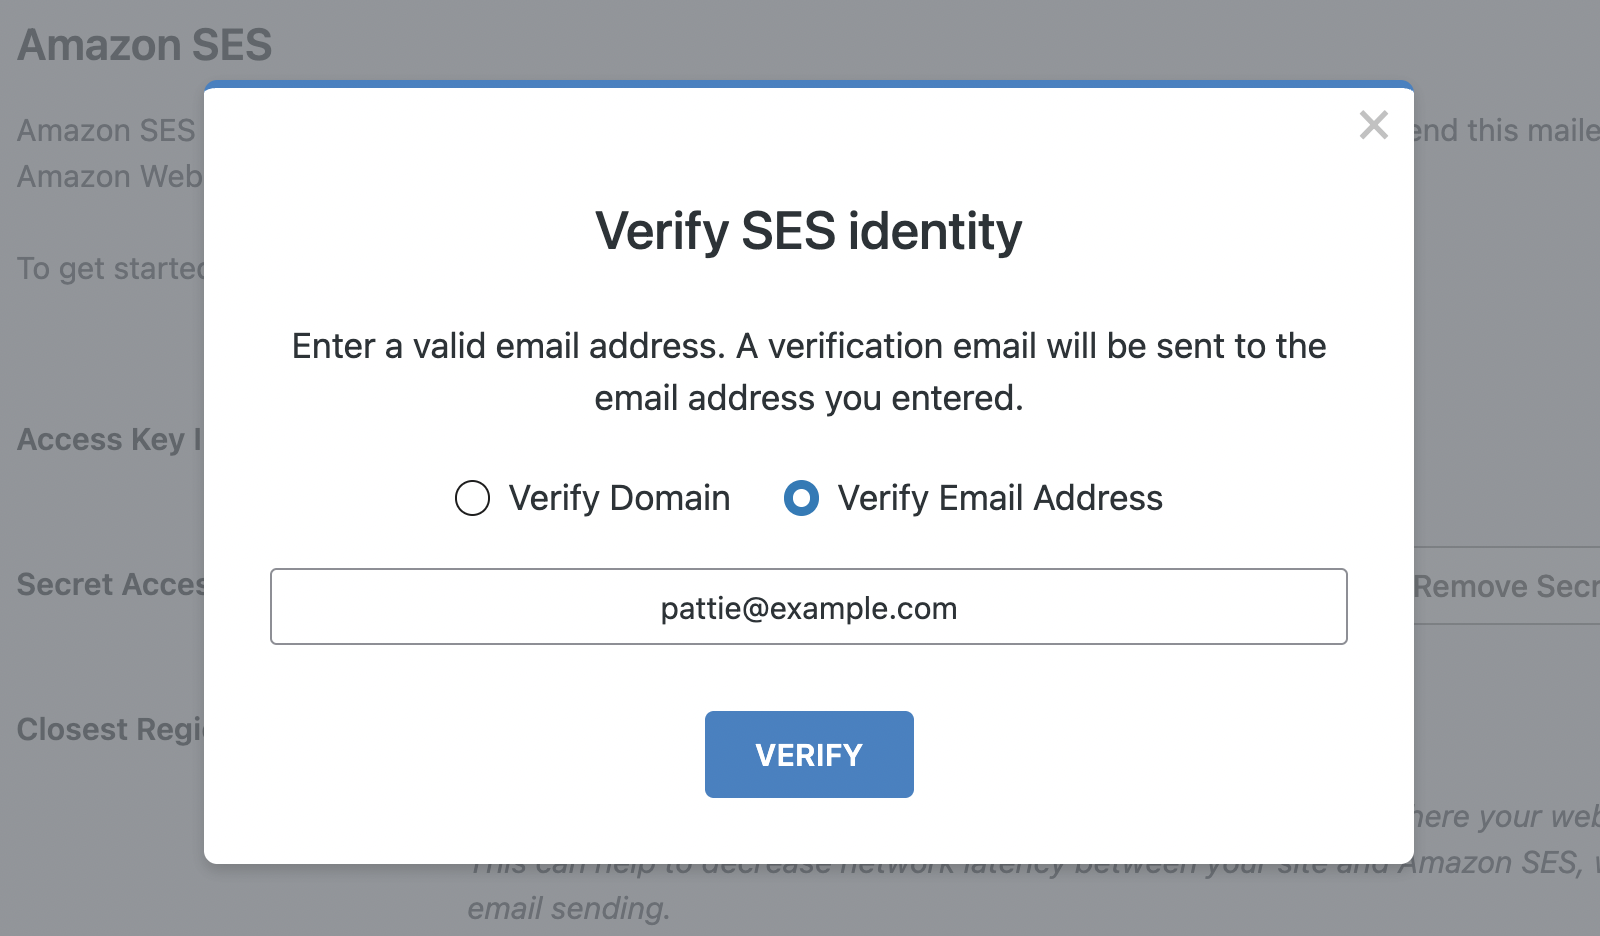
Amazon sends a confirmation email to that address. Click the link inside it within 24 hours to confirm.
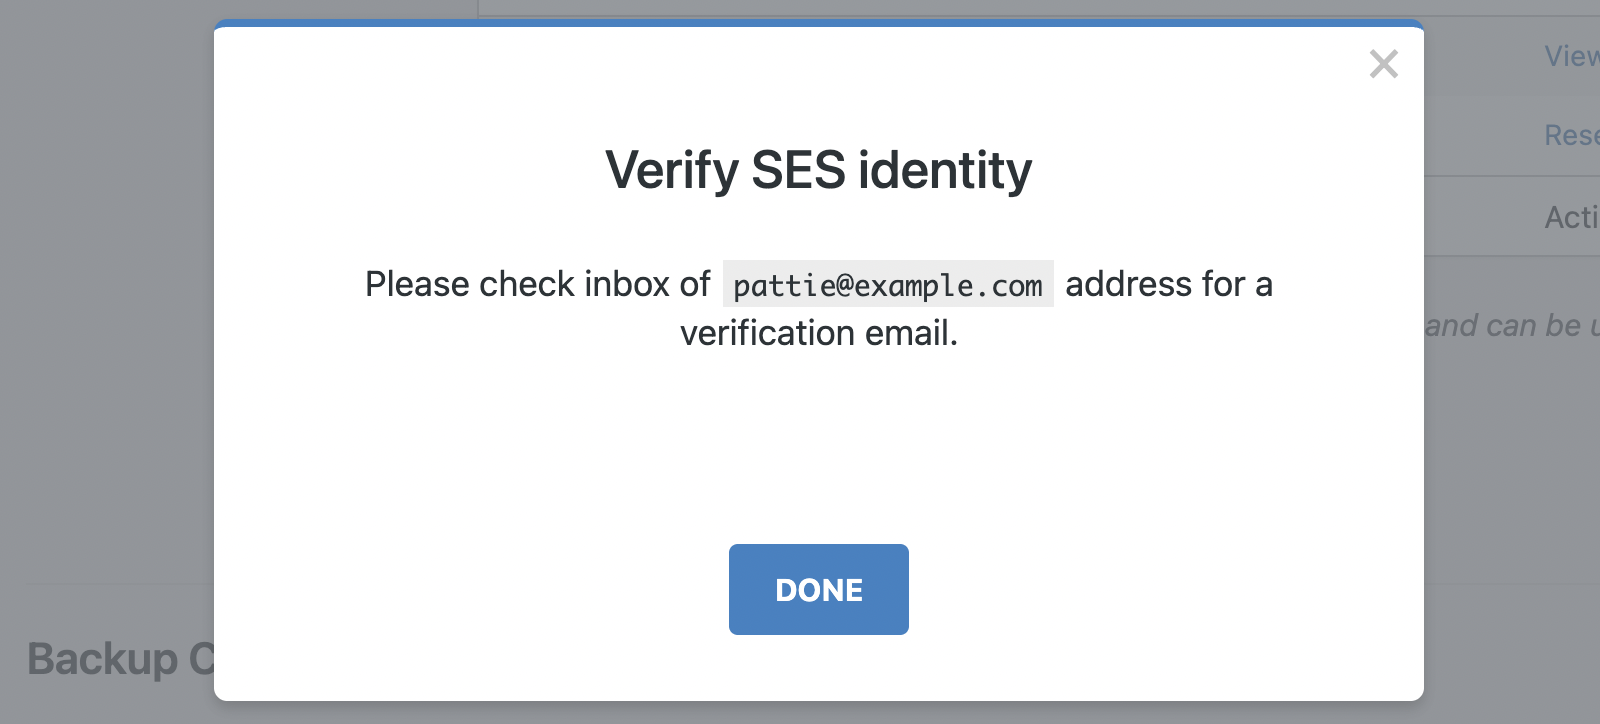
Once your identity shows as verified, you’re ready to test.
Step 6: Send a Test Email
Finally, send a test email to confirm everything works. WP Mail SMTP includes a built-in test tool for this.
Go to WP Mail SMTP » Tools and open the Email Test tab. The Send To field defaults to your admin email.
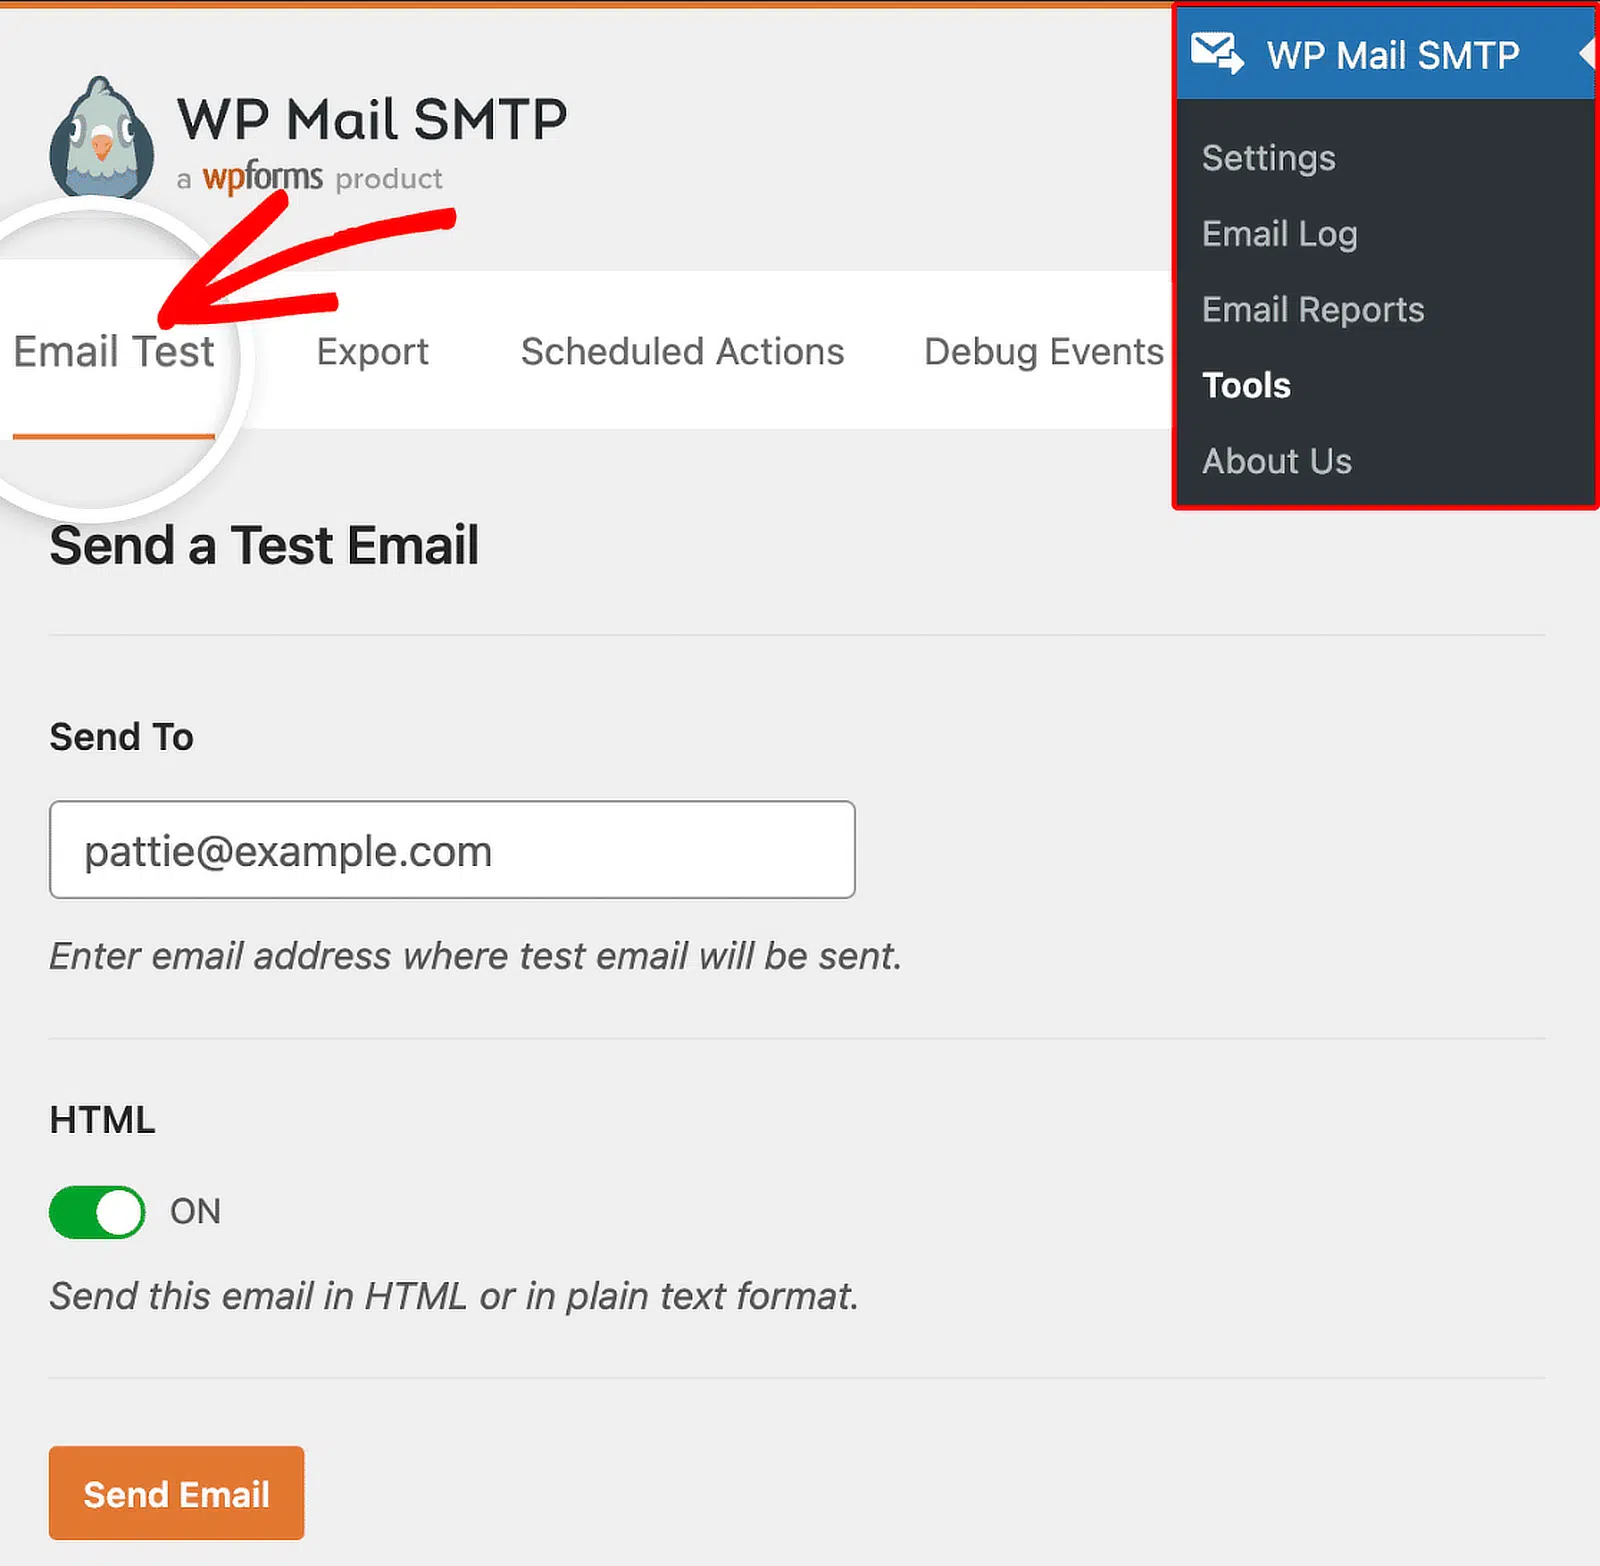
Click the Send Email button. If your setup is correct, you’ll see a Success! message.

Check that inbox to confirm the test email arrived. If it did, your WordPress site now sends email through Amazon SES.
How Do You Fix Common Amazon SES Errors?
Most Amazon SES problems come from 3 issues. Here’s how to spot and fix each one.
“Email address is not verified” error
The “not verified” error means your account is still in sandbox mode. Amazon only lets sandbox accounts send to verified identities.
Fix it in one of two ways:
- Verify the recipient’s address in Amazon SES, then resend.
- Request production access, so you can send to anyone.
Once Amazon approves production access, this error goes away.
The wrong region error
A region mismatch is the second most common problem. Your WP Mail SMTP region must match your Amazon SES region.
If they differ, WP Mail SMTP can’t find your verified identities or quota. Open WP Mail SMTP » Settings, check the Closest Region field, and set it to match your SES region.
Access key errors
An invalid key error means WP Mail SMTP can’t authenticate with AWS. It usually happens when a key is copied incorrectly.
Recheck your Access Key ID and Secret Access Key for extra spaces. If they still fail, create a new access key in IAM and paste the new values.
Frequently Asked Questions
Is Amazon SES free for WordPress?
Amazon SES is free to start; then you pay as you go. AWS includes a free tier of 3,000 emails a month for your first 12 months. After that, you pay about $0.10 per 1,000 emails. However, you’ll need a paid license with WP Mail SMTP to use the Amazon SES mailer.
What is Amazon SES sandbox mode, and how do I get out of it?
Sandbox mode is a testing state for new Amazon SES accounts. It only lets you send to verified addresses, with a daily limit of 200 emails. To leave it, request an increase in sending quota in the Service Quotas dashboard. Amazon usually approves production access within one business day.
Do I need to verify a domain to use Amazon SES with WordPress?
Yes, you must verify a sending identity before you can send. That identity is either your domain or a single email address. Verifying your whole domain is best, since it covers every address on it. It also helps your production access request get approved faster.
Why is my Amazon SES test email failing?
The most common cause is that your account is still in sandbox mode. If you see an error like “Email address is not verified,” you’re trying to send to an unverified address. Verify the recipient, or wait for production access. Also check that your WP Mail SMTP region matches your Amazon SES region.
Do I need WP Mail SMTP Pro to use Amazon SES?
Yes, the Amazon SES mailer is a Pro feature and requires a valid license to access. WP Mail SMTP Pro also includes features like detailed email logs, delivery tracking, and backup connections. Those help if you send a lot of email or need to debug delivery.
Next, Understand Hard vs Soft Email Bounces
Now that SES is sending your WordPress emails, I’ll recommend learning how bounces work. Some addresses fail once, and others fail permanently. Our guide on the difference between hard and soft bounces explains which is which.
Fix WordPress Email Issues Now
Ready to fix your emails? Get started today with the best WordPress SMTP plugin. If you don’t have the time to fix your emails, you can get full White Glove Setup assistance as an extra purchase, and there’s a 14-day money-back guarantee for all paid plans.
If this article helped you out, please follow us on Facebook and Twitter for more WordPress tips and tutorials.
