AI Summary
Is Broken Link Checker not sending email alerts when it finds dead links on your website?
Broken links can have a huge impact on user experience and hurt your SEO.
This guide will show you how to fix Broken Link Checker notification emails so you never miss a broken link on your WordPress site.
What Does ‘Broken Link’ Mean?
‘Broken link’ means that the link doesn’t point to a valid web page. This can happen if the original page is moved or deleted.
When someone clicks the link, they see a 404 error instead of the page they were expecting to see. Here’s an example of a 404 page that we made in SeedProd.

If you have a broken link in your content, your visitors will be frustrated when they hit a dead-end and can’t find the information they need. And when a site doesn’t offer a great user experience, that could harm its search engine rankings too. That’s why it’s so important to find and fix broken links ASAP.
The Broken Link Checker plugin from WPMU Dev automatically scans your site for dead internal and external links.
If you’re not getting any email alerts from the plugin, we’ll show you how to fix it.
How to Fix Broken Link Checker Not Sending Email
In This Article
1. Fix Broken Link Checker Not Sending Email With SMTP
WordPress uses a function called wp_mail() to send email through the web server that hosts your site. By default, it doesn’t add any authentication to the emails it sends.
As those emails pass through different servers, they might label the email as spam because the authentication is missing. In some cases, a server might just discard the message silently.
That’s why it can look like Broken Link Checker isn’t sending email from your website.
WP Mail SMTP makes it easy to fix this problem. It lets you send WordPress emails through a mailer service instead of relying on your web server. The mailer service adds authentication so that your emails deliver successfully.
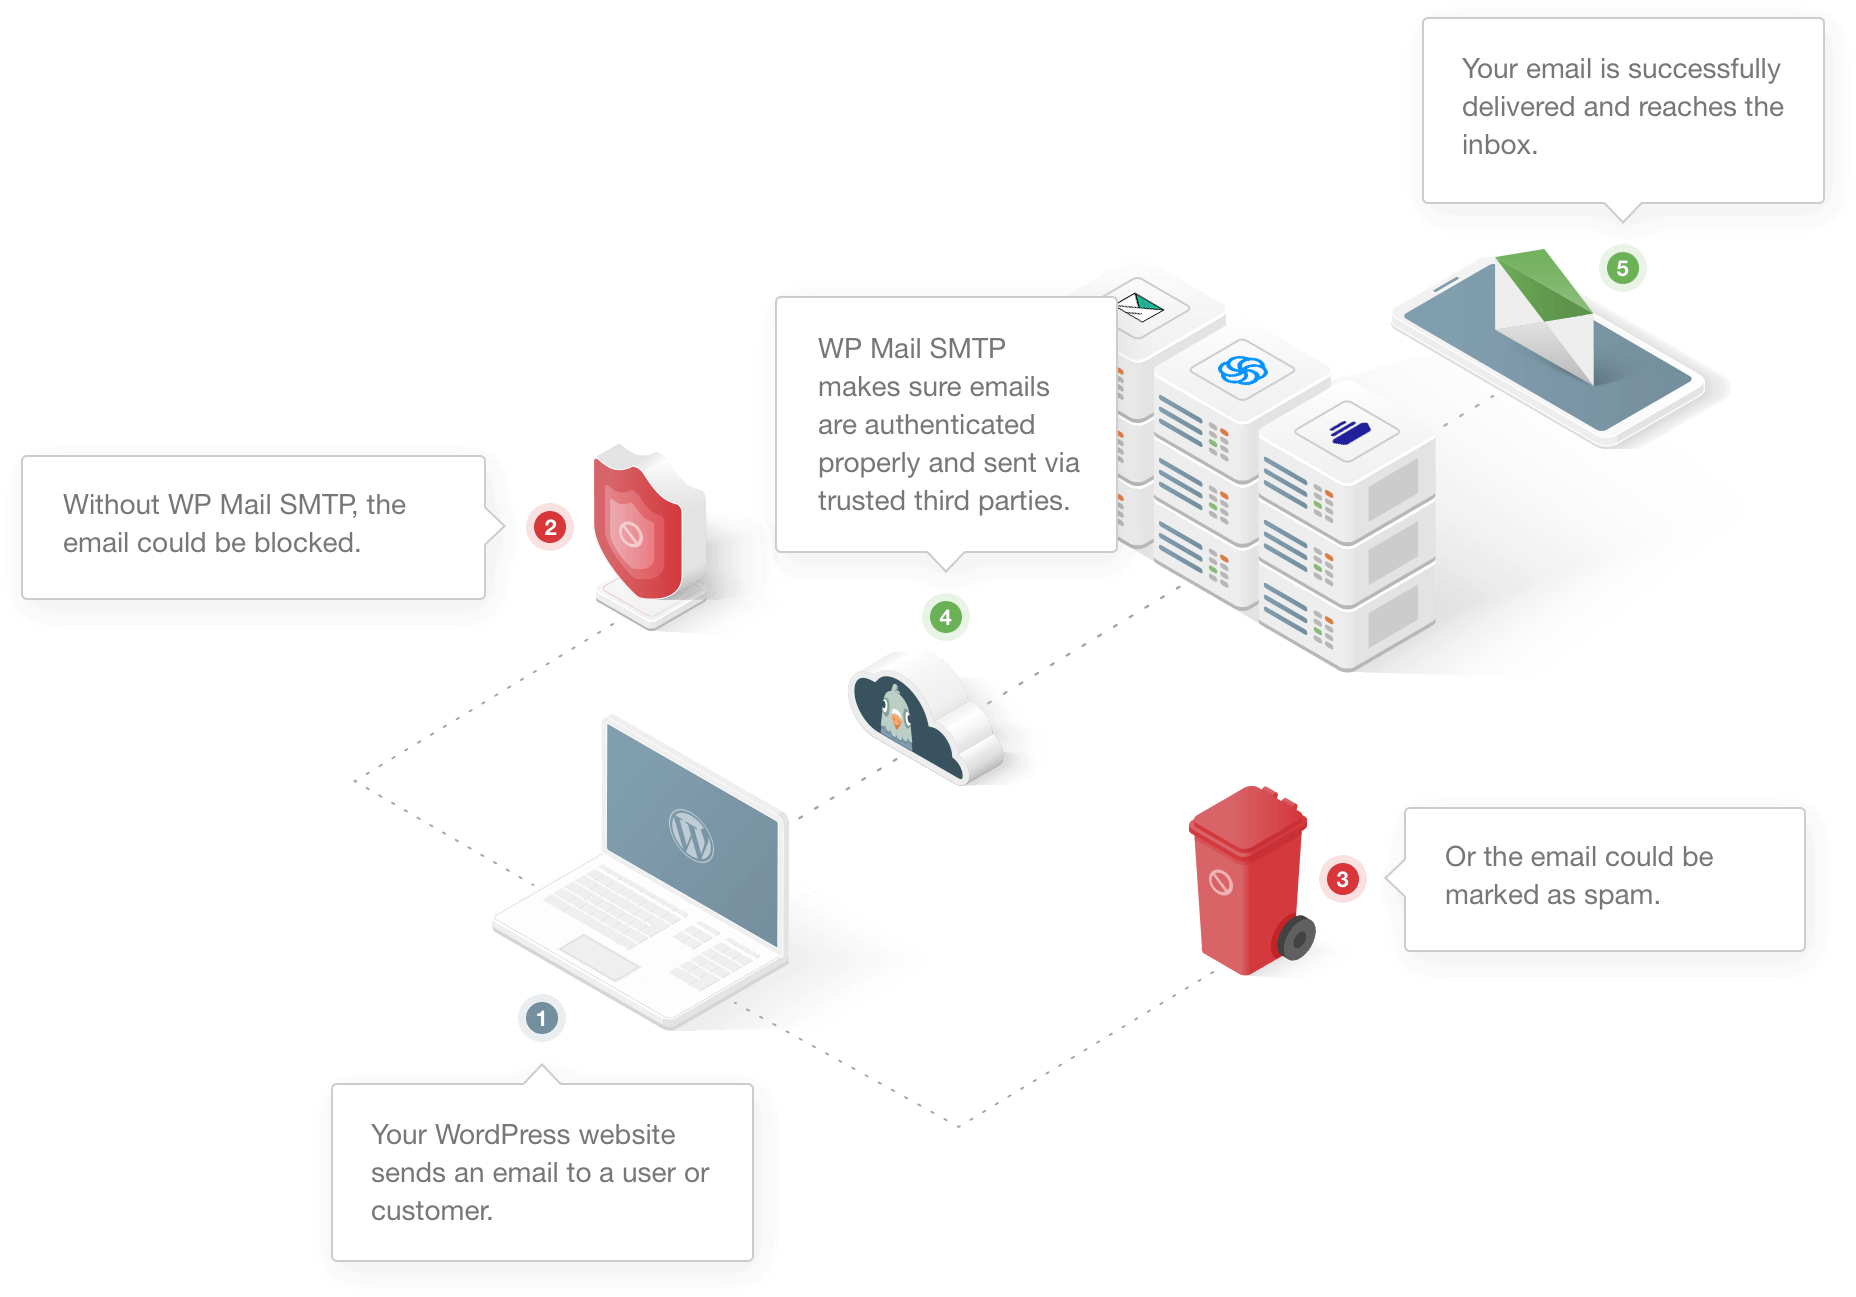
After you configure WP Mail SMTP, it’ll automatically fix email deliverability issues with your contact forms, your WooCommerce store, and even your backup plugin notifications.
The rest of this section will explain how to install WP Mail SMTP on your WordPress website. If you’d rather not do this yourself, you can get White Glove Setup when you purchase the Elite license.
For now, we’ll show you how to use the wizard to set things up.
Install the WP Mail SMTP Plugin
To start, download the plugin from your WP Mail SMTP account. You can get the latest version of the zip file from the Downloads tab.
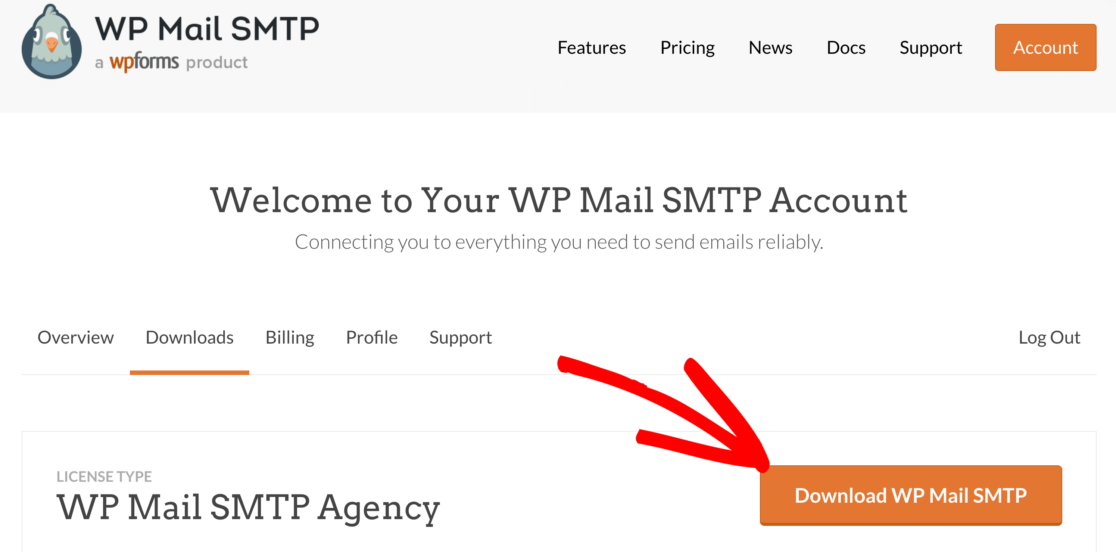
Save the zip file to your computer, then upload it to the Plugins page in the WordPress dashboard.
If you need help with this part, this guide to installing a WordPress plugin explains the process in more detail.

When you activate the plugin, the Setup Wizard will open in your browser.
Create an Account With Your Email Provider
Now let’s click the Let’s Get Started button to start setting up your SMTP service.

WP Mail SMTP lets you choose from free or paid providers to will handle your WordPress emails.
If you’re not sure which one to use, we recommend SendLayer, SMTP.com, or Brevo (formerly Sendinblue). Check out this complete guide to email providers for more details on each of the options here.
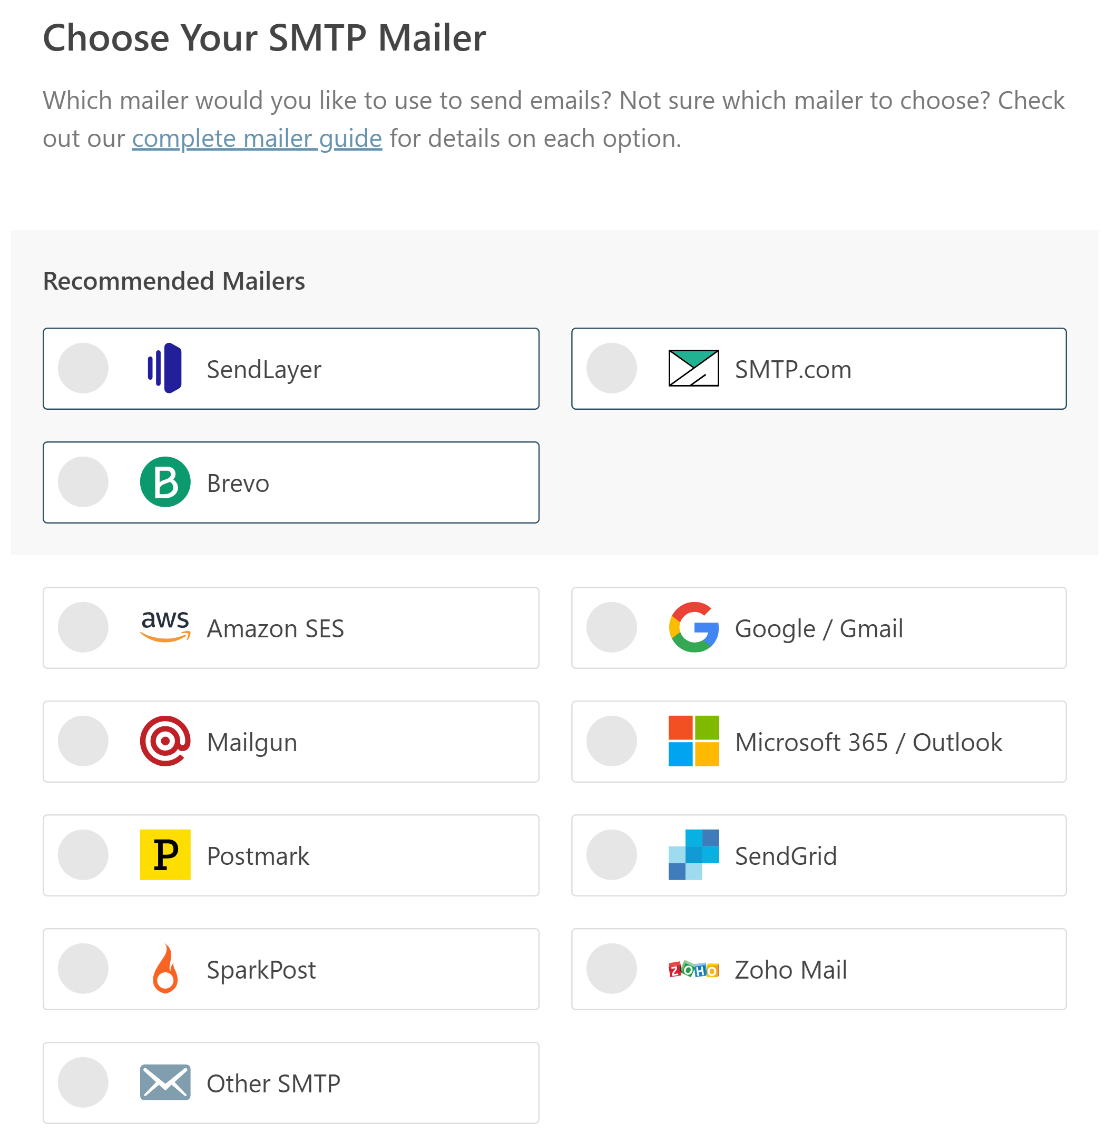
When you’ve selected your email provider, you’ll need to set up the connection on their side. We’ve got a document for each one to show you exactly what you need to do:
- SendLayer
- SMTP.com
- Brevo
- Amazon SES
- Google Workspace / Gmail
- Mailgun
- Microsoft 365 / Outlook.com
- Postmark
- SendGrid
- SparkPost
- Zoho Mail
- Other SMTP
If you want to set up multiple mailers, you can do so in the Additional Connections settings once you’ve finished the Setup Wizard. Then you can select a Backup Connection and configure Smart Routing.
Run through the document to get everything connected. When you’re ready, switch back to this guide to finish checking your settings in Broken Link Checker.
Turn on WordPress Email Logging (Optional)
In the next step, the Improved Email Deliverability and Email Error Tracking features will be automatically enabled. You’ll also have the option turn on Detailed Email Logs and other features.
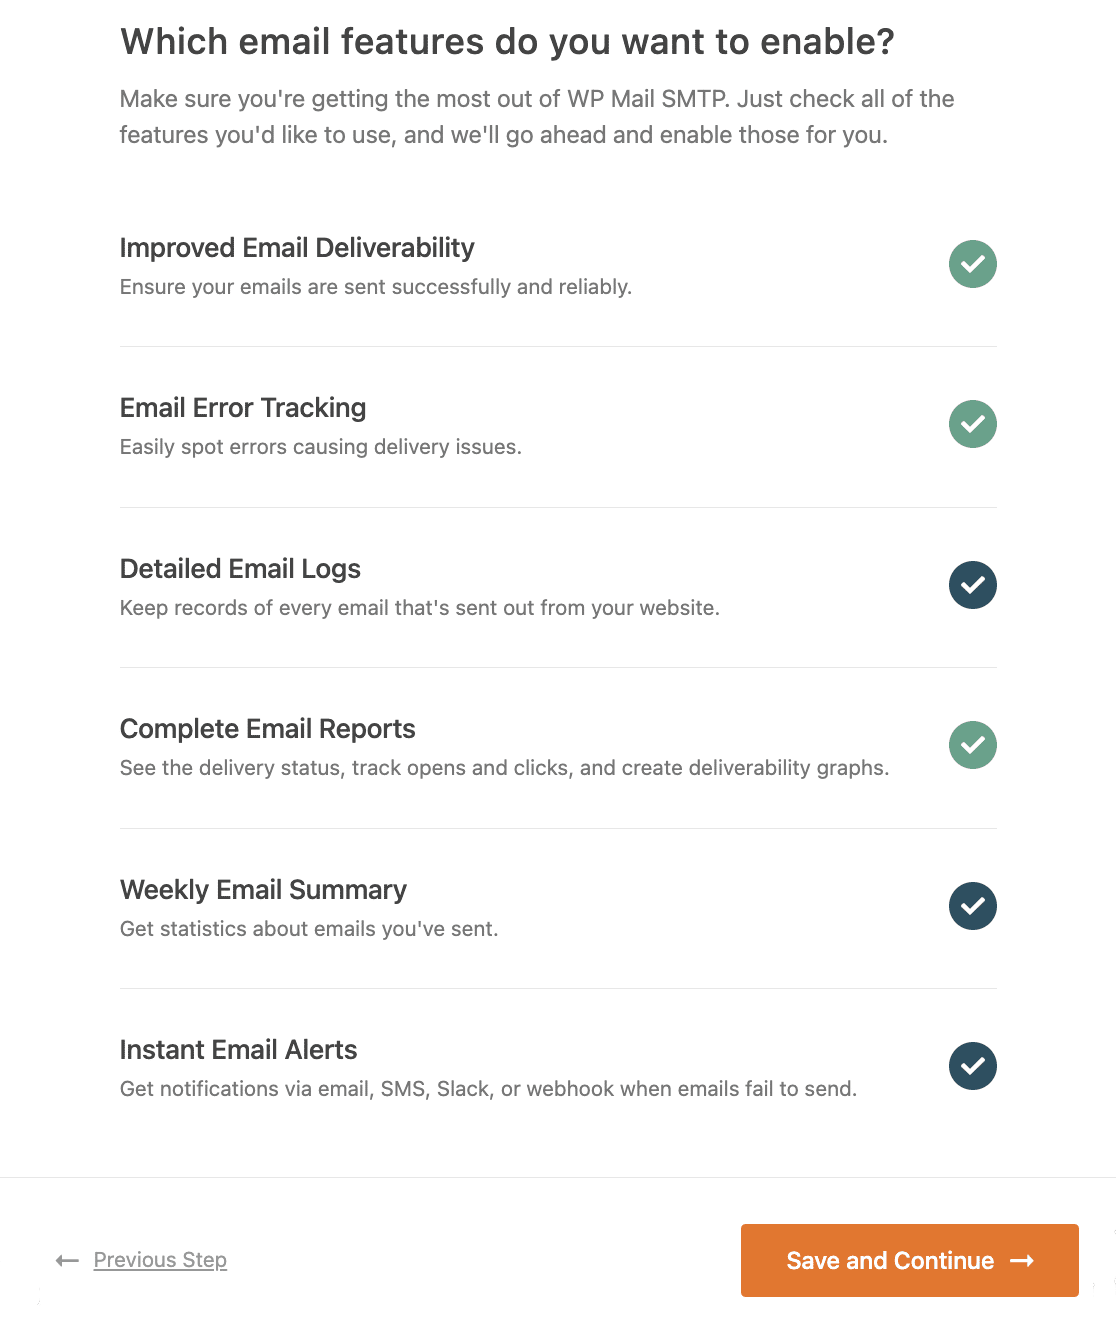
WP Mail SMTP’s built-in email logging feature will keep track of every email that WordPress sends so you can see the headers and status. You can view this information in Complete Email Reports or the WP Mail SMTP dashboard widget.
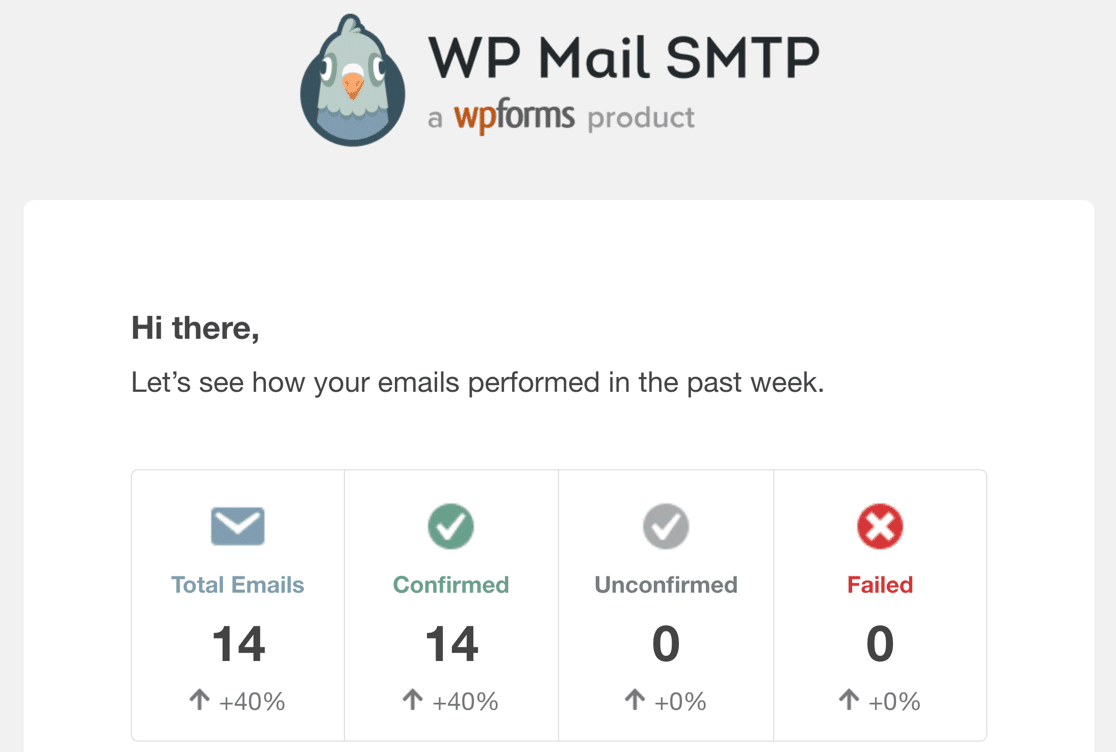
The Weekly Email Summary provides your latest email delivery stats right in your inbox each week.
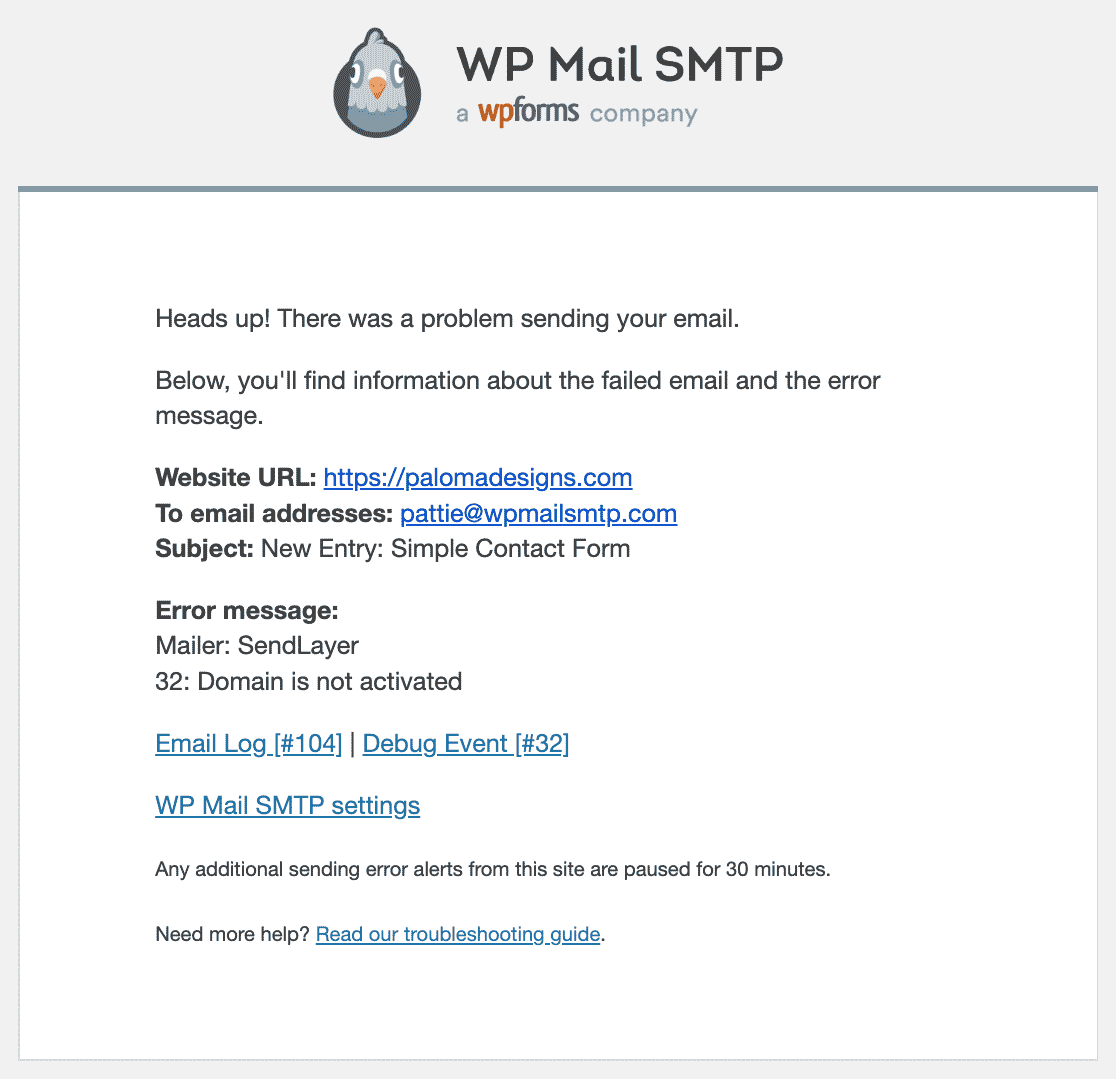
And Instant Email Alerts let you know when your site fails to send an email. This gives you the chance to fix the problem so you users don’t miss out on important emails.
On the next screen there are even more email logging features.
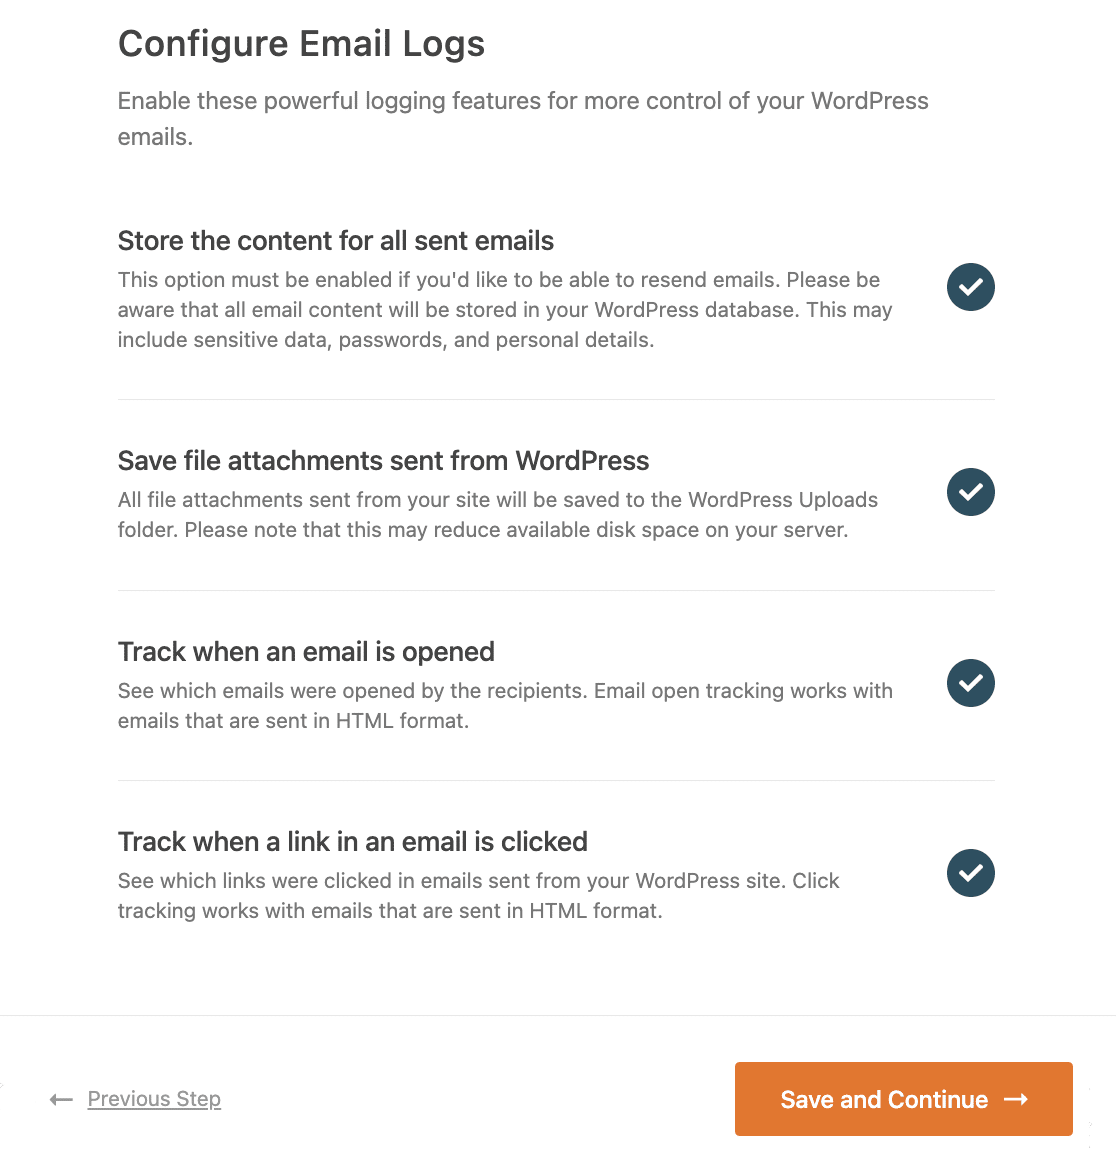
These ones let you:
- Save the full content of your site’s emails
- Store file attachments in WordPress
- Track email opens and link clicks
- And more
One last thing! Let’s grab your license key from your WP Mail SMTP account and paste it in to activate plugin updates.

And that’s it! We’re done setting up your new WordPress SMTP service.
Now let’s quickly check that the settings in the Broken Link Checker plugin are correct.
2. Review Broken Link Checker Email Settings
Broken Link Checker can alert you to broken external and internal links. It’ll report the dead links it finds at Tools » Broken Links.
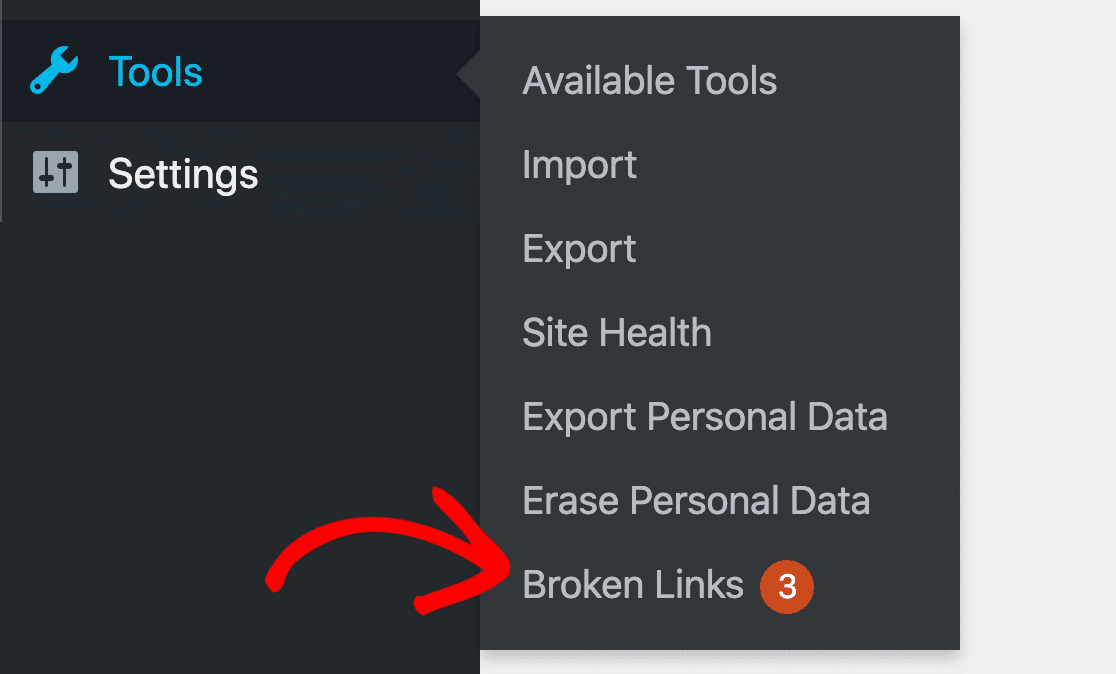
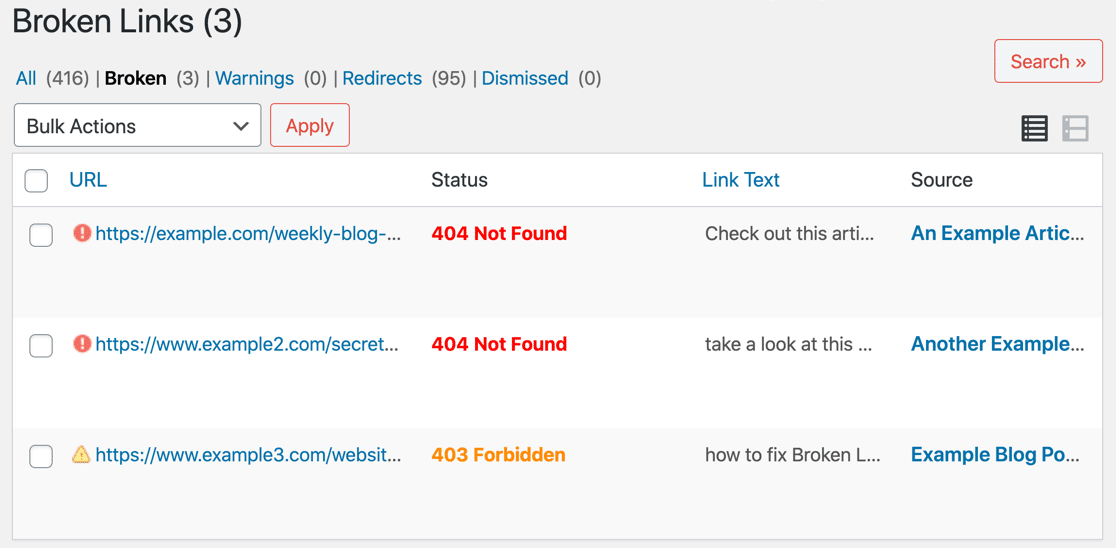
From the Broken Link Checker Tools menu, you’ll see a list of broken links for your entire website, along with the Status code. From here, you can clean up your site and quickly remove or replace links to pages that no longer exist.
To keep track of broken links in real-time, you’ll also want to receive email alerts. Broken Link Checker should send notifications like this one:
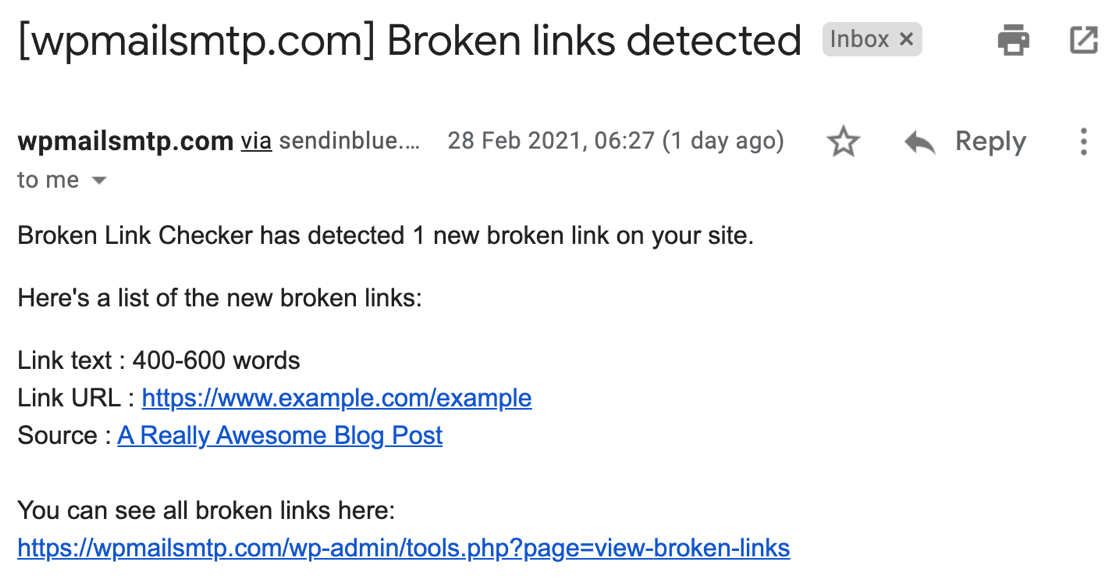
If you aren’t getting these emails, let’s check that the plugin is scanning all of the correct posts and pages first.
Stay in your WordPress dashboard and head to Settings » Link Checker.
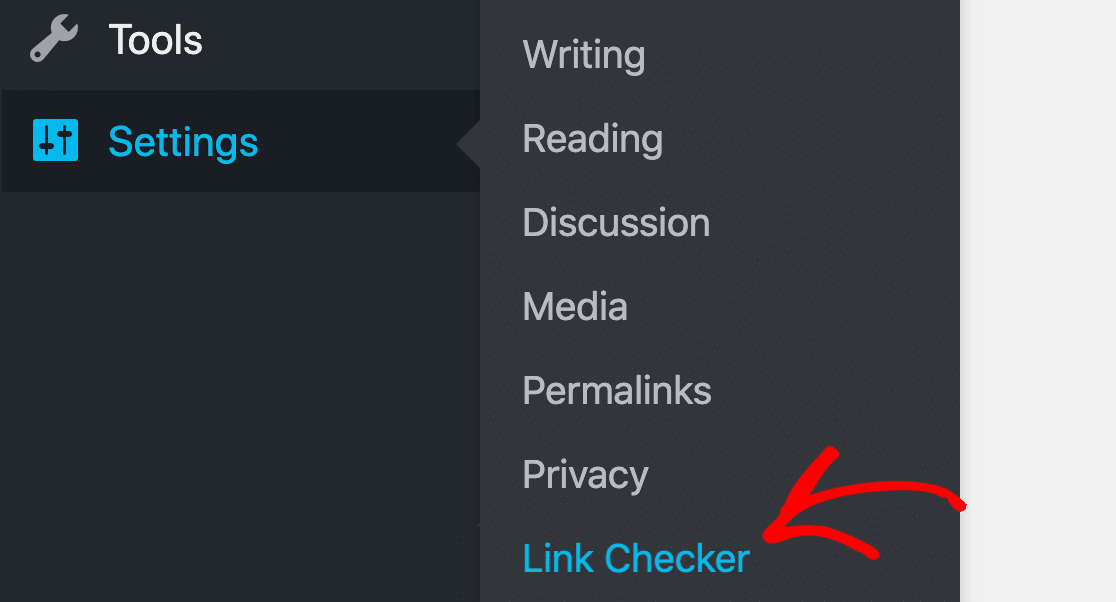
Let’s start in the General tab and work our way through the settings.

On the General page, you can choose 2 different settings for your email notifications:
- Send me email notifications about newly detected broken links
- Send authors email notifications about broken links in their posts
You’ll definitely want to check the first one. The second checkbox is optional.

Next, scroll down and check the email address Broken Link Checker emails are being sent to.
If this box is blank, it’ll default to sending emails to the site admin email in WordPress. Sometimes this is set to a generic email address like [email protected]. You can type in a different email here if you want to override it.

Click the Save Changes button before moving on to the next tab.
3. Enable All Post Types For Broken Link Checker
Next, let’s make sure that Broken Link Checker is scanning all of the post types you want to monitor. Click the Look For Links In tab to review those settings.

The list on this page shows you all of the different post types that the crawler will scan. You definitely don’t want to check every box here. Some of these post types are used for specific functionality in plugins and don’t actually appear on the frontend.
But on most sites, Posts and Pages should definitely be turned on.

Be sure to look through the list. Check any other custom post types that you’re using on your website.
All set? Click the Save Changes button if you enabled any new post types on this settings screen.
Now let’s check that Broken Link Checker is running hourly checks on your content.
4. Enable the Hourly Broken Link Monitor
The Link Monitor is an automatic scan that reviews the links in your content. If this isn’t set to run, you won’t get any emails from the plugin.
To check this setting, let’s click the Advanced tab.

There are a bunch of important settings here. For example, you can adjust the Timeout setting if you want to know about slow links so you can remove them.
But if we scroll down, Link monitor is the main setting we’re interested in.
For this section, make sure that there’s a check in the box next to Run hourly in the background. This will allow the plugin to scan your links even when you aren’t working on your site.

Click the Save Changes button to save your settings.
Now you’ve checked all of your settings, Broken Link Checker emails should be working just fine. Let’s send a test email to confirm that.
5. Send a Test Email From WordPress
Great! Now we’ve fixed all of the issues with Broken Link Checker not sending emails. Let’s send a test message from your site to make sure everything’s working.
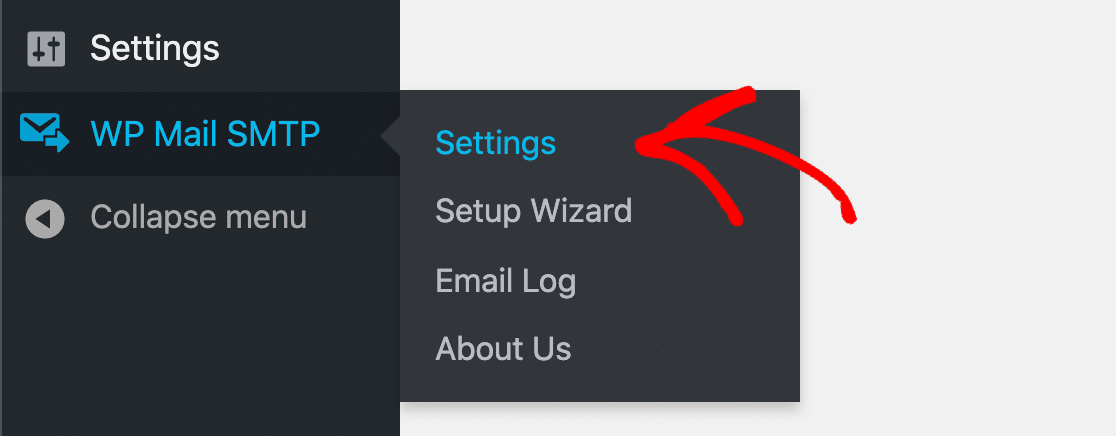
First, open up your WP Mail SMTP Settings in WordPress.
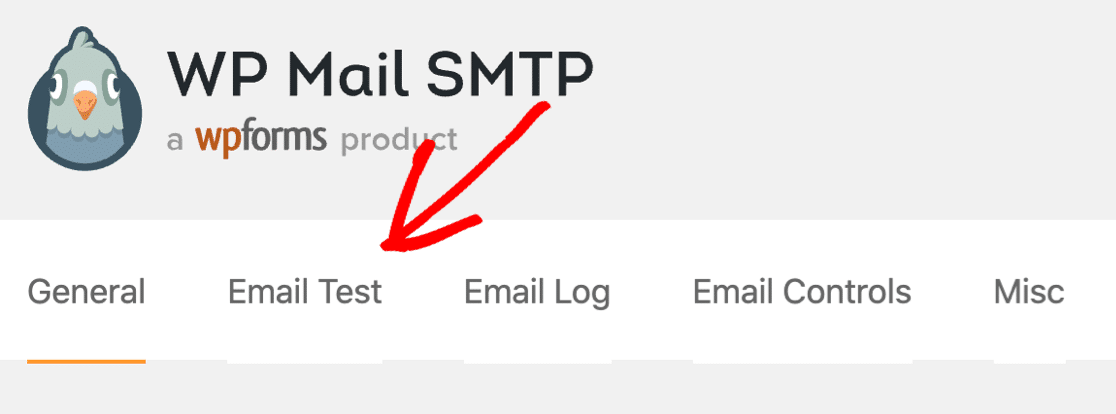
Look to the tabs across the top and click Email Test.
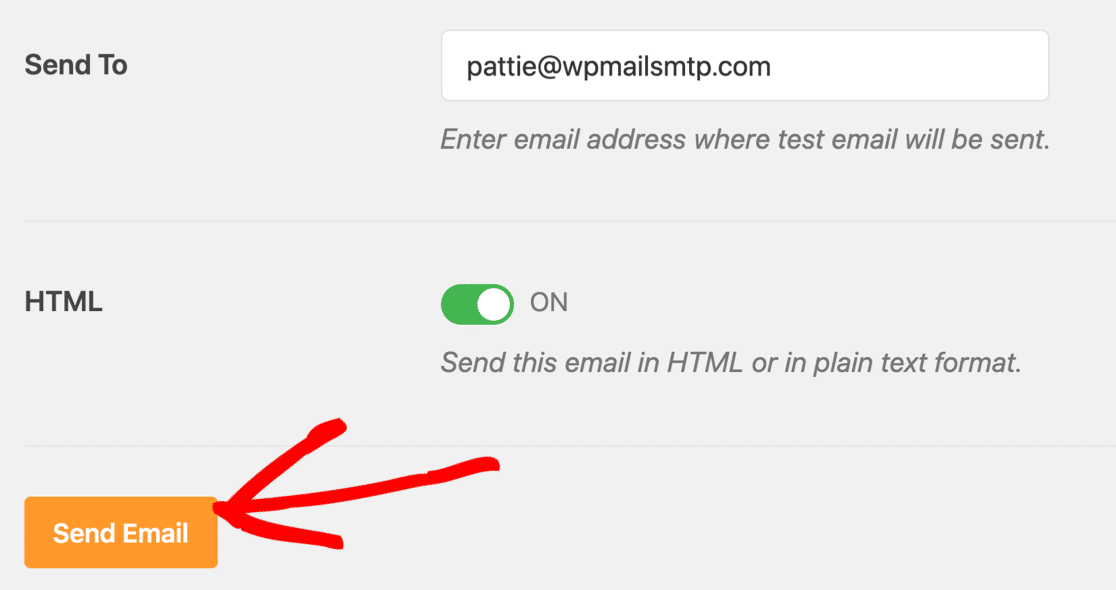
And then send your test email. It’s that easy!
Check your email to see if you got the test. WP Mail SMTP will alert you if it finds any issues with your email settings.

And that’s it! Now you know how to fix Broken Link Checker not sending emails from WordPress.
Fix Your Broken Link Checker Emails Now
Next, Check Your SPF Records in Your DNS Zone
Email servers often use SPF, DKIM, and DMARC records to authenticate emails. WP Mail SMTP will try to detect problems with your DNS and explain how to fix the problem.
For more information on some of the issues you might run into, check out this guide to merging multiple SPF records on your domain. SPF records are simple TXT records, so it’s easy to fix them if they’re wrong.
Also, check out this guide on Divi contact form not working if you’re experiencing any issues.
Ready to fix your emails? Get started today with the best WordPress SMTP plugin. If you don’t have the time to fix your emails, you can get full White Glove Setup assistance as an extra purchase, and there’s a 14-day money-back guarantee for all paid plans.If this article helped you out, please follow us on Facebook and Twitter for more WordPress tips and tutorials.

