AI Summary
Have you ever wondered how to get an SMS notification when users submit a form on your WordPress website?
SMS notifications, originating from your WordPress forms, bridge the gap between online actions and real-time alerts.
This tutorial shows you how to enable SMS notifications for forms by using WPForms and connecting it to Twilio via Zapier.
Why Are SMS Notifications for WordPress Forms Important?
Let’s dive into the specific reasons why integrating SMS notifications for form submissions is an essential move for every site owner:
- Instant Alerts: SMS notifications ensure that the moment a user interacts with your form, you’re notified immediately. This swift communication means you never miss out on timely actions or responses.
- Decreased Response Time: The quicker you’re notified, the faster you can act. Whether it’s a customer query, a product order, or a feedback form, reduced lag time ensures optimal user satisfaction.
- Enhanced Mobility: Not always at your computer? No problem. With SMS notifications, site owners are not tethered to their desktops. Whether in a meeting, on the go, or vacationing, you remain informed and connected.
- Minimized Risk of Overlooking: Emails can often land in spam or get lost amidst the clutter of promotional messages. SMS notifications bypass these pitfalls, ensuring crucial information from form submissions is not overlooked.
As you can see, SMS notifications for WordPress forms are a great functionality to increase operational efficiency. The next step is understanding how to enable it effectively.
How to Get an SMS Notification From Your Contact Form
This video tutorial walks you through the process of configuring your WordPress contact forms to send SMS notifications.
Here are the steps for configuring SMS notifications for form submissions if you’d prefer written instructions.
In This Article
1. Install and Activate WPForms
The first step is to download the WPForms plugin and activate it on your site. WPForms is the best plugin for WordPress when creating contact forms.
The plugin offers hundreds of form templates and addons to customize your forms, and its versatility also makes it useful for sending SMS notifications.

We recommend getting WPForms Pro since it comes with the Zapier addon, which is required for integrating WPForms with a messaging service like Twilio.
If you are new to WordPress plugins and don’t know how to install one, check out this guide for easy steps on how to install a WordPress plugin.
2. Create a Contact Form
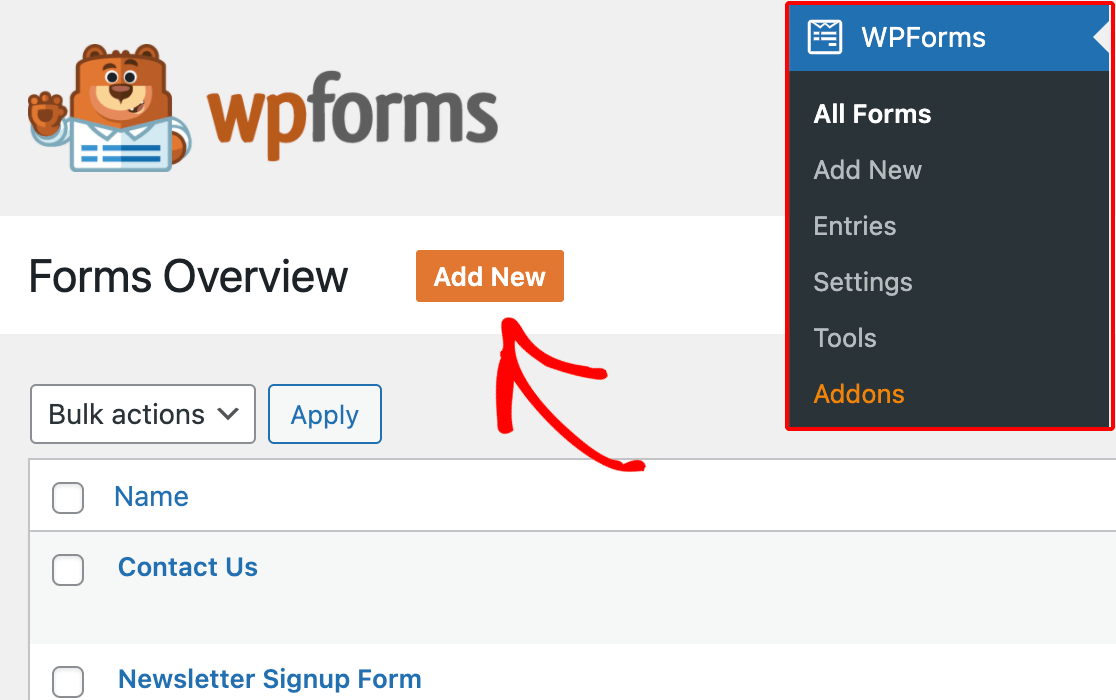
Once the WPForms Pro plugin has been installed successfully, navigate to WPForms » Add New to create a new form.
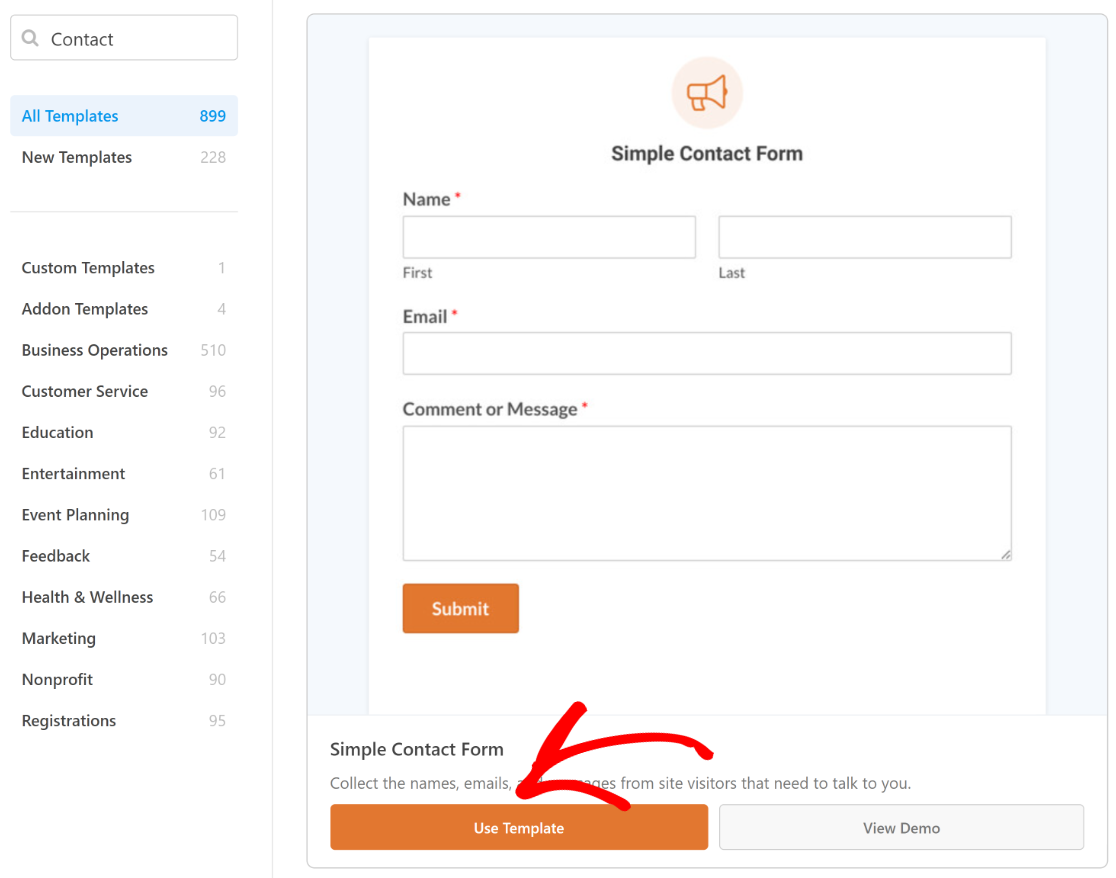
Give your form a name and use the search box to find the Contact Form Template. Once it shows up, click on the Use Template button.
You can now preview your form in the form builder interface and add more fields by dragging them from the left-hand panel to the right-hand panel.
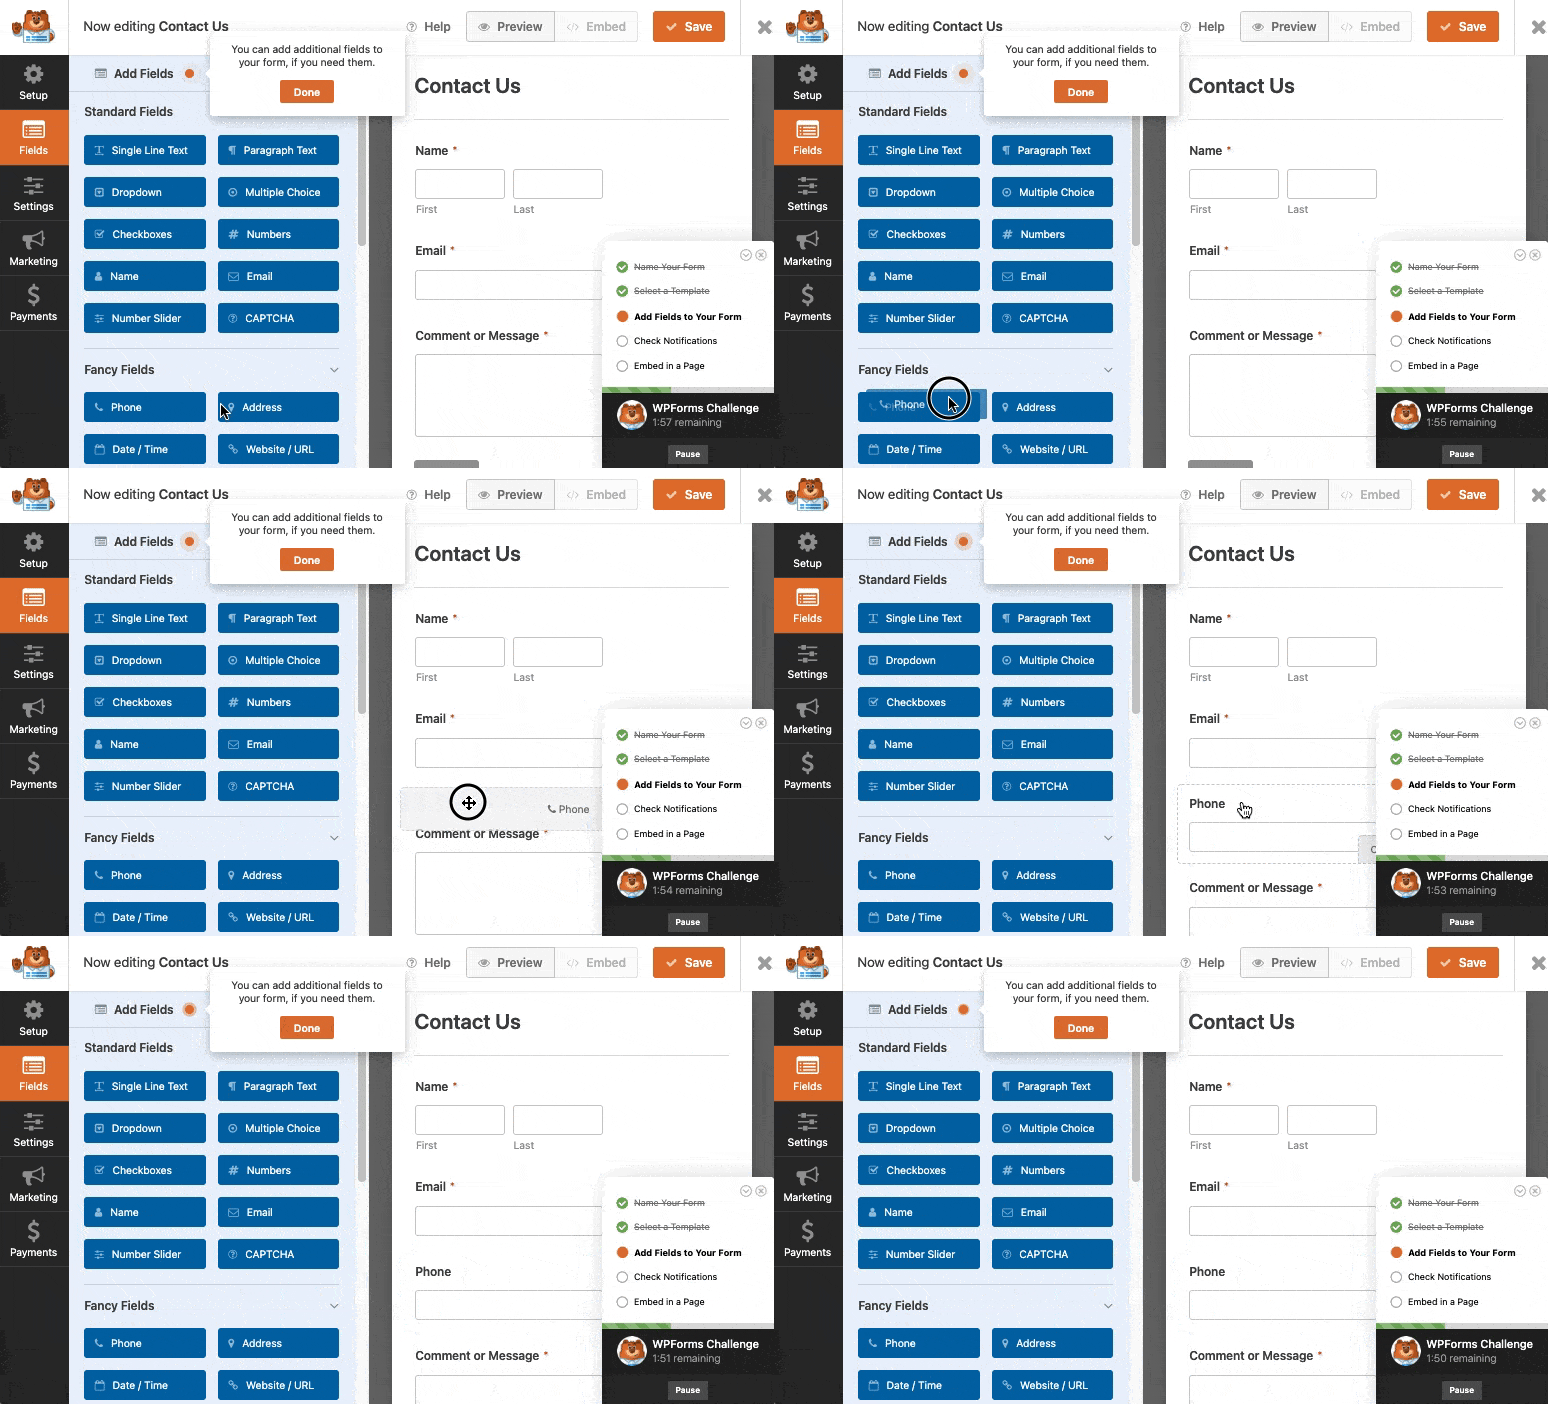
Once you’ve customized the form to your liking with the drag and drop form builder, you can move to the next step and install the Zapier addon.
3. Install the Zapier Addon
From your WordPress admin dashboard, navigate to WPForms and click on Addons from the list of options.
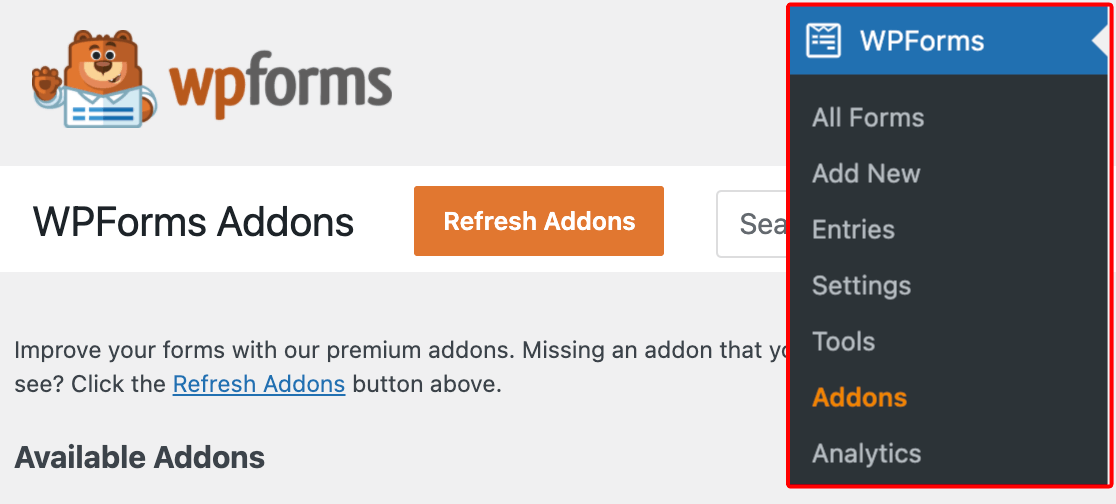
Now, search for the Zapier Addon by typing its name in the Search Addons field. Next, click on Install Addon.
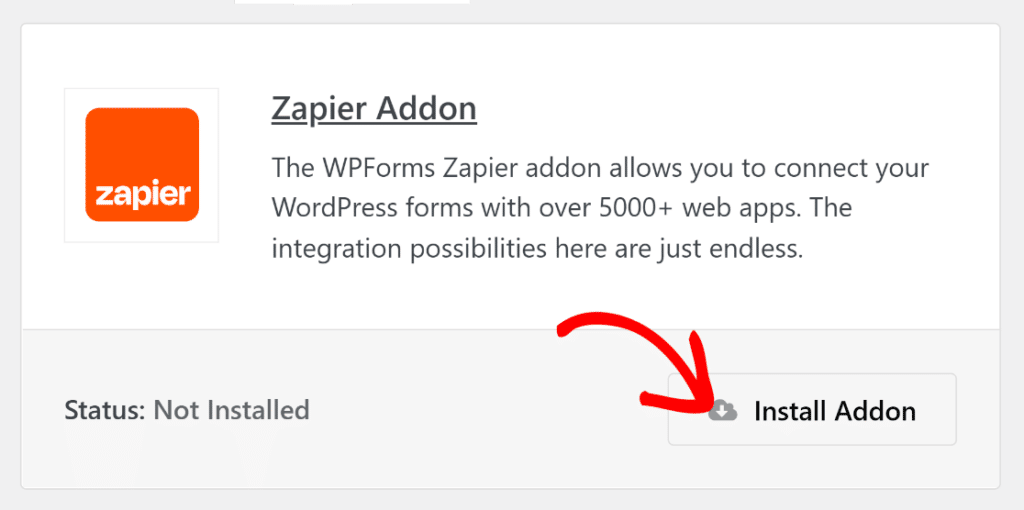
After the Zapier addon has been installed successfully, press the same button again to Activate it.
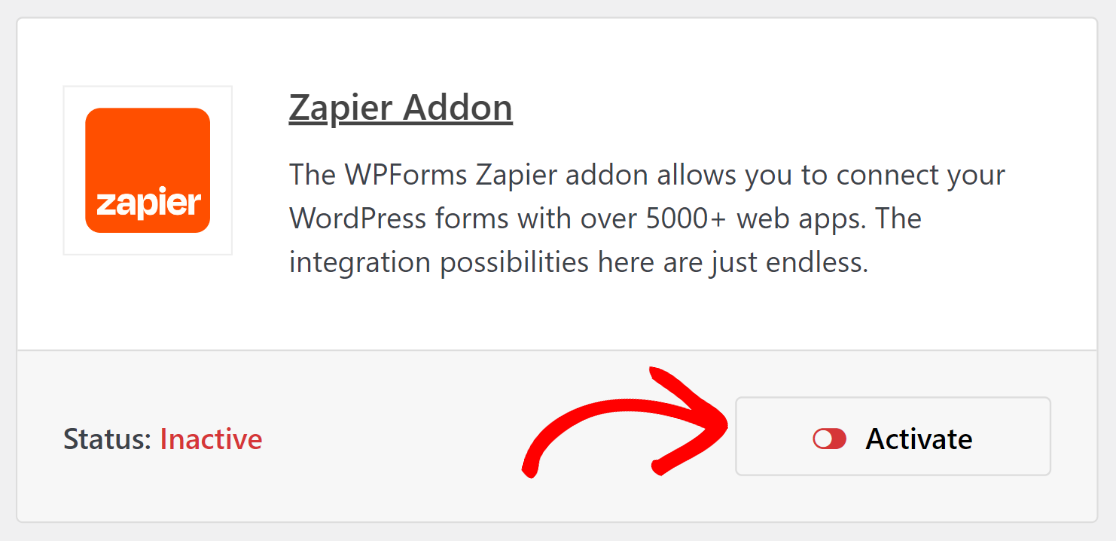
Great job so far! You’re now all set to connect your contact form to Zapier and integrate it with Twilio for SMS notifications.
4. Create Your New Zap
The integrations you make with Zapier are called “zaps.” So, the next step is to create a zap that transmits data collected from your forms to an external service.
You will need to sign into your Zapier account to accomplish this. If you don’t have one yet, then you can sign up for free.
After logging into your account, click the orange colored Create Zap button in the upper left corner.
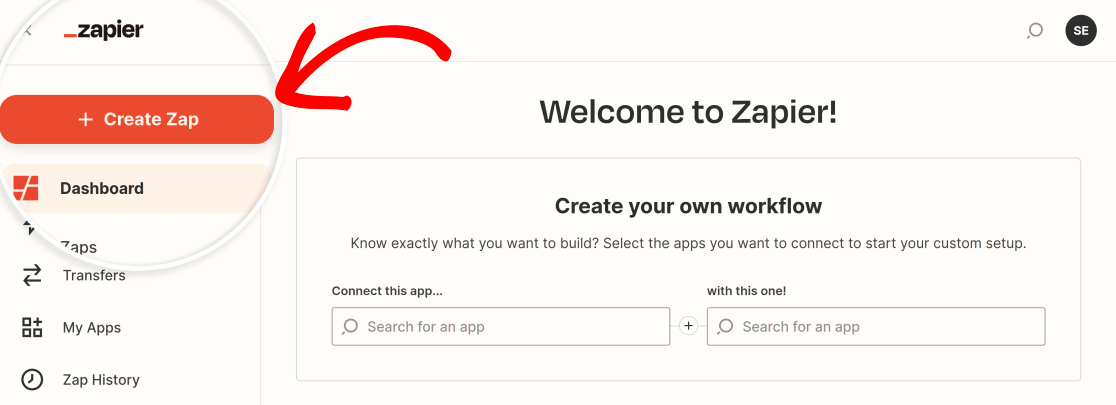
This will launch your new Zap setup page. Click on Untitled Zap in the top-left corner of the page to add a name to your Zap if you want to.
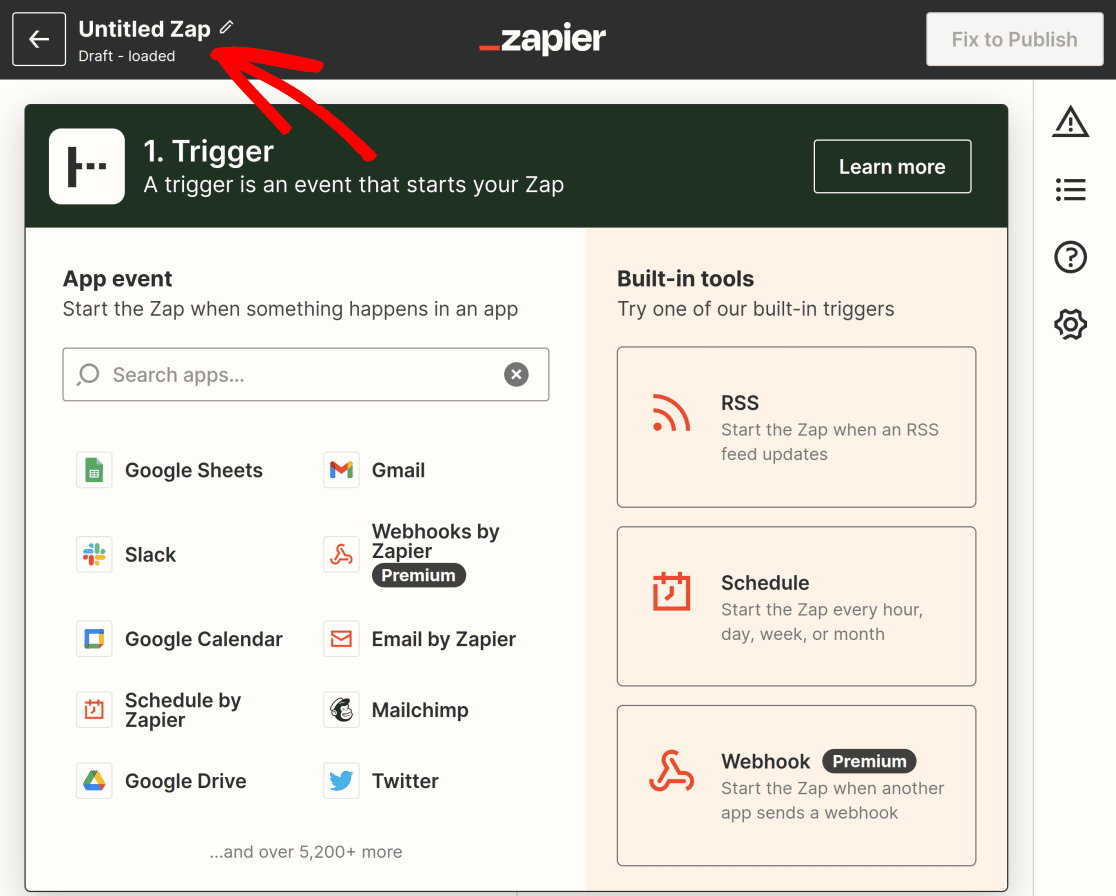
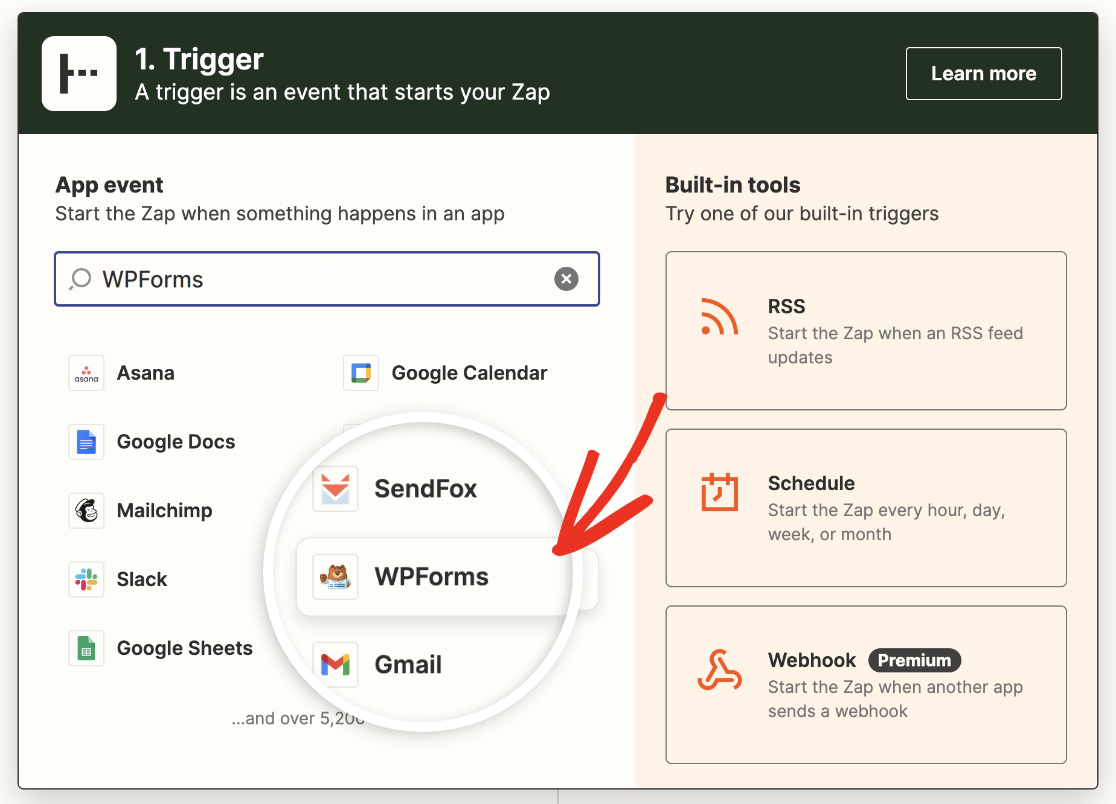
The next step is to choose WPForms as your trigger app. In the search box for App event, type “WPForms”. When the results show up, click on WPForms.
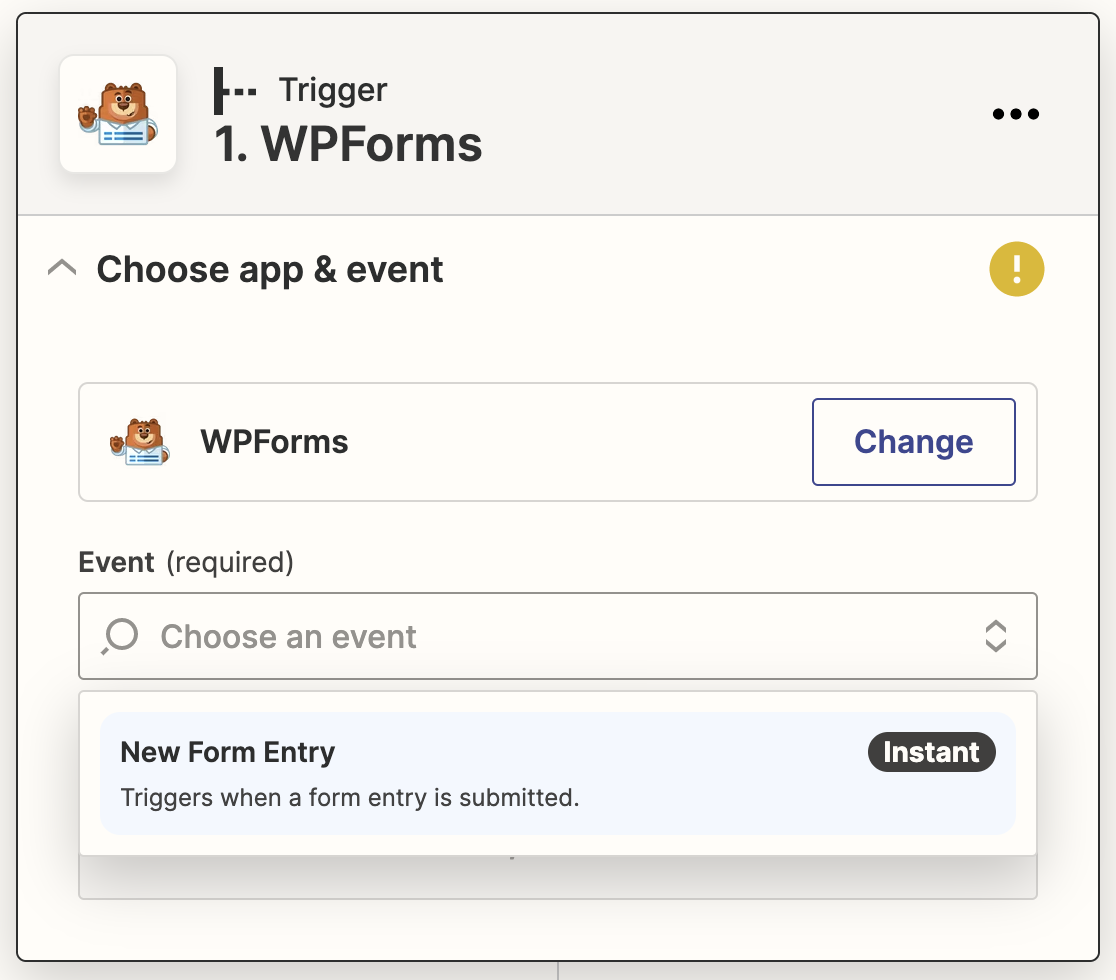
Once you’ve selected WPForms, Zapier will present your options in the section under Trigger. The only available trigger option for WPForms is “New Form Entry.”
To create a New Form Entry, first click within the search box, and then choose it from the dropdown menu.
Once done, click on Continue. The next step is to link your WPForms account to your Zapier account. To do this, click the Sign in button,
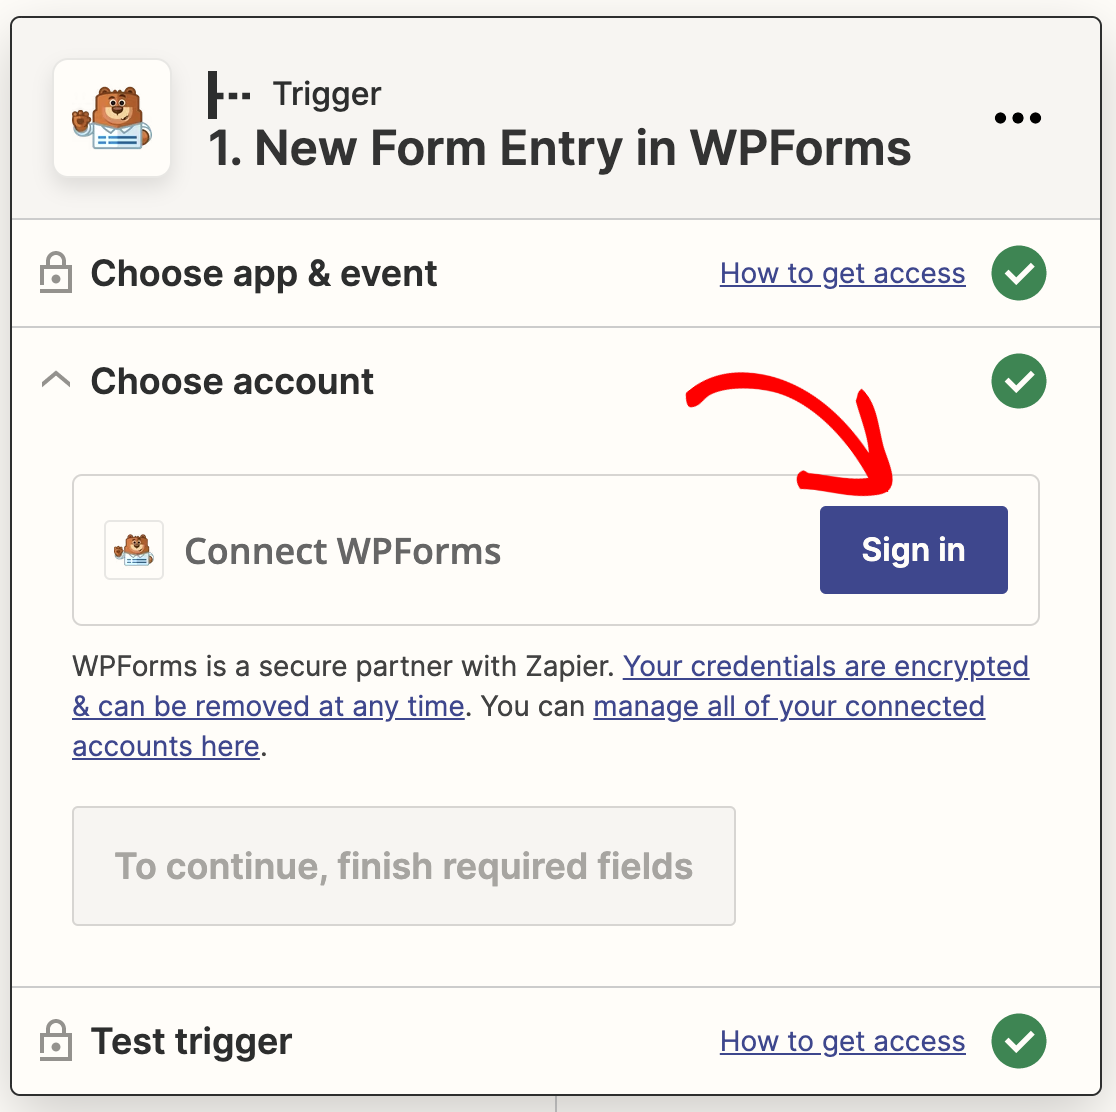
This action will result in a new window being shown. In this section, you will need to enter in your API Key to proceed ahead.
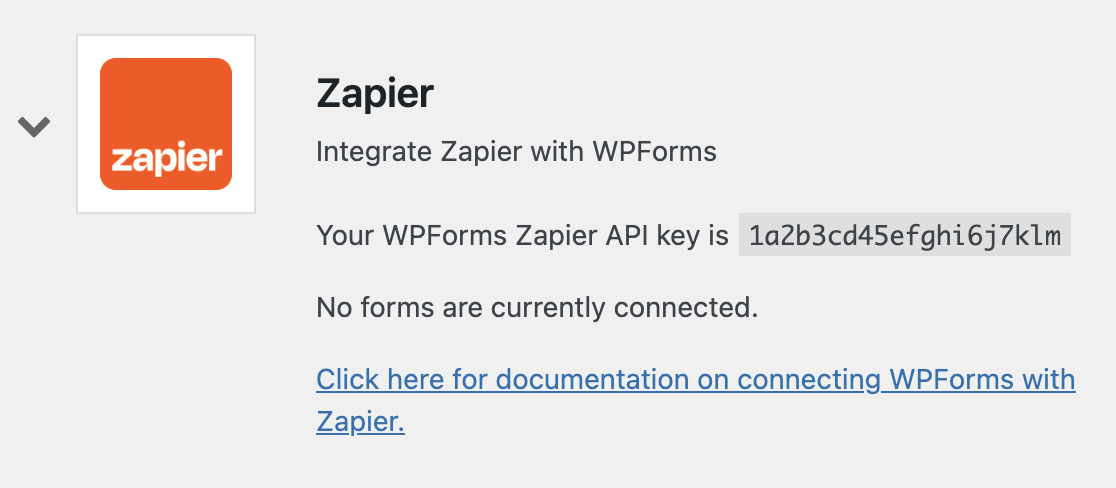
Return to the tab or window where you set up your WPForms connections to find your API key, as shown below.
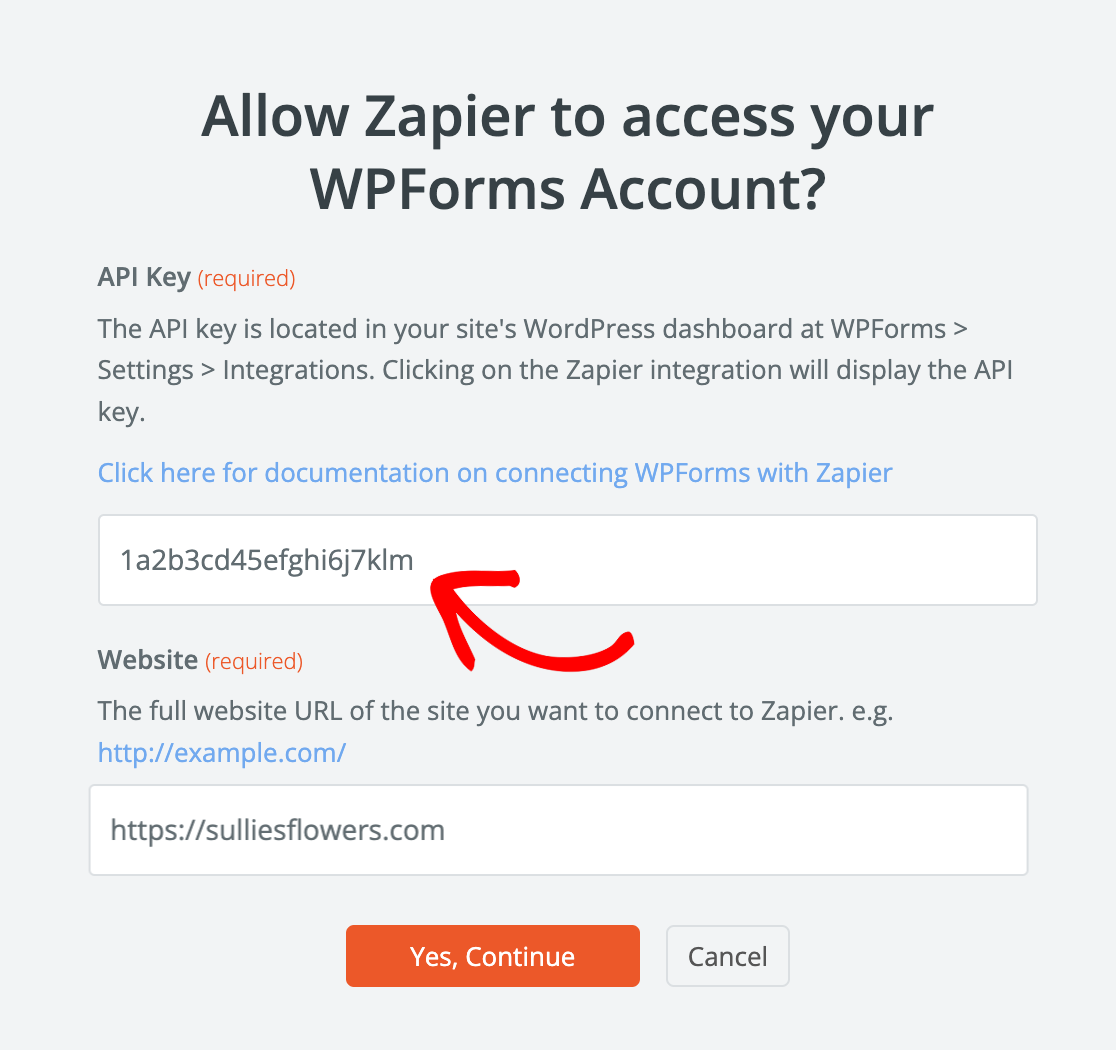
Simply copy and paste your API key into the popup window from Zapier, then input your domain name and click the Yes, Continue button.
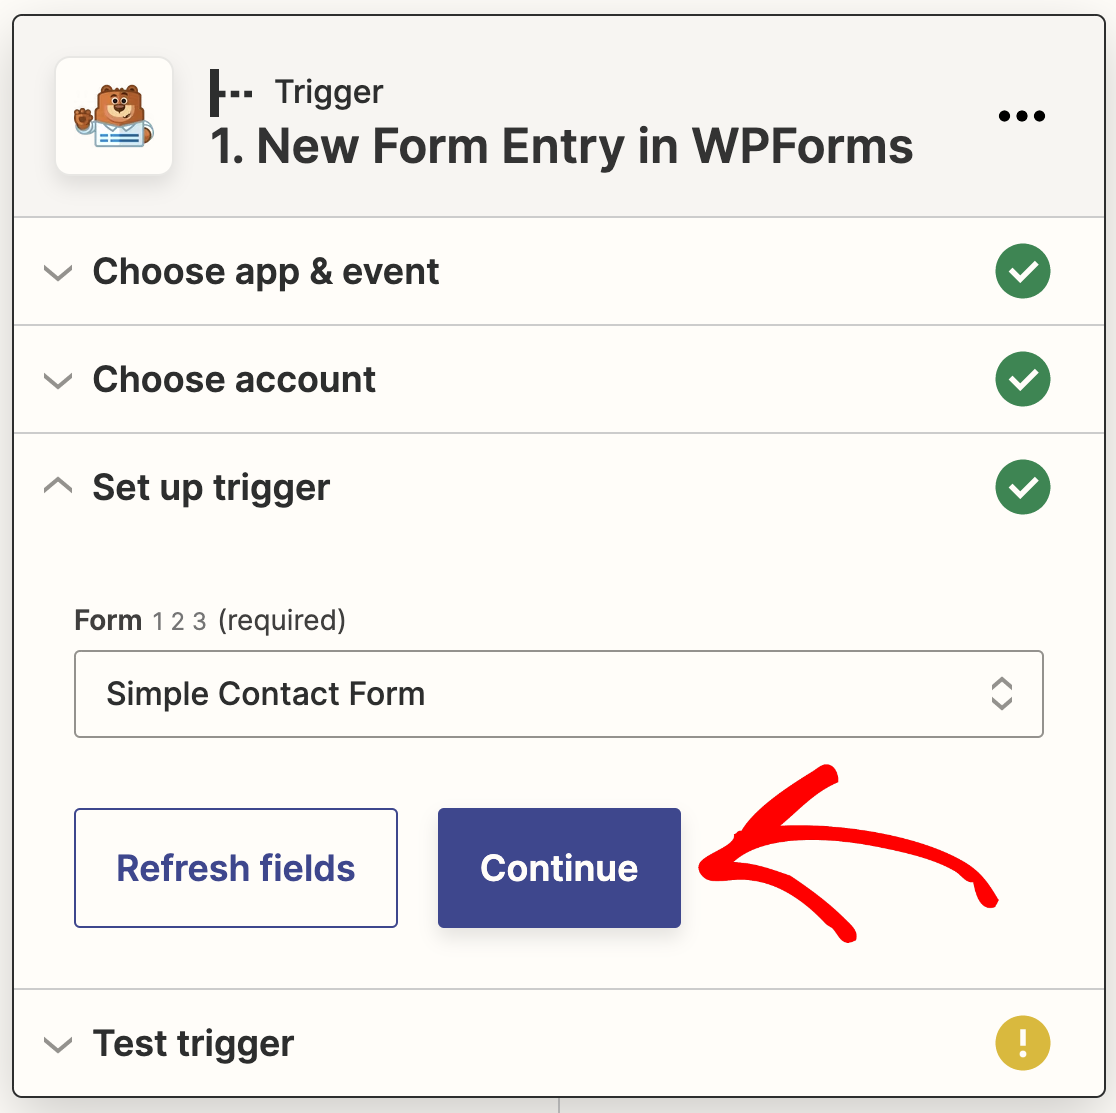
Now, from the dropdown menu, choose the form for which you would want to receive SMS notifications and hit the Continue button.
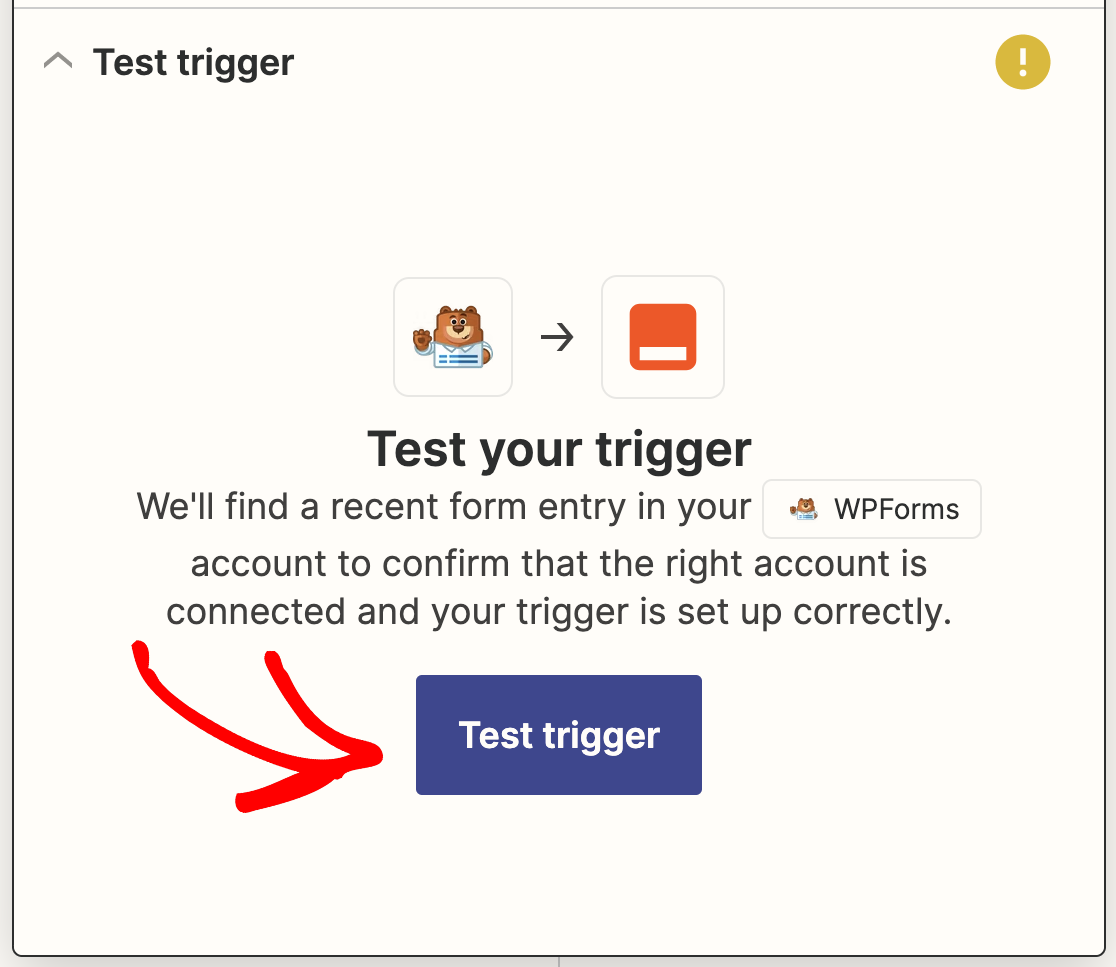
You can now test the connection of your form to Zapier. Before you proceed to click the Test trigger, it is vital that you have included at least one test entry for your form.
After a moment, you will receive a message confirming that your action was successful. Additionally, you can view the data you entered into the form.
Click on the Continue button to set up your action, which means creating an SMS integration in WordPress using Twilio.
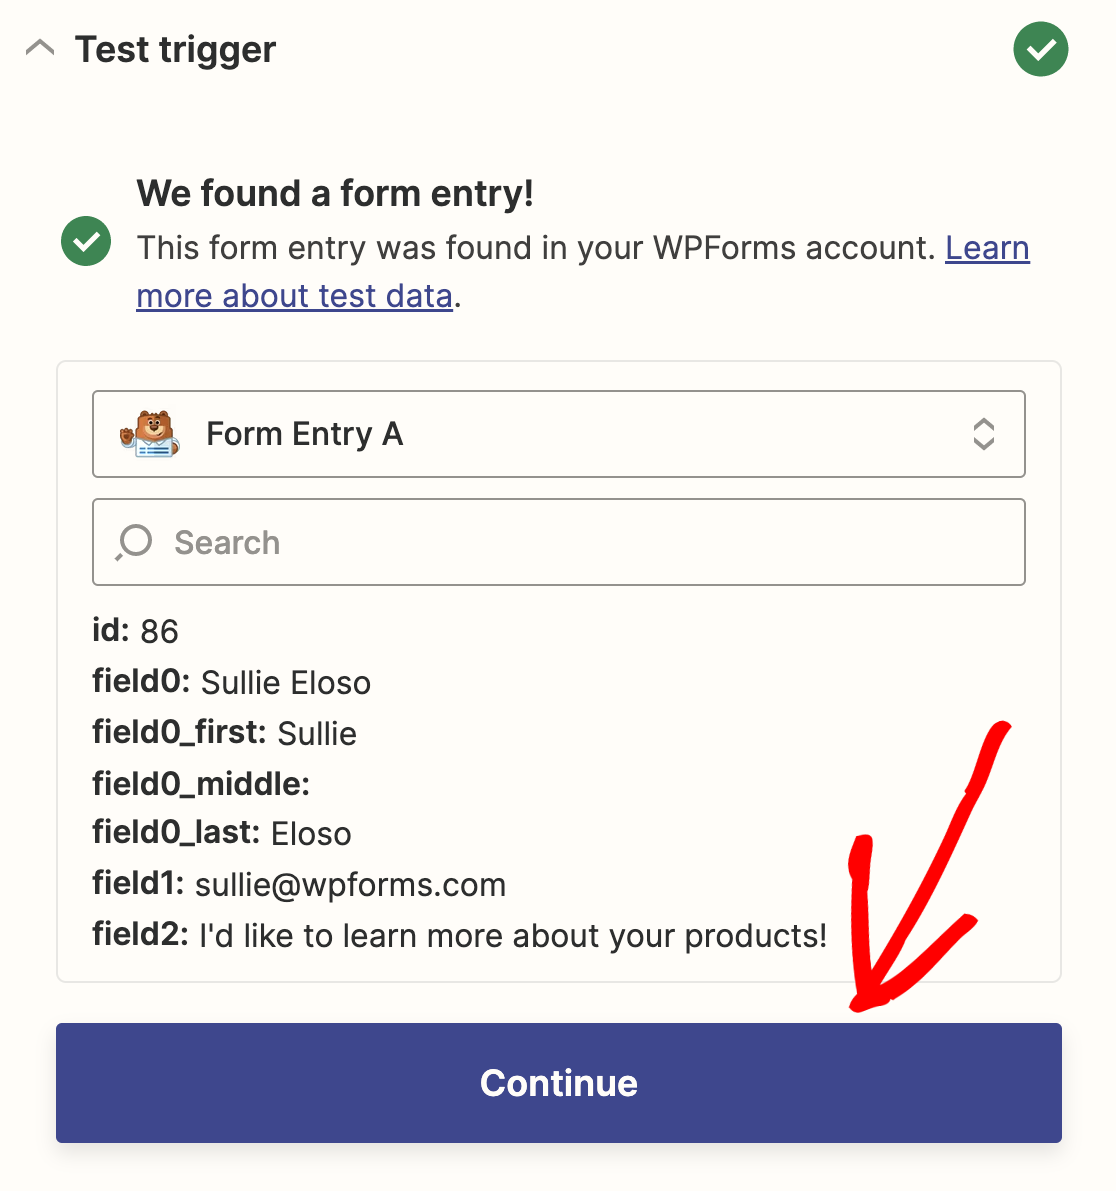
After clicking the Continue button, you will need to create a new browser tab, as you need to login to your Twilio account.
5. Set Up Your Twilio SMS Integration
If you don’t have a Twilio phone number yet, you must create one. To get started, simply create a Twilio account and click the Get a Twilio phone number button.
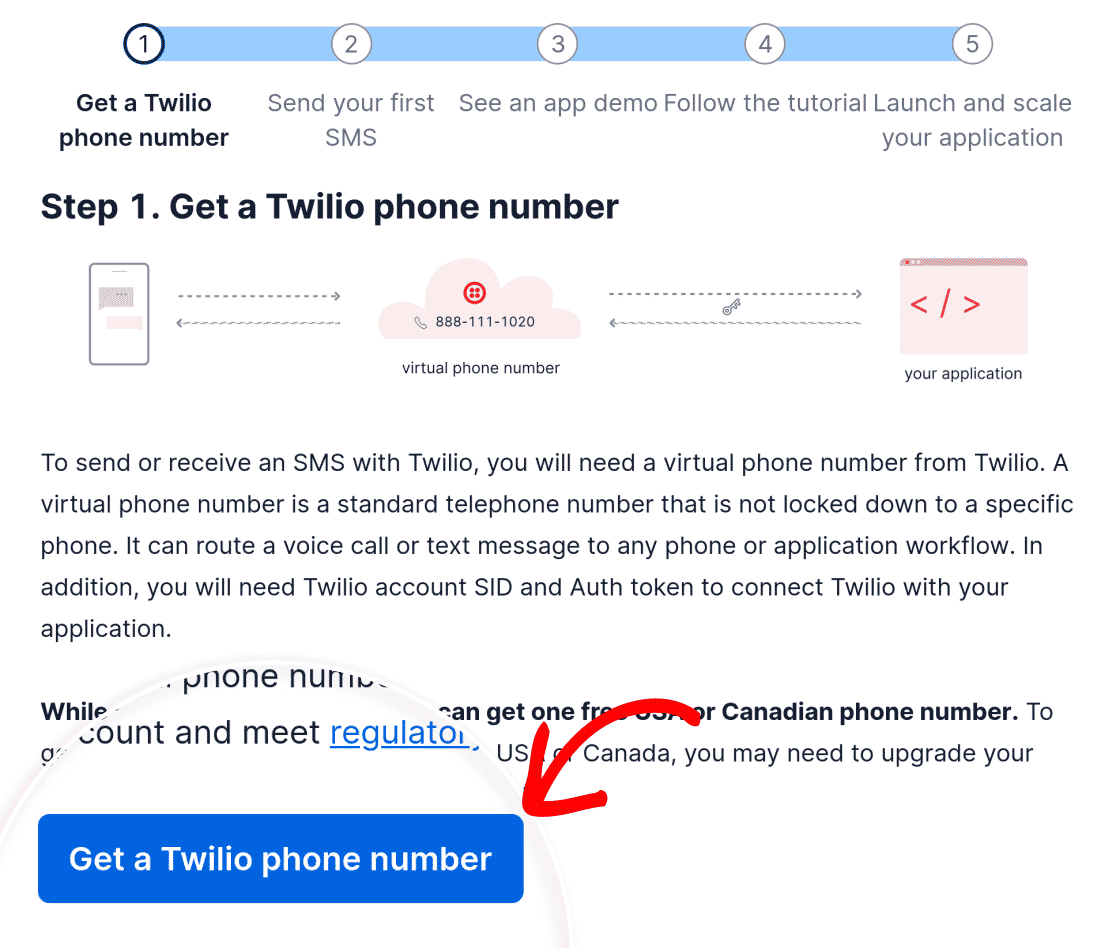
Once your phone number has been generated successfully, you may continue setting up Twilio integration on your website.
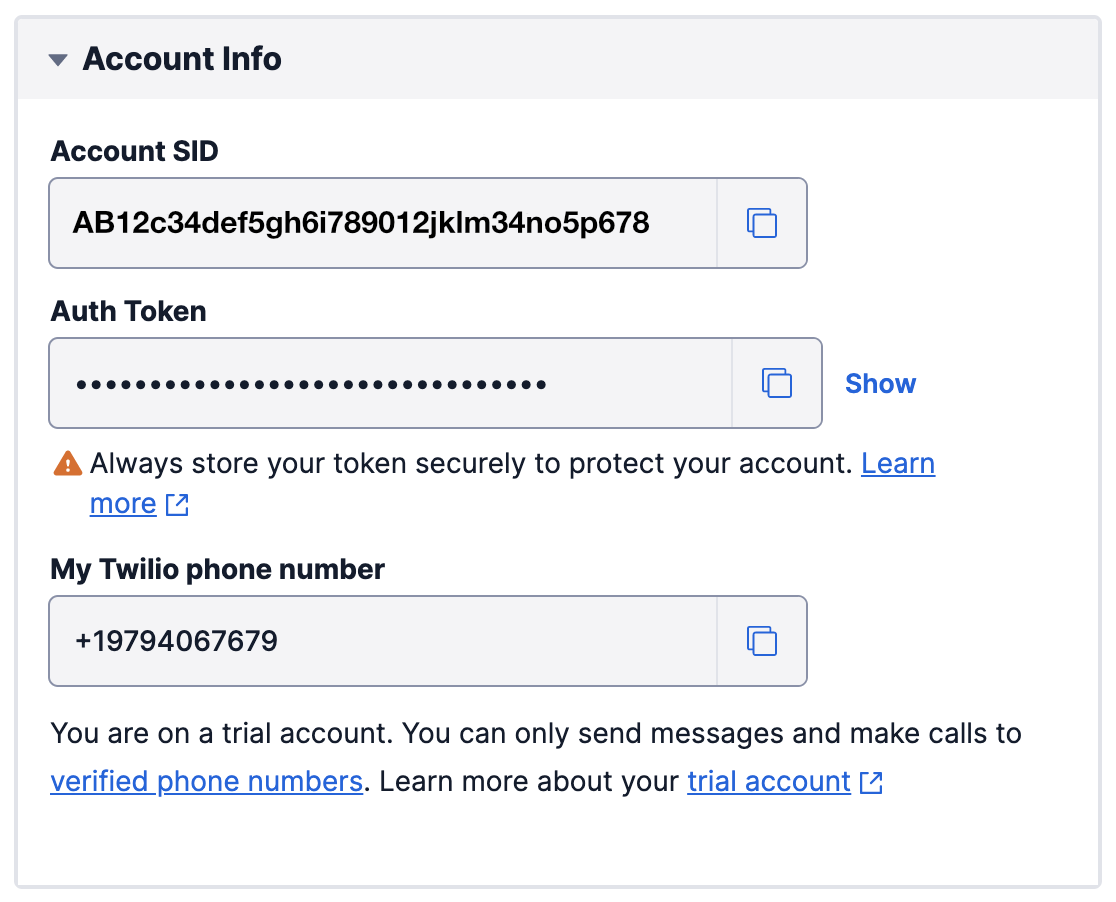
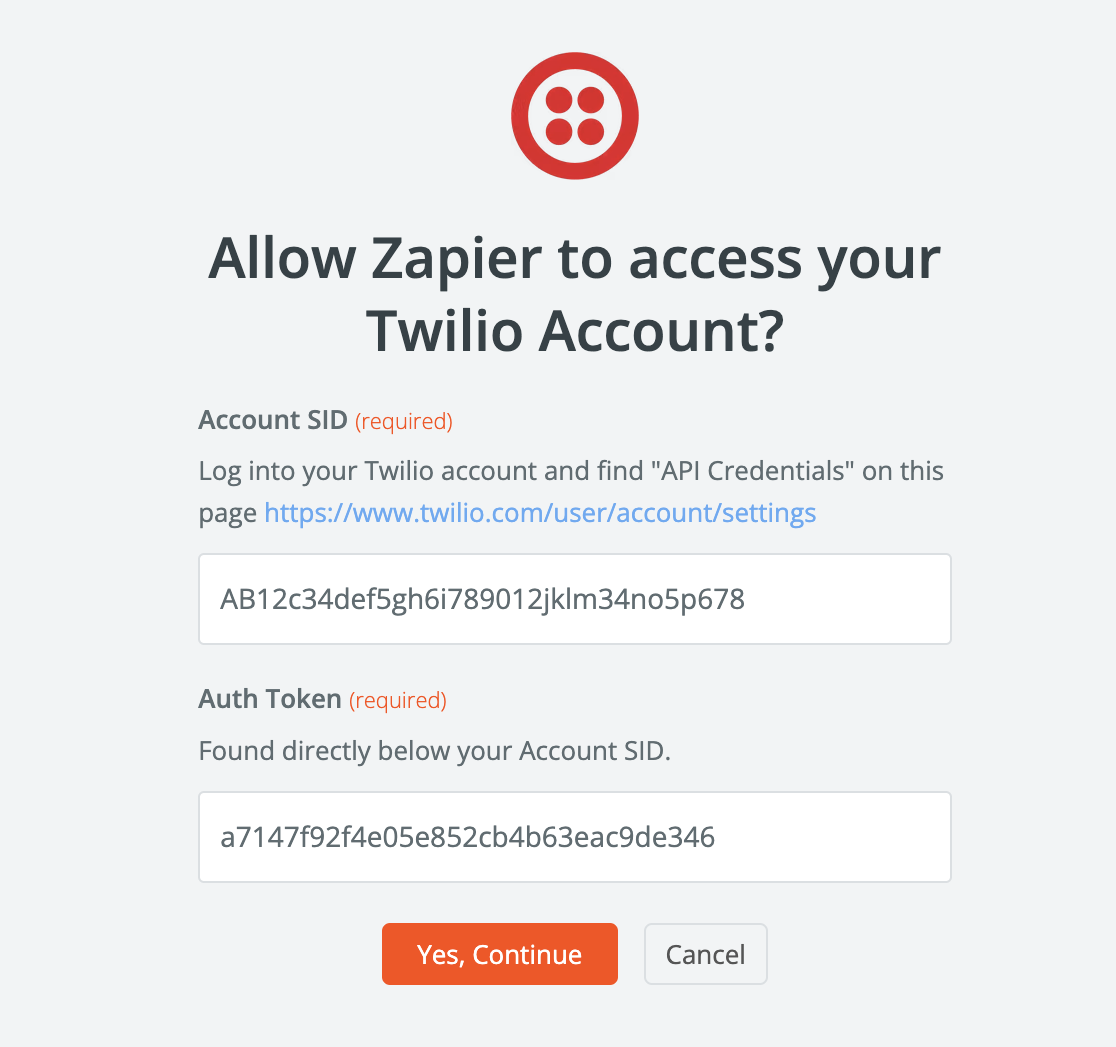
Now you need to find your Account SID and Auth Token. To do this, simply navigate to the Account Info section. Store this information someplace safe.
Return to the Action step in Zapier to create an SMS integration in WordPress using Twilio. For the App event for your Zap, choose Twilio.
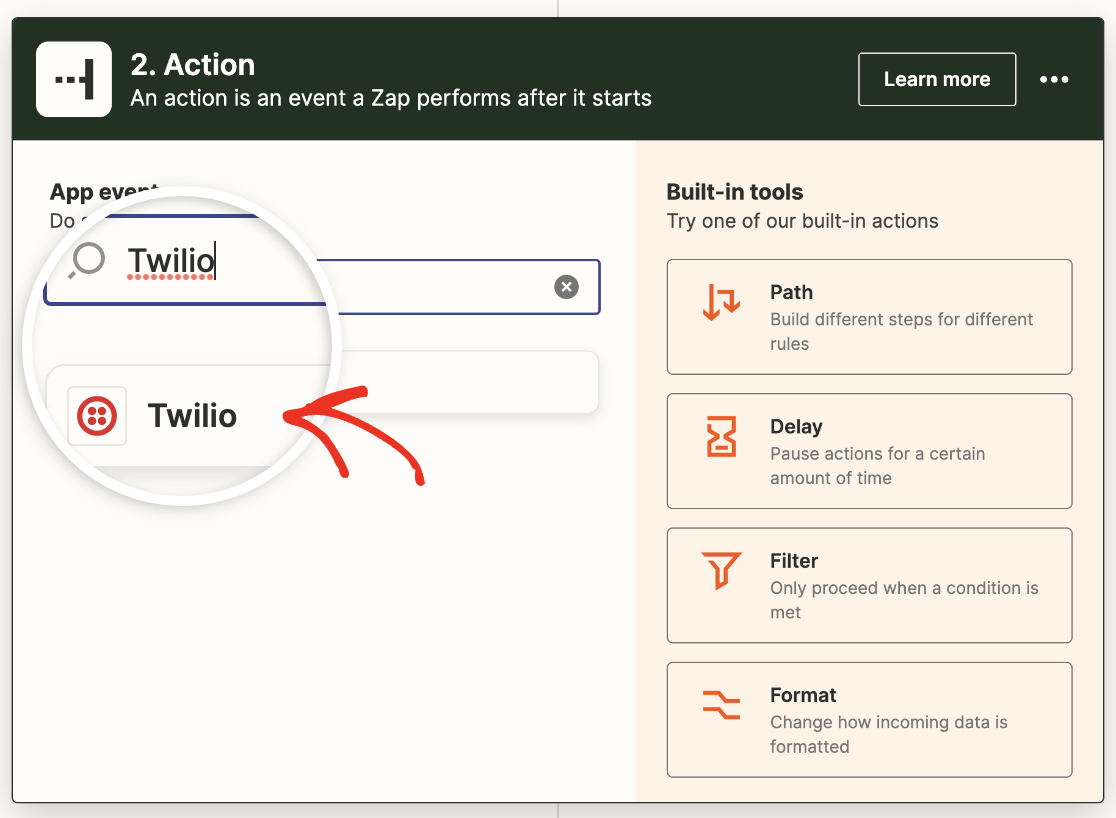
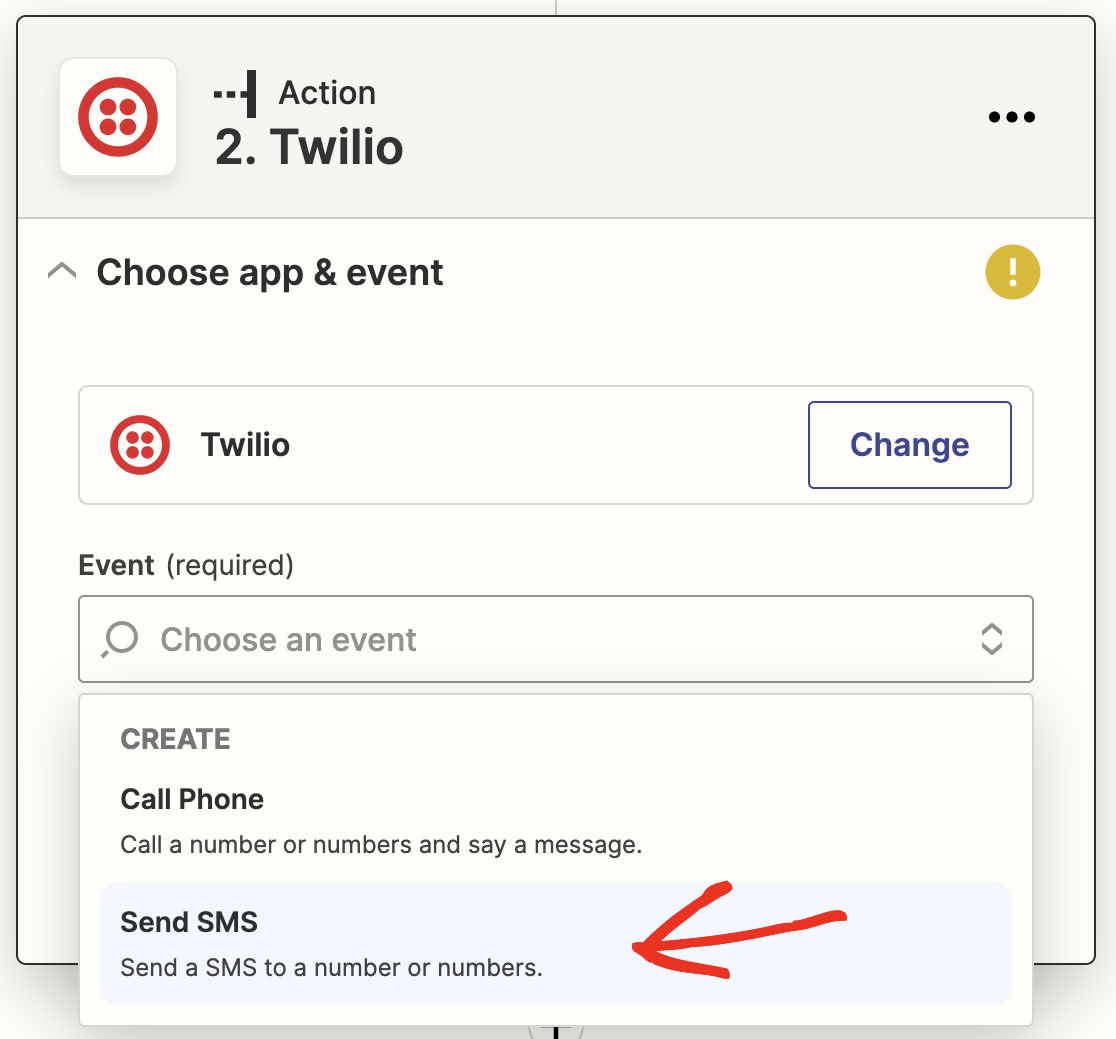
Next, choose Send SMS from the dropdown menu labeled Choose an Event. Then, press the Continue button.
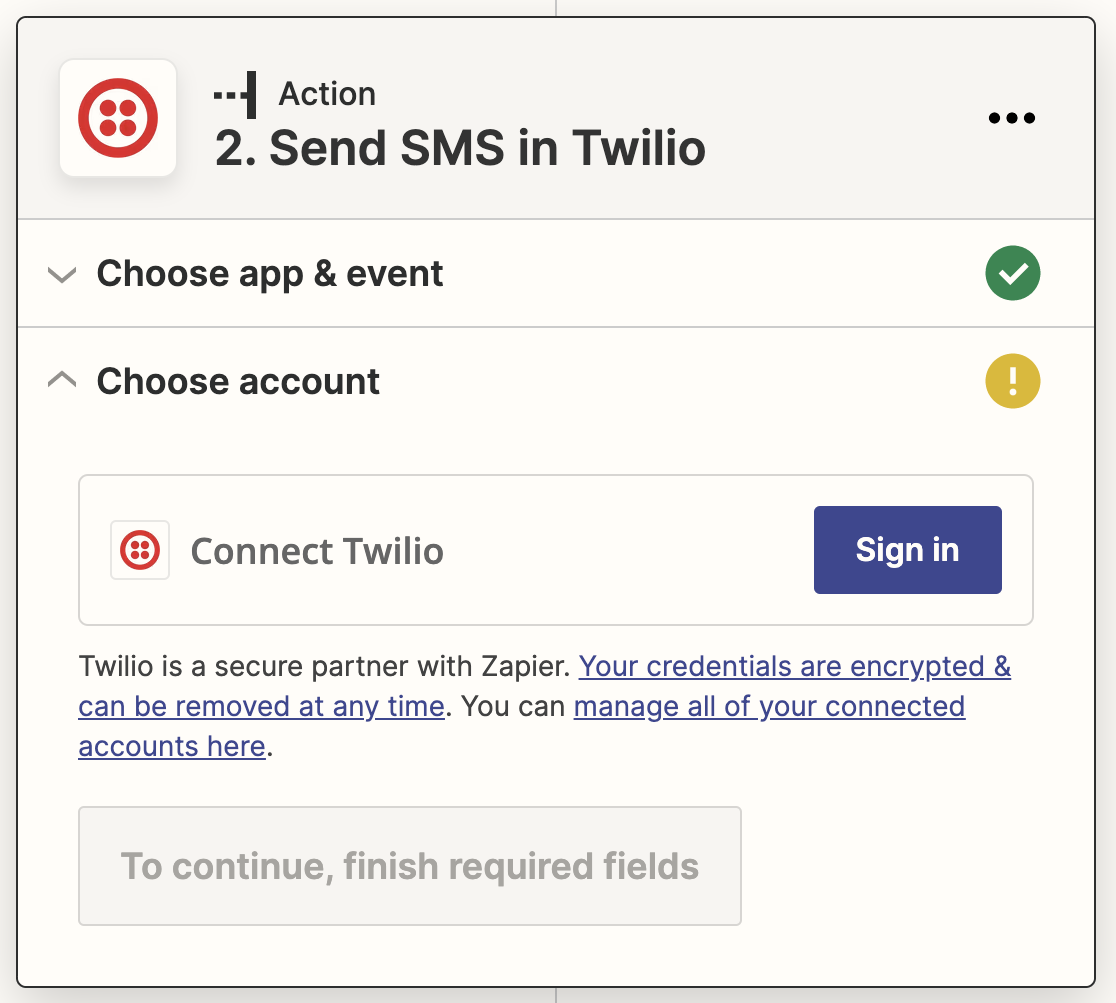
After that, you’ll need to connect your Zapier account with your Twilio account. Click the Sign In button to do this and enter your Twilio credentials.
Next, copy and paste the Account SID and Auth Token you saved earlier onto the relevant fields in the popup window from Zapier and hit the Yes, Continue button.
You’re almost there! Now that you’ve connected Zapier to Twilio, you just need to configure the SMS notification settings.
6. Configure SMS Notification Settings in Zapier
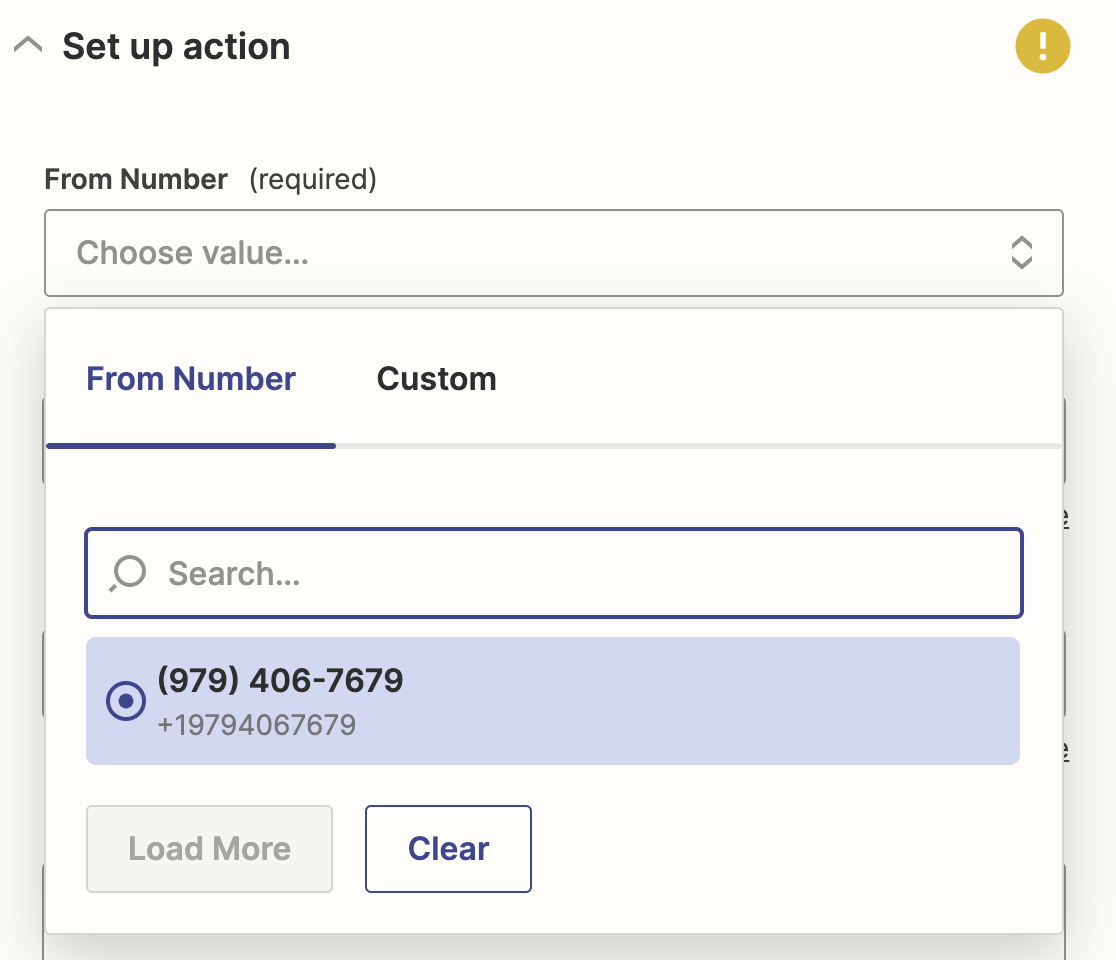
Please proceed to complete the remaining fields for your Twilio account in Zapier. Let’s start with the From Number field.
This is the mobile number that Twilio will use to deliver SMS notifications after a form is submitted on your website.
After that, enter the following details in Zapier:
- Alphanumeric Sender ID: Enter a sender ID that will display SMS notification. Your Twilio account needs to have this ID validated.
- To Number (required): The mobile phone number to which you would want to send SMS notifications. This number must be verified in your Twilio account.
- Message (required): The text of the message that will be sent to you by SMS. You have the option of entering original text or pulling material from a form field.
- Media URL: You have the option to include a picture in your SMS notice by adding the image’s URL. Read this for more information.
- Send Large Messages?: You can send one message with up to 160 characters or multiple messages with up to 1,600 characters each.
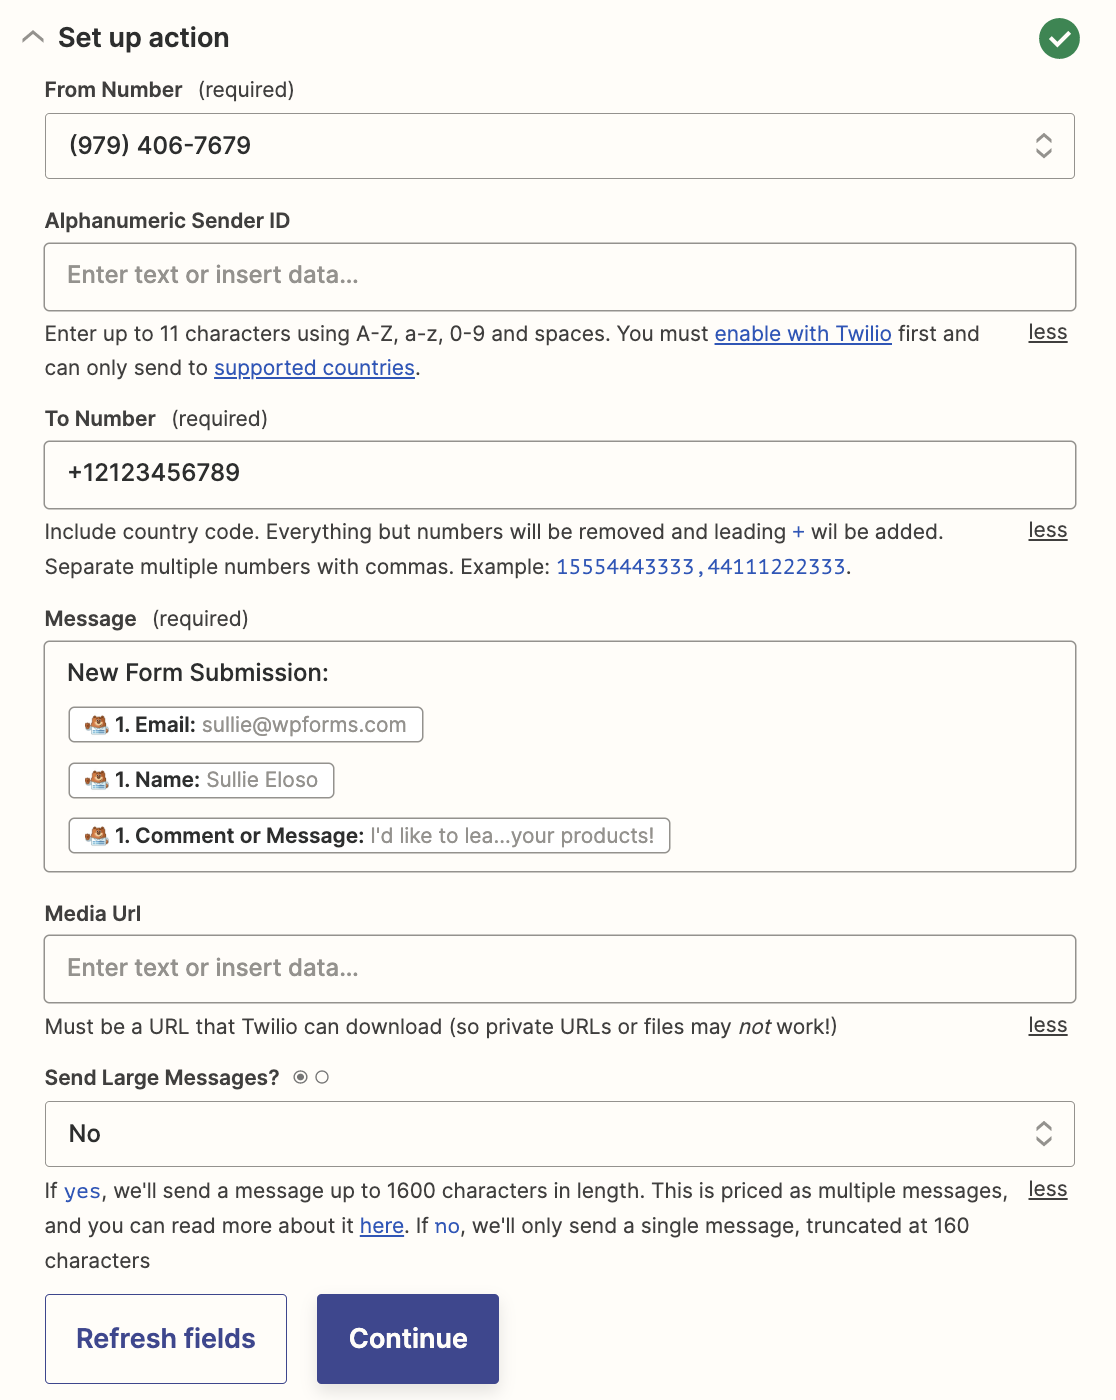
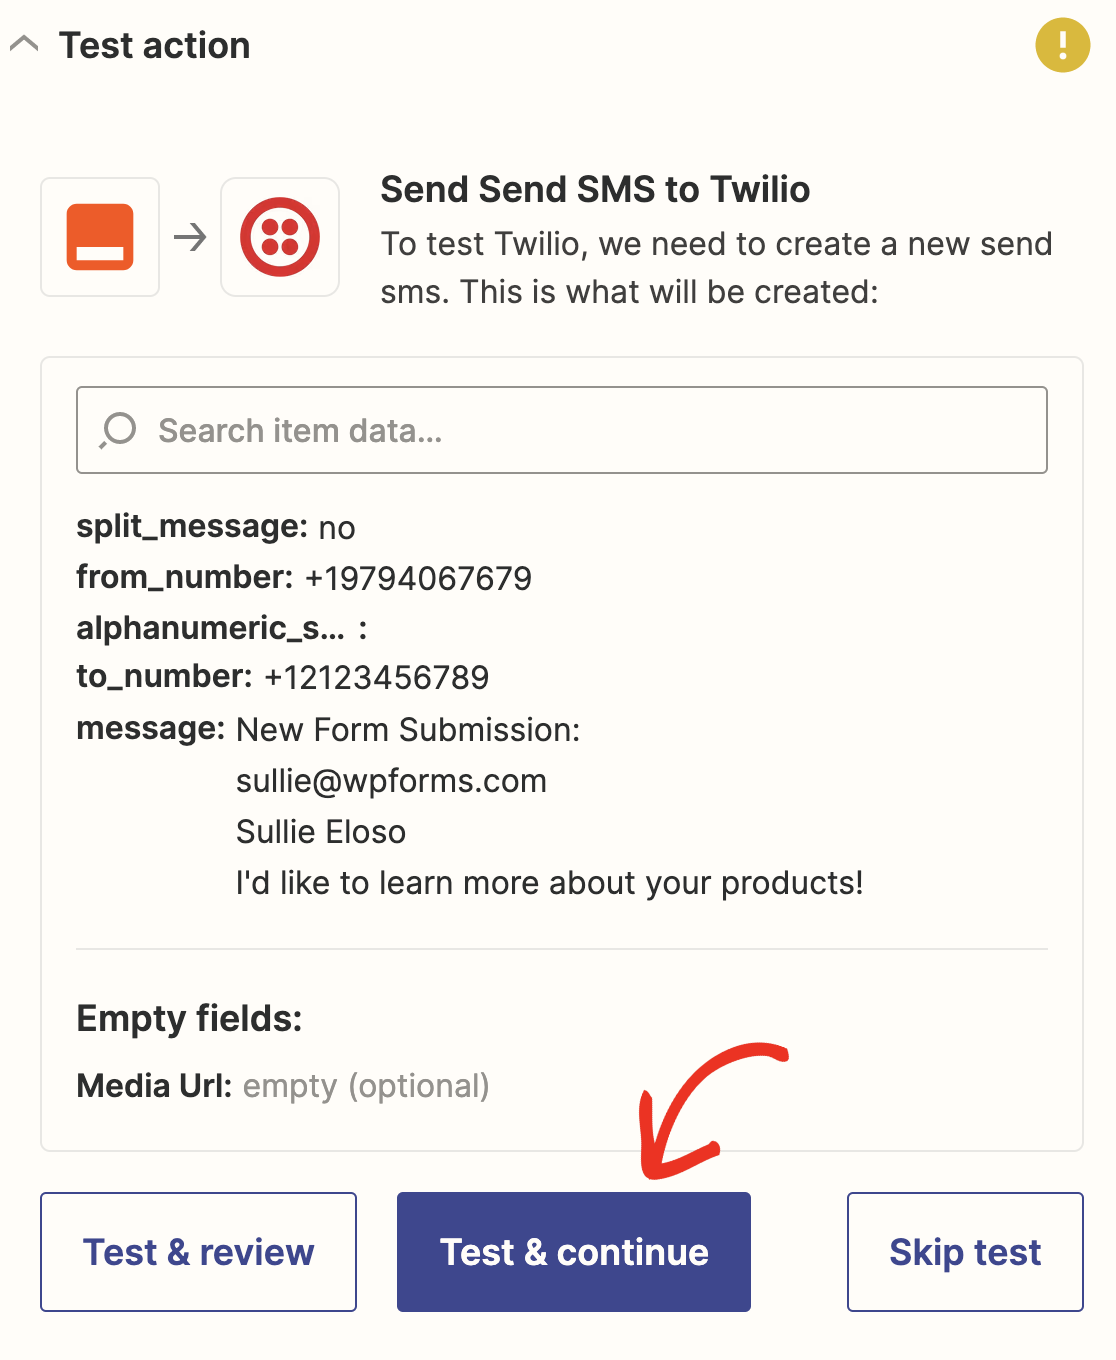
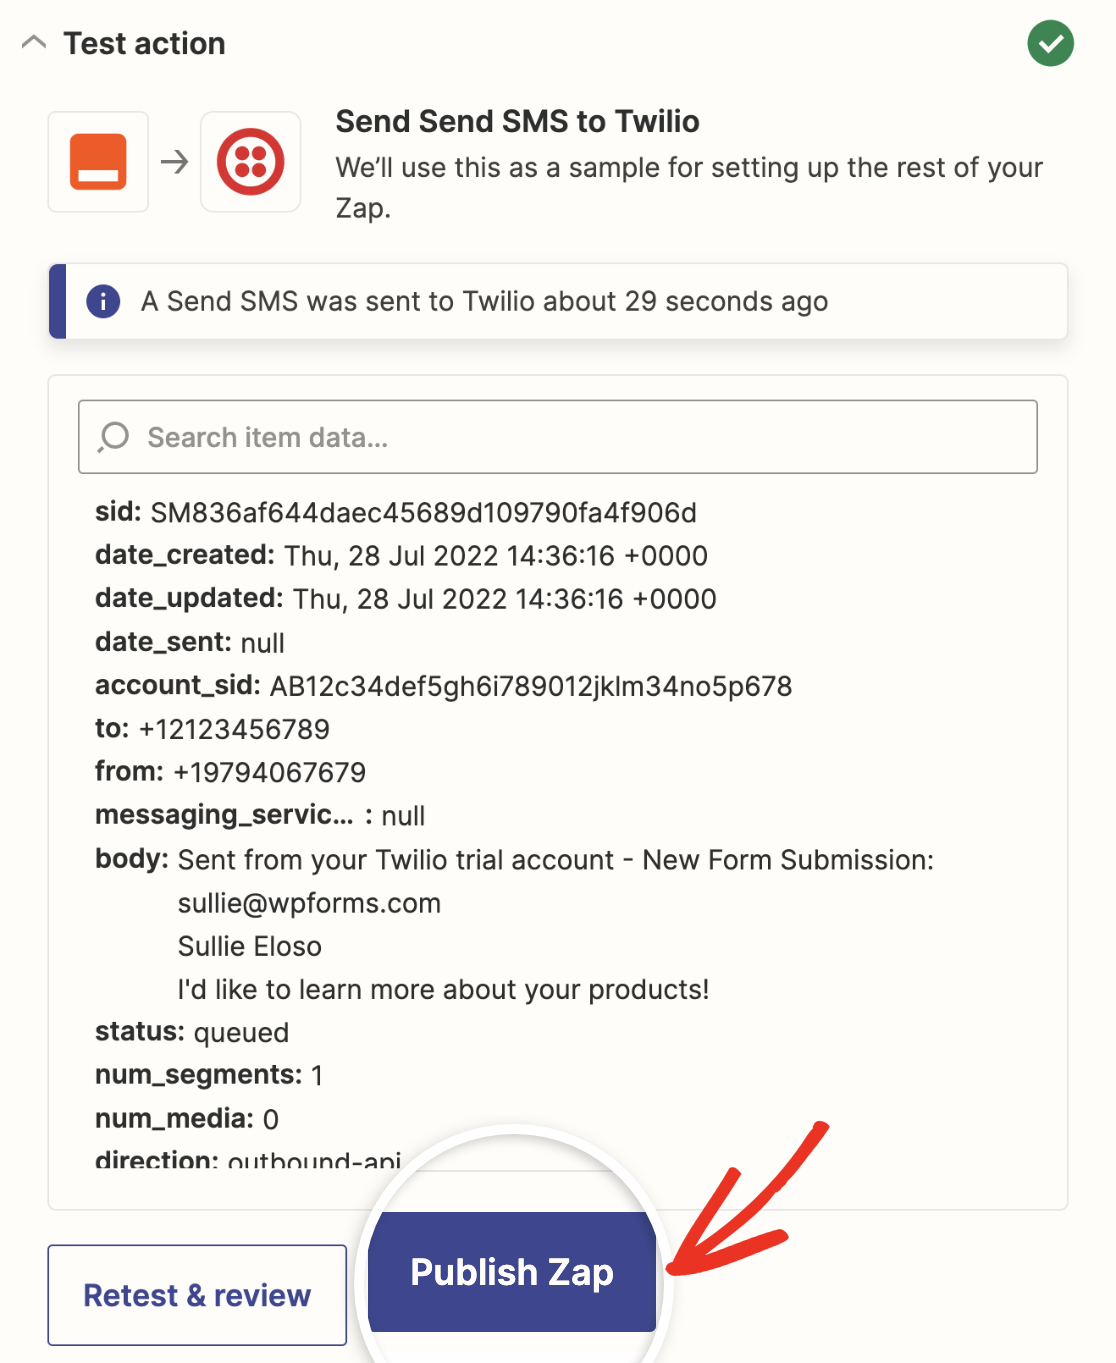
You can leave any of the fields that aren’t required empty and click Continue. Now all you have to do is click the Test & continue button to test your Twilio connection.
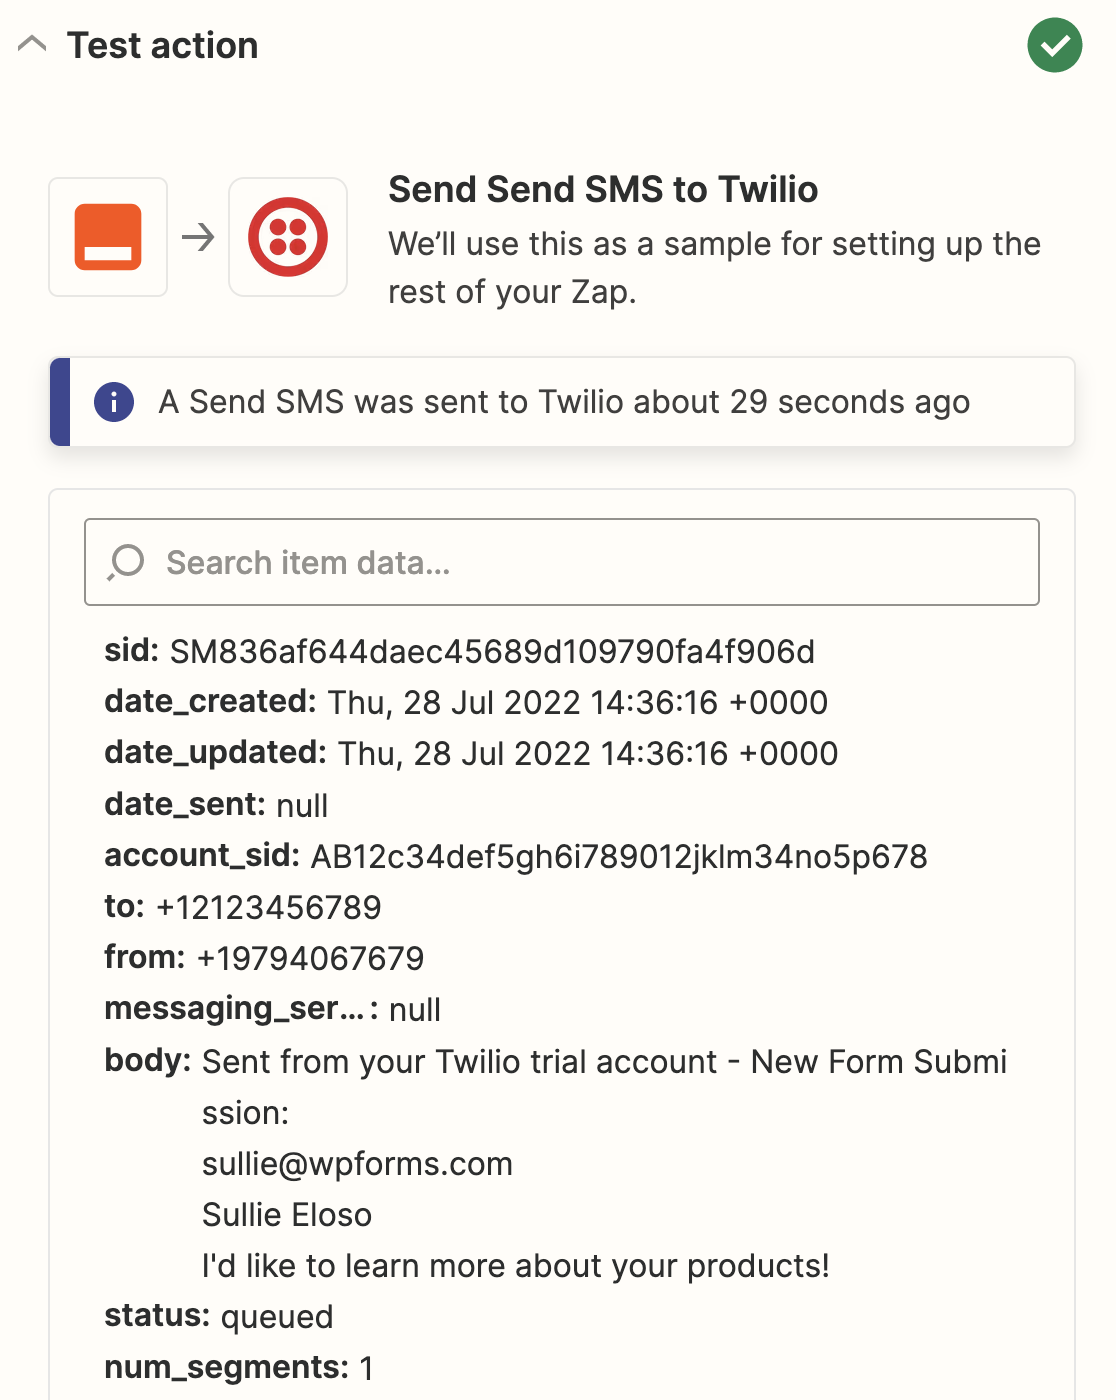
If all the necessary fields are correctly filled out, a success message will be displayed.
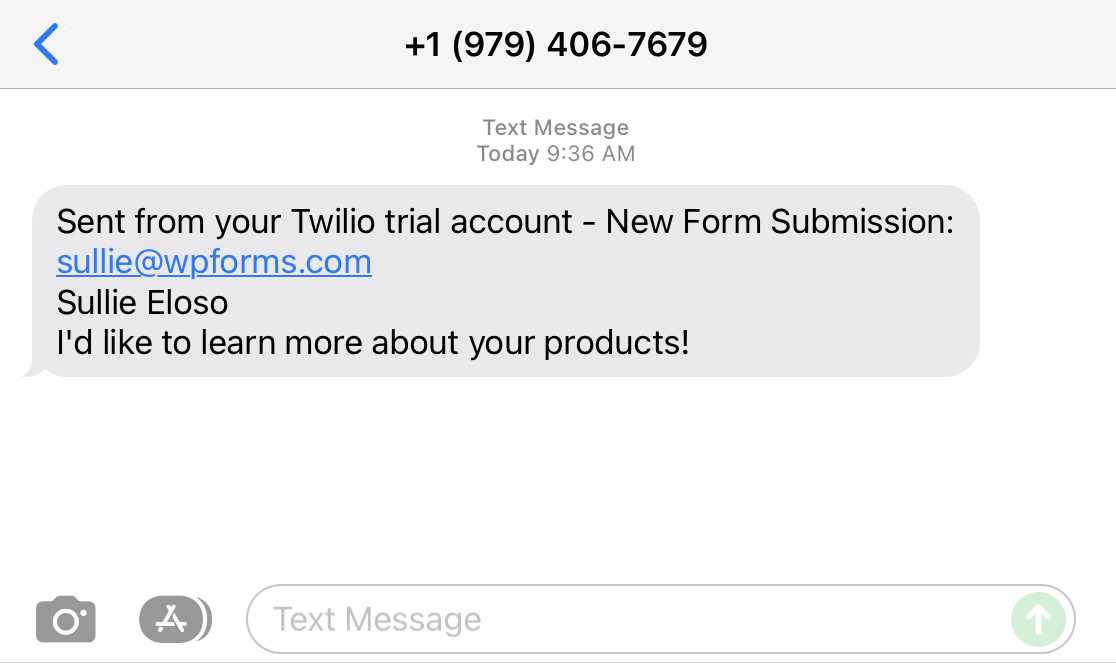
In addition to this, an SMS notification will be sent to the To Number that you specified.
If everything is working to your satisfaction, all you need to do now is hit the Publish Zap button.
And that’s all! Congratulations, you have successfully configured SMS message notifications for your WordPress form.
FAQs about SMS Notifications in WordPress
SMS notifications in WordPress are a popular topic of interest among our readers. Here are answers to some common questions about it.
How do I enable SMS notifications for form submissions in WordPress?
One easy way is to use the WPForms plugin along with the Zapier addon. This allows you to connect your WordPress forms to SMS messaging services like Twilio to send notifications via text message whenever a form is submitted.
What plugin allows SMS notifications when a WordPress form is submitted?
WPForms is a great WordPress plugin that allows SMS notifications upon form submission. With their Zapier integration addon, you can connect WPForms to an SMS gateway like Twilio to send text alerts.
Can I get text message alerts when someone fills out a form on my WordPress site?
Yes, by using WPForms and connecting it to Twilio via Zapier, you can receive SMS text message notifications each time someone submits a form on your WordPress site.
How do I set up SMS form notifications in WordPress without coding?
The WPForms plugin makes it easy to set up SMS notifications without any coding. Simply install WPForms, get their Zapier addon, and connect your WordPress forms to Twilio using Zapier workflows to enable text message alerts.
Next, How to Save Contact Form Emails in WordPress Database
If you’re using WordPress, the information entered into a contact form doesn’t have to be lost when hitting the submit button. Learn how to save contact form emails in the WordPress database to have a historical record of all form submissions.
Looking for a solution to improve the experience of website visitors who contact you via a multi-step form? Check out this guide to learn how to create a multi-step form in WordPress with WPForms.
Ready to fix your emails? Get started today with the best WordPress SMTP plugin. If you don’t have the time to fix your emails, you can get full White Glove Setup assistance as an extra purchase, and there’s a 14-day money-back guarantee for all paid plans.
If this article helped you out, please follow us on Facebook and Twitter for more WordPress tips and tutorials.

