Are you creating a contact form with multiple email addresses to send notifications to?
In many cases, you might want to send form submission notifications to different members of your team.
Or you might want to create separate notification messages entirely for different groups of people (customers and your team).
No matter your goal, we’ll show you how to make a WordPress contact form with multiple email addresses.
In This Article
- How to Make a WordPress Contact Form With Multiple Email Addresses
- Installing WPForms
- Creating a WordPress Form
- Case 1: Set Up A Single Notification for Multiple Email Addresses
- Case 2: Email Multiple Recipients With Carbon Copy
- Case 3: Email Specific Recipients Based on Form Response
- Case 4: Separate Notifications for Different Recipients
- Configure SMTP to Ensure Notification Deliverability
Why Should I Add Multiple Email Addresses to a WordPress Contact Form?
There are various possible scenarios where you might want to add multiple email addresses to your contact form:
- Sending emails to different team members: There might be multiple people responsible for emails in your team. It makes sense that they should all get notifications when a user submits a form on your site.
- Sending customized notifications to different groups of people: It’s common to set up one notification for your own team when a user submits a form and a separate notification for the visitor making the submission. This way, both parties can get notifications customized to be useful for them.
- Sending to different recipients based on user response: Sometimes, it makes sense to send a notification to a specific recipient only if the user gave a particular response when submitting the form.
Thankfully, we just need a single contact form plugin to cover all these notification scenarios – WPForms.
How to Make a WordPress Contact Form With Multiple Email Addresses
Let’s see how we can make the most of multiple notifications in 4 different scenarios.
Installing WPForms
You’re going to need a form builder plugin that has sufficient flexibility to allow setting up multiple email addresses. We recommend WPForms because it lets you add multiple email addresses in many different ways. And it makes the process outstandingly simple!
To begin, get WPForms Pro. You can see this doc guide if you need help installing WPForms on your site.
Next, we’re going to create a form where we can add multiple email addresses.
Creating a WordPress Form
Once WPforms is installed on your site, you can start creating a new form and include recipient email addresses.
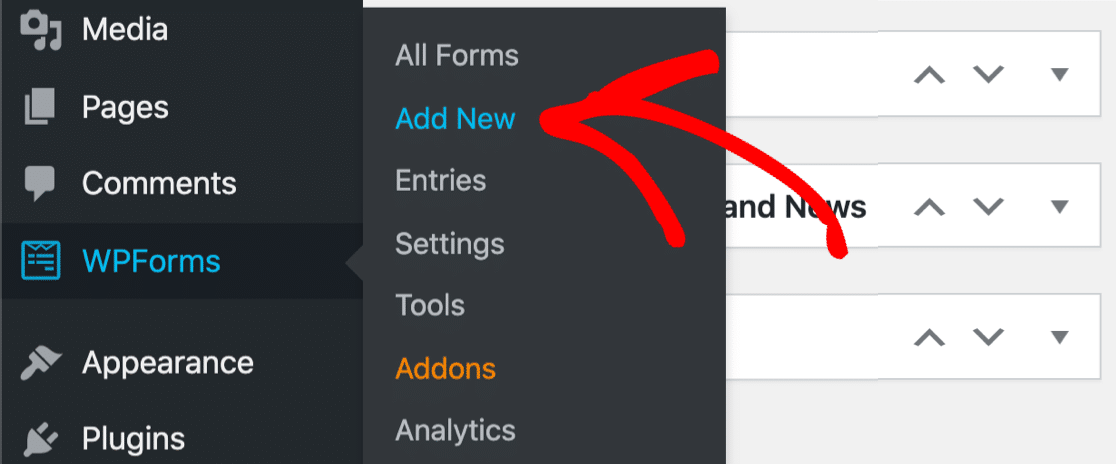
To create a form, click on WPForms » Add New.
You should now see WPForm’s form builder screen. Here, give a name to your form so you can easily get back to it later if you need to. Then, select a template from the available options.
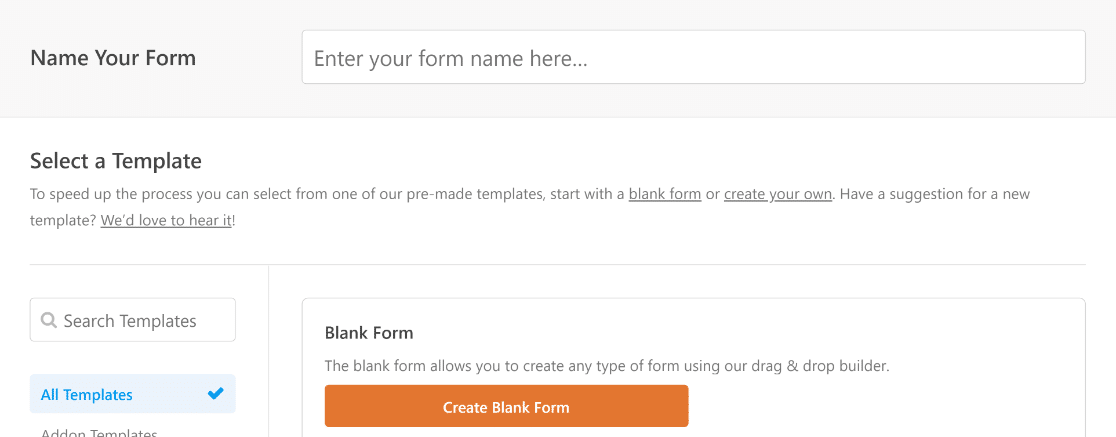
After you select the template, it should load within a couple of seconds. You can customize the form using the drag and drop fields.
When you’re finished customizing your form, you can move to the next step to set up notification email addresses.
We’ll show you 4 separate cases for adding multiple email addresses to your contact form.
Case 1: Set Up A Single Notification for Multiple Email Addresses
It’s a common requirement to have the same form notification sent to multiple people. With WPForms, this is extremely easy to do.
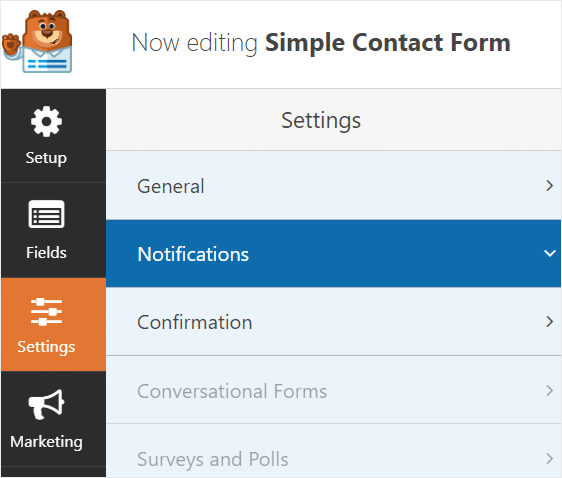
From your form builder screen, go to Settings » Notifications.
Here, insert the email addresses of all the people you wish to send the notification to within the Send To Email Address field. Each email address should be separated by a comma as shown in the example below.
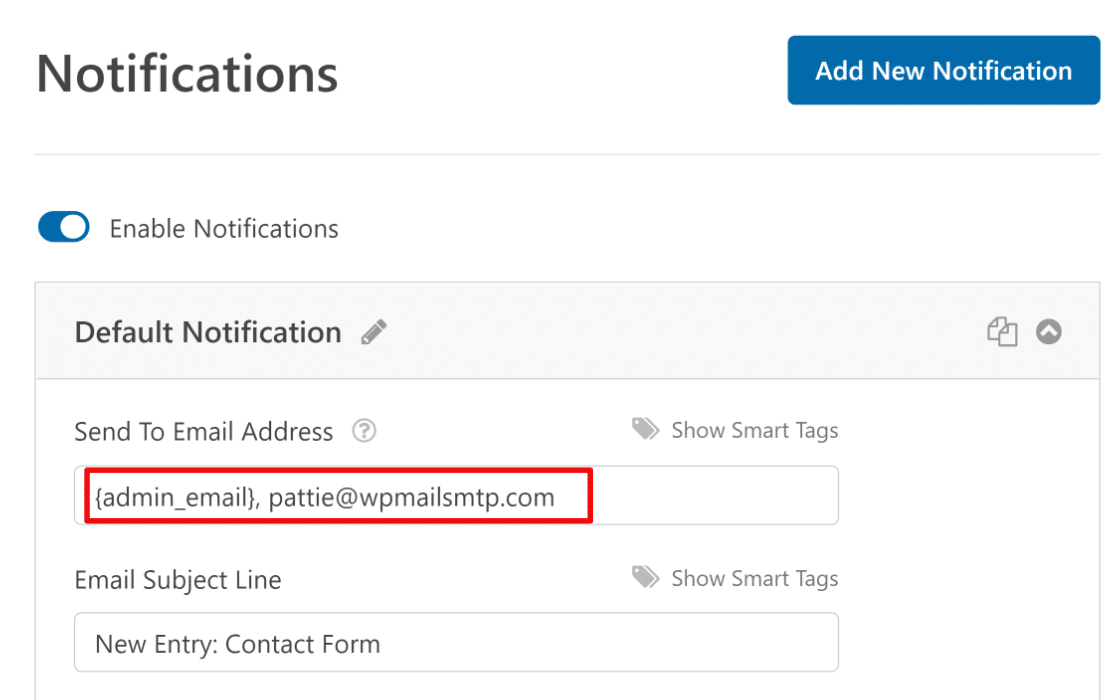
Note: You can use both smart tags and full email addresses in the field. In the example above, there’s a smart tag for the admin email address and a full email address for other people.
If you want, you can customize the email subject line and the message of the notification from here too. For more details, see this doc guide on setting up WPForms notifications.
Case 2: Email Multiple Recipients With Carbon Copy
In the method above, each recipient will receive their own separate copy of the notification.
This means that the recipients cannot see other people who have also received the same notification. Nor can they use the reply-all feature to reply to all these people, since they’ll only be seeing a single email address (the From Email).
But you can enable WPForms’ Carbon Copy feature to allow each recipient to respond to all other parties receiving the same form notification.
You can include a CC field into your form notification settings by going to WPForms » Settings and selecting the Email tab.
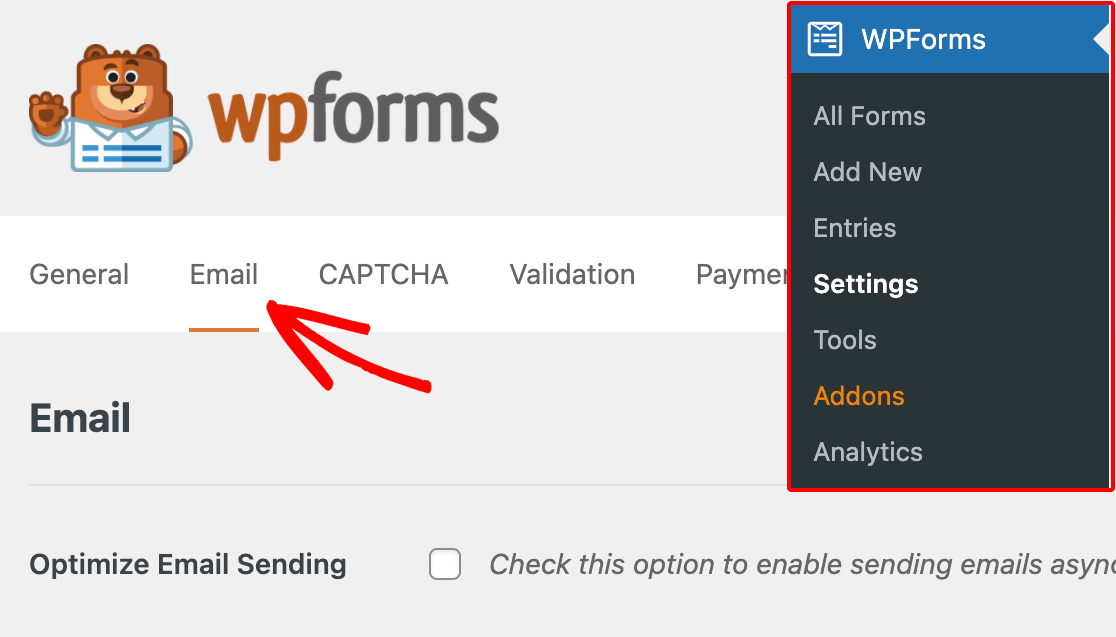
You’ll find the Carbon Copy settings on the bottom of this page. Checkmark the Carbon Copy option and click on Save Settings to enable it.
Return to your form’s notification area. You should now see a CC field right below the Send To Email Address field. As before, you can enter multiple email addresses in the CC field separated by commas.
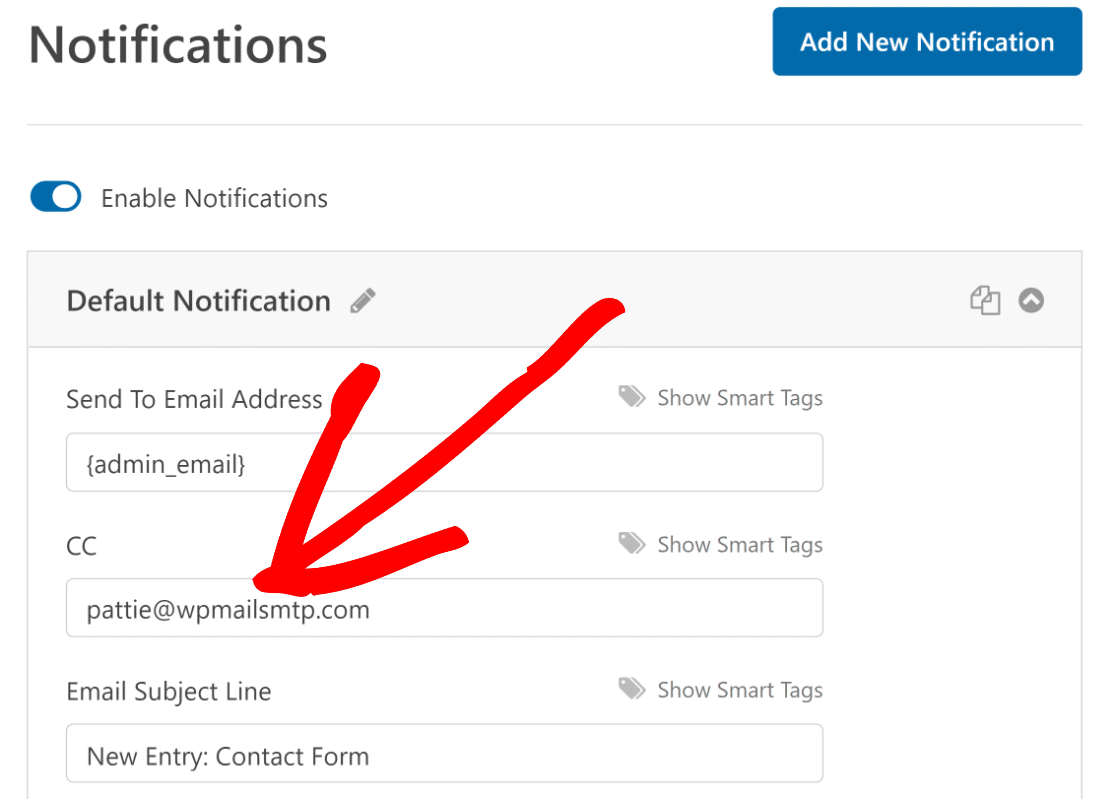
Now, your recipients will be able to use their email service’s reply-all feature to send a reply to all other people that have received this notification.
When using the CC field, it’s better to include only one email address in the Send To Email Address field. You can add the email addresses of all other recipients in the CC field so that only one copy of the email is sent to each recipient.
Case 3: Email Specific Recipients Based on Form Response
Suppose that you want to send form notifications to different members of your team depending on the answers provided by the user submitting the form.
You can easily do this using WPForm’s conditional logic feature.
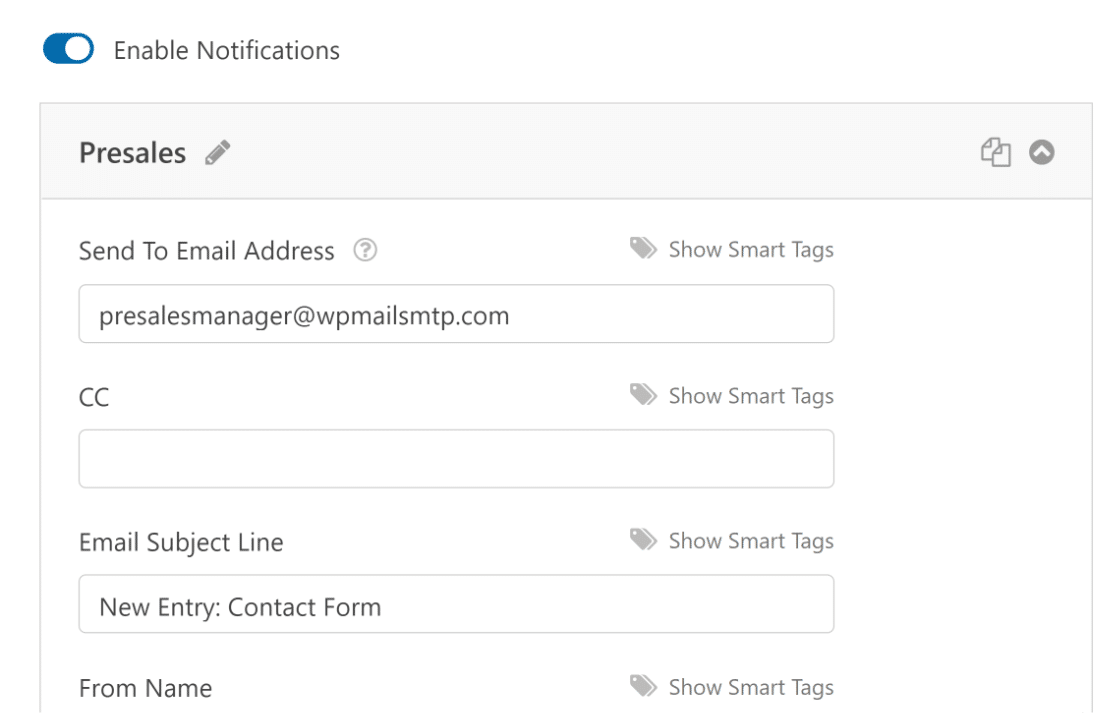
In the example below, we’ve created a contact form that asks users to specify which support department they’d like to contact.
Based on their response, the form notification will only be sent to the person(s) handling emails for that department.
If the user wants to contact the presales department, we can set up a separate notification with Send To Email Address and other details associated with that department.
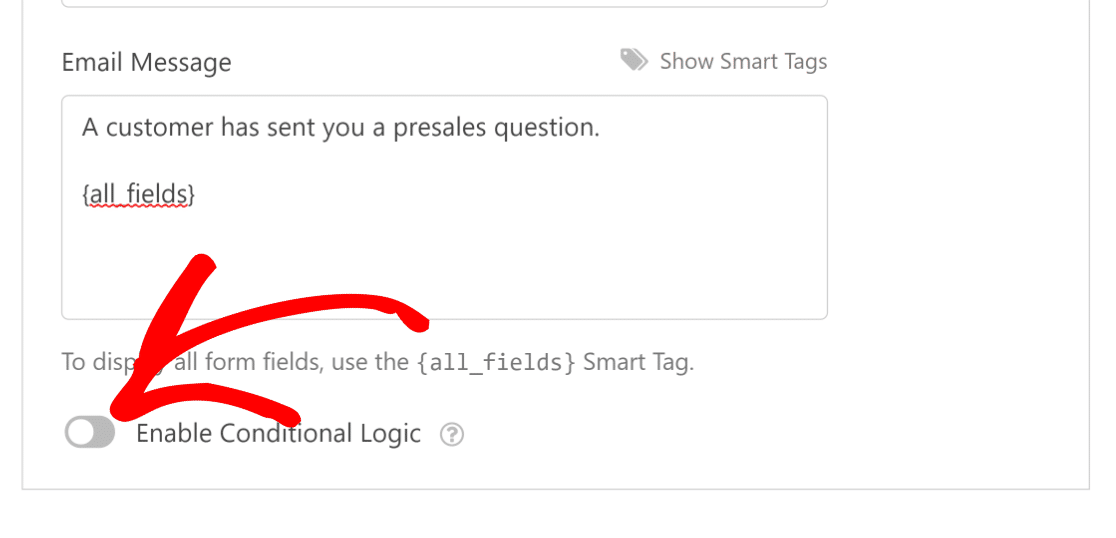
After you’ve customized the email, scroll down and use the toggle button next to Enable Conditional Logic.
Now, use the simple dropdown menus to create rules determining when a notification should be sent to a particular recipient.
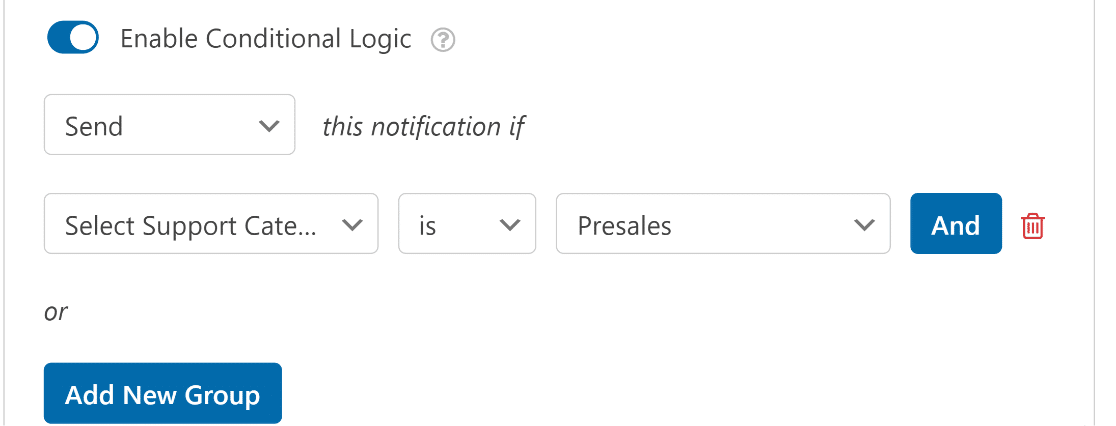
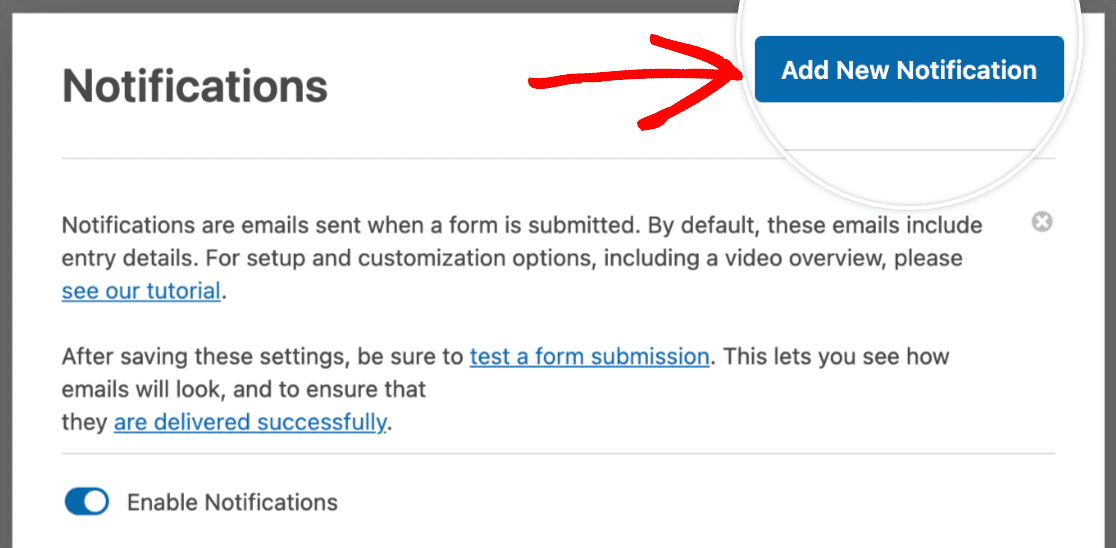
After setting up the smart notification rules, go to the top of the form notification settings page.
Click on Add New Notification and repeat the same process all over again to set up a separate notification for other recipients depending on different user answers (such as a user wishing to contact a different support department).
Next, we’ll look into setting up entirely separate notifications for different recipients.
Case 4: Separate Notifications for Different Recipients
With WPForms, you can also create customized notifications for different recipients or groups of people.
For example, let’s create a form notification to send to the admin when a user submits a form and another notification to send to the user filling out a form.
For the first notification, customize the default notification like you normally would and insert the email address of the intended recipient in the Send To Email Address field.
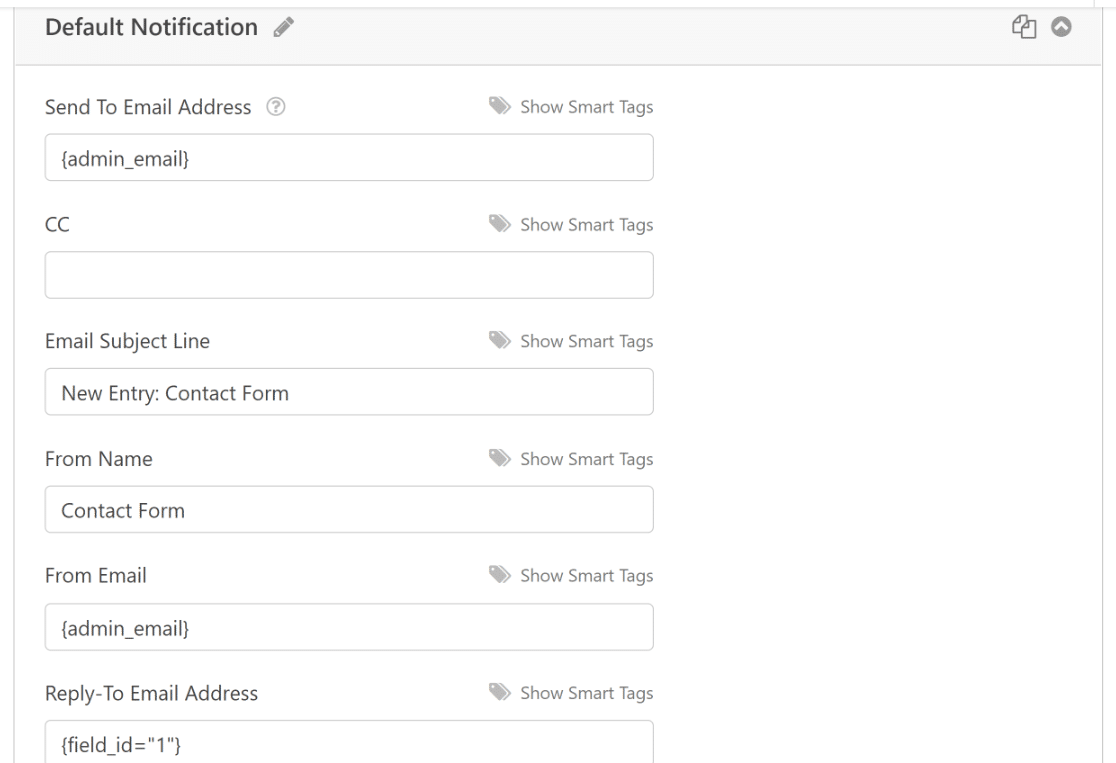
Next, click on Add New Notification on the top and give your second notification a name.

Now, customize the email message and insert the email address of the intended recipient in the Send To Email Address field.
Since we want to send this notification to the users who submit the form, we’ll use a smart tag to use the email they provided in the form as the recipient.
To do that, click on Show Smart Tags link on the Send To Email Address field.

A dropdown menu will now open with several different available smart tags. Find and click on Email to insert the appropriate smart tag for the Email field within the Send To Email Address field.
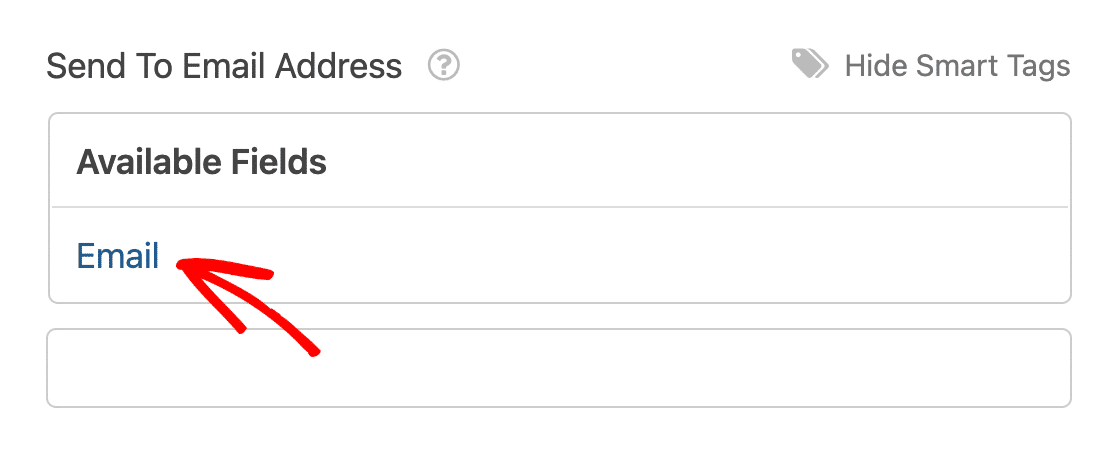
Now, WPForms will automatically send the notification to the email address that the user filled in during form submission.

Make sure to customize the subject line, message, and other details for relevance to the recipient of your second notification (in our example, it’s the person sending the form).
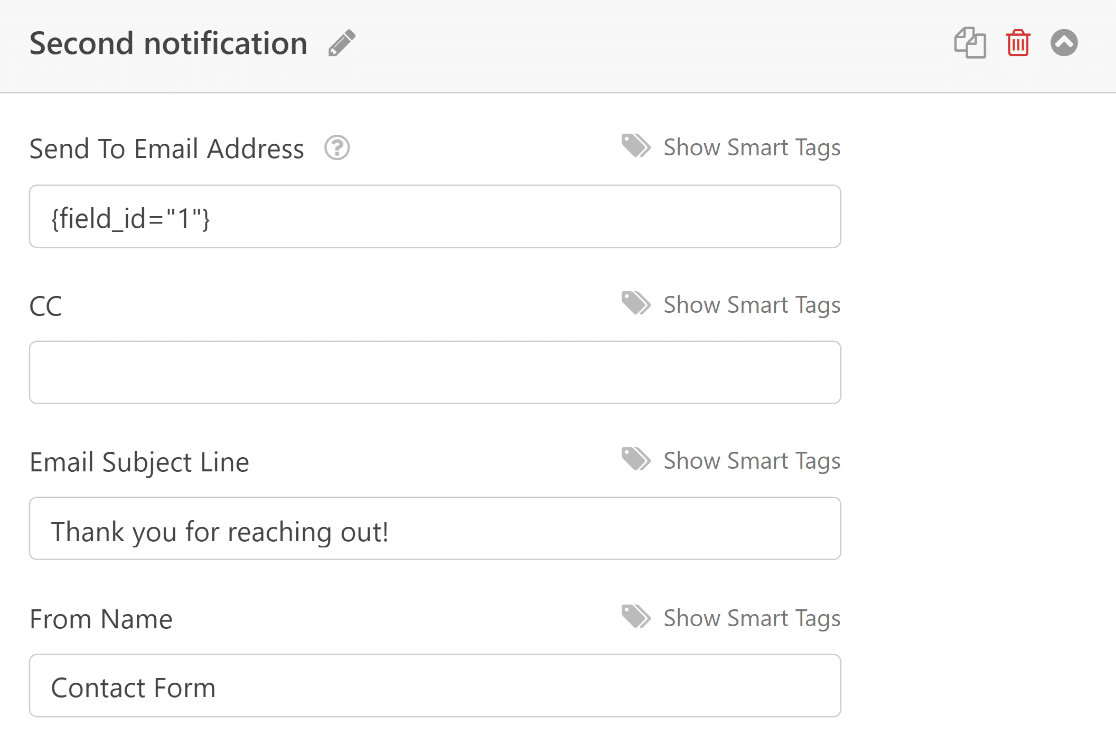
We’re done setting up form notifications with multiple email addresses. But what if you’re facing email deliverability problems? In that case, no one will be able to receive your notifications at all!
In the next step, we’ll show you how to take care of any email problems you might have on your WordPress site.
Configure SMTP to Ensure Notification Deliverability
WordPress emails often fail to send if you’re using the default PHP mail function for outgoing emails.
So you could have the most perfectly customized form notifications but they won’t do you any good if they fail to send.
Thankfully, you can fix most issues with WordPress not sending email using WP Mail SMTP.
Go ahead and install WP Mail SMTP on your site and connect it with your mailer. Our Setup Wizard makes it incredibly easy to connect your WordPress emails with a mailing service provider.
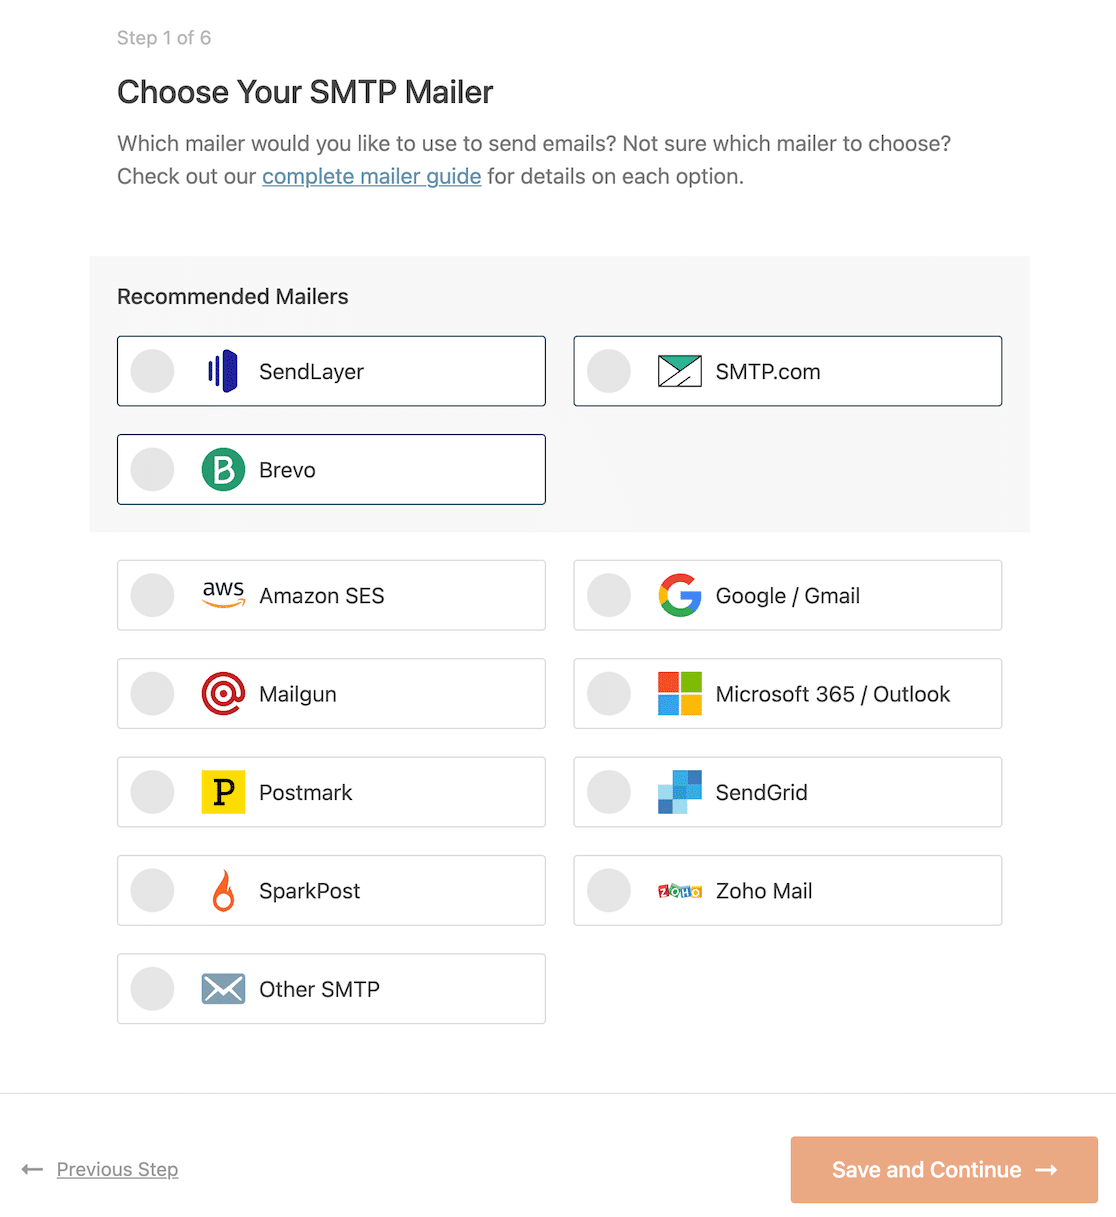
Once you’ve set up WP Mail SMTP on your site, the form notifications we created earlier should start sending without any issues.
We also recommend checking out this guide on setting up emails for authors when their posts are published. This can be really useful if you’re running a multi-author blog.
And that’s it! You can now make a WordPress contact form with multiple email addresses in a variety of different scenarios. Use this ability of WPForms to your advantage to get the most out of form notifications.
Next, Stop Contact Form Spam
WPForms has advanced contact form prevention built into it. See our post on how to stop contact form spam to learn how you can use WPForms to fight spam entries.
Also, don’t forget to check out our detailed guide on password reset email best practices.
Ready to fix your emails? Get started today with the best WordPress SMTP plugin. WP Mail SMTP Elite includes full White Glove Setup and offers a 14-day money-back guarantee.
If this article helped you out, please follow us on Facebook and Twitter for more WordPress tips and tutorials.

