Are you facing a lot of contact form spam in WordPress?
One of the greatest threats to any website using contact forms is the possibility of form abuse and spam.
Thankfully, there are ways to effectively combat contact form spam in WordPress that don’t require you to deal with it manually.
In this post, we’ll walk explain how you can use different techniques to block contact form spam in WordPress.
Why Contact Form Spam Is Dangerous
Contact forms on WordPress have always been easy targets for malicious spam programs. Here are some ways that spambots can harm your site by abusing contact forms:
- Submit harmful links: Spambots with malicious intent can use your contact form to submit links that may contain malware. If any user from your team clicks the link, the malware might infect your whole organization, including your WordPress site.
- Email deliverability issues: Every form submission generates a notification email, so your site can start sending an unusually high volume of emails if your forms are under attack. This can cause unsolicited or bulk email errors to surface on your site.
- Denial of Service (DoS): Some bots are highly efficient at repeatedly filling your forms to their limit. The goal of DoS bots is to overwhelm your website with tons of requests made in a short span of time. This may slow down your site, affect your form functionality for real users, and may even cause a site outage.
- Hacking: Automated brute force attack programs can target sites with user registration and login forms with the goal of hacking users. This is extremely dangerous because it can lead to account takeovers, information leaks, and data losses.
- Productivity losses: If your support staff has to filter through tons of spam entries, it affects their ability to respond to real users quickly. The impact on productivity may hurt your brand reputation and translate to lots of missed opportunities for conversions.
These are some of the ways that spam can cause a lot of trouble for your site.
But the good news is that blocking contact form spam is extremely easy. Below, we’ll show you the best tools and techniques you can use to get rid of contact form spam once and for all.
How to Stop Contact Form Spam in WordPress
To combat contact form spam successfully on your WordPress site, we recommend the following:
- 1. Get a WordPress Form Plugin With Built-in Spam Protection
- 2. Use WPForms Modern Anti-Spam Protection
- 3. Include reCAPTCHA
- 4. Use hCaptcha in Your Form
- 5. Use Cloudflare Turnstile
- 6. Use Custom CAPTCHA
- 7. Enable Country & Keyword Spam Filters
- 8. Block URLs Inside Text Fields
- 9. Use Antispam WordPress Plugins
- 10. Block Email Addresses of Repeat Spammers
- 11. Require Email Verification for New Users
- 12. Blacklist Spammy IP Addresses
Let’s dive into it.
1. Get a WordPress Form Plugin With Built-in Spam Protection
The most important step you can take to prevent contact form spam in WordPress is to use a plugin that has strong built-in spam protection features.
There are a lot of WordPress form plugins out there, but many don’t support reliable anti-spam methods.
For the easiest automated spam prevention built into your contact form, we recommend using WPForms.
WPForms is a form builder that is extremely well-equipped to deal with contact form spam as we’ll show below. It also comes with a variety of other useful features that you can learn more about in our WPForms review.
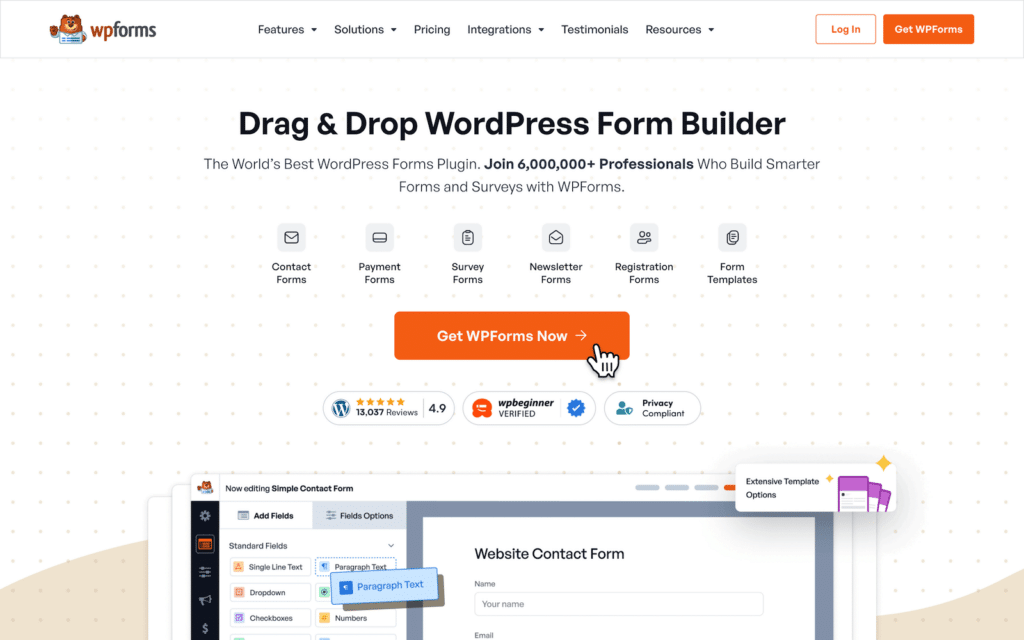
After you install WPForms, go ahead and add a form to a page in WordPress. You can then choose from a number of anti-spam methods available to you.
We’ll start with the easiest yet highly reliable option first.
2. Use WPForms Modern Anti-Spam Protection
WPForms uses a built-in multi-layered approach to detect and prevent spam. It is the easiest way to block contact form spam and is our top recommended reCAPTCHA alternative.
Modern anti-spam protection is enabled by default in WPForms and runs silently in the background to fight spam. You can access the settings for it by navigating to Settings » Spam Protection and Security from your WPForms visual interface.
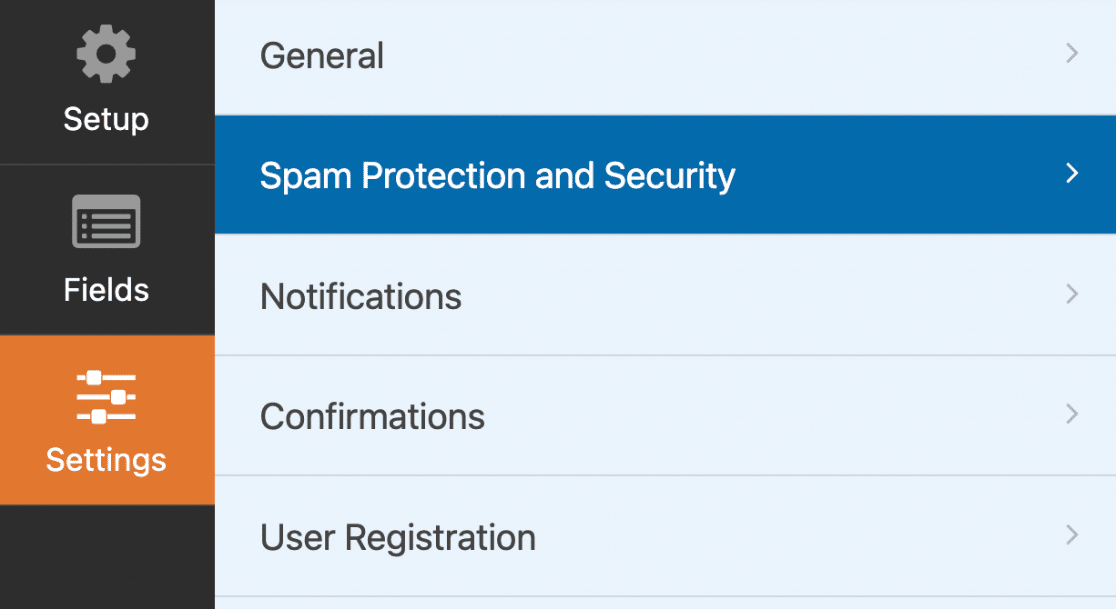
Then, make sure that the toggle button next to Enable modern anti-spam protection is activated.
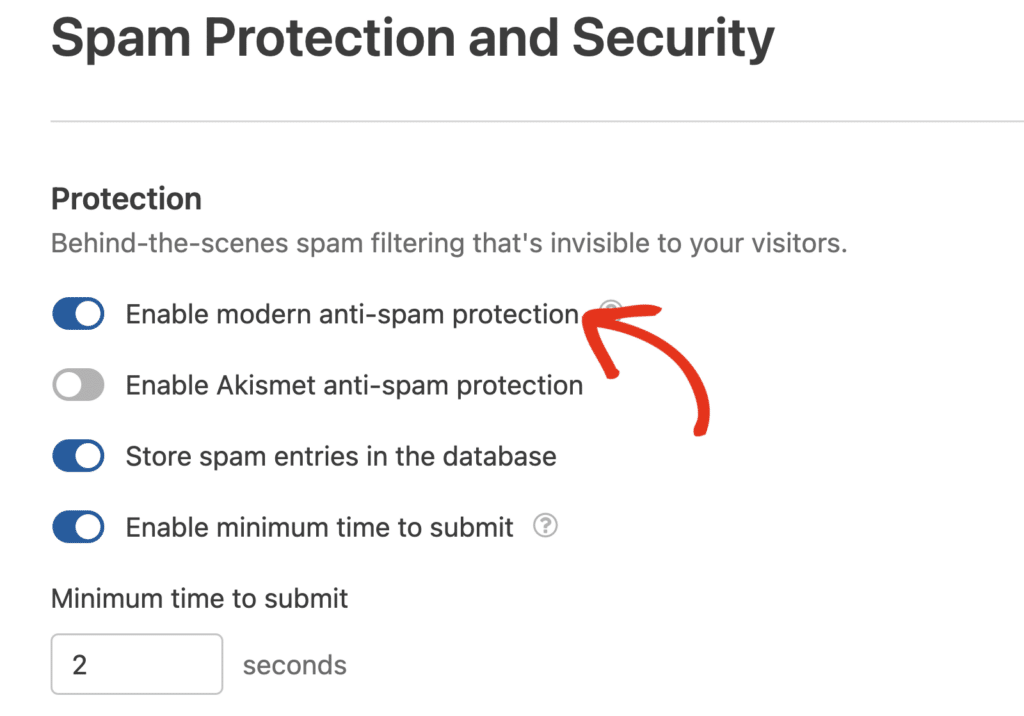
When this setting is activated, it will prevent a form from being submitted when a spam bot triggers the spam protection.
You also have the option to store spam entries in your WordPress database to review submissions and easily recover any false-positive entries.
The Enable minimum time to submit option is also enabled by default and set to 2 seconds. But you can change this minimum time to any value you like. This setting helps to prevent bots from submitting your form as it will prevent submissions before the usual time it would take a human to fill out the form.
The WPForms anti-spam protection is by far the best spam-blocking technique because it’s more privacy-friendly than others and provides the best user experience.
3. Include reCAPTCHA
WPForms also supports third-party spam prevention tools like Google’s reCAPTCHA. This is a very powerful method of spam protection, but setting it up takes a bit longer than simply enabling modern anti-spam protection as shown in the previous step.
You can watch the video to see a demo of the process or keep reading for step-by-step instructions.
Currently, there are 3 different types reCAPTCHA:
- Checkbox reCAPTCHA v2: This reCAPTCHA version has a checkbox that a user must click to verify that they’re not a bot. If user activity seems suspicious, it might ask you to do a small image verification test to confirm that you’re a real user.
- Invisible reCAPTCHA v2: With invisible reCAPTCHA, users don’t see a checkbox at all. Rather, this reCAPTCHA service analyzes user behavior to identify and block bots.
- reCAPTCHA v3: Although both services above may occasionally show an image challenge, reCAPTCHA v3 works completely silently in the background. It’s an advanced spam prevention tool but it can be a little too sensitive and block human users sometimes.
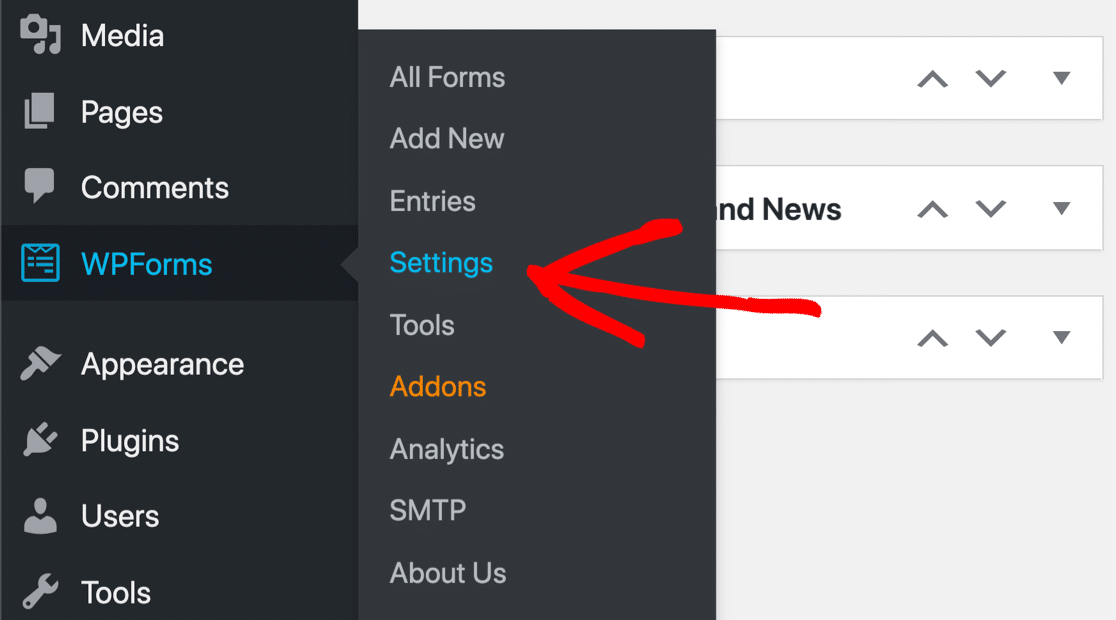
To add reCAPTCHA to your form, open your WordPress admin area and go to WPForms » Settings.
Click on the CAPTCHA tab on the horizontal bar below the WPForms logo.

This page will show the available CAPTCHA options in WPForms. Select reCAPTCHA.
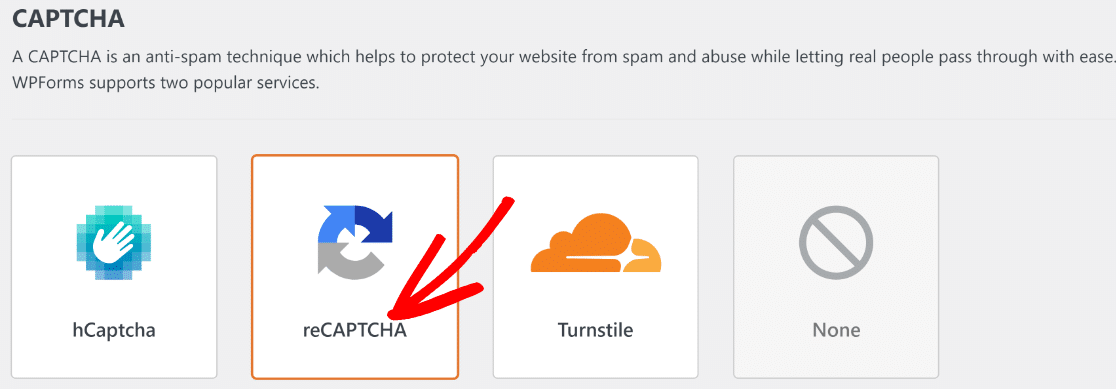
Now, select the reCAPTCHA version that you’d like to set up. We recommend Invisible reCAPTCHA v2 for its user-friendliness, but you can decide on other options as well.

To configure reCAPTCHA, you’ll now have to visit the reCAPTCHA site on a new browser tab and click on Admin Console.
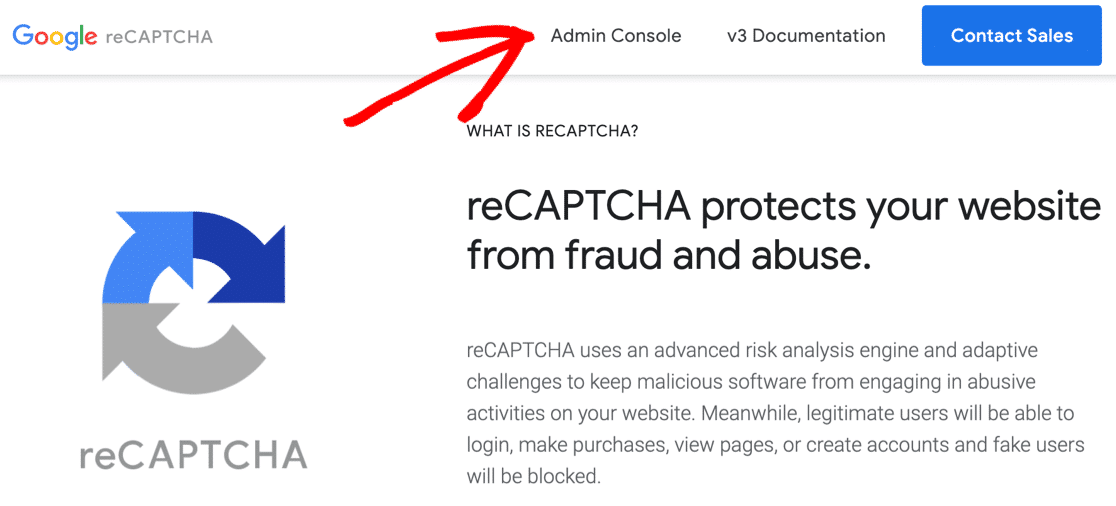
If prompted, sign in to your Google account now. After logging in, you’ll have to provide your site’s domain name to register it and select your preferred reCAPTCHA under the reCAPTCHA type section.
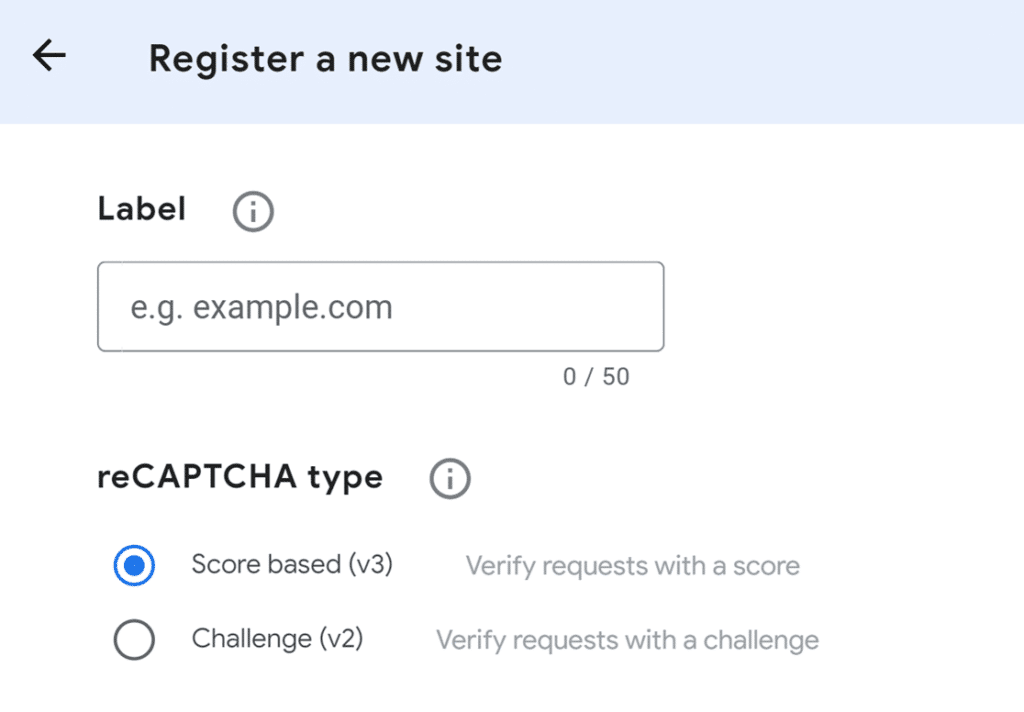
Next, enter your website’s domain name under Domains. Make sure to only type the part that comes after https:// in your URL.

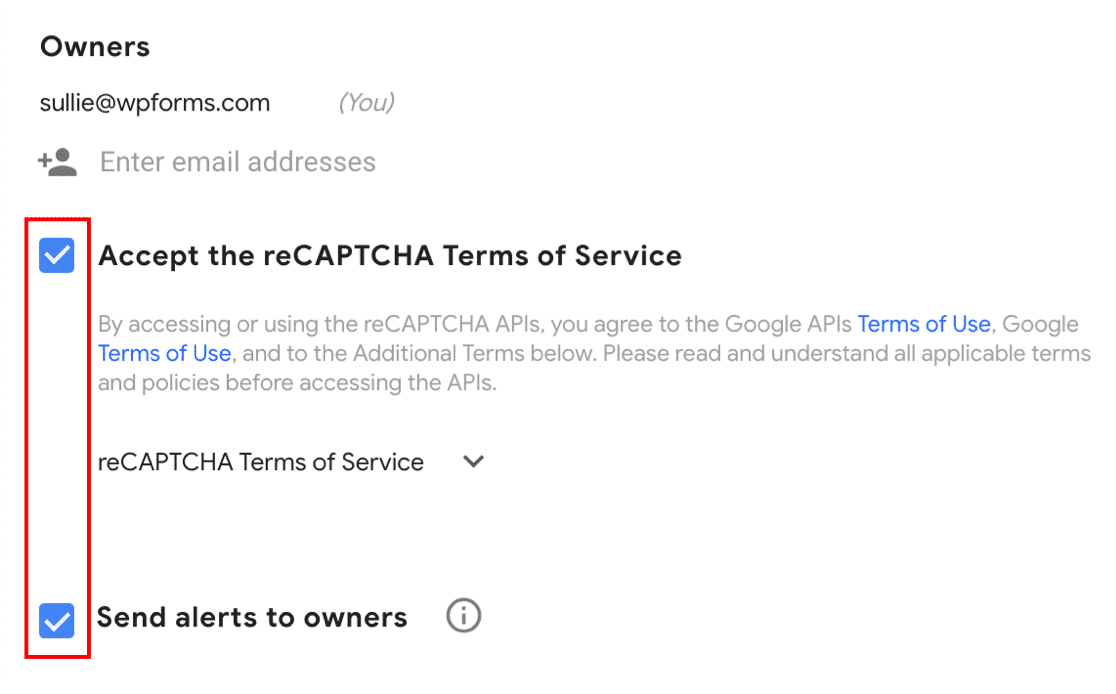
Then, accept the reCAPTCHA Terms of Service and checkmark alerts if you’d like to receive notifications.
Click on Submit to save the settings. You’ll now see a message saying that your domain has been registered, with a site key and secret key underneath.
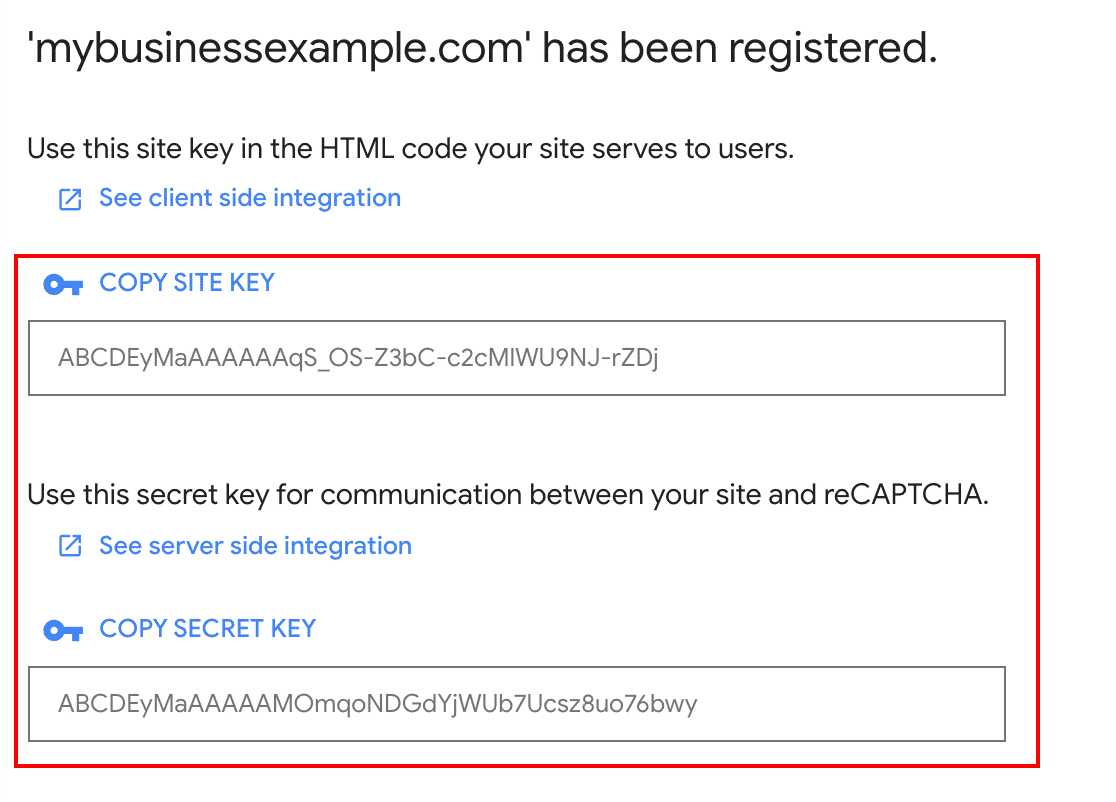
Switch to the browser tab where you have the WPForms » Settings page open and copy and paste the reCAPTCHA site and secret keys in the corresponding fields.

Press the Save Settings button to finish your reCAPTCHA setup.
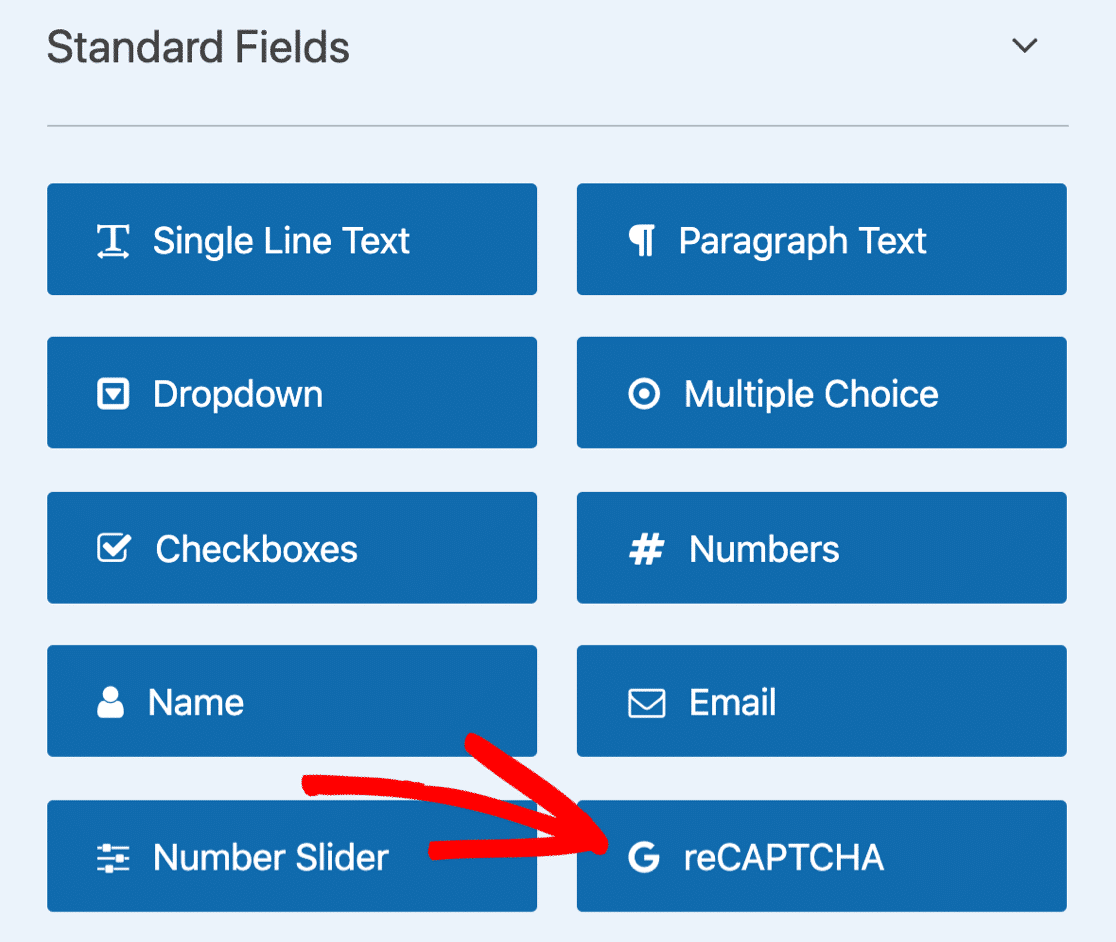
To add the reCAPTCHA field to your form, simply use the WPForms drag and drop interface to place the field onto your form.
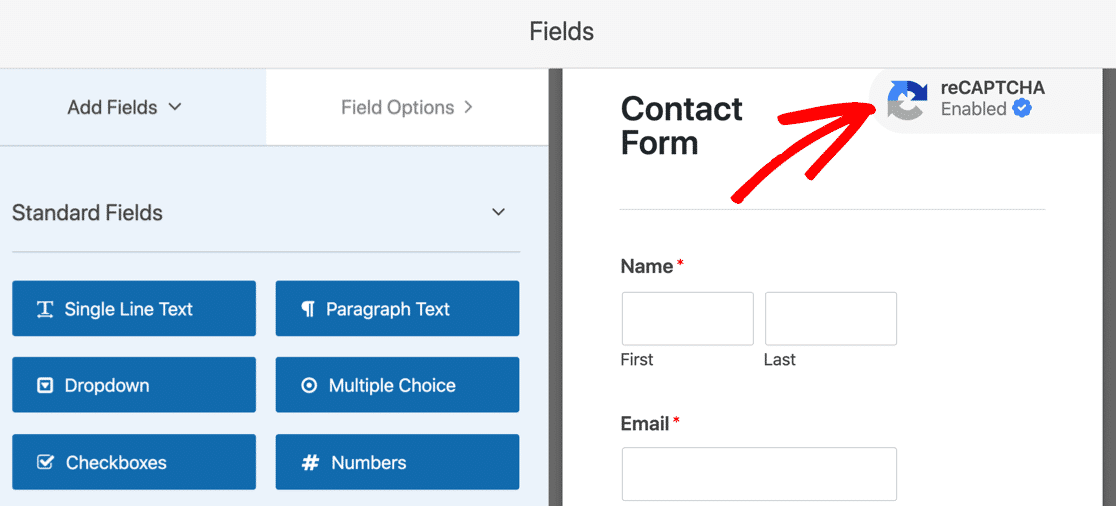
Your form will now display a reCAPTCHA badge on the frontend, indicating that you’ve successfully added the reCAPTCHA spam prevention to your form.
Next, we’ll look at another popular spam prevention service.
4. Use hCaptcha in Your Form
hCaptcha is very similar to Google’s reCAPTCHA, but it’s a more privacy-friendly spam blocking service. You can watch the video to walk you through the process or continue with the written instructions below.
To connect hCaptcha service with WPForms, head over to WPForms » Settings from your WordPress dashboard.

On the settings page, click on the CAPTCHA tab located on the horizontal bar.

Select hCaptcha from the available options.
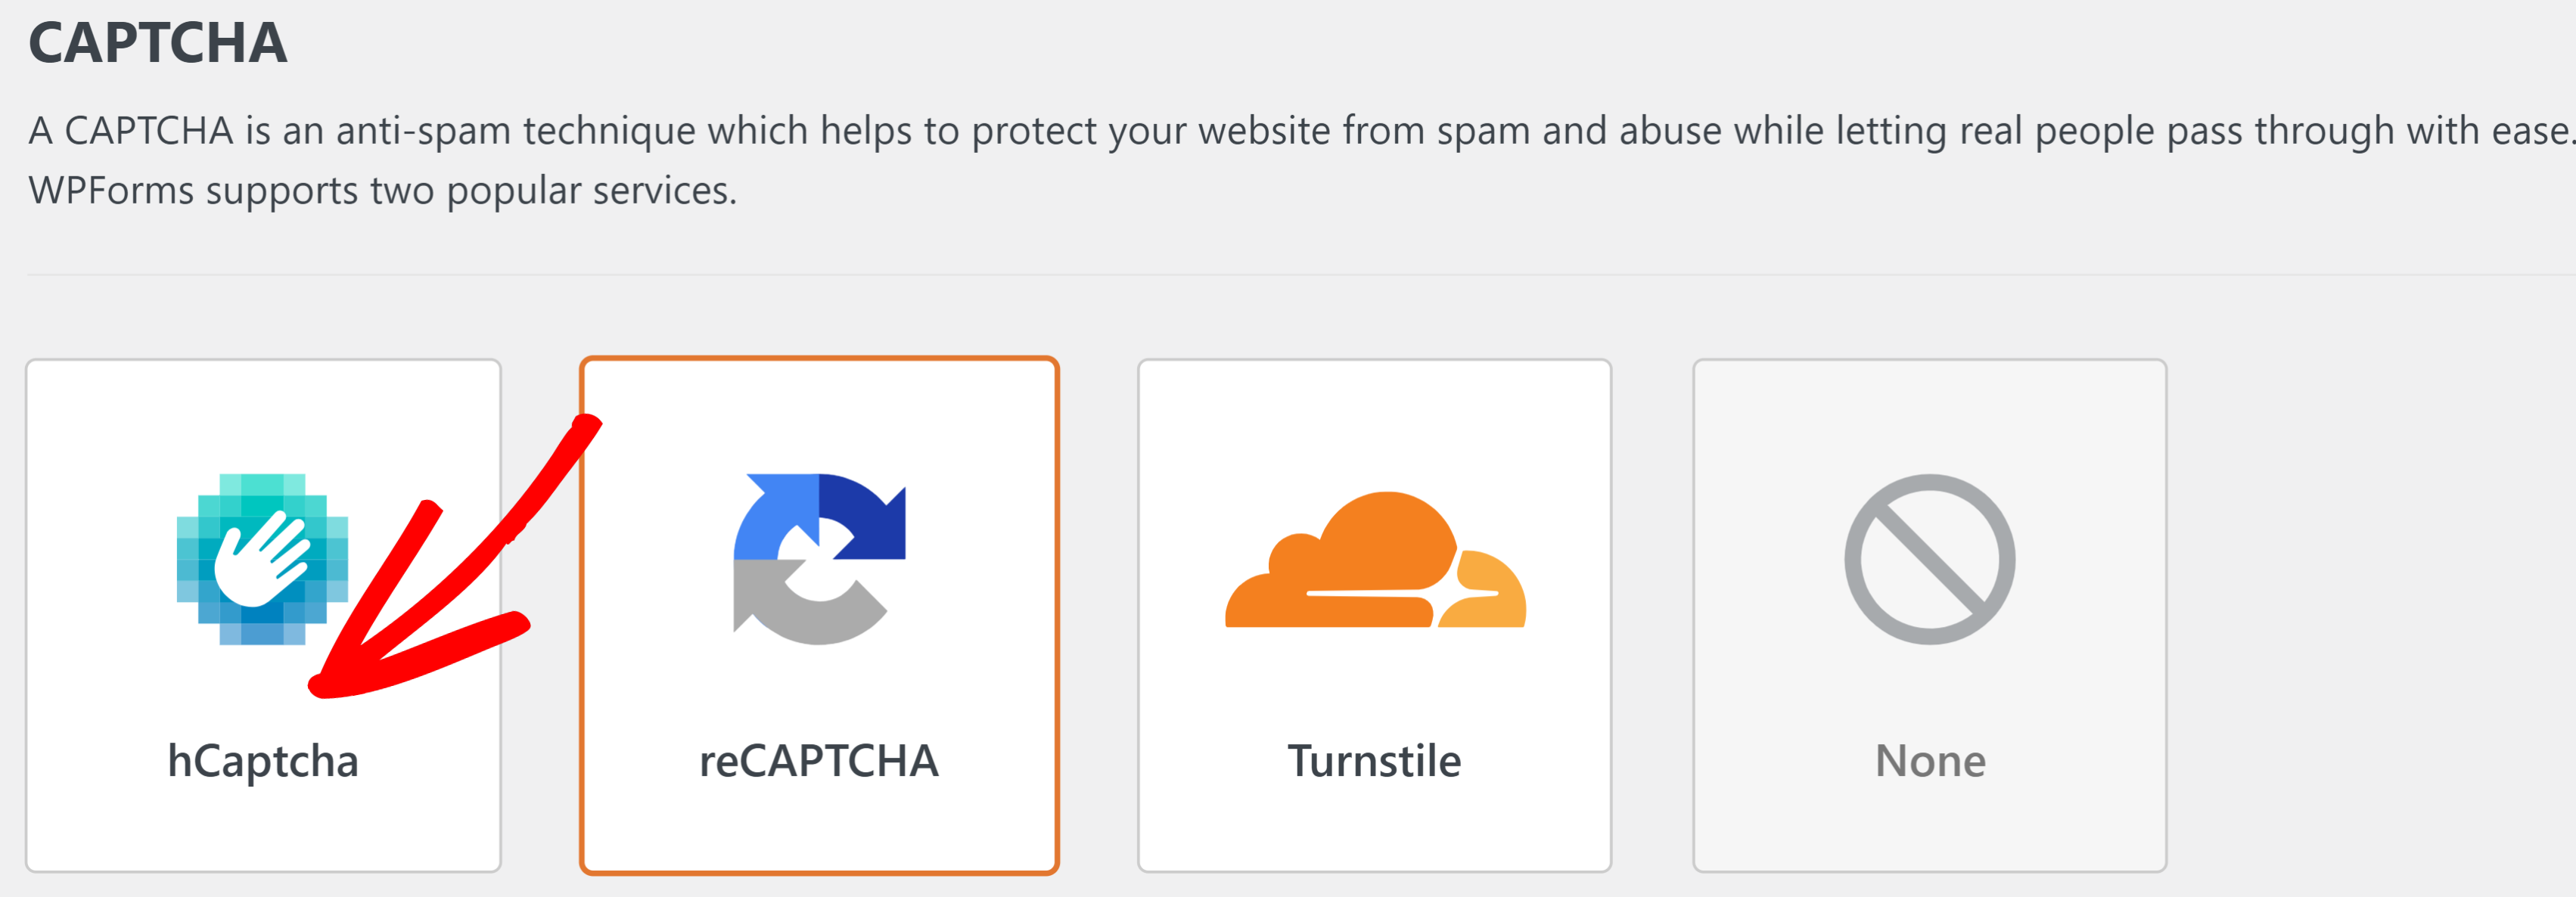
As before, switch to a new browser tab and visit hCaptcha to sign up with the service.

On the next screen, choose a hCaptcha plan. The free plan works perfectly well for small sites, so we’re going to work with that for this tutorial
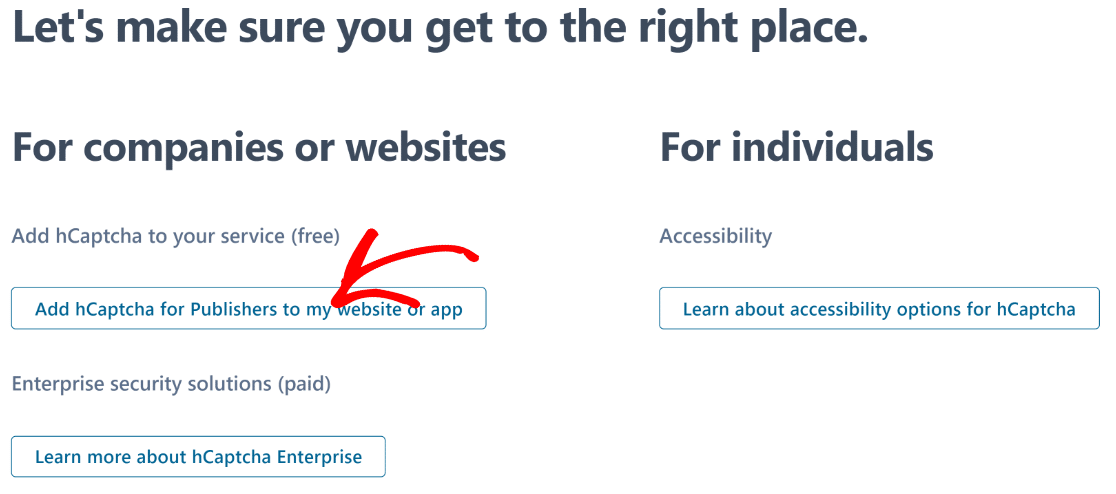
After you’ve selected your plan, go ahead and fill out the form to create your hCaptcha account.

When you’ve finished the sign up process and logged into your dashboard, click on New Site button to proceed.

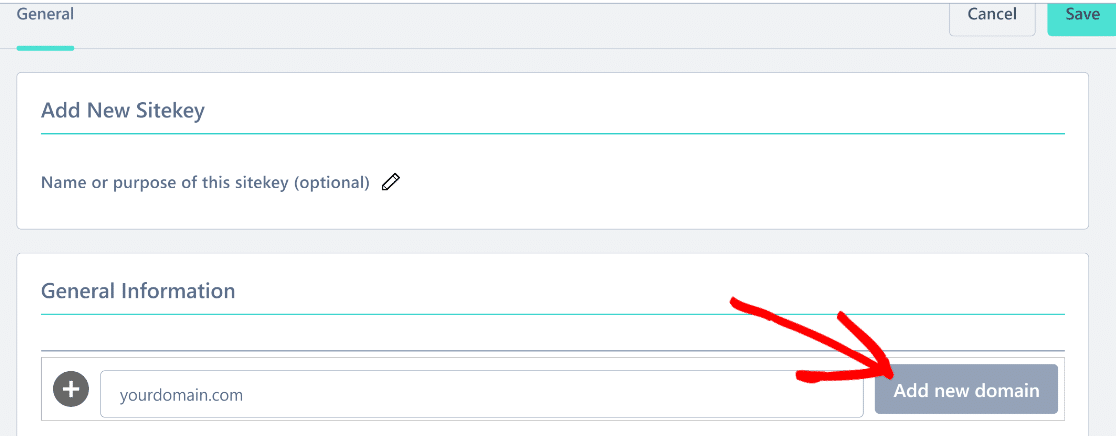
At the top, you can enter a name for your hCpatcha sitekey. Then scroll down to the General Information section and enter the name of your domain. Press Add New Domain when you’re done.
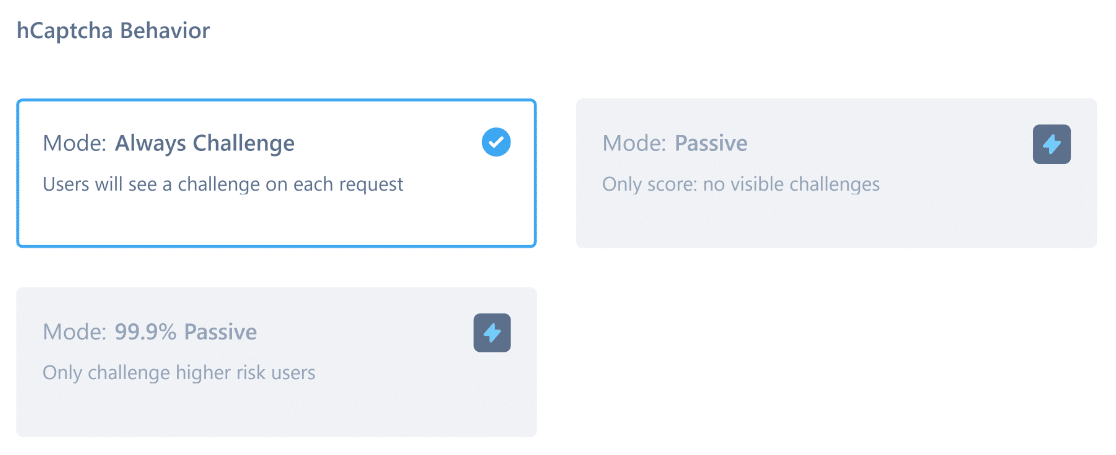
Scroll down below to find the hCaptchab behavior modes. You can choose from different modes depending on whether you want users to always be presented with a challenge or keep your captcha more passive.
Next, scroll down again to the Passing Threshold section. Here, you can set the difficulty level of the captcha challenges.

In most cases, the Moderate level of difficulty is reasonably effective at spam prevention without compromising user experience (you can always change this later if needed).
Now, scroll back to the top and press Save.
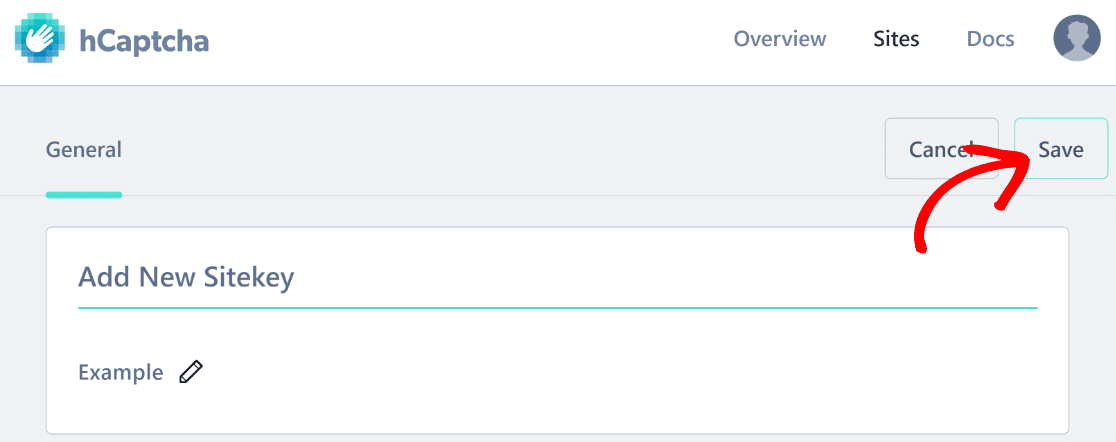
You’ll now be taken to the next page, where you’ll find your added sites listed. Click on the Settings button next to the domain that you just added.

Inside the settings, scroll down to the Sitekey and Copy it.

Paste your Sitekey to a text editor like Notepad for now. We’ll need this soon.
When you’ve done that, click on your profile icon at the top-right and select Settings.
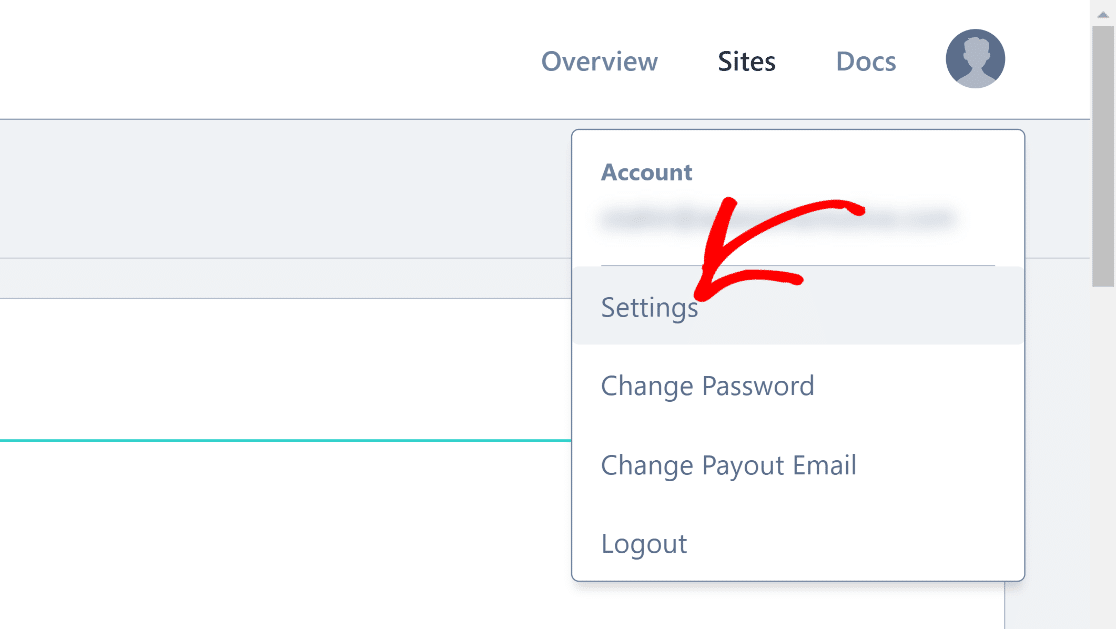
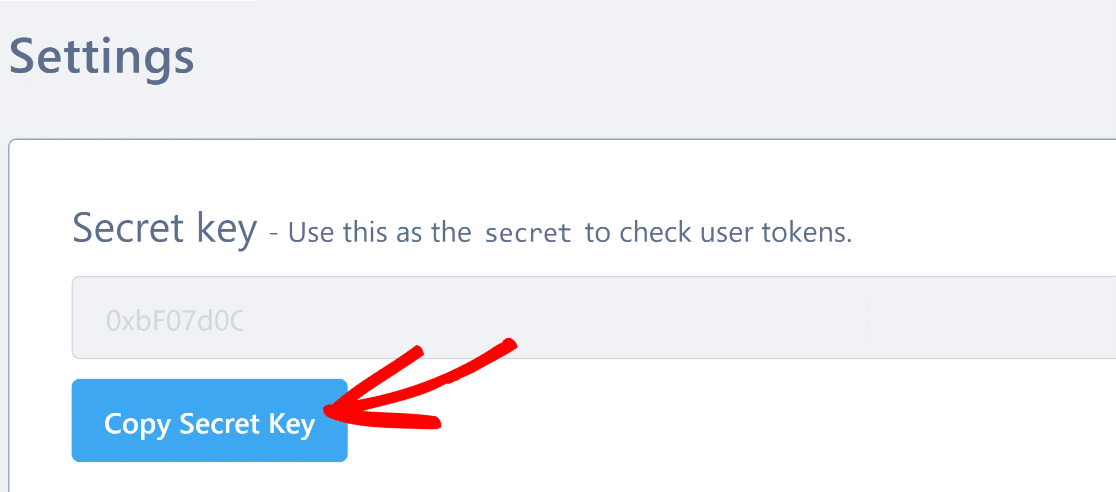
You’ll find your Secret Key here. Click on the Copy Secret Key button.
Great! Now that you have both your Site Key and your Secret Key, return to the WPForms hCpatcha settings page and paste your keys in the appropriate fields.
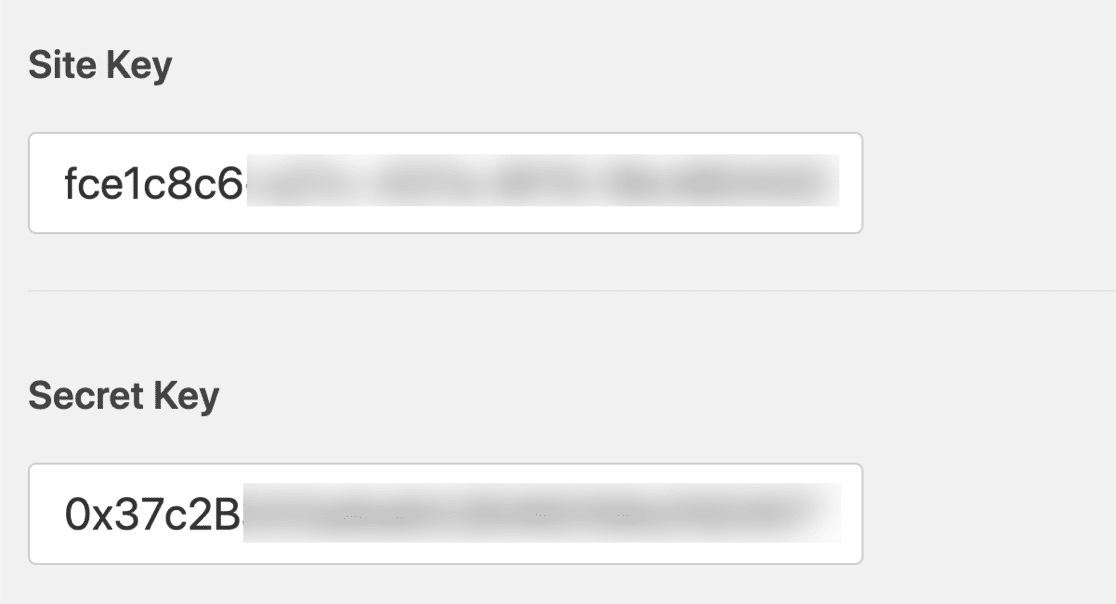
Then, click on Save to complete hCaptcha setup for WPForms.
Now, you can use the hCaptcha field when building your form using WPForms.
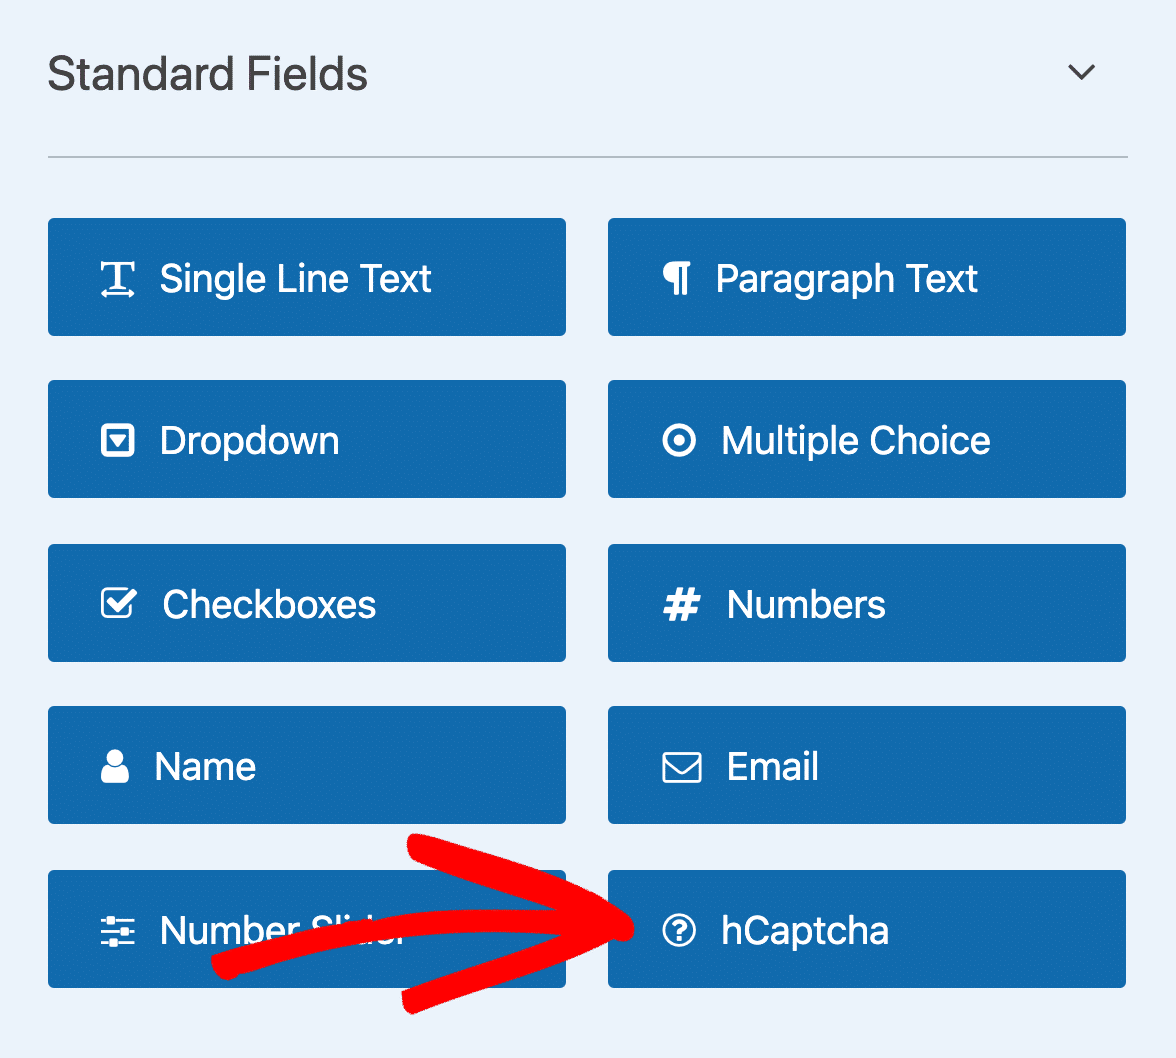
You should see the hCaptcha badge on the top of your form when it’s successfully added to it.
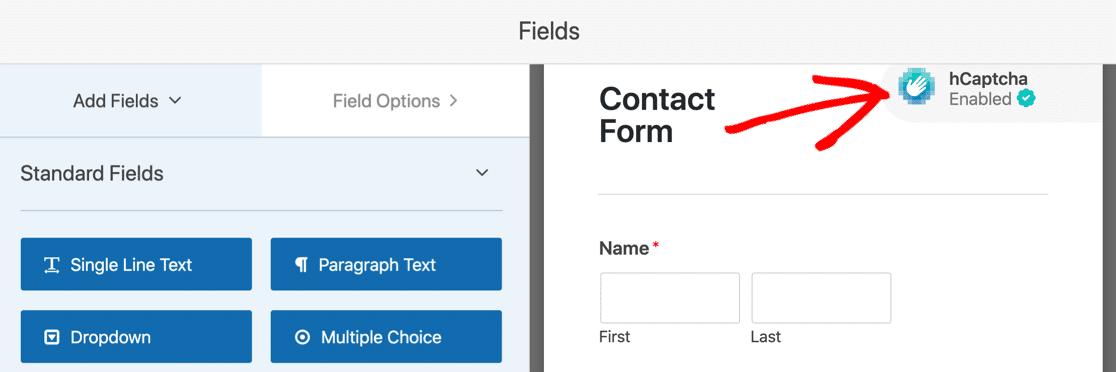
Congratulations! Your form is now protected from spam by hCaptcha. If you’d like more detailed instructions, take a look at our guide to adding CAPTCHA to your contact form using hCaptcha.
5. Use Cloudflare Turnstile
Cloudflare Turnstile is a free, privacy‑first alternative to Google reCAPTCHA and hCaptcha. It can run completely invisibly, so your visitors never have to solve a puzzle.
Watch the video or follow the steps below to add it to any WPForms form:
To get started, in your WordPress dashboard go to WPForms » Settings » CAPTCHA and pick Turnstile from the list of providers.
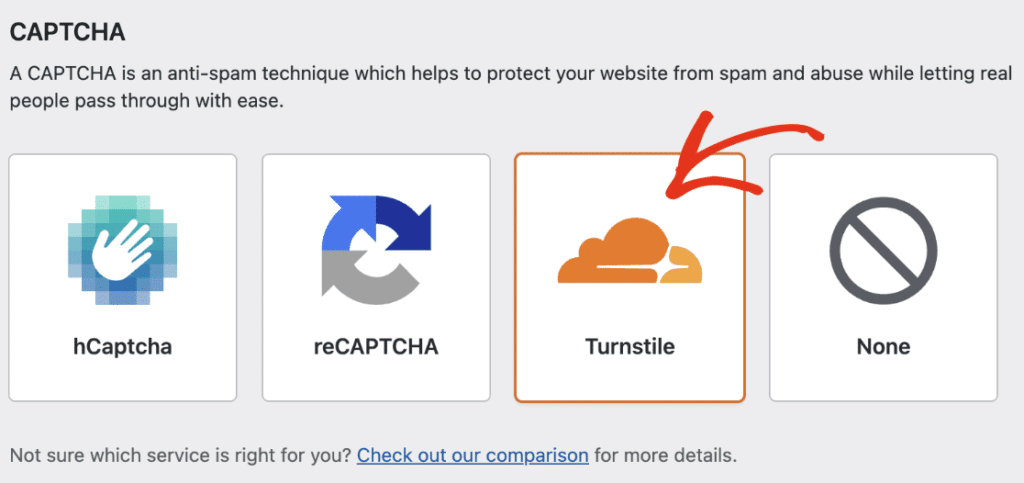
A pair of empty key fields will appear. Now, open a new tab, sign in to your Cloudflare account and select Turnstile » Add site.
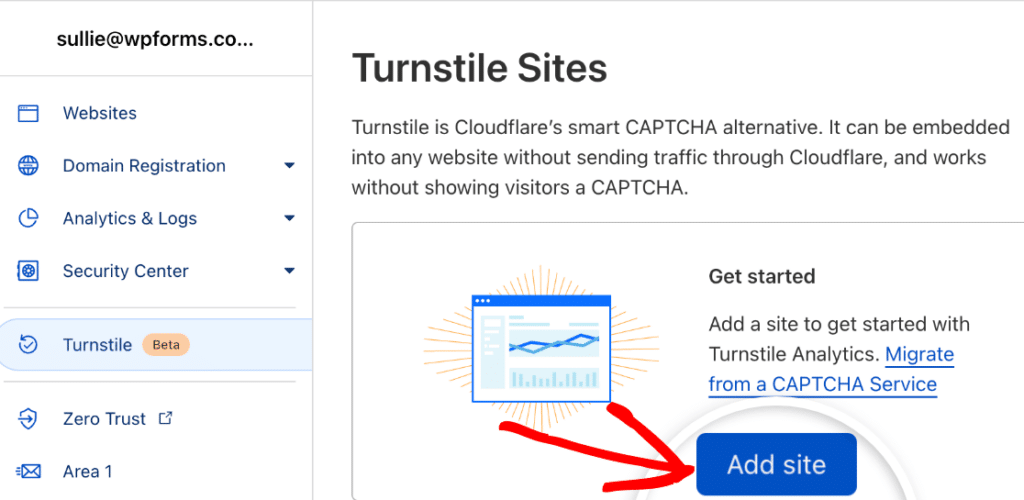
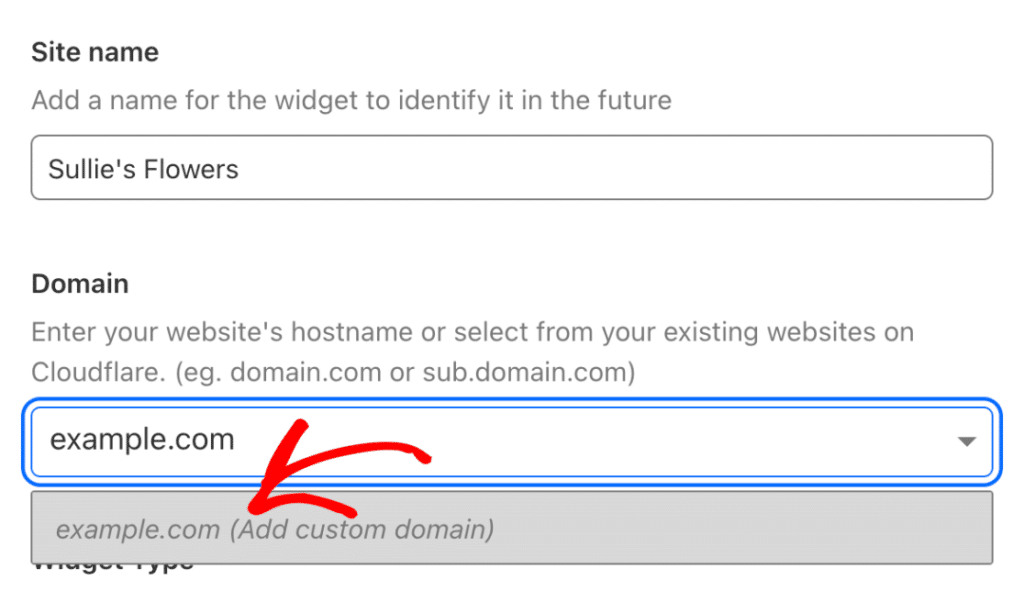
Enter a name and your site’s domain in the appropriate fields.
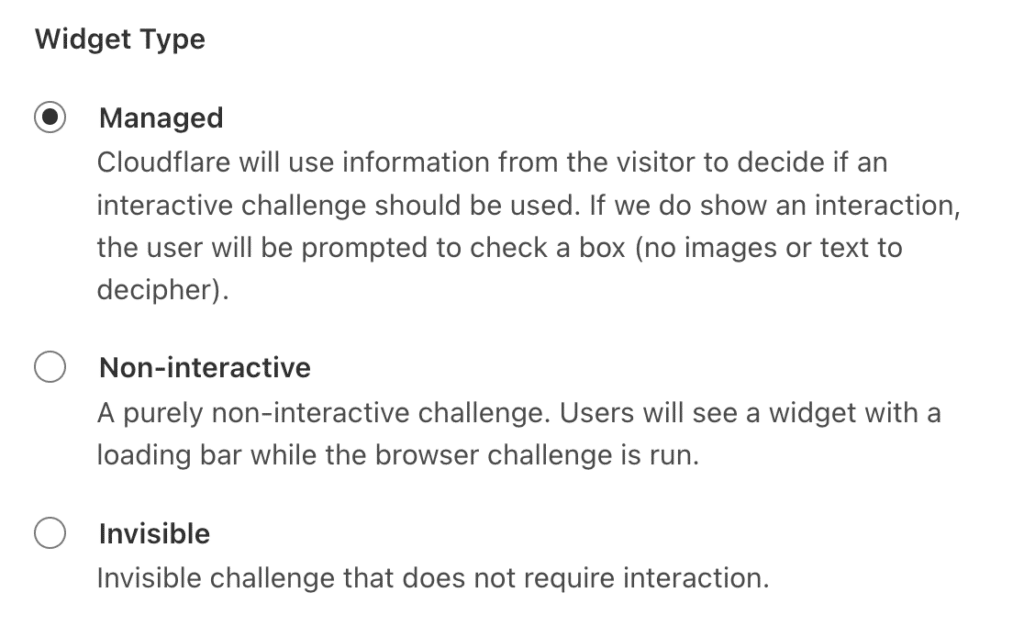
Next, choose a widget type ( Managed works for most sites).
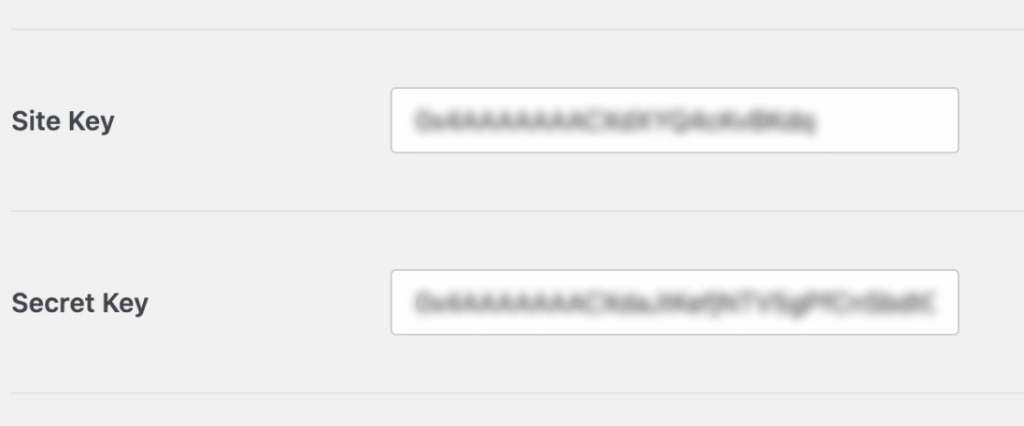
Now, click Create to reveal your Site Key and Secret Key.
Copy the Site Key and Secret Key from Cloudflare into the matching fields back in WPForms Settings.
If you want, you can change the fail message that displays when a user tries to submit the form without completing the Cloudflare Turnstile verification challenge. You can also choose the style of the widget (pick a Light / Dark / Auto theme) and optionally enable No‑Conflict Mode if another plugin or theme also loads Turnstile. Click Save Settings.
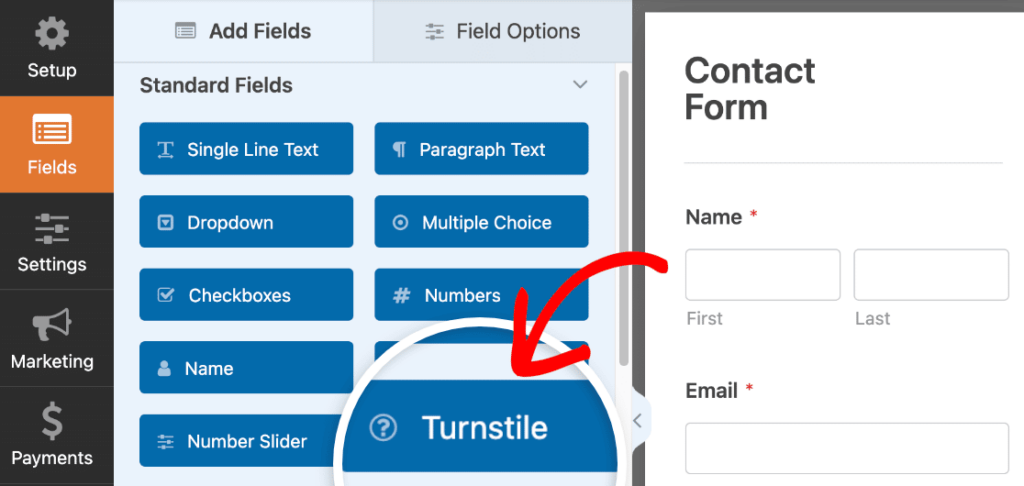
You can now enable Cloudflare Turnstile on any form. Open any form in the builder. Either drag the Turnstile field onto your form or go to Settings » Spam Protection and Security and toggle Enable Cloudflare Turnstile.
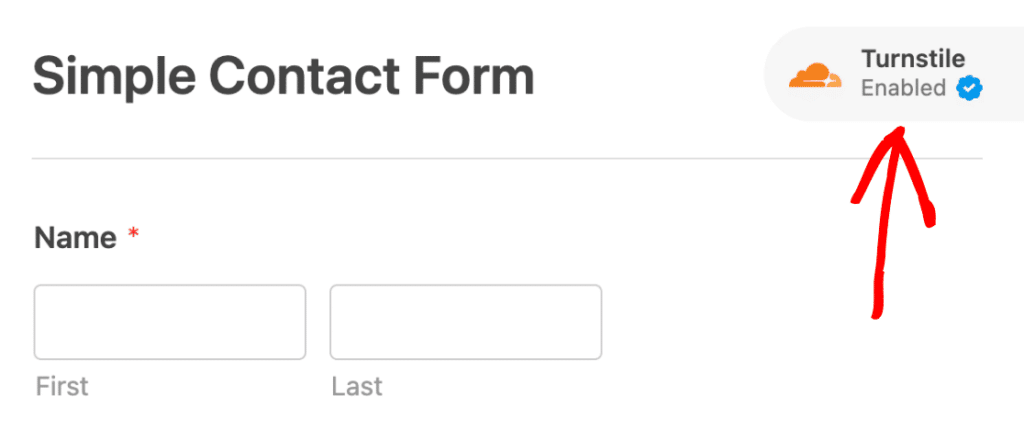
A small Turnstile badge in the corner confirms it’s active.
6. Use Custom CAPTCHA
We’re big fans of custom CAPTCHA because it’s very effective and doesn’t require image-based challenges that can sometimes be a bit tricky for real users.
WPForms Pro users can get the Custom CAPTCHA addon to include simple math-based quizzes or a custom question and answer in your forms for spam prevention.
To set up Custom CAPTCHA, launch the form builder interface.
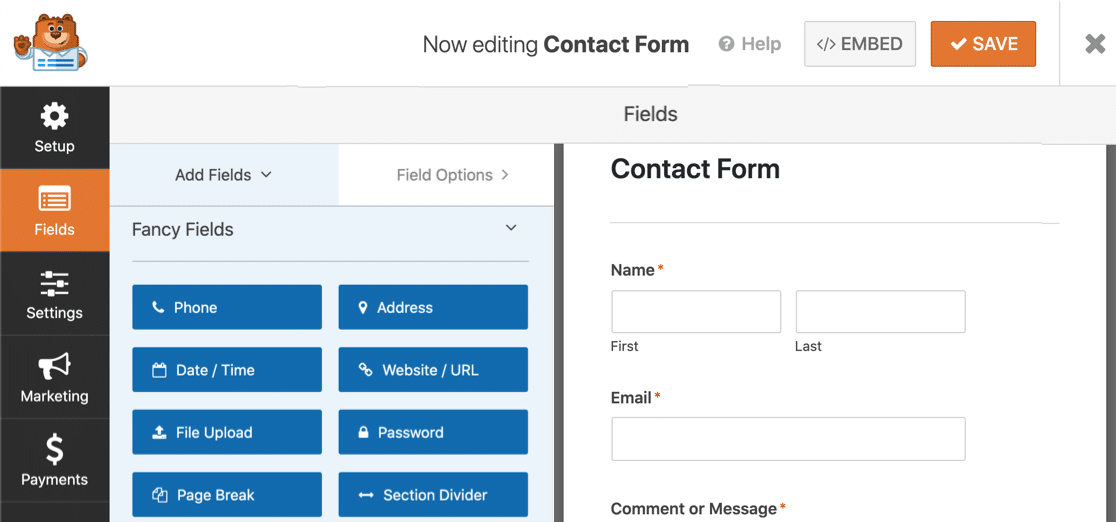
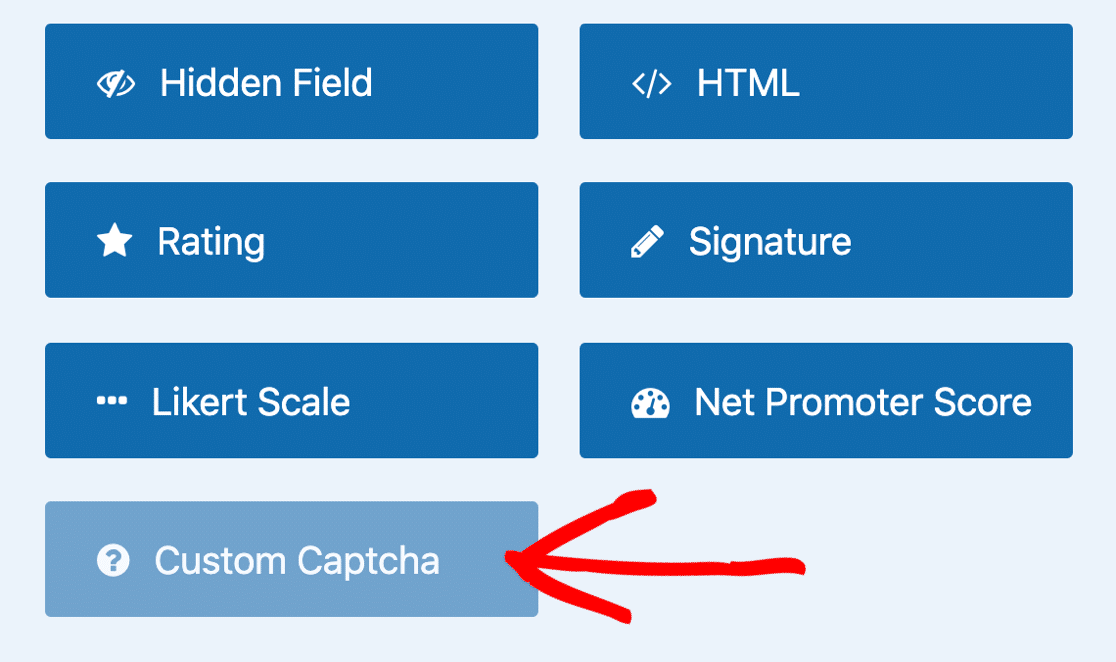
Then, find the Custom CAPTCHA field under the Fancy Fields section. If you don’t have the Custom CAPTCHA addon yet, this field will be semi transparent. Click on it and you’ll be prompted to install the addon.
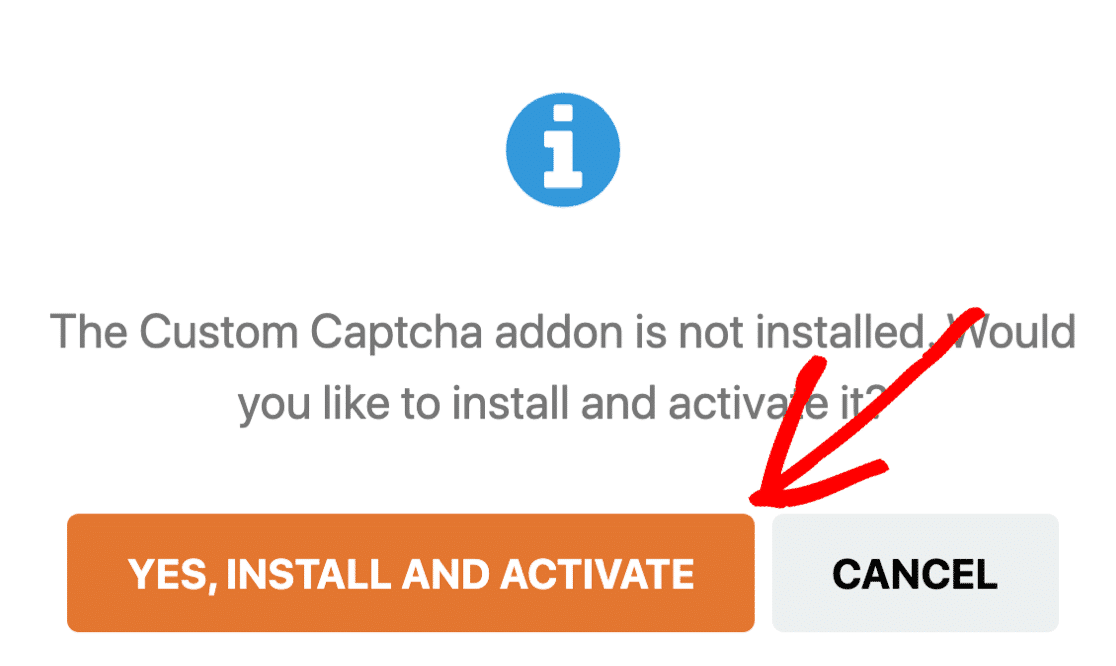
When a popup appears, click on Yes, Install and Activate to proceed.
The installation will take only 2-5 seconds to complete. The popup will display a success message once the Custom CAPTCHA addon is active. Click Yes, Save and Refresh to continue.
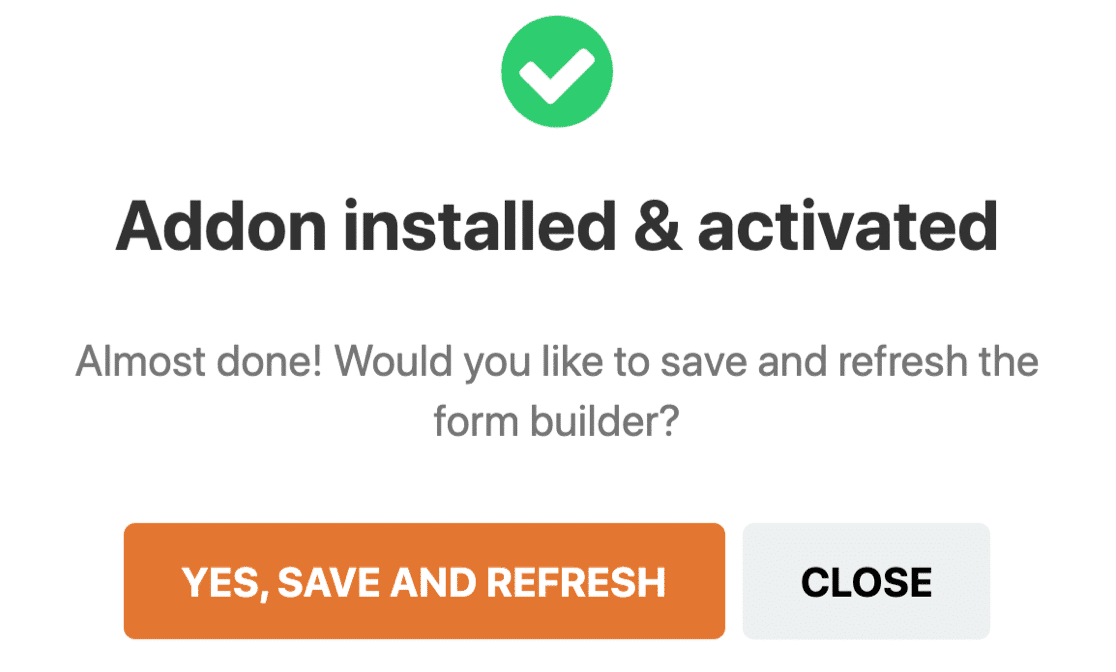
Now, drag and drop the Custom CAPTCHA field into your form. Click on the field once it’s added to your form to access its settings.
Here, you can select the type of CAPTCHA (math or custom question and answer) and add a description.
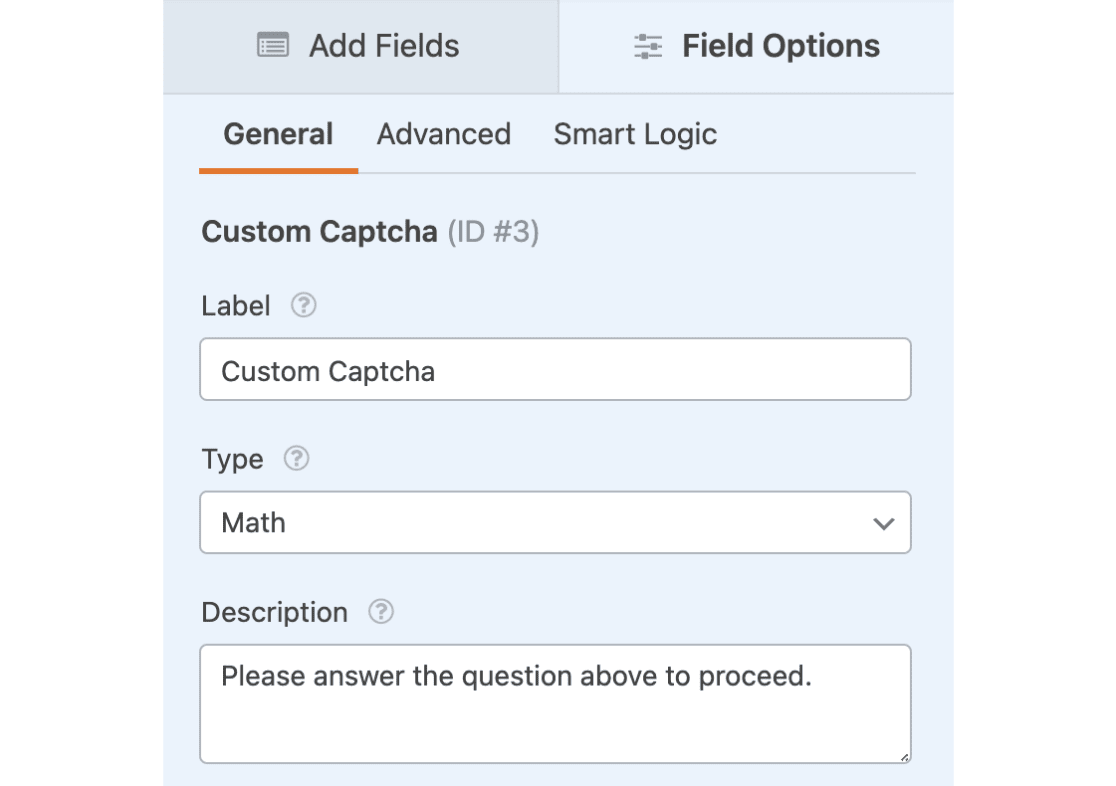
If you choose Math, WPForms will automatically generate a simple arithmetic question that users must answer correctly. Spambots can’t answer these math questions, which is why this Custom CAPTCHA is a very effective contact form spam prevention technique.
Alternatively, you may choose Question and Answer as your CAPTCHA type. This allows you to create a question and set its correct answer.

You can add multiple questions by using the blue (+) icon next to the question field in settings.
Make sure to Save your form after you’re done making changes.
7. Enable Country & Keyword Spam Filters
WPForms lets you block submissions from specific countries or reject any entry that contains words you know are spammy.
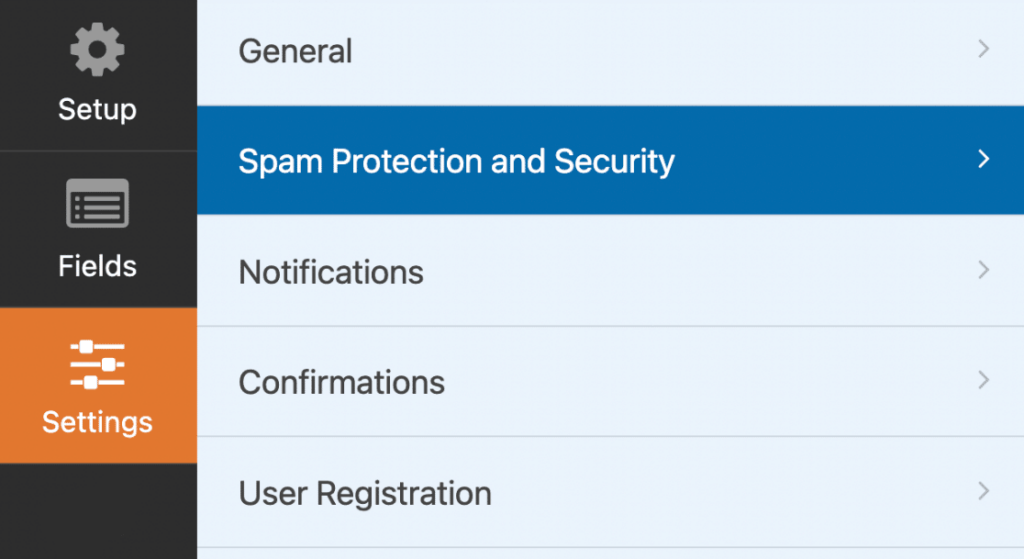
To turn these filters on for any form, open your form in the builder and click Settings » Spam Protection and Security.
Scroll to Filtering and toggle on Enable Country Filter or Enable Keyword Filter.
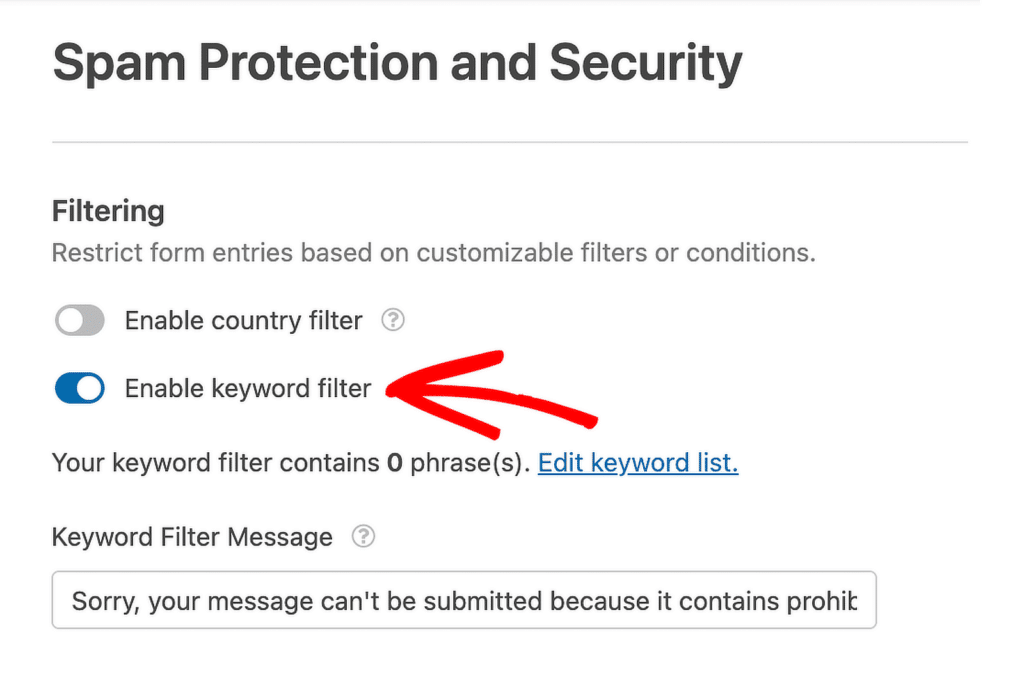
Use the dropdown to choose Allow or Deny for selected countries or add blocked keywords line‑by‑line.
Any blocked attempt is stopped before it reaches your inbox, so legitimate users never see an error message.
8. Block URLs Inside Text Fields
Many spambots are designed to distribute phishing links through contact forms. Sometimes, there may even be a real person submitting malicious links using your forms. As you know, CAPTCHA and form tokens can’t stop a real human spammer.
So if you’re receiving suspicious links through your form, you might want to block URL submissions in your form fields entirely.
You can block URLs in your form fields by adding a PHP script. If you want to learn about adding code snippets to your forms, see this tutorial on adding custom PHP for WPForms.
Use the code snippet below to block URLs within the Single Line Text and Paragraph Text fields of your form.
When you have added the above code to your form, WPForms will display a “No URLs allowed” error if a user tries to submit a link into your text fields.
9. Use Antispam WordPress Plugins
There are several powerful antispam plugins available for WordPress. Most of these plugins work by scanning databases of known spam content including patterns of words that appear repeatedly in spam, common links, email addresses, and even IP addresses of users and bots.
Some popular WordPress antispam tools are Akismet and Jetpack. Remember that these plugins operate across your whole site, so they’ll not only limit contact form spam but also reduce spam comments on your blog.
We’d particularly recommend Akismet, as WPForms comes with a native Akismet integration. When enabled, this integration is an excellent way of filtering contact form spam in WordPress.
Using these spam prevention WordPress plugins along with other techniques that we’ve shown above is a great combination for enhancing your overall site security.
10. Block Email Addresses of Repeat Spammers
The email address field can be quite handy when it comes to filtering human spammers. Since human spammers can easily bypass CAPTCHA and form tokens, you need extra safeguards to block them.
In cases where a website is frequently receiving spam from similar email addresses, blocking suspect email addresses is the way to go.
To block an email address, click on the Email field in WPForms. Then, select the Advanced tab on the left-hand pane.
Scroll down and click on the Allowlist / Denylist dropdown, then select Denylist.

Now you can add email addresses that you want to block submissions from in the box under the Denylist option. You can enter multiple email addresses separated by commas.
You can use an asterisk * to block email addresses with a partial match.
For instance, using an asterisk before an email domain (such as *@domain.com) will restrict all email addresses at that domain from submitting entries.
Or you can also block an email address starting with a particular username by putting an asterisk after it (such as example*).
These rules are great when you’re receiving spam from email addresses at the same domain or username.
Make sure to Save your form after building your blocklist.
11. Require Email Verification for New Users
Real spammers and bots can use fake emails to try and sign up to your site (assuming that you allow users to register). An easy way to discourage spammers from signing up with fake emails is by requiring email verification, which is an extra step that spammers don’t have the patience for.
WPForms allows you to set up email verification before a new user can register their account.
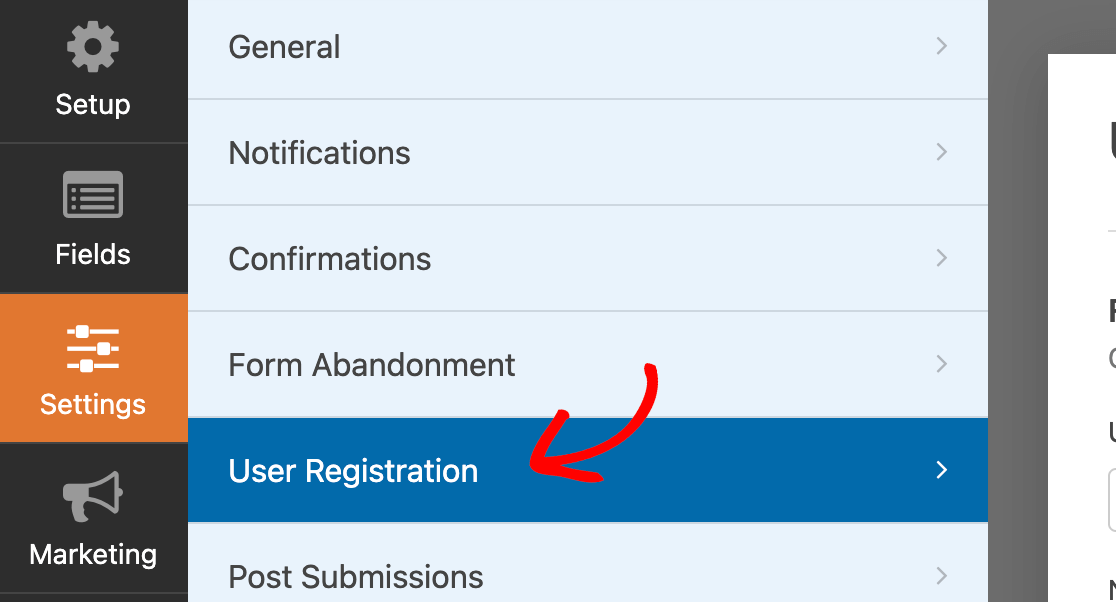
To add email verification, click on Settings » User Registration from the left-hand pane within the WPForms interface.
Note: You’ll need the User Registration addon for WPForms to access these settings. If you don’t have it, see how to create a user registration form.
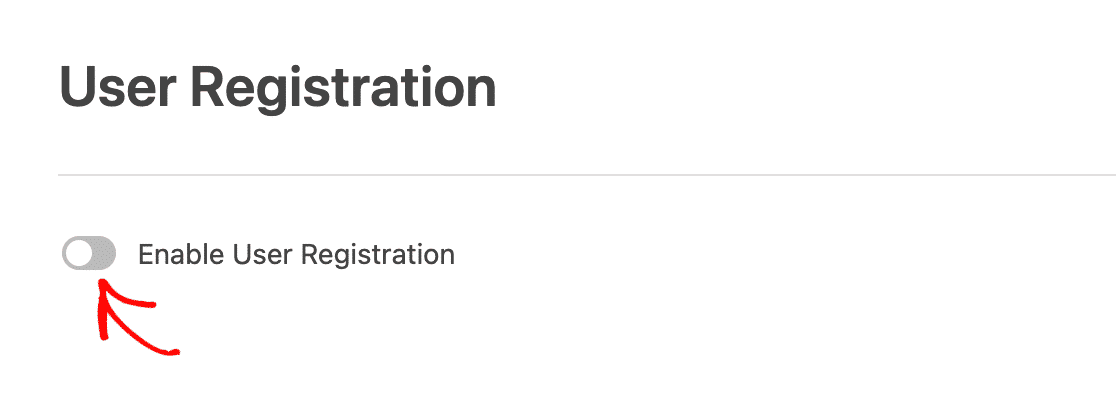
Then, click on Enable User Registration.
Activate the Enable User Activation toggle button.
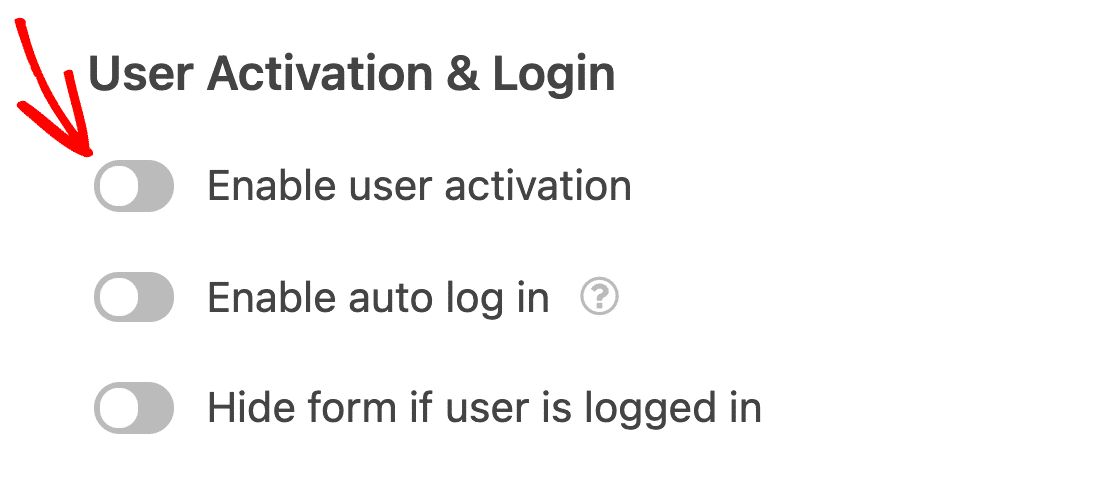
This will expand a new menu where you can select your activation type as User Email.
Now, whenever a user tries to register their account on their site, they will have to provide a valid email address to receive a registration link at. Meaning no spam from users with fake emails!
12. Blacklist Spammy IP Addresses
Blocking the IP addresses of spammers is not as efficient as other methods on this list because it’s easy to spoof an IP address using proxies and VPN services.
But if you notice a pattern of repeat spammers returning to your site, you can block their IP address to deny them access to your entire WordPress site.
To restrict users by IP address, go to Settings » Discussion from your WordPress dashboard, and enter the IP addresses that you want to block in the Disallowed Comment Keys box. If you have multiple IP addresses to block, make sure to add each IP address in a new line.

But how are you going to find IP addresses of spammers in the first place? For this, you’ll need to add the {user_ip} smart tag in your WPForms email notifications content.
Now, when you receive an email notification for a form submission, it will include their IP address within the email content.
If you notice that spam entries are coming from similar IP addresses, simply note them down and add them to the WordPress IP blocklist as shown above.
In case WPForms is not sending emails for you, we have a dedicated guide with troubleshooting steps.
And that’s all we have for you today! We hope this guide helped you learn useful tips for stopping contact from spam in WordPress.
Next, Apply Password Reset Email Best Practices
If you have a password reset form on your site, you’ll need to set up a clear and secure password reset email with it. Check out our article on password reset email best practices to learn important tips.
And if you’d like to improve your email deliverability, see our post on email subdomain and why you should use one.
Ready to fix your emails? Get started today with the best WordPress SMTP plugin. If you don’t have the time to fix your emails, you can get full White Glove Setup assistance as an extra purchase, and there’s a 14-day money-back guarantee for all paid plans.
If this article helped you out, please follow us on Facebook and Twitter for more WordPress tips and tutorials.

