
AI Summary
Wondering how to add a form to a page in WordPress?
Contact forms are a really useful way for potential customers to get in touch, but most WordPress themes don’t come with an inbuilt form feature. This means you’ll need to install a third-party form plugin.
But that’s no problem at all.
In this article, we’ll show you exactly how to add a form to a page in WordPress the easy way.
Ready? Let’s jump right in!
How To Add a Form to a Page in WordPress
Since we recommend using WPForms, this is the WordPress Form plugin we’ll focus on in this guide. WPForms is easy to use as you’ll see.
In the following 5 steps, you’ll learn how to create a contact form in WordPress, using WPForms.
In This Article
1. Install the WPForms Plugin
First things first, you’ll need to install the WPForms plugin. You may choose to use WPForms Lite, the free WPForms plugin, or go with a premium WPForms subscription.
If you’re not sure which to use, check out our WPForms Lite vs WPForms Pro comparison.
We recommend going with a WPForms Pro paid license, and that’s what we’ll be using in this article.

If you aren’t sure how to install the plugin, this step-by-step guide to installing WordPress plugins will have you covered.
2. Create a Form
Now that you have WPForms installed, you’re ready to build your forms. In your WordPress dashboard, scroll down and click on WPForms » Add New.
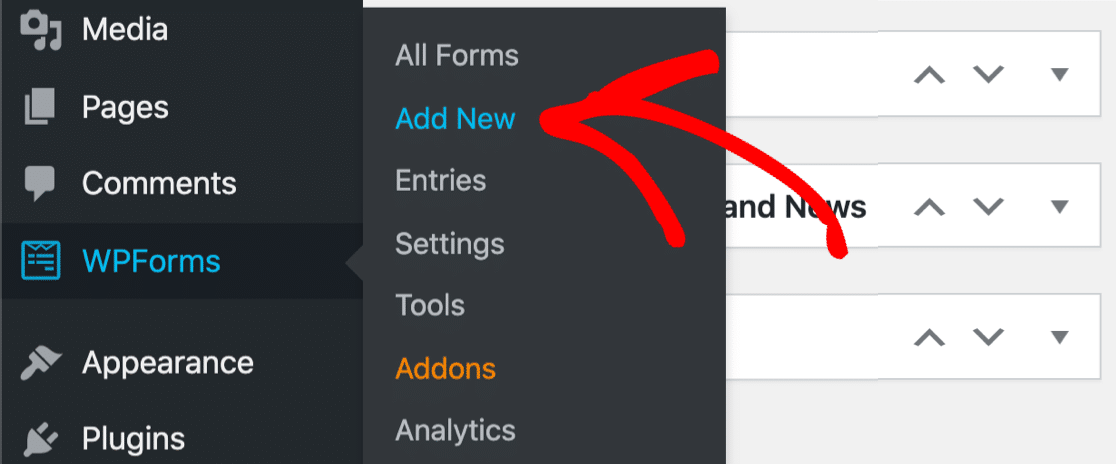
This will open up the form builder screen, asking you to name your form and select a template.
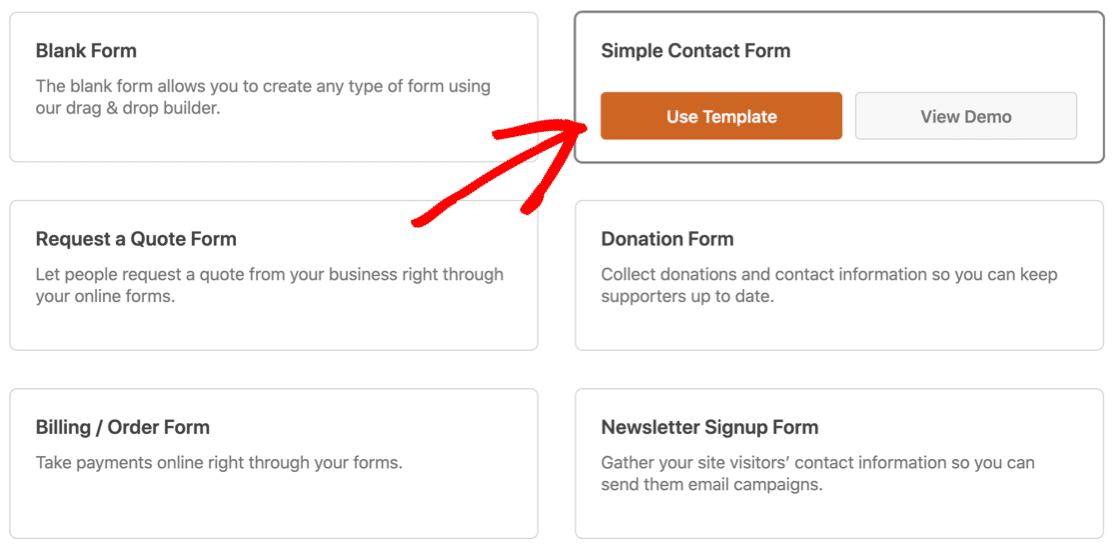
Once you’ve given your form a name, you can then select a template to make building your form faster and more intuitive. We’ll go with the Simple Contact Form template.
To do this, scroll down to Simple Contact Form and click Use Template.
This will open up the form builder with an options panel on the left.
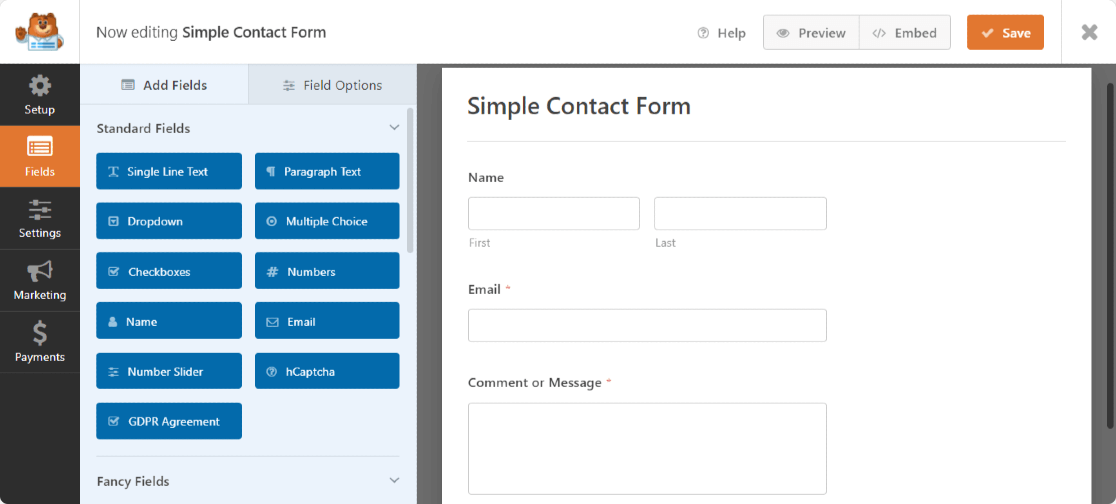
The template will already be fully built so you won’t have to take any further actions. Click Save and your form will be ready for use.
If you prefer to build your form from scratch, here’s what to do:
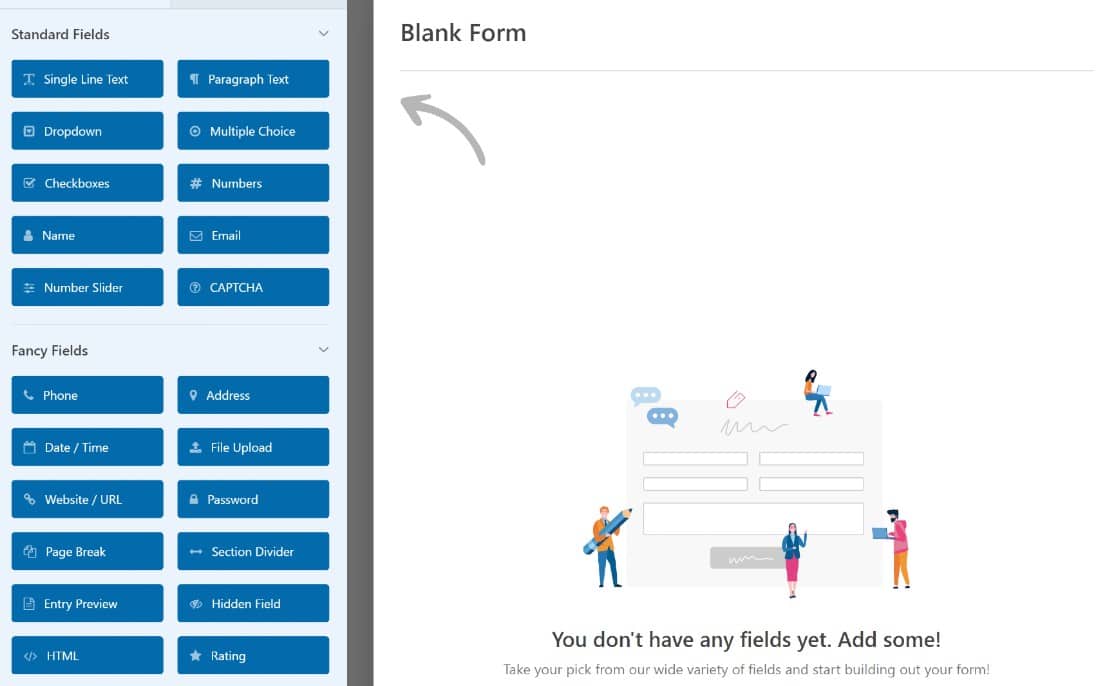
From the template library, click on Blank Form.
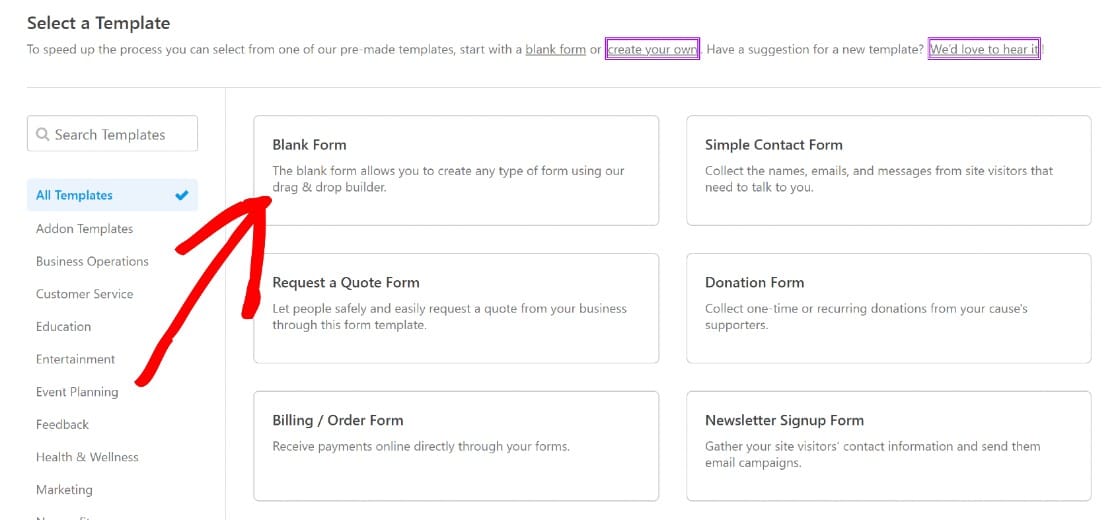
This will take you to the form builder where you can drag and drop form fields from the panel on the left. You can move these fields around to arrange them in a custom order.
If you like it, simply click on Save, or embed it into a page. We’ll show you how in the next step.
3. Add Your Form to a Page
Once you’ve created a form, you can add it to any WordPress page using WPForm’s super easy embed tool.
Before adding it, we recommend previewing the form to see how it will look on the frontend once it’s published. Simply click on the Preview button to take a look.

Once you’re happy with your form, you can go ahead and publish it. Click the Embed button at the top to begin the process.

A modal will now pop up with embed options for you to choose from. You can either add your form to a new WordPress page or add it to an existing one on your site.
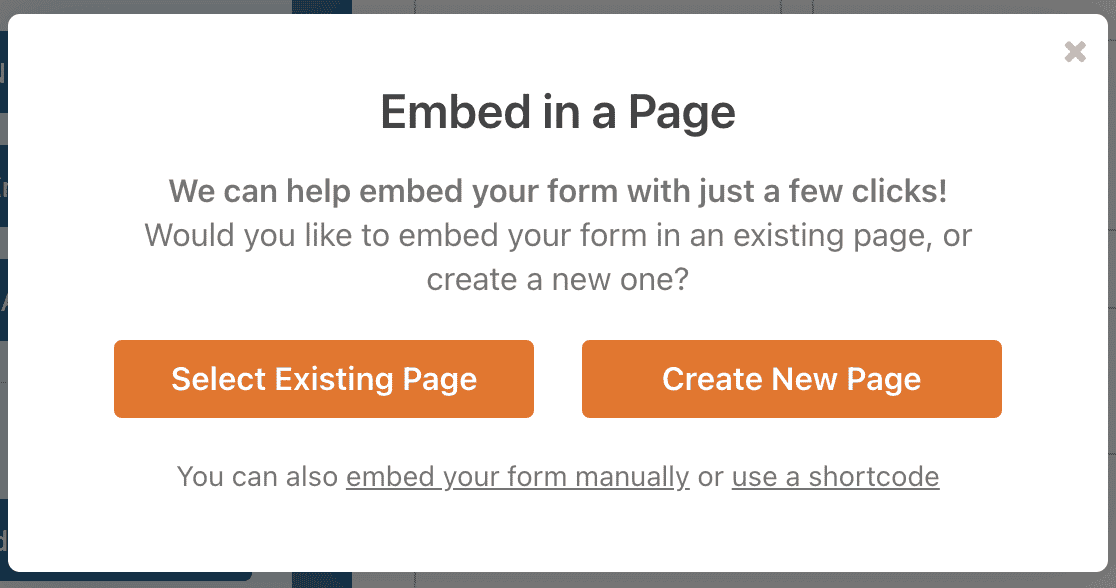
For this tutorial, we’ll assume that you want to embed your form in a new page. Once you click Create New Page, you’ll be prompted to give your new page a name. Enter one and select Let’s Go.

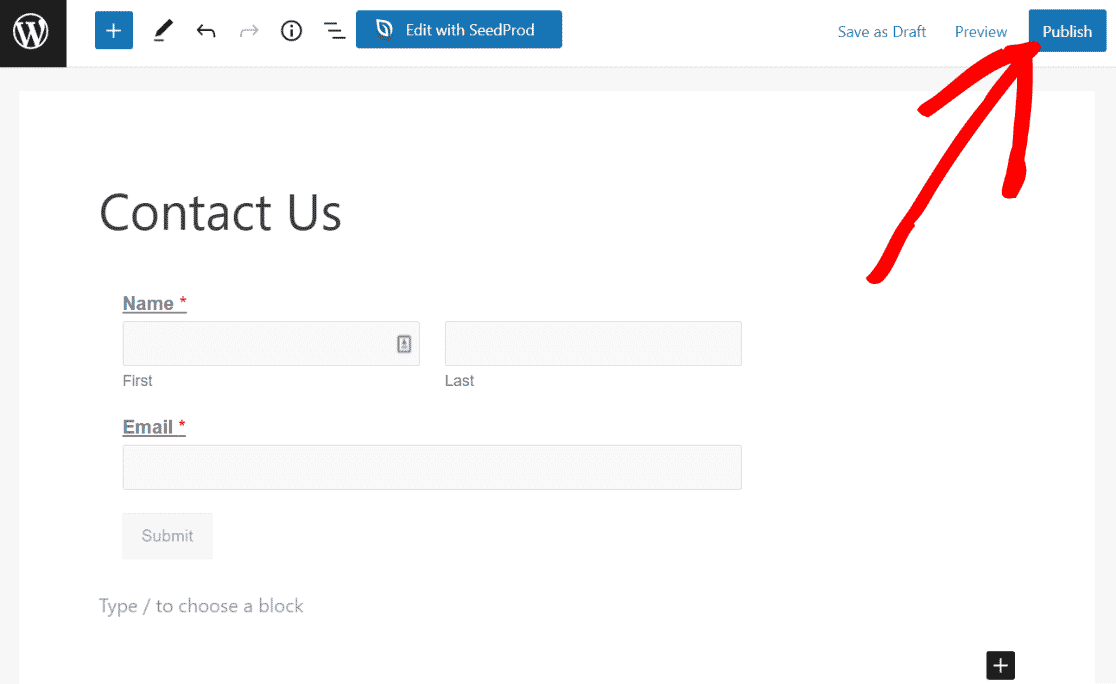
You’ll now be redirected to your WordPress block editor with the form already included within. Like any WordPress page, you can edit any part of this page, preview it, and when you’re ready, publish it.
Simply press the Publish button on the top-right to add the form to your new WordPress page.
This is how the form will look on your site’s frontend.

Excellent! Now that you’ve embedded your form, it’s a good idea to test it one final time to make sure it’s working as intended.
4. Test Your Contact Form
Now, we’re almost done. There’s just one more thing to do, and that’s making sure that your forms work the way they should. This is called form validation, and we’ll cover this in the next step.
The first thing to do is navigate to the frontend of your website and visit the page where you’ve embedded your form. For a quick validation, follow this simple checklist:
- Are all fields in order?
- Do compulsory fields work?
- Does CAPTCHA load properly?
- Does conditional logic work properly?
- Are form submissions properly received on the backend?
For a more detailed guide to form validation, check out this detailed form testing checklist.
5. Enhancing Your Forms With WPForms Pro Features (Optional)
At this point, you know all you need to create simple, effective forms. But you might have a bit more in mind. WPForms is an extremely well-rounded plugin, and you can use it to simplify your workflow in various ways and improve efficiency. Our WPForms review takes a deep dive into some of its best features that offer excellent value for small businesses.
For example, you might want to use WPForms anti-spam features and add a CAPTCHA field to your forms to block spam entries.
Or you might want to use conditional logic to create more options for users of your forms who meet specific criteria. WPForms provides a host of useful features that will help supercharge your WordPress forms.
If you’re using a WPForms paid plan, some of these features are enabled by default, and the others are easy to integrate with WPForms addons.

Here are 5 of our super popular features:
Custom Captcha Addon
Spam is a common problem with WordPress forms. The WPForms Captcha Addon is a powerful tool to help you get around this. To help you use the addon effectively, read this guide to stopping contact form spam in WordPress.
Conditional Logic
Conditional logic allows you to create additional options based on certain criteria.
Payment Integrations
Payment integrations allow you to collect payments using your forms. WPForms supports major payment gateways including PayPal, Square, Stripe, and Authorize.net.
Form Locations
The form locations feature allows you to see every single location where you’ve embedded any of your forms. This can be helpful when your website grows really large and you have lots of forms on different pages of your website.
Save and Resume Addon
The Save and Resume addon makes it easy for your users to save their progress and leave your website without losing their data. They can return at any time and resume their form entry from where they left off previously.
There are tons of other helpful WPForms addons that you’ll find really useful. Take a look and pick the ones that suit your needs best.
In this post, we’ve covered what WordPress form plugin to use, how to get started, and some really useful features to supercharge your forms.
That’s really all you need to learn how to add forms to a page in WordPress!
And if you’re looking for even more tools to use on your site that don’t require extensive coding knowledge, check out our roundup of the best no-code tools for WordPress and elevate your site now.
Next, Ensure WPForms Notification Delivery
WPForms sends you a notification every time a user submits a form. But if your website has email deliverability issues, you might be missing out. Check out our guide on fixing WPForms email issues to keep notifications working fine for you.
You might also be interested in our guide to sending emails from localhost using SMTP. And if you’re using WooCommerce, take a look at our troubleshooting guide for WooCommerce emails going to spam.
Ready to get started? Take advantage of the 100% Money-Back Guarantee and get started with the world’s most popular SMTP and PHP mailer plugin today.
And if you like this article, then please follow us on Facebook and Twitter for more free WordPress tutorials.